Sign In
Upload
Manuals
Brands
AMX Manuals
Switch
DGX1600-ENC
AMX DGX1600-ENC Manuals
Manuals and User Guides for AMX DGX1600-ENC. We have
2
AMX DGX1600-ENC manuals available for free PDF download: Hardware Reference Manual
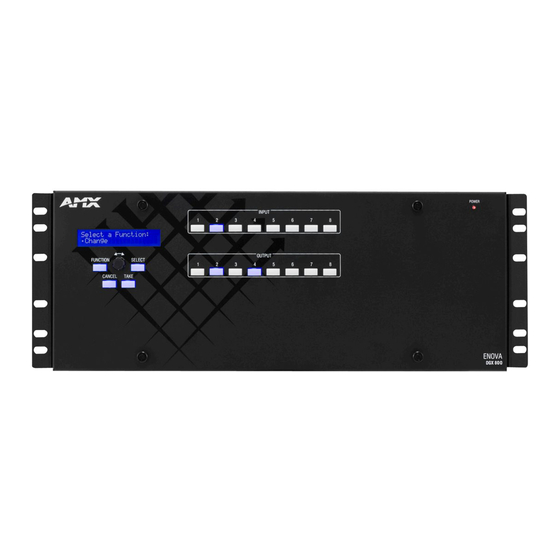
AMX DGX1600-ENC Hardware Reference Manual (290 pages)
DIGITAL MEDIA SWITCHERS, ENCLOSURES, INPUT/OUTPUT/EXPANSION BOARDS
Brand:
AMX
| Category:
Switch
| Size: 15.19 MB
Table of Contents
Table of Contents
6
Enova DGX 100 Series - Overview
25
Applicability Notice
25
DGX Digital Media Switchers & Standard Video Input and Output Boards
25
Enova DGX HDMI 4K60 Boards
25
Enova DGX HDMI Boards
25
Enova DGX DVI Boards
25
Enova DGX Dxlink Twisted Pair Boards
25
Enova DGX Dxlink Twisted Pair 4K Boards
26
Enova DGX Dxlink Fiber Boards
26
Input and Output Boards and Signal Types
26
Input and Output Board Connectors
26
Connectors and Signal Types
27
Enova DGX Expansion Boards
27
Audio Switching Board (ASB-DAN and ASB) Sets
27
Enova DGX Audio Insert/Extract Board
27
Important Notes on Using Expansion Boards
28
Integrated Netlinx NX Master Functionality
28
Network Connection
28
DHCP Server
28
Opening Public LAN and ICS LAN Sockets from Code
28
Integrated Netlinx NX Master Features
28
The Integrated Netlinx NX Master Supports the Following Features
28
Automatic Configuration of AMX Devices Via ICS LAN
28
Link-Local Fallback in DHCP Mode (Ipv4 Only)
29
Wired 802.1X Support
29
Support for Ipv6 Network Addressing
29
ID Pushbutton
29
Case Sensitive File System
29
USB Program Port Driver
29
Differences in DEFINE_PROGRAM Execution
29
Enova DGX Netlinx and Control Specifications
30
Configuration Information and Control Options
30
Switching Configuration Information
30
Embedded Audio Signals
30
Available Levels (Virtual Matrices)
31
Audio Switching Boards
31
Board Configuration Information
31
Control Options
31
Integrated Netlinx NX Central Control Processor
31
Control Panel
31
AMX Control Devices
31
BCS (Basic Control Structure) Protocol
31
Third-Party Controllers
31
Enova DGX 100 Series and Enova DGX 8/16/32/64: Differences
32
System Diagnostic Options
33
System Configuration Interface - Status Page
33
DGX_SHELL Commands
33
Instagate Pro Technology
34
Dgx 800
35
Front Panel
35
Power Indicator LED Behavior
35
Rear Panel
35
Power Supplies (X2)
35
Specifications
36
Dgx 1600
37
Front Panel
37
Power Indicator LED Behavior
37
Rear Panel
37
Power Supplies (X2)
37
Specifications
38
Dgx 3200
39
Front Panel
39
Power Indicator LED Behavior
39
Rear Panel
39
Power Supplies (X2)
39
Specifications
40
Dgx 6400
41
Front Panel
41
Power Indicator LED Behavior
41
Rear Panel
42
Power Supplies (X4)
42
Specifications
43
Installation and Setup
44
DGX Enclosure MAC Address / Serial Number
44
Dxlink Fiber Boards
44
Safety Recommendations for Laser Products
44
General Hazard Precautions
44
Elevated Operating Temperature
44
Airflow Restriction
44
Mechanical (Rack) Loading
45
Circuit Overloading
45
Reliable Earthing (Grounding)
45
Site Recommendations
45
Environment
45
Chassis Accessibility
45
Power
45
System Setup with Transmitters and Receivers
45
Options for System Setup with Dxlink Twisted Pair
45
Options for System Setup with Dxlink Twisted Pair 4K
46
Options for System Setup with Dxlink Fiber
46
Unpacking
46
Unpacking Tips
46
Rack Installation and System Setup
47
Required Items
47
Optional Items
47
Recommendations
47
Installation Procedure
47
Rack-Mounting Enova DGX 100 Series Enclosures
48
Rack-Mounting DGX 6400 Enclosures
48
Rack-Mounting DGX 800/1600/3200 Enclosures
49
Installing Boards, Connecting Devices and Powering up the DGX Enclosure
49
Special Information for Audio Expansion Boards
49
Installation Options
50
Attaching Cable Management Bars
50
Attaching Video Input and Output Cables
51
Enova DGX 800
51
Enova DGX 1600
51
Enova DGX 3200
51
Enova DGX 6400
51
Cabling Specific Connector Types
51
Input and Output Signal Cables
51
Wiring Audio Inputs and Outputs
52
System Setup for Using the Integrated Netlinx NX Master
52
System Setup Overview
52
RJ-45 Ports
53
RJ-45 Port Leds
53
ICS LAN 10/100 and LAN 100/1000 Indicator Leds
53
Cable Requirements and Pinouts
53
T568A
53
T568B
54
ICS LAN 10/100 Port
54
LAN 100/1000 Port
54
IP Protocols Used by the Enova DGX Integrated Controller
54
Avoiding Network (Ethernet) Loops
55
Connecting an Enova DGX to a Public LAN Via the LAN 100/1000 Port
56
Confirming Board Versions
56
System Configuration Interface Setup
57
System Requirements
57
Logging on to the System Configuration Interface and Executing a Test Switch
57
Additional Setup Options
57
Audio Control and Signal Processing Options
58
Audio Switching Boards (ASB)
58
System Configuration Interface
58
ICSP Commands
58
Control Panel
58
BCS Commands
58
Establishing Serial Communication with a PC Via the Program Port
58
Program Port
58
Cable Requirements
58
Program Port Leds - Modes and LED Blink Patterns
58
Attaching an Axlink Device
59
Axlink LED
59
Using the Axlink Connector for Data and Power
59
Axlink Device Numbering
59
Setting an Axlink Device Address
60
Axlink Power Measurement and Control
60
Axlink Port Diagnostics
60
Using the ID Pushbutton
60
Toggling between DHCP and Static IP Addressing
60
Resetting the Factory Default Settings
60
Restoring the Factory Firmware Image and Factory Default Settings
61
Program Run Disable (PRD) Mode
61
Setting the Config DIP Switch to Place the Integrated Master in PRD Mode
61
Troubleshooting and Technical Support
61
Troubleshooting
61
Enova DGX Switcher Hardware Troubleshooting
61
Video and Audio Troubleshooting
62
AMX Software Troubleshooting
62
Contacting Technical Support
62
AMX Contact Information
62
Applying Power and Startup
63
Overview
63
Power Budget Planning for Systems with Dxlink Twisted Pair Boards
63
Complete Power Redundancy Setup
63
Power-Up Sequence
63
Applying Power
64
Indicator Lights at Startup
64
Redundant Power Supply (RPS)
65
Power Supply Troubleshooting
65
Cpu/Control Board (All DGX 100 Series Enclosures)
66
Overview
66
Control Panel
67
Overview
67
Control Keys and Dial
67
Input and Output Keys
68
Function Menus and Modes
68
Enova DGX Control Panel - Basic Tasks
69
Labeling Input and Output Keys
69
Creating and Installing Custom Labels for Input and Output Keys
69
Executing Switches
70
Executing a Test Switch
70
Controlling Switches on Systems with Audio Switching Boards
70
Changing the Virtual Matrix
71
Disconnecting Switches
71
Disconnecting Inputs and Outputs
71
Verifying Signal Status
72
Defining and Executing Global Presets
72
Systems Without Audio Switching Boards (ASB or ASB-DAN)
73
Systems with Audio Switching Boards (ASB or ASB-DAN)
73
Defining a Global Preset
73
Executing a Global Preset
73
Locking and Unlocking
74
Locking the Control Panel
74
Unlocking the Control Panel
74
Adjusting Audio (Systems with Audio Switching Boards Only)
74
Audio Adjustments on the Control Panel
75
Adjusting Volume
75
Muting and Unmuting Outputs
75
Unmuting an Output While in Mute Mode
76
Adjusting Input Gain
76
Setup Options
76
Software Version
77
Checking Software Version Information
77
Master Info
77
Checking Integrated Master Info
77
Default Virtual Matrix
78
Reload Config
78
Setting the Password
79
System Error Codes and Troubleshooting
79
Enabling Error Code Reporting
80
Turning Error Code Reporting off
80
Error Code Troubleshooting
80
4K60 HDMI Input & Output Boards
81
Overview
81
Signal Routing
81
DGX Board Compatibility
81
4K60 Signal Routing
82
Video Signal Tiers Support
82
3Rd Party Equipment Requirements for DGX 4K60 HDMI Boards
82
Enova DGX 4K60 4:4:4 HDMI Input Board - Specifications
83
Enova DGX 4K60 4:4:4 HDMI Output Board - Specifications
84
4K60 HDMI Board Default EDID Resolutions Supported through Local DDC
85
HDMI DTD (Detailed Timing Descriptor)
85
HDMI CTA Video Information Code (VIC) Formats
85
Audio Data Block
86
4K60 HDMI Board EDID Resolutions - 50 Hz and 60 Hz Modes
86
Detailed Timings
86
HDMI Vics
86
Short Video Descriptors
86
4K HDMI Standard Timings
87
4K HDMI Established Timings
87
Standard Timings
87
Established Timings
87
Audio Data Block
87
Attaching HDMI Connectors
88
Executing a Test Switch for an HDMI Board
88
HDCP Support on Enova DGX 4K60 Switchers
88
Video Troubleshooting
89
Audio Troubleshooting
91
Determining the Dxlink Transmitter Source Audio Port
94
Audio Format Support on Enova DGX Boards
94
HDMI Input & Output Boards
95
Overview
95
Signal Routing
95
Instagate Pro and Smartscale
96
Enova DGX HDMI Input Board - Specifications
96
Enova DGX HDMI Output Board - Specifications
99
HDMI Board EDID Resolutions Supported Via Local DDC
100
Standard Timings (Default Shipping EDID)
100
Established Timings
100
HDMI CTA Video Information Code (VIC) Formats
101
Audio Data Block
101
4K HDMI Board EDID Resolutions Supported through Local DDC
101
Hdmi Dtd
101
4K HDMI Standard Timings
102
4K HDMI Established Timings
102
4K HDMI CTA Video Information Code (VIC) Formats
102
Audio Data Block
102
Attaching HDMI Connectors
103
Executing a Test Switch for an HDMI Board
103
HDCP Support on Enova DGX Switchers
103
HDMI System Conditions
103
Steps in the Content Protection Process
103
Supported Number of Sinks
104
HDCP Source Device
104
Enova DGX Switcher
104
Unsuccessful Transmission in System
104
Video Troubleshooting
104
Audio Troubleshooting
105
Audio Format Support on Enova DGX Boards
105
DVI Input & Output Boards
106
Overview
106
Signal Routing
106
Instagate Pro and Smartscale
106
Audio Support on DVI Boards
107
Enova DGX DVI Boards - Specifications
107
EDID Resolutions Supported through Local DDC
108
Standard Timings (Default Shipping EDID)
108
Established Timings
108
CTA Video Information Code (VIC) Formats
109
Audio Data Block
109
Connecting DVI Inputs and Outputs
109
DVI Pinout
110
Troubleshooting Video
110
Troubleshooting Audio
111
Audio Format Support on Enova DGX Boards
111
Dxlink Twisted Pair Input and Output Boards
112
Overview
112
Signal Routing
112
HDCP Compliance
112
Instagate Pro Technology
113
Dxlink - Twisted Pair Boards Specifications
113
Compatible AMX Dxlink - Twisted Pair Transmitters and Receiver
113
Compatible AMX Solecis Digital Switchers (1 Output Per Switcher)
113
EDID Resolutions Supported through Local DDC
114
Standard Timings (Default Shipping EDID)
114
Established Timings
115
CTA Video Information Code (VIC) Formats
115
Audio Data Block
115
System Setup with Dxlink Transmitters and Receivers
116
Options for Dxlink System Setup
116
Dxlink Transmitter/Receiver Grounding
116
Example of Typical Setup with Dxlink Transmitter and Receiver
116
Functions of Dxlink Transmitters and Receivers
117
Important Power Considerations for Enova DGX 3200 Endpoint Systems
118
Power Budget Planning for Enova DGX 3200 with Dxlink Boards
118
Power Budget Calculation
118
Foregoing Power Supply Redundancy
118
In the Event of a Power Supply Failure
118
Connecting Switching Systems with Dxlink Connectors
119
Avoiding Network (Ethernet) Loops
119
Important Twisted Pair Cabling Requirements and Recommendations
119
Twisted Pair Cable Pinouts
119
Connecting Sources and Destinations to Dxlink Inputs and Outputs Via TX/RX
119
Dxlink Connector Leds
120
Configuring Dxlink Endpoints for Communication with a Master
120
Best Practices for Configuration
120
DIP Switch Toggles
120
Auto-Setup
121
Need to Know for Auto-Setup
121
Disabling Auto-Setup Mode
121
Enabling Auto-Setup Mode
121
Enable Auto-Setup Mode Via DGX_SHELL Commands
121
Telnet Access to Endpoints in Auto-Setup Mode
121
Telnet Access to Dxlink Endpoints
122
Serial Data Transfer and IR Flow Control
122
Dxlink Twisted Pair / Dxlink Twisted Pair 4K Compatibility
122
Troubleshooting Audio
122
Dxlink Twisted Pair 4K Input and Output Boards
123
Overview
123
Signal Routing
123
HDCP Compliance
124
Instagate Pro Technology
124
Dxlink Twisted Pair 4K Boards Specifications
124
Compatible AMX Dxlink- Twisted Pair 4K Transmitters and Receivers
124
Compatible AMX Solecis 4K Digital Switchers (1 Output Per Switcher)
124
EDID Resolutions Supported through Local DDC
125
DTD (Detailed Timing Descriptor)
125
Standard Timings
126
Established Timings
126
CTA Video Information Code (VIC) Formats
126
Audio Data Block
127
System Setup with Dxlink Twisted Pair 4K Transmitters and Receivers
127
Options for Dxlink System Setup
127
Example of Typical Setup with Dxlink Twisted Pair 4K Transmitter and Receiver
127
Functions of Dxlink Transmitters and Receivers
128
Important Power Considerations for Enova DGX 3200 Endpoint Systems
128
Power Budget Planning for Enova DGX 3200 with Dxlink Boards
129
Power Budget Calculation
129
Foregoing Power Supply Redundancy
129
In the Event of a Power Supply Failure
129
Connecting Switching Systems with Dxlink Connectors
129
Avoiding Network (Ethernet) Loops
130
Important Dxlink Twisted Pair 4K Cabling Requirements and Recommendations
130
Twisted Pair Cable Pinouts
130
Connecting Sources and Destinations to Dxlink Inputs and Outputs Via TX/RX
130
Dxlink Connector Leds
131
Configuring Dxlink Endpoints for Communication with a Master
131
Best Practices for Configuration
131
DIP Switch Toggles
131
Auto-Setup
132
Need to Know for Auto-Setup
132
Disabling Auto-Setup Mode
132
Enabling Auto-Setup Mode
132
Telnet Access to Endpoints in Auto-Setup Mode
132
Telnet Access to Dxlink Twisted Pair 4K Receivers
132
Dxlink Twisted Pair / Dxlink Twisted Pair 4K Compatibility
133
Troubleshooting
133
Dxlink Fiber Input & Output Boards
134
Overview
134
Dxlink Fiber Boards, Duplex
134
Dxlink Fiber Boards, Simplex
134
Warning: Optical Fiber Products
135
OSHA Directive
135
Signal Routing
135
HDCP Compliance
135
Instagate Pro Technology
135
Dxlink Fiber Hardware Compatibility
135
Compatible Dxlink Fiber Transmitters and Receivers
135
Dxlink Fiber Directional Modes
136
Bidirectional Mode
136
Unidirectional Mode
136
Data Link-Lost Mode
136
Enova DGX Dxlink Fiber Boards Specifications
136
EDID Resolutions Supported through Local DDC
138
Standard Timing Identification (Default Shipping EDID)
138
Established Timing
138
CTA Video Information Code (VIC) Formats
138
Audio Data Block
139
System Setup with Dxlink Fiber, Duplex and Simplex Units
139
Destination Device Support Problems
140
Connecting Switching Systems with Dxlink Fiber Connectors
140
Attaching Cables
140
OSHA Directive
140
Wiring for Directional Modes
140
Fiber Optic Cable Wiring for Bidirectional Mode - Duplex Only (Default)
140
Fiber Optic Cable Wiring for Unidirectional Mode - Simplex (Default) or Duplex (Configurable)
141
Fiber Optic Cable Wiring for Data Link-Lost Mode - Duplex Only
141
Fiber Optic Transceivers
141
Board Types / Cable Types / Cable Runs
141
Fiber Optic Cable Requirements
141
Connecting Dxlink Fiber Inputs and Outputs
141
Fiber Optic Transceiver Leds in Duplex and Simplex Hardware
142
Transceiver Leds in Bidirectional Mode - Duplex Only
142
Transceiver Leds in Unidirectional Mode - Simplex (Default) or Duplex (Configurable)
143
Duplex Hardware Directional Mode Configuration
143
Hardware Configuration
143
Configuring Dxlink Duplex Hardware for Unidirectional Communication
143
Dxlink Fiber Inputs or Outputs
144
Units Connected to Dxlink Board Connectors
144
Configuring Dxlink Duplex Hardware for Bidirectional Communication
144
Checking Dxlink Fiber, Duplex Hardware Directional Mode Settings
144
Configuring Dxlink Endpoints for Communication with a Master
144
Auto-Setup
144
DIP Switch Toggles
144
Auto-Setup
145
Disabling Auto-Setup Mode
145
Enabling Auto-Setup Mode
145
Telnet Access to Endpoints in Auto-Setup Mode
145
Telnet Access to Dxlink Endpoints
145
Serial Data Transfer and IR Flow Control
146
Replacing an SFP+ Fiber Optic Transceiver
147
Items Required
147
Multimode SFP+ Fiber Optic Transceiver
147
Single Mode SFP+ Fiber Optic Transceiver
147
Fiber Transceiver Replacement
147
Removing/Replacing SFP+ Fiber Optic Transceivers
148
Dxlink Fiber Troubleshooting
148
General Signal Problems
148
Audio Problems
148
Audio Not Present or Intermittent with Good Video
148
Other Audio Problems
148
Video Problems
148
Verify Optical Signal - Multimode Transceivers Only
148
Verify Bidirectional Mode Fiber Path - Duplex Only
149
Verify Unidirectional Mode Fiber Path
149
Verify Auto-Setup Mode
149
Dante Audio Switching Boards
150
Overview
150
Dante Technology
150
Dante Network Configuration Considerations
150
Dante Audio Switching Boards Rules for System Setup
150
Enova DGX Model Specific Dante Audio Switching Board Location
151
Dante Audio Switching Boards Specifications
152
System Examples
153
Daisy Chain Topology (Default)
153
Star Topology Without Redundancy
155
Star Topology with Redundancy
155
Dante Audio Switching Board Numbering Overlays
156
Applying Dante ASB Overlays to Numbering Plates
156
Dante Audio Switching Board Overlay Placement
156
Enova DGX Dante ASB to Dante Subscription Mapping
157
Enova DGX 800 Path Mapping
157
Enova DGX 1600 Path Mapping
157
Enova DGX 3200 Path Mapping
157
Enova DGX 6400 Path Mapping
158
Attaching Cables
158
Dante Audio Switching Board Connectors
158
Dante Audio Switching Board Leds
159
Attaching the HSSI SMA (Sub-Miniature Version A) Cable
159
Routing Audio Signals
160
Audio Routing Capability
160
System Configuration Interface - Audio Virtual Matrix (VM 2)
160
Audio Matrix I/O Paths
160
Testing/Checking Audio Signal Routing
161
Digital Signal Processing (DSP)
161
Input and Output Digital Signal Processing
161
Down-MIX Audio Input
162
Dante Audio Switching Board Down-MIX Input
162
Supported Down-MIX Input Formats
162
Routing the Down-MIX Input
162
Down-MIX Send_Commands
162
Dante Audio Switching Board Troubleshooting
162
Switching Speed or Command Response Slows after Adding Dante Asbs to the Enclosure
162
Cannot Find the Dante Audio Switching Board in Dante Controller
162
To Determine Which Physical Dante Device Corresponds to an Entry in Dante Controller
162
Down-Mixed Audio Is Not Present or Is Intermittent with Good Video
163
Dante Audio Switching Board Defaults to "Embedded" Rather than "Switched" Audio
163
If You Lose Audio at Destinations and in Dante Virtual Soundcard / Dante Via
163
ASB Audio Switching Boards
164
Overview
164
Rules for System Setup
164
Enova DGX Model Specific Audio Switching Board Location
165
Enova DGX Audio Switching Boards - Specifications
166
System Examples
167
Embedded Audio - Replacing Embedded Audio on Video Signals
167
Audio Only - Audio Only from Source to Destination Device
167
All Audio (Embedded or Audio Only) - Routing to Differing Types of Destination Devices
168
Audio Switching Board Numbering Overlays
168
Applying ASB Overlays to Numbering Plates
168
Audio Switching Board Overlay Placement
169
Attaching Wires/Cables
169
Audio Switching Board Connectors
169
Attaching Terminal Block Audio Connectors
169
Important to Know When Wiring Audio Switching Board Terminal Block Connectors
169
Wiring Audio Connectors
169
Options for Wiring ASB Boards to Source and Destination Devices
170
Attaching the HSSI SMA (Sub-Miniature Version A) Cable
171
Routing Audio Signals
171
Audio Routing Capability
171
System Configuration Interface - Audio Virtual Matrix (VM 2)
171
Audio Matrix I/O Paths
171
Testing/Checking Audio Signal Routing
172
Digital Signal Processing (DSP)
172
Input and Output Digital Signal Processing
173
Stereo Audio
173
Down-MIX Audio Input
173
Audio Switching Board Down-MIX Input
173
Supported Down-MIX Input Formats
173
Routing the Down-MIX Input
174
Down-MIX Send_Commands
174
Audio Switching Board Troubleshooting
174
AIE Audio Insert/Extract Boards
175
Overview
175
Rules for System Setup
175
Enova DGX Model Specific AIE Notes
176
Enova DGX Audio Insert/Extract Boards - Specifications
176
System Examples
177
AIE Board in Left Expansion Board Slot - Extract Function
177
AIE Board in Left Expansion Board Slot - Insert Function
177
AIE Board in Right Expansion Board Slot - Insert Function
177
AIE Board in Right Expansion Board Slot - Extract Function
178
AIE Boards in both Expansion Board Slots - Insert and Extract Functions
178
Setting Audio Connectors to Insert or Extract
178
Removing an AIE Board
179
Setting the DIP Switches
180
Enable/Disable DIP Switches
180
Extract/Insert DIP Switches
180
Reinstalling an AIE Board
180
Enova DGX 6400 Only - AIE Board Numbering Overlays
181
Applying Overlays to AIE Board Faceplates
181
Attaching Wires
181
Wiring AIE Boards
181
Wiring Audio Connectors
182
Testing/Checking the Insert/Extract Functionality
182
AIE Board Troubleshooting
182
Options for Wiring AIE to Balanced Audio Input Device
183
Standard Wiring
183
If Necessary - Wiring to Eliminate Buzzing
183
Accessing the System Configuration Interface
184
Username and Password
184
System Configuration Interface Tips
184
System Configuration Interface
184
Overview
184
Menu Bar
185
Home Page
185
Switching Page
185
Switching Page Components
185
Color-Coded Switch Selection and Switching Orientation
186
Legend Page
187
Group Restore to Default - Warning Dialog
187
Switch Mode
188
Executing a Switch
188
Configuring/Switching the Down-MIX Signal
188
Designating an Input for Down-Mixing (Configuration Page)
189
Configuration Page
189
Configuration Page Components
189
Video Input and Output Details Windows
190
Video Settings
191
Inputs Only - General
191
Inputs Only - HDCP Setting
192
Outputs Only - General
192
Setting a Manual Override for a Scaled Output
192
Display Settings
192
On-Screen Display
193
Image Adjustments
193
Dxlink Video Settings
194
Dxlink (Twisted Pair or Fiber) Transmitters (for Selected Video Input)
194
Dxlink (Twisted Pair or Fiber) Receivers (for Selected Video Output)
195
Audio Settings
195
Inputs Only - General
195
Compression
196
Outputs Only - General
196
Levels & Delay
196
10-Band Parametric Equalizer
197
Dxlink Audio Settings
197
Dxlink (Twisted Pair or Fiber) Transmitter (for Selected Audio Input)
197
Dxlink TX Details
198
Dxlink (Twisted Pair or Fiber) Receivers (for Selected Audio Output)
198
Dxlink RX Details
199
EDID Configuration
199
Setting an Enova Standard EDID for an Input
199
Setting a Custom EDID from an Output Sink
199
Setting the EDID Mode for an Audio Input
199
Loading and Saving Edids
200
Status Page
200
System Configuration Interface Tips
201
Netlinx Studio
202
Overview
202
Installing Netlinx Studio and Connecting to a Master
202
System Requirements
202
Installing Netlinx Studio
202
Connecting to a Netlinx Master
202
Confirming Board Versions
203
Confirm Board Versions
203
Sending a Firmware .Kit File to the Enclosure
203
Enabling Control Characters in a Terminal or Telnet Session
203
Netlinx Studio Tips
203
Integrated Master - Netlinx Programming
204
Overview
204
Device Numbering
204
Enclosure Port Mapping
205
Enova DGX 800 Port Mapping
205
Enova DGX 1600 Port Mapping
205
Enova DGX 3200 Port Mapping
206
Enova DGX 6400 Port Mapping
207
Netlinx Channels and Levels
208
Netlinx Channels
208
Netlinx Levels
209
Digital Media Switchers: Send_Commands
209
Note the Following Port Information
209
Auto_Setup
210
Switcher Send_Commands
210
Ai<Input>O<Output
210
Auto_Setup
210
CI<Input>O<Output
210
Cl<L#>I<I#>O<O
210
Ext_Aud
210
?Fg
211
Fan_Alarm
211
Fan_Speed
211
Ifconfig
211
Input
211
Model
212
Output
212
Power_Alarm
212
Reboot
212
Temp
212
Temp_Alarm
212
VI<Input>O<Output
212
Ifconfig
211
Standard Input/Output Boards: Send_Commands
213
Variables for I# and O
213
Standard Input Send_Commands
213
Audin_Digital
213
Audin_Encoding
213
Audin_Name
213
Audin_Digital
213
Audin_Name
214
Vidin_Edid
214
Audin_Status
214
Vidin_Cable_Connected
214
Vidin_Edid_Data
214
Vidin_Format
215
Vidin_Hdcp
215
Hdcpstatus
215
Vidin_Name
215
Vidin_Edid_Data
215
Vidin_Hdcp
215
Vidin_Name
216
Standard Output Send_Commands
216
Audout_Encoding
216
Audout_Name
216
Vidin_Pref_Edid
216
Vidin_Res_Ref
216
Vidin_Status
216
Vidout_Aspect_Ratio
217
Vidout_Blank
217
Vidout_Blocked
217
Vidout_Brightness
217
Vidout_Cable_Connected
217
Vidout_Contrast
218
Vidout_Edid_Data
218
Vidout_Edid_List
218
Vidout_Format
218
Vidout_Freeze
218
Vidout_Hdcp_Status
218
Vidout_Mute
219
Vidout_Name
219
Vidout_Osd
219
Vidout_Osd_Color
219
Vidout_Osd_Color
220
Vidout_Osd_Pos
220
Vidout_Res_Ref
220
Vidout_Scale
220
?Vidout_Sleep
221
Vidout_Sleep
221
Vidout_Sleep_Delay
221
Vidout_Status
221
Vidout_Testpat
221
Dxlink Input and Output Boards: Send_Commands
222
Audin_Format
222
Audin_Format_Auto
222
Audout_Format
222
Dxlinkin_Link_Status
222
Dxlinkout_Link_Status
222
Dxlinkin_Quality
223
Dxlinkout_Quality
223
Dxlinkin_Quality_Alarm
223
Dxlinkout_Quality_Alarm
223
Vidin_Auto_Select
223
Vidin_Hshift
223
Vidin_Phase
224
Vidin_Vshift
224
Audio Switching Boards: Send_Commands
225
Audin_Compression
225
Audin_Compression_Attack
225
Audin_Compression_Ratio
225
Audin_Compression_Release
226
Audin_Compression_Thresh
226
Audin_Gain
226
Audin_Stereo
226
Audio Output Send_Commands
227
Audout_Eq_Cf
227
Audout_Eq_Enable
227
Audout_Balance
227
Audout_Delay
227
Audout_Eq_Enable
228
Audout_Eq_Ft
228
Audout_Eq_Gain
228
Audout_Eq_Mode
228
Audout_Eq_Q
229
Audout_Maxvol
229
Audout_Minvol
229
Audout_Mute
229
Audout_Mute
230
Audout_Reset_Eq
230
Audout_Stereo
230
Audout_Testtone
230
Audout_Testtone_Enable
230
Audio Switching Board Down-MIX Send_Commands
231
Down-Mix_Dolby_Drc
231
Down-Mix_Source
231
Audout_Volume
231
Hdmiout_Audio
231
Dxlink Endpoint Send_Commands
232
Endpoint_Tx_Icslan_Port
232
Endpoint_Rx_Icslan_Port
232
Netlinx NX Master Telnet Commands
232
Auto Locate (Enable|Disable|Status)
232
Dot1X
232
(Enable|Disable|Status)
232
Manage Firmware
232
Program Info
233
Reboot
233
Audin_Compression_Ratio
226
Audin_Compression_Release
226
Audin_Compression_Thresh
226
Audin_Gain
226
Audin_Stereo
227
Audout_Eq_Cf
227
Audout_Balance
227
Audout_Delay
228
Audout_Eq_Ft
228
Audout_Eq_Gain
228
Audout_Eq_Mode
229
Audout_Eq_Q
229
Audout_Maxvol
229
Audout_Minvol
229
Audout_Stereo
230
Audout_Testtone
230
?Audout_Volume
231
Audout_Testtone_Enable
231
Down-Mix_Dolby_Drc
231
Down-Mix_Source
231
Hdmiout_Audio
232
Endpoint_Tx_Icslan_Port
232
Endpoint_Rx_Icslan_Port
232
Program
233
Overview
234
Preparation Checklist for Firmware Upgrade
234
Preparation Checklist
234
Sending Firmware (*.KIT) Files to the Enova DGX
234
Master Upgrade
236
Enova DGX 100 Series Upgrade (Offline Upgrade)
236
Advertisement
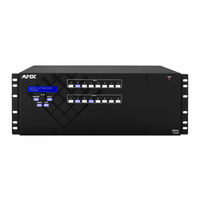
AMX DGX1600-ENC Hardware Reference Manual (295 pages)
ENOVA DGX 100 SERIES DIGITAL MEDIA SWITCHERS
Brand:
AMX
| Category:
Switch
| Size: 24.06 MB
Table of Contents
Copyright Notice
2
Important Safety Instructions
2
Esd Warning
4
Table of Contents
6
Product Overview and General Specifications
11
Applicability Notice
11
Product Notes
13
Common Applications
15
Front View
16
Rear View
17
Power Supply Units
20
Integrated Netlinx NX Master Functionality
24
Enova DGX 800 - General Specifications
28
Enova DGX 1600 - General Specifications
29
Enova DGX 3200 - General Specifications
30
Enova DGX 6400 - General Specifications
31
Enova DGX - Netlinx and Control Specifications
32
Configuration Information and Control Options
33
Enova DGX 100 Series and Enova DGX 8/16/32/64 Differences
35
System Diagnostic Options
37
Installation and Setup
38
Site Recommendations
38
General Hazard Precautions
38
Unpacking
39
System Setup with Transmitters and Receivers
39
Rack Installation and System Setup
40
Installation Procedure
41
Installation Options
44
Attaching Video Input and Output Cables
45
Wiring Audio Inputs and Outputs
47
Applying Power and Startup
47
Redundant Power Supply (RPS)
50
System Setup for Using the Integrated Netlinx NX Master
51
Confirming Board Versions
54
System Configuration Interface Setup
55
Audio Control and Signal Processing Options
56
Establish Serial Communication with a PC Via the Program Port
56
Attaching an Axlink Device
57
Using the ID Pushbutton
59
Program Run Disable (PRD) Mode
60
Troubleshooting and Technical Support
61
Enova DGX HDMI Boards
62
Enova DGX HDMI Boards - Specifications
63
Enova DGX 4K HDMI Boards - Specifications
65
Attaching Cables
70
HDCP Support on Enova DGX Switchers
70
Instagate Pro® Technology
72
Troubleshooting Video
72
Troubleshooting Audio
73
Enova DGX DVI Boards
74
Enova DGX DVI Boards - Specifications
75
Attaching Cables
79
Troubleshooting Video
80
Troubleshooting Audio
80
Enova DGX Dxlink™ Twisted Pair Boards
82
Enova DGX Dxlink™ Twisted Pair Boards - Specifications
83
System Setup with Dxlink Transmitters and Receivers
87
Power Budget Planning for Enova DGX 3200 with Dxlink Boards
90
Attaching Cables
91
Configuring Dxlink Endpoints for Communication with a Master
93
Auto-Setup
93
Serial Data Transfer and IR Flow Control
95
Dxlink Twisted Pair / Dxlink Twisted Pair 4K Compatibility
95
Troubleshooting Audio
95
Enova DGX Dxlink™ Twisted Pair 4K Boards
96
Enova DGX Dxlink™ Twisted Pair 4K Boards - Specifications
97
System Setup with Dxlink Twisted Pair 4K Transmitters and Receivers
101
Power Budget Planning for Enova DGX 3200 with Dxlink Boards
103
Attaching Cables
104
Configuring Dxlink Endpoints for Communication with a Master
106
Auto-Setup
107
Dxlink Twisted Pair / Dxlink Twisted Pair 4K Compatibility
108
Enova DGX Dxlink™ Fiber Boards
109
Hdcp Compliance
110
Dxlink™ Fiber Hardware Compatibility
111
Enova DGX Dxlink™ Fiber Boards - Specifications
112
System Setup with Dxlink Fiber, Duplex and Simplex Units
116
Attaching Cables
118
Fiber Optic Transceiver Leds in Duplex and Simplex Hardware
120
Duplex Hardware Directional Mode Configuration
121
Configuring Dxlink Endpoints for Communication with a Master
122
Auto-Setup
123
Serial Data Transfer and IR Flow Control
124
Replacing an SFP+ Fiber Optic Transceiver
125
Dxlink Fiber Troubleshooting
127
Enova DGX Dante™ Audio Switching Boards
128
Enova DGX Dante Audio Switching Boards - Specifications
130
Dante Audio Switching Board Numbering Overlays
134
Enova DGX Dante ASB to Dante Subscription Mapping
134
Attaching Cables
136
Routing Audio Signals
137
Testing/Checking Audio Signal Routing
138
Digital Signal Processing (DSP)
138
Downmix Audio Input
139
Dante Audio Switching Board Troubleshooting
140
Enova DGX Audio Switching Boards
142
Enova DGX Audio Switching Boards - Specifications
144
Audio Switching Board Numbering Overlays
147
Attaching Wires/Cables
148
Routing Audio Signals
150
Testing/Checking Audio Signal Routing
150
Digital Signal Processing (DSP)
151
Downmix Audio Input
152
Audio Switching Board Troubleshooting
153
Enova DGX Audio Insert/Extract Boards
154
Enova DGX Audio Insert/Extract Boards - Specifications
155
Setting Audio Connectors to Insert or Extract
157
Removing an AIE Board
157
Setting the DIP Switches
158
Reinstalling an AIE Board
159
Enova DGX 6400 Only - AIE Board Numbering Overlays
159
Attaching Wires
160
Testing/Checking the Insert/Extract Functionality
161
AIE Board Troubleshooting
162
Switching, Configuration, and Status
163
System Configuration Interface Overview
163
Switching Page
164
Switch Mode
166
Configuration Page
167
Video Settings
170
Audio Settings
173
Edid Configuration
175
Status Page
177
Netlinx® Studio
179
Installing Netlinx Studio and Connecting to a Master
179
Confirming Board Versions
180
Enabling Control Characters in a Terminal or Telnet Session
180
Integrated Master - Netlinx® Programming
181
Enclosure Port Mapping
182
Netlinx Channels and Levels
186
Netlinx Levels
187
Digital Media Switchers: Send_Commands
188
Standard Input/Output Boards: Send_Commands
192
Dxlink Input and Output Boards: Send_Commands
200
Audio Switching Boards: Send_Commands
202
Firmware Upgrade & Info for Network Admin
210
Preparation Checklist for Firmware Upgrade
210
Sending Firmware (*.KIT) Files to the Enova DGX
211
Changing the Proxy Setting
213
Checking Cache Settings in a Web Browser
215
Control Panel Operation
216
Control Panel Overview
216
Executing Switches
219
Changing the Virtual Matrix
220
Disconnecting Switches
221
Verifying Signal Status
222
Defining and Executing Global Presets
222
Locking and Unlocking
224
Adjusting Audio (Systems with Audio Switching Boards Only)
225
Muting and Unmuting Outputs
226
Setup Options
228
Setting the Password
231
System Error Codes and Troubleshooting
233
Advertisement
Related Products
Amx Enova DGX 16
AMX Enova DGX 100 Series
AMX DGX6400-ENC
AMX DGX-I-DXF-SMD
AMX DGX-I-DXF-MMS
AMX DGX-O-DXF-MMS
AMX DGX800/1600-ASB
AMX DGX-AIE
AMX DGX6400-ASB-DAN
AMX DGX-O-DXF-SMS
AMX Categories
Touch Panel
Matrix Switcher
Controller
Switch
Keypad
More AMX Manuals
Login
Sign In
OR
Sign in with Facebook
Sign in with Google
Upload manual
Upload from disk
Upload from URL