
Related Manuals for Firstech CM7000


Summary of Contents for Firstech CM7000
- Page 1 CM7000 Alarm and Starter Firstech, LLC. 21903 68th Ave S. Kent, WA 98032 Phone. 888-820-3690 Fax. 206-957-3330 Please visit techfeed.compustar.com for additional installation resources Version 2014...
-
Page 2: Table Of Contents
Alarm and Starter System techfeed.compustar.com CM7000 Master Guide Table of Contents Introduction Kit Contents Installation Basics Remote Programming Routine Valet Mode Placement and Use of Components Common Procedures Wiring Descriptions Option Programming Tables Option Menu Descriptions Special Option Groups 1 & 2... -
Page 3: Wiring Schematic
Alarm and Starter System techfeed.compustar.com CM7000 Master Guide Copyright 2014 Firstech, LLC. Page 3... -
Page 4: Introduction
• Shock sensor (FT-SHOCK) The remote(s) and antenna are modular and are not specific to the control modules. You have the ability to pair almost any Firstech remote(s) and antenna receiver to the CM7000. This includes all 4 and 6 pin antennas. -
Page 5: Installation Basics
CM7000 Master Guide Installation Basics If you are new to installing Firstech Series Remote Starts and/or Alarms, we highly recommended that you thoroughly review this manual to installing your first unit. Remote Programming: You must code remotes to this system before anything will function. Begin by cycling the ignition ON and OFF five times within 10 seconds and press and release button 1 (half second) on the first remote, and then press and release button 1 (half second) on the second remote. -
Page 6: Remote Programming Routine
Alarm and Starter System techfeed.compustar.com CM7000 Master Guide Remote Programming Routine IMPORTANT: Any and all remotes must be coded to the control module prior to performing any and all operations. STEP 1: Activate programming mode by manually turning the vehicle’s key between the Ign On and Off (or the Acc &... -
Page 7: Placement And Use Of Components
IMPORTANT: The placement and use of components are critical to the performance of this system. Antenna and Cable Firstech antennas are calibrated for horizontal installation at the top of the windshield. The cable that connects the antenna to the control module must be free from any pinches or kinks. Installing the antenna in areas other than the windshield may adversely affect the effective transmitting distance of the remotes. -
Page 8: Touch Panel Sensitivity
Alarm and Starter System techfeed.compustar.com CM7000 Master Guide RPS Touch and car call functions do not require programming, however in order to unlock/disarm your vehicle you must program a 4 digit passcode (numbers 1 through 10 only) you can view our video library for programming instructions at: techfeed.compustar.com... -
Page 9: Remote Paging Sensor Unlock/Disarm
Alarm and Starter System techfeed.compustar.com CM7000 Master Guide STEP 2: Scroll through the remote options by taping button 3 or 4 (Function button 2W901R-SS). Once the LCD RPS icon flashes reads “RPS-ON” tap button 1 or (Lock button 2W901R-SS) to turn this feature on. The LCD will read “RPS-OFF”... -
Page 10: Knock Panel Sensitivity
OFF - 1.5 Degree Tilt OFF - 3 Inch Movement Adjusting DAS Shock Sensitivity (CM7000, CM7200, CM6300) STEP 1: Turn the ignition to the ‘on’ position. STEP 2: 2 Way remotes-hold buttons 1 and 2 (Lock and Unlock) for 2.5 seconds. You will get two parking light flashes. - Page 11 2 & 4. FT-EZGO Setup The FT-EZGO from Firstech will unlock/disarm the vehicle when in range. It is capable of proximity lock/arm and unlock/disarm when in or out of range off the vehicle. There is a manual override button located on the back of the EZ-GO remote.
-
Page 12: Common Procedures
Thermister (Temperature Sensor) Every 2 Way LCD Firstech RF kit includes an optional thermister, which must be plugged into the blue 2 pin port of the CM7 in order to use properly. The use of the thermister allows the 2 Way LCD remote to display the vehicle’s interior temperature on screen or the status page of your Drone mobile phone App. -
Page 13: Setting Auxiliary Outputs On Connector 2
Alarm and Starter System techfeed.compustar.com CM7000 Master Guide Jumper 2 (2nd Ignition / 2nd Starter / 2nd Parking light) Jumper 2 sets the behavior of the large blue wire on Connector 1. This wire is powered by an internal relay in the control module. - Page 14 “data” signal, or a coil wire for tachometer sense. IMPORTANT: The remotes must be coded prior to programming tach. Firstech recommends using a digital multimeter when testing for tach. STEP 1: Start the vehicle with the key. Allow time for the engine to idle down. (If you do not want to wait for the vehicle to idle down, you can shift the vehicle into reverse while holding your foot on the brake.)
- Page 15 Alarm and Starter System techfeed.compustar.com CM7000 Master Guide STEP 1: Change Option 2-10 to setting 3 – Tachless Mode. STEP 2: Process complete – there is no further programming required other than adjusting crank time when necessary (see below). Adjusting Crank Time: To adjust minimum crank times, refer to Option 2-12. To help ensure successful starting, the system will automatically add additional crank time to the 2nd and 3rd start attempts.
-
Page 16: Additional Notes
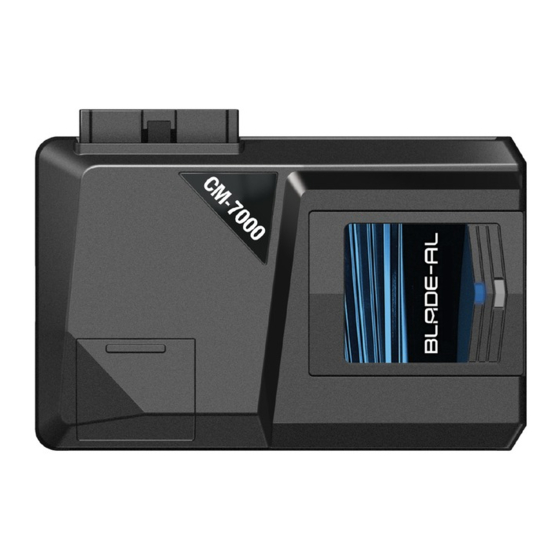
2.5 seconds. Current version starts with 1 flash. Blade Cartridge Slot and Connector CM7000, CM7200, and CM6300 slot gives you the ability to use the Blade-AL and Blade-TB modules from Firstech and ADS. With these modules you can virtually eliminate all wire connections between your control module and bypass module. -
Page 17: Wiring Descriptions
Blade you can use the Y-Cable OP500 (gold tag) end and not CM4 Series (silver tag) end. ADS and Firstech recommends using the 4 pin RS232 cable to avoid confusion. Cartridge must be removed to if the CM7 is being updated with a Firstech updater program from techfeed.compustar.com WARNING: Manufacturer or seller assumes no responsibility for any injuries and/or damages caused by improper care of the product such as decomposition, conversion, and transform done by a user voluntarily. - Page 18 Alarm and Starter System techfeed.compustar.com CM7000 Master Guide Pin 5 Blue - Programmable Output: Positive 12V (+) output that powers up during remote start. This output is programmable to provide a (+) 2nd ignition (default jumper setting), (+) 2nd Accessory, or (+) parking light output using the jumpers located under the access door on top of the control module.
- Page 19 Alarm and Starter System techfeed.compustar.com CM7000 Master Guide Pin 1 White: Accessory 12V positive (+) output. This wire must be connected to the vehicle accessory. The proper wire will test 0V with the key in the off position, (+) 12V while key is in the on position, 0V while cranking and back to (+) 12V when the key is returned to the on position.
- Page 20 Alarm and Starter System techfeed.compustar.com CM7000 Master Guide Pin 2 Brown - Siren: 1A (+) output can be connected to the positive lead of an aftermarket siren. Pin 3 White - [POC 2] AUX1: 250mA negative (-) output. This is an optional output that will provide a pulsed, latched, or timed negative output when triggered by the remote(s).
- Page 21 Alarm and Starter System techfeed.compustar.com CM7000 Master Guide Pin 11 Orange - [POC 6] Factory Alarm Arm (FAA) 250mA negative (-) output: This is an optional output that will provide a (-) pulse during lock, after crank and again after the ignition shuts down. The FAA output can be configured using feature 1-05.
- Page 22 Alarm and Starter System techfeed.compustar.com CM7000 Master Guide Pin 18 Yellow/Black - Engine sensing input (A/C): This wire is connected to the vehicle’s Tach or Alternator wire and is required when using the tach and alternator sense setting. (You can also connect this wire to the battery (+) post when using voltage sense to make it more accurate) IMPORTANT: To change engine-sensing modes, you must change Option 2-10;...
- Page 23 Firstech lock harness. (FT-DM600 or FT-DM700) Pin 1 None - 12v B+ constant output: available when using a Firstech door lock Module DM600, DM700 Pin 2 Violet/White - Trunk release 250mA negative (-) output: This is an optional output that will release the trunk.
- Page 24 (+) trigger door lock systems. For additional lock settings review Option Group 1. Pin 6 not used. Pin 6 None - B- ground output: available when using a Firstech door lock Module FT-DM600, FT-DM700 Connector 12 (CN12), 2-Pin (Pre-wired LED) **WHITE connector Note: Do not mistake for Thermister port.
-
Page 25: Option Programming Tables
Alarm and Starter System techfeed.compustar.com CM7000 Master Guide Pin 1 Black - Negative (-) ground when armed (GWA). Pin 2 Black/White - 2nd stage negative (-) input. (Instant trigger or arm) Pin 3 Red - 12V positive (+) output. Pin 4 Grey/White - 1st stage negative (-) input. (Warn away or disarm) - Page 26 Alarm and Starter System techfeed.compustar.com CM7000 Master Guide Option Group 2 Feature Default Setting - I Optional Setting - II Optional Setting - III Optional Setting - IV Tach Sensing Method Optimal Tach Method Previous Tach Method 2-01 Turbo Timer...
- Page 27 Alarm and Starter System techfeed.compustar.com CM7000 Master Guide Option Group 3 Continued Feature Default Setting - I Optional Setting - II Optional Setting - III Optional Setting - IV Key 5 times, or Key 5 times or Remote Valet Remote (I+III) while...
-
Page 28: Option Menu Descriptions
Alarm and Starter System techfeed.compustar.com CM7000 Master Guide Special Option Group 1 Feature Setting Value (Seconds) Diesel Timer - DISL 3 ~ 99 AUX1 output time 1 ~ 100 AUX2 output time 1 ~ 100 AUX3 output time 1 ~ 100... - Page 29 Alarm and Starter System techfeed.compustar.com CM7000 Master Guide 1-02 Door Lock/Unlock Pulse Duration: This does not affect the behavior of the factory arm output (orange wire) or factory alarm disarm output (orange/white wire). FO1 - 0.8 seconds: (-) Negative lock and unlock output time.
- Page 30 All other options will cancel reservation mode with the arm/lock command. FO4 - N/A: Hidden option please contact Firstech technical support for more information at 888- 820-3690 ext. 203 1-07 Unlock / Disarm with Trunk Release: FO1 - Unlock, Factory Alarm Disarm (FAD) trunk release: This option will send unlock and FAD outputs prior to sending the Trunk release output.
- Page 31 FO1 - Off: (default) FO2 - On: This option (when activated with the Firstech remote or Drone) will provide a door lock output when the foot brake is applied or 12 Volts is applied to the foot brake input on the CM7. The CM7 will also provide a door unlock output as soon as the key is turned off or 12v ignition is removed from the CM7.
- Page 32 12-15 seconds after the system has been armed using a Firstech remote or accessory (RPS, Drone, OEM remote input). Once the EZGO system is ready and the remote enters the proximity field, it will unlock/disarm.
- Page 33 FO2 - 2 Minutes: This option allows for a 2 minute run time after Turbo Mode has been engaged. To engage, set the e-brake, remove key, exit vehicle, and lock with the Firstech remote or accessory. Note: when using Turbo Mode with a manual transmission, the CM7 will not lock the doors automatically.
- Page 34 If there is any interaction with the CM7 after timer mode has been activated using the Firstech remote or accessory, timer mode will be cancelled and must be re-started in order to start a new timed cycle.
- Page 35 Alarm and Starter System techfeed.compustar.com CM7000 Master Guide FO3 - Reserve runtime: (runtime based on feature 2-07 option setting) Note: 2 way LCD remote required. This option will allow the user to set a predetermined time to remote start on the 2 way LCD remote.
- Page 36 2-13 Timer Mode: (Note: Must be set to on in order to operate timer mode).This feature enables the user to activate and deactivate Timer Mode (see option 2-06) using the Firstech remote or accessory (see the user manual for that remote for instructions).
- Page 37 Alarm and Starter System techfeed.compustar.com CM7000 Master Guide 2-14 PIC 1 (-): Programmable Input Channel provides 4 options for negative input to the CM7. FO1 - (-) negative E-brake (aka: parking brake) input: This option allows the CM7 to read input as e-brake which is needed to enter reservation mode or turbo timer mode.
- Page 38 While the vehicle is running with the key and the panic mode is activated using any Firstech 4 button or 2 way LCD remote, the CM7 will enable the ignition interrupt relay so the vehicle cannot be re-started.
- Page 39 Alarm and Starter System techfeed.compustar.com CM7000 Master Guide FO2 - On: (CM7200)/FO2- off (CM7000) Depending on the Control Module this option will enable or disable the security features. 3-07 Siren Duration: this feature changes the duration of the siren during full alarm.
- Page 40 FO1 - Off: (Default) This option will prevent the user form activating AUX 3-7 with the Firstech 2way LCD remote. FO2 - On: This feature will allow the user to enable AUX 3-7 which can be activated using a Firstech 2 way LCD remote. (Please refer to the remote users guide for specific AUX 3-7 activation process)
- Page 41 FO2 - RPS II: (knock sensor) This option enables the RPS II functions when using the RPS II hardware with the CM7. RPS can be used to arm/lock and disarm/unlock a CM7 or page a Firstech remote or accessory. Please refer the RPS section of this manual or the RPS product manual for installation and operation of the RPS II hardware.
- Page 42 4-03 Aux 1 Output Control: This feature allows the user to configure the method of which Auxiliary 1 can be activated. FO1 - Remote: (default) This option allows AUX 1 (output time based on feature 4-01) to be triggered by any 4 button Firstech remote or drone. Copyright 2014 Firstech, LLC. Page 42...
- Page 43 FO1- On: (default) this option will require the user to perform an additional step before activating AUX output using any Firstech 4 button or 2 way LCD remote (2way remotes with Roman numeral buttons will require a 0.5 second tap of button IV before activating any of the AUX outputs.2Way LCD remotes with lock/unlock/trunk/start icons on the buttons use the start button for the same.
- Page 44 Alarm and Starter System techfeed.compustar.com CM7000 Master Guide FO2 - Full alarm: This option will allow the AUX sensor input 1 to activate the full alarm cycle on the CM7 when triggered with negative input. (I.e. additional proximity, glass break, or impact sensor...
- Page 45 Note: once the antenna has powered down, 1 Way operation to the vehicle will stop. 2 Way operation will still function incase any alerts are sent to the remote. In order to wake up the antenna the user must unlock/disarm using a Firstech accessory, power ignition or trigger the alarm. Copyright 2014 Firstech, LLC.
-
Page 46: Special Option Groups 1 & 2
FO1 - Off: (default) This option does not provide a low battery indication. FO2 - On: This option will provide an alert to any Firstech 2 Way LCD remote or Drone when the vehicle’s battery voltage (at the CM7 power connector) drops to 11.7volts. Note: the Firstech 2 way LCD remote must be within range of the vehicle to receive the low battery alert and this option must be set in order to receive low battery alerts to Drone. - Page 47 Alarm and Starter System techfeed.compustar.com CM7000 Master Guide This special option group allows you to determine the output type of the POC wire. For example, if you want to set POC #5 (default setting status out) to Aux 1, you will need change special option 5 to number 10.
- Page 48 250mA (-) negative output on any POC programmed with this setting,when AUX4: AUX4 is triggered using a Firstech 2 way LCD remote (please refer to remote users guide for activation steps), (Feature 3-11 must be set to option 2)
-
Page 49: Option Programming
How to Program Options There are two ways to set options on the CM7 control modules. You can use the FT-OP500-KIT or most Firstech remotes. The remotes include 4 or 5 button 1 and 2 Way remotes. Option Programming Using the FT-OP500-KIT The OP500 can be used to change anything in the Option Tables. - Page 50 Alarm and Starter System techfeed.compustar.com CM7000 Master Guide How to Program Options with 5 Button 2-Way Remotes (F + Trunk) for 3 seconds Tap Key Tap Lock Tap Unlock Tap Trunk Tap Key Option then (F + Trunk) for 3...
- Page 51 Alarm and Starter System techfeed.compustar.com CM7000 Master Guide How to Program Options with 2 Way Remotes with Roman Numerals (1 + 2) for 3 seconds then Option Tap Button 4 Tap Button 1 Tap Button 2 Tap Button 3 Tap Button 4...
-
Page 52: Troubleshooting
Alarm and Starter System techfeed.compustar.com CM7000 Master Guide STEP 2: Scroll through menu waiting for 1 parking light flash and/or siren chirp per line. STEP 3: Once finished scrolling through menu, wait for the parking lights and/or siren chirp to confirm the option number. -
Page 53: Frequently Asked Questions
A: You must program tach before remote starting. Also be sure to check the foot brake and ignition wires on the CM7000 and CM7200. I am trying to program the control module with the OP500 Option Programmer and it flashes “ER 01”... - Page 54 High current is not needed for any reason. Does the CM7 series have tachless mode? A: Yes. The CM7000 and CM7200 are tachless. For details, review the “Common Procedures” section of this manual. All my connections are made and remotes programmed, how do I program the tach? A: Review the “Common Procedures”...
- Page 55 A: You must have an Option Programmer (FT-OP500-KIT) to set the auxiliaries on the CM4000, CM4200- DX, CM4300, CM5000, CM5200, CM6000, CM6200, CM6300, CM7000 and CM7200. First choose two POC wires on CN5 that you are not using. With the OP500 go into the Special Option Group 2 and set those POC’s to Aux 1 and Aux 2.
-
Page 56: Technical Support Contacts
Alarm and Starter System techfeed.compustar.com CM7000 Master Guide Technical Support Contacts Firstech technical support is reserved for authorized dealers only. Monday - Friday: 888-820-3690 (8:00 am – 5:00 pm Pacific Standard Time) Email: support@compustar.com Web: techfeed.compustar.com Wiring Diagrams Go to www.firstechonline.com to access Computech3. If you are an...