Table of Contents
Advertisement
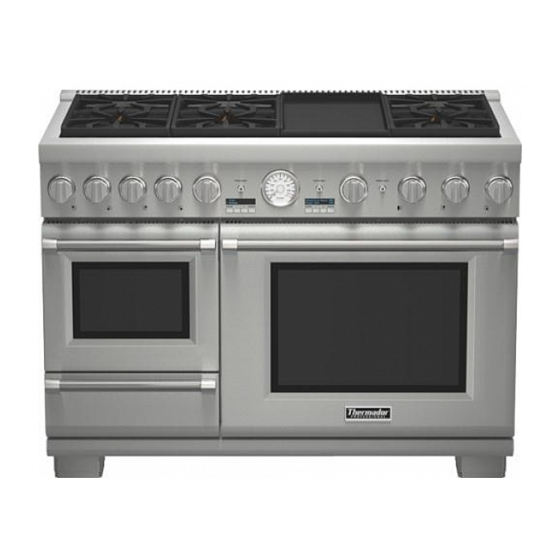
Service Manual for the Thermador Pro Grand Next Generation, Dual Fuel Range with Steam Oven, Models: PRD48JDSGC/02, PRD48JDSGU/02
TABLE OF CONTENTS
1
General .................................................................................................... 5
1.1
Technical Documents to Read Prior to Servicing .......................................... 5
1.2
Data Rating Plate .......................................................................................... 5
1.3
Wiring Diagram ............................................................................................. 6
1.4
Recommended Tools and Supplies .............................................................. 6
1.5
Important Safety Information ......................................................................... 7
1.5.1
Safety Symbols Used In This Manual .................................................... 7
1.5.2
Safety Precautions to Know Prior to Servicing ....................................... 7
2
Operation and Controls ....................................................................... 11
2.1
Knobs and Controls ..................................................................................... 11
2.1.1
Standard Burner Knob ......................................................................... 11
2.1.2
ExtraLow (XLO) and ExtraHi (XHI) Burner Knobs ................................ 11
2.1.3
Griddle / Grill Control Knob .................................................................. 11
2.1.4
Temperature / Function Selector Knob for Large Oven ....................... 11
2.1.5
Temperature / Function Selector Knob for Steam Oven ...................... 11
2.1.6
Control Buttons for Warming Drawer ................................................... 11
2.1.7
Oven Light and Panel Light Switches .................................................. 11
2.2
LED Indicators............................................................................................. 12
2.3
Automatic Re-Ignition .................................................................................. 12
2.4
Operation during a Power Outage ............................................................... 12
2.5
Rangetop Burner Assembly and Maintop Components .............................. 12
3
Ignition ................................................................................................... 13
3.1
Before Testing ............................................................................................. 13
3.2
Rangetop Burner Characteristics ................................................................ 13
58300000163852_ARA_EN_C
3.3
Rangetop Flame Characteristics ................................................................. 14
3.4
Testing Rangetop Burner Ignition ................................................................ 15
3.4.1
Time to Ignite ....................................................................................... 15
3.4.2
3.4.3
Testing Ignition for XLO Burner Settings .............................................. 15
3.5
Adjusting Rangetop Burner Valves Manually .............................................. 15
3.5.1
Special Tools Needed .......................................................................... 15
3.5.2
Adjusting the Bypass Screws ............................................................... 16
3.6
Troubleshooting Burner, Flame, and Ignition .............................................. 16
3.6.1
Burner and Flame Diagnostics for Rangetop Burners .......................... 16
3.6.2
Ignition Diagnostics for Rangetop Burners ........................................... 16
4
Oven, Oven Lights ................................................................................ 18
4.1
Element Diagnostics ................................................................................... 18
4.1.1
Safety Practices for Element Diagnostics ............................................ 18
4.1.2
Element Diagnostic Tips ...................................................................... 18
4.1.3
Element Cycle/Circuit Specification ..................................................... 18
4.2
Oven Temperature Sensor Diagnostics ...................................................... 18
4.2.1
4.3
Warming Drawer Diagnostics ...................................................................... 19
4.3.1
Warming Drawer Architecture .............................................................. 19
4.3.2
Warming Drawer Fault Messages ........................................................ 20
4.3.3
Warming Drawer Temperature Test ..................................................... 20
4.3.4
Warming Drawer Troubleshooting ....................................................... 20
4.4
Steam Oven Diagnostics ............................................................................. 22
4.5
Oven Light Diagnostics ............................................................................... 22
5
Fault Messages ..................................................................................... 24
6
Service and Repair ............................................................................... 25
Page 2 of 123
Advertisement
Table of Contents
Troubleshooting

Related Manuals for Thermador Pro Grand Next Generation PRD48JDSGC/02


Summary of Contents for Thermador Pro Grand Next Generation PRD48JDSGC/02
-
Page 1: Table Of Contents
Service Manual for the Thermador Pro Grand Next Generation, Dual Fuel Range with Steam Oven, Models: PRD48JDSGC/02, PRD48JDSGU/02 TABLE OF CONTENTS Rangetop Flame Characteristics ..............14 Testing Rangetop Burner Ignition ..............15 3.4.1 Time to Ignite ..................15 General ....................5 3.4.2... - Page 2 Service Manual for the Thermador Pro Grand Next Generation, Dual Fuel Range with Steam Oven, Models: PRD48JDSGC/02, PRD48JDSGU/02 Preparing the Range for Servicing .............. 25 6.7.15 Detaching the Funnel Assembly from the Tank Housing ..... 55 6.7.16 Servicing the Funnel Assembly Components........55 Component Removal Videos ..............
- Page 3 Service Manual for the Thermador Pro Grand Next Generation, Dual Fuel Range with Steam Oven, Models: PRD48JDSGC/02, PRD48JDSGU/02 6.9.7 Manifold for Maintop Burners – Removal and Replacement ....82 6.11.4.1 Removing the Bulb ..............109 6.9.8 Regulator Removal and Replacement ..........84 6.11.4.2 Removing the Oven Lamp Assembly ..........
-
Page 4: General
Service Manual for the Thermador Pro Grand Next Generation, Dual Fuel Range with Steam Oven, Models: PRD48JDSGC/02, PRD48JDSGU/02 GENERAL 1.2 Data Rating Plate The data rating plate shows the model, serial, and FD number. It is This manual contains information that is necessary for servicing the... -
Page 5: Wiring Diagram
Service Manual for the Thermador Pro Grand Next Generation, Dual Fuel Range with Steam Oven, Models: PRD48JDSGC/02, PRD48JDSGU/02 1.3 Wiring Diagram 1.4 Recommended Tools and Supplies The wiring diagram is located on the back side of the kick panel The following are recommended to use when servicing this appliance: (see Figure 2). -
Page 6: Important Safety Information
Service Manual for the Thermador Pro Grand Next Generation, Dual Fuel Range with Steam Oven, Models: PRD48JDSGC/02, PRD48JDSGU/02 home appliances, will void the warranty, and may create safety 1.5 Important Safety Information hazards resulting in bodily injury, death, or damage. - Page 7 Service Manual for the Thermador Pro Grand Next Generation, Dual Fuel Range with Steam Oven, Models: PRD48JDSGC/02, PRD48JDSGU/02 Testing for Gas Leaks Hot Surfaces ■ Do not ever use a flame to test for gas leaks, as doing so may...
- Page 8 Service Manual for the Thermador Pro Grand Next Generation, Dual Fuel Range with Steam Oven, Models: PRD48JDSGC/02, PRD48JDSGU/02 Clean-up Hazards Oven Door, Oven Accessories and Oven Gasket ■ Don’t allow any cleaning or polishing solutions/compounds, ■ Use caution when opening the oven door during or immediately disinfectants or bleaches to remain in contact with the stainless after operation.
- Page 9 Service Manual for the Thermador Pro Grand Next Generation, Dual Fuel Range with Steam Oven, Models: PRD48JDSGC/02, PRD48JDSGU/02 Caution Prior to Returning Appliance to Service Code Compliance Prior to returning the appliance to service, make sure that: Local codes vary. Installation, electrical connections, gas connections, ■...
-
Page 10: Operation And Controls
Service Manual for the Thermador Pro Grand Next Generation, Dual Fuel Range with Steam Oven, Models: PRD48JDSGC/02, PRD48JDSGU/02 2.1.3 Griddle / Grill Control Knob OPERATION AND CONTROLS The griddle / grill knob controls the temperature to the griddle or grill, from 150°... -
Page 11: Led Indicators
Service Manual for the Thermador Pro Grand Next Generation, Dual Fuel Range with Steam Oven, Models: PRD48JDSGC/02, PRD48JDSGU/02 2.2 LED Indicators 2.5 Rangetop Burner Assembly and Maintop Components When a burner is lit, its blue LED indicator is illuminated. 2.3 Automatic Re-Ignition Each rangetop burner has its own electronic igniter that sparks when the burner is turned on. -
Page 12: Testing, Adjusting, And Troubleshooting Rangetop Burners And Ignition
Service Manual for the Thermador Pro Grand Next Generation, Dual Fuel Range with Steam Oven, Models: PRD48JDSGC/02, PRD48JDSGU/02 TESTING, ADJUSTING, AND TROUBLESHOOTING 3.2 Rangetop Burner Characteristics RANGETOP BURNERS AND IGNITION If one or more rangetop burner blows out, the respective igniter electrode automatically re-ignites the flame. -
Page 13: Rangetop Flame Characteristics
Service Manual for the Thermador Pro Grand Next Generation, Dual Fuel Range with Steam Oven, Models: PRD48JDSGC/02, PRD48JDSGU/02 3.3 Rangetop Flame Characteristics Natural gas: The rangetop burner flame color should be blue with no yellow on the tips (see Figure 5). It is not uncommon to see orange in the flame color;... -
Page 14: Testing Rangetop Burner Ignition
Service Manual for the Thermador Pro Grand Next Generation, Dual Fuel Range with Steam Oven, Models: PRD48JDSGC/02, PRD48JDSGU/02 3.4 Testing Rangetop Burner Ignition 3.5 Adjusting Rangetop Burner Valves Manually Although pre-adjusted, if you need to set the valves for the lowest possible flame setting, then manually adjust the bypass screws on the valves. -
Page 15: Adjusting The Bypass Screws
Service Manual for the Thermador Pro Grand Next Generation, Dual Fuel Range with Steam Oven, Models: PRD48JDSGC/02, PRD48JDSGU/02 3.5.2 Adjusting the Bypass Screws 3.6 Troubleshooting Burner, Flame, and Ignition 3.6.1 Burner and Flame Diagnostics for Rangetop Burners Caution If a rangetop burner clicks (sparks) constantly or if burner doesn’t light... - Page 16 Service Manual for the Thermador Pro Grand Next Generation, Dual Fuel Range with Steam Oven, Models: PRD48JDSGC/02, PRD48JDSGU/02 Figure 8: Diagnostic Flowchart for Rangetop Burner Ignition Page 17 of 123 58300000163852_ARA_EN_C...
-
Page 17: Diagnostics For Elements, Temp Sensors, Warming Drawer, Steam Oven, Oven Lights
Service Manual for the Thermador Pro Grand Next Generation, Dual Fuel Range with Steam Oven, Models: PRD48JDSGC/02, PRD48JDSGU/02 ü Use a thermometer with a thermocouple leads to test the oven DIAGNOSTICS FOR ELEMENTS, TEMP SENSORS, temperature. If you leave the thermocouple in the oven during a... -
Page 18: Resistance And Temperature Values For Oven Temperature Sensor
Service Manual for the Thermador Pro Grand Next Generation, Dual Fuel Range with Steam Oven, Models: PRD48JDSGC/02, PRD48JDSGU/02 4.2.1 Resistance and Temperature Values for Oven Temperature Sensor Degrees F Ohms Figure 10: Control Buttons and LEDs 1016 4.3.1 Warming Drawer Architecture... -
Page 19: Warming Drawer Fault Messages
Service Manual for the Thermador Pro Grand Next Generation, Dual Fuel Range with Steam Oven, Models: PRD48JDSGC/02, PRD48JDSGU/02 4.3.2 Warming Drawer Fault Messages 4.3.4 Warming Drawer Troubleshooting Warming drawer fault messages are indicated by the blue LEDs on In addition to taking a temperature sensor resistance reading (see the warming drawer control panel. - Page 20 Service Manual for the Thermador Pro Grand Next Generation, Dual Fuel Range with Steam Oven, Models: PRD48JDSGC/02, PRD48JDSGU/02 5. On the female wire connector attached to the control panel (see Figure 100 and Figure 101, page 63), locate the blue wire labeled MAIN WARM-1 and the white wire labeled MAIN WARM-3.
-
Page 21: Steam Oven Diagnostics
Service Manual for the Thermador Pro Grand Next Generation, Dual Fuel Range with Steam Oven, Models: PRD48JDSGC/02, PRD48JDSGU/02 4.4 Steam Oven Diagnostics Steam Oven Diagnostic Action If YES, then: If NO, then: Problem Condensation on Condensation on The following diagnostics chart contains some common knobs is normal. - Page 22 Service Manual for the Thermador Pro Grand Next Generation, Dual Fuel Range with Steam Oven, Models: PRD48JDSGC/02, PRD48JDSGU/02 OVEN LIGHT DIAGNOSTICS 1 Make sure plunger doesn’t get stuck Turn light switch OFF and Is oven light Close oven door and Is oven light in closed position.
-
Page 23: Fault Messages
Service Manual for the Thermador Pro Grand Next Generation, Dual Fuel Range with Steam Oven, Models: PRD48JDSGC/02, PRD48JDSGU/02 FAULT MESSAGES Page 24 of 123 58300000163852_ARA_EN_C... -
Page 24: Service And Repair
Service Manual for the Thermador Pro Grand Next Generation, Dual Fuel Range with Steam Oven, Models: PRD48JDSGC/02, PRD48JDSGU/02 SERVICE AND REPAIR 6.3 Accessing Components under the Maintop This section contains the steps required to gain access to the components located under the maintop(s). - Page 25 Service Manual for the Thermador Pro Grand Next Generation, Dual Fuel Range with Steam Oven, Models: PRD48JDSGC/02, PRD48JDSGU/02 4. Remove and retain the two T-30 screws securing each brass burner base onto the pedestal (see Figure 16). Figure 17: Lifting the Burner Base off the Pedestal...
-
Page 26: Removing Maintops
Service Manual for the Thermador Pro Grand Next Generation, Dual Fuel Range with Steam Oven, Models: PRD48JDSGC/02, PRD48JDSGU/02 6.3.2 Removing Maintops Caution Be sure to check QuickFinder for relevant information, Fragile Component documentation, and the correct part number when replacing this component. -
Page 27: Removing Heat Shields
Service Manual for the Thermador Pro Grand Next Generation, Dual Fuel Range with Steam Oven, Models: PRD48JDSGC/02, PRD48JDSGU/02 6.3.3 Removing Heat Shields 6.3.4 Removing the Burner Support Rail Be sure to check QuickFinder for relevant information, This procedure is for the removal of the burner support rail with... - Page 28 Service Manual for the Thermador Pro Grand Next Generation, Dual Fuel Range with Steam Oven, Models: PRD48JDSGC/02, PRD48JDSGU/02 come out from their slots on the chassis (see Figure 24). Then remove burner support rail with the two jet holder assemblies attached (see Figure 25).
-
Page 29: Griddle / Grill Removal And Replacement
Service Manual for the Thermador Pro Grand Next Generation, Dual Fuel Range with Steam Oven, Models: PRD48JDSGC/02, PRD48JDSGU/02 4. Remove the backguard (see Backguard Removal and 6.4 Griddle / Grill Removal and Replacement Replacement, page 100). 5. At the back of the range, disconnect the 1/4 inch spade The griddle / grill removal requires access from the back and the connectors of both right and left element wires. - Page 30 Service Manual for the Thermador Pro Grand Next Generation, Dual Fuel Range with Steam Oven, Models: PRD48JDSGC/02, PRD48JDSGU/02 7. If the element needs replacing, first remove and retain the two 10. Detach and remove the insulation support bracket from under the screws securing the ends of the element onto the range (see element tray (see Figure 29).
-
Page 31: Side Panel Removal And Replacement
Service Manual for the Thermador Pro Grand Next Generation, Dual Fuel Range with Steam Oven, Models: PRD48JDSGC/02, PRD48JDSGU/02 6.5 Side Panel Removal and Replacement This procedure is for both the right and left side panels. Figure 30: Removing the Insulation 15. - Page 32 Service Manual for the Thermador Pro Grand Next Generation, Dual Fuel Range with Steam Oven, Models: PRD48JDSGC/02, PRD48JDSGU/02 1. Follow all safety precautions and steps in Preparing the Range for 4. Remove and retain the six screws that secure the side panel (see Servicing, page 25.
- Page 33 Service Manual for the Thermador Pro Grand Next Generation, Dual Fuel Range with Steam Oven, Models: PRD48JDSGC/02, PRD48JDSGU/02 Figure 35: Removing a Nut & Lockwasher using a Rachet with Swivel Extension Figure 34: Nuts with Lockwashers Upper nut with lockwasher (1) on screw...
-
Page 34: Control Panel Removal And Replacement
Service Manual for the Thermador Pro Grand Next Generation, Dual Fuel Range with Steam Oven, Models: PRD48JDSGC/02, PRD48JDSGU/02 6.6 Control Panel Removal and Replacement Be sure to check QuickFinder for relevant information, documentation, and the correct part number when replacing this component. - Page 35 Service Manual for the Thermador Pro Grand Next Generation, Dual Fuel Range with Steam Oven, Models: PRD48JDSGC/02, PRD48JDSGU/02 8. Cover the door with protective matting, and then close the door to provide a support for the control panel when it is removed (see Figure 41).
-
Page 36: Removal And Replacement Of Steam Oven Components
Service Manual for the Thermador Pro Grand Next Generation, Dual Fuel Range with Steam Oven, Models: PRD48JDSGC/02, PRD48JDSGU/02 6.7 Removal and Replacement of Steam Oven Components Steam oven components can require access from the front, back, top, and/or left side of the range. -
Page 37: Rack Supports For Steam Oven - Removal And Replacement
Service Manual for the Thermador Pro Grand Next Generation, Dual Fuel Range with Steam Oven, Models: PRD48JDSGC/02, PRD48JDSGU/02 6.7.1 Rack Supports for Steam Oven – Removal and 6.7.3 Gasket for Steam Oven Door – Removal and Replacement Replacement Be sure to check QuickFinder for relevant information, documentation, and correct part numbers when replacing any of these 1. -
Page 38: Steam Oven Control Board- Removal And Replacement
Service Manual for the Thermador Pro Grand Next Generation, Dual Fuel Range with Steam Oven, Models: PRD48JDSGC/02, PRD48JDSGU/02 Figure 45: Damaged Gasket 6.7.4 Steam Oven Control Board– Removal and Replacement The steam oven has two printed circuit board assemblies (PCBAs) – the control board, and the power module. For the power... -
Page 39: Power Module For Steam Oven - Removal And Replacement
Service Manual for the Thermador Pro Grand Next Generation, Dual Fuel Range with Steam Oven, Models: PRD48JDSGC/02, PRD48JDSGU/02 Caution Fragile Components Be careful not to exert too much pressure on the standoffs or the control board, as these are fragile components. -
Page 40: Actuator For Steam Oven - Removal And Replacement
Service Manual for the Thermador Pro Grand Next Generation, Dual Fuel Range with Steam Oven, Models: PRD48JDSGC/02, PRD48JDSGU/02 5. Remove and retain the screw securing the steam oven power 6.7.6 Actuator for Steam Oven – Removal and Replacement module onto the chassis (see Figure 50). -
Page 41: Flap Components For Steam Oven - Removal And Replacement
Service Manual for the Thermador Pro Grand Next Generation, Dual Fuel Range with Steam Oven, Models: PRD48JDSGC/02, PRD48JDSGU/02 4. If obstructing access to the actuator access panel, remove the 6.7.7 Flap Components for Steam Oven – Removal and burner support rail (with jet holder assemblies attached) by Replacement following the steps in Removing the Burner Support Rail, page 28. - Page 42 Service Manual for the Thermador Pro Grand Next Generation, Dual Fuel Range with Steam Oven, Models: PRD48JDSGC/02, PRD48JDSGU/02 6. Remove and retain the four nuts next to the seal (see Figure 56). Figure 54: Removing Flap Lid Figure 56: Removing the Nuts 7.
-
Page 43: Display Module Components And Oven Light Switch For Steam Oven - Removal And Replacement
Service Manual for the Thermador Pro Grand Next Generation, Dual Fuel Range with Steam Oven, Models: PRD48JDSGC/02, PRD48JDSGU/02 6.7.8 Display Module Components and Oven Light Switch for Steam Oven – Removal and Replacement To replace the oven light switch and/or display module for the steam oven, assess is from the top of the range. - Page 44 Service Manual for the Thermador Pro Grand Next Generation, Dual Fuel Range with Steam Oven, Models: PRD48JDSGC/02, PRD48JDSGU/02 3. Rotate the oven light switch bezel counter-clockwise to remove it 6. [If only replacing the button guide]: The button guide can be (see Figure 60).
- Page 45 Service Manual for the Thermador Pro Grand Next Generation, Dual Fuel Range with Steam Oven, Models: PRD48JDSGC/02, PRD48JDSGU/02 11. Replace display module if necessary, or perform the following steps for the removal and replacement of individual components. 12. At the back of the display module, on the button board detach both sides of the ribbon connector (see Figure 64).
- Page 46 Service Manual for the Thermador Pro Grand Next Generation, Dual Fuel Range with Steam Oven, Models: PRD48JDSGC/02, PRD48JDSGU/02 15. At the LCD board, remove the sleeve from each of the five standoffs, and then gently lift the LCD board off of the standoffs (see Figure 65 and Figure 66).
-
Page 47: Temperature Sensor For Steam Oven - Removal And Replacement
Service Manual for the Thermador Pro Grand Next Generation, Dual Fuel Range with Steam Oven, Models: PRD48JDSGC/02, PRD48JDSGU/02 18. Remove the button guide from the other side of the button board 6.7.9 Temperature Sensor for Steam Oven – Removal and... -
Page 48: Temperature Limiter Assembly For Steam Oven - Removal And Replacement
Service Manual for the Thermador Pro Grand Next Generation, Dual Fuel Range with Steam Oven, Models: PRD48JDSGC/02, PRD48JDSGU/02 1. Follow all safety precautions and steps in Preparing the Range for Servicing, page 25. 2. Remove the backguard, per Backguard Removal and Replacement procedure, page 100. -
Page 49: Steam Oven Convection Components - Removal And Replacement
Service Manual for the Thermador Pro Grand Next Generation, Dual Fuel Range with Steam Oven, Models: PRD48JDSGC/02, PRD48JDSGU/02 6.7.11 Steam Oven Convection Components – Removal and Replacement For the steam oven, the convection motor and element require access from both the back and front of the range. The convection fan and front cover are accessed only from the front of the range. - Page 50 Service Manual for the Thermador Pro Grand Next Generation, Dual Fuel Range with Steam Oven, Models: PRD48JDSGC/02, PRD48JDSGU/02 [To remove the element]: (The fan can remain in place.) From 9. [To remove the motor]: After you have removed the fan and...
-
Page 51: Evaporation Cup And Gasket - Removal And Replacement
Service Manual for the Thermador Pro Grand Next Generation, Dual Fuel Range with Steam Oven, Models: PRD48JDSGC/02, PRD48JDSGU/02 6.7.12 Evaporation Cup and Gasket – Removal and 4. Remove both the warming drawer and warming drawer cavity Replacement from the back of the range (see Removing the Warming Drawer and Cavity from the Range, page 64). -
Page 52: Water Tank Housing And Funnel Assembly Components - Removal And Replacement
Service Manual for the Thermador Pro Grand Next Generation, Dual Fuel Range with Steam Oven, Models: PRD48JDSGC/02, PRD48JDSGU/02 6.7.13 Water Tank Housing and Funnel Assembly Components NOTE: Do not remove the bezel or pry it open in order to remove –... - Page 53 Service Manual for the Thermador Pro Grand Next Generation, Dual Fuel Range with Steam Oven, Models: PRD48JDSGC/02, PRD48JDSGU/02 10. From the front of the range, push the tank housing (not the bezel) inwards, towards the back of the range in order to disengage it from the screws, and then from the back of the range pull the tank housing / funnel assembly out (see Figure 81).
-
Page 54: Reed Sensor Board - Removal And Replacement
Service Manual for the Thermador Pro Grand Next Generation, Dual Fuel Range with Steam Oven, Models: PRD48JDSGC/02, PRD48JDSGU/02 6.7.14 Reed Sensor Board – Removal and Replacement 6.7.15 Detaching the Funnel Assembly from the Tank Housing Be sure to check QuickFinder for relevant information,... - Page 55 Service Manual for the Thermador Pro Grand Next Generation, Dual Fuel Range with Steam Oven, Models: PRD48JDSGC/02, PRD48JDSGU/02 Figure 83: Rubber Seal on Tank Housing Figure 85: Rotating the Valve on the Funnel Assembly Figure 84: O Ring on the Funnel Assembly...
-
Page 56: Steam Oven Door Hinge Receiver - Removal And Replacement
Service Manual for the Thermador Pro Grand Next Generation, Dual Fuel Range with Steam Oven, Models: PRD48JDSGC/02, PRD48JDSGU/02 6.7.17 Steam Oven Door Hinge Receiver – Removal and Replacement Be sure to check QuickFinder for relevant information, documentation, and the correct part number when replacing these components. -
Page 57: Steam Oven Door - Removal And Replacement Of Glass With Drip-Tray Assembly
Service Manual for the Thermador Pro Grand Next Generation, Dual Fuel Range with Steam Oven, Models: PRD48JDSGC/02, PRD48JDSGU/02 6.7.18 Steam Oven Door – Removal and Replacement of Glass 4. Place the door on a protective mat with the handle facing down,... -
Page 58: Removal And Replacement Of Warming Drawer Components
Service Manual for the Thermador Pro Grand Next Generation, Dual Fuel Range with Steam Oven, Models: PRD48JDSGC/02, PRD48JDSGU/02 6.8 Removal and Replacement of Warming Drawer Components The warming drawer procedures require access from the front of the range, except for the Removing the Warming Drawer and Cavity from the Range procedure, which also requires access from the back of the range. -
Page 59: Warming Drawer Door Handle Assembly - Removal And Replacement
Service Manual for the Thermador Pro Grand Next Generation, Dual Fuel Range with Steam Oven, Models: PRD48JDSGC/02, PRD48JDSGU/02 6.8.1.1 Warming Drawer Door Handle Assembly – Removal 6.8.2 Warming Drawer Power LED Indicator – Removal and and Replacement Replacement Be sure to check QuickFinder for relevant information,... -
Page 60: Warming Drawer Display Module - Removal And Replacement
Service Manual for the Thermador Pro Grand Next Generation, Dual Fuel Range with Steam Oven, Models: PRD48JDSGC/02, PRD48JDSGU/02 5. Inside the control panel, remove and retain the small and large screw for the left endcap (see Figure 94, page 60); the power LED bracket then will be detached. -
Page 61: Removing The Warming Drawer Front Panel
Service Manual for the Thermador Pro Grand Next Generation, Dual Fuel Range with Steam Oven, Models: PRD48JDSGC/02, PRD48JDSGU/02 6.8.3 Removing the Warming Drawer Front Panel If you have already disassembled the warming drawer control panel and need to service or access other areas of the warming drawer, this procedure may be necessary. -
Page 62: Removing The Warming Drawer Control Panel Assembly
Service Manual for the Thermador Pro Grand Next Generation, Dual Fuel Range with Steam Oven, Models: PRD48JDSGC/02, PRD48JDSGU/02 6.8.4 Removing the Warming Drawer Control Panel Assembly This procedure may be needed when accessing or servicing other areas of the warming drawer. -
Page 63: Removing The Warming Drawer And Cavity From The Range
Service Manual for the Thermador Pro Grand Next Generation, Dual Fuel Range with Steam Oven, Models: PRD48JDSGC/02, PRD48JDSGU/02 6.8.5 Removing the Warming Drawer and Cavity from the Range This procedure is only necessary if you are servicing the following steam oven components: reed sensor board, water tank assembly, evaporator cup (heater) assembly, and steam oven door hinges. - Page 64 Service Manual for the Thermador Pro Grand Next Generation, Dual Fuel Range with Steam Oven, Models: PRD48JDSGC/02, PRD48JDSGU/02 7. At the base of the steam oven back panel, remove and retain the 8. Remove the back panel for the steam oven (see Back Panel for eight screws, then remove the bracket (Figure 103 &...
-
Page 65: Removing The Warming Drawer From The Cavity
Service Manual for the Thermador Pro Grand Next Generation, Dual Fuel Range with Steam Oven, Models: PRD48JDSGC/02, PRD48JDSGU/02 11. Move the wire with connector out of the way, and then detach the 6.8.6 Removing the Warming Drawer from the Cavity insulation-retaining wire strap (see Figure 106). - Page 66 Service Manual for the Thermador Pro Grand Next Generation, Dual Fuel Range with Steam Oven, Models: PRD48JDSGC/02, PRD48JDSGU/02 7. Unplug the sensor wire connector at the back of the warming drawer before removal of the warming drawer (harness shown in Figure 108.)
-
Page 67: Warming Drawer Sensor - Removal And Replacement
Service Manual for the Thermador Pro Grand Next Generation, Dual Fuel Range with Steam Oven, Models: PRD48JDSGC/02, PRD48JDSGU/02 6.8.7 Warming Drawer Sensor – Removal and Replacement You can service the sensor with or without removing the warming drawer from the cavity. -
Page 68: Element Gasket And Frame - Removal And Replacement
Service Manual for the Thermador Pro Grand Next Generation, Dual Fuel Range with Steam Oven, Models: PRD48JDSGC/02, PRD48JDSGU/02 6.8.8 Element Gasket and Frame – Removal and Replacement You can service the element gasket and frame with or without removing the warming drawer from the cavity. -
Page 69: Microswitch And Glass Heating Element - Removal And Replacement70
Service Manual for the Thermador Pro Grand Next Generation, Dual Fuel Range with Steam Oven, Models: PRD48JDSGC/02, PRD48JDSGU/02 4. Remove the frame and then remove the element gasket (see 6.8.9 Microswitch and Glass Heating Element – Removal and Figure 117 and Figure 118). - Page 70 Service Manual for the Thermador Pro Grand Next Generation, Dual Fuel Range with Steam Oven, Models: PRD48JDSGC/02, PRD48JDSGU/02 6. In the wire tray, first label, and then detach all six wire connectors (four are for the temperature limiters, and two are for the wires to the element terminals).
-
Page 71: Removing The Warming Drawer Slide Assembly
Service Manual for the Thermador Pro Grand Next Generation, Dual Fuel Range with Steam Oven, Models: PRD48JDSGC/02, PRD48JDSGU/02 c. Remove the matting (see Figure 123). Before installing the new the glass element, first inspect the matting. If it has 3 holes then it must be replaced with the new matting that has 1 hole (see Figure 123 and Figure 124). -
Page 72: Warming Drawer Temperature Limiter - Removal And Replacement
Service Manual for the Thermador Pro Grand Next Generation, Dual Fuel Range with Steam Oven, Models: PRD48JDSGC/02, PRD48JDSGU/02 7. Remove the frame and then remove the element gasket (see Element Gasket and Frame – Removal and Replacement, page 69). 8. Set the glass element assembly back down and carefully guide the element terminal wires through the receptacle when lifting the element off of the housing (see Figure 122, page 71). - Page 73 Service Manual for the Thermador Pro Grand Next Generation, Dual Fuel Range with Steam Oven, Models: PRD48JDSGC/02, PRD48JDSGU/02 5. In the wire tray, first label, and then detach all six wire connectors b. Remove any thermal tape and residue by hand from any glass (four are for the temperature limiters, and two are for the wires to element and temperature limiter that you plan to reuse.
-
Page 74: Warming Drawer External Gasket - Removal And Replacement
Service Manual for the Thermador Pro Grand Next Generation, Dual Fuel Range with Steam Oven, Models: PRD48JDSGC/02, PRD48JDSGU/02 14. When replacing a temperature limiter, you can reuse the existing retainer if it is not damaged. Press the terminals of a temperature limiter against a hard surface;... -
Page 75: Removal And Replacement Of Top-Accessible Components
Service Manual for the Thermador Pro Grand Next Generation, Dual Fuel Range with Steam Oven, Models: PRD48JDSGC/02, PRD48JDSGU/02 4. Prior to removing the jet holder assembly from the burner support 6.9 Removal and Replacement of Top-Accessible rail, remove and retain the wire guard clip (see Figure 129). -
Page 76: Standard Valve Removal And Replacement
Service Manual for the Thermador Pro Grand Next Generation, Dual Fuel Range with Steam Oven, Models: PRD48JDSGC/02, PRD48JDSGU/02 6.9.2 Standard Valve Removal and Replacement The standard valves do not have XLO or XHI functionality. Standard valves are accessible from under the maintop, and can be replaced without removing the control panel. -
Page 77: Microswitch Removal And Replacement
Service Manual for the Thermador Pro Grand Next Generation, Dual Fuel Range with Steam Oven, Models: PRD48JDSGC/02, PRD48JDSGU/02 7. Use a T-10 driver to remove and retain the screw on the 6.9.3 Microswitch Removal and Replacement microswitch (see Figure 133) and then pull the microswitch off the alignment pin on the standard valve. -
Page 78: Solenoid Valve Removal And Replacement
Service Manual for the Thermador Pro Grand Next Generation, Dual Fuel Range with Steam Oven, Models: PRD48JDSGC/02, PRD48JDSGU/02 6.9.4 Solenoid Valve Removal and Replacement 6. First make a note of how the wires are connected to the solenoid valve terminals, and then remove the wires from the terminals. -
Page 79: Xlo Valve Removal And Replacement
Service Manual for the Thermador Pro Grand Next Generation, Dual Fuel Range with Steam Oven, Models: PRD48JDSGC/02, PRD48JDSGU/02 Gas Leaks With electrical power off, carefully check for gas leaks at each gas component that was removed, replaced, or otherwise serviced using a... -
Page 80: Potentiometer Removal And Replacement
Service Manual for the Thermador Pro Grand Next Generation, Dual Fuel Range with Steam Oven, Models: PRD48JDSGC/02, PRD48JDSGU/02 2. Follow all steps in Accessing Components under the Maintop, page 25. 3. Remove the control panel (see Control Panel Removal and Gas Leaks Replacement, page 35). -
Page 81: Manifold For Maintop Burners - Removal And Replacement
Service Manual for the Thermador Pro Grand Next Generation, Dual Fuel Range with Steam Oven, Models: PRD48JDSGC/02, PRD48JDSGU/02 6.9.7 Manifold for Maintop Burners – Removal and 6. Detach all wire connectors to the LED indicators, temperature Replacement gauge, potentiometers, solenoid valves, and microswitches, and make a note of how all the wires are connected. - Page 82 Service Manual for the Thermador Pro Grand Next Generation, Dual Fuel Range with Steam Oven, Models: PRD48JDSGC/02, PRD48JDSGU/02 Figure 144: Detaching Manifold Pipe Bracket from Manifold Pipe 11. Remove all gas tubes from the standard valves and solenoid Figure 143: Manifold Support Bracket (Shown with Control Panel...
-
Page 83: Regulator Removal And Replacement
Service Manual for the Thermador Pro Grand Next Generation, Dual Fuel Range with Steam Oven, Models: PRD48JDSGC/02, PRD48JDSGU/02 Gas Leaks With electrical power off, carefully check for gas leaks at each gas component that was removed, replaced, or otherwise serviced using a gas leak detector (electronic leak detectors are highly recommended) or bubble test. -
Page 84: Oven Lamp Transformer Removal And Replacement
Service Manual for the Thermador Pro Grand Next Generation, Dual Fuel Range with Steam Oven, Models: PRD48JDSGC/02, PRD48JDSGU/02 6.9.9 Oven Lamp Transformer Removal and Replacement correctly identify their connections/locations when reassembling. Alternatively, you can photograph the wire connections prior to disconnecting (for example, with your mobile phone). -
Page 85: Oven Temperature Gauge Removal And Replacement
Service Manual for the Thermador Pro Grand Next Generation, Dual Fuel Range with Steam Oven, Models: PRD48JDSGC/02, PRD48JDSGU/02 5. At the back side of the control panel, detach the multi-pin wire connector from the switch, and then remove it. 6. Replace the selector switch if necessary (see Figure 147). -
Page 86: Control Boards For The Large Oven - Removal And Replacement
Service Manual for the Thermador Pro Grand Next Generation, Dual Fuel Range with Steam Oven, Models: PRD48JDSGC/02, PRD48JDSGU/02 4. Carefully pull out the bracket (see Figure 150). 6.9.12 Control Boards for the Large Oven – Removal and Replacement This procedure is for replacement of the large oven control board. -
Page 87: Simmer Control Board Removal And Replacement
Service Manual for the Thermador Pro Grand Next Generation, Dual Fuel Range with Steam Oven, Models: PRD48JDSGC/02, PRD48JDSGU/02 4. Remove and retain the two screws attaching the cover shield to Caution the range chassis (see Figure 152, page 87). 5. Remove all multi-pin wire connectors from the control board as Fragile Components well as the spade connector of the ground wire (see Figure 153). -
Page 88: Led Indicator Removal And Replacement
Service Manual for the Thermador Pro Grand Next Generation, Dual Fuel Range with Steam Oven, Models: PRD48JDSGC/02, PRD48JDSGU/02 5. Use a needle nose pliers to disengage the control board from the 1. Follow all safety precautions and steps in Preparing the Range for four plastic standoffs by lightly pressing the tiny protruding clip on Servicing, page 25. -
Page 89: Lighting Bar For Control Panel - Removal And Replacement
Service Manual for the Thermador Pro Grand Next Generation, Dual Fuel Range with Steam Oven, Models: PRD48JDSGC/02, PRD48JDSGU/02 NOTE: When installing a replacement lighting bar, be sure to affix the tape at the same three locations. Figure 156: Removing the LED Indicator 6.9.15... -
Page 90: Ignition (Spark) Module Removal And Replacement
Service Manual for the Thermador Pro Grand Next Generation, Dual Fuel Range with Steam Oven, Models: PRD48JDSGC/02, PRD48JDSGU/02 6.9.16 Ignition (Spark) Module Removal and Replacement 3. If obstructing access to the ignition module, remove the burner support rail (with jet holder assemblies attached) by following the steps in Removing the Burner Support Rail, page 28. - Page 91 Service Manual for the Thermador Pro Grand Next Generation, Dual Fuel Range with Steam Oven, Models: PRD48JDSGC/02, PRD48JDSGU/02 5. Remove and retain the single screw that holds the access panel to 7. Remove and retain the two T-20 screws under the front control the range chassis (see Figure 160).
- Page 92 Service Manual for the Thermador Pro Grand Next Generation, Dual Fuel Range with Steam Oven, Models: PRD48JDSGC/02, PRD48JDSGU/02 9. Detach the spade wire connectors from the latch and the white 10. Replace the door latch if needed. plastic piggyback wire connector on the door latch’s microswitch NOTE: If replacing the plunger switch, it must be done before the (see Figure 162 and Figure 163).
-
Page 93: Plunger Switch Removal And Replacement
Service Manual for the Thermador Pro Grand Next Generation, Dual Fuel Range with Steam Oven, Models: PRD48JDSGC/02, PRD48JDSGU/02 6.9.18 Plunger Switch Removal and Replacement Removing and replacing the plunger switch requires access from both the top and front of the range. -
Page 94: Griddle / Grill Thermostat Removal And Replacement
Service Manual for the Thermador Pro Grand Next Generation, Dual Fuel Range with Steam Oven, Models: PRD48JDSGC/02, PRD48JDSGU/02 1. Follow all safety precautions and steps in Preparing the Range for Servicing, page 25. 2. Follow all steps in Accessing Components under the Maintop, page 25. -
Page 95: Display Module Components And Oven Light Switch For Large Oven - Removal And Replacement
Service Manual for the Thermador Pro Grand Next Generation, Dual Fuel Range with Steam Oven, Models: PRD48JDSGC/02, PRD48JDSGU/02 6.9.20 Display Module Components and Oven Light Switch for 1. Follow all safety precautions and steps in Preparing the Range for Large Oven – Removal and Replacement Servicing, page 25. - Page 96 Service Manual for the Thermador Pro Grand Next Generation, Dual Fuel Range with Steam Oven, Models: PRD48JDSGC/02, PRD48JDSGU/02 4. Depending on the model, you may need to remove the griddle tray (see Griddle / Grill Removal and Replacement, page 30) to provide more room for accessing and removing the light switch and display module.
- Page 97 Service Manual for the Thermador Pro Grand Next Generation, Dual Fuel Range with Steam Oven, Models: PRD48JDSGC/02, PRD48JDSGU/02 12. At the back of the display module, on the button board detach both sides of the ribbon harness (see Figure 172).
-
Page 98: Removal And Replacement Of Back-Accessible Components
Service Manual for the Thermador Pro Grand Next Generation, Dual Fuel Range with Steam Oven, Models: PRD48JDSGC/02, PRD48JDSGU/02 16. Replace the LCD board if needed. NOTE: All four dipswitch settings on the LCD board should be in the OFF position (see Figure 175). -
Page 99: Backguard Removal And Replacement
Service Manual for the Thermador Pro Grand Next Generation, Dual Fuel Range with Steam Oven, Models: PRD48JDSGC/02, PRD48JDSGU/02 6.10.1 Backguard Removal and Replacement 4. Remove and retain the screws on the on the back side of the backguard (see Figure 178, page 101), and then lift the backguard straight up to remove (see Figure 179, page 101. - Page 100 Service Manual for the Thermador Pro Grand Next Generation, Dual Fuel Range with Steam Oven, Models: PRD48JDSGC/02, PRD48JDSGU/02 Figure 179: Backguard Installed Inside Guide Channels Backguard Figure 178: Rear Screws on Backguard and Back Panels Guide channels (2) Backguard (Island Trim shown)
-
Page 101: Back Panel For Steam Oven - Removal And Replacement
Service Manual for the Thermador Pro Grand Next Generation, Dual Fuel Range with Steam Oven, Models: PRD48JDSGC/02, PRD48JDSGU/02 6.10.2 Back Panel for Steam Oven – Removal and Replacement 6.10.3 Back Panel for Large Oven – Removal and Replacement Be sure to check QuickFinder for relevant information,... -
Page 102: Terminal Block And Power Cord - Removal And Replacement
Service Manual for the Thermador Pro Grand Next Generation, Dual Fuel Range with Steam Oven, Models: PRD48JDSGC/02, PRD48JDSGU/02 6.10.4 Terminal Block and Power Cord – Removal and 6.10.5 Electrical Wiring Connections at the Terminal Block Replacement For electrical wiring requirements and safety precautions, refer to the Installation Manual for this appliance. - Page 103 Service Manual for the Thermador Pro Grand Next Generation, Dual Fuel Range with Steam Oven, Models: PRD48JDSGC/02, PRD48JDSGU/02 4. Remove and retain the screws that secure the cooling fan mounting bracket onto the range chassis (see Figure 183 and Figure 184).
-
Page 104: Thermal Fuse Removal And Replacement
Service Manual for the Thermador Pro Grand Next Generation, Dual Fuel Range with Steam Oven, Models: PRD48JDSGC/02, PRD48JDSGU/02 6.10.7 Thermal Fuse Removal and Replacement 6.11.1 Oven Temp Sensor for Large Oven – Removal and Replacement When the large oven temperature reaches the maximum... -
Page 105: Meat Probe Receptacle Components - Removal And Replacement
Service Manual for the Thermador Pro Grand Next Generation, Dual Fuel Range with Steam Oven, Models: PRD48JDSGC/02, PRD48JDSGU/02 6.11.2 Meat Probe Receptacle Components – Removal and 1. Follow all safety precautions and steps in Preparing the Range for Replacement Servicing, page 25. -
Page 106: Rack Support Removal And Replacement
Service Manual for the Thermador Pro Grand Next Generation, Dual Fuel Range with Steam Oven, Models: PRD48JDSGC/02, PRD48JDSGU/02 8. From the side of the range, detach the wire connector, and then 6.11.3 Rack Support Removal and Replacement remove the receptacle (see Figure 190 and Figure 191). -
Page 107: Oven Lamp Assembly And Bulb - Removal And Replacement
Service Manual for the Thermador Pro Grand Next Generation, Dual Fuel Range with Steam Oven, Models: PRD48JDSGC/02, PRD48JDSGU/02 6.11.4 Oven Lamp Assembly and Bulb – Removal and Replacement The oven lamp is located inside the large oven cavity. To replace the oven lamp assembly, access is from both the front and top of the range. -
Page 108: Removing The Bulb
Service Manual for the Thermador Pro Grand Next Generation, Dual Fuel Range with Steam Oven, Models: PRD48JDSGC/02, PRD48JDSGU/02 6.11.4.1 Removing the Bulb 6.11.4.2 Removing the Oven Lamp Assembly 1. Follow all safety precautions and steps in Preparing the Range for 1. -
Page 109: Oven Door Removal, Installation, And Alignment
Service Manual for the Thermador Pro Grand Next Generation, Dual Fuel Range with Steam Oven, Models: PRD48JDSGC/02, PRD48JDSGU/02 5. Remove oven door (see Oven Door Removal, Installation, and 6.11.5 Oven Door Removal, Installation, and Alignment Alignment, page 110). NOTE: It is recommended to remove the door, to prevent weight or force applied from damaging the door and latch components. -
Page 110: Installing The Door
Service Manual for the Thermador Pro Grand Next Generation, Dual Fuel Range with Steam Oven, Models: PRD48JDSGC/02, PRD48JDSGU/02 5. When the door is lifted sufficiently to clear the hinge hooks, pull 6.11.5.2 Installing the Door the door straight out (see Figure 198), and place it in a safe location. -
Page 111: Aligning The Door
Service Manual for the Thermador Pro Grand Next Generation, Dual Fuel Range with Steam Oven, Models: PRD48JDSGC/02, PRD48JDSGU/02 6.11.5.3 Aligning the Door 6.11.6 Large Oven Convection Components – Removal and Replacement On models that have an alignment mechanism as a part of the hinge... - Page 112 Service Manual for the Thermador Pro Grand Next Generation, Dual Fuel Range with Steam Oven, Models: PRD48JDSGC/02, PRD48JDSGU/02 1. Follow all safety precautions and steps in Preparing the Range for 8. Remove the reflector cover shield. Servicing, page 25. 9. Remove the ten screws on the rear cover shield, and then pull the 2.
-
Page 113: Broil Element Components - Removal And Replacement
Service Manual for the Thermador Pro Grand Next Generation, Dual Fuel Range with Steam Oven, Models: PRD48JDSGC/02, PRD48JDSGU/02 12. Pull the bracket and motor forward slightly (into the cavity). See 6.11.7 Broil Element Components – Removal and Replacement Figure 203. - Page 114 Service Manual for the Thermador Pro Grand Next Generation, Dual Fuel Range with Steam Oven, Models: PRD48JDSGC/02, PRD48JDSGU/02 Figure 206: Broil Element 1. Follow all safety precautions and steps in Preparing the Range for Servicing, page 25. 2. Remove all trays from the oven.
- Page 115 Service Manual for the Thermador Pro Grand Next Generation, Dual Fuel Range with Steam Oven, Models: PRD48JDSGC/02, PRD48JDSGU/02 8. If necessary, after broil reflector plate removal you can pull the flue pipe out from the top of the range to remove it (Figure 209).
-
Page 116: Bake Element Components - Removal And Replacement
Service Manual for the Thermador Pro Grand Next Generation, Dual Fuel Range with Steam Oven, Models: PRD48JDSGC/02, PRD48JDSGU/02 6.11.8 Bake Element Components – Removal and Replacement Bake element components are accessible from the front of the range. Be sure to check QuickFinder for relevant information, documentation, and correct part numbers when replacing any of these components. - Page 117 Service Manual for the Thermador Pro Grand Next Generation, Dual Fuel Range with Steam Oven, Models: PRD48JDSGC/02, PRD48JDSGU/02 6. Pull to detach the bake element wire connectors (see Figure 215), and move the wire harness to the side, away from the tray.
-
Page 118: Door Interior Cleaning
Service Manual for the Thermador Pro Grand Next Generation, Dual Fuel Range with Steam Oven, Models: PRD48JDSGC/02, PRD48JDSGU/02 6.11.9 Door Interior Cleaning This procedure is for the large oven door only. In the event of spillage that seeps into the top vents of the large oven door, the spillage may get trapped inside of the door assembly, and may require cleaning. -
Page 119: Large Oven Door Components - Removal And Replacement
Service Manual for the Thermador Pro Grand Next Generation, Dual Fuel Range with Steam Oven, Models: PRD48JDSGC/02, PRD48JDSGU/02 5. At the base of the door assembly, gently lift the inner glass panel Caution upward slightly while removing the two lower retaining brackets that are positioned around the door hinges (see Figure 221). -
Page 120: Door Gasket Removal And Replacement
Service Manual for the Thermador Pro Grand Next Generation, Dual Fuel Range with Steam Oven, Models: PRD48JDSGC/02, PRD48JDSGU/02 6.11.11 Door Gasket Removal and Replacement 6.11.12 Kick Panel Removal and Replacement Be sure to check QuickFinder for relevant information, Be sure to check QuickFinder for relevant information,... -
Page 121: Before Returning Appliance To Service
Service Manual for the Thermador Pro Grand Next Generation, Dual Fuel Range with Steam Oven, Models: PRD48JDSGC/02, PRD48JDSGU/02 ■ Make sure all safety grounds (internal and external) are correctly 3. Loosen the two screws from the kick panel (you do not have to... -
Page 122: Additional Resources
Service Manual for the Thermador Pro Grand Next Generation, Dual Fuel Range with Steam Oven, Models: PRD48JDSGC/02, PRD48JDSGU/02 ADDITIONAL RESOURCES 9.1 QuickFinder For further information, please refer to the following documents on QuickFinder at http://portal.mch.bshg.com/portal ■ Installation Manual ■ Care and Use Manual In addition, the following may be available on QuickFinder: ■...