Sign In
Upload
Manuals
Brands
Toshiba Manuals
All in One Printer
e-STUDIO 230L
Toshiba e-STUDIO 230L Manuals
Manuals and User Guides for Toshiba e-STUDIO 230L. We have
5
Toshiba e-STUDIO 230L manuals available for free PDF download: Printing Manual, Network Administrator's Manual, Operator's Manual, Network Fax Manual, Service Manual
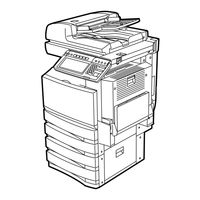
Toshiba e-STUDIO 230L Printing Manual (382 pages)
MULTIFUNCTIONAL DIGITAL SYSTEMS
Brand:
Toshiba
| Category:
All in One Printer
| Size: 6.97 MB
Table of Contents
Software License Agreement
2
Trademarks and Copyright
4
Preface
5
About this Guide
5
About Other Manuals
5
Conventions
5
Table of Contents
6
1 Overview
13
Features and Functions
14
About the Client CD-ROM
15
For Windows
15
For Macintosh
16
For UNIX
16
2 Installing Client Software
17
Installing Client Software for Windows
18
About Client Software for Windows
18
Planning for Installation
18
Before Installing Client Software
18
When GL-Docmon Has Been Installed
18
When Topaccessdocmon Has Been Installed
18
System Requirements
19
Types of Printer Drivers
19
About Installation Procedure
20
Parallel Port Connection
20
Local Area Network over TCP/IP
21
USB Connection
21
Lpr Printing
22
Smb Printing
22
Internet Connection
23
Novell Printing
24
Installing the Client Software for Parallel Printing
25
Installation for Parallel Printing Using the Installer
25
Installation for Parallel Printing by Plug and Play
31
Windows 98/Me
31
Windows 2000
34
Windows Xp/Server 2003
37
Installation for Parallel Printing by Add Printer Wizard
40
Windows 98/Me
40
Windows NT 4.0
44
Windows 2000/Xp/Server 2003
48
Installing the Client Software for USB Printing
53
Installation for USB Printing by Plug and Play
54
Windows 98/Me
54
Windows 2000
60
Windows Xp/Server 2003
63
Installing the Client Software for LPR Printing
66
Installation for LPR Printing Using the Installer
66
Windows NT 4.0
66
Windows 2000/Xp/Server 2003
69
Installation for LPR Printing by Add Printer Wizard
74
Windows NT 4.0
75
Windows 2000/Xp/Server 2003
80
Installing the Client Software for SMB Printing
89
Installation for SMB Printing Using the Installer
89
Using the Discovery Functions to Specify the SMB Port
95
Installation for SMB Printing by Point and Print
100
Windows 98/Me
101
Windows NT 4.0/2000/Xp/Server 2003
103
Installation for SMB Printing by Add Printer Wizard
104
Windows 98/Me
104
Windows NT 4.0
107
Windows 2000/Xp/Server 2003
112
Installing the Client Software for Peer-To-Peer Printing
118
Installation and Configuration of Peer-To-Peer Utility
118
Installing the Client Software for IPP Printing
127
Installation for IPP Printing by Add Printer Wizard
127
Installing the Client Software for Novell Printing
132
Installation for Novell Printing Using the Installer
133
Installation for Novell Printing by Point and Print
140
Windows 98/Me
141
Windows NT 4.0/2000/Xp/Server 2003
145
Installation for Novell Printing by Add Printer Wizard
148
Windows 98/Me
148
Windows NT 4.0
151
Windows 2000/Xp/Server 2003
156
Uninstalling the Client1 Software
162
When Installed Using the Installer
162
When Installed Using Add Printer Wizard
167
Installing Client Software for Macintosh
169
About Client Software for Macintosh
169
Planning for Installation
169
System Requirements
169
Installing the Printer on Mac os 8.6/9.X
169
Installing the Macintosh PPD File
169
Configuring the Printer on Mac os 8.6/9.X
170
Installing the Printer on Mac os X 10.2.4 or Later
176
Installing the Macintosh PPD File
176
Configuring the Printer on Mac os X
177
Configuring the Installable Options
182
Installing Client Software for UNIX
185
About Client Software for UNIX
185
Planning for Installation
186
System Requirements
186
Installing the Printer on UNIX
186
Installing the UNIX Filters
186
Configuring the Print Queue
187
Creating a Print Queue Manually
188
Creating a Print Queue Using Est4511Add/Estbwadd
188
Changing the Default Values
192
Deleting a Print Queue Manually
193
Deleting a Print Queue Using Est4511Rm/Estbwrm
193
Deleting the Print Queue
193
Installing the CUPS
195
Other Installation Procedures
198
Installing the Client Software from Topaccess
198
3 Printing
203
Printing from Windows
204
Before Using the Printer Driver
204
Configuring the Options
204
Configuring the Options Manually
205
Configuring the Options Automatically
206
Setting the Department Code
208
Copying the PPD File for Windows
210
Printing from Application
211
Considerations and Limitations
211
How to Print
211
Setting up Print Options
212
How to Setup
213
Setting Initial Values of Print Options
213
Setting Print Options for each Print Job
213
Setting Print Options Using Profiles
213
Print Options
216
Setup Tab
218
Print Job Tab
224
Layout Tab - Standard Window
226
Layout Tab - Booklet Window
230
Layout Tab - Multiple Pages Per Sheet Window
233
Effect Tab
235
Postscript Settings
238
Image Quality Tab
239
Font Tab
244
Configuration Tab
246
About Tab
249
Printing with Extended Print Functionality
249
Printing Scheduled Print Jobs
249
Printing Various Print Job Types
249
Printing Private Print Jobs
250
Creating an Overlay File
251
Printing Proof Print Jobs
251
Storing to E-Filing
252
Printing with Various Layout and Finishing Options
253
Sort Printing
253
Enlarge/Reduce Printing
255
Printing Color Document in Gray Scale
255
Stapling and Hole Punching
256
Printing on both Sides of a Sheet
257
Printing or Inserting Sheets from Different Paper Sources
258
Interleaving
259
Printing Booklets
260
Printing Several Reduced Pages Per Sheet
263
Using Watermarks
265
Printing with an Overlay File
267
Printing on a Tab Paper
269
Printing from Macintosh
271
Printing from an Application on Mac os 8.6 to 9.X
271
How to Print from Mac os 8.6 or 9.X
271
Selecting the Printer in the Chooser
271
Setting Options and Printing from Macintosh Computers
272
Page Attributes
273
Print Options for Page Setup Dialog on Mac os 8.6/9.X
273
General
274
Print Options for Print Dialog on Mac os 8.6/9.X
274
Background Printing
275
Color Matching
276
Cover Page
276
Font Settings
277
Job Logging
277
Layout
278
Finishing Options
280
Printing Modes
283
Booklet Mode Options
284
Watermark Options
285
Quality
286
Printing from Application on Mac os X 10.2.4 or Later
288
How to Print from Mac os X 10.2.4 or Later
288
Setting Options and Printing from Macintosh Computers
288
Print Options for Page Setup Dialog on Mac os X 10.2.4 or Later
289
Page Attributes
290
Copies
291
Print Options for Print Dialog on Mac os X 10.2.4 or Later
291
Layout
292
Duplex
294
Output Options
295
Scheduler
295
Paper Handling
296
Cover Page
297
Error Handling
298
Paper Feed
298
Printer Features
299
Printing from UNIX
309
Printing from an Application
309
Considerations and Limitations
309
Copies
309
Generic "Lp" and "Lptap" Options
309
Printing Using LP Command
309
Title
309
Color Mode
310
General Options
310
Print Language
310
Stapling
310
Output bin
311
Hole Punching
312
Media Type
312
Duplexing
313
Paper Sizes
313
Paper Source
313
Printing Modes
314
Department Code
315
Distinguish Thin Lines
315
Smoothing
315
Booklet Modes
316
Do Not Print Blank
316
Toner Save
316
Page Layout
317
Center Margin
318
Orientation
318
Outer Margin
318
Font Pitch
319
Page Length
319
Pure Black and Pure Gray
319
Left Margin
320
Pcl5E Specific Options
320
Right Margin
320
Text Wrapping
320
Banner Page
321
Text Length
321
Top Margin
321
Black over Print
323
PS Specific Options
323
Other Printing Methods
324
FTP Printing
324
Email Printing
325
4 Monitoring Print Jobs
327
Monitoring Print Jobs with Topaccessdocmon
328
Features and Functions
328
How to Use Topaccessdocmon
328
Running Topaccessdocmon
328
Starting Topaccessdocmon
328
Configuring Topaccessdocmon
329
Document Monitor Taskbar Menu
329
Configuring the Notifications
330
Configuring the Start up Options
330
Changing the Refresh Rate
331
Finding the Printer Address
333
Monitoring the Printer
333
Accessing from the Document Monitor Menu
333
How to Access the Topaccessdocmon Window
333
Accessing from the Printers File Menu
334
Searching for a Printer
335
Topaccessdocmon Window
339
Checking Device Status
341
Adding Devices
342
Changing Monitoring Devices
342
Monitoring Queues
347
Event Notification
350
5 Troubleshooting
351
When Printing Cannot be Performed
352
Printer Driver Errors
354
Printer Driver Installation Error Messages
354
Client Software CD Now Required
354
File *.DRV on Client CD Count Not be Found
354
Location Does Not Contain Information about Your Hardware
354
Setup Needs to Copy Windows NT Files
354
This Port Is Currently in Use
354
Problem with the Current Printer Setup
355
Printer Driver General Errors
355
Command Line Options Not Processed
355
Driver Mapped to Wrong Port
355
Cannot Print a Job as Expected Using PS Printer Driver
356
Cannot Print a Job Using SMB
356
Cannot Remember Document Password
356
Retrieval of Printer Configuration Failed
356
Topaccessdocmon Errors
357
Topaccessdocmon Error Conditions
357
Cannot Interpret Topaccessdocmon Messages/Warnings/Errors
357
Cannot View Job in Topaccessdocmon Print Queue
357
The Device Is Not Responding
357
Topaccessdocmon Error Messages
358
Topaccessdocmon Notification Messages
358
Topaccessdocmon Printer Status Messages
359
Device Status Indicators
364
6 Appendix
367
Managing Fonts with Font Manager
368
Installing Font Manager
368
Searching Fonts
368
Installing Fonts in Windows
369
Uninstalling Fonts in Windows
369
Removing Fonts from the Computer
369
Displaying Font Preview
370
Creating a Font Group
370
Sorting Fonts in the List
371
Inverting the Alphabetical Order
371
Sorting by Font Type
371
Sorting by Name
371
Internal Fonts List
372
Internal PCL Fonts List
372
Internal PS Fonts List
373
7 Index
375
Advertisement
Toshiba e-STUDIO 230L Network Administrator's Manual (222 pages)
MULTIFUNCTIONAL DIGITAL SYSTEMS
Brand:
Toshiba
| Category:
Printer
| Size: 4.15 MB
Table of Contents
Software License Agreement
2
Trademarks and Copyright
4
Preface
5
About this Guide
5
About Other Manuals
5
Conventions
5
Table of Contents
6
1 Overview
11
Features and Functions
12
About Setup from Topaccess
12
About Maintenance from Topaccess
13
About Registration from Topaccess
13
About Other Administrative Functions in Topaccess
14
Accessing Topaccess Administrator Mode
15
2 Easy Setup Flow
17
Overview for Network Configuration
18
Connecting to the Local Area Network over TCP/IP
19
Connecting to the Local Area Network over IPX/SPX
19
Connecting to the Local Area Network over Appletalk Network
19
Connecting to the Internet
20
Setup Flow for Printing Features
21
Setup Flow for Windows Printing
21
Setup Flow for LPR Printing
22
Setup Flow for SMB Printing
23
Setup Flow for Peer-To-Peer Printing
24
Setup Flow for IPP Printing
25
Setup Flow for Printing Via Windows Print Server
26
Setup Flow for Novell Printing
27
Setup Flow for Macintosh Printing
28
Setup Flow for Appletalk Printing
29
Setup Flow for LPR Printing
29
Setup Flow for Unix Printing
30
Setup Flow for FTP Printing
31
Setup Flow for Email Printing
31
Setup Procedure
32
Setup Flow for Scanning Features
33
Setup Flow for Save as File
33
Setup Flow for Scan to Email
34
Setup Flow for Fax Features
36
Setup Flow for Network-Fax
36
Setup Flow for Internet Fax
38
Setup Flow for Onramp Gateway
39
Setup Flow for Offramp Gateway
41
Setup Flow for E-Filing Features
44
Setup Flow for E-Filing Web Utility
44
Setup Flow for TWAIN Driver and File Downloader
44
3 Setting up from Topaccess
47
Setting up Device Settings
48
Setting up the Device Information
49
Setting up the Energy Save
50
Setting up the Time and Date
50
Setting up the Web General Setting
51
Setting up Network Settings
52
Setting up the TCP/IP
53
Setting up the IPX/SPX
54
Setting up the Appletalk
54
Setting up the Rendezvous
55
Setting up the LDAP Session
55
Setting up the DNS Session
56
Setting up the DDNS Session
56
Setting up the SLP Session
56
Setting up the SMB Session
57
Setting up the Netware Session
58
Setting up the HTTP Network Service
58
Setting up the SMTP Client
59
Setting up the SMTP Server
60
Setting up the POP3 Network Service
61
Setting up the FTP Client
62
Setting up the FTP Server
62
Setting up the SNMP Network Service
63
Setting up Copier Settings
65
Setting up the Copier Settings
66
Setting up Fax Settings
69
Setting up the Fax Settings
70
Setting up Save as File Settings
74
Setting up the Local Storage Path
75
Setting up the Storage Maintenance
75
Setting up the Destination
76
Setting up the Remote 1 and Remote 2
76
Setting up the N/W-Fax Destination
78
Setting up the N/W-Fax Folder
78
Setting up Email Settings
80
Setting up the Email Settings
81
Setting up Internet Fax Settings
83
Setting up the Internet Fax Settings
84
Setting up Printer Settings
85
Setting up the General Setting
86
Setting up the Default Raw Job Setting
86
Setting up the Raw Job Setting
88
Setting up Print Service Settings
90
Setting up the Raw TCP Print
91
Setting up the LPD Print
91
Setting up the IPP Print
92
Setting up the FTP Print
92
Setting up the Netware Print
93
Setting up the Email Print
93
Displaying Version Information
95
4 Managing the Device
97
Maintaining from Topaccess
98
About the Maintenance Functions
98
Updating the Software
99
Removing the Client Software
101
Backing up Data
102
Restoring Data from Backup File
104
Deleting the Data from Local Folder
107
Managing Directory Service
108
Setting up Notification
110
Importing and Exporting the Address Book
112
Importing the Address Book Data
112
Exporting the Address Book Data
113
Importing and Exporting the Department Code
115
Importing the Department Code Data
115
Exporting the Department Code Data
117
Exporting the Logs and Journals
119
Clearing the Logs and Journals
120
Registering from Topaccess
122
About the Registrations
122
Registering Public Templates
122
Creating or Editing the Public Templates
122
Destination Setting
127
Panel Setting
127
Internet Fax Setting
133
Fax Setting
134
Email Setting
136
Save as File Setting
137
Box Setting
139
Scan Setting
139
Resetting a Public Template
141
Resetting the Public Template
141
Resetting All Public Templates
142
Registering Fax and Internet Fax Received Forward
143
Destination Setting
146
Setting up the Fax or Internet Fax Received Forward Properties
146
Internet Fax Setting
151
Email Setting
152
Save as File Setting
153
Box Setting
155
Displaying Message Log
156
Managing Department Code
157
Displaying the Department List and Counters
157
Clearing the Department Counters
159
Registering or Modifying the Department Code
162
Deleting the Department Code
163
5 Setting up Network Server
167
About Network Server Setup
168
Setting up Windows Print Server
169
Configuring the Windows Print Server
169
Installing the Printer Drivers as Shared Printers
169
Setting up the Clients
170
Setting up Netware Print Server
171
Setting up the Netware in Bindery Mode
171
Editing the Network Startup File
171
Setting up the Netware File Server
171
Setting up the Netware in NDS Mode
173
Setting up the Netware in NDPS Mode
174
Setting up NDPS Using Novell Printer Gateway
174
Installing the TOSHIBA NDPS Gateway
179
Setting up NDPS Using TOSHIBA NDPS Gateway
179
Setting up the Equipment as an NDPS Object
180
Removing NDPS Components
183
Setting up DNS and Mail Servers
185
Tips of Setting up the DNS and Mail Servers for Email
186
Tips of Setting up the DNS and Mail Servers for Internet Fax
186
Tips of Setting up the DNS and Mail Servers for Offramp Gateway
186
6 Troubleshooting
187
Troubleshooting Overview
188
Network Connectivity Problems
188
Macintosh Environment
191
Cannot Discover Device
192
Cannot Ping the Device
194
Cannot Print from Client
195
Network or Touch Panel Display Disabled after LDAP Search
195
Banner Page Outputted to Inner Tray
196
Troubleshooting Hardware Errors
197
Common Errors
197
Print Jobs Not Output
197
Startup Page Does Not Print
197
Device Status Indicators
198
Copier Maintenance Calls
198
Topaccess Error Messages
200
Message Log
200
Troubleshooting Network Errors
204
Cannot See this Equipment
204
Cannot Print to this Equipment
205
7 Appendix
207
Default Setting List
208
Default Settings for General Setting
208
Device Information
208
Energy Save
208
Time Stamp
208
Web General Setting
208
Default Settings for Network Setting
208
Ipx/Spx
208
Tcp/Ip
208
Appletalk
209
DDNS Session
209
DNS Session
209
LDAP Session
209
Rendezvous
209
SLP Session
209
SMB Session
209
FTP Client
210
HTTP Network Service
210
Netware Session
210
POP3 Network Service
210
SMTP Client
210
SMTP Server
210
FTP Server
211
SNMP Network Service
211
Default Settings for Copier Setting
211
Default Settings for Fax Setting (Optional)
211
Default Settings for Save as File Setting
212
Default Settings for Email Setting
212
Default Settings for Internet Fax Setting
213
Default Settings for Printer Setting
213
Default Raw Job Setting
213
General Setting
213
Default Settings for Print Service
213
LPD Print
213
Raw TCP Print
213
Email Print
214
FTP Print
214
IPP Print
214
Netware Print
214
8 Index
215
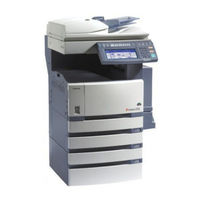
Toshiba e-STUDIO 230L Operator's Manual (174 pages)
MULTIFUNCTIONAL DIGITAL SYSTEMS Facsimile Function
Brand:
Toshiba
| Category:
All in One Printer
| Size: 3.33 MB
Table of Contents
Français
3
Table of Contents
3
Notice to Users
5
Preface
9
FEATURES of E-STUDIO3511/4511/350/450/200L/230/230L/280 FAX
10
General Precautions
11
When a Power Failure Occurs
11
Disclaimer Notice
12
English
13
Before Using Fax
13
Description of each Component
14
Main Components
14
Optional Equipment
17
Control Panel
18
Touch Panel
20
Message Area
20
Connecting the Cables
22
Sending a Fax
25
Transmission Modes
26
Preparation for Transmission
28
Switching to the Fax Mode
28
About Originals
29
Original Size/Original Scanning Range
29
Original Scanning Range
30
Setting Originals
31
Setting the Transmission Conditions
34
Variety of Optional Functions
34
Setting the Transmission Conditions
36
Sending Different Width Originals
38
Setting the Scanning Conditions for each Page
39
Specifying the Remote Fax
41
Direct Entry with Digital Keys
41
Address Book Entry
42
Group Entry
43
Searching by ID Number
44
Searching by Address (Search Address)
45
Searching Address Using LDAP Server
48
Multi-Address Transmission
49
Confirming the Destinations
50
Sending Originals
51
Memory Transmission
51
Direct Transmission
53
Other Transmissions
55
On-Hook Transmission
55
Off-Hook Transmission
56
Sending a Tone
57
Receiving a Fax
59
Reception Modes
60
Reception Settings
61
Setting of the Reception Mode
61
Manual Reception
62
Relationship between Original and Paper
64
Acceptable Size of Paper
64
Setting Rx Printing During Default Setup
64
Paper Priority When There Is no same Size Paper
65
Checking and Canceling the Communications
67
Checking Transmission Results
68
Checking Reserved Transmissions
68
Checking Communication Status (LOG)
70
Address Registration from Send/Receive Log
72
Canceling Transmissions
74
Canceling Reserved Memory Transmissions
75
Advanced Functions
79
Sending 2-Sided Originals (2-Sided Scanning)
80
Priority Transmission
82
Polling Communication
83
Polling Transmission
83
Polling Reception
84
Mailbox (Itu-T Compatible)
85
Setting up the Relay Mailbox
88
Deleting a Mailbox
90
Modifying the Relay Mailbox
91
Digital Keys
93
Chain Dial Communication
100
Delayed Tx Reservation
102
Recovery Tx
104
Onramp Gateway
106
Setting up a Relay Box with E-Mail Address
107
Offramp Gateway
108
Save as File
111
Printing Lists and Reports
113
Manually Printing Lists & Reports
114
Printing Transmission/Reception Journals
114
Error Code Table
115
Printing Reservation List
116
Automatically Printing Lists & Reports
117
Setting the Lists and Reports Output
118
The Control Panel
121
Setting the Communication Report Output
121
Setting the Reception List Output
124
Lists/Reports Samples
127
Reservation List (Manually Output)
130
Polling Report (Automatically Output)
135
Power Failure List
139
Registering and Setting Items
141
Setting the Initial Transmission Mode
142
Registering the Terminal ID
144
Setting the Reception Mode
148
Dial Type Setting
151
Nd Line Board (Optional) Installation
151
Nd Line Setting
152
Reception Only (24Hr)
154
Setting Rx Printing
155
Setting Duplex Printing
157
Setting the Rotate Sort (Alternation)
159
Setting Recovery Transmission
161
Transmission and Reception (Tx/Rx)
154
Troubleshooting
163
When the Following Messages Appear
164
Transmission Trouble
165
Reception Trouble
166
Specifications
167
Main Specifications
168
Advertisement
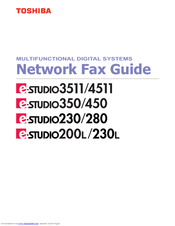
Toshiba e-STUDIO 230L Network Fax Manual (108 pages)
MULTIFUNCTIONAL DIGITAL SYSTEMS
Brand:
Toshiba
| Category:
All in One Printer
| Size: 2.53 MB
Table of Contents
Software License Agreement
2
Trademarks and Copyright
4
Preface
5
About this Guide
5
About Other Manuals
5
Conventions
5
Table of Contents
6
1 Overview
9
Features and Functions
10
Functional Highlights
10
Software Components
10
Address Book Viewer
10
N/W-Fax Driver
10
2 Installing Client Software
11
Installing Network Fax Software
12
Overview
12
Before Installing Client Software
12
When Address Book Viewer Has Been Installed
12
Installing the N/W-Fax Driver and Address Book Viewer
12
Installing from Client2 CD-ROM
13
Using the Discovery Functions to Specify the SMB Port
17
Installing from Topaccess
22
Uninstalling the N/W-Fax Driver and Address Book Viewer
23
When Installed Using the Installer
24
When Installed Using Add Printer Wizard
28
3 Faxing from Client Computers
31
Faxing from Applications
32
How to Fax Using the N/W-Fax Driver
32
Faxing from Windows Applications
32
Preparing Documents for Faxing
32
Setting up the N/W-Fax Options
34
Setting up the Send Properties
35
Specifying Recipients
36
Removing Recipients
41
Setting up the Cover Sheet Properties
42
Displaying the Version Information
43
Setting up the Sender Information Properties
43
Sending with Extended Fax Functionality
43
Saving a Fax as File
43
Delayed Transmission
44
Sending with a Cover Sheet
45
Managing Faxes
47
Managing Fax Jobs Using Topaccessdocmon
47
Managing Fax Jobs Using Topaccess
48
4 Managing Address Book
51
Running Address Book Viewer
52
Running the Address Book Viewer
52
Access Using Print Properties
52
Access Using Program Group
52
Selecting Contacts for N/W-Fax
53
About Address Book Viewer Interface
54
Using Commands
55
Menu Bar
55
Toolbar
57
Context-Sensitive Menu on Browse Pane (Left Pane)
58
Context-Sensitive Menu on Contents Pane (Right Pane)
58
Context-Sensitive Menus
58
Managing Address Book
60
About the Address Books
60
Managing the Private Address Book
60
Configuring the Connection by Local Discovery
61
Managing the Public Address Book
61
Configuring the Connection by Manual Selection
64
Configuring the MAPI Address Book
66
Downloading the Public Address Book
66
Managing the LDAP Address Book
67
Managing the Microsoft Outlook Address Book
67
Registering the LDAP Directory Services
67
Adding Contacts from LDAP Servers
69
Importing and Exporting the Address Book
73
Managing Contacts and Groups
75
Adding Contacts Manually
76
Managing Contacts
76
Copying Contacts from an Address Book
79
Displaying or Modifying Contacts Properties
80
Removing Contacts
83
Creating Groups
84
Managing Groups
84
Modifying Groups Properties
85
Removing Groups
86
Searching Contacts
87
Converting the Address Book Data
92
5 Appendix
99
Cover Sheet Samples
100
Standard Cover Page
100
Business Cover Page
101
Professional Cover Page
102
6 Index
103
Toshiba e-STUDIO 230L Service Manual (20 pages)
Brand:
Toshiba
| Category:
All in One Printer
| Size: 0.56 MB
Table of Contents
Table of Contents
2
1 Specifications / Accessories / Options / Supplies
5
Accessories
6
4 General Operation
7
Warming-Up
7
5 Control Panel
9
Display
10
Options
11
12 Development System
12
Functions
12
Supplies
13
E-STUDIO200L/230/230L/280/280S
14
11 Drum Related Section
18
Functions
18
Fuse
19
Advertisement
Related Products
Toshiba 230/280
Toshiba e-STUDIO FASTstart 230
Toshiba e-studio 2306
Toshiba e-studio 2307
Toshiba e-studio 2309a
Toshiba e-Studio 233
Toshiba e-studio 237
Toshiba e-STUDIO 232S
Toshiba E studio 232/282/202l
Toshiba e-STUDIO 232L
Toshiba Categories
Laptop
Air Conditioner
TV
LCD TV
All in One Printer
More Toshiba Manuals
Login
Sign In
OR
Sign in with Facebook
Sign in with Google
Upload manual
Upload from disk
Upload from URL