Sign In
Upload
Manuals
Brands
Solid State Logic Manuals
Broadcast monitors
C10 HD
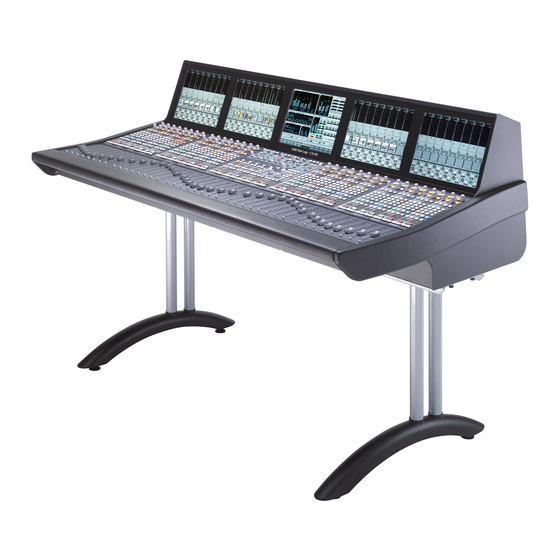
User Manuals: Solid State Logic C10 HD Audio Console
Manuals and User Guides for Solid State Logic C10 HD Audio Console. We have
1
Solid State Logic C10 HD Audio Console manual available for free PDF download: Installation Manual
Solid State Logic C10 HD Installation Manual (237 pages)
DIGITAL BROADCAST CONSOLE
Brand:
Solid State Logic
| Category:
Broadcast monitors
| Size: 10 MB
Table of Contents
Table of Contents
3
Section 2: Preparation
17
Services Available from Ssl
17
S Cection Contents Services Available from Ssl 2-1
18
Commissioning
21
Delivery
21
Services Available from SSL
21
Training
21
Factory Warranty
22
Extended Warranty
22
Physical Requirements
23
Console Basics
23
Remote I/O Units
23
Alpha-Link I/O
23
Additional I/O
23
Acoustic Isolation
24
Air Conditioning Requirements
24
Cable Ducting
24
Service Access
24
Grounding
25
UPS Provision
25
Mains Input Voltage & Current
25
Sync Source
25
Technical Requirements
25
Computer for File Management
26
Network Hubs/Switches
26
Computer for MORSE Configuration
26
Hub for the Ipmidi Network
26
Hub for the SSL Network
26
Hub for the TCP/IP Network
26
Installation Cabling
27
Analogue Cables
27
Digital Cables
27
Network Cables
27
Serial Cables
27
Sync Cables
27
System Wiring Overview
28
Fibre Cables
29
Fibre Standards
29
Channel Capacity
31
C10 Hd System Components
33
C10 HD Console
33
Frame Layout
33
Heatsink Clearance
33
Legs
33
Power Supplies and Isolator Switches
33
Trim
33
Connector Panels
35
Audio Processor (DSP)
35
Processor Redundancy
35
Single Board Computer (SBC)
35
Console Networks
35
Console Processors
35
Connectors
37
Alpha-Link LIVE-R
39
Alpha-Link Live
39
Connector Summary
39
Fibre Connection
39
Alpha-Link 8-RMP
40
Alpha-Link Live-R
40
MORSE System
43
MORSE System (Option)
43
Remote GP IO Interface
45
Output Switching
45
SDI-MADI Interface
47
Fibre Connections
47
System Options
48
Loudspeaker Shelf
48
Side Arm Trim
48
Section 3: Installation
49
S Cection Contents Mains Connection 3-3
50
Chassis Earth
53
Mains Connection
53
Sync Connections
53
Network Connections
55
SSL Network
55
Control of a MORSE Router
55
Network Configuration
56
TCP/IP Network
55
Service Access
56
Logging out
57
Root' Login
57
Sbc' Login (Macintosh OSX)
57
Sbc' Login (PC)
57
Time Zone Selection
58
Server Configuration Options - 'Ssl_Setup
59
Alpha-Link Live-R
60
8-RMP Remote
61
Unbalanced Digital I/O
61
Alpha-Link Live
61
Alpha-Link 8-Rmp
62
Analogue I/O
61
Digital I/O
61
Fibre Cables
61
Audio Connection
63
Remote Control Link
63
Remote ID Configuration
63
Fibre Cables
65
Morse Stageboxes
65
GP I/O - Console and Remote GP I/O Box
67
Remote GPIO Box
67
Outputs
67
Chassis Ground
67
Inputs
67
Network Connection
67
Oscillator
69
Talkback
69
Talkback Level
69
Headphone Input
71
Rs422 Serial Ports - Automation/Router Data
73
Ipmidi
75
Network Connection
75
S Ection 4: C Onfiguration
75
Configuration - PC
75
Installing the Ipmidi Driver
75
Configuration - Mac
76
Section 3: Installation
77
S Cection Contents I 4-1 Ntroduction F T B 4-2 Ile Ransfer and Ackup
81
Introduction
81
File Transfer and Backup
84
IP Address and Names
84
Accessing C10 Shared Folders
85
System Backup
86
Project Backup
87
Eyeconix
88
Image Specifications
88
Updates
88
A: I/O C Onfiguration
89
A: Io Configuration
89
Step A1: Check Connections
89
Step A2: Startup Console and Login
89
Step A3: Enter the Routing Configuration
90
Step A4: Configure MADI Connections
91
Alpha-Link Configuration
92
Step A5: Name and Bundle the IO
93
Grouping Multi-Channel Components
94
Customising IO Names
95
Step A6: Group the IO
96
Step A7: Select Signals for the Quick-Routing Function
98
Step A8: Assign Fixed Routing
99
Assigning Input Sources to Channels
101
B: Console Configuration
103
B: C Onsole C Onfiguration
103
Step B2: Set Passwords
104
Step B3: Create Projects
105
The Centre Section Function Display
107
Step B5: Assign Channel Softkeys
108
Step B6: Configure Fader Layers
109
Step B7: Name Busses, Softkeys and Layers
112
Naming Softkey Assignments
113
Step B8: Assign Projects to USER MODES Buttons
114
Step B9: Upload Eyeconix Images
115
Presets
117
Control Linking
118
S Cection Contents Section
123
Section 1: Introduction
123
Create
127
File Menu
127
Inspect
127
Edit
129
Delete
130
Copy
131
Creating Folders
133
Example Operation: Assigning Additional Functions to USER MODES Buttons
134
System Menu
135
Shutdown
135
Sample Rate
136
Clock Settings
137
Status
137
Sync
138
Lang
139
Route Menu
141
Groups
144
Quickroute Assignments
146
Quickroute
147
Ctrl Links
148
IO Links
149
Alpha-Link Configuration
151
MADI Remote Configuration
151
DHD Stagebox Configuration
152
RIO Setup
153
RIO Parameters
154
MIC Amp Input Parameters
155
Analogue Input Parameters
156
AESEBU Input Parameters
157
AESEBU Output Parameters
158
MORSE Setup
160
Netlist
161
Config Menu
165
Network Menu
161
Levels
165
Gpio
166
AFV Setup
170
Pan Formats
171
Dsp Menu
173
Status DSP
173
Front Panel Menu
175
Scribble
175
Settings
175
Ethernet FP Setup
176
Fader Reset
180
S Cection Contents A: Specifications 6-IV
184
C10 HD Console 6-IV
184
Alpha-Link 8-RMP
187
Rio
188
Console Footprint Drawing - 8 Channels
189
Console Footprint Drawings
189
Console Footprint Drawing - 16 Channels
190
Console Footprint Drawing - 24 Channels
191
Console Footprint Drawing - 32 Channels
192
Console Footprint Drawing - 40 Channels
193
B: Connector Details
194
DL 96-Pin - Used on the RIO Unit Analogue I/O Card
194
XLR 3-Pin
194
D-Type Multipin
194
C: Connector Pinouts
195
C10 HD Console
195
Headphone Input
195
TB out
195
12V Output
196
C10 HD Console
196
GPI Inputs
196
GPI Outputs
196
Analogue Input/Output 1-8
197
AES/EBU Inputs/Outputs A,B,C
197
Alpha-Link 8-RMP
198
Analogue Output
198
Microphone Input
198
GP Inputs
199
GPI Outputs
199
Remote GPIO Box
199
Analogue in / out
200
AES/EBU In/Out 1-8
200
RIO - Analogue and Digital I/O
200
Rio - Gp Io
201
GPI Outputs
201
GP Inputs
201
D: Audio Interfacing
202
Balanced Circuits
202
Connecting to Unbalanced Equipment
202
E: Environmental Specification
203
F: Table Mounting the Console
204
G: Redundant Processing
205
Fibre Connection
206
Gp I/O
206
H: the Rio
206
Snmp
206
Analogue I/O Card
207
Digital I/O Card
207
I/O Cards
207
Micamp Card
207
Fibre Connections
209
Redundancy Options
209
J: Morse System
210
How It Works
211
K: Snmp
211
Local Configuration
211
SNMP Traps
211
System Configuration
212
SNMP Management Systems
213
C10 HD SNMP Objects
214
B-RIO SNMP Objects
216
B-RIO SNMP Traps
216
Further Information on SNMP
216
L: Supported Sync Rates
217
Section 7: Service Information
219
Introduction 7-III
220
7-III
220
Safety Information
220
Fader Panel Removal
223
Tools Needed
223
Channel Control Tile Removal
224
Tools Needed
224
Centre Control Tile Removal
225
Tools Needed
225
Channel Tft Screen Removal
226
Tools Needed
226
Centre Tft Touchscreen Removal
227
Tools Needed
227
Power Supply Removal
228
Tools Needed
228
Dsp Processor Removal
229
Tools Needed
229
Sbc Processor Removal
230
Tools Needed
230
Advertisement
Advertisement
Related Products
Solid State Logic C100 HDS
Solid State Logic C200 routing guide
Solid State Logic DSP-Powered PCI Audio Card 4.3
Solid State Logic C300 HD
Solid State Logic C100HDSS
Solid State Logic CONNEX
Solid State Logic CapLite 96
Solid State Logic Categories
Music Mixer
Recording Equipment
DJ Equipment
Music Equipment
Amplifier
More Solid State Logic Manuals
Login
Sign In
OR
Sign in with Facebook
Sign in with Google
Upload manual
Upload from disk
Upload from URL