Lexmark X5400 Series Manuals
Manuals and User Guides for Lexmark X5400 Series. We have 6 Lexmark X5400 Series manuals available for free PDF download: User Manual, Fax Manual, Quick Setup
Lexmark X5400 Series User Manual (202 pages)
Lexmark X5470: User Guide
Brand: Lexmark
|
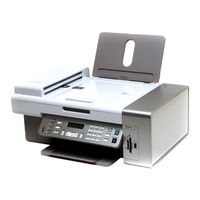
Category: All in One Printer
|
Size: 4 MB
Table of Contents
-
Introduction
13 -
-
-
Add Printers49
-
-
Printing
57 -
-
-
-
Copying
87 -
Scanning
93 -
Faxing
102-
Sending a Fax103
-
Receiving a Fax105
-
Forwarding Faxes108
-
-
-
-
Troubleshooting
128-
-
Photo Smudges137
-
Troubleshooting141
-
-
-
Fax Error169
-
Remote Fax Error169
-
Phone Line Busy170
-
Phone Line Error171
-
-
Troubleshooting171
-
Alignment Error172
-
Cover Open173
-
Error 1104173
-
Memory Failure174
-
-
-
Ink Low178
-
Out of Memory178
-
Out of Paper178
-
Paper Jam179
Advertisement
Lexmark X5400 Series User Manual (191 pages)
Mac
Brand: Lexmark
|
Category: All in One Printer
|
Size: 4 MB
Table of Contents
-
Printing
6 -
Copying
22 -
Scanning
30 -
Faxing
48 -
-
-
-
Saving Settings104
-
-
-
-
Customer Support132
-
Limited Warranty133
-
-
Troubleshooting
135-
-
Photo Smudges146
-
-
Fax Error161
-
Remote Fax Error162
-
Phone Line Error163
-
Phone Line Busy163
-
-
Error 1104171
-
Memory Full172
Lexmark X5400 Series User Manual (139 pages)
Lexmark X5410: User Guide
Brand: Lexmark
|
Category: All in One Printer
|
Size: 3 MB
Table of Contents
-
Introduction
11 -
-
-
Add Printers35
-
-
Printing
44 -
-
-
Copying
63 -
Scanning
69 -
-
-
-
-
Troubleshooting111
-
-
Alignment Error119
-
Cover Open120
-
Error 1104120
-
Advertisement

Lexmark X5400 Series Fax Manual (54 pages)
Lexmark X5470: Reference Guide
Brand: Lexmark
|
Category: All in One Printer
|
Size: 1 MB
Table of Contents
Lexmark X5400 Series Fax Manual (52 pages)
Fax Guide
Brand: Lexmark
|
Category: All in One Printer
|
Size: 0 MB
Table of Contents

Lexmark X5400 Series Quick Setup (2 pages)
Lexmark Printer Quick Setup