Sign In
Upload
Manuals
Brands
Husqvarna Manuals
Motorcycle
FS 450 2016
Husqvarna FS 450 2016 Manuals
Manuals and User Guides for Husqvarna FS 450 2016. We have
1
Husqvarna FS 450 2016 manual available for free PDF download: Repair Manual
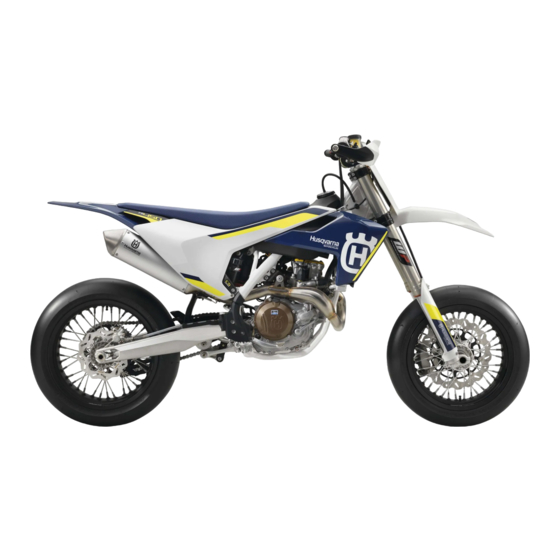
Husqvarna FS 450 2016 Repair Manual (319 pages)
Brand:
Husqvarna
| Category:
Motorcycle
| Size: 85.01 MB
Table of Contents
Table of Contents
4
Means of Representation
9
Symbols Used
9
Formats Used
9
Safety Advice
10
Repair Manual
10
Degrees of Risk and Symbols
10
Work Rules
10
Important Notes
11
Manufacturer and Implied Warranty
11
Operating and Auxiliary Substances
11
Spare Parts, Accessories
11
Figures
11
Serial Numbers
12
Chassis Number
12
Type Label
12
Engine Number
12
Fork Part Number
12
Shock Absorber Article Number
13
Motorcycle
14
Raising the Motorcycle with a Lift Stand
14
Removing the Motorcycle from the Lift Stand
14
Starting
14
Starting the Motorcycle to Check the Function
15
Fork, Triple Clamp
16
Of the Fork
16
Adjusting the Rebound Damping of the Fork
16
Bleeding the Fork Legs
17
Cleaning the Dust Boots of the Fork Legs
17
Removing the Fork Legs
18
Installing the Fork Legs
18
Removing the Fork Protector
19
Installing the Fork Protector
19
Conducting Major Fork Service
19
Conducting Minor Fork Service
20
Disassembling the Fork Legs
21
Disassembling the Cartridge
24
Disassembling the Piston Rod
26
Disassembling the Screw Cap with 9.4 the Membrane Holder
28
Disassembling the Screw Sleeve
29
Checking the Fork Legs
29
Checking the Fork Legs - During a Minor Fork Service
31
Changing the Pilot Bushing
33
Assembling the Screw Sleeve
34
Membrane Holder
34
Assembling the Piston Rod
35
Assembling the Cartridge
37
Assembling the Fork Legs
39
Bleeding and Filling the Cartridge
43
Filling the Cartridge with Nitrogen
45
Lubricating the Steering Head Bearing
46
Removing the Lower Triple Clamp
46
Installing the Lower Triple Clamp
47
Checking the Steering Head Bearing Play
49
Changing the Steering Head Bearing
49
Adjusting the Steering Head Bearing
51
Play
51
7 Handlebar,Controls
52
Handlebar Position
52
Adjusting the Handlebar Position
52
Adjusting the Basic Position of the Clutch Lever
53
Checking the Rubber Grips
53
Checking the Throttle Cable Routing
53
Checking the Play in the Throttle Cable
54
Adjusting the Play in the Throttle Cable
55
Adjusting the Characteristic Map of the Throttle Response
56
Frame
58
Checking the Frame
58
Changing the Footrests
58
Shock Absorber, Swingarm
60
Adjusting the High-Speed Compression Damping of the Shock Absorber
60
Adjusting the Low-Speed Compression Damping of the Shock Absorber
60
Adjusting the Rebound Damping of the Shock Absorber
61
Measuring the Rear Wheel Dimension Unloaded
62
Checking the Static Sag of the Shock Absorber
62
Checking the Riding Sag of the Shock Absorber
63
Shock Absorber
63
Adjusting the Riding Sag
64
Removing the Shock Absorber
65
Installing the Shock Absorber
66
Checking the Shock Absorber Linkage
68
Servicing the Shock Absorber
70
Removing the Spring
71
Disassembling the Damper
72
Disassembling the Piston Rod
73
Disassembling the Seal Ring Retainer
74
Changing the Pilot Bushing
75
Checking the Damper
76
Removing the Heim Joint
77
Installing the Heim Joint
78
Assembling Seal Ring Retainer
78
Assembling the Piston Rod
79
Assembling the Damper
81
Bleeding and Filling the Damper
83
Filling the Damper with Nitrogen
86
Installing the Spring
87
Checking the Swingarm
88
Checking the Swingarm Bearing for Play
88
Removing the Swingarm
89
Installing the Swingarm
90
Changing the Swingarm Bearing
92
Exhaust
95
Removing the Manifold
95
Installing the Manifold
96
Removing the Main Silencer
97
Installing the Main Silencer
97
Changing the Glass Fiber Yarn Filling of the Main Silencer
98
11 Air Filter
99
Removing the Air Filter Box Cover
99
Installing the Air Filter Box Cover
99
Removing the Air Filter
99
Installing the Air Filter
100
Cleaning the Air Filter and Air Filter Box
100
Sealing the Air Filter Box
101
12 Fuel Tank, Seat, Trim
102
Opening the Filler Cap
102
Closing the Filler Cap
102
Removing the Right Side Cover
103
Installing the Right Side Cover
103
Removing the Seat
103
Mounting the Seat
104
Removing the Fuel Tank
105
Installing the Fuel Tank
106
Checking the Fuel Pressure
108
Changing the Fuel Pump
109
Changing the Fuel Filter
111
Changing the Fuel Screen
114
13 Mask, Fender
116
Removing Front Fender
116
Installing Front Fender
116
Removing the Start Number Plate
117
Installing the Start Number Plate
117
14 Wheels
118
Checking the Tire Air Pressure
118
Checking the Tire Condition
118
Checking the Wheel Bearing for Play
119
Checking the Brake Discs
120
Checking Spoke Tension
120
Front Wheel
121
Removing the Front Wheel
121
Installing the Front Wheel
122
Changing the Front Brake Disc
123
Changing Front Wheel Bearing
123
Checking the Rim Run-Out
125
Rear Wheel
125
Removing the Rear Wheel
125
Installing the Rear Wheel
126
Changing the Rear Brake Disc
127
Checking the Chain Tension
128
Adjusting the Chain Tension
129
Checking the Chain, Rear Sprocket, Engine Sprocket, and Chain Guide
129
Checking for Chain Dirt Accumulation
132
Cleaning the Chain
132
Changing the Drivetrain Kit
132
Changing the Rear Wheel Bearing
134
15 Wiring Harness, Battery
137
Changing the Main Fuse
137
Removing the Battery
138
Installing the Battery
139
Recharging the Battery
139
Checking the Charging Voltage
141
Checking the Open-Circuit Current
141
Checking the Capacitor
142
Checking the Starter Relay
143
16 Brake System
144
Checking the Front Brake Linings
144
Changing the Front Brake Linings
144
Hand Brake Lever
146
Checking the Front Brake Fluid Level
147
Adding Front Brake Fluid
147
Changing the Front Brake Fluid
148
Checking the Brake Linings of the Rear Brake
150
Changing the Rear Brake Linings
150
Checking the Free Travel of Foot
152
Brake Lever
152
Adjusting the Basic Position of the Foot Brake Lever
153
Checking the Rear Brake Fluid Level
153
Adding Rear Brake Fluid
154
Changing the Rear Brake Fluid
155
17 Engine
158
Removing the Engine
158
Installing the Engine
165
Engine Disassembly
173
Preparations
173
Draining the Engine Oil
173
Removing the Clutch Push Rod
174
Removing the Oil Filter
174
Removing the Starter Motor
175
Removing the Spark Plug
175
Removing the Valve Cover
175
Removing the Alternator Cover
175
Removing the Camshaft
177
Removing the Cylinder Head
177
Removing the Piston
178
Removing the Rotor
178
Removing the Timing Chain
179
Removing the Suction Pump
179
Removing the Gear Position Sensor
180
Removing the Water Pump Cover
180
Removing the Clutch Cover
181
Removing the Clutch Discs
181
Removing the Outer Clutch Hub
182
Removing the Torque Limiter
183
Removing the Starter Idler Gear
183
Removing the Force Pump
183
Removing the Shift Shaft
184
Removing the Shift Drum Locating Unit
185
Removing the Locking Lever
185
Removing the Primary Gear
185
Removing the Freewheel Gear
185
Removing the Left Engine Case Section
186
Removing the Shift Rails
187
Removing the Shift Drum
187
Removing the Shift Forks
187
Removing the Transmission Shafts
187
Removing the Crankshaft
188
Working on Individual Parts
188
Working on the Right Section of the Engine Case
188
Working on the Left Section of the Engine Case
190
Removing the Oil Pressure Regulator Valve
191
Checking Spring Length of Oil Pressure Regulator Valve
191
Installing the Oil Pressure Regulator Valve
192
Changing the Crankshaft Seal Ring in the Clutch Cover
192
Removing the Water Pump
192
Installing the Water Pump
193
Removing the Crankshaft Bearing Inner Race
194
Installing the Crankshaft Bearing Inner Race
195
Changing the Connecting Rod, Conrod Bearing, and Crank Pin
195
Checking Crankshaft Run-Out at Bearing Pin
197
Measuring the Crankshaft End Play
197
Cylinder - Nikasil ® Coating
198
Checking/Measuring the Cylinder
198
Checking/Measuring the Piston
199
Checking the Piston Ring End Gap
200
Measuring the Piston/Cylinder Mounting Clearance
200
Checking the Oil Pumps
201
Disassembling the Autodecompressor
201
Assembling the Autodecompressor
202
Checking Camshaft
203
Checking the Timing Assembly
203
Removing the Rocker Arm
204
Removing the Valves
204
Changing the Camshaft Bearing
205
Checking the Valves
206
Checking Valve Springs
207
Checking Valve Spring Seat
207
Checking the Cylinder Head
207
Checking the Rocker Arm Shafts
208
Installing the Valves
208
Installing the Rocker Arm
209
17.4.34 Disassembling the Antihopping Clutch
210
Preassembling the Antihopping Clutch
211
Checking the Clutch
212
Checking the Shift Mechanism
213
Preassembling the Shift Shaft
214
Disassembling the Main Shaft
215
Disassembling the Countershaft
216
Checking the Transmission
216
Assembling the Main Shaft
218
17 .4.43 Assembling the Countershaft
219
Checking the Starter Drive
220
Checking the Freewheel
221
Removing the Freewheel
221
Installing the Freewheel
221
Engine Assembly
222
Installing the Crankshaft
222
Installing the Transmission Shafts
223
Installing the Shift Forks
223
Installing the Shift Drum
224
Installing the Shift Rails
224
Installing the Left Engine Case
224
Installing the Freewheel Gear
225
Installing the Primary Gear
225
Installing the Locking Lever
226
Installing the Shift Drum Locating Unit
226
Installing the Shift Shaft
226
Installing the Force Pump
226
Installing the Starter Idler Gear
227
Installing the Torque Limiter
228
Installing the Clutch Basket
228
Installing the Clutch Discs
229
Installing the Clutch Cover
230
Installing the Water Pump Cover
230
Installing the Gear Position Sensor
231
Installing the Suction Pump
231
Installing the Timing Chain
232
Installing the Rotor
232
Installing the Piston
233
Installing the Cylinder Head
235
Installing the Camshaft
236
Installing the Timing Chain Tensioner
236
Checking the Valve Clearance
237
17.5.28 Adjusting the Valve Clearance
238
Installing the Alternator Cover
238
Installing the Valve Cover
239
Installing the Spark Plug
239
Installing the Starter Motor
239
Installing the Oil Filter
239
Installing the Clutch Push Rod
240
Installing the Oil Screens
240
Removing the Engine from the Engine Assembly Stand
241
18 Clutch
242
Checking/Correcting the Fluid Level of the Hydraulic Clutch
242
Changing the Hydraulic Clutch Fluid
243
Anti Hopping Clutch
244
Adjusting the Antihopping Clutch
245
19 Water Pump, Cooling System
247
Cooling System
247
Checking the Antifreeze and Coolant Level
247
Checking the Coolant Level
248
Draining the Coolant
249
Refilling Coolant
249
20 Lubrication System
251
Oil Circuit
251
Checking the Engine Oil Level
251
Changing the Engine Oil and Oil Filter, Cleaning the Oil Screens
252
Adding Engine Oil
255
Checking the Engine Oil Pressure
256
Ignition System
258
Ignition Coil - Checking the
258
Secondary Winding
258
Checking the Spark Plug Connector
258
Alternator - Checking Stator Winding
258
Removing the Stator
259
Installing the Stator
259
22 Cylinder Head
260
Checking the Valve Clearance
260
Adjusting the Valve Clearance
262
23 Electric Starter
264
Checking the Starter Motor
264
24 Throttle Valve Body
265
Adjusting the Idle Speed
265
Executing the Initialization Run
265
25 Technical Data
267
Engine
267
Tolerance, Engine Wear Limits
268
Engine Tightening Torques
268
Capacities
270
Engine Oil
270
Coolant
270
Fuel
270
Chassis
270
Electrical System
271
Tires
271
Fork
272
Shock Absorber
272
Chassis Tightening Torques
273
26 Cleaning/Protective Treatment
275
Cleaning the Motorcycle
275
27 Storage
277
Preparing for Use after Storage
278
28 Service Schedule
279
Additional Information
279
Required Work
279
Recommended Work
280
29 Wiring Diagram
283
Substances
288
Auxiliary Substances
290
Special Tools
292
Standards
312
List of Abbreviations
313
Index
314
Advertisement
Advertisement
Related Products
Husqvarna FS 450
Husqvarna FS 450 2019
Husqvarna FS 450 2017
Husqvarna FS 450 2015
Husqvarna FS 450 2018
Husqvarna FS 450 2020
Husqvarna FS 450 2022
Husqvarna FC 250 Rockstar Edition 2022
Husqvarna FC 350 Heritage 2023
Husqvarna F2201W6
Husqvarna Categories
Lawn Mower
Trimmer
Chainsaw
Motorcycle
Saw
More Husqvarna Manuals
Login
Sign In
OR
Sign in with Facebook
Sign in with Google
Upload manual
Upload from disk
Upload from URL