Sign In
Upload
Manuals
Brands
Honeywell Manuals
Security Camera
EQUIP HD3MDIHX
Honeywell EQUIP HD3MDIHX Manuals
Manuals and User Guides for Honeywell EQUIP HD3MDIHX. We have
5
Honeywell EQUIP HD3MDIHX manuals available for free PDF download: User Manual, Selection Manual, Quick Install Manual
Honeywell EQUIP HD3MDIHX User Manual (116 pages)
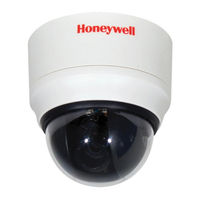
equIP Series Indoor High Resolution True Day/Night IP Dome Camera
Brand:
Honeywell
| Category:
Security Camera
| Size: 2.64 MB
Table of Contents
1
User Guide
3
Table of Contents
9
About This Document
9
Overview of Contents
10
Cautions and Warnings
10
FCC Compliance Statement
11
Manufacturer's Declaration of Conformance
11
North America
11
Europe
11
Warranty and Service
13
1 Introduction
13
Table 1-1 Fixed Mini Dome Network Camera Model Numbers
14
Features
15
2 Installation and Setup
15
Before You Begin
16
Unpack Everything
16
Equipment Required
16
Overview of Installation Procedure
18
Camera Components and Functions
18
Figure 2-1 HD3 Series Camera Components
19
Camera Installation
19
Preparing the Camera
19
Preparing the Mounting Surface
19
Figure 2-2 Surface Mounting Template
20
Connecting the Wires
20
Figure 2-3 Audio and Alarm Pins
20
Table 2-1 Audio and Alarm Connector PIN Definitions
21
Figure 2-4 Normal Alarm States
22
Figure 2-5 Alarm Connection
23
Figure 2-6 Camera and Cables
24
Figure 2-7 Wiring Connection Shown On Board
25
Mounting the Camera
26
Restore Factory Defaults
26
Adjusting the Camera FOV (Field of View)
27
Figure 2-8 Gimbal Adjustment - Gimbal Top View
28
Adjusting the Lens Focus
28
Figure 2-9 Gimbal Movement
29
Figure 2-10 Holding the Dome Bubble Over the Lens
30
Securing the Enclosure Cover
30
Figure 2-11 Installing the Enclosure Cover
31
3 Installing the Honeywell IP Utility
31
About the Honeywell IP Utility and Web Client
31
About the Honeywell IP Utility
32
Step 1: Confirm Your System Requirements
33
Step 2: Install the Honeywell IP Utility Software
33
Table 3-1 PC Minimum System Requirements
33
Table 3-2 Items Installed On Your System
34
Finding the Equip Series User Guide
34
Step 3: Log Onto the IP Utility and Discover Network Devices
35
Figure 3-1 Honeywell IP Utility Log On Window
36
Figure 3-2 Honeywell IP Utility User Interface
37
Step 4: Connect to a Device and Configure Network Settings
37
Connecting to or Disconnecting From Devices
38
Configuring the IP Network Settings Automatically or Manually
38
Table 3-3 IP Network Device Setting Options
39
Figure 3-3 Set the IP Network Settings Automatically or Manually
40
Interfacing with the Equip PSIA Device Via a Network Video Recorder
40
Step 5: Launch the Web Client to View Live Video
41
Figure 3-4 Activex Prompt
42
Uninstalling the IP Utility And/Or the Bonjour Software
42
Uninstalling IP Utility Using the Start Menu
42
Figure 3-5 Web Client Interface After Logging On
43
Uninstalling the IP Utility And/Or the Bonjour Software
45
4 IP Camera Web Client
45
Overview
46
About the Web Client
46
User Profiles: Web Client
46
Table 4-1 User Profiles and Permissions for the Web Client
47
Confirming Your System Requirements
47
Configuring Your OS and Browser for Activex Installation On Microsoft IE
47
Configuring Windows 7 (32-Bit and 64-Bit) and IE Security Settings
47
Table 4-2 PC Minimum Requirements for Activex
48
Figure 4-1 Windows Firewall Settings for IE
49
Figure 4-2 Allowed Programs List in IE
50
Figure 4-3 Adding IE to the Allowed Programs List
50
Figure 4-4 Searching for UAC in the Control Panel
51
Figure 4-5 User Account Control Settings Page
51
Figure 4-6 Preferred UAC Settings
52
Figure 4-7 Run IE As Administrator
52
Figure 4-8 Camera Login Page
53
Figure 4-9 Trusted Sites Configuration Page in IE
53
Figure 4-10 Trusted Sites List
54
Configuring Windows XP Service Pack 3 and IE Security Settings
54
Figure 4-11 Adding a Whole Subnet to the List of Trusted Sites
55
Figure 4-12 Allowing IE Through the Firewall
56
Figure 4-13 Camera Login Page
57
Figure 4-14 Trusted Sites Configuration Page in IE
57
Figure 4-15 Trusted Sites List
58
Logging On and Off the IP Web Client
58
Launching the Web Client From IP Utility
58
Figure 4-16 Adding a Whole Subnet to the List of Trusted Sites
59
Figure 4-17 Launching the Web Client From the IP Utility
60
Logging Onto the Web Client From Internet Explorer
61
Uninstalling the Honeywell PSIA IP Activex: Microsoft IE
61
Figure 4-18 Activex Prompt
62
Logging Out of the Web Client
62
Navigating the Web Client User Interface
62
Figure 4-19 Web Client Window Layout: Administrator Log On
62
Table 4-3 Tabs in the Web Client Application
63
Figure 4-20 Web Client: Administrator User of HD3MDIH(X) and HD3MWIH
64
Live View
64
Figure 4-21 Web Client: Administrator User of HD3HDIH
64
Figure 4-22 Web Client: Guest User
65
Taking a Snapshot
65
Device Settings
65
Configuring IP and Firmware Settings
65
Figure 4-23 Device Settings
66
Resetting the Device
66
Figure 4-24 IP and Firmware Settings: Device Information Tab
67
Compression Settings
67
Figure 4-25 Compressions Settings Tab: Primary Stream
68
Figure 4-26 Primary Stream Video Codec Settings
68
Figure 4-27 Secondary Stream Video Codec Settings
68
Primary Stream Video Codec Settings
68
Secondary Stream Video Codec Settings
69
Table 4-4 Video Streaming Resolutions - 1080P Resolution Primary Stream
69
Table 4-5 Video Streaming Resolutions - 720P Resolution Primary Stream
70
Table 4-6 Video Streaming Resolutions - 1080P Resolution Secondary Stream
70
Table 4-7 Video Streaming Resolutions - 720P Resolution Secondary Stream
70
Table 4-8 Compression Settings
71
Figure 4-28 Quality Settings
71
Figure 4-29 Bit Rate Settings
71
Table 4-9 Selecting Quality, Bit Rate, or Frame Rate
72
Statistics: Received Bit Rate and Frame Rate
72
Camera Setup
72
Figure 4-30 Frame Rate Settings
73
Basic Camera Setup Procedure
73
Figure 4-31 Camera Setup
74
Auto Exposure
74
Table 4-10 Auto Exposure Settings
75
White Balance
76
Zoom & Focus (HD3HDIH(X) Model Only)
76
Table 4-11 White Balance Settings
77
Figure 4-32 Zoom & Focus Tab
77
Figure 4-33 Zoom & Focus Controls
78
Video Analytics
78
Figure 4-34 Video Analytics Tab
79
Figure 4-35 Tamper Detection Settings On the Video Analytics Tab
79
Figure 4-36 Video Analytics Alarm Message
79
Table 4-12 Blur Threshold Values
79
Tamper Detection
80
Table 4-13 Blinding Threshold Values
81
Table 4-14 Scene Change Threshold Values
82
Configuring Video Motion Detection
84
Figure 4-37 Video Motion Detection Configuration - 30% Sensitivity Level
85
Figure 4-38 Video Motion Detection Configuration - 50% Sensitivity Level
85
Figure 4-39 Video Motion Detection Configuration - 80% Sensitivity Level
86
Figure 4-40 VMD Configuration Example - 30% Sensitivity Level for a Wide Field of View
86
Figure 4-41 VMD Configuration Example - 50% Sensitivity Level for a Wide Field of View
87
Figure 4-42 VMD Configuration Example - 80% Sensitivity Level for a Wide Field of View
87
Figure 4-43 Video Motion Detection Configuration - a Combination Setup
88
Alarm and Audio
88
Alarm Settings
88
Alarm Interlock Day/Night Switching
88
Figure 4-44 Audio and IO Settings Tab
89
Audio Settings
89
Figure 4-45 D/N Control Message
90
Figure 4-46 Audio Settings
91
Appendix A Surface Mounting Template
93
Appendix B Troubleshooting
93
Technical Support
93
Problem: Lens Out of Optical Focus
94
Problem: Live View Does Not Display the Expected Video
94
Problem: Failure of IP Utility Software Installation
94
Problem: Cannot Connect to a Device
94
Figure B-1 Limited or No Connection Message
95
Appendix Chd3Hdih(X) Specifications
97
Figure C-1 HD3HDIH(X) Camera Side View with Dimensions
97
Figure C-2 HD3HDIH(X) Camera Side View Dimensions Without Skirt
97
Figure C-3 HD3HDIH(X) Camera Side View Dimensions with Adapter Plate
98
Figure C-4 HD3HDIH(X) Camera Bottom View with Dimensions
98
Figure C-5 HD3HDIH(X) Camera Pendant Mount Option with Dimensions
99
Appendix Dhd3Mdih(X) Specifications
101
Figure D-1 HD3MDIH(X) Camera Side View with Dimensions
101
Figure D-2 HD3MDIH(X) Camera Side View Dimensions Without Skirt
102
Figure D-3 HD3MDIH(X) Camera Side View Dimensions with Adapter Plate
102
Figure D-4 HD3MDIH(X) Camera Bottom View with Dimensions
103
Figure D-5 HD3MDIH(X) Camera Pendant Mount Option with Dimensions
105
Appendix Ehd3Mwih(X) Specifications
107
Figure E-1 HD3MWIH(X) Camera Side View with Dimensions
107
Figure E-2 HD3MWIH(X) Camera Side View Dimensions Without Skirt
107
Figure E-3 HD3MWIH(X) Camera Side View Dimensions with Adapter Plate
108
Figure E-4 HD3MWIH(X) Camera Bottom View with Dimensions
108
Figure E-5 HD3MWIH(X) Camera Pendant Mount Option with Dimensions
109
Appendix F Glossary
111
Index
Advertisement
Honeywell EQUIP HD3MDIHX User Manual (92 pages)
Equip series Indoor high Resolution Trueday/night ip dome camera
Brand:
Honeywell
| Category:
Security Camera
| Size: 1.78 MB
Table of Contents
1
Ip Dome Camera
1
User Guide
3
Table of Contents
5
Figures
7
Tables
9
About This Document
9
Overview of Contents
10
Cautions and Warnings
10
FCC Compliance Statement
11
Manufacturer's Declaration of Conformance
11
North America
11
Europe
11
Warranty and Service
13
1 Introduction
13
Features
13
Table 1-1 Fixed Mini Dome Network Camera Model Numbers
15
2 Installation and Setup
15
Before You Begin
16
Unpack Everything
16
Equipment Required
16
Overview of Installation Procedure
18
Camera Components and Functions
18
Figure 2-1 HD3 Series Camera Components
19
Camera Installation
19
Preparing the Camera
19
Preparing the Mounting Surface
19
Figure 2-2 Surface Mounting Template
20
Connecting the Wires
20
Figure 2-3 Audio and Alarm Pins
20
Table 2-1 Audio and Alarm Connector PIN Definitions
21
Figure 2-4 Normal Alarm States
21
Figure 2-5 Alarm Connection
22
Connecting Power
23
Figure 2-6 Camera and Cables
23
Figure 2-7 Wiring Connection Shown On Board
24
Connecting to a Video Monitor
25
Mounting the Camera
26
Restore Factory Defaults
26
Adjusting the Camera FOV (Field of View)
27
Figure 2-8 Gimbal Adjustment - Gimbal Top View
28
Adjusting the Lens Focus
28
Figure 2-9 Gimbal Movement
29
Figure 2-10 Holding the Dome Bubble Over the Lens
30
Securing the Enclosure Cover
30
Figure 2-11 Installing the Enclosure Cover
31
3 Installing the Honeywell IP Utility and Web Client Software
31
About the Honeywell IP Utility and Web Client
31
About the Honeywell IP Utility
32
About the Web Client
32
User Profiles: Honeywell IP Utility and Web Client
32
Table 3-1 User Profiles for Honeywell IP Utility and the Web Client
33
Step 1: Confirm Your System Requirements
33
Table 3-2 PC Minimum System Requirements
33
Table 3-3 Items Installed On Your System
34
Step 2: Install the Honeywell IP Utility Software
35
Downloading the EQUIP Series Installation Guides
35
Step 3: Log Onto the IP Utility and Discover Network Devices
35
Figure 3-1 Accessing Your Installation Documents
35
Figure 3-2 Honeywell IP Utility Log On Window
37
Step 4: Connect to a Device and Configure Network Settings
37
Figure 3-3 Honeywell IP Utility User Interface
38
Configuring the IP Network Settings Automatically or Manually
38
Connecting to or Disconnecting From Devices
39
Figure 3-4 Set the IP Network Settings Automatically or Manually
39
Table 3-4 IP Network Device Setting Options
40
Interfacing with the EQUIP PSIA Device Via a Network Video Recorder
41
Step 5: Launch the Web Client to View Live Video
42
Figure 3-5 Activex Prompt
42
Figure 3-6 Web Client Interface After Logging On
43
Uninstalling IP Utility, Bonjour or the Activex Plug-In Software
43
Uninstalling IP Utility Using the Start Menu
43
Uninstalling IP Utility or IP Activex Using the Control Panel
45
4 IP Camera Web Client
45
Overview
46
User Profiles
46
Logging On and Off the IP Web Client
46
Launching the Web Client From IP Utility
46
Table 4-1 User Roles and Privileges
47
Figure 4-1 Launching the Web Client From the IP Utility
48
Logging Onto the Web Client From Internet Explorer
48
Logging Out of the Web Client
49
Navigating the Web Client User Interface
49
Figure 4-2 Web Client Window Layout: Administrator Log On
49
Table 4-2 Tabs/Views in the Web Client Application
50
Figure 4-3 Web Client: Administrator User of HD3MDIH and HD3MWIH
50
Figure 4-4 Web Client: Administrator User of HD3HDIH
51
Live View
51
Taking a Snapshot
51
Device Settings
51
Figure 4-5 Web Client: Guest User
52
Configuring IP and Firmware Settings
52
Figure 4-6 Device Settings
53
Figure 4-7 IP and Firmware Settings: Device Information Tab
53
Resetting the Device
54
Compression Settings
54
Figure 4-8 Compressions Settings Tab: Primary Stream
55
Figure 4-10 Secondary Stream Video Codec Settings
55
Figure 4-9 Primary Stream Video Codec Settings
55
Primary Stream Video Codec Settings
55
Secondary Stream Video Codec Settings
56
Table 4-3 Video Streaming Resolutions
56
Table 4-4 Compression Settings
57
Figure 4-11 Video Codec Settings
57
Statistics: Received Bit Rate and Frame Rate
58
Camera Setup
58
Auto Exposure
58
Figure 4-12 Camera Setup
59
Table 4-5 Auto Exposure Settings
60
White Balance
60
Table 4-6 White Balance Settings
61
Zoom & Focus (HD3HDIH(X) Model Only)
61
Figure 4-13 Zoom & Focus Tab
61
Figure 4-14 Zoom & Focus Controls
62
Video Analytics
62
Figure 4-15 Video Analytics Tab
63
Figure 4-16 Tamper Detection Settings On the Video Analytics Tab
63
Figure 4-17 Video Analytics Alarm Message
63
Sabotage Detection
63
Table 4-7 Blur Threshold Values
64
Table 4-8 Blinding Threshold Values
65
Configuring Video Motion Detection
65
Table 4-9 Scene Change Threshold Values
66
Alarm and Audio
66
Figure 4-18 Video Analytics: Defining a Region
66
Figure 4-19 Audio and IO Settings Tab
67
Alarm Settings
67
Audio Settings
67
Figure 4-20 Audio Settings
69
Appendix A Surface Mounting Template
71
Appendix B Troubleshooting
71
Technical Support
71
Problem: Lens Out of Optical Focus
72
Problem: Live View Does Not Display the Expected Video
72
Problem: Failure of IP Utility Software Installation
72
Problem: Cannot Connect to a Device
72
Figure B-1 Limited or No Connection Message
73
Appendix Chd3Hdih Specifications
75
Figure C-1 HD3HDIH(X) Camera Side View with Dimensions
75
Figure C-2 HD3HDIH(X) Camera Side View Dimensions Without Skirt
75
Figure C-3 HD3HDIH(X) Camera Side View Dimensions with Adapter Plate
76
Figure C-4 HD3HDIH(X) Camera Bottom View with Dimensions
77
Appendix Dhd3Mdih Specifications
79
Figure D-1 HD3MDIH(X) Camera Side View with Dimensions
79
Figure D-2 HD3MDIH(X) Camera Side View Dimensions Without Skirt
79
Figure D-3 HD3MDIH(X) Camera Side View Dimensions with Adapter Plate
80
Figure D-4 HD3MDIH(X) Camera Bottom View with Dimensions
81
Appendix Ehd3Mwih Specifications
83
Figure E-1 HD3MWIH(X) Camera Side View with Dimensions
83
Figure E-2 HD3MWIH(X) Camera Side View Dimensions Without Skirt
83
Figure E-3 HD3MWIH(X) Camera Side View Dimensions with Adapter Plate
84
Figure E-4 HD3MWIH(X) Camera Bottom View with Dimensions
85
Appendix F Glossary
87
Index
Honeywell EQUIP HD3MDIHX User Manual (80 pages)
Indoor High Resolution True Day/Night IP Dome Camera NTSC/PAL EQUIP Series
Brand:
Honeywell
| Category:
Security Camera
| Size: 1.24 MB
Table of Contents
1
Ip Dome Camera
1
User Guide
3
Table of Contents
5
Figures
7
Tables
9
About This Document
9
Overview of Contents
10
Cautions and Warnings
10
FCC Compliance Statement
11
Manufacturer's Declaration of Conformance
11
North America
11
Europe
11
Warranty and Service
13
1 Introduction
13
Features
13
Table 1-1 Fixed Mini Dome Network Camera Model Numbers
15
2 Installation and Setup
15
Before You Begin
15
Unpack Everything
16
Equipment Required
16
Overview of Installation Procedure
17
Camera Components and Functions
17
Figure 2-1 HD3MDIH/X Series Camera Components
18
Camera Installation
18
Preparing the Camera
18
Preparing the Mounting Surface
18
Figure 2-2 Surface Mounting Template
19
Connecting the Wires
19
Figure 2-3 Audio and Alarm Pins
19
Table 2-1 Audio and Alarm Connector PIN Definitions
20
Figure 2-4 Normal Alarm States
20
Figure 2-5 Alarm Connection
21
Connecting Power
22
Figure 2-6 Camera and Cables
22
Figure 2-7 Wiring Connection Shown On Board
23
Connecting to a Video Monitor
24
Mounting the Camera
25
Restore Factory Defaults
25
Adjusting the Camera FOV (Field of View)
26
Figure 2-8 Gimbal Adjustment
27
Adjusting the Lens Focus
27
Securing the Enclosure Cover
27
Figure 2-9 Installing the Enclosure Cover
29
3 Installing the Honeywell IP Utility and Web-Client Software
29
About the Honeywell IP Utility and Web-Client
29
About the Honeywell IP Utility
30
About the Web-Client
30
User Profiles: Honeywell IP Utility and Web-Client
30
Table 3-1 User Profiles for Honeywell IP Utility and the Web-Client
31
Step 1: Confirm Your System Requirements
31
Table 3-2 PC Minimum System Requirements
31
Table 3-3 Items Installed On Your System
32
Step 2: Install the Honeywell IP Utility Software
32
Downloading the EQUIP Series Installation Guides
32
Figure 3-1 Accessing Your Installation Documents
33
Step 3: Log Onto the IP Utility and Discover Network Devices
33
Figure 3-2 Honeywell IP Utility Log On Window
34
Figure 3-3 Honeywell IP Utility User Interface
35
Step 4: Connect to a Device and Configure Network Settings
35
Connecting to or Disconnecting From Devices
35
Configuring the IP Network Settings Automatically or Manually
36
Figure 3-4 Set the IP Network Settings Automatically or Manually
36
Table 3-4 IP Network Device Setting Options
38
Interfacing with the EQUIP Device Via a Network Video Recorder
38
Step 5: Launch the Web-Client to View Live Video
39
Figure 3-5 Activex Prompt
40
Uninstalling IP Utility, Bonjour or the Activex Plug-In Software
40
Uninstalling IP Utility Using the Start Menu
40
Figure 3-6 Web-Client Interface After Logging On
41
Uninstalling IP Utility or IP Activex Using the Control Panel
43
4 IP Camera Web-Client
43
Overview
44
User Profiles
44
Logging On and Off the IP Web-Client
44
Table 4-1 User Roles and Privileges
45
Figure 4-1 Launching the Web-Client From the IP Utility
45
Launching the Web-Client From IP Utility
46
Logging Onto the Web-Client From Internet Explorer
46
Logging Out of the Web-Client
47
Navigating the Web-Client User Interface
47
Figure 4-2 Web-Client Window Layout: Administrator Log On
47
Table 4-2 Tabs/Views in the Web-Client Application
48
Live View
48
Figure 4-3 Web-Client: Administrator User
48
Figure 4-4 Web-Client: Guest User
49
Taking a Snapshot
49
Device Settings
49
Configuring IP and Firmware Settings
49
Figure 4-5 Device Settings
50
Resetting the Device
50
Figure 4-6 IP and Firmware Settings: Device Information Tab
51
Compression Settings
51
Figure 4-7 Compressions Settings Tab: Primary Stream
52
Figure 4-8 Video Codec Settings Tab Available Functions
52
Table 4-3 Video Streaming Resolutions
52
Table 4-4 Compression Settings
52
Video Codec Settings Tab
53
Figure 4-9 Video Codec Settings
54
Statistics: Received Bit Rate and Frame Rate
54
Camera Setup
55
Auto Exposure
55
Figure 4-10 Camera Setup
55
Table 4-5 Auto Exposure Settings
56
White Balance
57
Video Analytics
57
Table 4-6 White Balance Settings
58
Figure 4-11 Video Analytics Tab
58
Figure 4-12 Tamper Detection Settings On the Video Analytics Tab
58
Sabotage Detection
59
Figure 4-13 Video Analytics Alarm Message
59
Table 4-7 Blur Threshold Values
60
Table 4-8 Blinding Threshold Values
60
Table 4-9 Scene Change Threshold Values
61
Configuring Video Motion Detection
61
Figure 4-14 Video Analytics: Defining a Region
62
Alarm and Audio
62
Alarm Settings
62
Figure 4-15 Audio and IO Settings Tab
63
Audio Settings
63
Figure 4-16 Audio Settings
65
Appendix A Surface Mounting Template
67
Appendix B Troubleshooting
67
Technical Support
67
Problem: Lens Out of Optical Focus
68
Problem: Live View Does Not Display the Expected Video
68
Problem: Cannot Connect to a Device
68
Figure B-1 Limited or No Connection Message
69
Appendix C Specifications
71
Figure C-1 HD3MDIH/X Camera Side View with Dimensions
71
Figure C-2 HD3MDIH/X Camera Side View Dimensions Without Skirt
73
Appendix D Glossary
75
Index
Advertisement
Honeywell EQUIP HD3MDIHX Selection Manual (16 pages)
IP Mini Dome Cameras
Brand:
Honeywell
| Category:
Security Camera
| Size: 0.56 MB
Honeywell EQUIP HD3MDIHX Quick Install Manual (2 pages)
Indoor High Resolution True Day/Night IP Dome Camera
Brand:
Honeywell
| Category:
Security Camera
| Size: 0.31 MB
Table of Contents
1
Fcc Compliance Statement
1
Camera Mounting
1
Camera Adjustment
1
Network Setup
1
Camera Operation
1
Product Dimensions
Share and save
Advertisement
Related Products
Honeywell EQUIP HD3MDIP
Honeywell HD3MWIHX
Honeywell EQUIP HD3MDIH
Honeywell HD3MWIH
Honeywell EQUIP HD3MDIPX
Honeywell HD3C
Honeywell EQUIP HD3HDIHX
Honeywell HD3UH
Honeywell HD3HX
Honeywell HD3DS
Honeywell Categories
Thermostat
Controller
Control Unit
Security Camera
Accessories
More Honeywell Manuals
Login
Sign In
OR
Sign in with Facebook
Sign in with Google
Upload manual
Upload from disk
Upload from URL