Extron electronics VNR 100 User Manual
Vn-matrix single channel recorder
Hide thumbs
Also See for VNR 100:
- User manual (34 pages) ,
- Setup manual (4 pages) ,
- Setup manual (2 pages)
Table of Contents
Advertisement
Quick Links
Download this manual
See also:
Setup Manual
Advertisement
Table of Contents

Subscribe to Our Youtube Channel
Related Manuals for Extron electronics VNR 100


Summary of Contents for Extron electronics VNR 100
- Page 1 User Guide Streaming AV Products VNR 100 VN-Matrix Single Channel Recorder 68-2237-01 Rev. B 06 14...
-
Page 2: Safety Instructions
Safety Instructions Safety Instructions • English Инструкция по технике безопасности • Русский WARNING: This symbol, , when used on the product, is intended ПРЕДУПРЕЖДЕНИЕ: Данный символ, , если указан to alert the user of the presence of uninsulated dangerous voltage на... - Page 3 Extron Safety and Regulatory Compliance Guide on the Extron Website. Copyright © 2014 Extron Electronics. All rights reserved. Trademarks All trademarks mentioned in this guide are the properties of their respective owners. The following registered trademarks , registered service marks , and trademarks are the property of RGB Sys-...
-
Page 4: Conventions Used In This Guide
Conventions Used in this Guide Notifications The following notifications are used in this guide: Attention indicates a situation that may damage or destroy the product or ATTENTION: associated equipment. NOTE: A note draws attention to important information. Software Commands Commands are written in the fonts shown here: ^AR Merge Scene,,Op1 scene 1,1 ^B 51 ^W^C [01] R 0004 00300 00400 00800 00600 [02] 35 [17] [03] E X! -
Page 5: Table Of Contents
Recording File Directory Nomenclature ..32 VNR 100 Power Down Procedure ....12 Frame Translation Procedure ......33 Initial Configuration of the VNR 100 ....12 Example Strings..........34 Getting Started with the Enterprise Controller ... 14 Advanced Use ..........35 Creating Still Frames from a VN-Matrix Video Working with Video and Audio Streams .. - Page 6 VNR 100 • Contents...
-
Page 7: Introduction
The recorder is able to play and control a previously recorded file while simultaneously recording a new file, with a sustained aggregate bit rate of 150 Mbps. The VNR 100 is also able to replay, with time slip, a file that is still being recorded. -
Page 8: Vnr 100 Drives
The VNR 100 recorder is fully compatible with existing VNM Matrix products, including the: • Extron 5-channel VN-Matrix recorder • Extron VN-Matrix 2 and 3 codecs • Extron VN-Matrix software decoder • Extron VN-Matrix Enterprise Controller Extron VNS 104 Multi-Stream decoding software •... -
Page 9: Overview Of Recorded Streams
• • Unicast Transmission Control Protocol (TCP) By default, the VNR 100 recorder provides a choice of unicast RTP or unicast TCP transport protocols. A multicast transport protocol may be configured if required (see the Enterprise Controller User Guide). NOTES: •... -
Page 10: Multicast Rtp - An Overview
However, because RTP is a connectionless protocol, data delivery is not guaranteed. When data packets are lost (for example, due to excessive network traffic), the decoder devices carefully manage the data stream to minimize any image disruption. VNR 100 • Introduction... -
Page 11: Unicast Rtp - An Overview
SOURCE specified encoder. DISPLAY Figure 4. Unicast TCP Streaming The decoder defines which source to connect to. Other than defining an IP address and source type (if required), no special source encoder setup is required. VNR 100 • Introduction... -
Page 12: Definitions
Whiteboard (wb) data — Also known as annotation data, whiteboard data outputs text and simple pointer annotation onto local displays that are connected to VN-Matrix encoders or decoders. This type of data is bidirectional, which allows a decoder to send whiteboard data to an encoder. VNR 100 • Introduction... -
Page 13: Features
System synchronization — synchronize playback across multiple VNR 100 units — supports lip sync, genlocked decoding, scaled playback across multiple VNR 100 units, synchronization of recorded external ancillary data to audio and video streams, and the ability to support recording and playback of videowalls, or multi-display systems. -
Page 14: Panels And Cabling
Ethernet port 0 (eth0) — use an RJ-45 cable to connect this port to the primary network (the VN-Matrix network). Ethernet port 1 (eth1) — is not functional. Do not connect this port to a network. VNR 100 • Panels and Cabling... -
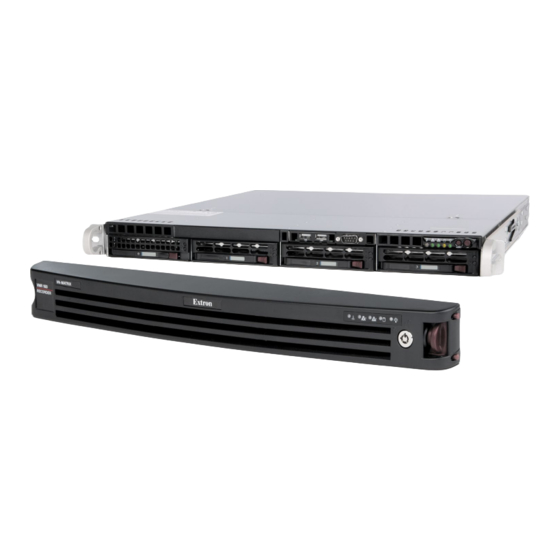
Page 15: Front Panel Cover
Release the catch to allow the two projections to fit into the holes on the surface of the handle. If required, use the key to lock the cover in place. Handle VN-Matrix VNR 100 Recorder Figure 7. VNR 100 Front Panel Cover, installed Remove the cover by reversing these steps. VNR 100 • Panels and Cabling... -
Page 16: Front Panel Features
NOTE: It is not necessary to access the front panel during normal operation of the VNR 100. Handles (2) — the VNR 100 is mounted on sliding rails in a standard rack. The handles allow the unit to be pulled in and out of the rack on the rails. They are also used to secure the front panel bezel. -
Page 17: Configuration And Hardware Setup
Creating Still Frames from a VN-Matrix Video Recording Setup Overview NOTE: if the VNR 100 recorder is rack mounted, access to the rear panel may be restricted. Connect all cables at the same time as the unit is mounted. Mount the VNR 100 recorder in a suitable location (see Mounting the VNR 100 page 22). -
Page 18: Vnr 100 Power Up Procedure
10). The VNR 100 boots up. VNR 100 Power Down Procedure Power off the VNR 100 by pressing and releasing the front panel power button. The recorder takes approximately 20 to 30 seconds to power-down. Initial Configuration of the VNR 100 The initial configuration of the VNR 100 allows it to connect to the Enterprise Controller. - Page 19 User account name cannot be changed. Data (media) disk —This area provides information about the media drive on the VNR 100. For full instructions on replacing the media drive, please see the VNR 100 Media Drive Replacement Kit Installation Guide, at www.extron.com.
-
Page 20: Getting Started With The Enterprise Controller
. The Enterprise Controller Device List opens: Login Figure 13. Enterprise Controller Device List Check the box next to the VNR 100 recorder. A series of action buttons appear at the bottom of the screen: Figure 14. Enterprise Controller Device List Action Buttons Use the Enterprise Controller User Guide (at www.extron.com) for complete... -
Page 21: Replacing The Vnr 100 Drives
The media drive kit also offers a convenient way to archive materials. There are four drive bays on the front panel of the VNR 100. From left to right, they are numbered 0 - 3. The OS drive is number 0 and the media drive is number 1. -
Page 22: Configuring The New Drive
Power on the recorder by pressing the front panel power switch ( see figure Power on the monitor. The login screen is displayed. Enter the Username Password NOTE: By default, the Username and the matrix_rec Password matrix VNR 100 • Replacing the VNR 100 Drives... - Page 23 192.168.254.254 Controller port 5432 1500 User settings New password Confirm New password Data disk Umount mounted to /home/matrix_rec/Recording_Files status: Disk free space: 19GB->98% used Format formated to ext3 Apply Changes Cancel Changes VNR 100 • Replacing the VNR 100 Drives...
-
Page 24: Media Drive Replacement Kit
NOTE: When the new drive is correctly seated, all necessary connections are automatically formed. Reconnect the power to the VNR 100 and power it on by pressing the power switch. Configuring the New Drive Initial configuration is through the browser of a computer connected to the same network as the VNR 100. -
Page 25: Monitoring Free And Used Disk Space
To monitor the amount of free disk space and the percentage of disk space used, see the Data Disk information on the VNR 100 Web page (see the figure above). Directory and File Structure Use the Enterprise Controller Website to view the directory and file structure of the VNR 100 media disk. Enter the of the Enterprise Controller in the address bar of your browser. -
Page 26: Reference Information
The port numbers are, in most cases, for the sender. Port numbers used for receiving are less important in regards to security. When configuring a network, make sure it allows traffic on the ports required for your given application. The ports highlighted in yellow accommodate most simple applications. VNR 100 • Reference Information... - Page 27 5432 (or the user-defined port number) on the Enterprise Controller. 9002 Default port for collecting UDP traffic for data-transport. Value is user-definable. 9996 HLI server port. 9997 Annotation server port. NOTE: The ports highlighted in yellow accommodate most simple applications. VNR 100 • Reference Information...
-
Page 28: Mounting The Vnr 100
(such as the use of power strips). Rack Mounting Using Rack Rails The rack mounting kit is used to mount the VNR 100 in a Telco rack or a standard 19 inch (48.3 cm) wide rack with four vertical posts, one in each corner. - Page 29 Press the rail against the VNR 100 so that the hooks pass through the holes. Slide the rail back so that the hooks hold the rail. Secure the rail against the side of the VNR 100 using the provided M4 flat head screws (two on each side).
- Page 30 The shorter rail section attaches to the rear of the rack. • The rear rail section goes to the outside of the front section (closer to the rack and further from the VNR 100). Stud Rack Mounting Rail Rail Slot...
- Page 31 Secure two rail mounting brackets to each rail assembly (figure 21, Align the flanges of the rail mounting brackets with the vertical posts of the Telco rack. Secure the rail assemblies to the Telco rack with the provided mounting screws. VNR 100 • Reference Information...
- Page 32 Installing the VNR 100 into the rack The rails must be attached to both the VNR 100 chassis and to the rack. ATTENTION: Do not pick up the VNR 100 by the front handles. These are designed only for pulling the recorder from the rack.
- Page 33 Finished Installation: Installed Figure 23. Standard Rack Mount Installed Figure 24. Telco Rack Mount VNR 100 • Reference Information...
-
Page 34: Gcode Frame Translator Utility Instructions
Transfer the still frames and audio files to a PC running a third-party editing application. Create a video or media file from the still frames and audio file. The main focus of this section is step 3, the Frame Translation Procedure on page 33. VNR 100 • Reference Information... -
Page 35: Preparation For Using The Gcode Frame Translator Utility
(see figure 26, Recording_Files and the gcode Utility is located in the directory ( ). Usually, VNRecorder_verx.y.z only one VNRecorder directory will be present; if the recorder has been upgraded, use the current version directory. VNR 100 • Reference Information... -
Page 36: Opening A Command Line Window
PuTTY Password Prompt Enter and press <Return>. matrix The command line window opens at the following directory location: /home/matrix_rec Use the command line window to enter the gcode commands that are described in the following section. VNR 100 • Reference Information... -
Page 37: Description Of The Frame Translator Utility
(for example: -o /home/matrix_rec/Recording_Files/recording1 • Only one stream can be exported at a time. Video and audio must be exported separately (see Working with Video and Audio Streams on page 37). VNR 100 • Reference Information... -
Page 38: Recording File Directory Nomenclature
Indicates the recording channel: Video Streams Audio Streams • — video recording channel 1 • — audio recording channel 1 Indicates the recording number. This value increases incrementally if a subsequent recording with the same name is made. VNR 100 • Reference Information... -
Page 39: Frame Translation Procedure
For example: ./gcode -t -o /home/matrix_rec/Recording_Files/Video_Audio_ Data/TGA -i /home/matrix_rec/Recording_Files/Video_Audio_Data/ Chan1_1021526.0.0_r0_s0.rec -s 09:44:18.00 -f 09:44:20.00 NOTE: To run the utility, gcode must be preceded by the characters. VNR 100 • Reference Information... -
Page 40: Example Strings
Each frame is displayed as it is generated ( • No output directory is specified. By default the newly generated files are displayed on the local display of the VN Recorder. The input directory is • /home/matrix_rec/Storage/SAC_Test/Dave_Gilmour_ Dimming_of_the_Day_620027.0.0_r0_s0.rec VNR 100 • Reference Information... -
Page 41: Advanced Use
17:45:27.53 - 17:47:27.65 • The length of the recording is calculated by subtracting the start time from the finish time (in this case 2 minutes 0.12 seconds). VNR 100 • Reference Information... - Page 42 ./gcode -t -o /home/matrix_rec/Targa -s 17:45:37.53 -f 17:46:27.53 -i /home/matrix_rec/Storage/SAC_Test/ Dave_Gilmour_Dimming_of_the_Day_620027.0.0_r0_s0.rec • The output files are Targa (tga) files ( The output folder is • /home/matrix_rec/Targa • The file conversion starts at 17:45:37.53 The finish time is • 17:46:27.53 VNR 100 • Reference Information...
-
Page 43: Working With Video And Audio Streams
The second command uses an audio file ( ) to produce a WAV file. Both the audio and video files are generated from the same start time ( ) to • 17:45:35.50 the same finish time ( 17:49:11.00 VNR 100 • Reference Information... - Page 44 Extron Electronics makes no further warranties either expressed or implied with respect to the product and its quality, performance, merchantability, or fitness for any particular use. In no event will Extron Electronics be liable for direct, indirect, or consequential damages resulting from any defect in this product even if Extron Electronics has been advised of such damage.
Need help?
Do you have a question about the VNR 100 and is the answer not in the manual?
Questions and answers