Advertisement
Quick Links
Menu system operations
The PIP LCD menu system diplays status changes and it provides access
to menus that allow the adjustment of the image and its parameters. The
LCD normally cycles continuously through default screens that identify the
detected format of the inputs and the assigned standard of the output as shown on the
previous page.
Menu system navigation
Press the Menu button to activate the menu system and to scroll through the four (PIP 444)
or three (PIP 422) main menus. Press the Next button to move between the submenus of
a selected main menu, to activate a submenu for viewing or configuration, and to save a
selection. When in a submenu or when a Picture Adjustments button is selected, rotate the
[
Adjust
knob and Adjust
{
knob to scroll through the submenu options and select a setting.
•
Input Configuration menu — Select the video format each input (composite video,
S-video, or component video).
•
Output Configuration menu — Select the standard for the video output (NTSC,
NTSC 0 IRE, or PAL).
•
Advanced Configuration menu — Select the border and background colors, the
transition effect (cut, wipe, or dissolve), and priority for each window.
•
Genlock Configuration menu (PIP 444 only) — Configure the horizontal phase and subcarrier phase of the
Genlock feature.
Configure the inputs
1.
Repeatedly press Menu until the LCD reads Input Config.
2.
Press Next.
[
3.
Rotate the Adjust
knob to select an input. The LCD shows the selected input in the message Input #n Fmt.
4.
Rotate the Adjust
knob to select the format of the connected video input (Video, S-video, or YUV).
{
5.
Repeat steps 3 and 4 for each connected input.
6.
PIP 444 — Press Menu > Menu > Menu > Menu (Menu 4 times) > Next to return the default display cycle.
PIP 422 — Press Menu > Menu > Menu (Menu 3 times) > Next to return the default display cycle.
Configure the output
1.
Repeatedly press Menu until the LCD reads Output Config.
2.
Press Next.
3.
Rotate either Adjust knob to select the output format (NTSC, NTSC 0 IRE, or PAL).
4.
PIP 444 — Press Menu > Menu > Menu (Menu 3 times) > Next to return to the default display cycle.
PIP 422 — Press Menu > Menu (Menu twice) > Next to return the default display cycle.
Windows
®
-based PIP 422 and PIP 444 Control Program
The control program is on the Extron Software Products DVD. Run the program on a PC connected to the RS-232/RS-422
f
port on the processor (
, on page 1). The program must be installed and cannot be run from the DVD.
N For details on installing and operating the program, refer to the PIP 422 and PIP 444 User's Manual, available at
www.extron.com.
Extron USA - West
Extron USA - East
Extron Europe
Headquarters
+800.633.9876
+800.3987.6673
+800.633.9876
Inside USA / Canada Only
Inside Europe Only
Inside USA / Canada Only
+1.919.863.1794
+31.33.453.4040
+1.714.491.1500
+1.919.863.1797 FAX
+31.33.453.4050 FAX
+1.714.491.1517 FAX
© 2010 Extron Electronics. All rights reserved.
Extron, Inc.
2 sec.
60-606 (607) -01
Power
on
PIP 444 (422)
FW ver. n.nn
NOTE
The PIP returns to the last active
main menu or submenu when you
press Menu.
Menu
*PIP 444 only
Extron Asia
Extron Japan
Extron China
Extron Middle East
+800.7339.8766
+81.3.3511.7655
+400.883.1568
+971.4.2991800
+81.3.3511.7656 FAX
+971.4.2991880 FAX
Inside Asia Only
Inside China Only
+65.6383.4400
+86.21.3760.1568
+65.6383.4664 FAX
+86.21.3760.1566 FAX
Default
2 sec.
Cycle
PIP 422 and PIP 444 – Setup Guide
Menu
N For full installation, configuration, and operation details, refer to the
PIP 422 and PIP 444 User's Manual, available at www.extron.com.
20 sec.
Input
Input
This guide provides quick start instructions for an experienced installer to set up
Config
Config
and operate the Extron Picture-in-Picture Processors.
Menu
Output
20 sec.
Installation and Cabling Features
Config
Menu
2
Advanced
20 sec.
Config
Menu
100-240V
0.3A
1
R-Y
Y/VID
I
N
P
Genlock
20 sec.
U
T
Config*
S
50/60 Hz
Menu
3
1
To exit menu
20 sec.
press NEXT
Connections
Next
a
AC power connector
b
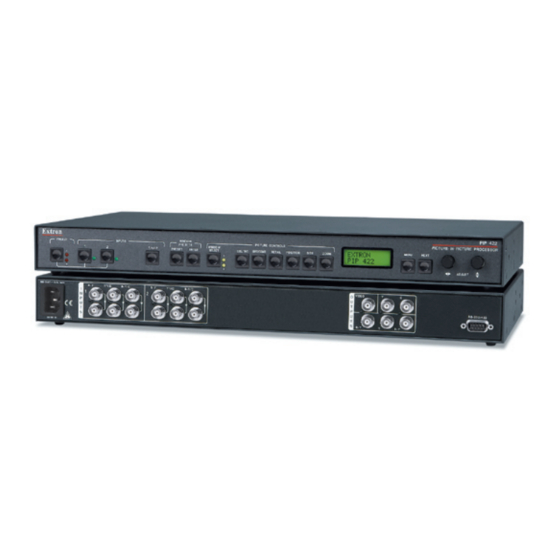
Inputs 1 through 2 (PIP 422) or 4 (PIP 444)
configurable BNC connectors
(component video, S-video, or composite video)
c
Inputs 1 through 2 (PIP 422) or 4 (PIP 444) loop-through
configurable BNC connectors
(component video, S-video, or composite video)
Step 1 — Mounting
Turn off or disconnect all equipment power sources. For tabletop use, affix the rubber feet.
For optional rack or under furniture mounting, secure the supplied rack mounting bracket
or optional furniture mounting bracket (see image at right) and mount the unit.
Step 2 — Video inputs
a.
Input (top) connectors — Connect up to
two (PIP 422) or four (PIP 444) component
video, S-video, or composite video input
devices to these BNC connectors. The figure
below shows how to connect the various
video formats.
N Connect only one video format to each input.
You must configure each input to identify
the connected video format.
b.
Input loop-through (bottom) connectors —
If desired, connect local monitors to these
female BNC connectors. The processor
buffers the video input and loops it out on
these connectors..
N The processor does not alter the video signal between the input and the buffered loop-through in any way. The buffered loop-
through output is in the same format as the input.
Input
Buffered
Loop-through
2
2
*
2
*
B-Y/C
2
R-Y
Y/VID
B-Y/C
3
R-Y
Y/VID
B-Y/C
4
R-Y
Y/VID
B-Y/C
VIDEO
Y
C
O
G
U
E
T
N
P
L
U
O
C
T
S
R-Y
Y
B-Y
K
3
3
*
3
*
4
5 *
* PIP 444 only
d
Output BNC connectors
(component video, S-video, and composite video)
e
(PIP 444 only) Genlock In and Out BNC connector(s)
f
RS-232/RS-422 DB9 connector
Supplied Rack Mounting Bracket
or
#8 Screw (4 Plcs)
Each Side
Optional Furniture Mounting Bracket
Component Video
S-Video
1
R-Y
Y/VID
B-Y/C
2
R-Y
Y/VID
B-Y/C
I
N
P
U
T
S
IN
RS-232/422
OUT
6
Mounting Screws
(2 Plcs)
Each Side
Composite Video
3
R-Y
Y/VID
B-Y/C
68-828-50
Rev. A
01 10
Advertisement

Related Manuals for Extron electronics PIP 422


Summary of Contents for Extron electronics PIP 422
- Page 1 PIP 444 — Press Menu > Menu > Menu > Menu (Menu 4 times) > Next to return the default display cycle. or optional furniture mounting bracket (see image at right) and mount the unit. PIP 422 — Press Menu > Menu > Menu (Menu 3 times) > Next to return the default display cycle. Step 2 — Video inputs Input (top) connectors —...
- Page 2 NTSC Mono 60 The PIP has 10 (PIP 422) or 20 (PIP 444) presets that define the number, size, position, the priority of the picture-in-picture previously selected for the display. The windows and window text, and the border and background colors.
Need help?
Do you have a question about the PIP 422 and is the answer not in the manual?
Questions and answers