Pitney Bowes DM125 Operator's Manual
Hide thumbs
Also See for DM125:
- Operator's manual (226 pages) ,
- Installing manual (25 pages) ,
- Software instructions (2 pages)
Table of Contents
Advertisement
Quick Links
Advertisement
Table of Contents

Related Manuals for Pitney Bowes DM125


Summary of Contents for Pitney Bowes DM125
- Page 1 Digital Mailing System DM125 Operator Guide Canada English Version...
- Page 2 SV62667 Rev. A 10/11 ©2011 Pitney Bowes Inc. All rights reserved. This book may not be reproduced in whole or in part in any fashion or stored in a retrieval system of any type or transmitted by any means, elec tron i cal ly or mechanically, without the express, written permission of Pitney Bowes.
- Page 3 Servicing This equipment is not intended to be serviceable. Please refer to the warranty information if problems occur. The responsible party is Pitney Bowes Canada. All service and supply inquiries can be done by calling 1-800-672- 6937 and following the telephone prompts. Customer Service Representatives are available Monday through Friday, 8:00 AM - 8:00 PM ET.
- Page 4 Product Name: DM125 Digital Mailing System Model Number: PREC Resources For direct questions or support, call the Pitney Bowes Customer Centre 1.800.672.6937 (M-F 8:00 AM to 8:00 PM E.T.) or visit www.pitneybowes.ca. To order Pitney Bowes supplies and accessories, go to: www.pitneybowes.ca...
-
Page 5: Table Of Contents
Table of Contents 1 • Introduction What's in this Guide ..............1-2 About Your Digital Mailing System ........... 1-3 Postal Requirements ..............1-3 Sections of the Meter Stamp ............ 1-4 About IntelliLink™ ..............1-4 About Constant Connection (LAN Network) ......1-5 About PC Meter Connect™Desktop Application ...... - Page 6 Table of Contents 4 • Printing Options Printing Options Overview ............4-1 Printing a $0.00 Meter Test Print ..........4-2 Sections of the Meter Stamp ............ 4-3 Auto-Advance of Printed Date for the Meter Stamp ....4-3 Manually Advancing Printed Date for the Meter Stamp ... 4-3 Setting the Machine to Today's Date ........
- Page 7 6 • Adding Postage/Connecting to Data Centre Postage and Your Machine ............6-1 Establishing Communications Between Your Machine and the Pitney Bowes Data Centre ........6-1 Downloads from the Data Centre to Machine ......6-2 Using a LAN Network (Constant Connection) to Establish ....
- Page 8 Table of Contents 7 • System Options System Options Overview ............7-1 Basic Options ................7-2 Advancing Date for Printing Postage ......... 7-4 ..... 7-2 At a PC Using PC Meter Connect ™ At Mailing Machine ..........7-3 Setting the Machine to Today's Date ......... 7-5 Adjusting the Contrast of the Display ........
- Page 9 Table of Contents 8 • Standard Accounting Standard Accounting Overview ..........8-1 Activating/Setting Up Standard Accounting Option ....8-2 Turning On Standard Accounting ..........8-4 Turning Off Standard Accounting ..........8-5 Turning On Account Passwords (Globally) ......8-6 Turning Off Account Passwords ..........8-7 Creating an Account ..............
- Page 10 Table of Contents 9 • Reports Overview of Reports ..............9-1 Printing a Report ..............9-2 Printing on an Envelope or Tape Strip ....... 9-2 Printing to an Attached Printer ........... 9-2 Register Report (Funds Report) ..........9-3 Add Postage Report ..............9-4 Single Accounts Report (Standard Accounting) .......
- Page 11 Table of Contents 11 • Troubleshooting Getting Help ................11-1 Messages on LCD Display ............11-1 Blank Display ................11-1 Display Problems (display hard to read) .........11-2 Feeding Problems (stalled envelopes) ........11-2 Printing Problems ..............11-3 Moistening Problems (envelopes don't seal) ......11-4 Problems Connecting to the Data Centre via Analog Line ..11-5 Problems Connecting to the Data Centre via LAN Network ...11-6 Problems Refilling Postage via the PC ........11-6 Viewing System Configuration Levels ........11-10...
- Page 12 Table of Contents This page was put in as a placeholder so you can print this guide in a duplex (double-sided) mode while keeping the proper page positions. SV62667 Rev. A...
-
Page 13: Introduction
1 • Introduction What's in this Guide Section Description Describes the key features of your mail ing system. It Chapter 1 also includes important safety notes. Introduction Explains the purpose and shows the lo ca tion of each Chapter 2 control and ma chine feature. -
Page 14: About Your Digital Mailing System
1 • Introduction About Your Digital Mailing System Your digital mailing system's advanced features include: • Space-saving, compact footprint • ENERGY STAR qualified design lowers operating costs and ® helps preserve the environment • Large, easy-to-read display shows system status and prompts you through setup operations •... -
Page 15: Postal Requirements
The CPC requires a postal inspection of your machine every 90 days. This postal inspection requirement can be automatically met by connecting to the Pitney Bowes Data Centre to check your Postage By Phone meter payment account balance or to ®... -
Page 16: Sections Of The Meter Stamp
1 • Introduction Sections of the Meter Stamp These are the sections that make up the meter stamp printed on your mail piece. Postage Meter Serial Applied Number Postal Code of Date Encrypted Envelope Ad postage meter Canpost Indicia Optional Printing Required Printing What is IntelliLink™... -
Page 17: About Constant Connection (Lan Network)
About Constant Connection (LAN Network) Constant Connection is an option that allows you to connect your DM125 machine to the Pitney Bowes Data Centre via a LAN network that has Internet access. Constant Connection’s high-speed connec- tivity eliminates the need for an analog line and provides faster trans- mission speed when connecting through your local network. -
Page 18: Other Sources Of Information
Other sources of information for your machine include: • The DM125 Quick Reference Guide has con densed ver sions of many of the topics covered in this book. You can normally store this handy guide in the slot in the stacker tray. -
Page 19: Important Safety Notes
If you should drop or other- wise dam age the unit, call Pitney Bowes. • Use only Pitney Bowes approved ink, tape strips, and clean- ers. To obtain Material Safety Data Sheets (MSDS) for OSHA requirements, please go to www.pb.com/msds. When prompted, enter the product name, manufacturer, the Pitney Bowes MSDS Number, or reorder number of the item you are interested in. -
Page 20: Important Telephone Safety Instructions
1 • Introduction Important Safety Notes • Avoid touching moving parts or materials while the ma chine is in use. Before clear ing a stall (jam), be sure ma chine mechanisms come to a complete stop. • To prevent overheating, do not cover the vent open ings. •... -
Page 21: Getting To Know Your System
2 • Getting to Know Your System SV62667 Rev. A... -
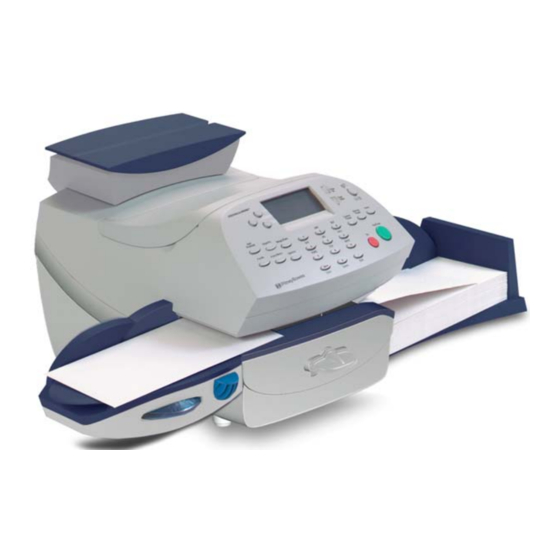
Page 22: Parts Of The Machine
2 • Getting to Know Your System Parts of the Machine SV62667 Rev. A... -
Page 23: Parts Of The Machine
2 • Getting to Know Your System Parts of the Machine Item Part Description Allows you to enter and set up information on Control Panel your machine (see next page for details) Opens up to allow replacement of the ink car- Top Cover tridge (see Chapter 10, Maintenance) Allows you to weigh a mail piece (your system... -
Page 24: Control Panel
2 • Getting to Know Your System Control Panel Item Part/Key Description Allows you to select an option (◄) on the Screen Selection screen with the corresponding key Keys Shows the current status of your system and LCD Display prompts you through all operations Allows you to scroll up and down through menu Page Up/Page choices (when lit, it indicates more choices) - Page 25 2 • Getting to Know Your System Control Panel Item Part/Key Description Feature Keys Allows you quick access to the key features on the system: Takes you back to the Home (date/postage) screen Home Allows you to recall settings that contain the most Normal Preset commonly printed postage value you use in your home or office (see Chapter 5, Normal and Custom...
-
Page 26: Connections On Back Of Machine
Power Input Used to connect: USB Port (type A host • to the Pitney Bowes Data Center via LAN Internet port) using a USB to LAN network adapter (known as Con- stant Conection; see Chapter 6, Adding Postage) • an external printer to print report data •... -
Page 27: Running Mail
3 • Running Mail Powering Up and Accessing the Home Screen When you power up your system, the screen that shows on your machine is based on its configuration or settings (see below). If your sys tem has been set up to require a lock code or password, you are prompted to enter it. -
Page 28: Checklist Before Running Mail
3 • Running Mail Checklist Before Running Mail Before you run mail on your system, review these items: • Make sure your mailing system is plugged into a prop er ly ground ed, 110 VAC receptacle. Always follow the safe ty pre cau- tions in Chapter 1, Introduction. -
Page 29: Checking Funds (Postage) Availability In Machine
3 • Running Mail Checking Funds ( Postage) Availability in Machine At a PC Using PC Meter Connect™ At the Postage tab (which is the default tab that displays when you first launch the program), the postage in the machine is displayed under the Current Meter Balance section. -
Page 30: Printing A $0.00 Meter Test Print
3 • Running Mail Printing a $0.00 Meter Test Print Periodically, you may want to conduct a test print to determine if your print mechanism is operating correctly. One way to do this is to print a a $0.00 indicia so as not to waste postage (the other way is to run the test print option from the menu;... -
Page 31: Selecting An Account To Track Postage (Optional)
3 • Running Mail Selecting an Account to Track Postage (Optional) If the accounting feature has been turned on, you need to select an account to track postage before you process mail. See Chapter 8, Standard Accounting, for information on setting up this feature. 1. -
Page 32: Adding An Advertisment To Meter Indicia (Optional)
3 • Running Mail Adding an Advertisement to Meter Indicia (Optional) At PC Using PC Meter Connect™ 1. At the My Meter tab, select Meter Settings. 2. Select Ads & Inscriptions. 3. In the Envelope Ads field, access the dropdown list and click on the advertisement you want to print with your meter indicia. -
Page 33: At Mailing Machine
3 • Running Mail Adding an Advertisement to Meter Indicia (Optional) At Mailing Machine 1. At the Home screen, press Page Down. 2. Select the key next to AD:. 3. Select Select an Ad. Page ◄Select an Ad ◄Install an Ad Page Down 4. -
Page 34: Applying Postage - Basics
3 • Running Mail Applying Postage - Basics • You can only print an indicia (a meter stamp), do a date correction, a postage correction, or a Statement of Mailing when the screen displays an indicia in the upper right corner (see examples below). Indicia Indication 11.08.28 ≡0.57≡... -
Page 35: Processing Lettermail With The Optional Scale
3 • Running Mail Processing Lettermail With the Optional Scale The machine has two optional scale configurations: • 1 kg weight capacity - recommended for users whose mail consists primarily of Lettermail • 2.5 kg weigh capacity - recommended for users who send Letter- mail and Parcels This procedure is used for processing Lettermail (mail pieces weighing between 1 gram and 500 grams whose dimensions fall within the Let-... - Page 36 3 • Running Mail Processing Lettermail With the Optional Scale 7. Place the envelope up (or tape sheet if mail piece is too big for machine) against the registration wall of the sys tem and slide it to the right until the sys tem grasps it. The system prints the dig i tal indicia and ejects the envelope/tape sheet Registration Wall...
-
Page 37: Processing Lettermail Without The Optional Scale
3 • Running Mail Processing Lettermail Without the Optional Scale This procedure is used for processing Lettermail (mail pieces weigh- ing between 1 gram and 500 grams whose dimensions fall within the Lettermail classification) if the optional scale is not attached and you already know the weight of a mail piece. - Page 38 3 • Running Mail Processing Lettermail Without the Optional Scale 8. If using the optional moistener, place flap along moistener and move towards the right. 9. Place the envelope up (or tape sheet if mail piece is too big for machine) against the registration wall of the sys tem and slide it to the right until the sys tem grasps it.
-
Page 39: Processing A Parcel With Optional Parcel Rating Module
3 • Running Mail Processing a Parcel With Optional Parcel Rating Module The machine has two optional scale configurations: • 1 kg weight capacity - recommended for users whose mail consists primarily of Lettermail • 2.5 kg weigh capacity - recommended for users who send Letter- mail and Parcels This procedure is used for processing Parcels (those mail pieces weigh- ing over 500 grams or those mail pieces whose dimensions are too large... - Page 40 3 • Running Mail Processing a Parcel With Optional Parcel Rating Module 5. Select, if needed, any applicable special services (such as COD, Oversize, etc.) associated with that class option and select Done. 6. Place the parcel on the scale. If the parcel is too heavy for the scale (greater than NOTE: 2500 grams), a Weight Over Capacity message displays.
-
Page 41: Processing A Parcel Without Parcel Rating Module
3 • Running Mail Processing a Parcel Without Parcel Rating Module This procedure is used for processing Parcels (those mail pieces weighing over 500 grams or those mail pieces whose dimensions are too large to qualify as Lettermail) if you did not purchase the optional Parcel Rating module. - Page 42 3 • Running Mail Processing a Parcel Without Parcel Rating Module 6. The next step depends on the machine configuration: • If you have a scale, place the parcel on the scale. If the parcel is too heavy for the scale (greater than NOTE: 1000 grams), a "Weight Over Capacity"...
- Page 43 3 • Running Mail Processing a Parcel Without Parcel Rating Module 8. Place the parcel (or tape sheet if par- cel is too big for machine) up against the registration wall of the sys tem and slide it to the right until the sys- tem grasps it.
-
Page 44: Adding Postage To Correct A Mail Piece
3 • Running Mail Adding Postage to Correct a Mail Piece This procedure is used if you have applied the incorrect amount of postage and need to make a correction to ensure that a mail piece has sufficient postage. 1. At the Home screen: •... - Page 45 3 • Running Mail Adding Postage to Correct a Mail Piece 5. Key in the postage correction using appropriate decimal places (in the example above, the value must be between $0.01 and $0.50) and select OK. 6. At the Services amount confirmation screen, select Done. A screen displays with the amount of correction (the example used in these steps is shown below): Must be a non-zero...
-
Page 46: Correcting A Date On A Mail Piece
3 • Running Mail Correcting a Date on a Mail Piece This procedure is used if you have applied the wrong date to a mail piece and need to make a correction. For example, if you already ran your mail for the day but it was too late for that day's mail pickup, you can apply the next business day's date on the mail pieces so they can be processed correctly by the post office. - Page 47 3 • Running Mail Correcting a Date on a Mail Piece 7. A screen displays with the date and $0.00 indicia (an example is shown below): 11.08.28 ≡0.00≡ 11.08.28 ≡0.00≡ ◄CLASS: Date Correct ◄CLASS: Date Correct ◄SCALE: MAN WT: Screen with Scale Screen without Scale 8.
-
Page 48: Printing A Statement Of Mailing Or Manifest Payment
3 • Running Mail Printing a Statement of Mailing or Manifest Payment This procedure is used when you have multiple parcels to send and want to evidence the postage payment for these shipments through one single digital indicia. 1. At the Home screen: •... - Page 49 3 • Running Mail Printing a Statement of Mailing or Manifest Payment 5. At the Services confirmation screen, select Done. A screen dis- plays (an example is shown below): Must be a non-zero indicia amount 11.08.28 ≡12.52≡ 11.08.28 ≡12.52≡ ◄CLASS: Manifesting ◄CLASS: Manifesting ◄SCALE: ◄MAN WT: x g...
-
Page 50: Checking And Clearing The Batch Count
3 • Running Mail Checking and Clearing the Batch Count Your system has the ability to keep track of batches of mail if desired. You may use this feature to track the amount of mail going out per day, per week, per month, etc. The system stores the postage value and piece count in for ma tion in a batch register. - Page 51 3 • Running Mail Checking and Clearing the Batch Count Printing the Batch Count 1. Press Funds. 2. Press Page Down twice and select Print Funds Report. 3. At the Please insert envelope or tape sheet to print report prompt, place the envelope/tape sheet up against the back wall of the sys- tem and slide it to the right until the sys tem grasps it.
- Page 52 3 • Running Mail This page was put in as a placeholder so you can print this guide in a duplex (double-sided) mode while keeping the proper page positions. 3-26 SV62667 Rev. A...
-
Page 53: Printing Options
4 • Printing Options Printing Options Overview There are various printing options available when processing mail through your machine. Refer to the table below. Used for Used for Outgoing Incoming Printing Option Mail Mail Print a normal meter stamp (postage indicia) Manually advancing printed date for meter stamp Bypass all printing and only seal the envelope (with the optional moistener) -
Page 54: Printing A $0.00 Meter Test Print
4 • Printing Options Printing a $0.00 Meter Test Print Periodically, you may want to conduct a test print to determine if your print mechanism is operating correctly. One way to do this is to print a $0.00 indicia so as not to waste postage (the other way is to run the test print option from the menu;... -
Page 55: Sections Of The Meter Stamp
4 • Printing Options Sections of the Meter Stamp These are the sections that make up the meter stamp printed on your mail piece. Postage Meter Serial Number Applied Postal Code of Date Encrypted Can- Envelope Ad postage meter post Indicia Optional Printing Required Printing Auto-Advance of Printed Date for the Meter Stamp... - Page 56 4 • Printing Options Manually Advancing Printed Date for the Meter Stamp At PC Using PC Meter Connect™ 1. At the My Meter tab, select Meter Settings. 2. Select Date and Time. 3. In the Print Date field, access the dropdown calendar. Use the < or >...
- Page 57 4 • Printing Options Manually Advancing Printed Date for the Meter Stamp At PC Using PC Meter Connect™ If you are accessing features from PC Meter Connect™ NOTE: please keep in mind the following: • If the system is in sleep mode, accessing a feature from the Main Window will awaken the machine.
-
Page 58: Setting The Machine To Today's Date
4 • Printing Options Setting the Machine to Today's Date 1. Press Options. 2. Select Set to todays date. You will be returned to the Home screen with the current (today's) date set. Bypass Printing and Seal the Envelope Only (when using the optional moistener) If using the optional moistener with pre-addressed envelopes, you can set up your mailing system to seal envelopes with out printing a... -
Page 59: Printing Date And Time On Incoming Mail
4 • Printing Options Printing the Date and Time on Incoming Mail You can set up your mailing system to print the date and time on in- coming pieces of mail. 1. Press Print Menu. 2. Select Date & Time Only. Page PRINT MENU ◄Seal Only... - Page 60 4 • Printing Options Printing an Ad, Date, and Time on Incoming Mail You can set up your mailing system to print an ad, the date and time on incoming pieces of mail. 1. Press Print Menu. 2. Use the Page Down key and select Ad, Date, & Time. Page PRINT MENU ◄Ad, Date, &...
-
Page 61: Printing An Envelope Ad On Incoming Mail
4 • Printing Options Printing an Ad, Date, and Time on Incoming Mail 6. Place the envelope up against the registration wall of the sys tem and slide it to the right until the sys tem grasps it. The system prints the time and date and ejects the envelope/tape sheet. - Page 62 AD. 2. Select Install an Add. 3. Select Connect now: 4. The system dials into the Pitney Bowes Data Centre (this may take a few moments). Various screens display, letting you know the status of the process. 5. After connection is made and the download has completed, a message stating so displays.
-
Page 63: Adjusting Horizontal Print Position
4 • Printing Options Adjusting Horizontal Print Position of Indicia You may need to adjust slightly the left/right print position of the indi- cia on a mail piece. To achieve maximum readability at the post office, we NOTE: strongly advise that you do not change the default value that the machine is shipped with. - Page 64 4 • Printing Options This page was put in as a placeholder so you can print this guide in a duplex (double-sided) mode while keeping the proper page positions. 4-12 SV62667 Rev. A...
-
Page 65: Normal And Custom Presets
5 • Normal and Custom Presets What is a Preset? A preset is a setting you can call up at the touch of a button that holds pre-defined values such as class, ad, etc. within your machine. Your system has a Normal preset whose values display after the ma- chine is turned on, after it is awaken from sleep mode, or by press- ing Normal Preset. -
Page 66: Normal Preset
5 • Normal and Custom Presets Normal Preset The Normal preset as shipped from the factory is set for "Seal Only" and cannot be used to print postage on a mail piece (see screen below). Page SEAL ONLY NO PRINTING Insert envelope or Page ◄Exit SEAL ONLY... -
Page 67: Viewing The Values Of The Normal Preset
5 • Normal and Custom Presets Normal Preset Viewing the Values of the Normal Preset At a PC Using PC Meter Connect™ 1. Select the My Meter tab. 2. Click Meter Settings. 3. Click on View Preset. 4. At the Preset field, use the dropdown menu to view or select the Normal preset. -
Page 68: At Mailing Machine
5 • Normal and Custom Presets Normal Preset Viewing the Values of the Normal Preset (cont'd) At Mailing Machine 1. Press Custom Preset. 2. Press Page Down. 3. Select View Preset. The display lists all presets. 4. Select Normal Preset (it should be the first preset on the list). The first screen of defined values for Normal Preset is listed. -
Page 69: Defining A Normal Preset (Systems With Scales Only)
5 • Normal and Custom Presets Normal Preset Defining a Normal Preset (Systems with Scales Only) To define the Normal Preset: 1. Establish the proper settings on the machine (such as class of mail, ad, fees, etc) that you want the preset to contain. 2. -
Page 70: Custom Presets
5 • Normal and Custom Presets Custom Presets Your system can store up to 10 cus tom pre sets. Press Custom Pre- set to access the Custom Presets menu: Page CUSTOM PRESETS ◄Select Preset ◄Defi ne New Preset Page (lit key indicates ◄Defi... -
Page 71: Selecting A Custom Preset
5 • Normal and Custom Presets Custom Presets Selecting a Custom Preset 1. Press Custom Preset. 2. Select Select Preset. The display lists all presets created on your system. A sample list is shown below. Page SELECT CUSTOM PRESET (lit key indicates ◄1 Ltr Dom Std more menu choices) ◄2 Dom Other... -
Page 72: At Mailing Machine
5 • Normal and Custom Presets Custom Presets Viewing the Values of a Custom Preset At Mailing Machine 1. Press Custom Preset. 2. Select View Preset. The display lists all presets. 3. Select the preset you want to view. The first screen of defined values for the custom preset is listed. -
Page 73: Defining A New Custom Preset
5 • Normal and Custom Presets Custom Presets Defining a New Custom Preset To define (create) a new custom preset: 1. Establish the proper settings on the machine (such as class of mail, ad, manual weight, etc) that you want the preset to contain. 2. -
Page 74: Editing A Custom Preset Name
5 • Normal and Custom Presets Custom Presets Editing a Custom Preset Name You may change the name of a custom preset if you want. 1. Press Custom Preset. 2. Press Page Down and select Edit Preset Name. 3. The display lists all the custom presets. Select the preset you want to edit. -
Page 75: Adding Postage/Connecting To Data Centre
For printing postage, the machine does not have to be connected to the Pitney Bowes Data Centre. However, we recommended you keep your machine in a ready-to-connect state to the Pitney Bowes Data Centre on a permanent basis (using any one of the above connection methods). -
Page 76: Downloads From The Data Centre To Machine
6 • Adding Postage/Connecting to Data Centre Downloads from the Data Centre to Your Machine When you connect to the Pitney Bowes Data Centre to add postage or perform other transactions, the Data Centre may activate other downloads while the machine is connected. If some type of software/ postal update or download is available, a message stating so dis- plays. - Page 77 Downloads from the Data Centre to Your Machine Postal Code Update If the Postal Code on record at the Pitney Bowes Data Centre does not match the Postal Code of your system, the code will be down- load ed into your system. (When a system is moved to a new Postal Code, the Data Centre en ters the new code into the record.
- Page 78 Postal Rate Update Postal rates change periodically. If new rates are available, you can download them quickly and easily directly from the Pitney Bowes Data Centre. The new rates are normally available for download at least seven days before the effective date. The prices will automati- cally change on the effective date.
-
Page 79: Using A Lan Network (Constant Connection) To Establish Communications With The Data Centre
Establish Communications with the Data Centre Constant Connection is an option that allows you to connect your machine to the Pitney Bowes Data Centre via a LAN network that has Internet access. Constant Connection’s high-speed connectivity eliminates the need for an analog line and provides faster transmis- sion speed when connecting through your local network. -
Page 80: Communications With The Data Centre
™ icon will restart the software. Alternately, you may click on the Start button > All Programs > Pitney Bowes > PC Meter Connect. A PC Meter Connect icon will then appear in system tray. -
Page 81: Using Analog Phone Line To Establish Communications With The Data Centre
Using Analog Phone Line to Establish Communications with the Data Centre If you do not have a Windows PC available with Internet access, you may establish communications to the Pitney Bowes Data Centre using an analog phone line. The following are usually analog phone lines: •... -
Page 82: At A Pc Using Pc Meter Connect
6 • Adding Postage/Connecting to Data Centre Checking Funds ( Postage) Availability in Machine At a PC Using PC Meter Connect™ At the Postage tab (which is the default tab that displays when you first launch the program), the postage in the meter is displayed under the Current Meter Balance section. -
Page 83: Phone® Account Balance
◄Add $xx ◄Add another amount ◄Check PBP balance 4. The system connects to the Pitney Bowes Data Centre (this may take a few moments). Various screens displays, letting you know the status of the process. 5. The Prepaid and Other balances displays. Press No. -
Page 84: Adding Postage
You can add postage to your machine any time you need to, as long as you have enough funds in your Postage By Phone® ac count and your system is connected to the Pitney Bowes Data Centre. At a PC Using PC Meter Connect™... -
Page 85: At Mailing Machine
The amount shown in the "Add $xx" selection line NOTE 2: represents the amount of postage you added the last time. 3. The system connects to the Pitney Bowes Data Centre (this may take a few moments). Various screens display, letting you know the status of the process. - Page 86 – the amount you have on credit on Additional Funds Available your Postage By Phone® ac count balance (by signing up to one of the various Pitney Bowes credit programs such as Purchase Power, etc.) No. – your Postage By Phone® ac count number Account –...
-
Page 87: Printing A Funds (Postage) Report
6 • Adding Postage/Connecting to Data Centre Printing a Funds (Postage) Report (only accessible at the mailing machine) A funds report allows you to print a record of how much postage has been used and how much is remaining in the machine. 1. -
Page 88: Performing Cpc Meter Inspection
◄Add $xx ◄Add another amount ◄Check PBP balance 4. The system connects to the Pitney Bowes Data Center (this may take a few moments). Various screens displays, letting you know the status of the process. 5. The Prepaid and Other balances displays. Press No. -
Page 89: Downloading Files Or Updating System
DATA Centre ◄Uploads & Downloads ◄Phone Parameters ◄Distributor Values 6. The system connects to the Pitney Bowes Data Centre (this may take a few moments). Various screens display, letting you know the status of the process. 6-15 SV62667 Rev. A... -
Page 90: Settings For Connecting To The Data Centre
Pitney Bowes representative. Uploads and Downloads Use this feature to connect to the Pitney Bowes Data Centre for sys- tem downloads, new updates, etc. See Downloading Files or Updat- ing System on preceding page for procedure. - Page 91 This menu option allows you to modify the phone con nec tion settings on your machine (tone or pulse, dial prefix, etc.) when using an ana- log phone line to connect to the Pitney Bowes Data Centre. PHONE PARAMETERS ◄Tone/Pulse ◄Dialing Prefi...
- Page 92 Postage By Phone® number in the option above. If you need to change the local number for connecting to Postage By Phone®, do so only if you are directed to by a Pitney Bowes agent. 1. Press Options. 2. Press Page Down twice.
- Page 93 Change Modem Parameters Use this if you need to change the modem settings used NOTE: to dial into the Pitney Bowes Data Centre, but do so only if you are directed to by a Pitney Bowes representative 1. Press Options.
-
Page 94: Lan Settings (For Lan Internet To Data Centre)
6 • Adding Postage/Connecting to Data Centre Settings for Connecting to the Data Centre LAN Settings (affects LAN PC Internet connections to Data Centre) This menu option allows you to modify the IP address when using an Internet connection via Local Area Network (LAN) to connect to the Pit- ney Bowes Data Centre. -
Page 95: Firewall Settings (For Pc Connections To Data Centre)
Centre) This menu option allows you to modify the firewall settings when us- ing an Internet connection via LAN to connect to the Pitney Bowes Data Centre. Further information on Internet settings can be found in the Troubleshooting section of Appendix A - PC Meter Connect™. -
Page 96: Distributor Values (For Both Analog Line And Pc Connections To Data Centre)
Data Centre) This option allows you to modify the parameters that your machine uses to connect to the Pitney Bowes Data Centre. A brief description of each parameter is provided on the next page. IMPORTANT: Do not change the Distributor Values un less directed to do so by your Pitney Bowes representative. - Page 97 (DNS). The domain name server con verts your system name to its IP address. Secondary DNS Server This is the internet address of the Pitney Bowes sec ond ary domain name server (DNS). Distributor URL The Universal Resource Locator (URL) of the web page to which your system connects.
- Page 98 6 • Adding Postage/Connecting to Data Centre This page was put in as a placeholder so you can print this guide in a duplex (double-sided) mode while keeping the proper page positions. 6-24 SV62667 Rev. A...
-
Page 99: System Options
7 • System Options System Options Overview System options allow you to customize the machine settings for the way you run your mail and add security to those features that are sensitive to your organization. Because of the many options avail- able, the options are categorized into Basic and Advanced. -
Page 100: Basic Options
7 • System Options System Options Advanced options allow you access to features that are used very infrequently, and include: • Change Language • Maintenance Mode (see Chapter 10, Maintenance) • Maintain InView Accounting Records (see publication SV62669) • System Withdrawal (for withdrawing postage funds) •... - Page 101 7 • System Options Basic Options Advancing the Printed Date for the Meter Stamp (cont'd) At PC Using PC Meter Connect™ 1. At the My Meter tab, select Meter Settings. 2. Select Date and Time. 3. In the Print Date field, access the dropdown calendar. Use the < or >...
-
Page 102: At Mailing Machine
7 • System Options Basic Options Advancing the Printed Date for the Meter Stamp (cont'd) At PC Using PC Meter Connect™ If you are accessing features from PC Meter Connect™, NOTE: please keep in mind the following: • If the system is in sleep mode, accessing a feature from the Main Window will awaken the machine. -
Page 103: Setting The Machine To Today's Date
7 • System Options Basic Options Setting the Machine to Today's Date 1. Press Options. 2. Select Set to todays date. You will be returned to the Home screen with the current (today's) date set. Adjusting the Contrast of the Display 1. -
Page 104: Turning Features (Already Installed) On And Off
7 • System Options Basic Options Turning Features (Already Installed) On and Off You can turn on and off features that you have already purchased and downloaded into your machine. For turning on or off the scale (if pur- chased), see Setting Scale Options later in this chapter. 1. - Page 105 7 • System Options Basic Options Turning Features (Already Installed) On and Off (cont'd) • - this turns on or off the scale stabilizer fea- Scale Stabilizer ture, which minimizes reactions to scale vibrations. You may use this feature in environments where there is blowing on the scale, accidental bumps to the scale or machine, or drop- ping of mail onto the scale or machine.
- Page 106 7 • System Options Basic Options Setting the Date, Time, and Timeouts You can change the system date/time, set the date/time to day light sav ings time, change the time at which your sys tem advances the date/time to the next day, and set the amount of time your sys tem can re main in ac tive be fore re vert ing to the nor mal preset val ues.
- Page 107 7 • System Options Basic Options Setting the Date, Time, and Timeouts (cont'd) ® Setting ENERGY STAR Sleep Mode Activation Time You can set the amount of time the machine waits until entering sleep mode. When the machine is in sleep mode, the display is blank and you can't process mail.
- Page 108 7 • System Options Basic Options Setting the Date, Time, and Timeouts (cont'd) Setting Autodate Advance Your system, as shipped from the factory, automatically advances the date of the machine at 12:00 AM. The autodate advance option allows you to advance the date at a more convenient time (say after mail pickup at your business).
- Page 109 7 • System Options Basic Options Setting the Date, Time, and Timeouts (cont'd) Correct Drift Sometimes, the time on the machine may need to be corrected due to internal drift or the activation of Daylight Saving Time. 1. Press Options. 2.
-
Page 110: At A Pc Using Pc Meter Connect
7 • System Options Basic Options Setting the Date, Time, and Timeouts (cont'd) Setting System Time You cannot change the system time to a date earlier than NOTE: the actual date, and you can advance the time to the next day's date only. - Page 111 7 • System Options Basic Options Setting the Date, Time, and Timeouts (cont'd) Setting Postage Display You can set the amount of time (in seconds) that the postage indicia stays displaying before the system prompts Place on item on scale. 1.
-
Page 112: At Mailing Machine
7 • System Options Basic Options Setting Postage Values (Low Funds Warning) You can specify values for the system to display a warning when your postage funds drop below a certain level. At a PC Using PC Meter Connect™ 1. Select the My Meter tab 2. - Page 113 7 • System Options Basic Options Setting the Lock Codes and Passwords Setting/Disabling the Lock Code The lock code prevents unauthorized access to your mail ing system upon awakening the machine after it has entered sleep mode or after powering up the machine. 1.
- Page 114 7 • System Options Basic Options Setting the Lock Codes and Passwords (cont'd) Setting/Disabling the Supervisor Password The su per vi sor pass word prevents unauthorized access to the ac- counting functions. 1. Press Options. 2. Press Page Down twice. 3.
-
Page 115: Setting Scale Options (If Optional Scale Is Purchased))
7 • System Options Basic Options Setting Scale Options (if optional scale was purchased) There are several options you can set with your scale such as zero- ing the weight on the scale, turning the scale on/off, viewing metric weights, and saving/changing class or Postal Code settings when weight changes on your scale. - Page 116 7 • System Options Basic Options Setting Scale Options (cont'd) Turning Scale On or Off You may turn on and off the scale function as necessary. 1. At the Home screen, press the selection key next to SCALE: line. 2. Select Turn Scale OFF (or ON). 3.
-
Page 117: Setting Weight Change Options
7 • System Options Basic Options Setting Scale Options (cont'd) Setting Weight Change Options You can set how the scale reacts regarding the class of service or postal code when the weight changes. 1. At the Home screen, press the selection key next to SCALE: line. 2. - Page 118 7 • System Options Basic Options Setting Scale Options (cont'd) Setting Class Change Options You can set how the scale reacts regarding the postal code when the class changes. 1. At the Home screen, press the selection key next to SCALE: line. 2.
-
Page 119: Advance Options
7 • System Options Advanced Options Advanced options allow you access to features that are used very infrequently such as changing language, meter withdrawal, etc. The Advanced Feature menu includes: • Change Language • Maintenance Mode (refer to Chapter 10, Maintenance for infor- mation on this option) •... -
Page 120: Advanced Options
Postage By Phone® Account. Nor- mally this is done if you are no longer going to use the machine. Contact Pitney Bowes fi rst before withdrawing funds. NOTE 1: 2: Machine must be connected to the Data Centre. - Page 121 7 • System Options Advanced Options Meter Withdrawal (Withdrawing Postage Funds) cont. 7. The system connects into the Pitney Bowes Data Center (this may take a few moments). Various screens displays, letting you know the status of the process. 8. The Transfer Successful screen displays. Select Continue.
-
Page 122: Run Install Mode
Mailing Systems drop-down menu. Do not run this option un less directed to do so by your NOTE: Pitney Bowes representative. To run the install mode: 1. Press Options. 2. Press Page Down twice 3. -
Page 123: Standard Accounting
8 • Standard Accounting (Option) Standard Accounting Overview An accounting feature on a mailing system allows you to track your postage costs by categories. These categories can represent whatev- er makes sense to your organization - departments, people, locations, projects, etc. Tracking your mailing expenses by category allows you to manage and budget your postal costs in a more efficient manner. - Page 124 8 • Standard Accounting (Option) Activating/Setting Up Standard Accounting Use the table below to step you through the process of setting up standard accounting (assuming you purchased it). The table covers the entire life cycle of an account, from creation to deletion. Step Action Description/Procedure Turns on the Accounting feature.
- Page 125 8 • Standard Accounting (Option) Activating/Setting Up Standard Accounting Step Action Description/Procedure Sets up your account name (and password if de- Create sired). See Creating an Account later in this chap- Account ter for procedure. Allows you to change the name and/or password Maintain (Edit) of an account.
-
Page 126: Turning On Standard Accounting
8 • Standard Accounting (Option) Turning On Standard Accounting You need to turn on the standard accounting feature in order to track postage by account. 1. At the home screen, press Options. 2. Press Page Down and select Turn items ON/OFF. Page OPTIONS ◄Turn items ON/OFF... -
Page 127: Turning Off Standard Accounting
8 • Standard Accounting (Option) Turning On Standard Accounting 6. The Select an Account screen displays (a sample is shown below). Press Page Down to see more choices (if lit). To select an account: Page SELECT AN ACCOUNT ◄1 (Use keypad) ◄0 None Page... -
Page 128: Turning On Account Passwords (Globally)
8 • Standard Accounting (Option) Turning ON Account Passwords (Globally) You can turn on the requirement for all operators to enter passwords when choosing an account. You need to set up a Supervisor password (see Chapter NOTE 1: 7, System Options) before you can enable Account passwords. You need to establish a password for each account to NOTE 2: complete the process. -
Page 129: Turning Off Account Passwords
8 • Standard Accounting (Option) Turning Off Account Passwords (Globally) You can turn off the requirement for operators to enter passwords (if passwords are set up) when choosing an account. 1. From Home screen, press the selection key next to ACCT: line to display the Accounts menu. -
Page 130: Creating An Account
8 • Standard Accounting (Option) Creating an Account You need to create an account before you can use the standard ac- counting feature to track postage. 1. From the Home screen, press the selection key next to ACCT: line to display the Accounts menu. 2. -
Page 131: Editing Account Names And Passwords
8 • Standard Accounting (Option) Editing Account Names and Passwords You can edit an account name and establish passwords for each ac- count if you wish. 1. From Home screen, press the selection key next to ACCT: line to display the Accounts menu. 2. - Page 132 8 • Standard Accounting (Option) Editing Account Names and Passwords 6. After the account is selected, you have a choice to edit the ac- count name or edit the account password (if the account pass- word option has been turned on). Edit Account Name option A.
-
Page 133: Selecting An Account
8 • Standard Accounting (Option) Selecting an Account You can select or change an account to track postage if standard ac- counting has been turned on. 1. From Home screen, press the selection key next to ACCT: line to display the Accounts menu. 2. -
Page 134: Displaying Account Totals
8 • Standard Accounting (Option) Displaying Account Totals You can view your account totals anytime using this option. 1. From Home screen, press the selection key next to ACCT: line to display the Accounts menu. 2. Press Page Down and select Display acct totals. Page ACCOUNTS ◄Edit an account... -
Page 135: Printing A Single Account Report
8 • Standard Accounting (Option) Printing a Single Account Report This report provides the postage amount and number of pieces ap- plied for a single account (if the Departmental Accounting feature is set up on your system). 1. Press Reports. 2. -
Page 136: Printing A Multi-Account Summary Report
8 • Standard Accounting (Option) Printing a Multi-Account Summary Report This report provides the postage amount and number of pieces ap- plied for all of your accounts, listed individually (if the Departmental Accounting feature is set up on your system). At a PC Using PC Meter Connect™... -
Page 137: At Mailing Machine
8 • Standard Accounting (Option) Printing a Multi-Account Summary Report At a PC Using PC Meter Connect™ (cont.) If you are accessing features from PC Meter Connect™, NOTE: please keep in mind the following: • If the system is in sleep mode, accessing a feature from the Main Window will awaken the machine. -
Page 138: Clearing An Account
8 • Standard Accounting (Option) Clearing an Account You can clear the postage totals on an account when necessary. IMPORTANT: Make sure your really want to clear an ac count. Once you do, the account in for ma tion is gone for ev er. 1. -
Page 139: Clearing All Accounts
8 • Standard Accounting (Option) Clearing All Accounts You can clear the postage totals on all accounts (for example, at the beginning of a new fiscal year) with this option. IMPORTANT: Make sure your really want to clear all your ac counts. Once you do, the account in for ma tion is gone for ev er. -
Page 140: Deleting An Account
8 • Standard Accounting (Option) Deleting an Account You can delete an account, but make sure you really want to be- cause you cannot get the information associated with that account back after it has been deleted. IMPORTANT: Make sure your really want to delete an ac count. Once you do, the account in for ma tion is gone for ev er. -
Page 141: Reports
9 • Reports Overview of Reports Your system allows you to print reports for funds usage, postage refills, postage tracked by account, and other valuable data. The re- ports are accessed by pressing Reports. Some reports can be printed on an envelope or tape strip; NOTE: others require an optional attached printer (laser). -
Page 142: Printing A Report
9 • Reports Printing a Report The report printing options available to you will depend on the type of report you have selected. Printing on an Envelope or Tape Strip 1. Press Menu. 2. Select Reports. 3. Select the appropriate report from the list. You may need to press the Page Down key to view additional reports. -
Page 143: Register Report (Funds Report)
9 • Reports Register Report (Funds Report) This report lists the postage used, postage available, pieces pro- cessed, and other information about your machine usage. 1. Press Reports. 3. Press Page Down and select Register Report. 3. When prompted, insert tape sheet or envelope into machine. The report is printed and you return back to the Reports menu. -
Page 144: Add Postage Report
9 • Reports Add Postage Report This report lists the last five postage refills. 1. Press Reports. 2. Select Add Postage Report. 3. When prompted, insert tape sheet or envelope into machine. The report is printed and you return back to the Reports menu. 4. -
Page 145: Single Accounts Report (Standard Accounting)
9 • Reports Single Accounts Report (Standard Accounting) This report provides the postage history for a single account (if the Standard Accounting feature is set up on your system). 1. Press Reports. 2. Select Single Account Rpt. 3. Key in an account. 4. -
Page 146: Multi-Account Summary Report (Standard Accounting)
9 • Reports Multi-Account Summary Report (Standard Accounting) This report provides the postage amount and number of pieces ap- plied for all of your accounts, listed individually (if the Standard Ac- counting feature is set up on your system). At a PC Using PC Meter Connect™ 1. -
Page 147: At Mailing Machine
9 • Reports Multi-Account Summary Report (Standard Accounting) At a PC Using PC Meter Connect™ (cont.) If you are accessing features from PC Meter Connect™, NOTE: please keep in mind the following: • If the system is in sleep mode, accessing a feature from the Main Window will awaken the machine. -
Page 148: Account List Report (Standard Accounting)
9 • Reports Account List Report (Standard Accounting) This is a laser printed report only that provides the postage amount and number of pieces applied to all of your accounts (if the Standard Accounting feature is set up on your system). 1. -
Page 149: Rates Summary Report
9 • Reports Rates Summary Report This report provides a summary of the rate files that are currently active in your system. You can print this as a way to confirm that you have received the latest rates. 1. Press Reports. 2. -
Page 150: Configuration Report
This report lists configuration information about your machine and Postage By Phone® account. It is generally a report you will not have to access unless your Pitney Bowes Customer Service Repre- sentative requests that you print it out. 1. Press Reports. -
Page 151: 10 • Maintenance
Waste Tank Full! The waste ink tank is full. If you haven't already, call the Supplies number for Pitney Bowes and order a waste ink pad replacement kit (see above). You will not be able to print postage in this condition. -
Page 152: Replacing The Ink Cartridge
10 • Maintenance Replacing the Ink Cartridge 1. Open the top cover. A Top Cover Open message displays. 2. Select Replace Ink Tank to continue (if you don't want to change the ink cartridge at this time, simply close the top cover). The message Moving ink tank to replacement position displays. - Page 153 10 • Maintenance Replacing the Ink Cartridge 5. Remove tape on bottom of new ink tank cartridge. 6. Lower the ink cartridge into the cavity (the label on the top of the cartridge should face the front of your system). The ridges on either side of the cartridge will slide into the grooves.
-
Page 154: Filling The Moistener
10 • Maintenance Filling the Moistener Refer to the following procedure to refill the moistener. 1. Check the moist en er tank to see how much sealing so lu tion is left. Fill Here Check Level Here 2. Add enough E-Z Seal to bring the sealant level up to the bottom ®... -
Page 155: Maintaining The Moistener
10 • Maintenance Maintaining the Moistener If you notice incomplete or poor sealing and the moistener tank is full, you may need to clean the moist en er brush or wick. If seal qual- i ty doesn't im prove af ter clean ing, you can replace the moistener brush or wick as need ed. - Page 156 10 • Maintenance Maintaining the Moistener Removing and Cleaning the Moistener Brush (cont'd) 3. Open the hinged brush holder. Brush Holder Brush 4. Grasp the bristles and slide the brush out of the hinged brush hold er, toward the front of the moistener tank.
-
Page 157: Removing/Cleaning The Moistener Wick And Holder
10 • Maintenance Maintaining the Moistener Removing and Cleaning the Moistener Wick and Holder This procedure assumes you have done steps 1 to 7 from NOTE: the previous Removing and Cleaning the Moistener Brush section. 1. Pull up and remove the holder and wick from the moistener as shown here. -
Page 158: Replacing The Print Head
10 • Maintenance Replacing the Print Head 1. Open the top cover. A Top Cover Open message displays. 2. Select Replace Ink Tank to continue (if you don't want to change the print head at this time, simply close the top cover). The mes- sage Moving ink tank to replacement position displays. - Page 159 10 • Maintenance Replacing the Print Head 5. Squeeze in on the two gray tabs on either side of the print head so that they slide toward each other. 6. While squeezing, lift and tilt the print head to the right toward the space for the ink cartridge.
- Page 160 10 • Maintenance Replacing the Print Head 8. Remove the protective tape or the black cap from the bottom of the replacement print head. Protective Tape Black Cap 9. Squeeze the two gray tabs on either side of the new print head and slightly angle the print head while pushing the print head flush against the wall.
- Page 161 10 • Maintenance Replacing the Print Head 11. Lower the ink cartridge into the cavity (the label on the top of the cartridge should face the front of your system). The ridges on either side of the cartridge will slide into the grooves. Ridge Ridge Groove...
-
Page 162: Running Print Tests
10 • Maintenance Running Print Tests The system has several tests that let you check print performance and help you determine printing problems. These tests are accessible by pressing Options, pressing Page Down to the third screen, and selecting Advance Features. Page OPTIONS ◄Advance the date... -
Page 163: Test Print
(see Replacing the Ink Car- tridge earlier this chapter) and then perform another test print (see above). If the ink cartridge replacement does not resolve the issue, con- tact Pitney Bowes (see page 10-13 SV62667 Rev. A... -
Page 164: Purge
5. Select Printer maintenance. 6. Select Purge. 7. You have a choice of four purges to use. Normally selecting Purge A is sufficient to purge the system, unless directed by a Pitney Bowes agent to do otherwise. Page PURGE ◄Purge A ◄Purge B... -
Page 165: Replacement Of Print Head Or Cartridge
10 • Maintenance Running Print Tests Replacement (of Print head or Cartridge) This option steps you through the procedure to replace either the print head or ink tank (cartridge). See Replacing the Ink Cartridge or Replacing the Print NOTE: Head at the beginning of this chapter which explains these pro- cedures in detail using figures. - Page 166 10 • Maintenance This page was put in as a placeholder so you can print this guide in a duplex (double-sided) mode while keeping the proper page positions. 10-16 SV62667 Rev. A...
-
Page 167: 11 • Troubleshooting
There may be times when you need help to solve a prob lem, or you may want more in for ma tion about how your mail ing system works. Pitney Bowes pro vides sev er al in for ma tion resources. See page v our web and phone support information. -
Page 168: Display Problems (Display Hard To Read)
11 • Troubleshooting Display Problems (display hard to read) The display contrast needs adjustment. 1. Press Options. 2. Select Adjust the Contrast. 3. Select Increase Contrast or Decrease Contrast to change the contrast level as necessary. 4. Press Home to return to the Home screen. Feeding Problems (stalled envelopes) 1. -
Page 169: Printing Problems
5. Select Printer maintenance. 6. Select Purge. 7. You have a choice of four purges to use. Normally selecting Purge A is sufficient to purge the system, unless directed by a Pitney Bowes agent to do otherwise. PURGE ◄Purge A ◄Purge B ◄Purge C... -
Page 170: Moistening Problems (Envelopes Don't Seal)
11 • Troubleshooting Moistening Problems (envelopes don't seal) Symptom Solution Make sure you slide the envelope flap under Incorrect feeding the blue edge of the feed deck. If you don't, the moistener can't wet the flap. Check the sight glass on the left side of the Low sealant level moistener tank. -
Page 171: Problems Connecting To The Data Center Via Analog Line
11 • Troubleshooting Problems Connecting to the Data Center via Analog Line Symptom Solution • Make sure you've connected your machine to a Improper phone dedicated an a log phone line (the same type you line or phone line connect your home phone to). If you are using not connected to a DSL line, you should use a DSL filter obtained machine... - Page 172 11 • Troubleshooting Problems Connecting to Data Center via LAN Network Symptom Solution Make sure you've connected your machine to a Machine may not be • work ing LAN Internet connection. Contact your connected to LAN network administrator if you suspect issues with Internet Connection your LAN network.
- Page 173 11 • Troubleshooting Problems Connecting to the Data Centre via the PC You can access www.pb.com using Internet Explorer but PC Meter Connect™ cannot detect the Internet (see also Troubleshooting in Appendix A - PC Meter Connect™.) 1. Right click on the PC Meter Connect tray icon and select Inter- ™...
- Page 174 11 • Troubleshooting Problems Connecting to the Data Centre via the PC You can access www.pitneybowes.ca using Internet Explorer but PC Meter Connect cannot detect the Internet (cont.) ™ Enter your own network's Proxy Address and Au- Solution B thentication settings (if used). Contact your IT administrator for these settings.
- Page 175 11 • Troubleshooting Problems Connecting to the Data Centre via the PC You can access www.pitneybowes.ca using Internet Explorer but you are having problems downloading files to your meter (see also Troubleshooting in Appendix A - PC Meter Connect™.) 1. Right click on the PC Meter Connect tray icon and select Inter- ™...
-
Page 176: Viewing System Configuration Levels
11 • Troubleshooting Viewing System Configuration Levels Sometimes in an effort to fix your problem over the phone, a Pitney Bowes agent may request you to look up the system level that is on your machine. Follow these steps to do this: 1. -
Page 177: 12 • Supplies And Options
Options Pitney Bowes offers a number of flexible options so you can tailor your mailing system to meet your exact needs today, and expand it as your business grows tomorrow. Contact your Pitney Bowes Sales... -
Page 178: Advertisements
Your system comes pre-loaded with several popular envelope adds. These give your mail a professional ap pear ance and can turn your mailings into a powerful pro mo tion al tool. Pitney Bowes can also provide additional envelope adds if your needs require it, up to a total of 20 envelope ads. - Page 179 • online support for your system • the Pitney Bowes Online Store, which provides an easy and con- venient way to order ink cartridges, E-Z Seal , envelopes, and ® other supplies for your system.
- Page 180 • an Internet connection Installation Download the PC Meter Connect™ software from the Pitney Bowes model-specific support website (see page v) to your PC with Internet access. Locate the USB cable supplied with your mailing machine and follow these instructions: 1.
- Page 181 ™ top icon will restart the software. Alternately, you may click on the Start button > All Programs > Pitney Bowes > PC Meter Connect. A PC Meter Connect icon will then appear in system tray.
- Page 182 Lists the PC Meter Connect software version. It also ™ About PC Meter allows you to send the software logs to Pitney Bowes Connect ™ support for troubleshooting purposes. Provides the model, serial number, and other informa-...
- Page 183 Appendix A • PC Meter Connect Desktop App. ™ PC Connect Main Window Once you double-click the desktop icon or the system tray icon, the PC Meter Connect™ Main window displays (see figure below). PC Meter Connect™ connects to the Data Center and provides the post- age amount in your machine, your pre-paidPostage-By-Phone ac- count balance, and lists any updates needed.
- Page 184 Appendix A • PC Meter Connect Desktop App. ™ PC Connect Main Window PC Meter Connect™ Main Window 1. Connection Status—indicates whether your PC can communi- cate with the Internet and to your mailing machine. A green check ✔ indicates a good connection, while a red means the devices cannot communicate.
- Page 185 Supplies - for ordering ink cartridges, E-Z Seal , envelopes, and ® other supplies for your machine from the Pitney Bowes web- site Updates - for downloading updates for your machine, updates to PC Meter Connect desktop application, postal inscriptions/...
- Page 186 Appendix A • PC Meter Connect Desktop App. ™ Feature Tabs Postage Postage Tab - Main Screen Support Information Provides the postage amount in your system, in your Prepaid account balance, and in your PitneyWorks balance. Task Panel Allows you to add postage to your meter. Simply: 1.
- Page 187 Appendix A • PC Meter Connect Desktop App. ™ Feature Tabs Supplies Supplies Tab - Main Screen Task Panel Provides links to the Pitney Bowes support website to order: • Supplies • Cleaning Kits • Envelopes • Envelope Ads •...
- Page 188 Support Information Provides the rate version information stored in your system, in either a summary or detail mode. Task Panel Allows you to connect to the Pitney Bowes Data Center and: • update the mailing system • perform a meter inspection A-10 SV62667 Rev.
- Page 189 Appendix A • PC Meter Connect Desktop App. ™ Feature Tabs Support Support Tab - Main Screen Task Panel Provides links to the Pitney Bowes support website for: • On-line Help • Demonstrations (Demos) about your machine • PDF of this guide •...
- Page 190 • viewing or printing accounting reports (see Chapter 8 - Standard Accounting) • link to INVIEW™ Total Meter Reporting on the Pitney Bowes website (if you have purchased that optional feature) My Meter - Refill History Screen A-12 SV62667 Rev. A...
- Page 191 Appendix A • PC Meter Connect Desktop App. ™ Feature Tabs My Meter (cont'd) Task Panel The Meter Settings screen (see below) provides access to these ad- ditional machine features: • Date and Time (see Chapter 4 - Printing Options) •...
- Page 192 Appendix A • PC Meter Connect Desktop App. ™ Feature Tabs My Meter (cont'd) Task Panel Ads & Inscriptions My Meter - Meter Settings Screen - Ads & Inscriptions (None Chosen) My Meter - Meter Settings Screen - Ads & Inscriptions (Chosen) A-14 SV62667 Rev.
- Page 193 Appendix A • PC Meter Connect Desktop App. ™ Feature Tabs My Meter (cont'd) Task Panel Warnings My Meter - Meter Settings - Warnings Screen Task Panel View Preset My Meter - Meter Settings Screen - View Preset A-15 SV62667 Rev. A...
- Page 194 PC (e.g., Norton, McAfee, etc.), please check your settings to ensure that FTP downloads are allowed. If FTP downloads are restricted, this will interfere with your machine downloading in- formation from the Pitney Bowes Data Center when using PC Meter Connect . If necessary, contact your network/IT adminis- ™...
- Page 195 Appendix A • PC Meter Connect Desktop App. ™ Displaying PC Meter Connect™ Icon on System Tray If you minimize or close the PC Meter Connect™ window, the appli- cation will still be running in the background as indicated by the icon in the system tray.
- Page 196 Appendix A • PC Meter Connect Desktop App. ™ Problems Connecting to the Data Center via the PC You cannot access www.pb.com from your PC using Internet Explorer Contact your IT administrator for any special setup needed to enable your PC and Internet Explorer to access the Internet. A-18 SV62667 Rev.
-
Page 197: Problems Connecting To The Data Center Via The Pc
Appendix A • PC Meter Connect Desktop App. ™ Problems Connecting to the Data Center via the PC You can access www.pb.com using Internet Explorer but PC Meter Connect™ cannot detect the Internet. 1. Right click on the PC Meter Connect tray icon and select Inter- ™... - Page 198 Appendix A • PC Meter Connect Desktop App. ™ Problems Connecting to the Data Center via the PC You can access www.pb.com using Internet Explorer but PC Meter Connect™ cannot detect the Internet (continued) Enter your own network's Proxy Address and Au- Solution B thentication settings (if used).
- Page 199 Appendix A • PC Meter Connect Desktop App. ™ Problems Connecting to the Data Center via the PC You can access www.pb.com using Internet Explorer but you are having problems downloading files to your machine 1. Right click on the PC Meter Connect tray icon and select Inter- ™...
- Page 200 Appendix A • PC Meter Connect Desktop App. ™ This page was put in as a placeholder so you can print this guide in a duplex (double-sided) mode while keeping the proper page positions. A-22 SV62667 Rev. A...
-
Page 201: When Is Text Entry Used
Appendix B • How to Enter Text When is Text Entry Used? Text is entered for these functions: • International mail (selecting a country) • Entering Postal Codes • Naming a Custom Preset • Naming an Account (in departmental accounting) How is Text Entry Done? Text entry is done via the numeric keypad in a fashion similar to cur- rent cell phone text entry. - Page 202 Appendix B • How to Enter Text Special Characters Special characters are accessed by repeatedly tapping the “1” key. Special characters include: Symbol Name Comma Ampersand & Asterisk Period Colon Currency symbol Minus sign (dash) Question mark Forward slash Backward slash Open parenthesis Close parenthesis Exclamation point...
- Page 203 Line–a standard phone line supplied by the phone company. Analog You use an analog phone line when you connect to the Pitney Bowes Data Centre using your machine's modem. Analog phone lines are usually Fax lines, residential phone lines, and lines used by modems or credit card readers.
- Page 204 —a small software application you install on PC Meter Connect ™ your PC to allow your meter to connect to the Pitney Bowes Data Centre through your PC’s Internet connection rather than over a standard telephone line. Postage refills and system software updates can be completed efficiently and much quicker via the Internet.
- Page 205 Appendix D • Specifications Equipment Base Model 9.7" (246 mm) H x 13.6" (345 mm) W Size x 15.8" (401 mm) D With Scale 10.1" (257 mm) H x 13.6" (345 mm) W x 15.8" (401 mm) D With Scale and Moistener 10.1" (257 mm) H x 18.5"...
- Page 206 Appendix D • Specifications Material (see also figure below) 5" x 3" (127 mm x 76 mm) Minimum Size 15" x 13" (381 x 330 mm) Maximum Size 7/8" (22 mm) Minimum Flap Depth 3" (76 mm) Maximum Flap Depth 0.007"...
- Page 207 Index Accounting, Standard Activating/Setting Up Standard Accounting (List of Steps) 8-2 Clearing All Accounts 8-17 Clearing One Account 8-16 Creating an Account 8-8 Deleting an Account 8-18 Displaying Totals 8-12 Editing Account Names and Setting Up Passwords 8-9 Printing a Multi-Account Summary Report 8-14 Printing a Single Account Report 8-13 Selecting an Account to Track Postage 8-11 Standard Accounting Overview 8-1...
- Page 208 LAN Network (Constant Connection) 6-5 Overview 6-1 PC Meter Connect™ 6-6 Confi guration Report, Machine Levels 9-10 Connecting to Data Centre.See Data Centre (Pitney Bowes) Connections on Back of Machine 2-6 Constant Connection (LAN Network) 1-5, 6-5 Contrast, Adjusting of LCD Display 7-5...
- Page 209 Index Data Centre (Pitney Bowes) Connecting via Analog Phone Line 6-7 Connecting via LAN Network (Constant Connection) 6-5 Connecting via PC Meter Connect™ 6-6 Settings Used for Connecting 6-16 Data Centre, Problems Connecting via Analog Line 6-17, 11-5 via LAN network 6-20, 11-6...
- Page 210 Index Enter/Yes Key 2-4 Envelope Feeding Problems 11-2 Proper Feeding 3-8, 3-10, 3-12, 3-15, 3-17 Sealing Only 4-6 Envelope Ad, Using and Downloading 4-9 Envelope Specifi cations D-2 Equipment Specifi cations D-1 Error Report 9-11 Establishing Communications Between Your Machine and Pitney Bowes Data Centre 6-1 External printer 2-6 External weighing platform 2-6...
- Page 211 Index Help, Getting 11-1 Home Screen, When Running Mail 3-1 Glossary Entry C-1 Illustration, of mailing systems 2-1, 2-2 Indicia.See Meter Stamp (see also "Printing") Ink Cartridge Messages Indicating Replacement 10-1 Order Number 12-1 Replacing 10-2 Ink Out, Message 10-1 Ink Waste Tank Location 2-3 Messages Indicating Replacement 10-1...
- Page 212 Index Machine Settings.See System Options Manually Changing Printed Date for the Meter Stamp 4-3 Manually Entering Weight 3-14 Material Specifi cations D-2 Messages Indicating Ink Cartridge Replacement 10-1 Messages Indicating Waste Ink Tank Replacement 10-1 Messages on the LCD Display 11-1 Meter Inspection, Perform 6-14 Meter Serial Number, Location on Refi...
- Page 213 Index Options.See Machine Settings Origin Postal Code Glossary Entry C-2 Overview, of Manual 1-1 Page Up/Page Down keys 2-4 Parts of the Machine Descriptions 2-3 Figures 2-2 Passwords Access On the Home Screen 3-1 Setting/Disabling Lock Code 7-15 Setting/Disabling Supervisor Password 7-16 Setting Up for Standard Accounts 8-9 Turning Off Account Passwords (Globally) 8-7 Turning On Account Passwords (Globally) 8-6...
- Page 214 Index Postage Adding funds (postage) to your Postage By Phone® account 6-1 Adding to Machine 6-10 Applying 3-6 Checking Funds in machine 3-2, 3-3, 6-8 Connecting to Data Centre to Add 6-1 Defi nition of Postage in Meter on Report 6-10 How it is Stored in Your Meter 6-1 How to Check Account Balance in Postage by Phone®...
- Page 215 Index Presets Custom, Defi ning New 5-8 Custom, Deleting 5-11 Custom, Description 5-6 Custom, Editing Preset Name 5-11 Custom, Selecting 5-7 Custom, Viewing the Values 5-9, 5-10 Glossary Entry C-2 Key Location 2-5 Normal Preset - Default Time Setting 7-8 Normal Preset - Defi...
- Page 216 Index Problems Accidentally Printing the Wrong Postage 11-10 Connecting to Data Centre via Analog Line 6-7, 11-5 Connecting to Data Centre via LAN Network 6-20, 11-6, A-20 Connecting to Data Centre via PC 6-21, A-19 Feeding 11-2 LCD Display 11-2 Moistening 11-4 Printing 11-3 Product Name v...
- Page 217 Index Scale Applying Postage With 3-7 Imperial Weight, Viewing 7-18 Location 2-3 Options 7-17 Ordering 10-2, 10-3 Scale Stabilizer, ON or OFF 7-7 Setting Options 7-17 Turning On/Off 7-18 Used in Applying Postage 3-7 Zeroing the Scale 7-17 Screen Selection Keys, Location of 2-4 Seal Only Mode 4-6 Security.See Passwords Serial Number...
- Page 218 Index System Options (Machine Settings) Adjusting the Contrast of the Display 7-5 Advanced Options Overview 7-21 Advancing the Printed Date for the Meter Stamp 7-2 Basic Options Overview 7-1 Change Language 7-21 Changing the Lock Codes and Passwords 7-15 Dial Prefi x 6-17 Distributor Values (connecting to Data Centre) 6-22, 6-23 Meter Withdrawal (Withdrawing Postage Funds) 7-22 Modem 6-19...
- Page 219 Index Time Correcting Drift 7-11 Setting Daylight Savings 7-11 Setting System Time 7-12 Timeouts for Normal Preset to Appear 7-8 Sleep Mode 7-9 Top Cover 2-2 Transport Release Lever 2-3 Troubleshooting.See Problems USB Ports 2-6 Utility Slot 2-3 Warnings, Ink Related 10-1 Weighing.See also Scale Entering Weight Manually 3-6 Platform Description/Location 2-3...
- Page 220 Index This page was put in as a placeholder so you can print this guide in a duplex (double-sided) mode while keeping the proper page positions. I-14 SV62667 Rev. A...
- Page 221 5500 Explorer Drive Mississauga, Ontario L4W 5C7 www.pitneybowes.ca For Service or Supplies PB Form SV62667 Rev. A 10/11 © 2011 Pitney Bowes Inc. All Rights Reserved *sv62667revA*...
Need help?
Do you have a question about the DM125 and is the answer not in the manual?
Questions and answers