
Summary of Contents for Fixstars GigaAccel 180
- Page 1 IBM PowerXCell™ 8i Accelerator Board GigaAccel 180 User’s Manual Copyright © Fixstars Corporation. All rights reserved.
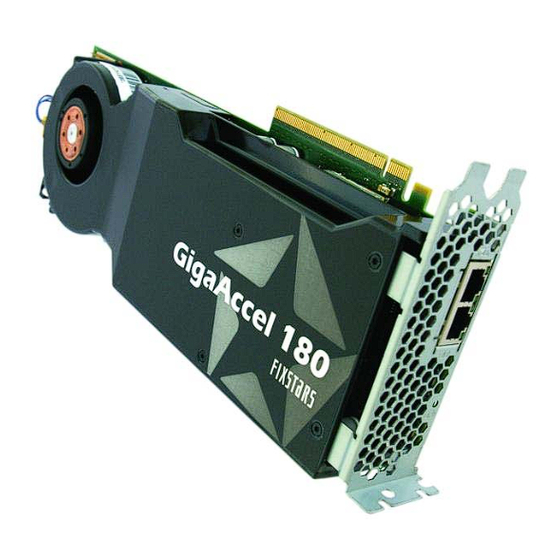
- Page 2 Thank you for purchasing GigaAccel 180. This “GigaAccel 180 User’s Manual” describes how to set up, configure, and start up the GigaAccel 180. Included accessories Please confirm that the following items are included in the package. (1) GigaAccel 180 (2) Serial cable...
-
Page 3: Table Of Contents
2.2 LED descriptions ....................... 4 3 Connection of GigaAccel 180 ..........5 3.1 Preparations ........................5 3.2 Directions of connection ....................5 4 Installation of GigaAccel 180 (NFS) ....... 8 4.1 Preparations ........................8 4.2 Disable services ......................... 8 4.3 Network settings ....................... 9 4.4 Prepare to create boot image and disk image .............. - Page 4 7.3 Start up PCI Express ...................... 33 7.4 Stop PCI Express driver ....................33 7.5 Reset PCI Express driver ....................33 Appendix A – Installing GigaAccel 180 (Fedora7) ....34 A.1 Preparations ........................34 A.2 Host settings ........................34 A.3 Network settings ......................35 A.4 Installation of necessary services ..................
-
Page 5: Introduction
1 Introduction GigaAccel 180 is an accelerator board based on IBM’s PowerXCell 8i processor. The board has 4GB of DDR2 SDRAM, two 1 Gigabit Ethernet Ports, one x16 PCI Express interface, and it can run Linux. This makes it possible to put the vastly superior floating-point calculation capabilities of PowerXCell 8i on a standard workstation. -
Page 6: Names Of Each Parts
2.1 Interfaces Main interfaces are as follows. x16 PCI Express x16 PCI Express eth1 eth1 eth0 eth0 Serial Port Serial Port Power port Power port (1) x16 PCI Express: Connector to host machine Copyright © Fixstars Corporation. All rights reserved. - Page 7 This board is also compatible with 2x3 power connectors, please use the pins outlined in blue when using a 2x3 connector. Power port (2x3pin) Power port (2x4pin) Power port (2x3pin) Power port (2x4pin) Copyright © Fixstars Corporation. All rights reserved.
-
Page 8: Led Descriptions
Pins are “T2OUT”, “GND”, and “R2IN” from top to bottom in the picture below. Serial port Serial port 2.2 LED descriptions Various LEDs light up on the side of the board with Ethernet ports when GigaAccel 180 is powered on. These LEDs indicate the current status of GigaAccel 180. ⑦ ⑥ ⑤... -
Page 9: Connection Of Gigaaccel 180
3 Connection of GigaAccel 180 This section explains the instructions for connecting GigaAccel 180 onto the host machine. The target host machine must have a x16 PCI Express interface (2 slots), and an AUX 12V 6-pin power connector for PCI Express. - Page 10 [Note] PCI-express connectors must be handled with care. If the connector is not installed firmly on the slot, GigaAccel180 may not function correctly. (4) Attach the PCI Express AUX 12V 6-pin power connector to GigaAccel 180. AUX12V 6-pin power connector...
- Page 11 Serial Connector(9pin) (6) Connect the Ethernet cable (crossover) to the eth0 port of GigaAccel 180. The port will be used for network booting and NFS mounting. In the following picture, the host machine has DHCP server, TFTP server and NFS server.
-
Page 12: Installation Of Gigaaccel 180 (Nfs)
(NFS) This section describes how to create the GigaAccel 180 disk image and how to install it to GigaAccel 180. If you are using an OS other than Yellow Dog Enterprise Linux for GigaAccel 180, please skip this section. Also, this instruction assumes that CentOS5.4 is installed on the host machine (x86, 64 bit). -
Page 13: Network Settings
IPADDR=192.168.2.10 NETMASK=255.255.255.0 4.4 Prepare to create boot image and disk image Set the DVD (Yellow Dog Enterprise Linux for GigaAccel 180) into the host machine. Create the installer directory, and mount the DVD drive to the installer directory. # mount /dev/cdrom /mnt -o ro # mkdir -p /nfsroot/ydlinstaller # mount /mnt/iso/ydel-X.X.X-cell.iso /nfsroot/ydlinstaller -o loop... -
Page 14: Nfs Service Settings
← IP address of TFTP server next-server 192.168.2.10; ← Boot image file name filename “ppc64.img”; GigaAccel 180 eth0 MAC address is printed on the side of GigaAccel 180 as “1ST MAC:--- ”. Set the DHCP service start up option as follows. # vi /etc/sysconfig/dhcpd... -
Page 15: Restart Gigaaccel 180
# minicom Pressing ‘s’ while GigaAccel 180 is running will display the command prompt. * When you configure the host machine, GigaAccel 180 may fail to boot. In this case, press ‘Enter’ key and then the commad prompt is displayed. -
Page 16: Start Up Gigaaccel 180
“root” Password: Password entered during installation process * To login GigaAccel 180 and to operate, we recommend ssh login described in the following. (2) SSH login Shortly after the host machine has started up the GigaAccel 180 OS will also start up. -
Page 17: Network Installation Of Additional Packages
Yellow Dog Enterprise Linux user name and password which were notified separately. * To connect to the external network, login to GigaAccel 180, and then, configure “/etc/sysconfig/network-scripts/ifcfg-eth1” file, activate eth1 (by “ifup eth1” command). - Page 18 After the configuration is complete, install package(s) with the yum command. Install the necessary package(s) at this time. in the following example, the gcc package is being installed. # yum install gcc Copyright © Fixstars Corporation. All rights reserved.
-
Page 19: Dvd Installation Of Additional Packages
Mount the installer DVD and the installer image on the host. # mount /dev/cdrom /mnt -o ro # mount /mnt/iso/ydel-X.X.X-cell.iso /nfsroot/media/DVD -o loop * The following actions will be performed on the GigaAccel 180. Create the mount directory on the host. # mkdir -p /media/DVD Mount the installer DVD on the GigaAccel 180. - Page 20 After editing the configuration file, restart NFS service. # service nfs restart Unmount the installer image and the installer DVD from host. # umount /nfsroot/media/DVD # umount /mnt Finally, remove the installer DVD from the DVD drive. Copyright © Fixstars Corporation. All rights reserved.
-
Page 21: Installing Gigaaccel 180 (Cifs)
5 Installing GigaAccel 180 (CIFS) This section describes how to set up CIFS boot in GigaAccel 180. If you are using nfs boot, there is no need to read this section. The OS is Yellow Dog Enterprise Linux on GigaAccel 180. -
Page 22: Network Settings
“Local Area Connection” will be used for the external network connection (assigned IP address by DHCP server) and “Local Area Connection 2” will be used for communications with GigaAccel 180. In “Local Area Connection 2”, assign the IP address (192.168.2.10) beforehand. - Page 23 Local Area Connection 2 Copyright © Fixstars Corporation. All rights reserved.
-
Page 24: Firewall Settings
Open “Advance” tab and clear the check box for “Local Area Connection 2”. 5.5 Create boot file and file system Perform creating CIFS boot file and file system for CIFS of GigaAccel 180. Insert “GigaAccel 180 Install DVD” in the host machine. -
Page 25: Configuration Of Folder Sharing
Perform sharing the folder(c:¥CIFS) which you created and put the file system in it. Here is how to configure file sharing. Right click CIFS folder. Select “Share…” Then opened “Sharing” tab in “CIFS Properties”. Click “Advanced Sharing…”. Copyright © Fixstars Corporation. All rights reserved. - Page 26 Then opened “Advaced Sharing” window. Select “Share this folder”, and then click “Permissions” button. Then opened “Permissions for CIFS” window. Click “Add…” button. Copyright © Fixstars Corporation. All rights reserved.
- Page 27 Type “root” in the object names to select, and then click “OK” button. Select “root” user and check the “Full Control” box. * You are recommended to delete “Everyone” user in security. Copyright © Fixstars Corporation. All rights reserved.
-
Page 28: Installation Of Tftp Service
Services page. 5.8 TFTP Service settings Run tftpd32_gui.exe in the unpacked folder and configure as follows. If the firewall warning appears, close firewall warning. After tftpd32 start, click “Setting” button. tftpd32 start page Copyright © Fixstars Corporation. All rights reserved. -
Page 29: Troubleshooting
The second field : //192.168.2.10/CIFS /cifs -o user=root,password=passw0rd [Note] You can enter the second field in less than 63 characters. If an invalid value is entered, GigaAccel 180 can not boot. If GigaAccel 180 can not boot, please refer to the troubleshooting. -
Page 30: Installation Of Terminal Software
5.9 Installation of Terminal Software To confirm the boot status of GigaAccel 180 (to show Serial Console), terminal software is necessary. This section describes the installation of “Tera Term Pro”(http://ttssh2.sourceforge.jp/index.html.en). Go to the download page and download the installer. Run the installer and install with the default settings. -
Page 31: Start Up Gigaaccel 180
In default configuration you can log in as the “root” user and password is “passw0rd”. (“0” is zero.) * When GigaAccel 180 is running you can log in by ssh. The default IP address of GigaAccel 180 is “192.168.2.11” (this is assigned by the DHCP feature of tftpd32). -
Page 32: Network Installation Of Additional Packages
Ensure that configuration settings allow GigaAccel 180 to connect to the external network. Also, make sure to have on hand the Yellow Dog Enterprise Linux user name and password which were notified separately. - Page 33 After the configuration is complete, install package(s) with the yum command. Install the necessary package(s) at this time. in the following example, the gcc package is being installed. # yum install gcc Copyright © Fixstars Corporation. All rights reserved.
-
Page 34: Dvd Installation Of Additional Packages
* The following actions will be performed on the GigaAccel 180. Create the mount directory. # mkdir -p /media/DVD CIFS Mount the Installer DVD and mount install image on the GigaAccel 180. # mount -t cifs //192.168.2.10/DVD /mnt -o ro # mount /mnt/iso/ydel-X.X.X-cell.iso /media/DVD -o loop Create the yum repo file. -
Page 35: Upgrading Ydel
6 Upgrading YDEL About upgrading YDEL, please refer to URL http://us.fixstars.com/support/solutions/ydel_6.x/upgrade_6_0_to_6_1.shtml. [Note] If you use Windows enviroment, you can not upgrade from YDEL6.0 to YDEL6.1. Copyright © Fixstars Corporation. All rights reserved. -
Page 36: Start Up Pci Express Driver (For Linux Host)
7.1 PCI Express driver overview If the OS of the host machine is Linux, installing the PCI Express driver will allow TCP/IP communications with GigaAccel 180 via PCI Express. However, to conduct TCP/IP communications, the driver must be running on both the host machine and GigaAccel 180. -
Page 37: Start Up Pci Express
Stop the PCI Express driver with the following command. (On both the host and GigaAccel 180) # service pxcab stop [Note] If the driver was stopped on both the host and GigaAccel 180, then use the following command on both the host and GigaAccel before starting the drivers again. # modprobe axon... -
Page 38: Appendix A - Installing Gigaaccel 180 (Fedora7)
This section describes how to create the GigaAccel 180 disk image and how to install GigaAccel 180 so that it can start up. If you are using an OS other than Fedora 7 for GigaAccel 180, then skip this section. -
Page 39: Network Settings
Decompress the Fedora7 file system for GigaAccel 180 which was downloaded beforehand into “/nfsroot” folder. # mkdir -p /nfsroot # cd /nfsroot # tar zxf Fedora-7-image-pxcab-UI.tgz Copy GigaAccel 180 kernel RPM into the file system for GigaAccel 180. # cp kernel-X.X.XX-X.YYYYMMDDpxcab.ppc64.rpm /nfsroot/Fedora7-pxcab-UI/tmp Copyright © Fixstars Corporation. All rights reserved. -
Page 40: Nfs Service Settings
Restart the NFS services after editing the configuration file. # service nfs restart A.7 Prepare the boot image Prepare the boot image for GigaAccel 180. Copy GigaAccel 180 kernel boot image downloaded beforehand to “/tftpboot” folder. # ls /tftpboot zImage-X.X.XX-X.YYYYMMDD.pxcab.img A.8 DHCP service settings... -
Page 41: Tftp Service Settings
MAC address of GigaAccel 180 eth0 is printed on the side of GigaAccel 180 as “1 MAC: ~” Set the DHCP service start up option as follows. # vi /etc/sysconfig/dhcpd (setting value) DHCPDARGS=eth0 Restart the DHCP service after editing the configuration file. -
Page 42: Start Up Gigaaccel 180
A.10 Start up GigaAccel 180 This section describes how to network boot GigaAccel 180. (1) Restart host machine The power source of GigaAccel 180 needed to start it up comes from the host machine, so it needs to be rebooted. (2) Perform SSH login Shortly after the host machine has started up the GigaAccel 180 OS will also start up. -
Page 43: Appendix B - Gigaaccel 180 Specifications
Appendix B – GigaAccel 180 Specifications GigaAccel 180 hardware specifications are as follows. GigaAccel 180 complies with “PCI Express Card Electromechanical Specification” and “PCI Express x16 Graphics 150W-ATX Specification” in almost all cases. Hardware specifications Main Processor IBM PowerXCell 8i Processor... - Page 44 Operating environment GigaAccel 180 operating environment is as below. Temperature: 10 ~ 40 °C Humidity: 5 ~ 95 % (Non condensing) Altitude: -400 ~ 3000 m Copyright © Fixstars Corporation. All rights reserved.
-
Page 45: Appendix C - Using Serial Console
Appendix C – Using Serial Console The status check of GigaAccel 180 can be done by using the serial console (minicom). To use the serial console, a serial cable is necessary. * Skip Appendix B if the host doesn’t use a Linux OS. -
Page 46: Appendix D - Common Console Commands
Appendix D – Common Console Commands Press the ‘s’ key during GigaAccel 180 start up to display the command prompt. The following describes the common commands. Command Description boot Start from the reading of boot image. reset-all (or ‘reboot’) Restart from the open firmware boot. -
Page 47: Appendix E - Troubleshooting
Confirm that power connector is attached. See “3.2 Directions of connection” GigaAccel 180 OS does not start up (cannot make SSH connection) Confirm that host eth0 and GigaAccel 180 eth0 are both connected with an Ethernet crossover cable. See “3.2 Directions of connection”... -
Page 48: Operational Troubleshooting
Freezes while displaying the message “Trying to load: root=/dev/ram … Bootloader 1.6”.(*1) Confirm that the host eth0 and GigaAccel 180 eth0 are connected with an Ethernet crossover cable. *1 When the host OS is Windows, freezes while displaying the message “Trying to load: root=/dev/ram ramdisk=131072 from: net …... - Page 49 Error occurred during NFS mount. Check the NFS server error log (/var/log/message) “kernel panic – not syncing : No init fount” message GigaAccel 180 disk image is incorrect. Confirm the directory structure at NFS mount path. “mount: Mounting /cifs/ga180root-cifs.ext3.xxx. xxx. xxx. xxx on /sysroot failed: No such file or directory”...
- Page 50 The contents of this document are for the standard use and configuration of GigaAccel 180, but it does not guarantee the actual operations of the device. Therefore, customers are liable when using this device. Fixstars is not liable for any damages, etc. incurred from the use of this device.
Need help?
Do you have a question about the GigaAccel 180 and is the answer not in the manual?
Questions and answers