Table of Contents
Advertisement
Advertisement
Table of Contents

Related Manuals for Mitel 5610 IP Dect Stand


Summary of Contents for Mitel 5610 IP Dect Stand
- Page 1 MITEL COMMUNICATIONS DIRECTOR PLATFORM AND 5000 COMMUNICATIONS PLATFORM...
- Page 2 Mitel Networks™ Corporation (MITEL ). The information is subject to change without notice and should not be construed in any way as a commitment by Mitel or any of its affiliates or subsidiaries. Mitel and its affiliates and subsidiaries assume no responsibility for any errors or omissions in this document.
-
Page 3: Table Of Contents
Configuration and Administration Guide INTRODUCTION ....................... 1 What’s New in This Release ....................1 Requirements and Conditions ..................... 2 Using a Repeater ......................... 2 About the Handset Connection Status Indicators ..............3 5610 Cordless Handset Feature Set ................... 3 Related Documentation ....................... 5 REGISTRATION AND CONFIGURATION .............. - Page 4 Configuration and Administration Guide Options->Active calls ........................21 Options->VoIP Line ........................21 OK->Contacts ..........................21 OK->Settings ..........................21 OK->Messages ..........................21 OK->Call Log ..........................21 Network Configuration Notes ..................... 22 IP Configuration ..........................22 File Transfer Protocol ........................22 DHCP ............................. 23 VLAN Tagging ..........................
- Page 5 Call Forwarding ..........................46 Hospitality Features ........................46 Do Not Disturb ..........................46 Feature Interactions ......................47 Call log............................47 Personal Ring Group (PRG) ......................47 MAINTENANCE ...................... 47 Firmware Updates ......................47 Download the Firmware ........................ 47 Schedule Automatic Firmware Updates ..................47 Firmware Update Error Codes ......................
-
Page 7: Introduction
The IP DECT stand connects to the network through the PC port on a Mitel 5312, 5320, 5324, 5330, 5340 or 5360 IP Phone. The IP DECT stand provides call transfer, conferencing, and other basic features between handsets. -
Page 8: Requirements And Conditions
Configuration and Administration Guide Requirements and Conditions An MCD system must have software MCD Release 4.0 SP1 or later to support the Mitel 5610 Cordless Handset and IP DECT stand. A 5000 CP must be equipped with v4.0 or later software. -
Page 9: About The Handset Connection Status Indicators
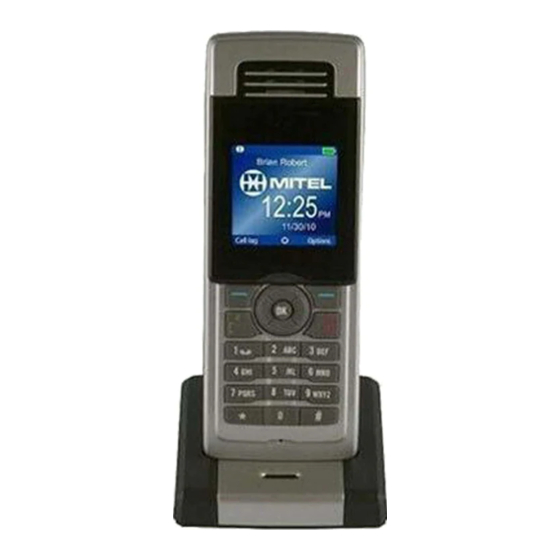
About the Handset Connection Status Indicators The two semi circles in the top left corner of the handset main display indicate the connection status of the handset. The left semi-circle indicates the status of the handset registration to the stand; the right semi-circle indicates the status of the SIP connectivity to the communication platform. - Page 10 Configuration and Administration Guide Contact directory (Maximum of 170 entries per stand) Speed dial Conferencing (3-party conference) Call hang up – upon return to charging cradle DTMF sending in call (RFC2833) Audio features Mute (disable microphone) Receiver volume control Ring tones melodies Ringer volume Key sounds (click, DTMF and special tones)
-
Page 11: Related Documentation
There are separate versions of this guide for the MCD and 5000 Registration and Configuration After you have physically installed the IP DECT Stand to a Mitel IP Phone, you must register the handsets with the IP DECT Stand. You can then configure the 5610 cordless handsets for operation either ... -
Page 12: Complete Device Programming
Before you configure a 5610 Cordless Handset on the IP DECT Stand, complete the following MCD programming tasks. Refer to the MCD System Administration Tool online help for instructions: 1. Program the Mitel IP Phone that is connected to the IP DECT Stand on the MCD. 2. Register the Mitel IP Phone with the MCD. -
Page 13: 5000 Cp Sip Phone Programming
5610 cordless handset to their desktop phone. The Handoff key is only supported on Mitel desktop phones. It is not supported on SIP devices and you cannot program it on a 5610 cordless handset. -
Page 14: Register The Handsets With The Ip Dect Stand
Configuration and Administration Guide Configure Dynamic Extension Express (Optional) Dynamic Extension Express (DEE) allows you to associate two or more devices for a single user under a common main extension number. You can use DEE to “twin” a person's desktop phone and his or her 5610 Cordless Handset together. -
Page 15: Configure Handsets Via Ip-Dect Stand Configurator Web Interface
6. Press Erase to delete the current entry (0.0.0.0). 7. Enter a static IP address for the stand. To enter periods in the address, press Options and then press Insert symbols. Press OK. Save? Appears in the display. Press Yes. 8. - Page 16 Refer to IP DECT Stand Configuration Notes on page 17 for additional details. Figure 1: Example of Mitel IP DECT Stand Configurator Web Interface 8. In the left frame of the configurator web interface, click VoIP Account 1.
- Page 17 Account Enter the handset directory number (as programmed on the MCD system). Password Enter the User PIN code that you programmed in the “User and Device Configuration” form on the MCD for this directory number. The entry in this field must match the code that is entered in the User PIN field.
- Page 18 Configuration and Administration Guide To have calls that are made to any of the accounts ring all handsets, check all the boxes: In the example below, the grid is configured such that calls to Account 1 ring Handset 1 and Handset 2.
- Page 19 14. Click SAVE CHANGES at the bottom of the screen. 15. In the left frame of the configurator web interface, click Time Settings. Enter the hostname of a Time Server on the internet, for example: “clock.mitel.com” or “pool.ntp.org” Enter the time server refresh interval, for example: 255 Set the time difference between Greenwich Mean Time (GMT) and your current location.
-
Page 20: Configure Handset From The Handset Display Menu
Configuration and Administration Guide Configure Handset from the Handset Display Menu It’s recommended that you configure the handsets using the web configurator interface. Also, there are certain parameters that you can only program through the web interface. However, you can perform basic configuration of individual handsets from the handset’s display menu. - Page 21 17. Select Time and Date and press OK. 18. Select Time Server and press OK. 19. Using the dial pad, enter the hostname of a time server on the internet, such as “clock.mitel.com” or “pool.ntp.org”, and press OK. 20. Press Yes to save.
-
Page 22: Change The Handset Display Name And Pin Code
Configuration and Administration Guide After approximately 30 seconds, the handset idle display appears. Basic handset configuration is complete. Change the Handset Display Name and PIN Code After configuring the handsets, change the default username and the default PIN code to prevent unauthorized access. -
Page 23: Ip Dect Stand Configuration Notes
STUN settings are not required unless the stand and MCD are separated by a SIP-aware firewall. Use the default RTP settings. Leave Signaling of Silence Suppression disabled. Setup->IP Settings You can use DHCP to provide a dynamic IP address to the handsets. Standard Mitel DHCP options (43/60 or 124/125) are not supported. -
Page 24: Setup->Pincode Settings
Configuration and Administration Guide Setup->Pincode Settings This web page allows you to set the PINs for accessing the IP DECT stand (via the handset) and the external tftp account settings. Setting Description Enter the 3 to 8 digit PIN code that the user Voip Settings Pincode must enter on the handset to access system menus (for example, System settings). - Page 25 If the user rejects the call, the call follows the CFNA (Call Forward No Answer) routing that is programmed on the MCD. If there is no Call Forward No Answer handling, the far end will continue to hear ringback until they disconnect. If you set this option to “Disable”, the IP-DECT base returns a busy signal if the called party is busy on a call.
-
Page 26: Setup->Time Settings
Configuration and Administration Guide Phonebook on page 41 for details. Configuration File Setup->Time Settings The IP DECT stand does not support the use of the DATE header in the SIP REGISTER message to provide the time and date information. The system requires the use of an NTP server. -
Page 27: 5610 Handset Configuration Notes
5610 Handset Configuration Notes About the Handset Menu The 5610 handset menu provides an interface to the IP DECT stand to allow the user to control the handset capabilities. From the idle screen, there are three soft key options: Call log”, “o” (selected by pressing the OK key”), and “Options”. -
Page 28: Network Configuration Notes
Configuration and Administration Guide Network Configuration Notes The following sections provide network configuration details. IP Configuration You can configure the 5610 Cordless Handset to obtain its IP address via DHCP or to use a static IP address. The IP settings can be changed from the handset menu: Settings – Internet settings, or from the web server “IP Settings”... -
Page 29: Dhcp
DHCP The handsets can be provisioned with an IP address automatically by using DHCP. When configured, the DHCP option 66 returns an IP address or a DNS string of a TFTP server. The handsets use this DHCP feature to retrieve the address of the configuration server. Even though DHCP specifications refer to the TFTP, the handsets use the retrieved address for HTTP as well, if transport is configured for HTTP (HTTP is default method). -
Page 30: Sip Configuration
Configuration and Administration Guide SIP Configuration SIP Server and SIP Accounts The SIP server domain and proxy address can be configured from the handset menu: Settings – VoIP settings – Accounts. Up to eight different servers can be configured individual via the menu “Accounts”. - Page 31 The web server gives access to the following additional settings: Name Values Description This parameter specifies how a SRV_0_SIP_URI_DOMAIN_CONFIG 0 (default) destination URI of the format SIP:<user>@<domain> for an outgoing call must be specified with respect to the <domain> part. Possible values are: 0: If application omits <domain>...
-
Page 32: Stun, Rport, Sip Port Settings
Configuration and Administration Guide SIP server example setup from configuration file: %SRV_0_SIP_UA_DATA_DOMAIN%:"proxy.goip.dk " %SRV_0_SIP_URI_DOMAIN_CONFIG%:0 %SRV_0_SIP_UA_DATA_SERVER_PORT%:5060 %SRV_0_SIP_UA_DATA_SERVER_TYPE%:0 %SRV_0_SIP_UA_DATA_SERVER_IS_LOCAL%:1 %SRV_0_SIP_UA_DATA_REREG_TIME%:3600 %SRV_0_SIP_UA_DATA_PROXY_ADDR%:"proxy.goip.dk " %SRV_0_SIP_UA_DATA_PROXY_PORT%:5060 %SRV_0_DTMF_SIGNALLING%:0 %SRV_0_SIP_UA_CODEC_PRIORITY%:1,0,2,4,255 %SUBSCR_0_SIP_UA_DATA_VOICE_MAILBOX_NAME%:"" %SUBSCR_0_SIP_UA_DATA_VOICE_MAILBOX_NUMBER%:"" STUN, RPORT, SIP Port Settings STUN mode, RPORT, RTP port and SIP port can be configured from the web server “NAT/RTP Settings”... - Page 33 SIP_STUN_KEEP_ALIVE_TIME defines in seconds how often keep-alives are sent in order to keep NAT bindings. If SIP_STUN_BINDTIME_DETERMINE is set, SIP_STUN_KEEP_ALIVE_TIME will be overruled and keep alives will be sent with a frequency of half of determined bindtime SIP_SIP_PORT 5060 (default) Local SIP port. Port used for first UA instance.
-
Page 34: Pin Protection Of Handset Menus
Configuration and Administration Guide PIN Protection of Handset Menus This setting is used for adding pin code protection of the following handset menus: VoIP settings Network settings menu System settings menu Telephony Settings | VoIP line ... -
Page 35: Web Server Customization
<IPEI> can be defined as: a text string of the octal representation of the IPEI, eg: %DECT_SUBS_1%:"023140003610" a comma separated 5 bytes hex number, eg: %DECT_SUBS_1%: 0x00,0x99,0x80,0x04,0xA2 The <IPEI> can be retrieved from the handset MMI: Settings ->System settings -> Handset settings - >... -
Page 36: Automatic Dst (Daylight Saving Time) Adjustment
Configuration and Administration Guide Figure 2: LOCAL_HTTP_SERVER_TEMPLATE_TITLE Parameter Controls Headlines in Web Interface Automatic DST (Daylight Saving Time) adjustment DST handling can be handled manually or automatically. If manual configuration is chosen the user can change the setting from the handset MMI or it can be set in the configuration files. Automatic handling of DST allows flexible definition of the DST start and end time. -
Page 37: Dst_Start_Month
Name Possible values Description DST_ENABLE 0,1,2 [DST OFF, Enables or disables the DST and DST ON, DST automatic DST Automatic] (default = 2) DST_FIXED_DAY_ENABLE 0: Use Month, DayOfWeek, LastInMonth 1: Use Fixed day. (default = 0) DST_START_MONTH 1..12 DST start month. (default=4, April) DST_START_DATE 1..31 DST start date. -
Page 38: Logs
Configuration and Administration Guide Logs The gateway continuously logs information to an internal log buffer. This log can be viewed using the internal web server or the gateway can be configured to automatically upload the log files to the boot server. - Page 39 Figure 3: Network Topology of a Typical Office Configuration Solution. Note: Optionally security can be ensured by encryption of the configuration file as well as server side authentication by username and password may be utilized. Configuration files can be encrypted with a software utility (EnDecryptFiles.exe) which implements AES-128. You must enter the handset configuration settings in a plain text based configuration file for each IP DECT Stand.
- Page 40 Configuration and Administration Guide Figure 4: Installation Process Using Configuration Server Figure 5: Example of Handset Configuration file on TFTP server...
-
Page 41: Handset Configuration File
Handset Configuration File The following is an example of a fully functional configuration file <<Handset MAC address>>.cfg file for the 5610 Cordless Handset and IP DECT Stand product: ~RELEASE=VOIPLANMAXWELL_FP_V0110 %CLIR_CODE_ENABLE_UA_0%:0 %CLIR_PREFIX_UA_0%:"" %CLIR_CODE_ENABLE_UA_1%:0 %CLIR_PREFIX_UA_1%:"" %CLIR_CODE_ENABLE_UA_2%:0 %CLIR_PREFIX_UA_2%:"" %CLIR_CODE_ENABLE_UA_3%:0 %CLIR_PREFIX_UA_3%:"" %CLIR_CODE_ENABLE_UA_4%:0 %CLIR_PREFIX_UA_4%:"" %CLIR_CODE_ENABLE_UA_5%:0 %CLIR_PREFIX_UA_5%:""... -
Page 42: Dst_Start_Wday_Last_In_Month
Configuration and Administration Guide %USER_VOIP_LINE_PP6%:6 %USER_VOIP_LINE_PP7%:7 %USER_VOIP_LINE_PP8%:8 %DECT_SUBS_MATCH_IPEI%:1 %DECT_SUBS_1%:1,48,31,3,86 %DECT_SUBS_2%:1,48,31,3,91 %DECT_SUBS_3%:1,48,30,253,49 %DECT_SUBS_4%:1,48,30,254,25 %DECT_SUBS_5%:0,0,0,0,0 %DECT_SUBS_6%:0,0,0,0,0 %DECT_SUBS_7%:0,0,0,0,0 %DECT_SUBS_8%:0,0,0,0,0 %FWU_POLLING_ENABLE%:0 %FWU_POLLING_MODE%:0 %FWU_POLLING_PERIOD%:86400 %FWU_POLLING_TIME_HH%:3 %FWU_POLLING_TIME_MM%:0 %DST_ENABLE%:2 %DST_FIXED_DAY_ENABLE%:0 %DST_START_MONTH%:3 %DST_START_DATE%:1 %DST_START_TIME%:2 %DST_START_DAY_OF_WEEK%:1 %DST_START_WDAY_LAST_IN_MONTH%:2 %DST_STOP_MONTH%:11 %DST_STOP_DATE%:1 %DST_STOP_TIME%:2 %DST_STOP_DAY_OF_WEEK%:1 %DST_STOP_WDAY_LAST_IN_MONTH%:0 %FWD_ON_BUSY_ACT_2%:"" %FWD_ON_BUSY_DEACT_2%:"" %FWD_ON_NO_ANSWER_ACT_2%:"" %FWD_ON_NO_ANSWER_DEACT_2%:"" %FWD_UNCOND_ACT_2%:"" %FWD_UNCOND_DEACT_2%:"" %FWD_ON_BUSY_ACT_3%:"" %FWD_ON_BUSY_DEACT_3%:""... - Page 43 %FWD_ON_NO_ANSWER_ACT_5%:"" %FWD_ON_NO_ANSWER_DEACT_5%:"" %FWD_UNCOND_ACT_5%:"" %FWD_UNCOND_DEACT_5%:"" %FWD_ON_BUSY_ACT_6%:"" %FWD_ON_BUSY_DEACT_6%:"" %FWD_ON_NO_ANSWER_ACT_6%:"" %FWD_ON_NO_ANSWER_DEACT_6%:"" %FWD_UNCOND_ACT_6%:"" %FWD_UNCOND_DEACT_6%:"" %FWD_ON_BUSY_ACT_7%:"" %FWD_ON_BUSY_DEACT_7%:"" %FWD_ON_NO_ANSWER_ACT_7%:"" %FWD_ON_NO_ANSWER_DEACT_7%:"" %FWD_UNCOND_ACT_7%:"" %FWD_UNCOND_DEACT_7%:"" %FWD_ON_BUSY_ACT_8%:"" %FWD_ON_BUSY_DEACT_8%:"" %FWD_ON_NO_ANSWER_ACT_8%:"" %FWD_ON_NO_ANSWER_DEACT_8%:"" %FWD_UNCOND_ACT_8%:"" %FWD_UNCOND_DEACT_8%:"" %HOTEL_MODE%:1 %ENABLE_ENHANCED_IDLE_SCREEN%:0 %COUNTRY_VARIANT_ID%:18 //--------------Emergency Primary Line -------------- %EMERGENCY_PRIMARY_PORT%:1 //0-PST, 1-VOIP1 . . . 8-VOIP8 %HANDSET_1_NAME%:"Test 1" %HANDSET_2_NAME%:"Test 2" %HANDSET_3_NAME%:"Test 3"...
- Page 44 //Firmware update server IP or FQDN %NETWORK_VLAN_ID%:0 %NETWORK_VLAN_USER_PRIORITY%:0 %VOIP_LOG_AUTO_UPLOAD%:0 //0-No uploading, 1-upload bootlog only, //2-upload everything %NETWORK_DHCP_CLIENT_TIMEOUT%:3 %NETWORK_DHCP_CLIENT_BOOT_SERVER%:3 %NETWORK_DHCP_CLIENT_BOOT_SERVER_OPTION%:160 %NETWORK_DHCP_CLIENT_BOOT_SERVER_OPTION_DATATYPE%:1 %LOCAL_HTTP_SERVER_TEMPLATE_TITLE%:"Mitel IP DECT Stand - Configurator" %LOCAL_HTTP_SERVER_AUTH_NAME%:"admin" //%LOCAL_HTTP_SERVER_AUTH_PASS%:"**********" %LOCAL_HTTP_SERVER_ACCESS%:61439 %CODEC_SILENCE_SUPPRESSION%:0 %SRV_0_SIP_UA_DATA_DOMAIN%:"10.112.87.127" %SRV_0_SIP_URI_DOMAIN_CONFIG%:0 %SRV_0_SIP_UA_DATA_SERVER_PORT%:5060 %SRV_0_SIP_UA_DATA_SERVER_IS_LOCAL%:0 //0-not local, 1-local to determine NAT %SRV_0_SIP_UA_DATA_REREG_TIME%:600 %SRV_0_SIP_UA_DATA_PROXY_ADDR%:"10.112.87.127"...
- Page 45 %SRV_2_SIP_UA_DATA_SERVER_IS_LOCAL%:0 %SRV_2_SIP_UA_DATA_REREG_TIME%:600 %SRV_2_SIP_UA_DATA_PROXY_ADDR%:"10.112.87.127" %SRV_2_DTMF_SIGNALLING%:2 %SRV_2_SIP_UA_CODEC_PRIORITY%:0,1,2,4,255 %SRV_3_SIP_UA_DATA_DOMAIN%:"10.112.87.127" %SRV_3_SIP_URI_DOMAIN_CONFIG%:0 %SRV_3_SIP_UA_DATA_SERVER_PORT%:5060 %SRV_3_SIP_UA_DATA_SERVER_IS_LOCAL%:0 %SRV_3_SIP_UA_DATA_REREG_TIME%:600 %SRV_3_SIP_UA_DATA_PROXY_ADDR%:"10.112.87.127" %SRV_3_DTMF_SIGNALLING%:2 %SRV_3_SIP_UA_CODEC_PRIORITY%:0,1,2,4,255 %SRV_4_SIP_UA_DATA_DOMAIN%:"" %SRV_4_SIP_URI_DOMAIN_CONFIG%:0 %SRV_4_SIP_UA_DATA_SERVER_PORT%:5060 %SRV_4_SIP_UA_DATA_SERVER_IS_LOCAL%:0 %SRV_4_SIP_UA_DATA_REREG_TIME%:600 %SRV_4_SIP_UA_DATA_PROXY_ADDR%:"" %SRV_4_DTMF_SIGNALLING%:2 %SRV_4_SIP_UA_CODEC_PRIORITY%:0,1,2,4,255 %SRV_5_SIP_UA_DATA_DOMAIN%:"" %SRV_5_SIP_URI_DOMAIN_CONFIG%:0 %SRV_5_SIP_UA_DATA_SERVER_PORT%:5060 %SRV_5_SIP_UA_DATA_SERVER_IS_LOCAL%:0 %SRV_5_SIP_UA_DATA_REREG_TIME%:600 %SRV_5_SIP_UA_DATA_PROXY_ADDR%:"" %SRV_5_DTMF_SIGNALLING%:2 %SRV_5_SIP_UA_CODEC_PRIORITY%:0,1,2,4,255 %SRV_6_SIP_UA_DATA_DOMAIN%:"" %SRV_6_SIP_URI_DOMAIN_CONFIG%:0 %SRV_6_SIP_UA_DATA_SERVER_PORT%:5060 %SRV_6_SIP_UA_DATA_SERVER_IS_LOCAL%:0 %SRV_6_SIP_UA_DATA_REREG_TIME%:600 %SRV_6_SIP_UA_DATA_PROXY_ADDR%:"" %SRV_6_DTMF_SIGNALLING%:2 %SRV_6_SIP_UA_CODEC_PRIORITY%:0,1,2,4,255 %SRV_7_SIP_UA_DATA_DOMAIN%:"" %SRV_7_SIP_URI_DOMAIN_CONFIG%:0 %SRV_7_SIP_UA_DATA_SERVER_PORT%:5060 %SRV_7_SIP_UA_DATA_SERVER_IS_LOCAL%:0 %SRV_7_SIP_UA_DATA_REREG_TIME%:600 %SRV_7_SIP_UA_DATA_PROXY_ADDR%:""...
- Page 46 Configuration and Administration Guide %SUBSCR_0_SIP_UA_DATA_VOICE_MAILBOX_NAME%:"56111" //Mailbox Name %SUBSCR_0_SIP_UA_DATA_VOICE_MAILBOX_NUMBER%:"" //Mailbox number %SUBSCR_0_UA_DATA_AUTH_NAME%:"56111" //Auth User ID //%SUBSCR_0_UA_DATA_AUTH_PASS%:"**********" //Auth password //-------------Registration 2 -------------------- %SUBSCR_1_SIP_UA_DATA_SIP_NAME%:"56112" //SIP name %SUBSCR_1_UA_DATA_DISP_NAME%:"Test 2" //Display name for Caller ID %SUBSCR_1_SIP_UA_DATA_SIP_NAME_ALIAS%:"Account 2" //Mailbox Name %SUBSCR_1_SIP_UA_DATA_VOICE_MAILBOX_NAME%:"56112" //Mailbox name %SUBSCR_1_SIP_UA_DATA_VOICE_MAILBOX_NUMBER%:"" //Mailbox number %SUBSCR_1_UA_DATA_AUTH_NAME%:"56112"...
- Page 47 %SUBSCR_6_SIP_UA_DATA_VOICE_MAILBOX_NUMBER%:"" //Mailbox Number %SUBSCR_6_UA_DATA_AUTH_NAME%:"" //Auth User ID //%SUBSCR_6_UA_DATA_AUTH_PASS%:"**********" //Auth password //-------------Registration 8 -------------------- %SUBSCR_7_SIP_UA_DATA_SIP_NAME%:"" //SIP name %SUBSCR_7_UA_DATA_DISP_NAME%:"" //Display name for Caller ID %SUBSCR_7_SIP_UA_DATA_SIP_NAME_ALIAS%:"Account 8" //Alias name for Phone %SUBSCR_7_SIP_UA_DATA_VOICE_MAILBOX_NAME%:"" //Mailbox Name %SUBSCR_7_SIP_UA_DATA_VOICE_MAILBOX_NUMBER%:"" //Mailbox Number %SUBSCR_7_UA_DATA_AUTH_NAME%:"" //Auth User ID //%SUBSCR_7_UA_DATA_AUTH_PASS%:"**********" //Auth password %SIP_STUN_ENABLE%:0 //0-disable, 1-enable stun services %SIP_RPORT_ENABLE%:0...
-
Page 48: Phonebook Configuration File
Configuration and Administration Guide Phonebook Configuration File The names and numbers in the phonebook configuration file must be enclosed in quotation marks and separated by commas. To create a phonebook configuration file using Microsoft Excel: 1. Open the Excel application. Enter the names and numbers of the phonebook entries in separate columns of the Excel workbook. -
Page 49: Feature Support
Feature Support 5610 Handset and IP DECT Stand Features The stand provides the following functionality: Registers up to eight handsets Two line support (If Call Waiting is enabled, the user hears a beep; if disabled, the handset returns busy) ... -
Page 50: Ip Dect Stand Led Indicators
Configuration and Administration Guide IP DECT Stand LED Indicators There are four LED indicators on the rear panel of the stand: Status Description Stand is connected to the LAN. Stand is not connected to LAN. VoIP Stand is connected to MCD. Stand is not connected to MCD. -
Page 51: Supervised Transfer
To configure a handset to receive voicemail message waiting indication: 1. Log into the IP-DECT Stand Configurator Web interface. See page 9 for instructions. 2. Access the VoIP Account of the handset. 3. Enter the directory number of the handset in the “Account Mailbox” field. 4. -
Page 52: Call Forwarding (Always, Busy, No Answer)
When MCD call forwarding is enabled there is no indication to the user (for example, stuttered dial tone) that is typically available on other Mitel phones. Do Not Disturb This feature should not be used from the handset. The MCD call Do Not Disturb feature access codes should be used to activate and deactivate this feature. -
Page 53: Feature Interactions
Firmware updates are provided via the Mitel Online Software Download site. You download new firmware files from the Mitel Online Software Download site and install them on a tftp server in your network. The IP DECT Stand automatically detects the firmware on the tftp server and then downloads them to all handsets that are associated with the stand. -
Page 54: Firmware Update Error Codes
Configuration and Administration Guide Field Description Values Notes Firmware Update Settings Firmware update server address Enter the DNS name or IP address String (max 31 of the tftp server that contains characters) or IP firmware update files. address Firmware path Enter the path to the directory on the String (max 31 If you place the... -
Page 55: Deregistering A Handset
Network not available is presented to the user when the IP DECT Stand experiences some network problem. This can be due to an unplugged Ethernet cable, furthermore are most HTTP/1.1 response codes are presented to the user as a network error. Code 3: VOIP_FWU_STATUS_UNKNOWN Code 3 can indicate that the firmware file is not found on the firmware update server (HTTP/1.1 404). -
Page 56: Resetting The Stand To Default Settings
Configuration and Administration Guide Resetting the Stand to Default Settings You can reset the stand to the default settings. This procedure clears all settings from the stand and resets them to the defaults. The web configurator interface username and password are reset back to the following: User name: admin Password: admin... - Page 57 Speak@Ease auto attendant application, the voicemail digit detection method may not be set correctly on the IP DECT stand. Log into the Mitel IP DECT Stand Configurator interface. Click the VoIP Account of the handset and change the DTMF signaling method. Try using “SIP INFO” or...
- Page 58 Configuration and Administration Guide...
Need help?
Do you have a question about the 5610 IP Dect Stand and is the answer not in the manual?
Questions and answers