HP MSL6000 Series User Manual
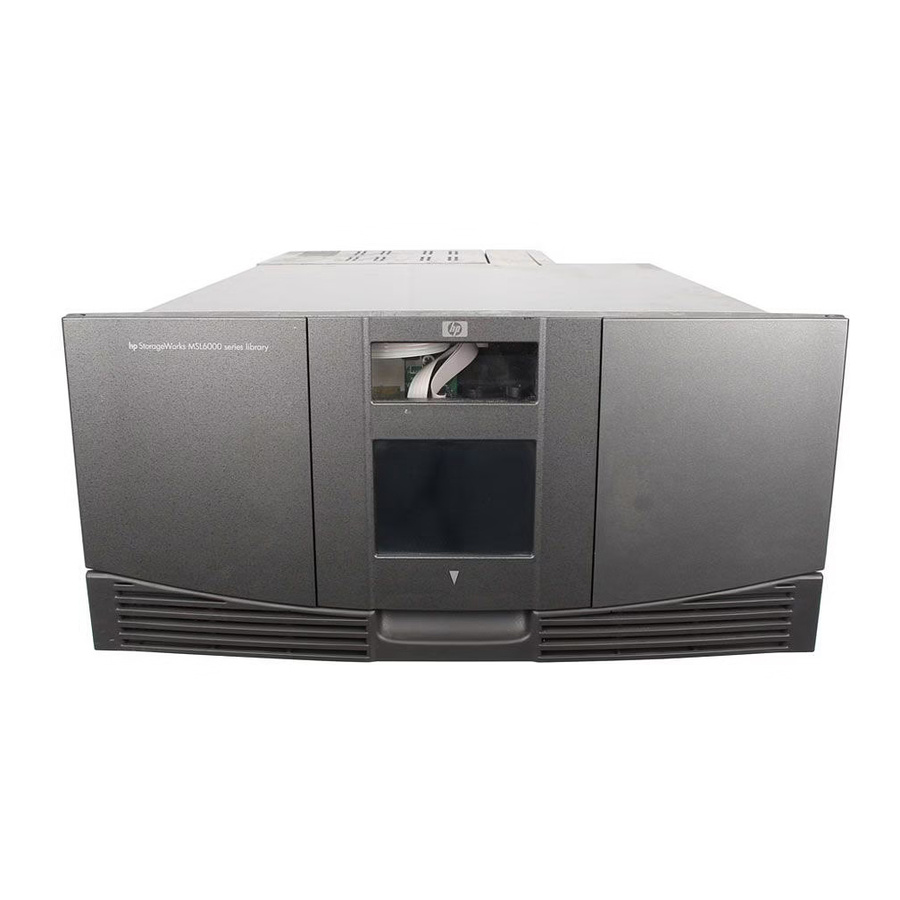
Storageworks msl6000 series storage tape library
Hide thumbs
Also See for MSL6000 Series:
- Reference manual (48 pages) ,
- Quickspecs (18 pages) ,
- Setting up (6 pages)

Related Manuals for HP MSL6000 Series


Summary of Contents for HP MSL6000 Series
- Page 1 HP StorageWorks MSL6000 series tape library user guide 231910-009 Part number: 231910-009 Eighth edition: February 2008...
- Page 2 Hewlett-Packard. The information is provided “as is” without warranty of any kind and is subject to change without notice. The only warranties for HP products and services are set forth in the express warranty statements accompanying such products and services.
-
Page 3: Table Of Contents
HP-authorized reseller ........ - Page 4 4 Operation ..........49 Front Panel .
- Page 5 Using HP StorageWorks Library & Tape Tools ........
- Page 6 Class B equipment ..........144 Declaration of Conformity for products marked with the FCC logo, United States only..
- Page 7 HP Ultrium 960 format trademark ........
- Page 8 23 Drive 0 bus ID data field screen (two-drive model shown) ......41 24 Reserved slot locations, SDLT..........42 25 Reserved slot locations, Ultrium (MSL6030).
- Page 9 20 Regulatory and Product Safety Certifications ....... . 161 MSL6000 series tape library user guide...
-
Page 11: About This Guide
In addition to this guide, please refer to other documents for this product: • HP StorageWorks MSL Series Pass-Through Mechanism Reference Guide • HP StorageWorks Network Storage Router User Guide These and other HP documents can be found on an HP web site: http://www.docs.hp.com. MSL6000 series tape library user guide... -
Page 12: Document Conventions And Symbols
Document conventions and symbols Table 1 Document conventions Convention Figure 1 Medium blue text: Medium blue, underlined text http://www.hp.com Bold font Italics font Monospace font Monospace, italic font Monospace, bold font WARNING! Indicates that failure to follow directions could result in bodily harm or death. -
Page 13: Hp Technical Support
• Detailed, specific questions For continuous quality improvement, calls may be recorded or monitored. HP strongly recommends that customers sign-up online using the Subscriber's choice web site at http://www.hp.com/go/e-updates. • Subscribing to this service provides you with e-mail updates on the latest product enhancements, newest versions of drivers, and firmware documentation updates as well as instant access to numerous other product resources. -
Page 15: Introduction
Introduction Designed for backup operations with high-end networks and high-performance servers, the HP StorageWorks MSL 6000 Series tape libraries are the next generation performers in high-volume backup and archival service. The libraries also feature high availability, maximum storage density, and easy serviceability. -
Page 16: Accessories
Throughout this manual, MSL6030/MSL6026 libraries will be referred to as two-drive models. MSL6060/MSL6052 libraries will be referred to as four-drive models. Accessories Contact your authorized service provider or visit the HP website at for the most current list of accessories that are available for an MSL Series library. Tape Drives... -
Page 17: Ultrium Tape Drives
(native) or 800 GB (2:1 compression) of data per cartridge. An Ultrium 1840 tape drive is capable of storing up to 800 GB (native) or 1600 GB (2:1 compression) of data per cartridge. Access the HP StorageWorks Ultrium Tape Drive User’s Guide from information about its features and capabilities. -
Page 18: Ultrium Tape Cartridges
CAUTION: HP Ultrium tape drives require special cleaning cartridges and data cartridges formatted specifically for HP Ultrium. To avoid damage to your tape drive, it is critical to use appropriate cleaning cartridges, and properly formatted data cartridges. Approved media will have the Ultrium format trademark which indicates that the media has passed... -
Page 19: Sdlt Tape Drives
An SDLT 320 tape drive is capable of storing up to 160 GB (native) or 320 GB (2:1 compression) of data per cartridge. An SDLT 600 tape drive is capable of storing up to 300 GB (native) or 600 GB (2:1 compression) of data per cartridge. Access the HP StorageWorks SDLT Tape Drive Reference Guide from capabilities. -
Page 20: Sdlt Tape Cartridges
SDLT Tape Cartridges NOTE: In addition to the information provided in this manual, refer to the documentation provided with your media for more information. CAUTION: SDLT tape drives require special cleaning cartridges and data cartridges formatted specifically for SDLT. To avoid damage to your tape drive, it is critical to use appropriate cleaning cartridges, and properly formatted data cartridges. -
Page 21: Magazines
The slots and mail slots are numbered beginning with 0: the first slot is Slot 0, the second is Slot 1, etc. SDLT magazine maximum capacity is 26 slots; LTO magazine maximum capacity is 30 slots. Figure MSL6000 series tape library user guide... -
Page 22: Power Supplies
Power Supplies MSL Series tape libraries support one or two power supplies depending upon the model (see Figure 4). These auto-ranging power supplies are capable of using any nominal AC voltage between 100 VAC and 240 VAC power, at 50 Hz or 60 Hz. Power to the library is supplied through AC connectors at the rear panel of each power supply receiver. -
Page 23: Robotics
#1 Phillips screwdriver (see replacement controller board is needed, contact your authorized service provider. Step-by-step Figure 5). The four-drive models also contain a vertical axis SHR-9014 MSL6000 series tape library user guide Figure 6). If a... -
Page 24: Library Controller Board
procedures will be included with the replacement. In two-drive models, the library controller board cannot be removed. Library Controller Board Factory-Defined Accessory PCI Slots (up to 5) Figure 6 Library controller board NOTE: The library controller board is not removable in two-drive libraries. Introduction... -
Page 25: Factory-Defined Accessory Pci Slots
HP-defined PCI add-in cards. CAUTION: Use of non-HP qualified PCI option cards can damage your MSL Series library and will void product warranty. Follow all operating instructions shipped with the optional card upgrade kit. -
Page 26: Embedded Network Storage Router (Optional)
NOTE: The library controller board must be installed in the right slot of the card cage area (upper card cage area for the four-drive models). Library Controller Board Optional Embedded Fibre Channel Board Figure 8 Library card cages Embedded Network Storage Router (Optional) Some library models ship with an optional embedded Network Storage Router in the slot next to the library controller board. -
Page 27: Multi Unit Library Systems
WARNING! The PTM continues to function each time a slave library is physically removed from the rack enclosure configuration during normal library operation. Refer to the HP StorageWorks MSL Series Pass-Through Mechanism Reference Guide for detailed installation, configuration, and operation information The library robotics can pick and place tape cartridges into a movable elevator that encompasses the full length of the PTM. -
Page 28: Library Ptm Mounting Location
access to the PTM is located at the rear of the library beneath the PTM cover (see page 28). PTM Interface Connector PTM Mounting Cover (removal required for PTM installation) Figure 10 Library PTM mounting location Introduction Figure 10... -
Page 29: Installation
Installation This chapter explains how to install an HP StorageWorks MSL Series tape library. Sections in this chapter include: • Converting a Tabletop Model to a Rackmount • Setting Up the Rackmount • Converting a Rackmount Model to a Tabletop •... -
Page 30: Setting Up The Rackmount Model
Figure 11 Converting a tabletop model (four-drive model shown) Setting Up the Rackmount Model WARNING! To reduce the risk of personal injury or damage to the equipment, be sure that: • The leveling jacks are extended to the floor. • The full weight of the rack rests on the leveling jacks. -
Page 31: Library Template (10000 Rack Enclosure Shown)
Figure 12 Library template (10000 rack enclosure shown) NOTE: For HP rack system/e and AlphaServer H9A rack enclosures, refer to the appropriate rack rail adapter kit. Remove the template and then attach the rails using the supplied fasteners (see front rail brackets are threaded to directly accept screws. The rear brackets are not threaded and require cage/clip nuts in the rack enclosure rear vertical rails. -
Page 32: Installing The Rails
Figure 13 Installing the rails Install the two slide-on clip nuts (previously marked using the template, two holes above the top bracket screw holes) on each of the front rack enclosure vertical rails WARNING! Two people should perform the next step. Make certain, when the library is fully extended, that a force of 20% of the rack enclosure’s weight, but not more than 57 pounds (26 kg), applied in any direction other than upwards, does not cause the rack enclosure to overbalance. -
Page 33: Installing The Library (Two-Drive Model Shown)
(If necessary, see Chapter 4, ”Operation” on page 49 for information on how to manually open the library doors.) 11.With the doors open, secure the front panel to the rack enclosure using the retaining screws (see Figure 15). 12.Close the doors. You can now cable the library. MSL6000 series tape library user guide... -
Page 34: Converting A Rackmount Model To A Tabletop Model
Left Retaining Screw Right Retaining Screw Figure 15 Securing the library NOTE: Two-drive libraries require four retaining screws; four-drive libraries require two retaining screws. Converting a Rackmount Model to a Tabletop Model Converting to a tabletop model requires a tabletop conversion kit and two people or a mechanical lift to physically install the library into the tabletop base. -
Page 35: Applying Power To The Library
For four-drive models only, the left-hand AC power receptacle is for the bottom power supply. The right-hand AC receptacle is for the top power supply. Toggle each power switch Figure 17): to each power supply receptacle. MSL6000 series tape library user guide... -
Page 36: Cabling For Scsi Configurations
NOTE: You can remove the appliqué from the GUI touch screen by catching one corner and carefully lifting it. Wait for power to come on and graphical user interface (GUI) touch screen display. Figure 17 Applying power to the library (four-drive rackmounted library shown) Cabling for SCSI Configurations This section describes supported SCSI cable configurations for the library. -
Page 37: Supported Scsi Cables
MSL6030/MSL6026 library SCSI cable configuration (two tape drives, dual host system) Examples” beginning on page 165 for a complete listing of Host cable (Bus 1, to host system) Host cable (Bus 0, to host system) MSL6000 series tape library user guide ”Library... -
Page 38: Four Tape Drives, Dual Host System
Four Tape Drives, Dual Host System Figure 19 shows a typical SCSI cable configuration for a library with four tape drives installed using a dual host system. SCSI Terminator 0.5 m cable (to library controller card) Host cable (Bus 1, to host system) Figure 19 MSL6060/MSL6052 library SCSI cable configuration (four tape drives, dual host system) NOTE:... -
Page 39: Library Configuration
Library Configuration This chapter explains how to configure an HP StorageWorks MSL Series tape library for normal operation. Sections in this chapter include: • Changing Default Configuration • Setting a SCSI ID, page 39 • Setting Up a Reserved • Configuring the Network Changing Default Configuration Settings For most applications, you do not have to change the default settings;... -
Page 40: Scsi Option Selection Screen (Two-Drive Model Shown)
Figure 20 SCSI option selection screen (two-drive model shown) NOTE: You can move to the next sequential SCSI options screen by touching the For example, to set the Drive 0 Bus ID to 3: a. Select the box next to the text “Drive 0 Bus ID:.” The resulting screen (see the current Drive 0 Bus ID along with the new value that you request. -
Page 41: Setting Up A Reserved Slot
Setting Up a Reserved Slot Use this option to designate one or more tape cartridge data storage slots as a cleaning slot, or to reduce the number of storage elements visible to the application software (for licensing reasons). MSL6000 series tape library user guide... -
Page 42: Reserved Slot Numbering
NOTE: Reserved slots may be incompatible with some application software. Reserved Slot Numbering Standard tape cartridge slots are numbered from the front of the magazine to the rear (see Figure 24 through Figure the last magazine. Additional reserved slots continue in this front-to-rear pattern. Cleaning Slot #2 Cleaning Slot #1 Figure 24... -
Page 43: Reserved Slot Locations, Ultrium (Msl6030)
Cleaning Slot #2 Cleaning Slot #1 Figure 25 Reserved slot locations, Ultrium (MSL6030) Cleaning Slot #0 Mail Slot (Left Magazine Only, If Configured) MSL6000 series tape library user guide... -
Page 44: Reserved Slot Locations, Lower Module, Sdlt
Cleaning Slot #2 Cleaning Slot #1 Figure 26 Reserved slot locations, lower module, SDLT Library Configuration Cleaning Slot #0 Mail Slot (Left Magazine Only, If Configured) -
Page 45: Reserved Slot Locations, Lower Module, Ultrium (Msl6060)
Press the associated box next to the Total Reserved Slots option (see Cleaning Slot #0 Mail Slot (Left Magazine Only, If Configured) to scroll to the screen that contains the Total Figure 28). MSL6000 series tape library user guide Figure 29). -
Page 46: Reserved Slots Numeric Keypad Screen
Figure 29 Reserved slots numeric keypad screen Enter the number of slots to reserve and then press Save to confirm your change. On the resulting confirmation screen (see Figure 30 Total reserved slots confirmation screen Press the Back button repeatedly to return to the Main menu screen. NOTE: Your choice takes effect the next time you boot the library. -
Page 47: Configuring The Network Settings
Touch each IP Address option and then use the keypad to enter each IP address (see Figure 33). Save and confirm your selections. Figure Figure Figure 32). MSL6000 series tape library user guide 31). 31) and then the User Specified... -
Page 48: Fixed Ip Address Screen
Figure 33 Fixed IP address screen Press the Back button repeatedly to return to the Main menu screen. NOTE: You must reboot the library for settings to take effect. Library Configuration... -
Page 49: Operation
Operation This chapter describes how to operate an HP StorageWorks MSL Series tape library. Sections in this chapter include the following: • Front Panel, page 49 • Library Display Screens and • Menu Selections, page 60 • Inserting and Removing Tape... -
Page 50: Magazine Door Mechanical Releases (Emergency Access)
you can manually open the magazine doors by pushing a small metal pin or paper clip into the mechanical releases (see CAUTION: The magazine doors must follow normal procedures can cause data loss and equipment damage. NOTE: The library may not perform a complete inventory each time a magazine is manually removed and then replaced using the emergency release. -
Page 51: Indicators
GUI touch screen that interrupts the current library operation (off-line). The library is in a fault state as detailed by the error message on the GUI touch screen. Figure 37): MSL6000 series tape library user guide... -
Page 52: Password Levels
• Service—allows access to the administrative menu that lets you view/edit library and SCSI options. The library ships with a default service password of 5566. NOTE: Figure 37 Password levels Each password is represented by four decimal digits that are stored in NVRAM in a range of 0001 to 9999. -
Page 53: Host System
Library Status Screen After the POST executes successfully and the library initialization completes (approximately 45 seconds), the following library Status screen appears (see Technical Support Information (HP logo) LCD Contrast Controls (reset and power-up) Figure 39): MSL6000 series tape library user guide... -
Page 54: Library Status Screen (Two-Drive Model Shown)
Figure 39 Library status screen (two-drive model shown) The library Status screen lets you select the following options: • Mail Slot Access • Magazine Access • Move Media • LCD Contrast Controls • Menu • Online/Offline • Status • Power Operation... -
Page 55: Technical Support Information
Technical Support Information Selecting this option via the HP logo displays HP-specific technical support assistance information, including the HP StorageWorks and the HP technical support websites (see Figure 40 Technical support information screen Mail Slot Access (Left-hand Magazines Only) Select this option to display the Mail Slot Access screen to a mail slot while the library remains powered up. -
Page 56: Move Media
The Magazine Access option can be password protected. NOTE: Figure 42 Magazine access screen (two-drive model shown) Move Media Select this option to display the Move Media screen (see lets you remove a cartridge from a tape drive, a data slot in any magazine, or a mail slot in a left-hand magazine. -
Page 57: Gui Contrast Controls
After you power-down the library, you must power it back up through the GUI display. NOTE: The library moves the shuttle assembly to the parked position before powering down. This position is a prerequisite for any library transport. Figure 44). MSL6000 series tape library user guide Figure 39). -
Page 58: Status
Figure 44 Power-down confirmation message screen Status Select this option to display the information Status screen magazine icon to display detailed information about the cartridges in that magazine. Touch a drive icon to view drive ID information, cleaning information, tape cartridge information, and drive status. Figure 45 Status screen (four-drive model shown) Operation... -
Page 59: Cartridge Map
Menu Selecting this option lets you view, configure, and use the library displays three distinct areas: • View System Data • Utilities • Edit Options 47). The Menu option (Figure MSL6000 series tape library user guide... -
Page 60: Menu Selections
Figure 47 Menu screen Menu Selections This section describes the three Menu areas: • View System Data • Edit Options • Utilities View System Data Area The View System Data area lets you select the following screens: • Library Options •... -
Page 61: View Library Options Screen
The default is 0. Lets you enable an automatic tape drive cleaning cycle. To use this option, you must have reserved a slot for a cleaning cartridge using the Total Reserved Slots option. The default is Disabled. MSL6000 series tape library user guide... - Page 62 Table 5 View Library Options (continued) Option Drive and Slot Numbering Library Mode Sequential Mode LCD Contrast Adjust Mail-Slot Mode Barcode Label Size Barcode Label Assignment Barcode Label Check Digit Operation Description Lets you specify whether SCSI elements in the library displays with either zero based or one based.
-
Page 63: Scsi Options
Lets you enable or disable an automatic library power-on after a power loss without the need to touch the GUI screen. The default is Enabled. or Back button to return to the Menu screen. MSL6000 series tape library user guide . To return to ”Tape Drives” on page 16... -
Page 64: View Scsi Options
Table 6 View SCSI Options Option Drive 0 Bus ID Drive 1 Bus ID Drive 2 Bus ID (four-drive models only) Drive 3 Bus ID (four-drive models only) Library SCSI Bus ID Library SCSI Bus Parity Mail Slot Access SCSI Mode Unit Attention Reporting Operation... - Page 65 Product Identification Lets you specify the response of the library’s robotics to the (PID) SCSI INQUIRY command in the Product Identification field. The default is MSL6000 Series. Vendor Identification Lets you specify the response of the library’s robotics to the (VID) SCSI INQUIRY command in the Vendor Identification field.
- Page 66 Table 6 View SCSI Options (continued) Option TapeAlert Mode Abort Move Status Door Open Response Initiate Wide Data Transfer Negotiation Operation Description Specifies conditions for logging and reporting the following Tape Alert data options. The default is Unconditionally Generate Recovered Error. •...
-
Page 67: Network Options
Synchronous, 10 MB/sec, Synchronous, 5 MB/sec, or Asynchronous Only. The default is Synchronous, 10 MB/sec. The default is Disabled. The default is Disabled. 50). Table 7 on page 68 lists and describes the available options. MSL6000 series tape library user guide... -
Page 68: Library Info
Table 7 View Network Options Option IP Address Determination IP Address IP Mask IP Gateway DNS Server Library Info Selecting this option lets you display the Miscellaneous Library Info screen screen displays the library’s firmware revision, the local IP and Ethernet address that is currently in use, the unit serial number, and the library’s power-on hours. -
Page 69: Scsi
Selecting this option lets you define the SCSI options used to configure the library for your specific needs (see Figure 53). NOTE: You can move to the subsequent SCSI screen by selecting the Figure 53 Edit SCSI options screen Table 6 on page 64 lists and describes the available options. MSL6000 series tape library user guide... -
Page 70: Network
Network Selecting this option lets you define the Network options used to configure the library for your specific needs (see Figure Figure 54 Edit network options screen Passwords Selecting this option lets you define the Password options used to configure the library for your specific needs (see Figure ”Front Panel and Media Security... -
Page 71: Maintenance
Available options are dependent on the specified user level. The Diagnostics menu options are described in Chapter 7, ”Troubleshooting” beginning on page 101. Figure 57 Diagnostics screen (four-drive model shown) Figure 56): Figure MSL6000 series tape library user guide 57). -
Page 72: Factory
NOTE: The Vertical Calibration button is only available on four-drive models. Factory The Factory menu options are intended for use by factory personnel only. Unauthorized use of the Factory option could render the library inoperable. CAUTION: Security Level Selecting this option lets you select passwords for a security level (see The library ships with a default Service password of 5566. -
Page 73: Removing Magazines
Ultrium and SDLT tape drives require special cleaning cartridges and data cartridges formatted specifically for the drive technology. To avoid damage to your tape drive, it is critical to use appropriate cleaning cartridges and properly formatted data cartridges. Contact an HP authorized dealer or sales representative for current compatibility and availability. -
Page 74: Inserting Cartridges Into A Magazine
Inserting Cartridges into a Magazine A full left-hand magazine is shown in cartridge slot is the one closest to the front of the left-hand magazine. For four-drive models, the lowest numbered tape cartridge slot Figure 60 Inserting a tape cartridge (left-hand magazine) Insert tape cartridges so that the bar code labels are facing outward (see NOTE: Handle and store tape cartridges in a clean, dust-free environment. -
Page 75: Labeling Tape Cartridges
Data residing on the tape • Age of the backup • Errors encountered while using the tape (to determine if the tape is faulty) Table 5 for more information. MSL6000 series tape library user guide Mail Slot Holder Tape Cartridge... -
Page 76: Ultrium Labels
The misuse and misunderstanding of bar code technology can result in backup and restore failures. To ensure that your bar codes meet HP’s quality standards, always purchase them from an approved supplier and never print bar code labels yourself. For more information, refer to the order form provided with the library, as well as the Bar Code Label Requirements, Compatibility and Usage white paper available from http://www.hp.com/support. -
Page 77: Sdlt Labels
Use this slot for inserting the bar code label by sliding it into the slot. CAUTION: Do not apply labels onto the top, bottom, sides, or back of the cartridge as this may cause damage to the tape drive, or interfere with reliable operation. MSL6000 series tape library user guide... -
Page 78: Media Label Identifiers
7- or 8-character SDLT and Ultrium bar code labels. CAUTION: To ensure that your bar codes meet HP’s quality standards, always purchase them from an approved supplier and never print bar code labels yourself. For more information, refer to the order form provided with the library, as well as the Bar Code Label Requirements, Compatibility and Usage white paper available from http://www.hp.com/support. -
Page 79: Remote Management Interface
Local Area Network To configure the Remote Management Interface you must set the IP addresses. (For information on setting IP addresses, see Interface, page 80 Passwords, page 88 ”Configuring the Network Settings” on page 47.) MSL6000 series tape library user guide... -
Page 80: Accessing The Remote Management Interface
CAUTION: Some options of the Remote Management Interface take the library offline. This inactive mode can interfere with host-based application software, causing data loss. Ensure that the library is idle before attempting to perform any remote operations that will take the library offline. Accessing the Remote Management Interface To access your library remotely, the library must be in the ready mode to establish communications with the Remote Management Interface. -
Page 81: Remote Management Interface Main Screen
Figure 66 Remote Management Interface main screen Click on the library to access the Status screen (see Figure 67). MSL6000 series tape library user guide... -
Page 82: Using Menu Buttons
Figure 67 Status screen Using Menu Buttons The Remote Management Interface menu buttons include: • Status, page 82 • Move Media, page 83 • Setup, page 84 • Functions, page 87 • History, page 88 Status Click the Status button to view a display of itemized status information for the library in general, and for each drive. -
Page 83: Move Media
Specify the source slot and destination. Click Execute the Move. A screen appears warning you that selecting Confirm causes the library to go offline during the move media operation. After the move media operation completes, a completion message appears. MSL6000 series tape library user guide... -
Page 84: Setup
Setup Click Setup for button-and-browser controls that let you set library, SCSI, and drive configuration options, also available on the Menu > Edit Options area of the tape library GUI. Figure 69 Setup screen Remote Management Interface... -
Page 85: Library Configuration
Library Configuration Click Library Config to set basic library parameters. Figure 70 Library configuration screen MSL6000 series tape library user guide... -
Page 86: Scsi Configuration
SCSI Configuration Click SCSI Config to SCSI mode and Tape Alert parameters. Figure 71 SCSI configuration screen Drive Configuration Click Drive Config to set the SCSI IDs of the drives. Figure 72 Drive configuration screen Remote Management Interface... -
Page 87: Functions
Excessive, unrequested cleaning can damage the tape drives. See ”Running a Cleaning NOTE: ”Updating operation in the Remote Management Interface. Cartridge” on page 93 for additional information. Firmware” on page 97 for additional information on using the library flash MSL6000 series tape library user guide... -
Page 88: History
History Click History to list files that you can display or download. Scroll down for additional menus. Figure 74 History screen When you select a file, a Save As window appears, letting you select a network destination for the download. When you select Display Trace, the log will display through the browser. Changing the Remote Management Interface Passwords The Remote Management Interface is set with two default passwords for level 1 and level 2 access to features. - Page 89 Select the Access tab in the Configure Library window. The default passwords display for levels 1 and 2. Change the default password(s) to a new password and click OK. Click OK to confirm the changes. MSL6000 series tape library user guide...
- Page 90 Remote Management Interface...
-
Page 91: Maintenance
Parks all drives prior to transporting the library. Restores the library to its firmware default settings. Forces library to reconfigure based on current or new SCSI elements. Table 9 lists the available MSL6000 series tape library user guide... -
Page 92: Maintaining Tape Cartridges
Table 9 Maintenance Menu Option Reboot Library Flash Drive From Tape Eject Tape From Drive Maintaining Tape Cartridges NOTE: In addition to the information provided in this section, refer to the documentation provided with your media for more information. Make it a practice to visually inspect your tape cartridges when loading or removing them from your library. -
Page 93: Ultrium Cartridges
Running a Cleaning Cartridge Use the Clean Drive menu option contained in the Maintenance submenu of the Utilities area on the front panel display to clean tape drives installed in HP StorageWorks MSL Series tape library. Worn (Do Not Use) -
Page 94: Automatically Running A Cleaning Cartridge
Ultrium and SDLT tape drives require special cleaning cartridges and data cartridges formatted specifically for the drive technology. To avoid damage to your tape drive, it is critical to use appropriate cleaning cartridges and properly formatted data cartridges. Contact an HP authorized dealer or sales representative for current compatibility and availability. -
Page 95: Running A Cleaning Cartridge From A Mail Slot
Install a cleaning cartridge in a reserved slot. ”Setting Up a Reserved Slot” on page 41 for more information.) ”Using Mail Slots (Left-hand Magazines Only)” on page 74). ”Setting Up a Reserved MSL6000 series tape library user guide Only)” Slot” on page 41 for more... -
Page 96: Replacing A Cleaning Cartridge In A Reserved Slot
Select the Clean Drive menu option from the Maintenance submenu on the front panel display. Note that the Source window defaults to the cleaning slot (Cln’g Slot 0). Select Cleaning. If the default entry is not the tape drive to be cleaned, press Drive in the Destination Element Type box to sequence through the available tape drive choices. -
Page 97: Updating Firmware
Library & Tape Tools (see page 98). The resulting information may be helpful to your service provider in resolving potential issues that may have prompted the firmware upgrade. MSL Series tape libraries can be flashed using HP StorageWorks Library and Tape Tools (L&TT), the Remote Management Interface, or the MSLUtil.exe diagnostic utility and diagnostic cable. -
Page 98: Using Hp Storageworks Library & Tape Tools
Library Info button from the View System Data area of the GUI to view the Firmware Revision. Using HP StorageWorks Library & Tape Tools HP StorageWorks Library & Tape Tools may already be installed on your host. If not, you can download it from http://www.hp.com/support/tapetools. Online help and instructions are included with the utility. -
Page 99: Firmware Flashing Procedure
Connect window, and try again. The library will reboot. Verify that the firmware level has been updated successfully by selecting the Library Info button from the View System Data area of the GUI to view the Firmware Revision. MSL6000 series tape library user guide... - Page 100 Maintenance...
-
Page 101: Troubleshooting
Troubleshooting This chapter describes how to identify and resolve the problems that can cause an HP StorageWorks MSL Series tape library to malfunction. Sections in this chapter include: • Identifying Platform • Performing Error Recovery, page 102 • Troubleshooting General •... -
Page 102: Performing Error Recovery
Performing Error Recovery Figure 79 outlines the recommended steps for error recovery. You should follow this chart in all cases. FSCs are listed in General Problems” on page 135. Figure 79 Troubleshooting flow chart Troubleshooting Table 10 on page 103. For general library problems, see ”Troubleshooting... -
Page 103: Fault Symptom Codes (Fscs)
• Ensure configuration options are set correctly. • Make sure a valid Ethernet address has been programmed using the LCD touch display. (Menu -> Maintenance -> Library) • Reboot the library MSL6000 series tape library user guide 103... - Page 104 Table 10 Fault Symptom Codes (continued) Message 0B02 Public Ethernet Set IP Error (The library could not set the IP parameters) 1001 SCSI Firmware Error (Internal SCSI task processing error. Unexpected state or hardware status.) 1002 SCSI FIFO Empty (The SCSI controller data FIFO is empty but should contain more data bytes.) 1003 SCSI FIFO Error...
- Page 105 (Menu -> Maintenance -> Force reconfiguration) • Invalid user initiated operation. Select parameters correctly and try again. • Make sure door(s) are closed. • Press the Enter button to clear the message. MSL6000 series tape library user guide 105...
- Page 106 Table 10 Fault Symptom Codes (continued) Message 200A Menu Mode 200C Cart Inaccessible (For an SDLT drive, indicates the tape is not in the unloaded state. For an Ultrium drive, indicates the tape is not ejected. Cartridge in drive is not accessible from changer.) 200D Drive In Error...
- Page 107 Make sure door(s) are closed. • Press the Enter button to clear the message. • Cycle power to the library or reboot using the GUI touch screen. • Run sensor test. • Make sure door(s) are closed. MSL6000 series tape library user guide 107...
- Page 108 Table 10 Fault Symptom Codes (continued) Message 2092 Open Right Door Fault (Door open sensor time-out detected when open door.) 2093 Open Doors Fault (Door open sensor time-out detected when open door.) 2094 Open DLT Handle Fault (Failed to open DLT handle.) 20a0 No IP Address Found (SMC router failed to get an IP address.)
- Page 109 Ensure that there are no obstructions inside the library (all cartridges are in magazines). • Run the cartridge cycle diagnostic to verify. Check the tape cartridge used in the last • operation for damage. MSL6000 series tape library user guide 109...
- Page 110 Table 10 Fault Symptom Codes (continued) Message 3013 Drive Fetch Failure (Loader failed to fetch a cartridge from a drive.) 3014 Drive stow Failure Stow to drive failed 3015 Drive Timeout Failure (Loader detects unload command time-out.) Troubleshooting Press the Enter button to reboot. •...
- Page 111 Reseat the drive. • Check cabling. • Load/unload a cartridge to the drive to verify. • Check the tape cartridge used int he last operation for damage. • Run the cartridge cycle diagnostic to verify. MSL6000 series tape library user guide 111...
- Page 112 Table 10 Fault Symptom Codes (continued) Message 3019 Drive Open Door Failed 301A Drive Close Door Failed 301B Drive Communication Error (Intertask send, receive failed.) Troubleshooting Press the Enter button to reboot. • • Ensure the drive shows good status through the drive status window.
- Page 113 No action is required. This error is expected when replacing the controller board. If controller board was not replace, then contact support. Press the Enter button to clear the • message. Contact support. • MSL6000 series tape library user guide 113...
- Page 114 Table 10 Fault Symptom Codes (continued) Message 3033 Chassis S/N did not scan (A valid serial number bar code label could not be read.) 3034 Chassis S/N save operation failed (The serial number scanned from the bar code label could not be saved to non-volatile memory.) 3035 Drive Unload Prevented...
- Page 115 (Menu -> Maintenance -> Force reconfiguration) • Cycle power to the library or reboot by using the LCD touch display. • Update the Map using the LCD touch display. (Menu -> Maintenance -> Force reconfiguration) MSL6000 series tape library user guide 115...
- Page 116 Table 10 Fault Symptom Codes (continued) Message 305B Diag Fetch, Drive not loaded (Diag: no cartridge present for fetch.) 305D Diag Timeout waiting for drive empty, ready (Fetch, time-out waiting for drive unload.) 305F Invalid bin number (Invalid bin number detected in diag.) 3060 Zone Sequence Error (Robot did not find sensor on power-up.)
- Page 117 • Reseat drive. • Load/unload a cartridge to the drive to verify. • Check the tape cartridge used in the last operation for damage. • Run the cartridge cycle diagnostic to verify. MSL6000 series tape library user guide 117...
- Page 118 Table 10 Fault Symptom Codes (continued) Message 3078 Diag get drive 0 status failed (Failed to get drive status, communication error.) 3079 Diag get drive 1 status failed (Failed to get drive status, communication error.) Troubleshooting Press the Enter button to reboot. •...
- Page 119 Invalid user initiated operation. Set parameters correctly and try again. • Press the Enter button to clear the message. • Invalid user initiated operation. Set parameters correctly and try again. Ensure cartridges are in magazines. • MSL6000 series tape library user guide 119...
- Page 120 Table 10 Fault Symptom Codes (continued) Message 3084 UnSupported Drive For Requested Operation (Unsupported drive type.) 308F No Retry On Fetch/Stow (The loader retried an operation and retries were disabled.) 3100 Picker Jammed (The picker jammed during a bin stow operation.) 3102 Picker Jammed 2...
- Page 121 Cycle power to the library or reboot using the GUI touch screen. • Ensure that there are no (all cartridges are in magazines). • Ensure cartridges are fully inserted in the magazine(s). • Check pass-through alignment. MSL6000 series tape library user guide 121...
- Page 122 Table 10 Fault Symptom Codes (continued) Message 3108 Picker Jammed 8 (The picker jammed during a pass-through fetch operation.) 3109 Picker Jammed 9 310A Picker Jammed 10 310B Picker Jammed 11 (The picker jammed during a drive fetch operation.) 310F Picker Jammed on Stow (The picker jammed on a stow operation.) Troubleshooting...
- Page 123 Cycle power to the library or reboot using the GUI touch screen. • Press the Enter button to reboot. • Check pass-through mechanism alignment. • Cycle power to the library or reboot using the GUI touch screen. MSL6000 series tape library user guide 123...
- Page 124 Table 10 Fault Symptom Codes (continued) Message 3300 Rotary Jammed (Rotary track could not reach target location.) 3301 Shuttle on Wrong Side Of The Rotary (Zone indicators show that the shuttle is backwards on the rotary track during power-up initialization.) 3303 Shuttle Not Attached to Cable 3400...
- Page 125 Press the Enter button to clear the • message. • Invalid user initiated operation. Set parameters correctly and try again. • Ensure the drive shows good status through the drive status window. MSL6000 series tape library user guide 125...
- Page 126 Table 10 Fault Symptom Codes (continued) Message 503D Drive Status Fail (Cleaning operation failed because the library could not retrieve drive status.) 6001 Inter-Module Unknown Event (Inter-module communication failure.) 6002 Inter-Module no command matching response 6003 Inter-Module command length (Incorrect command length.) 6004 Inter-Module loopback buffer mismatch 6005...
- Page 127 Cycle power to the library or reboot using the GUI touch screen. • Press the Enter button clear the message. • Cycle power to the library or reboot using the GUI touch screen. MSL6000 series tape library user guide 127...
- Page 128 Table 10 Fault Symptom Codes (continued) Message 700C Destination Xchg was Null 700D Sending of a cmd failed 700E Deactivating a drive that is not attached (The control task indicates that a request to deactivate a drive failed because the drive is not attached.) 700F Deactivation of a drive failed...
- Page 129 Cycle power to all libraries in a stack, or reboot using the GUI touch screen. • Press the Enter button clear the message. • Cycle power to the library or reboot using the GUI touch screen. MSL6000 series tape library user guide 129...
- Page 130 Table 10 Fault Symptom Codes (continued) Message 701B Invalid L-drive number to convert (Attempted to send a command to a drive, but the logical drive number is out of range.) 701C Invalid P-drive number to convert (Attempted to send a command to a drive, but the physical drive number is out of range.) 701D...
- Page 131 Ensure the drive shows good status through the drive status window. • Cycle power to the library or reboot using the GUI touch screen. • Check the tape cartridge used in the last operation for damage. MSL6000 series tape library user guide 131...
- Page 132 Table 10 Fault Symptom Codes (continued) Message 8002 Drive Fan stalled (The fan in the drive hot-swap shoe is either not installed or has stalled.) 8003 Drive load did not complete (The drive failed to successfully load a tape.) 8004 Invalid drive was installed (One or more installed drives are of a type either unknown or not supported in...
- Page 133 • Cycle power to the library or reboot using the GUI touch screen. Press the Enter button to reboot. • • Cycle power to the library or reboot using the GUI touch screen. MSL6000 series tape library user guide 133...
- Page 134 Make sure the firmware file is complete and correct. If having difficulty uploading firmware via FTP, telnet, the web management interface, or TSMC, try using HP StorageWorks Library and Tape Tools. Press the Enter button to clear the • message.
-
Page 135: Troubleshooting General Problems
If having difficulty uploading firmware via FTP, telnet, the web management interface, or LTT, try using HP StorageWorks Library and Tape Tools (see page 141). Press the Enter button to clear the • message. MSL6000 series tape library user guide 135... -
Page 136: Troubleshooting General Problems
• Try to access the library from the Web using the Remote Management Interface (see page 79), or through a host-based diagnostics tool such as HP StorageWorks Library & Tape Tools (see page 98). • Download library firmware (see page 97). - Page 137 • LTO Cartridge Memory has failed or is damaged. Replace the data cartridge. • LTO Cartridge Memory has failed, and the drive has found no data to recover. Replace the data cartridge. MSL6000 series tape library user guide 137...
- Page 138 Table 11 Troubleshooting General Problems (continued) Problem An Ultrium cartridge that has data written to it and is write-protected restores very slowly. Cannot write to tape. Cannot load the cleaning cartridge. Connections Changed the drive SCSI ID, but the new ID is not recognized by the host computer.
- Page 139 If using Fibre Channel, make sure there is not a zoning issue that is preventing the host from seeing the library. • If using Fibre Channel, make sure that the router sees the library and/or drives. • Contact your authorized service provider. MSL6000 series tape library user guide 139...
-
Page 140: Using Diagnostic Support Tools
Table 11 Troubleshooting General Problems (continued) Problem Library Performance HP-UX host responds slowly, or crashes after connecting to the library. The library is not efficiently backing up data. Using Diagnostic Support Tools This section describes diagnostic tools available to help troubleshoot and maintain your tape library. -
Page 141: Hp Storageworks Library And Tape Tools
HP StorageWorks Library and Tape Tools To provide continued service to our customers, HP provides the HP StorageWorks Library and Tape Tools (L&TT) software application. L&TT is a diagnostic tool that is designed to aid in the installation and maintenance of both HP tape devices and tape libraries. L&TT includes several features designed for use by both HP storage customers and trained service personnel. -
Page 142: Library Diagnostic Tests
Table 12 Library Diagnostic Tests Test Cartridge Cycle Drive Cycle Barcode Cycle Inventory Sensor Test Vertical Calibration (available in four-drive models only) View Error Log Touch Screen Calibrate Tachometer Diagnostic Friction Diagnostic Troubleshooting Description Cycles cartridges continuously and randomly in bins and mail slots, displaying a count of the type of cycle on the control panel. -
Page 143: Regulatory Compliance Notices
Regulatory compliance notices This appendix contains regulatory notices for the HP StorageWorks MSL Series libraries. Regulatory compliance identification numbers For the purpose of regulatory compliance certifications and identification, this product has been assigned a unique regulatory model number. The regulatory model number can be found on the product nameplate label, along with all required approval markings and information. -
Page 144: Class B Equipment
Class B equipment This equipment has been tested and found to comply with the limits for a Class B digital device, pursuant to Part 15 of the FCC Rules. These limits are designed to provide reasonable protection against harmful interference in a residential installation. This equipment generates, uses, and can radiate radio frequency energy and, if not installed and used in accordance with the instructions, may cause harmful interference to radio communications. -
Page 145: Class B Equipment
• EN 55022 (CISPR 22)—Electromagnetic Interference • EN55024 (IEC61000-4-2, 3, 4, 5, 6, 8, 11)—Electromagnetic Immunity • EN61000-3-2 (IEC61000-3-2)—Power Line Harmonics • EN61000-3-3 (IEC61000-3-3)—Power Line Flicker • EN 60950 (IEC60950)—Product Safety Japanese notices MSL6000 series tape library user guide 145... -
Page 146: Japanese Power Cord Statement
Japanese power cord statement Korean notices Class A equipment Class B equipment Taiwanese notices BSMI Class A notice Regulatory compliance notices... -
Page 147: Taiwan Battery Recycle Statement
• Allow only HP Authorized Service technicians to repair the unit. The Center for Devices and Radiological Health (CDRH) of the U.S. Food and Drug Administration implemented regulations for laser products on August 2, 1976. These regulations apply to laser products manufactured from August 1, 1976. -
Page 148: Dutch Laser Notice
- Tout contrôle, réglage ou procédure autre que ceux décrits dans ce chapitre ne doivent pas être effectués par l'utilisateur. - Seuls les Mainteneurs Agréés HP sont habilités à réparer l'appareil laser. Regulatory compliance notices cet appareil peut être équipé d'un laser classé en... -
Page 149: German Laser Notice
Komponenten, die vom Benutzer gewartet werden können. - Benutzen Sie das Lasergerät ausschließlich gemäß den Anleitungen und Hinweisen in diesem Dokument. - Lassen Sie das Gerät nur von einem HP Servicepartner reparieren. Italian laser notice AVVERTENZA: laser classificato come prodotto laser di Classe 1 in conformità alle normative US FDA e IEC 60825-1. -
Page 150: Japanese Laser Notice
- No realice más operaciones de control, ajustes o manipulaciones en el dispositivo láser que los aquí especificados. - Sólo permita reparar la unidad a los agentes del servicio técnico autorizado HP. Recycling notices Disposal of waste equipment by users in private household in the European... -
Page 151: Danish Notice
Neem contact op met uw gemeente, het afvalinzamelingsbedrijf of de winkel waar u het product hebt gekocht voor meer informatie over inzamelingspunten waar u oude apparatuur kunt aanbieden voor recycling. Czecholslovakian notice MSL6000 series tape library user guide 151... -
Page 152: Estonian Notice
Estonian notice Finnish notice Laitteiden hävittäminen kotitalouksissa Euroopan unionin alueella Jos tuotteessa tai sen pakkauksessa on tämä merkki, tuotetta ei saa hävittää kotitalousjätteiden mukana. Tällöin hävitettävä laite on toimitettava sähkölaitteiden ja elektronisten laitteiden kierrätyspisteeseen. Hävitettävien laitteiden erillinen käsittely ja kierrätys auttavat säästämään luonnonvaroja ja varmistamaan, että laite kierrätetään tavalla, joka estää... -
Page 153: German Notice
Wiederverwertung, die die Gesundheit des Menschen und die Umwelt schützt. Informationen dazu, wo Sie Rücknahmestellen für Ihre Altgeräte finden, erhalten Sie bei Ihrer Stadtverwaltung, den örtlichen Müllentsorgungsbetrieben oder im Geschäft, in dem Sie das Gerät erworben haben. Greek notice MSL6000 series tape library user guide 153... -
Page 154: Hungarian Notice
Hungarian notice Italian notice Smaltimento delle apparecchiature da parte di privati nel territorio dell'Unione Europea Questo simbolo presente sul prodotto o sulla sua confezione indica che il prodotto non può essere smaltito insieme ai rifiuti domestici. È responsabilità dell'utente smaltire le apparecchiature consegnandole presso un punto di raccolta designato al riciclo e allo smaltimento di apparecchiature elettriche ed elettroniche. -
Page 155: Latvian Notice
Latvian notice Lithuanian notice MSL6000 series tape library user guide 155... -
Page 156: Polish Notice
Para obter mais informações sobre locais que reciclam esse tipo de material, entre em contato com o escritório da HP em sua cidade, com o serviço de coleta de lixo ou com a loja em que o produto foi adquirido. -
Page 157: Slovakian Notice
MSL6000 series tape library user guide 157... -
Page 158: Swedish Notice
Swedish notice Bortskaffande av avfallsprodukter från användare i privathushåll inom Europeiska Unionen Om den här symbolen visas på produkten eller förpackningen betyder det att produkten inte får slängas på samma ställe som hushållssopor. I stället är det ditt ansvar att bortskaffa avfallet genom att överlämna det till ett uppsamlingsställe avsett för återvinning av avfall från elektriska och elektroniska produkter. -
Page 159: B Specifications
Specifications This appendix lists the following specifications met by HP StorageWorks MSL Series tape libraries: • Power, page 159 • Mechanical, page 159 • Environmental (All • Acoustics, page 161 • Safety and Regulatory, page 161 Power Table 13 Power Specifications... -
Page 160: Environmental (All Models)
Environmental (All Models) Table 15 Operating Environmental Specifications Description Dry bulb temperature Temperature gradient Temperature shock Wet bulb temperature Relative humidity (noncondensing) Humidity gradient Altitude Table 16 Packed or Unpacked Environmental Specifications Description Dry bulb temperature Temperature gradient Temperature shock Wet bulb temperature Relative humidity (noncondensing) Humidity gradient... -
Page 161: Acoustics
Schalleistungspegel L Gerät MSL6030/MSL6026 MSL6060/MSL6052 NOTE: Aktuelle Werte für spezielle Ausrüstungsstufen sind über die HP Vertretungen erhältlich. 1 B = 10 dBa. Safety and Regulatory The library carries the following Regulatory Agency product safety certifications. Table 20 Regulatory and Product Safety Certifications... - Page 162 Table 20 Regulatory and Product Safety Certifications Description CE Marking (European Union) CUL Mark (Canadian UL) Regulatory Series ID Number Specifications Specification Low Voltage Directive, 72/23/EEC, European Union CAN/CSA 22.2 No. 60950-1 (standard for safety of information technology equipment) ED 1005, Class A...
-
Page 163: C Electrostatic Discharge
Use conductive field service tools. • Use a portable field service kit with a folding static-dissipating work mat. If you do not have any of the suggested equipment for proper grounding, have an HP authorized service provider install the part. NOTE: For more information on static electricity, or for assistance with product installation, contact your authorized service provider. - Page 164 Electrostatic Discharge...
-
Page 165: D Configuration Examples
• For optimal performance, do not attach more than two drives per SCSI bus. NOTE: One drive per bus is HP’s recommended configuration. Two drives per bus is an acceptable configuration for SDLT 1 and 2. ”Cabling for MSL6000 series tape library user guide 165... -
Page 166: Configuration Examples
Configuration Examples SCSI Terminator 0.5 m cable (to library controller card) Figure 80 MSL6030/MSL6026, 2 hosts/2 drives SCSI Terminator 0.5 m cable (to library controller card) Host cable (Bus 1, to host system) Figure 81 Single MSL6060/MSL6052, 4 hosts/4 drives Configuration Examples Host cable (Bus 1, to host system) Host cable (Bus 0, to host system) -
Page 167: Optional Fibre Channel Card
LAN. Consequently, Fibre Channel is subject to data flow interruptions from power cycling, connections, disconnections, and ESD charges. NOTE: For a complete list of prerequisites and supported configurations, contact your HP sales representative. MSL6000 series tape library user guide 167... -
Page 168: Connectors And Indicators
Connectors and Indicators Figure 82 shows the connectors and indicators for the optional Fibre Channel board. Power LED Serial RJ-11 connector Ethernet RJ-45 connector Fibre Channel activity LED Figure 82 Connectors and indicators NOTE: The Fibre Channel board serial cable is not the same as the library controller board serial cable. -
Page 169: Ethernet Port
Configuration For detailed configuration information, refer to the HP StorageWorks Network Storage Router User Guide available on the MSL Series tape library documentation CD, or on the HP website at: http://www.hp.com/support. Before attempting to configure the Fibre Channel board, a basic understanding of Fibre Channel and SCSI devices is recommended. -
Page 170: Configuration Examples
Configuration Examples SCSI cable Terminator FIbre cable Figure 83 MSL6030/MSL6026 standalone Optional Fibre Channel Card 10998... -
Page 171: Msl6060/Msl6052 Standalone
SCSI cable Terminator Fibre Cable MSL6060/MSL6052 standalone Figure 84 MSL6000 series tape library user guide 171 10999... - Page 172 Optional Fibre Channel Card...
-
Page 173: Index
59, electronics controller card electrostatic discharge environmental specs error recovery procedures errors post recovered European Union notice fasteners fault symptom codes notice rating label MSL6000 series tape library user guide 173... - Page 174 FCC classification fibre channel board described location fibre channel card configuration examples configuring Ethernet settings firmware updating upgrade requirements front panel FSCs grounding methods GUI touch screen 26, help, obtaining host system authorized reseller storage web site Subscriber’s choice web site illustrated applying power attaching a bar code 76,...
- Page 175 SCSI options SCSI bus IDs bus parity cable configuration examples cable configurations IDs, setting options securing the library security level set up network MSL6000 series tape library user guide 175...
- Page 176 160, environmental mechanical power safety status screen storage element base address Subscriber’s choice, HP symbols in text tabletop model converting to rackmount 29, Taiwanese notices tape alert mode tape cartridges inserting and removing mixed media requirements...
-
Page 177: Figures
HP Ultrium 960 format trademark ........ - Page 178 47 Menu screen ............60 48 View library options screen.
- Page 181 Document conventions ..........12 Ultrium Tape Drive Capacity and Data Transfer Rate .
Need help?
Do you have a question about the MSL6000 Series and is the answer not in the manual?
Questions and answers