Table of Contents
Advertisement
Advertisement
Table of Contents
Troubleshooting

Related Manuals for Talkswitch DESKTOP PHONE SYSTEM


Summary of Contents for Talkswitch DESKTOP PHONE SYSTEM
-
Page 1: User Guide
DESKTOP PHONE SYSTEM User Guide... -
Page 2: Copyright Information
Copyright Information Centrepoint Technologies’ Talkswitch, Copyright 2001. All Rights Reserved. Reproduction, adaptation or translation without prior written permission is prohibited, except as allowed under the copyright laws. Information in this user guide is subject to change without notice and does not represent any commitment on the part of Centrepoint Technologies Inc.. -
Page 3: Table Of Contents
1.0 Installing TalkSwitch 1.1 What's included with TalkSwitch ....... .1 1.2 Front Panel Descriptions... - Page 4 ........69 3.8 Upgrading the TalkSwitch Firmware ......70 Appendices Appendix A - Help &...
-
Page 5: Installing Talkswitch
Installing TalkSwitch What's included with TalkSwitch The TalkSwitch products come shipped with the following items. 1. The TalkSwitch Unit 2. AC Power Adapter (Warning: never use any other Power Adapter other than the one provided with the TalkSwitch.) 3. 9 pin Serial Cable 4. -
Page 6: Front Panel Descriptions
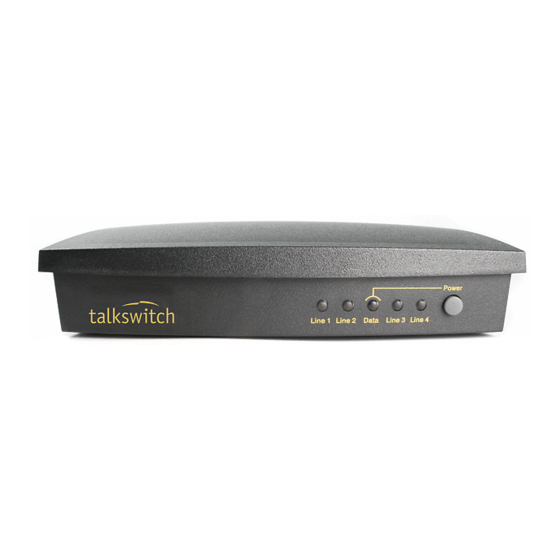
Front Panel Descriptions TalkSwitch's front panel consists of a power button ("Power") and 5 LED lights that do more than let you know TalkSwitch is plugged in and turned on. What do the LED lights tell you? LED light: State... -
Page 7: Back Panel Descriptions
SERIAL Attach the supplied serial cable (RS232) that connects TalkSwitch to your PC. If you use the serial port you can - not use the USB port simultaneously. P O W E R Plug the supplied AC Power Adapter in here. -
Page 8: The Talkswitch 48Ls
The ‘PF’ box in between E4 and L1/L2 represents power failure support. In the event of a power failure or loss of power to the TalkSwitch, Extension 4 will be able to receive calls and make calls on Line 1. -
Page 9: Plugging Into The Back Panel
The ‘PF’ box in between E4 and L1/L2 represents power failure support. In the event of a power failure or loss of power to the TalkSwitch, Extension 4 will be able to receive calls and make calls on Line 1. -
Page 10: Attaching Phones And Other Analog Devices To Talkswitch Extension Jacks
Connect your single line analog telephone or fax machines to one of TalkSwitch's extension jacks (E1 to E4 for the TalkSwitch 24 and E1 to E8 for the TalkSwitch 48LS) just as you would if you were plugging them into a standard telephone wall jack. -
Page 11: Connecting Devices To The Music And Pa Jacks
(Most modems have a telephone jack, located beside the 'Line In' jack.) You do not have to attach a PC to TalkSwitch (via the Serial or USB ports) for your modem to be functional. -
Page 12: Configuring Talkswitch
In some cases, Windows may find a device called “Creatix V90 modem” and install drivers for this device. TalkSwitch is powered by a modem chipset, but does not act as a modem, so the drivers do not need to function properly. Simply let the install proceed so that you are not bothered by Windows detecting new Hardware everytime you reboot your PC. -
Page 13: Control Centre
TalkSwitch software. PC Connection: Choosing PC Connection allows you to choose the correct COM port when connecting TalkSwitch to the PC. USB will appear as a COM port as well. Configure: Choosing Configure brings up the configuration software. (see section 2.3) Note: You cannot configure TalkSwitch by phone while the software is open. -
Page 14: Configuration
About: Displays useful information including the TalkSwitch software, firmware and hardware version numbers. Configuration From the Control Centre choose Configure. The following screen will appear: The configuration screen consists of 4 parts: 1. Menu Items 2. Configuration Navigation Controls what is displayed in the configuration window 3. - Page 15 Retrieves settings from TalkSwitch connected to the PC. Open File... Opens existing configuration files from the PC. Default configuration files are included with the software. TalkSwitch also backs up to a file called “LastSavedConfig.dat” every time you save settings to TalkSwitch. Save to TalkSwitch Saves the current configuration to TalkSwitch.
- Page 16 Menu Items - Help TalkSwitch Help: Opens the TalkSwitch Help file. You can search through the contents for useful information. Help is also accessible by pressing the ‘F1’ key while the Configuration is open.
-
Page 17: System Information
2.3.1 System Information 2.3.1.1 Telephone Lines This section tells TalkSwitch about the telephone lines plugged into its back panel. Simply select a line and fill in the information. For each line there is a status message (“Line detected at initialization”) indicating if TalkSwitch detected a line plugged into each of its line port. - Page 18 Enable this option if you have Call Waiting service on the current line. It is recommended that you remove this service from your line(s) since there is no way for TalkSwitch to handle a second call while it is handling the first call. You may want to consider adding the Hunt/Rollover service to your lines.
-
Page 19: Line Hunt Groups
Hunt Group 81: selects Line 1 Hunt Group 82: selects Line 2 Hunt Group 83: selects Line 3 (for the TalkSwitch 48 LS only) Hunt Group 84: selects Line 4 (for the TalkSwitch 48 LS only) TalkSwitch User Manual... -
Page 20: Fax Information
Telephone Lines section under System Information. Next, select the extension number where you have your fax device connected. For example if you have your fax machine connected to E8 on the rear of the TalkSwitch, then select extension number 118. -
Page 21: Local Extensions
'Direct line access' and choose the appropriate Hunt Group. As soon as the fax goes off hook, TalkSwitch will hunt the specified lines for an available line. This feature is also useful if you want to avoid dialing any digits for accessing a line. -
Page 22: Remote Extensions
Direct Line Access enabled, dial Flash 4 after going off hook. 2.3.1.5 Remote Extensions With TalkSwitch's Remote Extensions, you can have calls forwarded directly from your home/office to any phone number you choose. Your cell phone, pager or any out-of-office number becomes a 'Remote Extension' of your office system. - Page 23 When using Same Line Connect, callers will hear silence while they are on hold since the callers are on hold at the Telephone Company and not at TalkSwitch. If you want callers to hear music while they are on hold for calls forwarded to Remote Extensions, do not use Same Line Connect.
-
Page 24: Extension Ring Groups
Extension Ring Group 300 for the Sales Department, in which case it will ring extensions 111, 112, 113, and 114. You may want to also set up Ring Group 301 for Technical Support, in which case it will ring extensions 115 and 116. Configuring TalkSwitch... - Page 25 This is the list of extensions that will ring when the Extension Ring Group is selected from the Auto Attendant or Local Extension. All extensions listed will ring simultaneously when this Ring Group is dialed from an extension or at the Auto Attendant. TalkSwitch User Manual...
-
Page 26: Voicemail
2.3.1.7 Voicemail This tab deals with the internal voicemail system included with TalkSwitch. It allows you to activate General, Local and Remote mailboxes and view mailbox status. In the “General, Local and Remote mailbox activation ” sections: These sections allow you to activate General, Local or Remote mailboxes as either a mailbox or an announcement. - Page 27 This may be useful if someone has forgotten their password or someone has left the company. If you want to reset a voice mailbox completely, use the Voicemail manager located under the Utilities menu. TalkSwitch User Manual...
-
Page 28: Music-On-Hold
Also when the caller makes a selection at the Auto Attendant to go to an extension that has call screening enabled, they will hear both ringing and music. For more information on using Music-on-hold, please see section 3.6. Configuring TalkSwitch... -
Page 29: Call Handling
To use the Automatic Mode Switching feature, you must first activate it by clicking 'Use Automatic Mode Switching'. Next, set the start times for each mode. If you want TalkSwitch to change modes more than twice in one day, you can activate up to two extra mode changes for that day. -
Page 30: Auto Attendant
A total of 9 different Auto Attendants can be recorded with a combined total time of 25 minutes (shared with voicemail, but can be expanded on the TalkSwitch 48-LS using TalkSwitch Memory cards). You do not have to use or record all 9 Auto Attendants. - Page 31 In the “At the Auto Attendant, perform the following actions:” section: For each Auto Attendant, you can configure how you want TalkSwitch to handle calls when a caller selects '0, 1, 2, 3, 4, 5', makes 'no selection' or if a 'fax call is detected'.
- Page 32 TalkSwitch will handle the call accordingly. Not all fax machines emit a CNG tone, and as a result TalkSwitch will not be able to detect the fax call and route it to the fax machine. To guarantee the reception of every fax, we recommend the use of a ‘Distinctive Ring Number’...
- Page 33 Selecting this button displays the amount of time used by all the Auto Attendants. This feature helps you keep track of memory usage as you may have unused Auto Attendant messages that can be deleted to free up more memory. TalkSwitch User Manual...
-
Page 34: Telephone Lines
This section deals with how TalkSwitch will handle incoming calls based on the incoming line and ring cadence (distinctive ring numbers). First select a line to configure then the appropriate mode you want TalkSwitch to use these settings. Play Auto Attendant:... -
Page 35: Local Extensions
Cascade sequence is exactly what you will get. You can set up the Call Cascade sequences differently for both scheduling modes (the scheduling for these modes are set up on the Modes tab). TalkSwitch User Manual... - Page 36 Attendant, play busy tone (for example: used if a fax machine is at the exten - sion), queue caller, or hang up. For more information on these features, see chapter 3.0 - Using TalkSwitch. 2. No answer at ext. - routing options when this extension does not answer after a specified number of rings.
- Page 37 Routing options include forwarding calls to a Local Extension, Remote Extension, Extension Ring Group, built in Voicemail, Announcement, Auto Attendant or hang up. In the case where ‘hang up’ is selected, TalkSwitch will first play the following prompt before hanging up: “I’m sorry, that extension is unavailable at this time.
-
Page 38: Remote Extensions
2. No answer at ext. - routing options when this extension does not answer after a specified number of rings. Cascade options include forwarding calls to a Local Extension, Remote Extension, Extension Ring Group, built in Voicemail, Announcement or Auto Attendant, keep ringing or hang up. Configuring TalkSwitch... - Page 39 Voicemail, Announcement, Auto Attendant or hang up. If you select ‘stay connected’ you will notice that the Call Cascade options are greyed out. TalkSwitch can only control forwarded calls when prompting is enabled. Also, if you use one of the prompted methods for this Remote...
-
Page 40: Extension Ring Groups
2. No answer at ext. - routing options when all the extensions in the Ring Group do not answer after a specified number of rings. Cascade options include forwarding calls to a Local Extension, Remote Extension, Extension Ring Group, built in Voicemail, Announcement, Auto Attendant, keep ringing or hang up. Configuring TalkSwitch... -
Page 41: Call Back / Call Bridge
Bridge allows you to place calls from your office telephone lines when you are not in the office. You can make a direct call to TalkSwitch, activate Call Bridge and enter the telephone number you want to dial. TalkSwitch dials the number from your... -
Page 42: Auto Call Back
Prompted Call Back. By default, Prompted Call Back is not activated in the TalkSwitch configuration. You will need to activate Prompted Call Back before you can use this feature. - Page 43 In essence this saves you the hassle of having to always enter the same prefix every time you want to set up an Auto Call Back phone number. TalkSwitch User Manual...
- Page 44 Select the line/phone number when out of the office that you will be dialing to trigger this Auto Call Back. TalkSwitch will initiate the Call Back using the same line you initially called. You can make configure changes to this Auto Call Back by dialing into this phone number only.
-
Page 45: Prompted Call Back
(do not enter a Line Hunt Group in the dialing string). TalkSwitch will Call Back out on the same line the call originated. When you access Prompted Call Back from out of the office, you may change this number before initiating Prompted Call Back. - Page 46 This option is designed to give you security and to restrict who can use Prompted Call Back. Simply fill in a 4 to 8 digit password and when TalkSwitch calls you back, you will be prompted to input the password to accept Call Back to access Call Bridge or any TalkSwitch extension.
-
Page 47: Call Bridge
Bridge box. You may also restrict the Hunt Group access using Call Bridge from this Call Back by choosing the Hunt Group Access button. The call back number shown will always be the last number TalkSwitch dialed in the last Prompted Call Back session. -
Page 48: Options
2.3.4 Options 2.3.4.1 Administrator Password This tab allows you to set up the Administrator password for TalkSwitch. The Administrator password gives access to all configuration options. The password that is entered here will be used at configuration start-up and through DTMF configuration. -
Page 49: Audio Controls
This section deals with the adjustment of volume and system gain controls. All the controls on this page update TalkSwitch in ‘real time’. This allows you to adjust levels during a conversation without having to first save the configuration to TalkSwitch. -
Page 50: Manual Transfer
By default, the settings compensate for any loss created by TalkSwitch and a portion of the loss created by your lines. If you have problematic lines or high loss lines, you may need to further increase the gain for each line. -
Page 51: Miscellaneous
Group, an Announcement, or a Voice mailbox. This section allows you to choose which transfer prefix you would like to use to perform the action. The transfer prefix ‘wakes up’ TalkSwitch and can be considered the equivalent of the Flash or Link action at a Local Extension. By default the prefix is Example: Let’s say you receive a call on a phone in your home that is not an... - Page 52 Setting up TalkSwitch behind an existing PBX: 1. Connect the PBX extension to one of TalkSwitch’s Line jacks. You may do this with all your TalkSwitch lines (1 PBX extension per line) depending upon how many Auto Attendant ports you would like on the PBX.
- Page 53 Caller ID on any of the lines, this option defaults to the active position. If it is de-activated, TalkSwitch can obtain it’s time information from the time and date set in the ‘Mode’ tab under Automatic Mode Switching.
-
Page 54: Troubleshooting
If you are a single person operation and would like to screen all voicemail messages being left on TalkSwitch, you can connect a speaker to the PA output and select ‘Play Voicemail prompts and recordings through PA’. When a caller goes to voicemail, you will hear your greeting and the caller leaving a message. - Page 55 50 ms to 900 ms. The default setting is 400 ms. If you notice that you are having problems with any of the TalkSwitch features that use 3- way calling, you may want to experiment with this value.
- Page 56 3) If you don’t want to give callers the ability to dial any of the extensions and only permit them to access single digit options, set this value to ‘immediately’. As soon as TalkSwitch detects the first digit, it will follow the specified option for that Auto Attendant.
-
Page 57: Using Talkswitch
If you subscribe to Caller ID service, you may want to set the Auto Attendant to answer after at least 1 ring to give TalkSwitch a chance to capture the Caller ID information. In the Office - Making and Receiving Calls 3.2.1 Making calls from a Local Extension... -
Page 58: Receiving Calls At A Local Extension
If you use the ‘Hold’ button on your phone, you will not be able to access any of the TalkSwitch features while the caller is on hold. Also, if you have Music-on-hold enabled, the caller will not hear music while they are on hold. -
Page 59: Transferring Calls
'flash' 4 to complete the transfer and get internal dialtone. The caller will immediately be taken off hold and connected with the receiving extension. Using TalkSwitch... -
Page 60: Call Park - Parking And Retrieving Callers
3.2.5 Call Park - Parking and retrieving callers Call Park is a useful feature for placing a caller on hold and then being able to retrieve them from any other Local Extension. TalkSwitch has 10 Park Orbits for all models. -
Page 61: Conference Calling With Talkswitch
If you want to queue callers for a Ring Group, you can only queue callers to one of the extensions in the Ring Group and not to the entire Ring Group. TalkSwitch does not have the resources to perform Automatic Call Distribution with Ring Groups. -
Page 62: Using Phones Connected In Parallel To Talkswitch
Auto Attendant (e.g. TalkSwitch determines if the call is a Distinctive Ring and detects any Caller ID information). A parallel phone can 'barge in' on any telephone call on any of TalkSwitch's Lines (e.g. any calls to or from a TalkSwitch extension). -
Page 63: External Modem Telephone Line Access
Call Cascade actions. When a phone in parallel with Talkswitch is off-hook, you will notice that the corresponding line light will flicker very rapidly to indicate the line is occupied. -
Page 64: Out Of The Office - Receiving Calls Through Call Forwarding
Auto Attendant can forward the call to a Remote (out of office) extension number. Conditional call forwarding is configured using the Call Cascade’s 'No answer' or 'Busy at extension' settings configurable for each Local Extension, Remote Extension and Ring Group. TalkSwitch User Manual... -
Page 65: Screening Options For Forwarded Calls
Call Cascade options by pressing hanging up. If a forwarded call is not answered or the line is busy, TalkSwitch will perform the following based upon how the call was originally forwarded:... -
Page 66: Out Of The Office - Making Calls With Call Back And Call Bridge
Call Bridge allows you to place calls using your office telephone lines when you are not in the office. You can make a direct call to TalkSwitch, access a telephone line connected to TalkSwitch and enter the number you want to dial. This is especially useful when out of the office with your cell phone and need to dial a long distance number. -
Page 67: Using Call Back
'1', country code, and area code if applicable. 3.4.2 Using Call Back The Call Back feature allows you to initiate TalkSwitch to call you at a specified telephone number. This gives you access to any of the following: •... - Page 68 For Prompted Call Back, TalkSwitch always dials the last Prompted Call Back number entered. If you do not have the Auto Attendant set to answer a line, a generic TalkSwitch Auto Attendant will answer after 15 rings and you can then dial 6 to access the Call Back settings.
-
Page 69: Using The Internal Voicemail System
3.5.2 Accessing a Voice mailbox When a new message is left at a Local Extension mailbox, TalkSwitch will play stutter dial tone to that extension when the handset is picked up. It can also light up the message waiting light on a phone if it supports FSK Message Waiting Indicator. -
Page 70: Music-On-Hold
Music-on-Hold TalkSwitch can play music to callers when they are on hold, parked or queued. The music played to the callers will be provided by whatever source you have connected to the MUSIC jack. -
Page 71: Mode Switching Options
If you DO NOT ENABLE Music-on-Hold and have an audio device plugged into the back of TalkSwitch: 1. When callers are put on hold at an extension, callers will hear TalkSwitch's default on hold beeping tone and your music. 2. When the Auto Attendant answers a call and transfers the caller to an extension, the caller will not hear any pre-recorded message. -
Page 72: Upgrading The Talkswitch Firmware
TalkSwitch) is located on a 'Flash EPROM'. This means that the Code operating your TalkSwitch can be 'updated' without removing the chip that contains the code. Because of this, you can easily update your TalkSwitch by disk or by visiting our website at www.talkswitch.com and downloading an update from the Support area. - Page 73 Step # 3 The final step in the upgrade process is to open the TalkSwitch software and select 'Flash Upgrade' from the main splash screen. A screen will appear warning you not to interrupt the update process once it has begun. Click on the "Yes" button to proceed.
-
Page 74: Appendices
Appendices Appendix A - Help & Troubleshooting Appendix B - Using TalkSwitch with Telephone Company Calling Services Appendix C - Quick Commands and DTMF Functions Appendix D - Safety Precautions and Regulatory Information Appendix E - TalkSwitch One Year Warranty... - Page 75 Please have the following information available when you call: a) Your e-mail address and telephone number. b) The serial number located on the bottom of TalkSwitch and your date of purchase. c) The number of telephone lines that you have connected to TalkSwitch.
- Page 76 TalkSwitch. (Do not plug your extensions directly into a wall jack.) 2. Check the Serial cable or U S B connection between TalkSwitch and your PC. 3. Ensure that TalkSwitch's power adapter is plugged into a working power outlet and that TalkSwitch is turned on.
- Page 77 If so, you will have to dial flash 4 to receive internal dialtone. • If the TalkSwitch configuration software is open, you cannot configure TalkSwitch using DTMF. If the software is closed and you continue to get the prompt “I’m sorry, TalkSwitch is currently being configured.” Try resetting TalkSwitch.
- Page 78 Problem: The Auto Attendant answers calls before any of the extensions ring. This is a problem for those TalkSwitch users who wish to have their local extensions ring before the Auto Attendant picks up incoming calls. • Check the 'Extensions to ring on incoming call before Auto Attendant answers' setting in the Call Handling tab in the 'Inbound Calls' folder.
- Page 79 Problem: Unable to place calls on hold (Calls are disconnected). • Extensions that have been given 'Direct Access to Telephone Lines' cannot use TalkSwitch's 'Call Hold' feature. These extensions will also not have access to any of the call handling features which require the use of Hold, such as transfer call Grab, etc.
- Page 80 'if a fax call is detected'. • Not all fax machines emit a CNG tone that TalkSwitch can detect and route. Therefore, it is wise to consider incorporating an additional method of fax routing.
- Page 81 • Some telephones require more 'voltage' in order to ring. These phones are usually the older 'Bell' phones that have mechanical ringers. These phones are simply too much of a load for TalkSwitch and should not be used as an extension.
-
Page 82: Appendix B - Using Talkswitch With Telephone Company Calling Services
Auto Attendant answers, TalkSwitch will pass the Caller ID information to that extension. If a call is transferred from one extension to another, the Caller ID information will also be passed. TalkSwitch can also use the Caller ID’s time stamp to set it’s internal clock. - Page 83 Hunt and Rollover services. Call Hold and Flash TalkSwitch uses 'Flash' to put calls on hold. A Flash signal is produced by pressing the 'Flash' or 'Link' button on your telephone (Link is another name for Flash). If you do not have these buttons on your telephone, you can produce a 'Flash' by quickly depressing and releasing the telephone's 'Hangup Hook' or 'Hook Switch'.
- Page 84 COs.) Using a 'Double Flash': first Flash places the caller on hold, and the second Flash (if pressed within 2 seconds) tells TalkSwitch to pass a Flash to the CO line to activate the CO or PBX intended feature.
-
Page 85: Appendix C - Quick Commands And Dtmf Functions
Administrator password. Next, enter any command followed by the sign. Command Action TalkSwitch tells you which mode it is currently using Switch Modes (x = 1or 2) Record Auto Attendant (x = 1 to 9) Erase Auto Attendant messages (x = 1 to 9) - Page 86 <flash>4 Action performed after putting a caller on internal dialtone <or> disconnects Hold then dialing an indented destination. TalkSwitch from external dial tone and <or> Action performed with Direct Line gives internal dial tone. Access enabled at a Line. External P.A. Access...
- Page 87 DTMF Notes Function performed <flash>5 Action performed after putting a caller on Hold Disconnects current caller and and dialing an intended destination. reconnects immediately to the last caller put on hold. Press 'flash' to place a call on hold, then assign Call Parking Spaces - 10 in total for 500-509 the entire system.
- Page 88 User Defined - Mapped to an Extension, Ring Group, Auto Attendant, Voice mailbox, Announcement or perform no action. 111-114 (118) Dials Local Extensions (For the TalkSwitch 48 models, the extensions are 111-118). 211-218 Dials Remote Extensions associated with an external phone number.
-
Page 89: Appendix D - Safety Precautions And Regulatory Information
3. Moisture - Do not place TalkSwitch in a high humidity environment. 4. Heat - Never place TalkSwitch near heat sources such as radiators, floor registers or direct sunlight. 5. Power Supply - The equipment should only be connected to an approved power supply of the type described in the operating instructions or marked on the equipment. - Page 90 • Consult the dealer or an experienced Radio/TV technician for help. This CLASS B Digital apparatus meets all requirements of the Canadian interference-causing equipment regulations. Changes or modifications not expressly approved by Centrepoint Technologies could void the user's authority to operate the equipment. TalkSwitch User Manual...
- Page 91 FCC Part 68: Notice: The Industry Canada label identifies certified equipment. This certification m e a n s t h a t t h e e q u i p m e n t m e e t s t e l e c o m m u n i c a t i o n s n e t w o r k p r o t e c t i v e , operational and safety requirements as prescribed in the appropriate Terminal Equipment Technical Requirements document(s).
- Page 92 Service Should you experience trouble with this telephone equipment, Model CT-TS01, TalkSwitch, for repair or warranty information, please contact your reseller. See Appendix E, “TalkSwitch One Year Limited Warranty”, for more information. If the equipment is causing harm to the telephone network, the Telephone Company may request that you disconnect the equipment until the problem is corrected.
-
Page 93: Appendix E - Talkswitch One Year Warranty
Centrepoint Technologies warrants to the original end-user purchaser that TalkSwitch meets applicable specifications (as set forth in the product descriptions in the technical manuals) and to be free from defects in materials and workmanship for a period of one year from the date of purchase (proof of purchase required). - Page 94 Centrepoint Technologies. The original end-user purchaser shall pay all shipping charges, duties and taxes for products sent to Centrepoint Technologies for warranty service. Centrepoint Technologies shall pay for return of the product to the end-user purchaser. TalkSwitch User Manual...
- Page 95 To obtain Warranty service: To obtain Warranty service: 1. Contact your reseller and obtain a Warranty Return Authorization (WRA) number if required. If you purchased the product directly from Centrepoint Technologies, you can obtain this number by contacting the Technical Support department at Centrepoint Technologies (613) 725-2980.
-
Page 96: Appendix F - Return Policy
Products purchased directly from Centrepoint Technologies: Contact Centrepoint Technologies for details regarding the return policy. information regarding product servicing, please refer to the TalkSwitch One Year Limited Warranty. Centrepoint Technologies will not accept product returns outside of its return policy. -
Page 97: Appendix G - Talkswitch And Power Interruptions
TalkSwitch's power supply. Calling Features: Calling Features: In the event of a power failure, no TalkSwitch features or capabilities will be available other than: • Local Extension 114 can make or receive calls on Line 1 In the event of a power return, all TalkSwitch features and capabilities will be re- established. - Page 98 The character on the bottom right of A TalkSwitch feature which, once your touchtone telephone keypad. It is activated, instructs TalkSwitch to call you also commonly called the number sign. back at a preset Out-of-Office telephone number. You can then access TalkSwitch's Call Bridge feature.
- Page 99 Configuration machine/modem. The way a system is setup. For TalkSwitch the configuration is the collection of values or options you have chosen for Central Office. each of TalkSwitch's features. Together,...
-
Page 100: Glossary
'Extensions' jacks located on the back TalkSwitch recognizes Distinctive Ring 1 panel of your TalkSwitch. as 2 short rings. Distinctive Ring 2 is identified as 3 short rings. (Distinctive... - Page 101 Unlike online service networks (.com, .ca, .net, etc.) which are a telephone. All of these actions will send a signal to TalkSwitch to put calls on or centrally controlled, the Internet is decentralized by design. Each Internet off hold.
- Page 102 LEDs are used in dis- plays on electronic devices such as com- Modes puters. TalkSwitch has five LEDs on its front panel. They show which telephone A TalkSwitch feature which allows you to is in use, whether data is being trans-...
- Page 103 Selective Call Forward. Prompts are also Determining the path that a message or provided when configuring TalkSwitch call is to take over circuits. TalkSwitch using a telephone Keypad and for callers offers 'routing' of incoming calls using being put 'on hold'.
- Page 104 A telephone or other communications device not physically connected to Tel Lines 1, 2, 3, or 4 TalkSwitch as an extension, but which A jack or plug-in on the back panel of provides the same functionality. In TalkSwitch which can accept a RJ-11...
-
Page 105: Index
9 pin Serial Cable, 1 Call Back ring return, 4 8 About (Menu item), 11 Call Bridge, 44 , 1 0 1 About TalkSwitch, 13 Call Cascade, 33 , 34 , 35 AC Power Adapter, 1 Call Forward, 36 , 62, 10 3... - Page 106 Connecting devices to the music and PA Home phone, 10 6 jacks, 7 How to use Call Bridge, 4 4, 6 4 Connecting TalkSwitch to a PC, 7 Hunt Group access, 19 Connector, 10 4 Hunt Group restriction, 61 Copyright Information, ii...
- Page 107 47 Remote extension mailboxes, 67 Troubleshooting, 52 Remote Extensions, 1 9, 3 5 Two--line analog telephone, 6 Remote mailbox activation, 23 Unscreened transfer, 5 7 Reset mailbox password, 24 Upgrading the TalkSwitch firmware, 70 Retrieve settings, 1 2 Index...
- Page 108 Use Same Line Connect, 20 View Auto Attendant memory usage, 30 View Mailbox data, 2 4 Virtual extension, 1 09 Voice mailboxes, 23, 67 Voicemail, 23, 67, 83 Voicemail manager, 1 3 Warranty, 9 5 Warranty service, 96 TalkSwitch User Manual...
Need help?
Do you have a question about the DESKTOP PHONE SYSTEM and is the answer not in the manual?
Questions and answers