Table of Contents
Advertisement
Advertisement
Table of Contents

Related Manuals for Ingenico EFT930G


Summary of Contents for Ingenico EFT930G
- Page 1 Terminal User Guide EFT930G/B...
-
Page 2: Table Of Contents
Contents Section Title Page Introduction Important Safety Instructions Declaration of Conformity Installing the Terminal Using the Terminal Battery Information Signal Information Using the Menus Starting a Transaction Sale Transactions Voice Referrals Setting the Referral Password Refund Contactless Refunds Purchase with Cashback Cash Advance Add Gratuity as a Percentage Purchase with Gratuity (Restaurants) -
Page 3: Introduction
Introduction This guide will detail how you install and use your EFT930 terminal, including Safety Instructions and instructions on transaction processing, printing reports and general maintenance of the terminal. Important Battery Information Battery Operation The terminal displays the Battery Power status as a number of bars much like those on a mobile phone display. - Page 4 The EFT930 is fitted with a lithium battery which can only be accessed and serviced by a qualified technician. The EFT930 is fitted with battery specially designed for this terminal. • Only use the appropriate chargers and batteries listed in the Ingenico’s catalogue. • Do not short circuit the battery. •...
- Page 5 The SAR values found for the EFT930G GSM/GPRS Point of sale terminal are below the maximum recommended levels of 1.6 W/Kg as averaged over any 1 g tissue according to the FCC rule §2.1093, the ANSI/IEEE C 95.1:1999, the NCRP Report Number 86 for uncontrolled environment, according to the...
-
Page 6: Declaration Of Conformity
WEEE as unsorted municipal waste and to collect such WEEE separately. To ensure that the product is collected and recycled with respect to the environment, you must contact your supplier (contact the Ingenico local office or the commercial head office in charge of your country on www.ingenico.com <<contact us>> page). -
Page 7: Installing The Terminal
Connection Method option and then press ENTER to select that option. If using a Telephone <PPP> EFT930G the display will show GRPS Network twice. LOCAL NETWORK Now switch on the mains supply. The terminal will display this screen, press ENTER and a number of additional screens will be displayed while the handset assigns to the base. -
Page 8: Using The Terminal
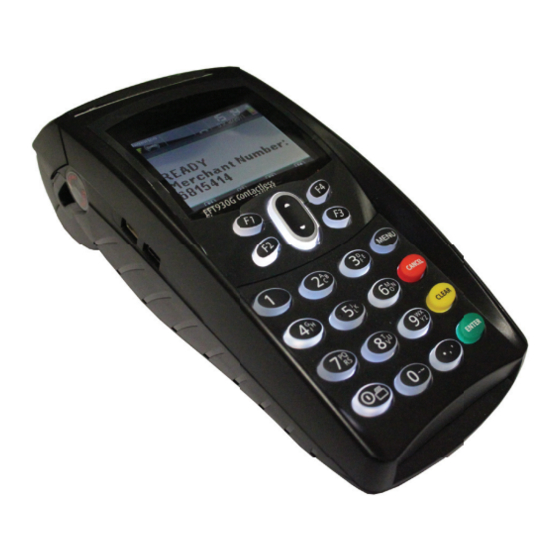
Finally, the terminal will dial the Host computer to report the successful installation. READY Merchant Number 12345678 Installation is now complete and the terminal will display the READY prompt. Your terminal is now ready for use. Check the date and time on your terminal, if this needs to be corrected refer to Section 31 of this guide for details on how to do this Using the Terminal Switching the Terminal On and Off... -
Page 9: Signal Information
Signal Information EFT930GCC: The signal icon represents the strength of the GSM/GPRS mobile signal. The fewer bars indicated represents poorer network strength. Your terminal may not be able to communicate with the acquirer if the signal is very poor. The network name shown next to the signal icon, indicates which network the terminal is communicating by. - Page 10 All instructions to be carried out by the customer are Amount 55.00 denoted by this shaded display. PIN **** Cardholder to key PIN At this time you should hand the terminal to the Enter=OK Clear=REKEY customer and ask them to follow the instructions displayed.
-
Page 11: Starting A Transaction
Swiping a Card The card should be swiped with the black magnetic stripe facing the terminal and running along the bottom of the card. Make sure that the bottom of the card runs firmly along the bottom of the card swipe and that the card is swiped at even speed. -
Page 12: Sale Transactions
10. Sale Transactions At the READY PROMPT you may be asked to “Key in the amount” of the sale or to “insert or swipe” customer card. If the card is a Chip card, please see ‘Sale (Card Inserted)’. If the customer’s card has been swiped, please see ‘Sale (Card Swiped)’. If the customer’s card is a Contactless card and is to be used for a Contactless transaction, please see ‘Sale (Contactless)’. - Page 13 Sale (Card Swiped) SALE 1. Swipe the customer’s card through the terminal. Checking Card Please Wait... 2. You may be prompted to confirm the last four digits of Key in last 4 digits of Card the card number. Key in the last four numbers from the Number customer’s card and then press the GREEN button.
-
Page 14: Voice Referrals
4. If the customer requests a receipt press the key and Printing a customer receipt will be printed. This must be done before CUSTOMER RECEIPT the next transaction takes place. Please Wait... If receipt is not printed clearly press the MENU button or press the GREEN button to return to the READY prompt. -
Page 15: Setting The Referral Password
Incorrect Code/Password If you enter an incorrect Password this screen will be INCORRECT REFERRAL displayed, press the YELLOW button to retry. PASSWORD Press CLEAR to retry. If an incorrect Password is entered at the second attempt Enter Referral Password this screen will be displayed, press the GREEN button for a LAST TRY final retry. -
Page 16: Refund
13. Refund TRANSACTION MENU 1. At the READY prompt, press the MENU button. Refund Sale 2. Use the arrow keys to highlight refund and press the Purch. with Cashback GREEN button. 3. Either key in the amount of refund transaction and then REFUND press GREEN button or swipe/insert card in the terminal and Key in Amount... -
Page 17: Purchase With Cashback
15. Purchase with Cashback This menu option only needs to be used to provide Cashback when normal Sale transactions are performed with a gratuity. Selecting this option allows a transaction to be carried out with Cashback instead of with gratuity. Please note: Only certain types of debit cards allow Purchase with Cashback. -
Page 18: Add Gratuity As A Percentage
The transaction will now continue as a normal sale transaction. Please refer to Section 10 of this guide for how to complete a Sale transaction. 17. Add Gratuity as a Percentage If the terminal is configured for gratuity this can be added as a percentage of the total or as an actual value. - Page 19 4. Pass the terminal to the customer to confirm the amount. Cardholder to Confirm Amount 55.00 If the customer rejects the amount, the customer should Press ENTER to Accept return the terminal. You will be prompted to swipe the or CLEAR to Reject Supervisor Card or key in your supervisor code and re-enter the amount.
-
Page 20: Refund With Gratuity
19. Refund with Gratuity 1. At the READY prompt press the MENU button. Use the REFUND arrow buttons to view the available options and press the Key in TOTAL: GREEN button when the Refund option is highlighted. 0.00 and then press ENTER 2. - Page 21 1. At the READY prompt press the MENU button. Use the TRANSACTION MENU arrow buttons to view the available options and press the Refund GREEN button when the Pre-Auth option is highlighted. Purchase. with Cashback Pre-Auth 2. Key in the amount of the transaction and press the GREEN button or insert/swipe the customer’s card and then key in PRE-AUTH Key in Amount:...
-
Page 22: Key Entering Card Details And Mail Order Transactions
21. Key Entering Card Details and Mail Order Transactions You may need to key enter a customer’s card details if their card is faulty or if you are entering a mail order transaction where the customer is not present. A. Mail Order Transactions : Begin at Step 1 if you are performing a Mail Order Transaction. B. - Page 23 6. Key in the amount of the transaction and press the GREEN <transaction type> ENTER button. The terminal will now dial for authorisation. Key in Amount: The authorisation code will be displayed. Press the GREEN 0.00 button. and then press ENTER NOTE: Not displayed if amount is keyed in first.
-
Page 24: Reversal
Message Text Result ALL MATCH All data entered is correct SEC CODE MATCH ONLY Only the Security Code is correct ADDRESS MATCH ONLY Only the address is correct NO DATA MATCHES None of the data entered is correct DATA NOT CHECKED The data has not been checked 11. -
Page 25: Pin Entry Failure
Insert or Swipe Card VERIFY ACCOUNT Insert or Swipe Card to continue ( or press Cancel key ) Cardholder PIN entry ( * (asterisk) will be displayed as Amount £0.00 each PIN digit is keyed in ) PIN: **** Cardholder to key PIN Enter=OK Clear=REKEY The terminal will contact the acquirer to verify the account Amount... -
Page 26: Clearing Mistakes
2. CANCELLING AFTER AUTHORISATION BUT BEFORE COMPLETION When carrying out a swiped transaction and the transaction requires cancelling after authorisation has been obtained, but before the transaction has been completed, press the YELLOW button at the ‘SIGNATURE OK’ prompt to select NO and reject the signature. The transaction will be cancelled and a void receipt will be printed. -
Page 27: Waiter Totals
2. Use the arrow buttons to view the available options TOTALS MENU and press the GREEN button when the required option is End-of-Day Banking highlighted. Z-Totals X-Totals 3. You will then be asked to swipe the Supervisor Card or enter your Supervisor code. X-Totals? (or Z-Totals?) 4. -
Page 28: Entering Function Codes
1. At the READY prompt, press the MENU button twice. The SYSTEM MENU TOTALS option will be highlighted. Press the GREEN button Totals and the TOTALS menu will be displayed. Print Function Codes Select Function 2. Use the arrow buttons to view the available options TOTALS MENU and press the GREEN button when the End of Day option is End-of-Day Banking... - Page 29 Once the function code has been entered, follow the prompts displayed by the terminal. You may be prompted to swipe your Supervisor Card or key in Supervisor code. The following codes are available for you to use: CODE TITLE DESCRIPTION Print Transaction Refer to section 33 Set Date/Time...
- Page 30 7. Your terminal will automatically allocate the next ADD WAITER Code nn available Waiter ID. Key in the text/name description and Key in Waiter’s Name press the GREEN button (this field is limited to 10 aaaaaaaaa characters). and then press ENTER (Please refer to Section 8 of this guide for instructions on how to enter letters).
-
Page 31: How To Change The Date And Time
If Waiters Already Exist Waiters Already Exist If Default Waiters exist on your terminal and you wish to add Delete ALL if you wish a named waiter, this screen will be displayed. You MUST to remove delete a Default Waiter before a named waiter can be added. -
Page 32: How To Print A Transaction Log
3. Press ENTER to continue setting Sleep Parameters or Clear SYSTEM to cancel. Sleep Parameters? Enter=YES Clear=NO 4. Enter the number of minutes before which the terminal Number of Mins before goes to sleep and then press the GREEN button. going to sleep (1-30) The terminal will return to the READY prompt. - Page 33 4. To assign the terminal to a base unit press the GREEN SYSTEM button. To cancel the operation, press the YELLOW button. Radio Setup? 5. Select ASSIGN TO BASE and press the GREEN button. Enter=YES Clear=NO 6. Place the handset onto the base unit if you have not RADIO SETUP already done so.
-
Page 34: How To Test The Signal Quality
35. How to Test the Signal Quality You should make every effort to retain a high signal strength when using the terminal; signal strength is indicated by this symbol on your terminal display: To test the signal strength please proceed as instructed below. This will allow you to determine if you have any bad reception areas. -
Page 35: How To Change A Paper Roll
36. How to Change a Paper Roll 1. Hold the terminal securely in one hand. With the other hand, and by using two fingers, lift the printer cover release as shown. Fully open the printer cover and remove the old roll of paper. 2. -
Page 36: Helpful Hints
Should you suspect that the terminal might have been removed, stolen or apparently modified or replaced then you should advise your Bank immediately and stop using the terminal until advised by the Bank accordingly. This is to protect both your business and also the persons who have or will continue to use your terminal. -
Page 37: Miscellaneous Prompts
Unable to Connect Terminal not connecting to host Check the telephone line is via a telephone line connected properly. Call the Helpdesk for guidance. DIV434697A Copyright © 2012 Ingenico UK Ltd ALL RIGHTS RESERVED Date: May 2012 Released for: UT4.13.10 Page 36... - Page 38 Ingenico Ridge Way Donbristle Industrial Park Dalgety Bay Fife KY11 9JU Part Number: DIV434697A_Cover...
Need help?
Do you have a question about the EFT930G and is the answer not in the manual?
Questions and answers