Table of Contents
Advertisement
Quick Links
Advertisement
Table of Contents

Subscribe to Our Youtube Channel
Related Manuals for Euphonix System 5B


Summary of Contents for Euphonix System 5B
- Page 1 Digital Audio Mixing System Operation Manual Document Revision: 1.1 Release Date: August, 2005 eMix version: 2.8.1 Part Number: 840-09147-01 Euphonix, Inc. 220 Portage Ave. Palo Alto, California 94306 Phone: 650-855-0400 Fax: 650-855-0410 Web: http://www.euphonix.com e-mail: info@euphonix.com...
- Page 2 Clear Displays, Track Panner, SnapShot Recal, DSC (Digital Studio Controller), Hyper- Surround, Total Automation and Mix View are trademarks of Euphonix, Inc. ©2005 Euphonix, Inc. All rights reserved worldwide. No part of this publication may be reproduced, transmitted, transcribed, stored in a retrieval system, or translated into any language in any form by any means without written permission of Euphonix, Inc.
-
Page 3: Important Safety Instructions
IMPORTANT SAFETY INSTRUCTIONS The lighting flash with arrowhead symbol within an equilateral triangle, is intended to alert the user to the presence of uninsulated “dangerous voltage” within the product’s enclosure that may be of sufficient magnitude to constitute a risk of electrical shock to persons. The exclamation point within an equilateral triangle, is intended to alert the user to the presence of important operating and maintenance (servicing) instructions in the literature accompanying the product. - Page 4 13) Unplug this apparatus during lightning storms or when unused for long periods of time. 14) Refer all servicing to qualified service personnel. Servicing is required when the apparatus has been damaged in any way, such as power-supply cord or plug is damaged, liquid has been spilled or objects have fallen into the apparatus, the apparatus has been exposed to rain or moisture, does not operate normally, or has been dropped.
-
Page 5: Table Of Contents
System 5-B Digital Audio Mixing System Operation Manual Table of Contents List of Figures ........................xi List of Tables .........................xv Chapter 1: Introduction ....................17 How to Use This Manual.................17 Overview of the System Components .............19 1.2.1 DF64 Digital Audio Frame ............19 1.2.2 Analog and Digital I/O..............19 1.2.3... - Page 6 System 5-B Digital Audio Mixing System Operation Manual 4.2.8 Talkback Signal Patching............47 Busses ......................48 4.3.1 Law Palette................49 Externals ....................50 System .....................50 4.5.1 Mixer Model ................50 Folddown....................51 Diagnostics ....................52 Masters ....................53 Events ......................53 4.10 System 5 Logo..................53 Chapter 5: CM401 Master Section ................55 Monitoring....................56 5.1.1...
- Page 7 System 5-B Digital Audio Mixing System Operation Manual Meters ......................70 5.4.1 Meters Panel................70 5.4.2 Master Section Meters ..............73 Chapter 6: CM402 Center Section ................75 Channel Select Panel ................77 Knobset Panels ..................78 6.2.1 Knobset Control Panel ..............78 Bus Routing Panel ...................80 6.3.1 Grp Route..................80 6.3.2...
- Page 8 System 5-B Digital Audio Mixing System Operation Manual Chapter 8: Channels and Strips ................89 Strips......................89 8.1.1 Map Channels and Control Groups to Strips ......91 8.1.2 Input Names or Channel Number ..........93 8.1.3 Strip Utilities ................94 Channel Control Features ................97 8.2.1 Channel Name................97 8.2.2 Function Keys ................97...
- Page 9 System 5-B Digital Audio Mixing System Operation Manual 9.1.4 Name Control Group...............125 9.1.5 Clear Control Group..............126 Multi Format Masters ................126 Spill......................127 Control Groups or Multi Format Masters..........128 Chapter 10: Layouts and Snapshots ..............129 10.1 Layouts ....................130 10.1.1 Create a New Layout...............130 10.1.2 Recall a Layout ...............132 10.1.3...
- Page 10 System 5-B Digital Audio Mixing System Operation Manual 11.9.3 Move a Fader to Start a Cart Machine ........145 11.9.4 Move a Fader to Stop a Cart Machine ........146 11.9.5 Video Switcher Turns a Specific Camera and Channel On ..147 11.9.6 Video Switcher Turns a Specific Camera and Channel Off ...148 11.9.7 Audio Follow Video..............149...
-
Page 11: List Of Figures
System 5-B Digital Audio Mixing System Operation Manual List of Figures Typical System 5-B Hardware Configuration ..............20 New Title dialog .......................25 Device Outputs page in PatchNet ..................27 Cabling ..........................28 Microphone assignment in Device Outputs ..............29 Projects Window .......................32 Titles Window ........................33 New Title dialog .......................34 File operations buttons for current Title ................35 Updating Title Defaults warning ..................36... - Page 12 System 5-B Digital Audio Mixing System Operation Manual Comms:Talkback Panels ....................62 Comms:Listenback Panel ....................63 Comms:Slate/Osc Panel ....................65 Quick Access Communication Panels ................66 Master Solo section (top-left) and Solo Control Panel .............67 5-10 Channel meter with dynamics gain reduction meter on right ...........70 5-11 Meter Presets and Meter Configuration Panels ..............71 5-12...
- Page 13 System 5-B Digital Audio Mixing System Operation Manual 8-16 Changing processor order ....................116 8-17 GRP and MAIN route switches ..................117 8-18 Group Bus Routing Knobsets ..................118 8-19 Main Section Routing Knobset ..................119 8-20 Mix Minus Knobset and Signal Flow ................121 Groups Panel ........................124 Masters Screen ........................126 10-1...
- Page 14 System 5-B Digital Audio Mixing System Operation Manual...
-
Page 15: List Of Tables
System 5-B Digital Audio Mixing System Operation Manual List of Tables Monitor Bussses ......................47 Law Palette Formats ...................... 49 Center Panel Knobset Presets ..................79 11-1 GP Input Types, Settings, and Activation Values ............138 11-2 GP Output Types, Settings, and Activation Values ............. 139 11-3 Logical Operators Used for GPI/O Event Processing .......... -
Page 17: Chapter 1: Introduction
How to Use This Manual Euphonix has dedicated substantial time and resources to the System 5-B documenta- tion. We recognize the diverse range of experience among our customers and have writ- ten and organized the manual to be accessible to everyone. - Page 18 System 5-B Digital Audio Mixing System Operation Manual Introduction How to Use the PDF The Acrobat PDF version of this manual provided in your system can be a valuable “on- line help” learning tool while using System 5. We have included some amenities that we wish to explain for those not familiar with Acrobat: •...
-
Page 19: Overview Of The System Components
System 5-B Digital Audio Mixing System Operation Manual Introduction Overview of the System Components 1.2.1 DF64 Digital Audio Frame The DF64 Digital Frame performs all System 5-B audio processing: dynamics, EQ, bus- ses (mix, record, aux, and monitor). System 5-B uses one Mixer Model (one DF64 with a SH612 Studio Hub), which has the following characteristics: 96 channels, 24 groups/ clean feeds, 16 aux sends, 24 Mix sections and 24 external inputs). -
Page 20: Typical System 5-B Hardware Configuration
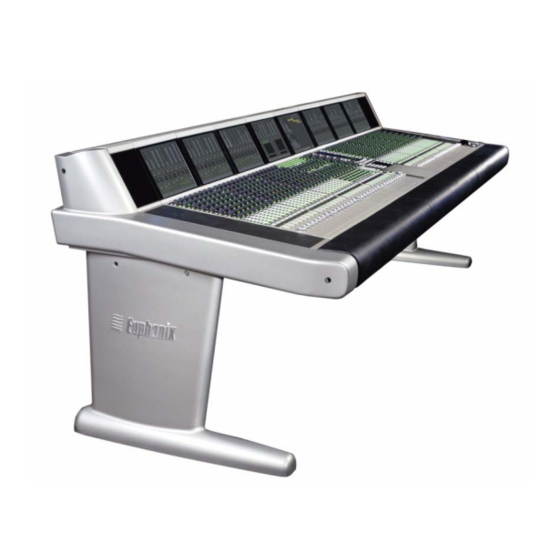
System 5-B Digital Audio Mixing System Operation Manual Introduction CM408 CM408 CM402 CM401 CM408 CM408 Talk & Listen Speakers Mics GPI/O System MIDI I/F Computers ML530 MC524 Analog Mic/Line Monitor Interface MA703 AM713 MADI to Analog Analog to MADI DF64 Core MA703 AM713... -
Page 21: Control Surface
System 5-B Digital Audio Mixing System Operation Manual Introduction 1.2.3 Control Surface System 5-B features a professional modular control surface that can be easily config- ured to suit a variety of operational layouts. The control surface connects to the DF64 Digital Frame via ethernet and the EuCon Hub;... -
Page 22: System 5-B Startup Sequence
System 5-B Digital Audio Mixing System Operation Manual Introduction System 5-B Startup Sequence With all system components turned off: 1. Turn on the SC261 System Computer, the SH612 Studio Hub(s), all I/O units, the MIDI Interface, the TT007 and the GP132. At the Windows Login Screen press Ctrl + Alt + Delete and click OK or press Enter. -
Page 23: Chapter 2: New Features In Version 2.8.1
System 5-B Digital Audio Mixing System Operation Manual Chapter 2: New Features in Version 2.8.1 Mix Bus Terminology Newer surface hardware now uses the term Main Bus instead of Mix Bus. The manual has been updated to reflect this change. The two terms can be used interchangeably. Mixer Model A new Mixer Model now supports 24 Aux sends. - Page 24 System 5-B Digital Audio Mixing System Operation Manual New Features in Version 2.8.1...
-
Page 25: Chapter 3: Quickstart To Common Task
System 5-B Digital Audio Mixing System Operation Manual Chapter 3: Quickstart to Common Task Connect and Play a CD eMix Setup 1. Select Drives at the bottom of the eMix screen and choose a drive. 2. Click Projects->New, and name the new Project. 3. - Page 26 System 5-B Digital Audio Mixing System Operation Manual Quickstart to Common Task 4. Connect the CD’s digital output (AES or SDIF) to channels 1 and 2 on the DM714. The DM714 should already be connected to the first input on the Studio Hub (SH612 1-1).
-
Page 27: Device Outputs Page In Patchnet
System 5-B Digital Audio Mixing System Operation Manual Quickstart to Common Task Figure 3-2 Device Outputs page in PatchNet Route to the Mix Bus 1. Press the Channel On switches for each CD channel (CDL and CDR). Select the Mix button on channels 1 and 2 (CDL and CDR). Select the In key for the B Mix Bus (defaults to stereo). -
Page 28: Connect And Monitor A Microphone
System 5-B Digital Audio Mixing System Operation Manual Quickstart to Common Task Connect and Monitor a Microphone Configure PatchNet 1. From the left side of PatchNet, select the Cabling tab. Select MADI In Ports and select Hub 1-8 (any Hub can be selected). Select MADI Out Ports and click in the MADI Out column next to Mic 1. -
Page 29: Microphone Assignment In Device Outputs
System 5-B Digital Audio Mixing System Operation Manual Quickstart to Common Task 4. Select the green selection box for Mic-Line 1, Ch 1, and name the channel. The patch point shows up in Selected - Destinations. Click Patch. The knobs on Channel 3 now display HiZ, 48V, HPF, Gain. Figure 3-4 Microphone assignment in Device Outputs... - Page 30 System 5-B Digital Audio Mixing System Operation Manual Quickstart to Common Task Route to the Mix Bus 1. Plug a microphone into Channel 1 of the ML530. 2. To listen to the mic return, press the Mix button on channel 3 and select the In key of the B Mix bus.
-
Page 31: Chapter 4: Emix Application
System 5-B Digital Audio Mixing System Operation Manual eMix Application Chapter 4: eMix Application The eMix application has tabs along the bottom of the window to select between the following subjects: • Directory: file management • Patchnet: digital patchbay • Busses: formatting of group busses and main sections •... -
Page 32: Projects Window
System 5-B Digital Audio Mixing System Operation Manual eMix Application Open or Create a Project 1. Click the Drives tab to see a list of available Drives. 2. Select the desired Drive and click the Projects tab or double-click the Drive. The Projects Window appears with a list of Projects on that Drive. -
Page 33: Titles
System 5-B Digital Audio Mixing System Operation Manual eMix Application Rename, Copy, Paste, or Delete a Project These buttons are arranged vertically along the right side of the Projects Window. Copying a Project and pasting it to another Drive is the easiest way to backup a Project. Select a Project from the Projects Window. -
Page 34: New Title Dialog
System 5-B Digital Audio Mixing System Operation Manual eMix Application Create a New Title 1. Click the Drives tab to see a list of available Drives. 2. Select the desired Drive and click the Projects tab or double-click the Drive. The Projects Window appears with a list of Projects on that Drive. -
Page 35: Operations On Current Title
System 5-B Digital Audio Mixing System Operation Manual eMix Application Open an Existing Title 1. Click the Drives tab to see a list of available Drives. 2. Select the desired Drive and click the Projects tab or double-click the Drive. The Projects Window appears with a list of Projects on that Drive. -
Page 36: Title Defaults
System 5-B Digital Audio Mixing System Operation Manual eMix Application 4.1.4 Title Defaults This section describes how to set up basic PatchNet settings. This process includes naming the device inputs and outputs and connecting group bus outputs to multitrack inputs. The setup process is equivalent to setting and labeling the normalled connec- tions on a conventional patch. -
Page 37: Device Inputs Normalled
System 5-B Digital Audio Mixing System Operation Manual eMix Application Normalled Connections The inputs and outputs that require normalled connections should be designated in PatchNet and saved to the Title Defaults. In this example, the console group bus outputs 1–24 should be hardwired to both the R- 1 and DAW inputs. - Page 38 System 5-B Digital Audio Mixing System Operation Manual eMix Application Meter Presets The meters can be configured and stored as presets so they appear in their most useful formats. See Meters on page 70 for more information. The following are useful meter presets: •...
-
Page 39: Patchnet
• The FC727 and FC726 provide 56 channels of digital format conversion. Some equipment, such as the Euphonix R-1, the Sony 3348HR recorder, and some high end consoles, offer a MADI interface. Most other equipment, however, (i.e., mics, speakers, DAWs that support AES/EBU and vintage gear) must have their inputs and outputs converted to and from MADI using the appropriate Euphonix converter. -
Page 40: Console I/O
System 5-B Digital Audio Mixing System Operation Manual eMix Application In an analog studio, the patchbay is hardwired to all the equipment supplied with the room. The multitrack is normalled to the console line inputs, the mics to the console mic inputs, and the outboard gear is ready to be patched into channels. -
Page 41: Device Inputs And Outputs
This category handles MADI cable connections for the ML530 Mic/Line Interfaces. Mic/Line Interface Patching For mic inputs and analog inputs not at +4 dB, the Euphonix ML530 provides 24 preamps each with gain, phantom power, high-pass filter, and hiZ/loZ switching. The analog outputs are connected to an AM713 Analog to MADI converter which then con- nects to one of the MADI inputs on the SH612 Studio Hub. -
Page 42: Patching Examples
System 5-B Digital Audio Mixing System Operation Manual eMix Application For each ML530, PatchNet needs to know which MADI input the associated AM713 is connected to so the mic preamp parameters appear on the corresponding input channel knobset. For each Mic/Line Interface, note how it is connected. In the following exam- ple, two ML530s are each connected to an AM713. -
Page 43: Device Outputs Window
System 5-B Digital Audio Mixing System Operation Manual eMix Application Figure 4-10 Device Outputs window 3. Select Mic1-1–Mic1-12 from the Mic-Line column by clicking and dragging through the cells. These entries are highlighted in green in Figure 4-10. These sources appear in the Sources column of the Selected: window below. -
Page 44: Selecting Destination Channels
System 5-B Digital Audio Mixing System Operation Manual eMix Application To set the destinations for the 12 mics: 4. Select the Console I/O category and the A and B Inputs sub-category. Click and drag through the A Input column next to C25–C36 to select channels 25–36. -
Page 45: Mics Patched To Channels
System 5-B Digital Audio Mixing System Operation Manual eMix Application Figure 4-12 Mics Patched to Channels Patch the multitrack returns into channels 1–24 1. Click on the Device Outputs category to access the outputs from the R-1. 2. Click on the Hub1-3 sub-category. This is where the R-1 is hardwired. -
Page 46: Main Bus Send/Return
System 5-B Digital Audio Mixing System Operation Manual eMix Application Figure 4-13 R-1 and mics patched 4.2.5 Main Bus Send/Return Click the Console I/O category and then click the Main Busses sub-category. Each main bus has a send and return. In Figure 4-14, the first six sends (a 5.1-channel main section) are routed to channels 41–46 A inputs. -
Page 47: Monitor Patching
System 5-B Digital Audio Mixing System Operation Manual eMix Application 4.2.6 Monitor Patching The monitor outputs are automatically routed to the MC524 Monitor Controller sup- plied with System 5-B and are ready to be normalled to the speaker inputs. The monitor feeds are also available within PatchNet for routing to other destinations, if necessary. -
Page 48: Busses
System 5-B Digital Audio Mixing System Operation Manual eMix Application Busses Click the Busses tab at the bottom of the eMix window to display the Busses window. At the bottom left of the window, click either the Group or Main buttons to configure the Group or Main sections, respectively (Figure 4-15 shows the Main sections;... -
Page 49: Law Palette
System 5-B Digital Audio Mixing System Operation Manual eMix Application The letters at the far left of Figure 4-15 denote the 16 Main sections. The letters “I” and “L” have been omitted to avoid being confused with one another. Click the cell to the right of the letter to name the section. -
Page 50: Externals
System 5-B Digital Audio Mixing System Operation Manual eMix Application Externals Click the Masters tab at the bottom of the eMix window, At the bottom left of the win- dow, click the Externals button to configure the Externals. Externals are configured in the same way as Main and Group busses. -
Page 51: Folddown Window
System 5-B Digital Audio Mixing System Operation Manual eMix Application Folddown Click the Folddown tab at the bottom of any eMix window to display the Folddown window (Figure 4-19). This window allows you to set rules by which one monitor output format (Format In along the left) is converted to a different format (Format Out on top). -
Page 52: Diagnostics Window
Application Diagnostics When a system error occurs and the user is not in the Diagnostics page, the Euphonix logo and top-screen border flashes, alerting the user to inspect the Diagnostics page. Display the Diagnostics page by clicking the Euphonix logo at the bottom-left corner of the main Emix screen. -
Page 53: Masters
System 5-B Digital Audio Mixing System Operation Manual eMix Application Masters See Chapter 7: Busses and Bus Masters. Events See Chapter 11: GPI/O Event System. 4.10 System 5 Logo Clicking on the System 5 Logo in the lower right corner of the eMix screen will display software version information and shutdown options. - Page 54 System 5-B Digital Audio Mixing System Operation Manual eMix Application...
-
Page 55: Chapter 5: Cm401 Master Section
System 5-B Digital Audio Mixing System Operation Manual Chapter 5: CM401 Master Section The CM401 Master Module (Figure 5-1) controls master functions for Monitors, Com- munications, Solo, and Meters. This chapter discusses each subject is in detail. H i F V T R 1 Mon D Source... -
Page 56: Monitoring Matrix
System 5-B Digital Audio Mixing System Operation Manual CM401 Master Section Monitoring The System 5-B monitor system accommodates multi format outputs up to 7.1 chan- nels. There are seven monitor outputs (Figure 5-2): Control Room: • Main - 7.1 max •... -
Page 57: Monitor Source Selection
System 5-B Digital Audio Mixing System Operation Manual CM401 Master Section 5.1.1 Monitor Source Selection The sources for Mon A–D and Control Room outputs are selected using the Panel Viewer. Press the Mon A–D or CR Source buttons to display available sources (Figure 5-3 shows the Mon D Source Panel). -
Page 58: Main Section And Aux Send Format
System 5-B Digital Audio Mixing System Operation Manual CM401 Master Section Sum or Intercancel The Σ key is inactive (not lit) by default, which means that selecting a new source automatically cancels the previous one. When the Σ key is lit, multiple sources can be se- lected simultaneously. -
Page 59: Cr Output Controls And Control Room Output Panel
System 5-B Digital Audio Mixing System Operation Manual CM401 Master Section Press to display Control Room Output Control Room Output Panel Dim - 10 LR phase Output Sl Sr B LR Phase Output CR Source Mix 1 Level (dB) Source Output L On Main... -
Page 60: Sls/Cue Monitor Outputs
System 5-B Digital Audio Mixing System Operation Manual CM401 Master Section Cut Individual CR Speakers The Control Room speakers can be individually switched on and off. The L, C, R, Sl, Sr, Bm, X and Y keys in the Control Room Output Panel are lit when on. In addition, the LEDs above the CR Source LCD display light to show active speakers (see Figure 5-4). -
Page 61: Communications
System 5-B Digital Audio Mixing System Operation Manual CM401 Master Section Communications System 5-B’s communication system includes: • Two talkback microphone inputs (one mic included). Each input has 111 dB of gain, phantom power, and a compressor. The talk- back mics can be mounted anywhere but normally Tbk1 is mounted near the engineer and Tbk2 near the client. -
Page 62: Talkback
System 5-B Digital Audio Mixing System Operation Manual CM401 Master Section 5.2.1 Talkback Comms : Talkback : Aux Comms : Talkback Tbk1 -5.00 Tbk>MonD Tbk1 and Tbk2 levels 13/14 15/16 Tbk>MonC Tbk2 -10.0 Talkback to Mon A, B, Tbk>MonB Tbk2 On Tbk2 On/Off 11/12 Tbk>MonA... -
Page 63: Listenback
System 5-B Digital Audio Mixing System Operation Manual CM401 Master Section Aux Busses Press the Aux key at bottom right of the Comms:Talkback Panel to display the Aux busses. The same rules apply to the Aux Busses as monitors. Select the Aux Busses (single or pairs) to route the talkback signals. -
Page 64: Oscillator/Slate
System 5-B Digital Audio Mixing System Operation Manual CM401 Master Section The listen mics can feed any combination of the CR Main, Alt1, Alt2, or Mon A–D speakers by activating their keys on the top half of the Panel. Activate Lsn>Flw to route the listen mics to the active CR Speaker. -
Page 65: Comms:slate/Osc Panel
System 5-B Digital Audio Mixing System Operation Manual CM401 Master Section Comms: Slate/Osc Turns oscillator Osc>Sine Osc>On on/off Oscillator wave types Osc>100Hz Osc>White Osc>440Hz Osc>Pink Oscillator frequencies Osc>1kHz Osc>10kHz User-settable Slate Slt>30.0H Osc>20.0H Oscillator frequency frequency Slate Oscillator Slt>-20.0 Osc>-20.0 level level Slt>Grp... -
Page 66: Quick Access Communications Panels
System 5-B Digital Audio Mixing System Operation Manual CM401 Master Section 5.2.4 Quick Access Communications Panels The Quick Access Panel, located below the CR Level area, provides easy, fast access to the most commonly used Communications parameters without using the Panel Viewer. Use the buttons above the panel to display Quick Access Panels for general Communi- cations, Talkback, Listen, and Slate/Osc (Figure 5-8). -
Page 67: Solo
System 5-B Digital Audio Mixing System Operation Manual CM401 Master Section Solo System 5-B has an extensive solo control system that is accessed from the center sec- tion. Press the Solo Ctrl switch in the master Solo section to display the Solo Control Panel. -
Page 68: Solo Level
System 5-B Digital Audio Mixing System Operation Manual CM401 Master Section 5.3.2 Solo Level The Solo knob controls the solo level (APL and PFL modes) sent to the speakers or the Solo Output in PatchNet. The level is indicated on the LEDs surrounding the knob. The LED in the center of the knob flashes when a channel is soloed. -
Page 69: Solo-Safe
System 5-B Digital Audio Mixing System Operation Manual CM401 Master Section 5.3.7 Solo-Safe Solo-Safe is used with the SIP mode and has no effect in APL or PFL modes. SIP mode effectively mutes all channels except the soloed channel. Designating a channel Solo- Safe allows it through to the main busses even when another signal is soloed. -
Page 70: Meters
System 5-B Digital Audio Mixing System Operation Manual CM401 Master Section Meters The System 5-B meters are displayed on the TFT screen at the top of each Strip. Each Strip’s meter can be set independently and can measure: • Channel: the fader, Swap, Main, or any channel, even one not assigned to that Strip. -
Page 71: Meter Presets And Meter Configuration Panels
System 5-B Digital Audio Mixing System Operation Manual CM401 Master Section Meter Configuration Meter Presets Faders Channel < > Fader Named Group Bus Group Main Presets Mix Bus Swap Un-named Ch 1 Presets None Ch 2 Ch 3 Ch 4 Ch 5 Ch 6 Ch 7... - Page 72 System 5-B Digital Audio Mixing System Operation Manual CM401 Master Section To select one meter: 1. While displaying the Meter Configuration Panel, press Strip 1’s Wave key. Press the Full key from the bottom row to select one large meter. 3.
-
Page 73: Master Section Meters
System 5-B Digital Audio Mixing System Operation Manual CM401 Master Section To select the same meter configuration for multiple Strips, press another Strip’s Wave key after configuring the first Strip. Because each meter’s signal is automatically incre- mented by one, set the lowest numbered Strip first and then set additional Strips con- secutively. - Page 74 System 5-B Digital Audio Mixing System Operation Manual CM401 Master Section...
-
Page 75: Chapter 6: Cm402 Center Section
System 5-B Digital Audio Mixing System Operation Manual Chapter 6: CM402 Center Section The CM402 Center Section module (Figure 6-1) is located to the left of the CM401 Master Section (which contains the Center Strip). The purpose of the CM402 is to ex- pand access to Center Strip channel’s functions so they are more readily available. -
Page 76: Cm402 Center Section
System 5-B Digital Audio Mixing System Operation Manual CM402 Center Section Pan to: Record Record Reverse Machine Repro Input Safe GRP Buses MIX Buses Route Track B V U 9 5 0 Arming Route Route Section P a n P a n 1 / 2 7 / 8 F 1 t p... -
Page 77: Channel Select Panel
System 5-B Digital Audio Mixing System Operation Manual CM402 Center Section Channel Select Panel solo solo solo solo solo solo solo solo C 1 0 C 1 1 C 1 2 C 1 3 C 1 4 C 1 5 C 1 6 solo solo... -
Page 78: Knobset Panels
System 5-B Digital Audio Mixing System Operation Manual CM402 Center Section Knobset Panels P an P an F1tp F1fr F2tp F2fr KnobValues AssignKnobs 12:Guit Filt Slct / P unch Stor e P Slct / P unch xKne xHld cKne cGMU xAtk xR el cAtk... -
Page 79: Knobset Control Panel
System 5-B Digital Audio Mixing System Operation Manual CM402 Center Section KnobValues Assign Knobs 12:Guit Filt Slct / P unch Store P Slct / P unch Figure 6-4 Knobset Control Panel The Knob Values key toggles between showing the parameter name in each knob’s LCD display (unlit) and the parameter value (lit). -
Page 80: Bus Routing Panel
System 5-B Digital Audio Mixing System Operation Manual CM402 Center Section Bus Routing Panel R ec R ec Pan to: Record Record Reverse GRP Buses MAIN Buses Machine Repro Input Safe Route Track Main BVU950 Arming Route Route Section Figure 6-5 Bus Routing Panel This panel shows the Group and Main Bus routing for channels assigned to the Center Strip. -
Page 81: Chapter 7: Busses And Bus Masters
System 5-B Digital Audio Mixing System Operation Manual Chapter 7: Busses and Bus Masters Introduction to System 5-B Busses The number of processing cards in the DF64 digital frames and the Mixer Model de- termine the total number of busses and channels available in a System 5-B configura- tion. -
Page 82: Bus Master Functions
System 5-B Digital Audio Mixing System Operation Manual Busses and Bus Masters Bus Master Functions The Bus Master Strip has eight knobs and five function keys to control all Bus Master functions. Clear H i F V T R 1 Mon D Source H i G... -
Page 83: Aux, Grp, And Main Masters
System 5-B Digital Audio Mixing System Operation Manual Busses and Bus Masters 7.2.1 Aux, Grp, and Main Masters Press the Aux Mstrs, Grp Mstrs, or Main Mstrs keys (Figure 7-1) to display the Aux Bus, Group Bus, or Main Bus functions, respectively, on the Bus Master knobset. 7.2.2 Bus Lock The Bus Lock key disables the following functions when activated: Bus Levels (Main... -
Page 84: Main Bus Master (Left) And Individual Bus (Right) Displays
System 5-B Digital Audio Mixing System Operation Manual Busses and Bus Masters Clear Clear Press this button or the Main Mstrs Selects individual button to return sections from this to Main Masters page Main Bus Adjusts Mix Bus Turns Main section level Bus on/off... -
Page 85: Group And Aux Busses
System 5-B Digital Audio Mixing System Operation Manual Busses and Bus Masters Individual Main Busses The right side of Figure 7-2 shows the individual Main Bus display selected by pressing the upper of the two buttons to the left of each knob. The important functionality is sum- marized below: •... -
Page 86: Toggle Stereo
System 5-B Digital Audio Mixing System Operation Manual Busses and Bus Masters 7.2.8 Toggle Stereo Pairs of Aux busses can be set to stereo or toggled back to mono from this panel. 1. Press the Stereo button. 2. Press an odd numbered Aux bus knob followed by an even numbered Aux bus knob to toggle both between mono and stereo. -
Page 87: Copy Faders To Aux
System 5-B Digital Audio Mixing System Operation Manual Busses and Bus Masters 7.2.12 Copy Faders to Aux A useful technique to create a performer’s monitor mix is to first create the mix on the faders, which typically feed an output bus, and use those settings as a starting point for the aux mix. -
Page 88: Bus Master Inserts
System 5-B Digital Audio Mixing System Operation Manual Busses and Bus Masters 7.2.15 Bus Master Inserts Each Group, Main, and Aux Bus has an insert point. See Main Bus Send/Return on page 46 to learn about bus insert send and returns specified in PatchNet. Switching the insert in/out works the same for Aux, Main, and Group busses. -
Page 89: Chapter 8: Channels And Strips
System 5-B Digital Audio Mixing System Operation Manual Chapter 8: Channels and Strips Strips A CM408 module contains eight identical Strips, each with a Main and Swap channel with independent settings. The Strip is the physical control area on the console that contains switches, knobs, displays, and a fader. -
Page 90: The Strip With Block Diagram For Main/Swap Channels And Meter/Status Display
System 5-B Digital Audio Mixing System Operation Manual Channels and Strips Swap Channel Meter and Status Display Channel Inputs Pre-Fader Output Trim & Phase Channel Output Input Select Mix Minus Output Order Function Mix Minus Delay 2 of 8 1 of 7 Processing Function Function... -
Page 91: Map Channels And Control Groups To Strips
System 5-B Digital Audio Mixing System Operation Manual Channels and Strips 8.1.1 Map Channels and Control Groups to Strips Each Strip can control a Main and Swap channel. One or both of the channels can be a Control Group instead of a normal channel. Channels can be assigned individually us- ing the Strip controls or to multiple Strips using the Channel Assign Panel (page 92). -
Page 92: Channel Assign Panel
System 5-B Digital Audio Mixing System Operation Manual Channels and Strips Multiple Assignments: Channel Assign Panel The Channel Assign Panel is most commonly used to assign channels to multiple Strips but can also be used for a single assignment. Press the Main Panel key in the center section. Press the Channels key to display the Channel Assign Panel. -
Page 93: Input Names Or Channel Number
System 5-B Digital Audio Mixing System Operation Manual Channels and Strips Shortcut Assignment for Multiple Channels Use the following procedure to assign multiple, consecutive channels to the console surface: 1. Press the Main Panel key at the bottom of the Panel Viewer. Press the Channels key in the Main Panel to display the Channel Assign Panel. -
Page 94: Strip Utilities
System 5-B Digital Audio Mixing System Operation Manual Channels and Strips 8.1.3 Strip Utilities System 5-B provides several useful utilities to operate efficiently with Strips: Strip Lock, Strip Expand, Spill Select, Fader Unity, and Fader Meters (Figure 8-4). Strip Config Page 2 Strip Config Page 1 Fader Text: Strip Lock... - Page 95 System 5-B Digital Audio Mixing System Operation Manual Channels and Strips Strip Lock Strip Lock prevents Strip assignments from being changed when a Layout is recalled or when the All function is active for another channel. To activate Strip Lock: Press the Strips key in the Main Panel Viewer.
-
Page 96: Center Section Select Panel
System 5-B Digital Audio Mixing System Operation Manual Channels and Strips Spill Select Spill Select allows Control Groups and Multi Format Masters to spill their slaves to a defined area so they can be individually accessed. See Spill on page 127 for details. From the Main Panel, press the Strips key. -
Page 97: Channel Control Features
System 5-B Digital Audio Mixing System Operation Manual Channels and Strips Channel Control Features 8.2.1 Channel Name The Main and Swap channels are designated by a number (C# by default) or by a four- character name assigned in the Channel Assign Panel (see page 92). The Main channel is below the Swap channel;... -
Page 98: Touch-Sensitive Fader And Controls
System 5-B Digital Audio Mixing System Operation Manual Channels and Strips Select/Punch Keys There are several Select keys on a Strip that operate on different levels: • At the top of the strip (see Figure 8-6), the Knobset Select key selects all knob- set parameters for the currently selected function, including knobs and switch- •... -
Page 99: Wave Key
System 5-B Digital Audio Mixing System Operation Manual Channels and Strips Backstop PFL The System 5-B faders have a backstop switch past the bottom of their travel. Press Solo Ctrl on the Center Section to open the Solo Control Panel and select Backstop PFL to enable this feature. -
Page 100: Talk
System 5-B Digital Audio Mixing System Operation Manual Channels and Strips 8.2.7 Talk Holding down the Talk key switches the talkback mic into the channel’s Mix Minus output (see page 120). 8.2.8 Copy and Paste Settings from one channel may be copied and pasted to others. To copy the settings: 1. -
Page 101: Channel Processing Functions
System 5-B Digital Audio Mixing System Operation Manual Channels and Strips Channel Processing Functions System 5-B provides flexible and complete programmable functions for each channel: Input, Dynamics, EQ, Filters, Aux Sends, and Panning. 8.3.1 Inputs Each channel has an A and B input. See Section 8.4.1 on page 115 to learn about assigning sources for these inputs. - Page 102 System 5-B Digital Audio Mixing System Operation Manual Channels and Strips Analog Controls If an ML530 Mic/Line Interface is patched to the input, the top four knobs show the analog mic/line controls: • The top knob display shows whether the input is high or low impedance (HiZ = line;...
-
Page 103: Stereo Controls
System 5-B Digital Audio Mixing System Operation Manual Channels and Strips Stereo Controls There are two additional controls used for stereo channels (see Multi Format Masters on page 126). Gain Trim Swap Filt Aphs Bphs Page keys display second page and Signal Processing In/Out page Figure 8-9 Stereo Controls •... -
Page 104: Dynamics
System 5-B Digital Audio Mixing System Operation Manual Channels and Strips Right-to-mono: Press the lower key next to the Bal knob to send the right channel equally to both the left and right sides of the stereo channel. Both-to-mono: Press both keys next to the Bal knob to send a mono mix of both channels equally to both sides of the stereo channel. -
Page 105: Dynamics Knobset
System 5-B Digital Audio Mixing System Operation Manual Channels and Strips Sidechain (page 3) Compressor/Limiter (page 1) Expander/Gate (page 2) cGmu Gain Makeup (dB) xDpt cDpt Depth(dB) xRel cRel Release time (ms) xAtk cAtk Attack time (ms) cThr xThr Threshold (dB) cRat xRat Infinity:1 =... - Page 106 System 5-B Digital Audio Mixing System Operation Manual Channels and Strips The dynamics function consists of the following controls (see Figure 8-10). Compressor cGmu: gain makeup (dB) cDpt: compressor depth limits the maximum gain reduction in the compressor cRel: Compressor release time cAtk: Compressor attack time cThr: Compressor threshold (dB) cRat: ratio (infinity:1 = hard limiter)
-
Page 107: Equalizers And Filters
System 5-B Digital Audio Mixing System Operation Manual Channels and Strips 8.3.3 Equalizers and Filters Each channel has a four-band, parametric equalizer and two filters. Press the EQ func- tion switch to display the EQ controls on the knobset. Press the key to display the Filters page (Figure 8-11). - Page 108 System 5-B Digital Audio Mixing System Operation Manual Channels and Strips Parametric EQ Each parametric EQ band has two knobs: one shared between frequency and Q and an- other for gain. Press the upper switch to the left of any of the frequency knobs to toggle between Q and frequency.
-
Page 109: Aux Sends
System 5-B Digital Audio Mixing System Operation Manual Channels and Strips Filters Two filters are available on each channel. Each filter can be one of four filter types: high-pass filter (HPF), low-pass filter (LPF), band-pass filter (BPF), and notch filter (NTCH). -
Page 110: Aux Send Knobset And Pre/Post Config
System 5-B Digital Audio Mixing System Operation Manual Channels and Strips Aux Send Knobset Aux 1/2 Pan Pan in/out 1 / 2 Pre/post Aux 1/2 Gain on/off Pre/post Aux 3 Gain on/off Pre/post Aux 4 Gain on/off Pre/post Aux 5 Gain on/off Pre/post Aux 6 Gain... -
Page 111: Pan
System 5-B Digital Audio Mixing System Operation Manual Channels and Strips 8.3.5 System 5-B is not limited to a single pan format and one pan control per channel im- posed by the traditional analog console. System 5-B allows the following pan formats (also called pan laws): mono, stereo, LCR, LCRS, 5.1, 6.1, and 7.1. - Page 112 System 5-B Digital Audio Mixing System Operation Manual Channels and Strips Pan Front (PanF): Controls the front channel levels only (i.e., in 5.1-channel format, pan applies to L, C, R).Rotate (Rot8): Allows circular panning. Width (Wdth): Available only on Multi Format Masters (see page 126). Controls the front channel width.
-
Page 113: Pan Graph
System 5-B Digital Audio Mixing System Operation Manual Channels and Strips Divergence Rear (DivR): Same as Divergence Front. Focus Rear (FocR): Same as Focus Front.Page 2 Pan Graph When the Pan parameters are on the knobset, a pan graph appears on the TFT screen showing the two-dimensional position (front:surround and left:right) for that channel. -
Page 114: Channel Process Order And Patch Points
System 5-B Digital Audio Mixing System Operation Manual Channels and Strips Channel Process Order and Patch Points The seven process functions can be placed in any order to suit different applications. The default order is Delay, Metering, Insert, EQ, Filters, Dynamics, and Fader. The ten patch points are A Input, B Input, Insert Send/Return, Pre-fader Output, Post-fader Channel Output, Dynamics Key Input, Dynamics Side-Chain Link In/Out and Mix Mi- nus Output (see Figure 8-15). -
Page 115: Channel Patch Points
System 5-B Digital Audio Mixing System Operation Manual Channels and Strips 8.4.1 Channel Patch Points The first configuration page allows sources to be assigned to the Key, A, and B inputs. Each input has identical controls. All patch points can be set in PatchNet (see Console I/O on page 40). To change the source to the A input: 1. -
Page 116: Insert Point
System 5-B Digital Audio Mixing System Operation Manual Channels and Strips Abort selection Accept selection Wave key Fader scrolls through list Figure 8-16 Changing processor order 3. When that processor’s position is correct, press the fader Select/Punch key (above the Wave key) to accept the new order. The knob display changes only after pressing the Select/Punch key. -
Page 117: Channel Mixing Functions
System 5-B Digital Audio Mixing System Operation Manual Channels and Strips Channel Mixing Functions 8.5.1 Group Bus Routing System 5-B’s group busses can be used for sub-groups, clean feeds and matrix outputs. The center section (CM401) has a Main/Group/Aux Master Strip that controls the mas- ter Group functions (see Chapter 7: Busses and Bus Masters). -
Page 118: Group Bus Routing Knobsets
System 5-B Digital Audio Mixing System Operation Manual Channels and Strips Page 1 Last Page 1 / 2 G S L Assign Grp 1 Assign Grp 1&2 Group Send Assign Grp 2 on/off Level 3 / 4 Assign Grp 3 Assign Grp 3&4 Assign Grp 4 5 / 6... -
Page 119: Main Bus Routing
System 5-B Digital Audio Mixing System Operation Manual Channels and Strips 8.5.2 Main Bus Routing There are 16 Main Bus sections comprised of individual busses in a defined pan format. For example, one section with a stereo format uses two busses, another section with a 5.1 format uses six busses. -
Page 120: Mix Minus
System 5-B Digital Audio Mixing System Operation Manual Channels and Strips To route the post-fader channel signal to a Main bus, press the MAIN route key below the function switches (Figure 8-17). This assigns the first eight Main sections that have been defined in eMix to the knobset (Figure 8-19). -
Page 121: Mix Minus Knobset And Signal Flow
System 5-B Digital Audio Mixing System Operation Manual Channels and Strips Mix Minus Processing G S L From Fader Mix Minus Subtract Ref Bus Post Level Processing Switch Mix- Switch Mix Minus Output Gain Talk Switch Bus Switch From Talkback Mix Minus Ref Bus P r e... - Page 122 System 5-B Digital Audio Mixing System Operation Manual Channels and Strips Talk To enable talkback functions: 1. Physically connect the S5’s talkback mic to the MC524’s Talkback 1 input. Physically connect the MC524’s Talkback 1 output to a spare A/D input on an AM713.
-
Page 123: Chapter 9: Control Groups And Multi Format Masters
System 5-B Digital Audio Mixing System Operation Manual Chapter 9: Control Groups and Multi Format Masters Control Groups System 5-B supports Control Groups which allow a Group Master channel to control multiple slave channels. Control Groups are similar to traditional VCA Groups. The Group Master channel can be assigned to a strip just like any other channel. -
Page 124: Groups Panel
System 5-B Digital Audio Mixing System Operation Manual Control Groups and Multi Format Masters Groups Strg Drms Guit Page Main Info Panel Name Create New Modify Clear Rename Group Group Group Group Figure 9-1 Groups Panel... -
Page 125: Create Control Group
System 5-B Digital Audio Mixing System Operation Manual Control Groups and Multi Format Masters 9.1.1 Create Control Group 1. Press the New key at the bottom-left of the Groups Panel (Figure 9-1). 2. Select the slave channels by pressing their Chan Select keys. The Chan Select keys flash to show they are included in the Control Group. -
Page 126: Clear Control Group
System 5-B Digital Audio Mixing System Operation Manual Control Groups and Multi Format Masters 9.1.5 Clear Control Group 1. Press the Clr key at the bottom of the Groups Panel. The Clr key begins flashing. Press the key for the Control Group you wish to clear. All slaves are deleted from the Control Group, the name reverts to the default (G#), and the display dims to show it is empty. -
Page 127: Spill
System 5-B Digital Audio Mixing System Operation Manual Control Groups and Multi Format Masters 2. Select the channels to include in the master channel by left-clicking and dragging across the desired channels. The selected channels are now highlighted. Right-click on any highlighted channel to select their channel format. To group discontinuous channels into a multi-format master, right-click each channel and select the same format. -
Page 128: Control Groups Or Multi Format Masters
System 5-B Digital Audio Mixing System Operation Manual Control Groups and Multi Format Masters Control Groups or Multi Format Masters This section presents general information to help decide whether to use a Control Group or Multi Format Master for a given task. If you need to adjust individual parameters on the slave channels, use a Control Group. -
Page 129: Chapter 10: Layouts And Snapshots
System 5-B Digital Audio Mixing System Operation Manual Chapter 10: Layouts and Snapshots System 5-B performs several mix-management functions significantly faster than any pre-digital mixing system: • The PatchNet digital signal patching system (see Chapter 4: eMix Application) can save a complex patch system for each Title. Snapshots and Layouts further extend this model of flexibility by storing different, but complementary, information that describes the console state at a given time: •... -
Page 130: Layouts
System 5-B Digital Audio Mixing System Operation Manual Layouts and Snapshots 10.1 Layouts A system with 24 Strips and 96 channels cannot map all channels to the console surface at once. Since each Strip can have two channels (Main and Swap), two Layouts are re- quired to map all 96 channels: 1. -
Page 131: Layouts Panel
System 5-B Digital Audio Mixing System Operation Manual Layouts and Snapshots Layouts Ch 1-48 L 13 Ch 49-96 L 14 Vocal 1 L 15 Vocal 2 L 16 Drums L 17 Guitar L 18 Strings L 19 L 20 Horns Dialogue L 21 BackVox... -
Page 132: Recall A Layout
System 5-B Digital Audio Mixing System Operation Manual Layouts and Snapshots 10.1.2 Recall a Layout To recall a single Layout: 1. If the RCL key is not lit, press it once so it flashes. 2. Press the location key for the desired Layout. The Layout reconfigures the console surface and the RCL key turns off. -
Page 133: Delete A Layout
System 5-B Digital Audio Mixing System Operation Manual Layouts and Snapshots 10.1.5 Delete a Layout 1. Press the Clr key at the bottom of the Layout Panel so it begins flashing. Press the key corresponding to the Layout to delete. That key’s display darkens and the name returns to the default (i.e., L #). -
Page 134: Snapshots Panel
System 5-B Digital Audio Mixing System Operation Manual Layouts and Snapshots Individual Channels Press the Chan Select key for each channel to include in the Snapshot. All channel settings are included but only for the active layer (Main or Swap). All Strips on Console Surface Press the Strps key at the bottom of the Snapshot Panel to select all Knobset functions and switches for all Strips (both Main and Swap channels) currently... -
Page 135: Recall A Snapshot
System 5-B Digital Audio Mixing System Operation Manual Layouts and Snapshots 4. Press an unused key in the Snapshot Panel to store the new Snapshot. Unused locations are darkened and have a default name SS #. In Figure 10-2, the first unused location is SS 20. It is not possible to overwrite an existing Snapshot. -
Page 136: Rename A Snapshot
System 5-B Digital Audio Mixing System Operation Manual Layouts and Snapshots 10.2.4 Rename a Snapshot 1. Press the Name key at the bottom of the Snapshot Panel so it begins flashing. Press the key corresponding to the Snapshot to rename. That key flashes. -
Page 137: Chapter 11: Gpi/O Event System
System 5-B Digital Audio Mixing System Operation Manual Chapter 11: GPI/O Event System The event system can program many System 5-B features. The following features are very useful: • use a fader to start a cart machine or turn speakers on/off; •... -
Page 138: Input Types
System 5-B Digital Audio Mixing System Operation Manual GPI/O Event System 11.1 Input Types Table 11-1 GP Input Types, Settings, and Activation Values Input Type Settings Activation Values Monitor A Monitor B Monitor C Control Room Monitor D Control Room Cut Control Room Dim Activation Level (dB) Fader... -
Page 139: Output Types
System 5-B Digital Audio Mixing System Operation Manual GPI/O Event System 11.2 Output Types Table 11-2 GP Output Types, Settings, and Activation Values Output Type Settings Activation Values Monitor A Monitor B Monitor C Control Room Monitor D Control Room Cut Control Room Dim Relay Output #: (1-32) Pulse length ms (0 to latch): 0 to -1000 ms... -
Page 140: Logical Operators
System 5-B Digital Audio Mixing System Operation Manual GPI/O Event System 11.3 Logical Operators The logical operators process input event conditions to determine if the output event is executed. Table 11-3 Logical Operators Used for GPI/O Event Processing Logical Required Input Conditions for Truth Operator Output Event Execution... -
Page 141: Event List
System 5-B Digital Audio Mixing System Operation Manual GPI/O Event System Figure 11-1 Event Configuration Window 11.5 Event List An event is composed of an input description and type, a logical operator, and an output description and type. Add an event to the list by clicking the <click to add event>... -
Page 142: Output
System 5-B Digital Audio Mixing System Operation Manual GPI/O Event System Figure 11-2 Add Input Event Dialog Select the Input Type from the dropdown menu and click OK. Enter a text description by typing in the Description field; be sure to identify the event it pertains to. The properties area displays the settings for the selected input type (see Table 11-1 and Table 11-2 for settings for each input/output type). -
Page 143: Gpi Examples
System 5-B Digital Audio Mixing System Operation Manual GPI/O Event System 11.9 GPI Examples Refer to Figure 11-1 and Figure 11-2 for these examples. The options available in the Input and Output Properties areas are summarized in Table 11-1 and Table 11-2. If an event consists of just one input, AND and OR deliver the same result and may be used interchangeably. -
Page 144: Move A Fader To Turn On The Floor Monitors
System 5-B Digital Audio Mixing System Operation Manual GPI/O Event System 11.9.2 Move a Fader to Turn On the Floor Monitors This example demonstrates how to turn on the floor monitors by moving any one of several faders below a selected level. In the Event Configuration window, under Event List, click on the <click to add event>... -
Page 145: Move A Fader To Start A Cart Machine
System 5-B Digital Audio Mixing System Operation Manual GPI/O Event System 11.9.3 Move a Fader to Start a Cart Machine This example demonstrates how to start a Cart machine by moving a fader above a selected level. 1. In the Event Configuration window, under Event List, click on the <click to add event>... -
Page 146: Move A Fader To Stop A Cart Machine
System 5-B Digital Audio Mixing System Operation Manual GPI/O Event System 11.9.4 Move a Fader to Stop a Cart Machine This example demonstrates how to stop a Cart machine by moving a fader below a se- lected level. 1. In the Event Configuration window, under Event List, click on the <click to add event>... -
Page 147: Video Switcher Turns A Specific Camera And Channel On
System 5-B Digital Audio Mixing System Operation Manual GPI/O Event System 11.9.5 Video Switcher Turns a Specific Camera and Channel On 1. In the Event Configuration window, under Event List, click on the <click to add event> field. The Add Event dialog appears. 2. -
Page 148: Video Switcher Turns A Specific Camera And Channel Off
System 5-B Digital Audio Mixing System Operation Manual GPI/O Event System 11.9.6 Video Switcher Turns a Specific Camera and Channel Off 1. In the Event Configuration window, under Event List, click on the <click to add event> field. The Add Event dialog appears. 2. -
Page 149: Audio Follow Video Configuration
System 5-B Digital Audio Mixing System Operation Manual GPI/O Event System 11.9.7 Audio Follow Video In this example, there are four cameras each with a microphone configured with a video switcher, GP 132, and System 5-B console (Figure 11-3). Camera Inputs 1 2 3 4 Tally Inputs 1 - 4 to GP 132 1 2 3 4... -
Page 150: Add Input Event Dialog
System 5-B Digital Audio Mixing System Operation Manual GPI/O Event System The goal is to enable the following functionality: • When the video switcher takes camera 1, channel 1’s audio is on while chan- nels 2–4 are muted. • When the video switcher takes camera 2, channel 2’s audio is on while chan- nels 1, 3, and 4 are muted. -
Page 151: Add Output Event Dialog
System 5-B Digital Audio Mixing System Operation Manual GPI/O Event System 6. From the Output section, click <click to add output event>. The Add Output Event dialog opens. Figure 11-6 Add Output Event dialog 7. Select Switch Output from the Output Type dropdown menu. 8. - Page 152 System 5-B Digital Audio Mixing System Operation Manual GPI/O Event System...
-
Page 153: Index
System 5-B Digital Audio Mixing System Operation Manual Index CM402 Center Section 75 Communications 61 Listenback 63 Oscillator/Slate 64 All key 130, 134 Talkback 62 All Knobs Key 100 Control Group 123 All mode 99 assign to Strip 125 Aux Bus 63, 70, 83 clear 126 Aux Busses 85 create 125... - Page 154 System 5-B Digital Audio Mixing System Operation Manual Titles 33 EQ. See Channel Processing Functions MADI 39, 41, 47, 115 event 137 Main Bus 83, 119 GP132 137 Main Bus Routing 119 GPI Examples 143 Main Busses 81, 85 Input Types 138 Main Section 119 Logical Operators 140 Meters 94...
- Page 155 System 5-B Digital Audio Mixing System Operation Manual Main Bus Send/Return 46 Pan laws 111 Monitors 47 Phase Reversal of LR CR 60 Solo Bus and Utility Patching 47 Solo selection 68 Talkback Signal 47 Solo speaker dim 68 PFL. See Solo Spill 94 Spill Area 127 Spill Select 96...
- Page 156 System 5-B Digital Audio Mixing System Operation Manual...
Need help?
Do you have a question about the System 5B and is the answer not in the manual?
Questions and answers