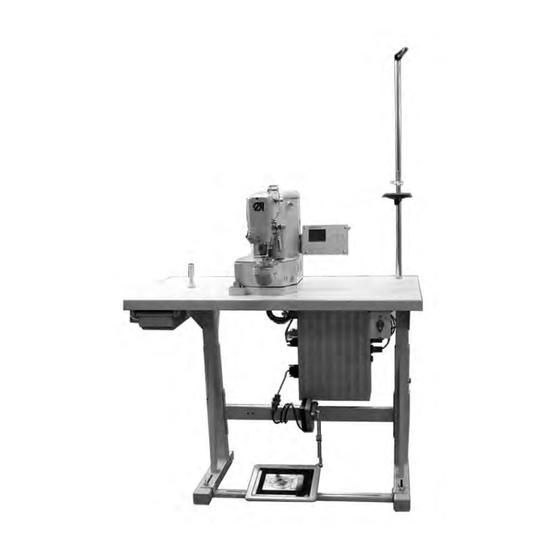
Duerkopp Adler 530 Operating Instructions Manual
Cnc automat for button sewing
Hide thumbs
Also See for 530:
- Installation instructions manual (31 pages) ,
- Parts list (49 pages) ,
- Service instructions manual (44 pages)
Table of Contents
Advertisement
Quick Links
Aufstellanleitung / Installation Instructions
Postfach 17 03 51, D-33703 Bielefeld Ÿ Potsdamer Straße 190, D-33719 Bielefeld
Telefon +49 (0) 5 21/ 9 25-00 Ÿ Telefax +49 (0) 5 21/ 9 25 24 35 Ÿ www.duerkopp-adler.com
Ausgabe / Edition:
Änderungsindex
06/2008
Rev. index: 01.0
CNC Knopfannähautomat
CNC Automat for Button Sewing
Bedienanleitung /
Serviceanleitung / Service Instructions
Printed in Federal Republic of Germany
Operating Instructions
530
Teile-Nr./Part.-No.:
0791 530001
1
2
3
Advertisement
Chapters
Table of Contents

Related Manuals for Duerkopp Adler 530


Summary of Contents for Duerkopp Adler 530
- Page 1 CNC Knopfannähautomat CNC Automat for Button Sewing Bedienanleitung / Operating Instructions Aufstellanleitung / Installation Instructions Serviceanleitung / Service Instructions Postfach 17 03 51, D-33703 Bielefeld Ÿ Potsdamer Straße 190, D-33719 Bielefeld Telefon +49 (0) 5 21/ 9 25-00 Ÿ Telefax +49 (0) 5 21/ 9 25 24 35 Ÿ www.duerkopp-adler.com Ausgabe / Edition: Änderungsindex Teile-Nr./Part.-No.:...
- Page 2 Anleitung, komplett Manual, complete Übersicht Summary Bedienanleitung Operating Instructions Aufstellanleitung Installation Instructions Serviceanleitung Service Instructions Bauschaltplan Interconnection-diagram 9890 510001 B 9890 510001 B Alle Rechte vorbehalten. Eigentum der Dürkopp Adler AG und urheberrechtlich geschützt. Jede, auch auszugsweise Wiederverwendung dieser Inhalte ist ohne vorheriges schriftliches Einverständnis der Dürkopp Adler AG verboten.
- Page 3 Foreword This instruction manual is intended to help the user to become familiar with the machine and take advantage of its application possibilities in accordance with the recommendations. The instruction manual contains important information on how to operate the machine securely, properly and economically. Observation of the instructions eliminates danger, reduces costs for repair and down-times, and increases the reliability and life of the machine.
-
Page 4: General Safety Instructions
General safety instructions The non-observance of the following safety instructions can cause bodily injuries or damages to the machine. 1. The machine must only be commissioned in full knowledge of the instruction book and operated by persons with appropriate training. 2. -
Page 5: Table Of Contents
Index Page: Preface and general safety hints Part 1: Operating Instructions Class 530 (Edition 06/2008) Description of product ......... . Description of proper use . - Page 6 Index Page: 8.5.2 Programming mode ..........8.5.3 Sewing pattern sequences .
-
Page 7: Description Of Product
Description of product The Dürkopp Adler 530 is a CNC double lockstitch automat for button sewing. The available button patterns are adjustable in length, width and speed and can be memorized in their modified form. It is also possible to create “free” sewing patterns (by programming). The button sewing automat is equipped with automatic sewing foot lifts, thread trimmer, thread retractor and integrated DC direct drive. -
Page 8: Description Of Proper Use
Description of proper use Class 530 is an button sewing automat determined for processing light to medium-weight material, i.e. fabrics made of textile fibres or leather. Such sewing materials are used in the clothing industry and for the production of home and car upholstery. Furthermore, this button sewing automat can also sew so-called technical seams. -
Page 9: Optional Equipment
Optional equipment The following optional equipment is available for the button sewing automat 530: Order No. Optional equipment 9822 51 002 6 Sewing light 9822 51 002 7 Table clamp 9870 00 102 1 Cable assembly (add-on kit socket for sewing light) 0510 59 004 4 Laser marking lights (3 lights) 0510 59 003 4... -
Page 10: Technical Data Of The Subclasses
6.1 Technical data of the subclasses Subclass: Stitch type: Hook type: oscillating hook Needle system: DPx17 (135x17) Needle size: [Nm] 80 - 110 Needle size [Nm] standard: Thread size: 50/3 - 120/3 Stitch length: [mm] dependent on seam pattern Max. speed [min 2700 Clamp stroke... -
Page 11: Operating
Operating 7.1 Threading needle thread Caution: Danger of injury ! Switch off main switch ! Thread the needle thread only when the button sewing automat is switched off. – Put thread reels on the thread reel holder and conduct needle thread and bobbin thread through the unwinding arm. -
Page 12: Adjust Needle Thread Tension
7.2 Adjust needle thread tension Pretension 3 With open main tension 2 a minor residual stress of the needle thread is required. The residual stress is produced by the pretension 3. At the same time the pretension 3 influences the length of the cut needle thread end (initial thread for the next seam). -
Page 13: Adjust Thread Regulator
7.4 Adjust thread regulator Caution: Danger of injury ! Switch off main switch ! Adjust thread regulator only when the button sewing automat is switched off. The thread regulator 3 controls the needle thread quantity required for the stitch formation. Only a precisely adjusted thread regulator guarantees an optimum sewing result. -
Page 14: Wind On Bobbin Thread
7.5 Wind on bobbin thread – Put bobbin on bobbin winder 4. – Pull thread through guide 2 and around tension 1. – Wind thread counter-clockwise around the core of the bobbin (approx. 5 times). – Press winder lever 3 into the bobbin. –... -
Page 15: Change Hook Thread Bobbin
7.6 Change hook thread bobbin Caution: Danger of injury ! Switch off main switch ! Change hook thread bobbin only when button sewing automat is switched off. Remove empty bobbin – Pull down hook cover 3. – Lift bobbin case cover 1. –... -
Page 16: Adjust Bobbin Thread Tension
7.7 Adjust bobbin thread tension Caution: Danger of injury ! Switch off main switch ! Adjust bobbin thread tension only when the button sewing automat is switched off. The required bobbin thread tension is to be produced by tension spring 1. The top of bobbin case 3 should drop slowly due to its own weight when being held at the threaded-in bobbin thread. -
Page 17: Change Needle
7.8 Change needle Caution: Danger of injury ! Switch off main switch ! Change needle only when the button sewing automat is switched off. – Loosen screw 1. – Push new needle into the drill-hole of needle bar 2 as far as it will go. -
Page 18: Button Shank Shaper
7.9 Button shank shaper The button clamp of the button sewing automat is equipped with a button shank shaper 1. Swinging in/out of button shank shaper – Swing manually in or out the swivelling lever 2 with button shank shaper while button clamp is lifted. Adjust button shank length –... -
Page 19: Setting The Hook Feet Of Button Clamp
7.10 Setting the hook feet of button clamp Caution: Danger of injury ! Set the button clamp while the button sewing automat is switched on with utmost caution only. The button should be easily pushed and aligned between the hook feet of the button clamp. -
Page 20: Operating The Control Of Class 530
Operating the control of class 530 8.1 The control panel For the input and output of data a control panel with an LCD display and function keys is used. P-key: S-key: Programming mode Sequence- Programming mode ESC-key F-key Technician mode Cursor keys OK-key 8.1.1... - Page 21 Function key Function If no text field is activated: Change between the lines of the menus. The selected line is displayed white on black. If a text field is activated: Increase or reduce the value of the respective point by one or change between the parameters in case of functions with several choices.
-
Page 22: User Interface
8.2 User interface 8.2.1 Structure of menu Switch on main switch Key F Service mode Code 1 Sewing mode Key ESC Key ESC Key F Key P Code 1 Programming mode Technician mode Key S Key S Key P Sequence programming mode Call up the service mode –... -
Page 23: Alter Numerical Values, Parameter Values, Selection Of Alternatives
Call up the technician mode – Switch on main switch. The control is initialized. The sewing mode menu appears on the display. – Press key “ F ”. – Enter Code 1 (see Chapter 8.5.4). – Press key “OK” . The display changes over to the technician mode. -
Page 24: Selection Of A Parameter
8.3.2 Selection of a parameter Some parameters offer a selection of non-modifiable adjustments. – Select the desired line with the parameter to be altered with the keys “ñ” or “ò”. – Press “OK” key . – Change between the given possibilities with the keys “ñ” or “ò” Example: Sewing pattern number –... -
Page 25: Sewing Patterns
8.4 Sewing patterns Three different sewing pattern types are available for the button sewing automat 530: · Specified standard sewing patterns (Type 1) (see chapter 11) The sewing parameters length, width and sewing speed can be altered in the sewing mode; the laser marking lamps can be switched on and off. -
Page 26: Main Menu
8.5 Main menu 8.5.1 Sewing pattern operation The parameters for the individual sewing patterns are arranged in the main menu. The sewing patterns can be altered via these parameters. – Switch on main switch. The control is initialized. The main menu appears. –... - Page 27 Submenu Behind this symbol there is a submenu. Number of stitches By this menu line, the needle throw distribution for standard sewing patterns will be indicated and the complete number of stitches for free contours (cannot be modified). When selecting the line with key “OK” the submenu “Special functions” opens.
- Page 28 Submenu sewing pattern offset In this menu to it is possible to change the sewing pattern position in X-/Y-direction. When switching to this menu, the clamping foot will be lowered. If the value for the X- and Y-Offset is changed, the stepping motors will move the material accordingly.
- Page 29 Winding thread on to a bobbin: With pedal – Step pedal forwards (step 2). The sewing motor starts. – Step pedal backwards. The sewing motor stops. Via control panel BF3 – Press “F” key . The sewing motor starts. – Press “ESC”...
- Page 30 Submenu counter of daily number of pieces or counter of capacity Alternative display of counter of daily number of pieces or counter of capacity. Both counters work in parallel operation. It can be selected which counter is displayed in the main menu. ·...
-
Page 31: Programming Mode
8.5.2 Programming mode Under this menu item the parameters for programming of sewing patterns are arranged. With the help of the parameters shape, length, width, speed etc. of the sewing pattern are entered. – Switch on main switch. The control is initialized. The main menu appears. - Page 32 Submenu sewing pattern offset Select the present menu to shift the sewing pattern in X-/Y-direction. Display:present X-/Y- offset value Number of stitches and stitch distribution Only indication of needle throw distribution (for standard patterns) or of the complete number of stitches (for free contours). Softstart Via this parameter the soft start can be switched on or off.
-
Page 33: Sewing Pattern Sequences
8.5.3 Sewing pattern sequence 8.5.3.1 Switching the sequence programming mode on/off Changeover from the sewing pattern operation to the sewing pattern sequence operation – Actuate the function key “S” while the main menu is being displayed in order to skip to the sequence programming mode. –... - Page 34 Skipping from sewing pattern sequence operation to sewing pattern operation – Actuate the function key “S” while the main menu is being displayed in order to skip to the sequence programming mode. – Start the editing by actuating the “OK” key. –...
- Page 35 Menu items in the main menu of the sewing pattern sequence Sequence Selection of the sewing pattern sequence. Input: 1 (2 … 25, if available) Sequence succession 51 52 Display of the sequence succession. The current sewing pattern number is marked with a bar (underlined). In case of more than five numbers the display is scrolled.
-
Page 36: Sequence Programming Mode
8.5.3.2 Sequence programming mode In this menu item individual sewing patterns are combined to retrievable sewing pattern sequences. Totally 25 independent sewing pattern sequences are available. Every sewing pattern sequence can be combined out of 20 sewing patterns in any order whatever. In this menu, it is also possible to switch on the sewing pattern sequence operation. -
Page 37: Technician Mode
8.5.4 Technician mode In the technician mode the following menus are included: Machine configurations machine config Maschine user config. Benutzer service functions Service free contours Freie Konturen memory dongle Memory-Dongle In this menu machine-specific adjustments are made. User configurations machine config Maschine operat.config. - Page 38 Free contours machine config Maschine user config. Benutzer service functions Service Freie Konturen free contours Memory-Dongle memory dongle With the automat for button sewing 530 up to nine freely defined seam contours can be created and sewn. The coordinates are entered directly at the control panel.
- Page 39 Recall technician mode – Switch on main switch. The control is initialized. The main menu appears. – Press function key “F” in the main menu. The screen for the code entry appears. – Enter code number “25483". After input of the correct code number the display changes over to the menu ”Technician mode”.
- Page 40 8.5.4.1 Machine configuration Parameter parameter Softstart soft start Einrichtung sewing equipment Zeiten times Parameter In this submenu different machine parameters can be set. Soft start In this submenu the driving speeds for the soft start slope can be set. Equipment In this submenu the settings for the sewing equipment and optional units can be actuated.
- Page 41 Submenu machine parameters cut.rpm max.rpm stop pos. feeding position Referenz.: – Select desired parameter with the keys “ñ” or “ò”. The symbol of the selected parameter / submenu is displayed white on black. – Start selected parameter with the key “OK” or change into the submenu.
- Page 42 Referencing In this menu point the referencing mode of the step motor after the sewing process can be configurated. Input: 0 = no referencing 1 = referencing each time 2 – 10 = referencing after each 2nd to 10th sewing process Soft start In this submenu speed adjustments for the soft start can be made.
- Page 43 Sewing equipment In this submenu adjustments for the sewing equipment can be made. w.clamp f. open dimens number length 10.0 width 10.0 Ausstattung config. Note The entry of the clamping foot number serves for the automatic verification, whether the sewing pattern to be currently sewn is positioned within the inner frame of the clamp.
- Page 44 Length Input of a freely selectable sewing field. Input only possible in case “free clamp dimension” had been selected. Otherwise the length / width of the selected clamp is indicated (cannot be modified). Input: 0.5 ... 20.0 Width Input of a freely selectable sewing field. Input only possible in case “free clamp dimension”...
- Page 45 Submenu Configuration hand switch:off Handtast.: laser light: off Laserl.: opt. sign. Opt. Anzeige assignment input Belegung Eing. Belegung Ausg. assignment output Hand switch Activating of optional hand switches. When the option is switched on, a menu item in order to select the operation mode will appear in the menu “User configuration”.
- Page 46 Submenu Times Delay between pedal level 1 (lowering the clamping foot) and sewing start (t1) Time only relevant with quick start via pedal or hand switch (optional). Input: 50 ...300 ms Preset value: 150 ms Turn-on delay for the thread wiper magnet (t2) This menu item will only be displayed if the option “electric thread wiper”...
- Page 47 8.5.4.2 User configuration In this menu operation-specific adjustments are made. Sprache language sewing mode Par. sperr.: manual keys Nähm. sperren param.mod Sequ. sperren forced st pattern locking sequence locking – Select desired parameter/ submenu with the keys “ñ” or “ò”. The selected parameter/ submenu is displayed white on black.
- Page 48 Operating mode push button (optional) Selection of the push button mode. This menu item is only available if the “hand switch” option in the menu configuration is switched on. Input: A = Normal B = Quick start In the push button mode “NORMAL” the keys have the following functions: Key 1:Lifting and lowering of the clamping foot.
- Page 49 Lock sewing pattern In this submenu individual sewing patterns can be released or locked for selection in the sewing mode. lock all unlock all In general the following restrictions apply: 1. Sewing pattern operation · The sewing pattern currently selected in the sewing mode cannot be locked.
- Page 50 Lock sequences In this submenu individual sequences can be released or locked for selection in the sewing mode. lock all unlock all In general the following restrictions apply: 1. Sewing pattern operation · The last sequence selected in the sequence operation cannot be locked.
- Page 51 8.5.4.3 Service functions The service functions allow the quick verification of all hardware components. Note The service menu can also be reached directly when switching on the machine (see chapter 8.2.1). Multitest multitest Multitest 180°-disc 180° - Scheibe events Ereignisse DAC III INIT In the menu “Multitest”...
- Page 52 DAC III multitest Multitest 180°-disc 180° - Scheibe events Ereignisse DAC III DAC III INIT INIT In this menu are indicated the different parameters of the control unit. Initialization multitest Multitest 180° - Scheibe 180°-disc Ereignisse events DAC III DAC III INIT INIT Via this menu the event memory buffer and the permanent data can be...
- Page 53 Multitest Selection of the submenu of Multitest output test PWM-output test input test auto input tst motor test step.motor tst RAM test EEPROM test Caution: Danger of injury ! Do not reach into the running machine during the function test of the output elements.
- Page 54 Output test With this test function the function of the output elements is checked. – Start the test function with the “OK” key. – Select desired output element with the keys “ñ” or “ò”. – Switch desired output element on and off with the key “OK”. output test output –...
- Page 55 PWM Output test This test function checks the function of the magnets. – Start the test function by pressing the “OK” key. – Select the desired output element by pressing the keys “ñ” or “ò”. – Switch the selected output element on and off by pressing the “OK”...
- Page 56 Input test With this test function the input element to be tested is selected. ATTENTION ! The input elements have been carefully adjusted in the factory. Adjusting and correcting must only be done by trained service staff. – Start the test function with the “OK” key . –...
- Page 57 Auto-Input test With this test function the function of the input elements is checked. – Start test function with the “OK” key. – Actuate desired input element. The switch status and the number of the actuated input element are indicated. auto-input test –...
- Page 58 Sewing motor test With this test function the sewing motor can be checked. – Start test function with the “OK” key. – Start motor with the key “ñ”. – Alter speed with the keys “ñ” or “ò”. The speed is indicated. –...
- Page 59 Step motor test With this test function the step motors and the pertaining reference switches can be checked. ATTENTION ! Risk of breakage ! Before the test: Move needle in position “up” by handwheel. – Start test function with the key “OK”. –...
- Page 60 RAM test With this test function the main memory (SRAM and program data memory) is checked. – Start test function with the “OK” key . The display shows the test result. Display Explanation SRAM OK Main memory works perfectly SRAM ERROR Error in the main memory NV-RAM OK Program data memory is in order...
- Page 61 EEPROM test This test function checks the read memory (ROM) of the micro-processor. – Start test function with the key “OK”. The display shows the following test results: - ROM-size - Machine class - Software version - Software date - Check sum and status ROM size class version...
- Page 62 Events In case of failure the menu can give important hints regarding the cause of the malfunction. event memory latest events Event memory = Ereignisspeicher = E4304: E8254: (example) In this menu item all events that occurred are indicated. – Exit the menu item by actuating the “ESC”...
- Page 63 DAC III Selection of the submenu for the display of the DAC III parameters. Temp. (°C): (V): 325 Temperature Here the current inside temperature of the control unit is indicated in °C. It should be below 80 ° C. When the temperature of 80°C is exceeded, the error message 3107 will appear.
- Page 64 Initialization (Init) The selection of the submenu for the initialization of the event memory and the permanent data. event memory Ereignissp. variants + sequences Var . + Sequ. machine parameters Maschinenpar. free contours Fr. Konturen machine complete Masch. kpl! Event memory Via this menu item the event memory can be reset to zero.
- Page 65 8.5.4.4 Free contours Maschine Benutzer Service Freie Konturen Memory-Dongle With the button sewing automat 530 up to nine freely defined seam contours can be created and sewn. The entry of the coordinates is done at the control panel. design edit clear copy no.st.av.
- Page 66 Determining the contour coordinates When creating a seam contour every individual stitch has to be entered in the control indicating its position in the coordinate system (X- and Y-axis). Therefore the individual coordinate points have to be determined before. This can be done with the help of millimeter graph paper.
- Page 67 Create contour In this menu the X- and Y-coordinates are entered for every individual stitch. append stitch parameter/end Note: In order to enter stitch operations (f. e. intermediate trimming), first finish the contour creating (entering of coordinates) and then insert the stitch operation in the menu change contour by editing.
- Page 68 Submenu parameter Selection of the submenu for entering the contour parameters std. rpm dist. x Abst. X: dist. y Abst. Y: Standard rpm: Standard speed Input: 100 ... 2700 rpm Distance X: Hole distance in X-direction Input: 0 ... 40.0 mm Distance Y: Hole distance in Y-direction Input:...
- Page 69 Change contour stitch coordin rem.st. ins.st. append stitch parameters no.stitch no.st.av. Stitch coordinates Selection of the submenu for altering the stitch coordinates. Delete stitch: Delete stitch. Input: Stitch number to be deleted Add stitch: Add stitch. Input: Stitch number before which a stitch is to be added. The submenu for altering the stitch coordinate appears.
- Page 70 – Select desired stitch with the keys “ñ” or “ò”. – Select stitch with the key “OK”. The submenu for altering a stitch coordinate appears. If a stitch operation is classed with a stitch, this will be marked with an asterisk (*) instead of a diagonal stroke (/) on the display.
- Page 71 Operation Number Description Note No stitch operation Intermediate trimming The intermediate trimming can be programmed up to 10 times within a contour. Between 2 intermediate trimmings at least 3 stitches must be sewn. Delete contour design edit clear copy no.st.av. no.pat.av.
- Page 72 Copy contour – Select the menu item “copy“ with the “ñ“ or “ò“ keys. – Actuate the “OK” key. – Select the desired sewing pattern number (1-50,91-99) with the “ñ“ or “ò“ keys. – Confirm the selection by actuating the “OK” key. The contour will be copied and the menu “Change contour”...
- Page 73 8.5.4.5 Memory dongle Maschine machine Benutzer user Service service Freie Konturen free contours Memory-Dongle memory dongle By using the functions of this submenu, data can be transferred from the machine to the dongle or vice versa. contents Inhalt Laden load Speichern save Formatieren...
- Page 74 Displaying the dongle contents Boot dongle If a boot dongle is inserted, information concerning the machine program will be displayed. Klasse: class U-Klasse: subclass Version: version Datum: 100105 date (example) A boot dongle with a machine program for any machine class can be inserted in order to display the dongle information.
-
Page 75: Fr. Kont. Kpl
Display of the memorized free seam contours (example) If no sewing pattern program or free seam contour is memorized, „—“ will appear, otherwise the corresponding contour name will be indicated. If a dongle of another machine class is inserted, the following information will be displayed. -
Page 76: Control Unit Can Be Displayed
Contents Via this menu item the contents of a memory dongle connected to the control unit can be displayed. Free seam contours completely Via this menu item the loading of all free seam contours will be started. A window to confirm the selection will appear. –... - Page 77 Memorizing data on the dongle Here program data (sewing pattern programs and sequences) and machine parameters or all free seam contours can be saved from the machine to the dongle. contents Inhalt free cont. compl. Fr. Kont. kpl. mach. compl. Masch.
-
Page 78: A Window To Confirm The Selection Will Appear
A window to confirm the selection will appear. – Actuate the “ï“ key (no), in order to cancel the transaction or the “ð“ key (yes), in order to start the transaction. The program data and the machine parameters memorized on the dongle will be deleted when the saving is started! Note The time needed in order to save the data depends on the number of... - Page 79 Error messages Number Name Possible cause Elimination Dongle missing No dongle inserted Insert dongle into control unit 4301 Dongle empty No data saved on Save data on the dongle 4302 • • dongle 4304 Wrong dongle type Dongle has the wrong •...
-
Page 80: Error Messages
8.6 Error messages In case of an error in the control system or in the sewing pattern program the display shows a corresponding symbol and an error number. With the help of the following tables the cause of the error can be determined and remedial action can be taken. -
Page 81: Application Messages
8.6.2 Application messages Picto- Description Category Reaction/ Problem elimination gram · Clamping foot can only Capacity counter is “zero” Hint be lowered after confirmation via key “OK”. · With the confirmation the hint disappears · With the confirmation the capacity counter is reset to its initial value again. - Page 82 Picto- Description Category Reaction/ Problem elimination gram Contour exceeds the Warning · No sewing start possible work surface opening of · Select another clamping foot the clamping foot in · Choose another sewing pattern X-direction · Reduce size of sewing pattern in X-direction Contour exceeds the Warning...
-
Page 83: Machine Errors
8.6.3 Machine errors Error Description Possible causes Troubleshooting code 1051 Sewing motor timeout · Cable to motor faulty · Check cable · Reference switch faulty · Check reference switch . Sewing motor faulty . Check sewing motor . Mechanics rough-running . - Page 84 Error Description Possible causes Troubleshooting code 2201 Step motor Y-axis · Cable to reference switch · Check cable timeout referencing faulty · Reference switch faulty · Check reference switch . Step motor faulty . Check step motor . Mechanics rough-running .
- Page 85 Error Description Possible causes Troubleshooting code 3301 Error control Internal error - Switch the sewing machine off 3320 procedure / Test and on again procedure /Step motor - Software update 3322 test procedure / - Contact the DA-Service staff 3330 Starting procedure / Sewing procedure / 3332...
- Page 86 Error Description Possible causes Troubleshooting code 5804 Free Contours: - Check via Multitest, Wrong checksum NV-SRAM faulty check the control - Switch the sewing machine off Failure and on again Data will be reset to factory setting. 5808 Error free seam Internal error - Switch the sewing machine off contour...
- Page 87 Error Description Possible causes Troubleshooting code 7701 Protocol error Internal error · Switch machine off and on again · Software update · Contact the DA-Service staff 8151 Error IDMA · Failure Switch machine off and on again 8156 · Control faulty Check control 8159 8152...
-
Page 88: Sewing
Sewing Operating and function sequence when sewing: Sewing operation Operation/ Explanation Before the sewing start Starting position - Pedal in resting position Button sewing automat stands idle Needle and fabric clamps in position “up”. Feed material Sewing - Step pedal forwards up to step 1. The clamps are lowered. -
Page 89: Maintenance
10. Maintenance 10.1 Cleaning and checking Caution: Danger of injury ! Switch off main switch. The maintenance of the button sewing automat must only be carried out if the machine is switched off. Maintenance work has to be done after the intervals indicated in the tables at the latest (see column “Operating hours”). -
Page 90: Oil Lubrication
10.2 Oil lubrication Caution: Danger of injury ! Oil can cause skin eruption. Avoid a longer contact with the skin. Wash yourself thoroughly after a contact. ATTENTION ! The handling and disposal of mineral oils is subject to legal regulations. Deliver used oil to an authorized collecting station. -
Page 91: Standard Sewing Patterns
11. Standard sewing patterns Stitch pattern Stitch Number of Standard size Standard size repartition connecting threads X-axis (mm) Y-axis (mm) 6 - 6 8 - 8 8 - 8 10 - 10 12 - 12 6 - 6 8 - 8 10 - 10 12 - 12 6 - 6... - Page 92 Stitch pattern Stitch Number of Standard size Standard size repartition connecting threads X-axis (mm) Y-axis (mm) 10 - 10 12 - 12 6 - 6 10 - 10 6 - 6 10 - 10 5 - 5 - 5 8 - 8 - 8 5 - 5 - 5 8 - 8 - 8 4 - 4 - 4...
- Page 93 Stitch pattern Stitch Number of Standard size Standard size repartition connecting threads X-axis (mm) Y-axis (mm) 4 - 4 - 4 4 - 4 - 4 4 - 4 - 4 4 - 4 - 4 4 - 4 - 4 6 - 6 - 6 - 6 8 - 8 - 8 - 8...
-
Page 94: Clamping Feet
12. Clamping feet 10 x 10 button clamp Due to the technical circumstances and a safety margin, the sewing field is smaller than the inner frame of the clamp. -
Page 95: Numbering Of Menu Items
13. Numbering of menu items Parameter English (displayed on the screen) English (meaning) off/a off/a on/b on/b canc cancel Q01? Initialize variants and Initialize variants and sequencesquestion sequencesquestion Q02? Initialize machine Initialize machine Q03? Initialize free contoursquestion Initialize free contoursquestion Q04? Initialize machine complete? Initialize machine complete? - Page 96 Parameter English (displayed on the screen) English (meaning) T1.3.6.7 output alloc. output allocation T1.3.6.8 l.ta cfs long ta clamp foot solenoid T1.4 times times user settings user settings T2.1 language language T2.2 sewing mode sewing mode T2.2 hand switch hand switch T2.3 par.lock.
- Page 97 Parameter English (displayed on the screen) English (meaning) T4.1.7 append stitch append stitch T4.1.8 parameter parameter T4.1.8.1 std.rpm standard speed T4.1.8.2 orig. X origin X T4.1.8.2 dist. X distance X T4.1.8.3 orig. Y origin Y T4.1.8.3 dist. Y distance Y T4.1.8.4 T4.2 edit...
- Page 98 Parameter English (displayed on the screen) English (meaning) EMERGENCY-OFF EMERGENCY-OFF SERIOUS ERROR SERIOUS ERROR NOTE NOTE INTERNAL ERROR INTERNAL ERROR CONFIRMATION CONFIRMATION read data read data save data save data format format output output input input stop pos. stop position software software date...
Need help?
Do you have a question about the 530 and is the answer not in the manual?
Questions and answers