Table of Contents
Advertisement
Quick Links
Advertisement
Table of Contents

Related Manuals for Vivitek DU9057Z


Summary of Contents for Vivitek DU9057Z
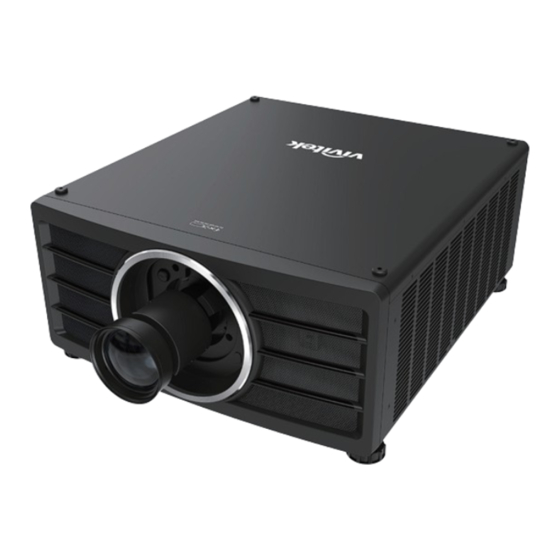
- Page 1 DU9057Z DU9055Z DU9053Z User Manual www.vivitekcorp.com...
-
Page 2: Table Of Contents
DLP Projector - User Manual Table of Contents Copyright ....................................3 Copyright ..................................3 Disclaimer ..................................3 About the Manual ................................. 3 Important Safety Guidelines ............................... 4 Safety Notification ............................... 4 Risk Group 3 Laser Hazard ............................5 Light Hazard Warning .............................. 5 Light Intensity Hazard Distance .......................... - Page 3 OSD Menu – INFO ............................... 61 Product Specification ................................ 62 Supported Signal Input Timing ............................63 Configurations of Terminals ............................. 67 DU9057Z Lens Series ............................... 68 Product Dimensions ................................69 LED Indication ..................................70 Common Problems and Solutions ............................ 71 About the Vivitek Support ..............................
-
Page 4: Copyright
All rights are reserved. No duplication of the manual or any content included in the manual is allowed without the written consent of the manufacturer. © 2023 Vivitek. Vivitek is a trademark of Delta Electronics, Inc. © All rights reserved. 2023 Disclaimer The information in the manual is subject to change without notice. -
Page 5: Important Safety Guidelines
If the above scenario occurs, the user may be responsible for correcting the interference WARNING! Changes or modifications without approval from Vivitek could void the user’s authorization to operate the product. UM90570802EN00... -
Page 6: Risk Group 3 Laser Hazard
DLP Projector - User Manual Risk Group 3 Laser Hazard This product is a risk group 3 laser product. It must be installed in a safe place and must be handled by qualified and professionally trained personnel. Do not attempt to access the internal hardware of the projector. Do not a attempt to modify or remove the laser module. -
Page 7: Restriction Zone
DLP Projector - User Manual Restriction Zone A restriction zone should be in place around the hazard zone to prevent any person from entering the hazard zone with any part of their body: Horizontal clearance . This should be no less than 2.5m around the hazard zone Vertical clearance . - Page 8 DLP Projector - User Manual LIGHT MODULE A light module containing multiple laser diodes acts as the light source in the product. These laser diodes are sealed in the light module. It is recommended to ask dealer for maintenance or repair services of the light module.
-
Page 9: Disposal Of Old Electric And Electronic Equipment
DLP Projector - User Manual Installation and Use Notices Read and keep this manual properly. Pay attention to all the noted warnings, and follow all the guidelines and descriptions in this manual. Do not use the projector near water. Do not install the equipment near the thermal sources, such as heaters, radiators, furnace, amplifiers, and any other equipment that may generate heat. -
Page 10: Introduction
You can find the latest version of the Manual and the manual of other Vivitek products on www.vivitekcorp.com. Packing Checklist The following items are included in the packaging box of the DU9057Z series projector. If there is any loss or damage to any item, contact your dealer or Vivitek customer service department. -
Page 11: Projector Overview
DLP Projector - User Manual Projector Overview Front-left View Lens Mounting Hole The mounting hole is for installing the projection lens. 2. Air Intake The fan pulls the cool air to the projector for system cooling. 3. Control Panel Press the button to operate the OSD menu or adjust the lens Settings see OSD controls. - Page 12 DLP Projector - User Manual Bottom View 13. Ceiling Mounting Hole Total, six M6 screw holes with maximum depth of 16mm 14. Recess for projector handling. These four recesses can be used for handling the projector. Caution: When installing, ensure that you use only UL Listed ceiling mounts. Contact your dealer for information on mounting the projector on a ceiling.
-
Page 13: Io Panel
DLP Projector - User Manual IO Panel SYNC IN / OUT RS-232 Connect 3D-sync in cable from a computer or an The 9-pin D-sub interface is used to connect to the enabled device. PC control system and projector maintenance. HDMI 1 / 2 DVI-D Connect the HDMI cable from a computer or video Connect to DVI-D cable from a DVI-D output of the... -
Page 14: Control Panel
DLP Projector - User Manual Control Panel LED Indicator EXIT Display current projector status such as power, light Push the button to return to the menu on the source status and warning. previous level or exit the OSD menu. POWER User the button to turn on/off the projector. -
Page 15: Remote Control
DLP Projector - User Manual Remote Control Use the button to turn on the projector. Use the button to turn off the projector. FOCUS Adjust the focus of the projected image. ZOOM Zoom in/out the projected image. TEST PATTERN Use the button to show the test pattern. Press this button again to switch to the next pattern. - Page 16 DLP Projector - User Manual 3G-SDI Select 12G SDI as the input source. DisplayPort HDBaseT Select HDBaseT the input source. Wired Remote Jack CLEAR Connect to WIRED REMOTE Erase the set ID number of the remote control; refer to the section terminal on the projector “Using Control ID for Multi-projector Application”.
-
Page 17: Installation And Setting Up
DLP Projector - User Manual Installation and Setting up Inserting or Changing the Remote Control Batteries 1. Remove the battery compartment cover by sliding the cover in the direction of the arrow. 2. Place two AA batteries with the correct polarity. 3. -
Page 18: Installing The Projector
DLP Projector - User Manual Installing the Projector The high quality display effect can be guaranteed only when the projector is correctly installed. Generally, the light source facing the screen should be reduced or eliminated as much as possible. The contrast of the image will be obviously reduced if the light directly shines on the screen, such as the beam from windows or the searchlight cast on the image. - Page 19 DLP Projector - User Manual 189.40 189.40 6-Mounting holes M6*1 MAX. Length L=16mm UM90570802EN00...
-
Page 20: Installing Or Removing The Optional Lens
DLP Projector - User Manual Installing or Removing the Optional Lens Caution: Do not shake or place excessive pressure on the projector or the lens components as the projector and lens components contain precision parts. When shipping the projector with the optional lens, remove the optional lens before shipping the projector. - Page 21 DLP Projector - User Manual Removing the Existing Lens Push the LENS RELEASE button all the way in and rotate the lens counterclockwise. The existing lens will be disengaged Pull out the existing lens slowly. Important: When installing the lens into the projector, be sure to remove the lens cap from the back of the optional lens before installing the optional lens into the projector.
-
Page 22: Connecting To Ac Power Supply
DLP Projector - User Manual Connecting to AC Power Supply The AC power cord is included in the box; plug the power cord to the AC socket on the IO panel. Important: When the input voltage is 110V, the current supplied by the power supply does not provide the current required to run the projector at full power. -
Page 23: Turning Off The Projector
DLP Projector - User Manual Turning Off the Projector Once the projector is no longer required, it is important to shut it down correctly to avoid damage or unnecessary wear and tear on the device. Important: Do not unplug the power cable from the wall outlet or projector when the projector is powered on. Doing so can cause damage to the projector’s AC IN connector or the prongs of the power cable plug. -
Page 24: Adjusting The Projection Mode
DLP Projector - User Manual Adjusting the Projection Mode DU9057Z is designed for set up in all angles including desktop, ceiling, portrait and free-tilt installation as shown in the below illustration. You can change the direction of the image using the Projection Mode. The projector has a smart cooling mechanism, which regulates the fan automatically according to the projection mode. -
Page 25: Adjusting The Projected Image Position
Adjusting the Projected Image Position The DU9057Z projector has the powered lens shift feature; the image can be shifted vertically or horizontally without moving the projector. The lens shift range is shown in the percentage of the image height and width, the maximum vertical shift range can be up to 50% of the projected image height and down to 50% of the height, and maximum horizontal shift range is 15% of the image width to right and left. -
Page 26: Adjusting Geometric Distortion
When the image is projected on a curved surface or screen at an angle, the image may become distorted. You can utilize the latest Vivitek Geometric Correction engine to make an image look visually correct when it is projected onto a non-planar screen or at an angle. The option as below figure, the available function combination is listed on the submenu of each geometry correction option. -
Page 27: Corner
DLP Projector - User Manual Rotate the projected image within active display area. Use the ◄ or ► button to rotate the image clockwise or counterclockwise.Select Reset option to return Rotation setting to default value. Note that the image size is shrunk for projecting full image when Rotation is enabled;... - Page 28 DLP Projector - User Manual Top-Right Corner Horizontal -192 (Pixels) 192 (Pixels) Vertical -120 (Pixels) 120 (Pixels) Bottom-Left Corner Horizontal -192 (Pixels) 192 (Pixels) Vertical -120 (Pixels) 120 (Pixels) UM90570802EN00...
- Page 29 DLP Projector - User Manual Bottom-Right Corner Horizontal -192 (Pixels) 192 (Pixels) Vertical -120 (Pixels) 120 (Pixels) H Linearity V Linearity Reset Reset all of settings under this option to the default value. UM90570802EN00...
-
Page 30: Pincushion / Barrel
DLP Projector - User Manual Pincushion / Barrel When image is projected onto a cylindrical screen or hemispherical domes, you can use Pincushion /Barrel Correction to correct the distortion. Use the ◄ or ► button to adjust Pincushion / Barrel effect, Keystone or rotate the image by Rotation option. -
Page 31: Custom Warp
DLP Projector - User Manual Keystone Below is an example of using Horizontal Keystone Note: H or V Keystone is available when Horizontal or Vertical of Pincushion/Barrel is adjusted. Rotation is available when H or V Keystone is adjusted. ... -
Page 32: Using Control Id For Multi-Projector Application
DLP Projector - User Manual Using Control ID for Multi-Projector Application When installing more than one projector in the room, the projectors may receive the control signal at the same time. In this case, you can use control ID function to specify the identification of the projector and remote control to operate the specified projector. - Page 33 DLP Projector - User Manual Set the identification number of remote control Press and hold ID SET button on the remote control around 5 seconds, Power LED indicator is flashing red periodically. Press two digits to set desired ID number, each pressing shall be leisurely. Power LED will flash on time when the remote control is confirmed the setting.
-
Page 34: Using The Constant Brightness Function To Maintain The Brightness Output
The brightness output of a projector may decline after thousands of hours of usage. In certain applications, such as mapping, a periodical adjustment to multiple projectors is required to ensure the overall image result. Vivitek’s Constant Brightness feature is designed to reduce the need for installers to regularly recalibrate the projectors. A... -
Page 35: Connecting Equipment
DLP Projector - User Manual Connecting Equipment Follow the instructions below to connect the DU9057Z projector to a video source or external control equipment (if any). When connecting to the equipment, use the correct signal cable to connect to the signal source and ensure that the cable is securely connected. -
Page 36: Connecting To A Control Equipment
DLP Projector - User Manual Connecting to a Control Equipment The projector has the following control port for connecting to the control equipment: HDBaseT/LAN (Network control): The projector supports network control. LAN and HDBaseT share the same port. If only network control is used, you can connect the LAN on the projector to PC or through the local network. Refer to the Remote Communication Manual for detailed information. -
Page 37: Connecting A Screen Trigger
DLP Projector - User Manual Connecting a Screen Trigger If your projection system includes a electric projection screen and other 12V trigger device, you can connect these devices to the projector’s 12V trigger output port to configure the 12V signal settings. The projector will output 12V signals when it’s turned on. -
Page 38: Connecting An Hdbaset Transmitter
LAN signals can be sent to the projector via a single RJ-45 cable. If the HDBaseT Transmitter you purchased supports the input and output of the IR remote control, the control signals from the IR remote control can be sent to the DU9057Z projector via the RJ-45 cable. DVD P la ye r... -
Page 39: Using The Projector
DLP Projector - User Manual Using the Projector Using On-Screen Display Using the On-Screen Display The projector has an On-Screen Display (OSD) that lets you make image adjustments, change various settings and check the projector’s current status. Navigating the OSD You can use the remote control or the control buttons on the projector to navigate and make changes to the OSD. -
Page 40: Menu Tree
DLP Projector - User Manual Menu Tree Use the following table to quickly find a setting or determine the range for a setting. Main Menu Sub Menu Settings INPUT Input HDMI1 / HDMI2 / DVI / HDBaseT / SDI Selection Resync (OK) to execute HDMI... - Page 41 DLP Projector - User Manual Main Menu Sub Menu Settings PICTURE Picture Mode High Bright / Presentation / Video Brightness 0 ~ 100 ~ 200 Contrast 0 ~ 100 ~ 200 Color Color R / G / B / C / M / Y / W Manager Hue (R / G / B / C Red Gain (W)
- Page 42 DLP Projector - User Manual Main Menu Sub Menu Settings ALIGNMENT Aspect Ratio 5:4 / 4:3 / 16:10 / 16:9 / 1.88 / 2.35 / LetterBox / Source / Native Projection Front Desktop / Front Ceiling / Rear Mode Desktop / Rear Ceiling / Auto-front Digital Zoom Digital Zoom 0% ~ 100%...
- Page 43 DLP Projector - User Manual Main Menu Sub Menu Settings ALIGNMENT Edge Blend Edge Blend Mode Off / On Align Pattern Off / On Blend Start 0 - 360 Bottom 0 - 360 Left 0 - 534 Right 0 - 534 White Level 4K model: 0, 100 - 1000 WUXGA model: 0, 100 - 500...
- Page 44 DLP Projector - User Manual Main Menu Sub Menu Settings CONTROL Light Source Light Mode Normal / ECO / Custom Custom Light 30 ~ 100 Constant Off / On Brightness Dynamic Black Off / On Light Off Timer Disable / 0.5 Sec / 1 Sec / 1.5 Sec/ 2 Sec / 3 Sec / 4 Sec High Altitude Off / On / Auto / Quiet...
- Page 45 DLP Projector - User Manual Main Menu Sub Menu Settings CONTROL Rental Mode Power Locked Power Locked 30% / 40% / 50% / 60% / 70% / 80% / Level Level 90% / 100% Power Locked (execute) Level Reset Usage Locked Usage Locked Disable / Enable Time...
- Page 46 DLP Projector - User Manual Main Menu Sub Menu Settings INFO Model Name Serial Number Software Control Module Version Video Module Option Module Formatter Module Light Module Laser Hours Signal Format Active Source Timing H Refresh V Refresh Pixel Clock Color Format HDR Format System...
-
Page 47: Osd Menu - Input
DLP Projector - User Manual OSD Menu – INPUT Input Selection Use the shortcut key on the remote control or this function to select the input source. The Input options are as below. The available input source of the product is HDMI 1, HDMI 2, HDBaseT, DVI and SDI. Resync To automatically synchronize the projector to the input source. - Page 48 DLP Projector - User Manual Noise Reduction Use ◄► to adjust the noise of the projected image. This function is used to remove the noise of the image with interlaced scanning input. Generally, noise reduction can lower the high-frequency details and make the image softer.
- Page 49 DLP Projector - User Manual minutes every thirty minutes or one hour. Auto Source The Auto Source functions “ON” lets projector automatically search for the input signal. Test Pattern The built-in images are provided for installation and adjustment. You can select TEST PATTERN or Test Pattern on OSD or the TEST PATTERN button on the remote control to show the test pattern.
-
Page 50: Osd Menu - Picture
DLP Projector - User Manual OSD Menu – PICTURE Picture Mode Use ◄or► to select desired picture mode High Bright: The highest brightness output mode is suitable for the application where the highest brightness output is needed. Presentation: The best projection effect is suitable for the presentation or picture. Video: The mode is suitable for playing video content. - Page 51 DLP Projector - User Manual options are REC709, EBU SMPTE and Native. Color Temperature: The default of color temperature is Native, and it is suitable for most situations. As color temperature rises, the picture will appear bluer, while as the color temperature decreases, the picture will appear redder.
-
Page 52: Osg Menu - Alignment
DLP Projector - User Manual OSG Menu – ALIGNMENT Aspect Ratio This function allows the user to adjust the aspect ratio of the projection image by the ◄ or ► button. Projection Mode Use the ◄ or ► buttons to select a projection mode to change the direction of the image. The selectable options are as follows: Auto-Front: One orientation sensor is built in the projector. - Page 53 DLP Projector - User Manual Blanking This function can adjust the edges of the image and hide surplus sections of the projection. Top: Press the the ▲ or ▼ button to adjust the top blanking area on the projected picture. Bottom: Press the ▲or ▼...
- Page 54 DLP Projector - User Manual Pincushion / Barrel: Press the ▲or ▼ button to correct pincushion/barrel distortion. Top: Press the ◄ or ► button to adjust Top side distortion. Bottom: Press the ◄ or ► button to adjust Bottom side distortion. Left: Press the ◄...
- Page 55 DLP Projector - User Manual Lens Memory: This projector supports Lens Memory function, Lens shift, Zoom and Focus memory can be stored in the projector up to 10 sets. You can load the stored memory setting to set up the lens automatically. Select Lens memory 1~10 : ENTER key to Save/Load.
-
Page 56: Osd Menu - Control
DLP Projector - User Manual OSD Menu – CONTROL Light Source Light Mode: When AC 220V, the Eco option will setup the initial power of light source at 70% and the Normal option will setup the initial power of light source at 100%. When AC 110V, will be grayed-out and force the laser power output at 30% (safety consideration), the purpose of AC 110V support that just for initial install the projector when no AC 220V available yet. - Page 57 DLP Projector - User Manual Note: Light Off Timer is available when Dynamic Black function is turned on. High Altitude Use this function to adjust the cooling fan of the projector to get well cooling if the projector is installed in an area over 4000 feet.
- Page 58 DLP Projector - User Manual Native: Outputs 12V of power on Trigger when Aspect Ratio is set to Native. RS232: Outputs 12V of power on Trigger by RS232 command control. UM90570802EN00...
- Page 59 DLP Projector - User Manual Instant Startup Enable instant startup function. Standby Period Setting instant startup period time. Available when instant startup is On. Network Use this function to configure the network settings, so that you can control the projector via the network. Press the ▲...
-
Page 60: Osd Menu - Settings
DLP Projector - User Manual OSD Menu – SETTINGS Power Management Standby Mode: Switch standby power mode. Auto Power Off: This function is set to OFF by default. When it is set to ON and no input signal is received within 20 minutes, the projector will turn off automatically. - Page 61 DLP Projector - User Manual Memory Recall Memory: Load color image settings by previous input source memory. Save Settings: Save color image settings by current input source. Language Select OSD language and choose from one of the 8 available languages options. Available lanaguges include: English, Français, Español, Deutsch, Português, 簡体中文, 繁體中文, 日本語, 한국어.
-
Page 62: Osd Menu - Info
DLP Projector - User Manual OSD Menu – INFO Model Name Display the project model name. Serial Number Display the serial number of the projector. Software Version Display the software version in the projector including : Control Module / Video Module / Option Module / Formatter Module / Light Module. Laser Hours Displays the accumulated time which the light source of the projector is used. -
Page 63: Product Specification
DLP Projector - User Manual Product Specification Model Name DU9057Z DU9055Z DU9053Z Display Type Single Chip 0.96" DLP Technology by TI Brightness* 27,000 (ISO) Lumens 24,000 (ISO) Lumens 21,000 (ISO) Lumens Native Resolution WUXGA (1920 x 1200) Maximum Resolution 4K UHD (3840x2160) @60Hz... -
Page 64: Supported Signal Input Timing
DLP Projector - User Manual Supported Signal Input Timing HDMI / HDBaseT Frame Signal H Freq. PCLK Resolution Rate Format (KHz) (MHz) (Hz) 8-bit 10-bit 12-bit 640x480 31.469 59.94 25.175 640x480 37.500 74.99 31.500 640x480 43.269 36.000 ... - Page 65 DLP Projector - User Manual HDMI / HDBaseT Frame Signal H Freq. PCLK Resolution Rate Format (KHz) (MHz) (Hz) 8-bit 10-bit 12-bit 640x480 35.000 66.67 30.240 832x624 49.720 74.55 57.280 Apple Mac 1024x768 60.241 74.93 80.000 ...
- Page 66 DLP Projector - User Manual 12G SDI (SDI Format) Color Sampling Timing SDI Link mode Signal Standards Bit Depth Encode Structure 1080i59 SMPTE 292M 1.5Gbps HD YCbCr 4:2:2 1080i50 SMPTE 292M 1.5Gbps HD YCbCr 4:2:2 1080i60 SMPTE 292M 1.5Gbps HD YCbCr 4:2:2 720p24...
- Page 67 DLP Projector - User Manual Supported 3D Signal Dual Output V-Freq H-Freq Standard Resolution V-Total HDMI Display Channel (Hz) (kHz) Frame Rate HDMI 1/2 720p50 Frame Packing 1280x720 50.00 1470 37.50 720p59 Frame Packing 1280x720 59.94 1470 44.96 ...
-
Page 68: Configurations Of Terminals
DLP Projector - User Manual Configurations of Terminals DVI-D Terminal Serial Control Terminal (RS-232, D-sub 9 pin) Serial T.M.D.S. Data 2- Input T.M.D.S. Data 2+ Input Ground Ground T.M.D.S. Data 0- Ground Input T.M.D.S. Data 0+ Short with pin8 Input Short with pin7 Ground T.M.D.S. -
Page 69: Du9057Z Lens Series
3D Sync Out Signal Ground DU9057Z Lens Series Five types of optional electric lenses are available for the projector and are listed in the below table. Contact an authorized Vivitek dealer for additional details. Zoom Part Number Lens Name F Number... -
Page 70: Product Dimensions
DLP Projector - User Manual Product Dimensions 598.80 676.60 189.40 189.40 6-Mounting holes M6*1 MAX. Length L=16mm UM90570802EN00... -
Page 71: Led Indication
DLP Projector - User Manual LED Indication Several indicators messages are used to display the current projector status or alert the abnormal message. TEMP LED Indicator LED Color and Status Pattern Sequence Condition Description Off (No color) No Error RED, continuous flashing. Temperature Error LIGHT LED Indicator LED Color and Status... -
Page 72: Common Problems And Solutions
DLP Projector - User Manual Common Problems and Solutions These guidelines provide tips to deal with problems you may encounter while using the projector. If the problem remains unsolved, contact your dealer for assistance. Often the problem is something as simple as a loose connection. Check the following before proceeding to the problem-specific solutions. - Page 73 DLP Projector - User Manual 2. Ensure the power source is good by testing with another electrical device. 3. Restart the projector in the correct order and check that the Power LED is green. 4. Check if Blank or Shutter function is enabled Remote Control Problems Problem: The projector does not respond to the remote control.
-
Page 74: About The Vivitek Support
DLP Projector - User Manual About the Vivitek Support If you cannot find solutions from this user guideline, please contact us using the contact information below: Europe, Middle East and Africa Vivitek Service & Support Zandsteen 15 2132 MZ Hoofddorp... - Page 75 Visit www.vivitekcorp.com for more product info Copyright (c) 2023 Delta Electronics, Inc. All Rights Reserved...
Need help?
Do you have a question about the DU9057Z and is the answer not in the manual?
Questions and answers