Table of Contents
Advertisement
Quick Links
Advertisement
Table of Contents

Related Manuals for Vivitek DU9000


Summary of Contents for Vivitek DU9000
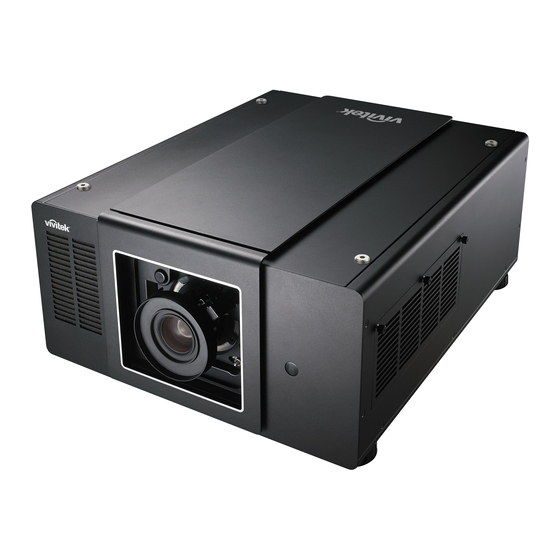
- Page 1 DU9000...
-
Page 2: Table Of Contents
® Index Safety Notice Copyright Disclaimer About the Manual Disposal of Old Electrical and Electronic Equipment Important Recycling Instructions Important Safety Guidelines Installation and Use Notice Introduction Product Features Packing Checklist Projector Overview General I/O Panel Keypad and LED Keypad Indicator LED Remote Control Installation of the Remote Control Battery... - Page 3 ® Before Using the Projector Remove Dust Cover Before Turning on Power Connecting to AC Power AC Outlet Turn On Changing the OSD Language Adjusting the Projection Mode Front Table Rear Table Front Ceiling Rear Ceiling Rear Tabletop Lens Adjustment Vertical Lens Shift Horizontal Lens Shift Zoom In/Out...
- Page 4 Connect with an External Integrated Video and Control Signal Transmission Box Set Up the Projector for Networking Control the Projector Through a Network Control the Projector Through a Web Browser Control Projector with the PJLink Protocol Control Projector with TCP/IP Communication Protocol Specificatons and Support Specifications Vivitek Support...
-
Page 5: Safety Notice
No duplication of the manual or any content included in the manual is allowed without the written consent of the manufacturer. ©2014 Vivitek. Vivitek is a trademark of Delta Electronics, Inc. Other trademarks are the properties of their respective owners. -
Page 6: Important Safety Guidelines
Safety Notice ® Important Safety Guidelines Thank you for purchasing this high quality product! Read the Manual carefully in order to obtain the best performance from your projector, please read the manu- al completely. Installation and Use Notice 1. Please read and keep the manual available for future reference. 2. -
Page 7: Introduction
Vivitek has made every effort to ensure that the information in this Manual is correct at the time of printing. The contents may be updated due to product enhancements, customer feedback or improvements. You can find the latest version of the Manual and the manual of other Vivitek products at www.vivitekcorp.com. -
Page 8: Packing Checklist
Safety Notice ® Packing Checklist The following items are included in the DU9000 packaging. If any item is missing or damaged, please contact your dealer or Vivitek customer service center. 1. Power Cord (USA, Europe,China) 2. Remote 3. Battery (AAA) 4. -
Page 9: General
Appearance ® General I/O Panel HDBaseT/LAN Connect to the RJ45 Cat5 Ethernet cable. 3D Sync Out Connect to the 3D IR synchronization signal transmitter. HDMI Connect to HDMI source. 3G/HD/SD SDI Connect to SDI source. Provide the standard 15-pin VGA connection and can connect to RGB, HD Component or personal comput- Component / Y/Pb/Rr Connect BNC-type input terminal to the RGB or YPbPr/YCbCr output signal of video equipment. -
Page 10: Keypad And Led
Appearance ® Keypad and LED INPUT MENU STBY ENTER IR RECEIVER STAND BY ERROR STATUS Keypad STBY Use STBY button to turn on/off the projector. INPUT Push INPUT button to select the video source. HDMI, SDI, VGA, Component / BNC or HDBaseT. MENU Push MENU button to display or hide the OSD menu. -
Page 11: Remote Control
Appearance ® Remote Control PICTURE Use this button to turn on the pro- Start to adjust the image. jector. NETWORK Press this button to enter the LAN Use this button to turn off the pro- menu. jector. AUTO SYNC FOCUS Press this button to carry out auto- Adjust the focus of the projected matic signal synchronization. -
Page 12: Installation Of The Remote Control Battery
Appearance ® Installation of the Remote Control Battery 1. Slide the battery cover in the direction of the arrow. 2. Place two AA batteries with the correct polarity. 3. Slide the cover back. Battery installation instructions • Make sure that batteries are installed with the correct polarity. •... -
Page 13: Precautions For Installation
Precautions For installation ® Precautions For Installation The high quality display effect can be guaranteed only when the projector is correctly installed. Generally, the light source facing the screen should be reduced or eliminated as much as possible. The contrast of images will be obviously reduced if the light such as the beam from glass window or searchlight directly shines on the screen. -
Page 14: Cautions On Ventilation
Precautions For installation ® Cautions on Ventilation This product is a high-brightness projector. The intakes with filters are located on the front and right sides to provide sufficient air cooling function. The projector has two vents on the back for cool air discharging. Make sure the intake and vent are unobstructed when the projector is being installed. -
Page 15: Lens Shift
® Lens Shift The DU9000 projector has lens shift feature so the image can be vertically shifted without moving the projector. The lens shift bit is shown in the percentage of the screen height. The projector installed on the desk can move up and down. -
Page 16: Connecting The Projector To Source Devices
Connecting the Projector to Source Devices Follow the instructions below to connect the DU9000 projector to the video source, external control equip- ment (if any) and AC power supply. When connecting to the equipment, use the correct signal cable to con- nect to every signal source and ensure that the cable is securely connected. -
Page 17: Connecting To The Screen Trigger
RS-232 and LAN signals can be sent to the projector via a single RJ-45 cable. If the HDBaseT Transmitter you purchased supports the input and output of the IR remote control, the control signals from the IR remote control can't be sent to the DU9000 projector via the RJ-45 cable. Note: The projector supports the video signal only, RS-232 and IR remote control are not supported. -
Page 18: Before Using The Projector
Before Using the Projector ® Before Using the Projector Remove Dust Cover Before Turning on Power Remove this plastic cover before turning on power and installing Lens. Connecting to AC Power There are three AC power cords included in the box. Before plug the power cord, please choose the compliant power cord for the AC Voltage in you region. -
Page 19: Ac Outlet
Befor Using the Projector ® AC Outlet Europe China (NEMA 5-20P) • Caution: Ensure that the power net meets the power requirements of the projector. • Warning: Do not attempt operation if the AC supply and cord are not within the specified voltage and power range. -
Page 20: Turn On
When the power and lamp LED indicator lights are blue and the projector light is turned on, this mean that the projector is ready for use. Refer to Page 9 [Indicator LED] if the LED indicator flashes red. Please contact the Vivitek licensed dealer if the problem cannot be solved. Changing the OSD Language The projector can display English and Simplified Chinese menus. -
Page 21: Adjusting The Projection Mode
Befor Using the Projector ® Adjusting the Projection Mode The projection mode has influence on the direction of the projected image and cooling. The projection mode option can be used to change the direction of the projected screen and the cooling fan speed to ensure that the projector is properly cooled. -
Page 22: Start Using The Projector-Operation
Start Using the Projector ® Start Using the Projector-Operation Select the Input Source Press the INPUT Source button on the remote control to se- lect the input source. Select the Aspect Ratio Press ASPECT to adjust the aspect ratio of the image. Use OSD (OnScreen Display) 1. - Page 23 Start Using the Projector ® Factory 1st Layer 2nd Layer 3rd Layer Selections Reset Auto / REC709 / REC601/ RGB PC / Color Space Auto RGB Video Gamma 1.0 / 1.8 / 2.0 / 2.2 / 2.35 / 2.5 / S-Curve Color 5500K / 6500K / 7500K / 9300K / Native Native...
- Page 24 Start Using the Projector ® Factory 1st Layer 2nd Layer 3rd Layer Selections Reset Lens Control Center Lens Horizontal Keystone -350 ~ 350 Vertical Keystone -200 ~ 200 Rotation -20 ~ 20 Pincushion / Barrel -100 ~ 100 Warp Top Left corner X: +/- 192, Y +/- 120 Top Right corner X: +/- 192, Y +/- 120...
- Page 25 Start Using the Projector ® Factory 1st Layer 2nd Layer 3rd Layer Selections Reset Language English / 簡中 / Korean Top Left / Top Right / Bottom Left / Menu Position Center Bottom Right / Center Menu Transparency 0% / 25% / 50% / 75% OSD Settings Always On / 10 Seconds / 30 Seconds / Time Out...
-
Page 26: Osd Menu - Main Selection
Start Using the Projector ® OSD Menu - Main Selection OSD Menu - MAIN... -
Page 27: Aspect Ratio
Start Using the Projector ® Aspect Ratio This function allows the user to adjust the aspect ratio of the image. With a normal input of 16:10, the aspect ratio: 16:9 /LetterBox / 4:3 / 4:3 Narrow / 16:10 / 5:4 / Native Output aspect ratio Output aspect ratio Output aspect ratio... -
Page 28: Preset
Start Using the Projector ® Preset There are 10 display modes, 6 preset and 4 user assigned, that can be used to adjust the display. Preset modes include: Picture/Brightness/Contrast/Saturation/Hue/Sharpness. The user assigned modes are as- signed by the user and memorized by the system. Input Selection This function is same as the shortcut key on the remote control. - Page 29 Start Using the Projector ® 3D Swap If the 3D imaged viewed through the 3D glasses for the left and right eyes are inverse, set the 3D Swap to "Inverse". If the images are normal, keep the current setting as Normal. Dark Time Manually switch the Dark time for glasses tolerance.
-
Page 30: Osd Menu - Image
Start Using the Projector ® OSD Menu - IMAGE Picture Model Use ◄► to select a picture model. Bright: The highest brightness output mode is suitable for the occasion where high brightness is needed. Presentation: The best image effect is suitable for the presentation or picture. Video: The best color mode is suitable for playing video. -
Page 31: Osd Menu - Advanced Image
Start Using the Projector ® OSD Menu - ADVANCED IMAGE Color Space This function allows you to change the corresponding color space for the input signal. In most cases, the correct color space can be selected automatically by Auto mode. If the selection is not correct, you can use a specific color space forcibly by selecting one of the following options: •... -
Page 32: Hsg
Start Using the Projector ® Fine Sync Adjust the sync of signal to get proper display on screen. • H and V Position : Adjust horizontal and vertical position of image if not at center. • Phase : Adjust the phase of signal sampling clock if noise is visible. •... -
Page 33: Power
Start Using the Projector ® Power User can select custom power % of lamp. Lamp Select Use the ◄► button to select the single-lamp or dual-lamp mode. • Dual Enable the dual-lamp projection mode. • Lamp 1 Use Lamp 1 for projection. The system switches to Lamp 2 if Lamp 1 is abnormal in activation. •... -
Page 34: Lens Control
Start Using the Projector ® Lens Control Select this function to open the Lens Control menu for adjustment of Zoom, Focus or Shift. You can use the Enter button to switch the Zoom/Focus or Shift menu. Use ◄► to adjust zooming and horizontal shift of the lens, or use ▲▼... -
Page 35: Blanking
Start Using the Projector ® • Pincushion/Barrel Adjust the Pincushion / Barrel of the projected picture. Pincushion Adjust Barrel Adjust • Top Left Corner Adjust the Top left corner of the projected picture Top Left Corner Adjust • Top Right Corner Adjust the Top right corner of the projected picture Top Right Corner Adjust... -
Page 36: Edge Blend
Start Using the Projector ® Edge Blend Edge blend function requires multiple projectors simultaneously displaying on the same screen. Use this to adjust the uniformity of the images. To use this function, Edge Blending must be enabled on both projectors. Status On/Off To enable or Disable Edge Blend function. -
Page 37: Osd Menu - Control
Start Using the Projector ® OSD Menu - Control Language Select the OSD language English or Simplified Chinese. OSD Setting 1. Menu Position Select the OSD pop up position. 2. Menu Transparency Left Right Setting the OSD transparency 0%, 25%, 50%, Center 3. -
Page 38: Auto Power Off
Start Using the Projector ® Auto Power Off This function is set to OFF by default. When it is set to ON and no input signal is received within 20 minutes, the projector will turn off automatically. Auto Power On This function is set to OFF by default. -
Page 39: Osd Menu - Service
Start Using the Projector ® OSD Menu - Service The functions of the projector are related to the display of some basic information of the projector. Model: Projector model name. Serial Number: Projector serial number. Software Version1&2: The version of the software installed in the projector. FPGA Version: The version of the Software installed in the projector. -
Page 40: Maintenance
Note: • Purchase the lamp module produced by Vivitek. Using the lamp that is not made by Vivitek may affect the performance of the projector or damage the projector. -
Page 41: Installing Or Removing The Projection Lens
Maintenance ® Installing or Removing the Projection Lens Remove Lens 1. Remove the dust cap from the projector. 2. Press the release button and then turn in a Counter Clockwise direction to remove the lens. Install Lens 3. -
Page 42: Replacing The Filter
Maintenance ® Replacing the Filter The timing of replacing the filter may vary depending on the dustiness of the environment. It is recommended to conduct regular check of the filter to achieve the best projector performance. 1. Follow the drawing to remove the cover. 2. -
Page 43: Outline Dimensions
Dim. ® Outline Dimensions... -
Page 44: Supported Signal Input Timing
Supported Signal Input Timing ® Supported Signal Input Timing Signal Frame HDMI HDMI - YUV BaseT Resolution Y-Pr-Pb RGBHV HDBaseT References Type Rate 8/10/12-bit 8-bit 640x480 59.94 VESA DMT 640x480 74.99 VESA DMT 640x480 VESA DMT 800x600 60.32 VESA DMT 800x600 VESA DMT 800x600... -
Page 45: 3D Signal Input Mode & Timing
Supported Signal Input Timing ® Signal Frame HDMI HDMI - YUV BaseT Resolution Y-Pr-Pb RGBHV HDBaseT References Type Rate 8/10/12-bit 8-bit SMPTE 274M, CEA-861-D SMPTE 274M, 1080i 59.94 CEA-861-D SMPTE 274M, CEA-861-D SMPTE 296M, CEA-861-D 720p SMPTE 296M, CEA-861-D HDTV SMPTE 274M, CEA-861-D SMPTE 274M,... -
Page 46: Serial Interface Rs-232 Command
RS-232 Command ® Serial Interface RS-232 Command This controller supports projectors with a RS-232 serial interface. There are two types of serial commands: • Operation command: Available menu options are INPUT, PICTURE, LAMP, ALIGNMENT, CONTROL, SERVICE, and OTHERS. • Simulated IR remote controller commands: Controls projector with serial command analog IR remote con- troller and its control keys. -
Page 47: List Of Operation Commands
When controlling the projector to execute multiple commands, make sure the return message of the last command is received be- fore sending out the next one. List of Operation Commands Serial Command Operation Value Remark 1 Vivitek 0 = Off power.on 1 = On power.off 0 = 16:9 1 = Theaterscope (LetterBox) - Page 48 RS-232 Command ® Serial Command Operation Value Remark 1 Vivitek 1080p24 output frame rate 0 = 96Hz setting for 3D 3d.24 = ? (default) 1 = 144Hz Note: Only Available in 3D Mode 0 = Brigh pic.mode = ? (default)
- Page 49 RS-232 Command ® Serial Command Operation Value Remark 1 Vivitek hsg.g.gain = ? (default) 0 – 200 hsg.g.sat = ? (default) 0 – 200 hsg.b.hue = ? (default) 0 – 200 hsg.b.sat = ? (default) 0 – 200 hsg.b.hue = ? (default) 0 –...
- Page 50 RS-232 Command ® Serial Command Operation Value Remark 1 Vivitek 0 = Off auto.powoff = ? (default) 1 = On 0 = Off auto.powon = ? (default) 1 = On 0 = Front Tabletop 1 = Front Ceiling proj.mode = ? (default)
- Page 51 RS-232 Command ® Serial Command Operation Value Remark 1 Vivitek eb.red = ? + -(default) 0 ~ 32 eb.green = ? + -(default) 0 ~ 32 eb.blue = ? + -(default) 0 ~ 32 eb.reset (execute) w2.recover 0 = Off eb.adl...
- Page 52 RS-232 Command ® Serial Command Operation Value Remark 1 Vivitek 0 = Off 1 = White 2 = Black 3 = Red 4 = Green pattern = ? (default) 5 = Blue OSD Test Patterns 6 = ANSI Checkboard 7 = Focus Grid...
-
Page 53: Simulated Ir Remote Controller Commands
RS-232 Command ® Simulated IR Remote Controller Commands This control command simulates the IR remote controller and its control keys. It shares the same syntax of operation command. It begins with characters "ky", followed by control commands and settings separated by space blank [SP], and ended by carriage return pair "CR"... -
Page 54: Control The Projector Through A Network
Control the projector through a network ® Control the Projector Through a Network This projector supports the following remote control functions through a network connection. • Control projector through web browser. • Control projector with RS-232 control or simulated IR commands via TCP/IP communication protocol. •... -
Page 55: Set Up The Projector For Networking
Control the projector through a network ® Set Up the Projector for Networking In case the remote network control is not connected to LAN or DHCP or the LAN is not activated, connect as illustrated below: Caution: In case the remote network control is not connected to LAN or DHCP or the LAN is not activated, set DHCP option to Off and then select Apply. -
Page 56: Control The Projector Through A Network
Control the projector through a network ® Control the Projector Through a Network Control the Projector Through a Web Browser Open the web browser of your control PC and type the projector's IP address. The projector's web server homepage will display with the following four options: •... - Page 57 Control the projector through a network ® Network Setup DHCP on : Enable DHCP off : Disable DHCP IP address Projector IP address setup Subnet mask Projector subnet address setup gateway Projector gateway setup DNS server Projector DNS server setup...
- Page 58 Control the projector through a network ® Alert Mail Setup This projector can send emails with projector abnormality messages to preset users. Set up the projector be- fore enabling this function: SMPT Server : Set up SMTP server name as the projector sends email via a SMTP server. Port : Set up transmission port User Name...
-
Page 59: Control Projector With The Pjlink Protocol
Control the projector through a network ® Press this button to validate email settings after setup is completed. Control Projector with the PJLink Protocol PJLink is a standard designed by Japan Business Machine and Information System Industries Association (JBMA) for controlling projectors with genuine commands. A PJLink standard compliant projector from any supplier can be controlled with these genuine commands. -
Page 60: Specificatons And Support
Specifications and Support ® Specificatons and Support Specifications Model Name DU9000 Technology Resolution WUXGA(1920x1200) Max. Resolution WUXGA(1920x1200)@60Hz Contrast 1250:1 / with DB 5000:1 Lamp Life and Tye 1500/2000 hours(Standard/Eco mode),465Wx2 Projection Lens 1.85-2.4:1 (Standard) 1.56-1.86:1 0.8-1.03:1 2.4-4.0:1 Projection distance 2.5-9.0m (Standard lens) F=2.17-2.46, f=39-50.7mm(Standard Lens) -
Page 61: Vivitek Support
15700 Don Julian Road, Suite B City of Industry, CA. 91745 U.S.A Tel: 855-885-2378 (Toll-Free) Email: T.services1@vivitekcorp.com URL: www.vivitekusa.com Europe and Africa Vivitek Service & Support Zandsteen 15 2132 MZ Hoofddorp The Netherlands Tel: +31 20 655 0960 Email: support@vivitek.eu URL: www.vivitek.eu...
Need help?
Do you have a question about the DU9000 and is the answer not in the manual?
Questions and answers