
Subscribe to Our Youtube Channel
Related Manuals for Oricom CARE920-1


Summary of Contents for Oricom CARE920-1
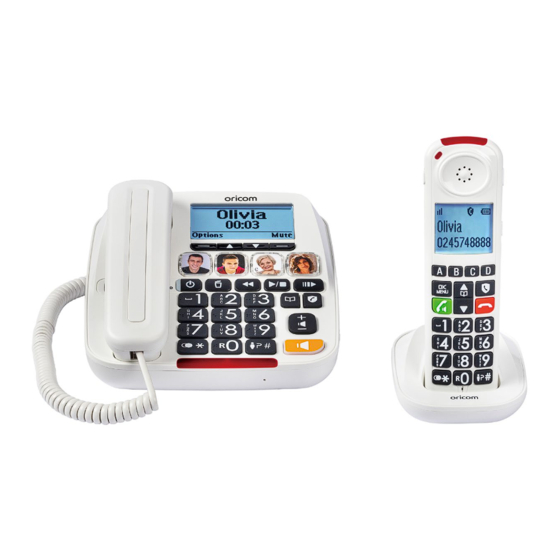
- Page 1 CARE920-1 Amplified Phone with direct dial picture buttons and cordless handset USER’S GUIDE Keep this user guide for future reference. Always retain your proof of purchase in case of warranty service.
-
Page 2: Table Of Contents
Troubleshooting ................56 Safety ....................59 Environment ................... 60 Express Warranty (Australia) ............60 Need Help? If you need assistance setting up or using your Oricom product now or in the future, call Oricom Support. Australia 02 4574 8888 www.oricom.com.au Mon-Fri 8am –... -
Page 3: General Information
General Information General Information It is very important that you read the User Guide carefully as it contains detailed information on installation, programming and WARNING operational issues which you will need to be aware of to ensure the Care Phone operates properly. Following is a list of some of the important issues and important warnings which you need to be aware of. - Page 4 General Information Notes for operation in New Zealand The grant of a Telepermit for any item of terminal equipment indicates only that Spark has accepted that the item complies with the minimum conditions for connection to its network. It indicates no endorsement of the product by Spark, nor does it provide any sort of warranty. Above all, it provides no assurance that any item will work correctly in all respects with another item of Telepermitted equipment of a different make or model, nor does it imply that any product is...
-
Page 5: Package Contents
Package Contents Package Contents This package contains the following items: 1. Cordless handset 2. Cordless handset base 3. Base unit 4. Base unit handset 5. Coiled Cord 6. AC power adaptors (1 for base unit and 1 for cordless handset) 7. Telephone line cord 8. 3pcs of AAA 500mAh NiMH rechargeable batteries 9. -
Page 6: Important Safety Instructions
Important Safety Instructions Important Safety Instructions When using your telephone equipment, basic safety precautions should always be followed to reduce the risk of fire, electric shock and injury, including the following: 1. Read and understand all the instructions. 2. Follow all warnings and instructions marked on the product. 3. Unplug this product from the wall outlet before cleaning. Do not use liquid cleaners alcoholic wipes or aerosol cleaners. -
Page 7: Location
Location Location For maximum coverage and reduced interference, here are some guidelines you should consider for base unit location, - Place at a convenient, height, and central location with minimal obstructions between the cordless handset and base unit in an indoor environment. - Place away from electronic appliances such as televisions, microwave ovens, radios, personal computers, wireless devices or other cordless phones. - Avoid facing radio frequency transmitters, such as external antennas of mobile phone cell stations. - Avoid plugging it into the same powerpoint as other major household electrical appliances because of the potential for interference. Try moving the appliance or the base unit to another power outlet. If reception is poor, try to relocate to base unit if possible. - Page 8 Installing Your Phone Wall mounting position NOTE: In Australia some phone wall sockets are the old "non modular" style. If you have this type of wall socket you will need to purchase a modular converter plus similar to the corresponding image (not supplied). These can be obtained from most electronic stores.
- Page 9 Installing Your Phone Connecting the Charger Plug the power adapter into a mains socket. If you have a Broadband line. If you connect your telephone to a line with a broadband connection, you will need to insert a micro-filter between the telephone and the telephone line, otherwise you may get interference between the telephone and the broadband.
-
Page 10: Getting To Know Your Phone
Getting to Know Your Phone Getting to Know Your Phone Base Station Overview 1. INCOMING CALL LED • Flashes when there is an incoming call. • On when there the phone is in use. • On when a device is being registered. • On when another telephone (cordless) is in use. - Page 11 Getting to Know Your Phone 2. MESSAGE LED • On when the answering system is on. • Flashes when there are new messages/memos in the answering system. • Flashes slowly when pressing for slow play. 3. DIRECT MEMORY KEYS (A, B, C, D) • Press to dial out phone number stored. • Press to repeat playing the current message from the beginning. • Press twice to skip backward to the previous message. • Press to play the message. • Press again to stop the message playback. • Press to delete the message currently playing. • In idle mode, long press to delete all old messages. • Press to turn on the answering machine.
- Page 12 Getting to Know Your Phone • During a call: Slide up and down to increase the volume /decrease the volume. • During message playback: Slide to adjust the volume. • Sound experience: select “NATURAL”, “BASS” or “TREBLE” during a call BASS (lowest position) TREBLE (mid position) NATURAL (highest position) BASS TREBLE NATURAL (lowest position) (mid position) (highest position) Warning: The handset may emit high volume of sound. Take Extra Care when you use audio boost key, recommend to adjust suitable volume by setting to minimum, and then turning on audio boost key. 13. AUDIO BOOST • Press to enhance the clarity and loudness through earpiece of the base during a call.
- Page 13 Getting to Know Your Phone 20. DOWN KEY • In menu mode: Press to scroll down the menu items. • In Phonebook list / Redial list / Call List: Press to scroll down the list. • While entering names or numbers: Press to move the cursor to the right. 21. VOLUME DECREASE KEY • During a call and message playback: Press to decrease the volume. 22. PHONEBOOK • In idle mode: Press to access the phonebook. 23. BASE STAND IN WALL MOUNTING POSITION 24. HANDSET HOOK FOR WALL MOUNTING POSITION Display Icons and Symbols of LCD Display icons Description Soft key icon for confirm selection and save input data. - For...
- Page 14 Getting to Know Your Phone On: The answering system (TAM) is turned on. Flashes: when new TAM message is received. Off: The answering system (TAM) is turned off. On: when an alarm is set. Off: when an alarm is off. On: when audio booster is activated (in earpiece mode). Off: when audio booster is deactivated. On: when the telephone line is in use. Flashes: when there is an incoming call. On: when the entry in call list is a contact saved in black list. Menu - Base unit.
- Page 15 Getting to Know Your Phone Hearing Aid Compatibility: Special feature which helps to eliminate background noise and interference when you use this telephone with a hearing aid.
- Page 16 Getting to Know Your Phone Handset Overview 1. INCOMING CALL LED • Flashes when there is an incoming call/ the base is paging the handset. 2. CHARGE LED • On when the handset is charging in the base. • In menu mode: Press to scroll up the menu items. • While entering names or numbers in the phonebook: Press to move the cursor to the left. • In idle mode: Press to access phonebook. • During a call: Press to end a call and go back to idle screen. • In editing/predialing mode: Press to clear a character/digit. • In menu/editing mode: Press and hold to go back to idle screen. • In ringing: Press to suppress handset ringer. • In menu mode: Press to scroll down the menu items. • While entering names or numbers in the phonebook: Press to move the cursor to the right.
- Page 17 Getting to Know Your Phone • In idle/pre-dialing mode: Press to make a call. • During ringing: Press to answer a call. • During a call: Press to turn on/off the speaker phone. • Press to access the menu. • While in a menu: Press to select an item or save an entry or setting. • Press to dial out phone number stored in memory A, B, C, or D.,,, 10. ALPHANUMERIC KEYPAD / • In idle / pre-dial / editing mode / during a call: Press to enter characters /numbers. • Press any key to answer an incoming call. • During a call: Press and hold key to answer an incoming call when you receive a call waiting alert*.
- Page 18 Getting to Know Your Phone Menu - Handset...
-
Page 19: Using Your Phone
Using Your Phone Using Your Phone Set Date & Time Set Date & Time Through telephone base: 1. Choose Menu. to select BS Setting, then press Ok. 2. Press to select Date / Time, then press Ok. 3. Press... - Page 20 Using Your Phone 4. Press to select Set Time, then press Ok , enter the day, month, year, then press Ok , enter hour (24HR format), and minutes, then press Ok , you hear confirmation tones. 5. Press to select AM/PM (12HR format) Note: if wrong digit is entered Date or Time, you can press to select the right position and enter correct digit. Through cordless handset: 1.
- Page 21 Using Your Phone 2. Press to select the desired entry. 3. Press or lift up corded handset to dial the entry. Through cordless handset: to select Phonebook then 1. Press OR press to access phonebook. 2. Press to select the desired entry. 3.
- Page 22 Using Your Phone Call the indirect memories (Key 1 to Key 9) Long press Key 1, or, ….Key 9 to dial. Note: Before dialing, programming of key 1, …key 9 is required, refer to Section "Delete the entire list of the Call List". Answer a Call Through telephone base: Press to answer a call. The hansdsfree mode will be activated or lift up corded handset to answer. Through cordless handset: If the handset is not on the charging cradle, when the phone rings, press End a Call During a call,...
- Page 23 Using Your Phone 3. Press to select A, B, C, D, then press 4. Select Add new, then press , enter the telephone number, then enter the name, then press . You hear confirmation tones. Note: When entering number or name, you can delete an error by pressing last number or letter will be removed.
- Page 24 Using Your Phone to select A, B, C, D, then press Ok. 3. Press 4. View appears, press to select Voice Tag, then press Ok. 5. Playback apppears, then press Ok. 6. Playing… will appear. The recorded voice will be play. Through cordless handset: 1. Press on the handset in idle mode. to select Direct Mem., then press 2.
- Page 25 Using Your Phone Edit record of Photo memory Through telephone base: 1. Press Menu in idle mode. to select Direct Mem., then press Ok. 2. Press to select A, B, C, D, then press Ok. 3. Press 4. View appears, then press to select Edit, then press Ok.
- Page 26 Using Your Phone To turn on Audio Boost: While you are on a call or listening to a message or an announcement using the handset earpiece. Using cordless handset, press on side of handset or Using base handset, press on left front side of base. To turn off Audio Boost: Press on side of handset or on front left side of base again.
-
Page 27: Phonebook
Phonebook Phonebook The phonebook stores up to 100 entries, which are shared by all handsets. Add a New Phonebook Entry In idle mode, Through Base unit: 1. Press Menu and to select Phonebook, then press Ok to access the phonebook list. ALL appears and press Ok. - Page 28 Phonebook Search a phonebook entry 1. Follow the steps in View a phonebook entry above to enter the phonebook. 2. Enter the first character of the name to search. Edit a Phonebook Entry Through base unit: 1. Select a desired entry in the phone book, and then press Menu 2. Add new appears then press to select Edit, press Ok to edit number of the entry.
-
Page 29: Phone Settings
Phone Settings Delete a Phonebook Entry Through base unit: 1. Select a desired entry in the phone book, and then press Menu. 2. Add new appears then press to select Delete, press Ok. 3. Confirm? will display, press Ok to confirm. You hear confirmation tones Through cordless handset: 1. - Page 30 Phone Settings For cordless handset: 1. Press on the handset in idle mode. to select HS Setting, then press 2. Press 3. Select Ring Setup by pressing to select Ext. Ring, Int. Ring or Ring Volume, then press 4. Press 5.
- Page 31 Phone Settings 5. Press to select Time Format, then press , select your desired time format (24HR or 12HR). 6. Press to confirm. You hear confirmation tones. Talking Digit You can turn on or off the audible spoken tone when you press the dialing keys on handset and Base.
-
Page 32: Registration Cordless Handset To Telephone Base
Registration Cordless Handset to Telephone Base Registration Cordless Handset to Telephone Base Registration Your handset and telephone base is pre-registered. If for some reason, the handset is not registered to the base station, Put On BS will display on the handset screen. Remove cordless handset off the charging base, if disappears on the screen, register your handset according to the following procedure. - Page 33 Registration Cordless Handset to Telephone Base Conference Call Up to 4 cordless handsets and the telephone base can join an external call at the same time. To join a call with the telephone base: • Press to join the call, • Press again, to exit the call. • Lift up the Corded handset to join,and return to cradle to exit. To join a call with a cordless handset: • Press join the call. • Press or place the handset in the charging base to exit the call. Transfer a call During an external call, you can transfer the call from a cordless handset or the telephone base to one another.
- Page 34 Registration Cordless Handset to Telephone Base Intercom Use the intercom feature for conversations between two cordless handsets or between cordless handset and base. In idle mode, Intercom initiated from telephone base 1. Press Menu , and then press to select Intercom, then press Ok. 2. If you have two or more cordless handsets, press to select the desired device and then press Ok.
-
Page 35: Reminder
Reminder Enriched ringer When first call is not picked up and the same caller calls again within 5 minutes, the ringer level of cordless handset and base will automatically ring at maximum, in order to alert you that the phone is ringing. To enable enriched ringer: 1. Press Menu to select BS Setting, then press Ok. 2. Press to select Enriched Ringer, then press Ok to select On. 3. - Page 36 Reminder Select melody of the alarm reminder 1. Repeat step 1 to 3 in Section "Turn on alarm reminder, set time and frequency". 2. On/Off appears then press to select Melody, press Ok. 3. Press to select desired melody. 4. Press OK to confirm. You hear confirmation tones. Rename the alarm reminder 1.
-
Page 37: Speed Dial Keys (Key 1 To Key 9)
Speed Dial Keys (Key 1 to Key 9) Speed Dial Keys (Key 1 to Key 9) You can make use of keys 1 to 9 on handset as speed dial keys, by long pressing the number to dial in idle mode or in talk mode. Store a speed dial entry Through telephone base: 1. -
Page 38: Caller Display (Network Dependent)
Caller Display (network dependent) Edit a speed dial entry Through both cordless handset and telephone base 1. Repeat the step 1 to 3 in Section "Store a speed dial entry". 2. View will display, then press to select Edit, then press Ok. 3. - Page 39 Caller Display (network dependent) View the Call List All received calls are saved in Call List with the latest call at the top of the list. When the call list is full, the oldest call will be replaced by a new call. When number of digits of incoming number is more than 10, it will show first 9 digits in first page, then, you can press key to view all digits. In idle mode, Through telephone base: key, or Press Menu and to select Call List.
- Page 40 Caller Display (network dependent) Store a Call List Number into the Black List Through telephone base: 1. Select a desired entry in the call list, and then press Ok to select Add To Block, and then press Ok. 2. Press 3.
-
Page 41: Call Block
Call Block Through cordless handset: 1. Select a desired entry in the call list. to select Delete All, and then press 2. Press 3. Confirm? will show, Press to confirm. You hear confirmation tones. Call Waiting You hear a tone in the handset earpiece if someone calls while you are already on a call. - Page 42 Call Block Contacts In this automatic mode, any number not registered to your phonebook will be automatically blocked. All calls from contacts registered to your phonebook will proceed normally. When this mode is chosen, Contacts OK is displayed on LCD in idle mode unless you have unread messages/ missed calls (to enable, see part "Contacts only").
- Page 43 Call Block Enable MANUAL mode Menu Call block Block set. VIP OK Contacts OK In idle mode, to select Call Block. Press , press Press , press to select Block Set. to select On (manual mode). Press , press to access Block Set. directly. In idle mode, press After you enable this option, the call block icon will be displayed on the LCD.
- Page 44 Call Block Delete a number in Blocklist 1. Repeat step 1 and 2 in Section "Add numbers to Blocklist" to select the stored numbers. 2. Press , press to select Delete, Confirm? is shown, press confirm. Delete all numbers from Blocklist 1.
- Page 45 Call Block 1. Press , press to select Call Block. to select Block Set. 2. Press , press to select Contacts OK (Automatic mode). 3. Press , press Anonymous call block mode This feature allows you to block numbers that do not display a number on your phone. It can be enabled or disabled independently from the previous call block modes.
-
Page 46: Voice Mail (Network Dependent)
Voice Mail (Network Dependent) Set Block Anonymous Calls OFF In idle mode, 1. Repeat step 1 and 2 in Section "Block Private Calls". 2. Press Ok, press to select Off, press Ok to confirm. icon will no longer display when the regular call block (see 1. And 2.) is also set to OFF. Voice Mail (Network Dependent) By subscription to your operator, you can have your calls diverted to a voicemail box when you are absent. For more details, contact your operator. When new messages are received, appears on the screen. - Page 47 Answering Machine Through Cordless Handset: 1. Press in idle mode. to select Ans. Machine, then press 2. Press to select Tam On/Off, then press 3. Press to select On or Off, then press 4. Press to save. You hear confirmation tones. Message Playback If 2 new voice messages are stored in the phone, “2 New Msgs” will appear and the...
- Page 48 Answering Machine Listen new messages through the Base 1. Press to listen to new messages through base speaker. After playback of all new messages, a long beep will sound from the base. 2. To playback old messages, press again to listen. Options during playback: •...
- Page 49 Answering Machine 4. Recording shows on the screen. After the tone, speak towards the microphone. 5. Press Ok when you finish recording. Playing … shows on the screen. Your recorded memo will play, then returns to the previous menu. 6. When another user listens to the memo (procedure refers to Section "Message Playback" through handset or base), the time & date of the memo will display on the screen if listened through handset. Note: Mem.
- Page 50 Answering Machine 4. Ans & Rec appears and then 5. Play OGM appears then press Ok, Playing… appears, the default outgoing message will play. Record your own Outgoing Message (OGM) Through telephone base: 1. Repeat step 1 to 4 in Section "Play your Outgoing Message (OGM)". 2. Play OGM appears and then press to select Rec.
- Page 51 Answering Machine Answering Machine Settings Set the Answer Mode By default, the answer machine is set in Ans & Rec mode which allows callers to leave a message. This mode can be changed to Answer Only which does not allow callers to leave a message. In that case, your callers will be prompted to call back later. Through telephone base: to select Ans. Machine. 1. Press 2. Press Ok and to select TAM Settings. 3. Press Ok and to select Answer Mode 4.
- Page 52 Answering Machine 1. Repeat step 1 to 3 in Section "Set the Answer Mode". to select Record Time, then press Ok. 2. Press to select 60s, 120s, 180s, then press Ok to save. You hear 3. Press confirmation tones. Through cordless handset: 1. Repeat step 1 to 3 in Section "Set the Answer Mode". 2.
- Page 53 Answering Machine 3. Press OK to save. You hear confirmation tones. Through cordless handset: 1. Repeat step 1 to 3 as above. to select Change Pin, then press 2. Press to enter a 4-digit number How to Access Remotely to your Answering Machine? You can ring your phone from another tone-dialing phone to switch on or off the answering machine and listen to your messages remotely.
- Page 54 Answering Machine At any time if you want to pick up the call, you can press on the cordless handset, or press on the telephone base, or pick up base handset and the message recording will stop automatically. If the answering machine is in the process of recording, the message already stored will be saved.
-
Page 55: Technical Specifications
Technical Specications 1. Press in idle mode. to select Ans. Machine, then press 2. Press to select Tam Settings, then press 3. Press to select Msg. Alert, then press 4. Press to select On or Off, then press 5. Press to confirm. -
Page 56: Troubleshooting
Troubleshooting Troubleshooting If you have difficulty with your phone, please try the suggestions listed below. As a general rule, if a problem occurs, remove the batteries from all the handsets in your installation for about 1 minute, then disconnect and reconnect the power supply to the base and reinstall the handset batteries. Phone does not work •... - Page 57 Troubleshooting Your own voice cannot be announced when the telephone number of incoming call is same as 1 of 4 photo memories stored • The ringer volume may be switched off. • Voice recording in 1 of 4 photo memories was not done successfully. Please refer to Section "Record your own voice tag" to record again. • Your telephone line may not be subscribed or availability of the service from the fixed line operator. Cordless handset does not ring (Caller Line Identification) • The ringer volume may be switched off.
- Page 58 - Negligence or faulty maintenance, - A intervention, modification or repair carried out by a person not authorized by Oricom. If the returned Product is not covered by the warranty, you will receive a quote from repair that will mention the cost of analysis and transportation costs that you will be charged if you want the Product returned to you.
-
Page 59: Safety
Safety Safety In the event of an electrical hazard, the mains adapter acts as a 230 V electrical isolation device. It should therefore, as a precaution, be installed close to the appliance and be easily accessible. To disconnect the device from the primary power source, the mains adapter must be removed from the 230V AC/50 Hz socket. If the mains adapter fails, it must be replaced by an identical model. We recommend that you also keep a conventional telephone – one that doesn’t require a power supply – as a backup. ! Do not use the phone to report a gas leak when standing in the vicinity of the leak. -
Page 60: Environment
This Express Warranty is provided by Oricom International Pty Ltd ABN 46 086 116 369, Unit 1, 4 Sovereign Place, South Windsor NSW 2756, herein after referred to as “Oricom”. Oricom warrants that the product is free from defects in materials or workmanship during the Express Warranty Period. This Express Warranty does not extend to any product from which the serial number has been removed or was purchased outside of Australia. - Page 61 Products distributed by Oricom are manufactured using new materials or new and used materials equivalent to new in performance and reliability. Spare parts may be new or equivalent to new. Spare parts are warranted to be free from defects in material or workmanship for thirty (30) days or for the remainder of the Express Warranty Period of the Oricom branded product in which they are installed, whichever is longer. During the Express Warranty Period, Oricom will where possible repair and if not replace the faulty product or part thereof. All component parts removed under this Express Warranty become the property of Oricom. In the unlikely event that your Oricom product has a recurring failure,...
- Page 62 Please note that if a Customer Support Team member advises that your product does not qualify for return, this warranty does not apply to your product. Products that are authorised to be returned to Oricom in Australia must include all of the following: • A completed Return Authorisation form...
- Page 63 Oricom Support - Australia For all product enquiries, troubleshooting or to discuss the range of Oricom products, feel free to contact Oricom or visit our website for answers to frequently asked questions. 02 4574 8888 Monday - Friday 8am – 6pm AEST Email: support@oricom.com.au...
Need help?
Do you have a question about the CARE920-1 and is the answer not in the manual?
Questions and answers
What is the maximum volume in dB in the Oricom care920-1
What are dimensions of cordless handset of Care920-1 ?