Table of Contents

Related Manuals for Oricom CARE80


Summary of Contents for Oricom CARE80
-
Page 1: User Guide
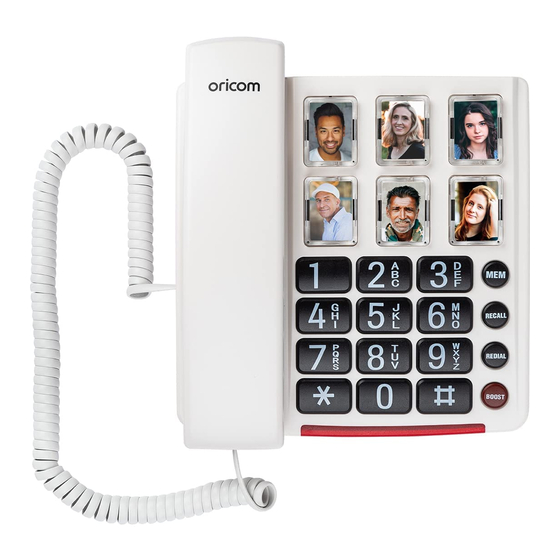
CARE80 Amplified Phone with direct dial picture buttons User Guide Keep this user guide for future reference. Always retain your proof of purchase in case of warranty service and register your product on line at: AUSTRALIA: www.oricom.com.au... -
Page 3: Table Of Contents
Operation ................7 Memory ................10 Consumer Support ............... 11 Warranty Informationrt ............12 Need Help? If you need assistance setting up or using your Oricom product now or in the future, call Oricom Support. Australia 1300 889 785 www.oricom.com.au Mon-Fri 8am – 6pm AEST... -
Page 4: General Information
General Information General Information It is very important that you read the User Guide carefully as it contains detailed information on WARNING installation, programming and operational issues which you will need to be aware of to ensure the Care Phone operates properly. - Page 5 General Information Notes for operation in New Zealand The grant of a Telepermit for any item of terminal equipment indicates only that Telecom has accepted that the item complies with the minimum conditions for connection to its network. It indicates no endorsement of the product by Telecom, nor does it provide any sort of warranty.
-
Page 6: Installation
Installation Installation Connecting the telephone 1. Plug one end of the telephone cable supplied into the TEL. LINE jack at the back of the telephone base. 2. Plug the other end of the telephone cable into the wall outlet. 3. Plug one end of the curly cord into the socket on the handset. 4. - Page 7 Installation Method B. Attach directly to a wall 1. Drill two holes vertically, one above the other, 83mm apart, and leave the screws protruding from the wall by 5mm. 2. Follow steps 1 and 2 above. 3. Then press down and slide the bracket upward until the tabs snap into place. 4. Plug one end of the telephone cable into the TEL. LINE jack at the back of the base.
-
Page 8: Location Of Controls
Location of Controls Location of Controls 1. Hook switch 10. Memory button 2. Handset holder 11. Recall button 3. Coil cord socket 12. Tone Hi/Low switch 4. Receiver volume controller 13. Redial button 5. Store button 14. Amplify key 6. Telephone line socket 15. Ring LED indicator 7. -
Page 9: Operation
Operation Operation Recall switch Setting For Australia the Recall switch should be set to 100. For New Zealand the Recall switch should be set to 600. Making a call 1. Pick up the handset and wait for a dial tone. 2. Dial the number you wish to call. -
Page 10: Ringer Volume Control
Operation Recall and call waiting Press the Recall button followed by the extension number to transfer calls when connected to a PBX. Access to additional network services can be gained by using the Recall button * and # keys. Contact your network operator for more information. To Turn on Telstra call waiting (Australia) You can use the recall button to answer a second call while you are on the phone. -
Page 11: Volume Control
Operation Volume Control Receiver volume control The receiver volume control enables you to adjust the receiver volume on the handset. Press the BOOST button, the red LED will turn on, now you can increase the receiver volume by rotating the knob (under the receiver) to the desired level ( level 1 to level 9). Warning: Setting your earpiece volume too high can damage your hearing!!! Receiver Tone Volume Control... -
Page 12: Memory
Memory Memory The telephone has 6 one-touch and 10 two-touch memories for frequently dialed telephone numbers. When a number is stored into Memory you only press one or two buttons dependent on location to make a call. The one-touch memories are M1-M6, the two-touch memories are accessed using the telephone keypad digits 0-9. -
Page 13: Consumer Support
If you have any problems setting up or using this product you will find useful tips and information in the Troubleshooting section of this user guide as well as “Frequently Asked Questions” on our website www.oricom.com.au. If you have further questions about using the product after reviewing the resources above or would like to purchase replacement parts or accessories please call our Customer Support Team. -
Page 14: Warranty Informationrt
Please note that if a Customer Support Team member advises that your product does not qualify for return, this warranty does not apply to your product. Products that are authorised to be returned to Oricom in Australia must include all of the following: • A completed Return Authorisation form... - Page 15 Warranty Informationrt Warranty Information (Australia) This Warranty is provided by Oricom International Pty Ltd ABN 46 086 116 369, Unit 1, 4 Sovereign Place, South Windsor NSW 2756, herein after referred to as “Oricom”. Oricom makes no other warranties or conditions, express or implied, including as to acceptable quality and fitness for a particular purpose, except as stated in this Warranty.
- Page 16 No change to the conditions of this Warranty is valid unless it is made in writing and signed by an authorised representative of Oricom. Oricom will not be in breach of a warranty expressly set out in this User Guide or under the Competition and Consumer Act 2010 and excludes any...
- Page 17 Competition and Consumer Act 2010 applies to this Warranty and which may not be so excluded, restricted or modified. For warranties that cannot be excluded, restricted or modified, Oricom limits the remedies available to those specified in the relevant legislation.
- Page 18 Phone: 1300 889 785 (Monday to Friday 8am to 6pm AEST) Web: www.oricom.com.au Fax: (02) 4574 8898 Contact details for Oricom support and warranty claims in New Zealand Email: support@oricom.co.nz Phone: 0800 674 266 (Monday to Friday 10am to 8pm NZST) Web: www.oricom.co.nz...
Need help?
Do you have a question about the CARE80 and is the answer not in the manual?
Questions and answers