Table of Contents
Advertisement
Quick Links
Advertisement
Table of Contents

Related Manuals for Oricom TP68


Summary of Contents for Oricom TP68
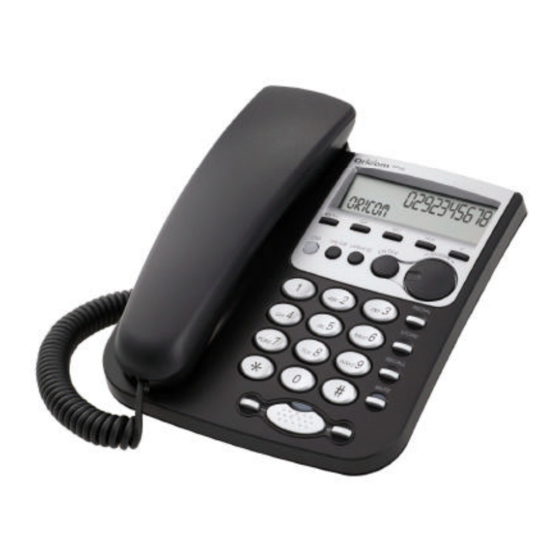
- Page 1 Speakerphone with SIM Card Reader TP68 User guide...
-
Page 2: Table Of Contents
5 Caller Number Display (CID)... 22 Viewing the Caller List ... 22 Dialling a telephone number directly from the Caller List... 23 Saving a number from the Caller List to the Phone Book ... 24 Deleting individual numbers from the caller list... 24... - Page 3 Recall button for network services...25 Storing Telephone numbers on a PBX ...25 7 Other Settings ...26 Adjusting Display Contrast ...26 Set Clock Display Format ...26 Entering Access Numbers for different Telephone Network Providers...27 8 Important information...28 Troubleshooting...28 Hearing aid compatible...28 Cleaning and care ...28 Temperature and ambient conditions ...28...
-
Page 4: General Information
Before installing or changing the battery, make sure that the telephone is not connected to the telephone network. First install the batteries supplied, connect the curly cord to the phone and the handset. - Page 5 1 telephone to your telephone line. A standard telephone line has a maximum REN capacity of 3 (RN of 5). It is possible to connect 3(5) devices with a REN of 1 (RN of 1) with no degradation to the product’...
-
Page 6: User Controls
C (Clear) CID Button (Caller list) Pause SIM-Update Right side SIM-card drawer Modem connection Underside Ring volume Connection telephone cable Connection main power supply ENTER (Dial) 10 Jogdial 11 AUTO-Redial 12 Redial 13 Recall button 14 Mute button 15 Handsfree button... -
Page 7: Setting Up
After unpacking your telephone, you must first connect the telephone handset to the base unit. First take the short end of the curly cord and plug it into the socket on the handset. Turn the telephone base over and plug the long end into the socket marked with a handset Feed the cable through the cable channel. -
Page 8: Connect Mains Power Supply
Fitting the desk support If you intend to use your telephone on a desk, then the desk support supplied must be fitted. To do this, turn the telephone over. Now insert the two upper hooks into the openings provided and push the desk support firmly home. -
Page 9: Modem Connection
Modem Connection The telephone has a “MODEM” socket for connection of a modem or fax machine on the right side of the unit. Please note that this connection uses the same telephone line as the telephone itself. The connected device cannot be used at the same time as the telephone. -
Page 10: Entering Your Local Area Code
Telephone numbers must always be stored in mobile phones with the dialling code. If these numbers are then transferred to your telephone via the SIM card, the dialling code can of course be omitted when making local calls. For this purpose the telephone must know your local dialling code. -
Page 11: Access Number For International Numbers
3.13 Access Number for International Numbers For international numbers, the TP68 automatically replaces the “+” sign with the IDD access number used in your country. Program this code by following the instructions below. A. Please follow the instructions: Press the MENU button once. -
Page 12: Outside Line Code On A Pbx (Business Users Only)
Outside Line Code on a PBX (business users only) If you have connected your telephone to a PBX, you may need to dial a particular number (e.g. “9” or “0”) in order to get dial tone for an outside line. If... -
Page 13: Operation
If the other party answers their voice will be heard over the in-built loudspeaker. The volume can be adjusted using the two buttons VOL your telephone. If you want to change from the handsfree facility to the handset, simply lift the handset. -
Page 14: Dialling From The Phone Book
When the other party answers, you can speak using the handsfree facility or by lifting the handset. If the other party does not answer, hang up by using the Note: Chapter 4.9 explains how to store telephone numbers in the phone book. Receiving Calls As soon as you receive a call, the caller’... -
Page 15: Muting
The indicator light will go out and you will be able to continue your call as normal. Adjustable Ringer Volume You can use the “RING” slide switch underneath the telephone to select the settings (soft) or If you ever do not want to be disturbed, use the... -
Page 16: Redial
If you made the call using the handsfree facility, the call is ended automatically. Now, after about 30 seconds your telephone will try to call the number again. The handsfree facility is switched on and the number is dialled. If the number is still engaged, the handsfree facility automatically switches itself off again after a short time and your telephone waits for a further 30 seconds before another attempt is made. -
Page 17: Storing Numbers In The Phone Book
Storing numbers in the Phone Book Using your telephone, you can store 150 telephone numbers, each with 20 digits, in the phone book. In addition, a name can be stored with each telephone number, each name having 16 letters. A. Please follow the instructions: Press the MENU button. -
Page 18: Changing Stored Telephone Numbers Or Names
With international calls, your telephone automatically replaces the “+” sign with the IDD code you have programmed in to the phone. -
Page 19: Deleting A Number In The Phone Book
(item 4.10,1) so that the numbers already stored both in the mobile phone and in the telephone are not lost. If you should ever change your SIM card at a later date (e.g. change of provider), do not use synchronisation the first time but copy the data as described under item 4.10.2 instead. -
Page 20: Copying The Phone Book From Gsm Mobile Phones To The Internal Phone Book And Vice Versa
“Phone to Card” are available. Example 1 for “Phone to Card”. You have a new mobile phone with a new SIM card and want to transfer the entire phone book from your telephone to the SIM card. Example 2 for “Card to Phone”. You have not yet entered any telephone numbers into your telephone’... -
Page 21: Add Entry
Press YES once more. Now choose whether you want to copy the telephone numbers from the telephone to the SIM card or from the SIM card to the telephone by using the Jog dial. Card to phone => Telephone numbers on the card are copied to the telephone Phone an Card =>... -
Page 22: Caller Number Display (Cid)
( If you have stored this telephone number with a name in your phone book, the name is also shown in addition to the number. All calls are saved in a caller list with date and time so that you will not miss any calls. -
Page 23: Dialling A Telephone Number Directly From The Caller List
Note! Before dialling, your telephone compares the country and local dialling codes of the number dialled with your location (local dialling code). If you have entered your local dialling code during installation, the appropriate numbers will not be dialled if this is a number from within your local network. -
Page 24: Saving A Number From The Caller List To The Phone Book
Saving a number from the Caller List to the Phone Book A telephone number stored in the caller list can be saved directly to the phone book. A. Please follow the instructions: Press the CID button once. Turn the Jog dial until the required telephone number appears in the display. -
Page 25: The Recall Button
The Recall Button You can use the Recall button on your telephone on a PBX and when using your network operators services such as call waiting etc. Recall button on a PBX If you have connected your telephone to a PBX, you can use all the facilities such as call transfer, automatic recall, etc. -
Page 26: Other Settings
Other Settings Note: The DIAGNOSTICS item on the menu is intended for test purposes and should only be used by a trained specialist. Adjusting Display Contrast To adjust the display to suit the local lighting conditions, please proceed as follows: A. -
Page 27: Entering Access Numbers For Different Telephone Network Providers
Entering Access Numbers for different Telephone Network Providers With your telephone you can make calling by way of the private telephone network providers considerably easier. You can store 3 different access numbers to these private telephone network providers in your telephone. When making calls using the phone book you can then choose which provider you wish to use to make the call. -
Page 28: Important Information
The telephone is designed for use in protected rooms with a temperature range of 10 °C to 30 °C. The telephone must not be installed in damp rooms such as a bathroom or laundry room. Avoid proximity to sources of heat such as radiators... -
Page 29: Warranty
NOTE: The warranty does not extend to damage caused by misuse, negligence, excessive voltage, faults on the telephone line or lightning. This guarantee in no way affects your statutory rights. Full details of the warranty are contained in the enclosed warranty card.
Need help?
Do you have a question about the TP68 and is the answer not in the manual?
Questions and answers