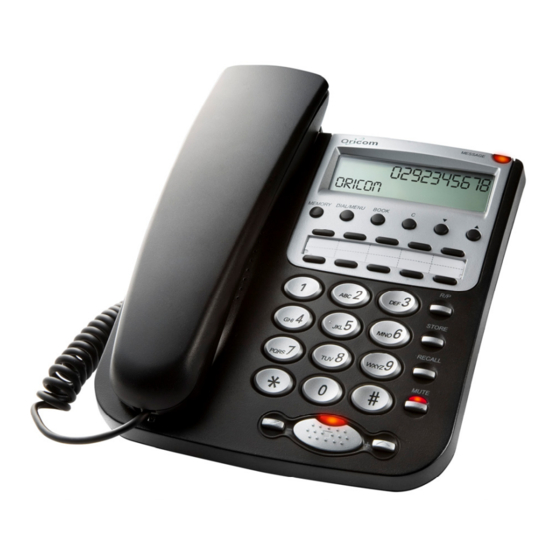
Summary of Contents for Oricom TP29
- Page 1 TP29 Caller ID Speakerphone Keep this user guide for future reference Always retain your proof of purchase in case of warranty service and register your warranty on line at:-www.oricom.com.au...
-
Page 2: Table Of Contents
Deleting the entire caller list ... 17 Dialling a telephone number directly from the Caller List... 17 6.10 Saving a number from the Caller List to the telephone memory ... 17 6.11 Message Waiting Indication ... 17 Using phone on a PBX ... 18 Pause function when using phone on a PBX... -
Page 3: General Information
General Information Warnings • The telephone is designed for indoor use only. Do not install the telephone in areas where there is the risk of an explosion, excessive exposure to smoke, dust, vibrations, chemicals, moisture and heat. • Do not install in damp locations such as a bathroom or laundry, do not expose the unit to direct sunlight. - Page 4 The rubber feet of the base station are not resistant to all cleaning agents. The telephone feet do not normally leave any marks on the surface. However, on account of the multitude of varnishes and surface finishes used, surface marks caused by the feet of the unit cannot be ruled out.
-
Page 5: Operating Functions
13 Handsfree button with indicator 14 Volume adjustment 15 Hanger for handset 16 Connection for Headset cable 17 Speaker/Headset selection switch Lower surface of the telephone Ringer adjustment switch PBX message waiting selection switch Slots for desk support Connection for handset curly cord... -
Page 6: Installation
Insert the battery, ensuring that the polarity is correct. Close the battery compartment. The LCD display may not display until you are connected to a telephone line and pick up the receiver. This is for protecting the telephone memory while replacing battery. -
Page 7: Connecting The Telephone Handset
The RJ type connector is the same as the telephone handset curly cord. To install a headset, please turn the right side of the telephone base up and plug the headset cord into the headset jack marked with a headset jack is connected, move the Speaker/Headset selection switch, which is adjacent to the headset jack, to Headset position. -
Page 8: Fitting The Desk Support
This hanging device is not required when the telephone is used on a desk, as it impedes lifting of the handset. Using a small screwdriver, turn this hanging device until the screw is completely flush and its upper end does not protrude at all. -
Page 9: Setting The Time/Date
3.13 Adjustable Ringer Volume You can use the slide switch underneath the telephone to select the settings (loud) or (soft) to adapt the ringer volume to your requirements. Should you not want to be disturbed, select -Operation- button for 3 seconds. -
Page 10: Last Number Redial
If a connection that you have dialled is engaged or you were unable to get through, simply replace the receiver. The last number dialled will be saved in the telephone automatically. To use the redial facility, proceed as follows: Lift the receiver or press the handsfree button... - Page 11 Press the handsfree button and you will hear the dial tone from the speaker. Now dial the required telephone number. The display shows the number dialled. If the number dialled is longer than 32 digits, only the last 32 digits will be saved in the redial memory.
-
Page 12: Storing Telephone Numbers
The indicator light will go out and you will be able to continue your call as normal. Storing telephone numbers You can store 119 numbers in your telephone. Ten numbers can be stored under the one touch memory buttons the speed dial buttons. The numbers buttons. -
Page 13: Saving Numbers Under The Phonebook
Enter the name characters (maximum 15 chars) using the number buttons. BOOK Press the button to advance to telephone number. Enter the telephone number (maximum 15 digits) using the number buttons. BOOK Press the button to store the number in phonebook. -
Page 14: Making A Call Using The Speed Dial Buttons
Save their access numbers and the telephone numbers separately in different storage locations. First dial the memory location for the network provider and then the memory location for the required telephone number or dial the required telephone number manually. -
Page 15: Viewing The Caller List
Phonebook name matching display If the telephone number of the caller is appeared in the list of the phonebook, the name in the phonebook will be displayed. Call waiting display Call waiting is an optional service from your telephone service provider. -
Page 16: Select Language
Select Language ENGLISH, FRANCAIS, ESPANOL, DEUTSCH, ITALIANO, PORTUGUES, TURKISH, DANSK prompts for caller I.D. message display can be selected. Please proceed as follows: DIAL/MENU Press the ”. Press the buttons until the display shows “LANGUAGE”. DIAL/MENU Press the button to select the preferred language. DIAL/ MENU Confirm with RECALL... -
Page 17: Deleting The Entire Caller List
6.10 Saving a number from the Caller List to the telephone memory A telephone number stored in the caller list can be saved directly to the telephone memory. Press button to select the required call number on the display. -
Page 18: Using Phone On A Pbx
When the MSG (message) indicator turned on solidly, the indicator is activated by some PBX’s. The TP29 offers two types of PBX message wait indication. Use the Message Setting Switch located at the lower side of the unit to select the setting to suit your PBX the default setting is OFF. -
Page 19: Important Information
If the fault is still present, connect another telephone (if available) to the telephone socket. The results will show you whether the fault lies with this unit or with the telephone line. If the product is working correctly the fault is on the telephone line.


