
Related Manuals for HPE Apollo 4200 Gen10 Plus


Summary of Contents for HPE Apollo 4200 Gen10 Plus
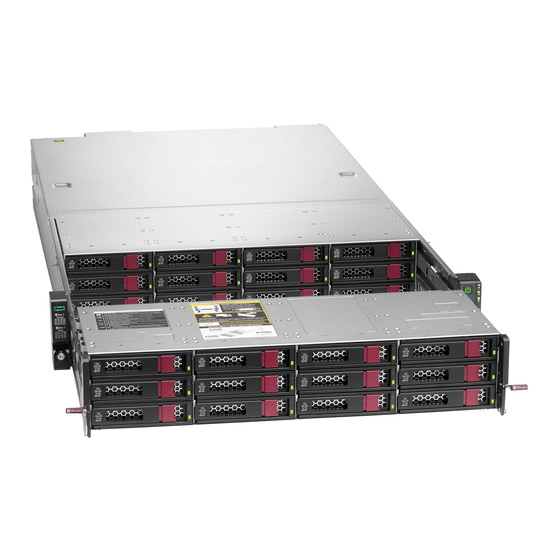
- Page 1 HPE Apollo 4200 Gen10 Plus Server Maintenance and Service Guide HPE Apollo 4200 Gen10 Plus Server Maintenance and Service Guide Part Number: P35306-002 Published: January 2022 Edition: 2...
- Page 2 HPE Apollo 4200 Gen10 Plus Apollo 4200 Gen10 Plus Server Server Maintenance and Service Guide Maintenance and Service Guide Abstract Abstract This guide describes identification and maintenance procedures, diagnostic tools, specifications and requirements for hardware components and software. This guide is for an experienced service technician. Hewlett Packard Enterprise assumes that you are qualified in the servicing of computer equipment, trained in recognizing hazards in products, and are familiar with weight and stability precautions.
-
Page 3: Table Of Contents
Table of contents Table of contents 1 Customer self repair 1 Illustrated parts catalog 2 Mechanical components 3 System components 4 Server options 1 Removal and replacement procedures 2 Required tools 1 Safety considerations 4 Preventing electrostatic discharge 5 Symbols on equipment 6 Server warnings and cautions 7 Rack warnings and cautions 8 Cabling replacement parts... - Page 4 1 Power supply options 36 Removing and replacing a hot-plug AC power supply 37 Removing and replacing the HPE 800 W Flex Slot -48 VDC hot-plug power supply 38 Removing and replacing an HPE 1600 W Flex Slot -48 VDC hot-plug power supply...
- Page 5 1 System board components 9 DIMM slot locations 10 DIMM label identification 1 System maintenance switch descriptions 12 Disabling the HPE SR100i Gen10 Plus Software RAID 13 Drive cage numbering 14 Drive numbering 1 Drive LEDs 16 Low-profile LFF drive LED definitions...
- Page 6 17 System fan 18 Fan cage 19 Fan module 20 Configuration overviews 1 Common removal videos 22 Top cover 23 Large air baffle 24 LFF drive cage 3 25 SFF drive cage 3 26 System fans and fan cage 27 Left cable arm 28 Right cable arm 1 Common replacement videos 30 Top cover...
-
Page 7: Customer Self Repair
Dans le cas d'une pièce CSR, Hewlett Packard Enterprise supporte l'ensemble des frais d'expédition et de retour, et détermine la société de courses ou le transporteur à utiliser. HPE Apollo 4200 Gen10 Plus Server Maintenance and Service Guide... - Page 8 HINWEIS: Einige Hewlett Packard Enterprise Teile sind nicht für Customer Self Repair ausgelegt. Um den Garantieanspruch des Kunden HINWEIS zu erfüllen, muss das Teil von einem Hewlett Packard Enterprise Servicepartner ersetzt werden. Im illustrierten Teilekatalog sind diese Teile mit „No“ bzw. „Nein“ gekennzeichnet. HPE Apollo 4200 Gen10 Plus Server Maintenance and Service Guide...
- Page 9 Para este servicio de garantía exclusivo de componentes, es obligatoria la sustitución de componentes por parte del usuario (CSR). Si solicita a Hewlett Packard Enterprise que realice la sustitución de estos componentes, tendrá que hacerse cargo de los gastos de desplazamiento y de mano de obra de dicho servicio. HPE Apollo 4200 Gen10 Plus Server Maintenance and Service Guide...
- Page 10 Enterprise paga todas as despesas de transporte e de devolução da peça e determina a transportadora/serviço postal a ser utilizado. Para obter mais informações sobre o programa de reparo feito pelo cliente da Hewlett Packard Enterprise, entre em contato com o HPE Apollo 4200 Gen10 Plus Server Maintenance and Service Guide...
-
Page 11: Illustrated Parts Catalog
Illustrated parts catalog Mechanical components Mechanical components Hewlett Packard Enterprise continually improves and changes product parts. For complete and current supported parts information, see the Hewlett Packard Enterprise PartSurfer website PartSurfer website. HPE Apollo 4200 Gen10 Plus Server Maintenance and Service Guide... - Page 12 Air baffle Mandatory Access panel Mandatory Rail kit Mandatory Primary PCI riser cage Mandatory Secondary PCI riser cage Mandatory HDD blank Mandatory Security slim bezel Mandatory Cable holder Fan cage Mandatory HPE Apollo 4200 Gen10 Plus Server Maintenance and Service Guide...
-
Page 13: System Components
System components System components Hewlett Packard Enterprise continually improves and changes product parts. For complete and current supported parts information, see the Hewlett Packard Enterprise PartSurfer website PartSurfer website. HPE Apollo 4200 Gen10 Plus Server Maintenance and Service Guide... -
Page 14: Server Options
For more information, see Removal and replacement procedures. Server options Server options Hewlett Packard Enterprise continually improves and changes product parts. For complete and current supported parts information, see the Hewlett Packard Enterprise PartSurfer website PartSurfer website. HPE Apollo 4200 Gen10 Plus Server Maintenance and Service Guide... - Page 15 Drive cage 3 Mandatory Drive cage 3 backplane Mandatory Chassis fan Mandatory Drive cage fan Chassis intrusion switch Front I/O board Mandatory iLO service port HPE Smart Storage Battery System cables HPE Apollo 4200 Gen10 Plus Server Maintenance and Service Guide...
-
Page 16: Removal And Replacement Procedures
This symbol indicates Hewlett Packard Enterprise systems and peripherals that contain assemblies and components that are sensitive to electrostatic discharge. Carefully observe the precautions and recommended procedures in this document to prevent component damage from static electricity. HPE Apollo 4200 Gen10 Plus Server Maintenance and Service Guide... -
Page 17: Server Warnings And Cautions
The server weighs more than 22.34 kg (49.25 lb), so at least two people must lift the server into the chassis together. An additional person may be required to help align the server if the server is installed higher than chest level. HPE Apollo 4200 Gen10 Plus Server Maintenance and Service Guide... -
Page 18: Cabling Replacement Parts
Be sure sufficient clearance exists for cabling, installation and removal of the server, and movement of the rack doors. IMPORTANT: IMPORTANT: The HPE Apollo 4200 Gen10 Plus Server cable management arm is not supported on Compaq-branded 7000 series racks. Cabling replacement parts Cabling replacement parts If you are replacing an assembly that includes a cable, you are not required to replace the current cable with the new cable from the assembly. -
Page 19: Remove The Bezel
Releasing the cable management arm Release the cable management arm and then swing the arm away from the rack. Extend the server Extend the server from the rack from the rack HPE Apollo 4200 Gen10 Plus Server Maintenance and Service Guide... -
Page 20: Extend The Server From The Rack
Observe local occupational health and safety requirements and guidelines for manual material handling. Get help to lift and stabilize the product during installation or removal, especially when the product is not fastened HPE Apollo 4200 Gen10 Plus Server Maintenance and Service Guide... -
Page 21: Remove The Server From The Rack
Press the release button. c. Pull up the latch to disengage the access panel from the chassis. d. Lift the front half of the access panel to access drive cage 3. HPE Apollo 4200 Gen10 Plus Server Maintenance and Service Guide... -
Page 22: Remove The Complete Access Panel
Slide the access panel toward the rear of the server and lift it from the chassis. Turn the access panel over to locate the HPE Apollo 4200 Gen10 Plus Server access panel label. This label provides convenient access to component identification, LED status indicators, and system maintenance switch settings information. -
Page 23: Removing And Replacing The Cable Management Arm
Disconnect each power cord from the power source. b. Disconnect each power cord from the server. 3. Extend the server from the rack . 4. Remove the cables from the cable management arm. HPE Apollo 4200 Gen10 Plus Server Maintenance and Service Guide... -
Page 24: Removing And Replacing The Rack Rails
To reduce the risk of personal injury or damage to the equipment, you must adequately support the chassis during installation and removal. Prerequisites Prerequisites Before you begin, be sure that you have the appropriate screwdriver for the screws in the rack. HPE Apollo 4200 Gen10 Plus Server Maintenance and Service Guide... - Page 25 When removing the rail from the rack, always remove the front of the rail first. 4. Remove the rail from the rack. To replace the component, reverse the removal procedure. HPE Apollo 4200 Gen10 Plus Server Maintenance and Service Guide...
-
Page 26: Removing And Replacing A Drive Blank
3. Depending on the type of drive in the cage, do one of the following: Remove an LFF drive: a. Determine the status of the drive from the low profile LFF drive LEDs (see Drive LEDs). b. Wait until the Online/Activity LED stops flashing. HPE Apollo 4200 Gen10 Plus Server Maintenance and Service Guide... - Page 27 Removing and replacing a hot-plug drive from drive cage 2 Procedure Procedure 1. Back up all server data. 2. Extend the server from the rack . 3. Open drive cage 2. HPE Apollo 4200 Gen10 Plus Server Maintenance and Service Guide...
-
Page 28: Removing And Replacing A Hot-Plug Drive In Drive Cage 3
Procedure 1. Back up all server data. 2. Extend the server from the rack . 3. Open the access panel to access drive cage 3. 4. Open drive cage 3. HPE Apollo 4200 Gen10 Plus Server Maintenance and Service Guide... -
Page 29: Removing And Replacing A Hot-Plug Drive From A Rear Drive Cage
Removing and replacing a hot-plug drive from a rear drive cage Removing and replacing a hot-plug drive from a rear drive cage Procedure Procedure 1. Back up all server data. 2. Access the product rear panel (see Rear panel components). HPE Apollo 4200 Gen10 Plus Server Maintenance and Service Guide... -
Page 30: Removing And Replacing A Fan
2. Open the access panel to access drive cage 3 to access the fans behind drive cage 2. 3. Remove the fan. To replace the component, reverse the removal procedure. Drive cage options Drive cage options HPE Apollo 4200 Gen10 Plus Server Maintenance and Service Guide... -
Page 31: Removing And Replacing Drive Cage 3
When removing drive cage 3 from the server, be sure to carefully feed the cables through the openings at the rear of the drive cage. 6. Disconnect cables connected to the backplane. HPE Apollo 4200 Gen10 Plus Server Maintenance and Service Guide... -
Page 32: Removing And Replacing A Rear Drive Cage
2. Remove the server from the rack . 3. Place the server on a flat, level surface. 4. Remove the complete access panel . 5. Remove the rear drive cage. HPE Apollo 4200 Gen10 Plus Server Maintenance and Service Guide... -
Page 33: Removing And Replacing Drive Backplanes
2. Remove the server from the rack . 3. Place the server on a flat, level surface. 4. Remove the access panel . 5. Disconnect all cables connected to the drive backplane. HPE Apollo 4200 Gen10 Plus Server Maintenance and Service Guide... -
Page 34: Removing And Replacing A Power Supply Blank
Always install a power supply blank into each bay to maintain proper airflow and cooling in the power enclosure. Improper airflow can lead to thermal damage. Procedure Procedure 1. Remove the power supply blank. HPE Apollo 4200 Gen10 Plus Server Maintenance and Service Guide... -
Page 35: Power Supply Options
2. If the server is using a single power supply only, remove all power from the server: a. Back up all server data. b. Power down the server. c. Disconnect all peripheral cables from the server. 3. Release the power cord from the strain relief strap. HPE Apollo 4200 Gen10 Plus Server Maintenance and Service Guide... - Page 36 4. Disconnect the power cord from the power supply. 5. Remove the power supply. HPE Apollo 4200 Gen10 Plus Server Maintenance and Service Guide...
- Page 37 Enterprise servers located in a restricted access location. The HPE 800 W Flex Slot -48 VDC hot-plug power supply is not intended for direct connection to the DC supply branch circuit. Only connect this power supply to a power distribution unit (PDU) that provides an independent overcurrent-protected output for each DC power supply.
- Page 38 4. To access the ground cable screw, slide the power supply out of the bay. 5. Detach the ground (earthed) cable from the power supply. 6. Remove the terminal block connector from the power supply. HPE Apollo 4200 Gen10 Plus Server Maintenance and Service Guide...
- Page 39 Enterprise servers located in a restricted access location. The HPE 1600 W Flex Slot -48 VDC hot-plug power supply is not intended for direct connection to the DC supply branch circuit. Only connect this power supply to a power distribution unit (PDU) that provides an independent overcurrent-protected output for each DC power supply.
- Page 40 4. Release the ground (earthed), -48 V, and return wires from the strain relief strap. 5. Disconnect the ground (earthed) wire from the power supply. 6. Remove the clear plastic cover from the power supply. HPE Apollo 4200 Gen10 Plus Server Maintenance and Service Guide...
-
Page 41: Removing And Replacing The Cable Arm
Improper grounding can cause electrostatic discharge. IMPORTANT: IMPORTANT: Screws included for this part are color-coded. Be sure to replace the color-coded screws in the same location from HPE Apollo 4200 Gen10 Plus Server Maintenance and Service Guide... - Page 42 4. Remove the access panel . 5. Remove the air baffle . 6. Remove drive cage 2. 7. Remove the cable arm. 8. Remove the brackets from the cable arm and then remove the cables. HPE Apollo 4200 Gen10 Plus Server Maintenance and Service Guide...
-
Page 43: Removing And Replacing The Pci Riser Cage
5. If expansion boards with internal cabling are installed on the PCI riser cage, disconnect all internal cables from the expansion boards to remove the cage from the server. 6. Remove the PCI riser cage. Primary slot HPE Apollo 4200 Gen10 Plus Server Maintenance and Service Guide... -
Page 44: Removing And Replacing An Expansion Board
For more information on installing controllers, SAS expanders, or GPU cards, see the related section. Prerequisites Prerequisites Before you perform this procedure, make sure that you have the following items: HPE Apollo 4200 Gen10 Plus Server Maintenance and Service Guide... -
Page 45: Removing And Replacing A Type -A Storage Controller
Removing and replacing a type -a storage controller WARNING: To reduce the risk of personal injury from hot surfaces, allow the drives and the internal system components WARNING: to cool before touching them. HPE Apollo 4200 Gen10 Plus Server Maintenance and Service Guide... - Page 46 NS204i-p NVMe OS Boot Device option option Removing and replacing the boot device Removing and replacing the boot device Prerequisites Prerequisites Procedure Procedure 1. Observe the following alerts: CAUTION: CAUTION: HPE Apollo 4200 Gen10 Plus Server Maintenance and Service Guide...
- Page 47 WARNING: To reduce the risk of personal injury from hot surfaces, allow the drives and the internal system WARNING: components to cool before touching them. 2. Back up all server data. 3. Power down the server. HPE Apollo 4200 Gen10 Plus Server Maintenance and Service Guide...
-
Page 48: Relocating The M.2 Drive Retaining Latches
2. Remove the server from the rack . 3. Place the server on a flat, level surface. 4. Remove the complete access panel . 5. Remove the air baffle . 6. Remove the DIMM. HPE Apollo 4200 Gen10 Plus Server Maintenance and Service Guide... -
Page 49: Removing And Replacing The Ocp Nic 3.0 Adapter
4. Place the server on a flat, level surface. 5. Remove the complete access panel . 6. Remove the secondary PCIe riser cage (if equipped). 7. Remove the OCP NIC 3.0 adapter. HPE Apollo 4200 Gen10 Plus Server Maintenance and Service Guide... -
Page 50: Removing And Replacing The Ocp Fan Board
2. Remove the server from the rack . 3. Place the server on a flat, level surface. 4. Remove the complete access panel . 5. Remove drive cage 4. 6. Remove the OCP fan board. HPE Apollo 4200 Gen10 Plus Server Maintenance and Service Guide... -
Page 51: Removing And Replacing The Front I/O Board
Remove the screws behind the right rack ear. b. Carefully open the right rack ear from behind, and then disconnect the front I/O cable. This action releases the right rack ear assembly from the chassis. HPE Apollo 4200 Gen10 Plus Server Maintenance and Service Guide... -
Page 52: Diagnostic Tools
UEFI System Utilities The UEFI System Utilities is embedded in the system ROM. Its features enable you to perform a wide range of configuration activities, including: Configuring system devices and installed options. HPE Apollo 4200 Gen10 Plus Server Maintenance and Service Guide... -
Page 53: Selecting The Boot Mode
UEFI BIOS. Secure Boot validates the software identity of the following components in the boot process: UEFI drivers loaded from PCIe cards UEFI drivers loaded from mass storage devices HPE Apollo 4200 Gen10 Plus Server Maintenance and Service Guide... -
Page 54: Launching The Embedded Uefi Shell
Service Pack for ProLiant (SPP). SPP is a comprehensive systems software and firmware solution for ProLiant servers, server blades, their enclosures, and HPE Synergy compute modules. These components are preloaded with a basic set of firmware and OS components that are installed along with Intelligent Provisioning. -
Page 55: Hpe Insight Remote Support
Warranty, HPE support services, or Hewlett Packard Enterprise contractual support agreement. HPE InfoSight for servers HPE InfoSight for servers The HPE InfoSight portal is a secure web interface hosted by HPE that allows you to monitor supported devices through a graphical interface. HPE InfoSight for servers:... -
Page 56: Smart Storage Administrator
Accessing SSA in the offline environment: system. In offline mode, users can configure or maintain detected and supported HPE ProLiant devices, such as optional controllers and integrated controllers. Some SSA features are only available in the offline environment, such as setting the boot controller or performing split-mirror operations. -
Page 57: Front Panel Leds And Buttons
Solid amber = System in standby Off = No power present NIC status LED Solid green = Link to network Flashing green (1 flash per second) = Network active Off = No network activity HPE Apollo 4200 Gen10 Plus Server Maintenance and Service Guide... -
Page 58: Uid Button Functionality
The UID button can be used to display the Server Health Summary when the server will not power on. For more information, see the latest HPE iLO 5 User Guide on the Hewlett Packard Enterprise website Hewlett Packard Enterprise website . -
Page 59: Rear Panel Components
Hot-plug power supply bay 1 (standard) Hot-plug power supply bay 2 (optional) COM port USB 3.0 connectors iLO Management port Video connector OCP NIC 3.0 Rear panel LEDs Rear panel LEDs HPE Apollo 4200 Gen10 Plus Server Maintenance and Service Guide... -
Page 60: System Board Components
The components shown in this section are associated with the ProLiant XL420 Gen10 Plus server server board. Item Item Description Description Internal USB 3.0 connector Front USB for iLO connector TPM 2.0 connector HPE Apollo 4200 Gen10 Plus Server Maintenance and Service Guide... -
Page 61: Dimm Slot Locations
This description may be different from the label on the server. DIMM slot locations DIMM slot locations DIMM slots are numbered sequentially (1 through 12) for each processor. The supported AMP modes use the letter assignments for population guidelines. HPE Apollo 4200 Gen10 Plus Server Maintenance and Service Guide... -
Page 62: Dimm Label Identification
To determine DIMM characteristics, see the label attached to the DIMM. The information in this section helps you to use the label to locate specific information about the DIMM. For more information about product features, specifications, options, configurations, and compatibility, see the HPE DDR4 SmartMemory QuickSpecs on the Hewlett Packard Enterprise website (https://www.hpe.com/support/DDR4SmartMemoryQS https://www.hpe.com/support/DDR4SmartMemoryQS). -
Page 63: System Maintenance Switch Descriptions
To access the redundant ROM, set S1, S5, and S6 to On. When the system maintenance switch position 6 is set to the On position, the system is prepared to restore all configuration settings HPE Apollo 4200 Gen10 Plus Server Maintenance and Service Guide... -
Page 64: Drive Cage Numbering
NOTE: NOTE: When you use the software to update, maintain, or monitor the HPE Apollo 4200 Gen10 Plus server, you will see HPE ProLiant XL420 Gen10 Plus Server as the product name in the interface. ProLiant XL420 Gen10 Plus Server... -
Page 65: Drive Numbering
Drive numbering 24-bay SFF hot-plug drive cage 1 24-bay SFF hot-plug drive cage 1 numbering numbering 12-bay LFF hot-plug drive cage 1 12-bay LFF hot-plug drive cage 1 numbering numbering HPE Apollo 4200 Gen10 Plus Server Maintenance and Service Guide... -
Page 66: Drive Leds
5 numbering numbering Drive LEDs Drive LEDs LFF and SFF drives have different sets of LEDs to reflect the drive status. Low-profile LFF drive LED definitions Low-profile LFF drive LED definitions HPE Apollo 4200 Gen10 Plus Server Maintenance and Service Guide... -
Page 67: Drive Led Definitions
Flashing amber (1Hz) A predictive failure alert has been received for this drive. Replace the drive as soon as possible. Online/Activity Solid green The drive is online and has no activity. HPE Apollo 4200 Gen10 Plus Server Maintenance and Service Guide... -
Page 68: Drive Cage Backplane Identification
Drive cage backplane identification 4LFF drive cage backplane 4LFF drive cage backplane Item Description Item Description x4 Mini SAS connector Power input connector 2SFF rear drive cage backplane 2SFF rear drive cage backplane HPE Apollo 4200 Gen10 Plus Server Maintenance and Service Guide... - Page 69 24 SFF drive cage backplane Item Description Item Description x4 Mini SAS connector x4 Mini SAS connector Power input connector 12 LFF drive cage backplane 12 LFF drive cage backplane HPE Apollo 4200 Gen10 Plus Server Maintenance and Service Guide...
-
Page 70: Storage Controller Components
Thermal interface pad with removable liner M.2 drive retaining latches HPE NS204i-p NVMe OS Boot Device NS204i-p NVMe OS Boot Device LED definitions LED definitions Item Item Description Fault LED status Description Fault LED status HPE Apollo 4200 Gen10 Plus Server Maintenance and Service Guide... -
Page 71: Fan Numbering
Description Description Management port 1GbE RJ45 Network interface port 10/25G SFP+ based Network interface port 10/25G SFP+ based LEDs LEDs Fan numbering Fan numbering System fan numbering System fan numbering HPE Apollo 4200 Gen10 Plus Server Maintenance and Service Guide... -
Page 72: Specifications
Specifications Specifications For more information on cable, power, environmental, compliance, and general specifications, see the HPE Compute Transceiver and HPE Compute Transceiver and Cable Hardware Matrix. Cable Hardware Matrix Environmental specifications Environmental specifications Specification Specification Value Value Temperature range Temperature range —... -
Page 73: Mechanical Specifications
With the two-bay SFF drive cage 4 and two-bay SFF drive cage 5 48.35 kg (106.61 lb) options, maximum 48-bay SFF drive models (24 SFF in drive cage 1 and 24 SFF in — drive cage 2) HPE Apollo 4200 Gen10 Plus Server Maintenance and Service Guide... -
Page 74: Power Supply Specifications
HPE 1600 W Flex Slot -48 VDC Hot-Plug Power Supply These power supplies are Flexible Slot Power Supply products for ProLiant servers. For more information about the power supply features, specifications, and compatibility, see the Hewlett Packard Enterprise website ( http://www.hpe.com/servers/powersupplies http://www.hpe.com/servers/powersupplies). -
Page 75: Hot-Plug Power Supply Calculations
Cage 3 power cable LFF cage 3 backplane LFF cage 3 backplane LFF cage 2 to LFF cage 3 data cable LFF cage 2 to LFF cage 3 data cable HPE Apollo 4200 Gen10 Plus Server Maintenance and Service Guide... -
Page 76: Sff Cage 3 Backplane
The procedures that are common to all removals and replacements are only summarized in the following videos. To see the complete details, view the applicable common procedure video. AC power module AC power module OCP NIC adapter OCP NIC adapter HPE Apollo 4200 Gen10 Plus Server Maintenance and Service Guide... -
Page 77: Large Air Baffle
Configuration 3 or Configuration 4: LFF chassis, P408i-p riser 3-Tertiary, Cage 2 LFF Configuration 4 or Configuration 5: LFF chassis, P408i-p riser1-Primary, Cage 3 LFF Configuration 4 or Configuration 5: LFF chassis, P408i-p riser1-Primary, Cage 3 LFF HPE Apollo 4200 Gen10 Plus Server Maintenance and Service Guide... -
Page 78: Common Removal Videos
Several removal procedures are common to all components. Select the applicable procedure to view the video. Top cover Top cover Large air baffle Large air baffle LFF drive cage 3 LFF drive cage 3 SFF drive cage 3 SFF drive cage 3 HPE Apollo 4200 Gen10 Plus Server Maintenance and Service Guide... -
Page 79: System Fans And Fan Cage
Large air baffle Large air baffle LFF drive cage 3 LFF drive cage 3 SFF drive cage 3 SFF drive cage 3 System fans and fan cage System fans and fan cage HPE Apollo 4200 Gen10 Plus Server Maintenance and Service Guide... -
Page 80: Left Cable Arm
Some software products provide a mechanism for accessing software updates through the product interface. Review your product documentation to identify the recommended software update method. To download product updates: Hewlett Packard Enterprise Support Center https://www.hpe.com/support/hpesc https://www.hpe.com/support/hpesc HPE Apollo 4200 Gen10 Plus Server Maintenance and Service Guide... -
Page 81: Remote Support
IMPORTANT: IMPORTANT: Access to some updates might require product entitlement when accessed through the Hewlett Packard Enterprise Support Center. You must have an HPE Passport set up with relevant entitlements. Remote support Remote support Remote support is available with supported devices as part of your warranty or contractual support agreement. It provides intelligent event diagnosis, and automatic, secure submission of hardware event notifications to Hewlett Packard Enterprise, which initiates a fast and accurate resolution based on the service level of your product. -
Page 82: Documentation Feedback
Feedback button and icons (located at the bottom of an opened document) on the Hewlett Packard Enterprise Support Center portal (https://www.hpe.com/support/hpesc https://www.hpe.com/support/hpesc) to send any errors, suggestions, or comments. All document information is captured by the process. HPE Apollo 4200 Gen10 Plus Server Maintenance and Service Guide...
Need help?
Do you have a question about the Apollo 4200 Gen10 Plus and is the answer not in the manual?
Questions and answers