Chapters
Table of Contents

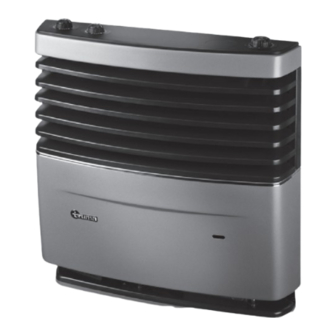
Related Manuals for Truma S 3004


Summary of Contents for Truma S 3004
- Page 1 Truma S 3004 / S 5004 Einbauanweisung Seite Installation instructions Page Instructions de montage Page Istruzioni di montaggio Pagina CS, FI, NO, PL, SL Page...
-
Page 2: Table Of Contents
1�7 Sicherheitshinweise für die Fachkraft ������������� 3 • Einbau ������������������������������������������������������������ 4 Gültigkeit 2�1 Besondere Hinweise für den Einbau ��������������� 4 Diese Anleitung gilt für Truma S 3004 und S 5004� 2�2 Elektrischer Anschluss ������������������������������������ 6 Zielgruppe 2�3 Warmluftverteilung ����������������������������������������� 6 2�4 Beispiel einer Warmluftverteilung ������������������� 6 Diese Anleitung richtet sich an Fachkräfte�... -
Page 3: Warnhinweise
Truma S 3004 / S 5004 Zu dieser Anleitung 1.7.2 Umgang mit Abgasen Symbol Bedeutung Gas- und Dieselverbrauchsgeräte dürfen wegen Vergif- (Abb� 3-1) Siehe Abbildung 3 - Nummer 1 tungs- und Erstickungsgefahr nicht in geschlossenen Warnhinweise Räumen, wie Garagen oder Werkstätten ohne Abgasab- saugung oder Belüftungsanlage, betrieben werden�... -
Page 4: Einbau
Herstellers, können die Funktion und die Sicherheit Sachmängel-, Garantieansprüche sowie Haftungsan- des Gerätes beeinträchtigen, das Fahrzeug beschä- sprüche gegenüber Truma sind in den unter dem Punkt digen und die Gewährleistung und Herstellerhaftung „Ausschluss der Garantie“ in der Gebrauchsanweisung einschränken�... - Page 5 Truma S 3004 / S 5004 Einbau Die Installation in engen Durchgängen ist zu vermeiden� Zur Vermeidung der Ansammlung von unverbrann- Ein unbeabsichtigter Kontakt mit heißen Oberflächen tem Gas, muss der Sockel in der unteren Bodenplatte oder austretender Warmluft ist insbesondere im Auf- (Abb�...
-
Page 6: Elektrischer Anschluss
Truma S 3004 / S 5004 Elektrischer Anschluss Warmluftverteilung 2.2.1 12 V Anschluss VORSICHT Wird ein Truma Gebläse TEB-3 oder eine Beleuchtung Brandgefahr für die Bedienteile montiert, ist dafür eine 12 V-Span- Risiko eines Brandes durch Überhitzung oder nungsversorgung erforderlich (Wechselspannungswel- Entzündung von Teilen bei falschem Einbau... -
Page 7: Bodenausschnitt Herstellen
Pfeile müssen dabei genau auf die Vorder- Bei einer Durchführung muss ein Abstandshalter (z� B� kante des Ausschnittes zeigen� eine Isolierung) angebracht werden, um den Kontakt zu vermeiden� Der Truma Schlauchclip SC kann ab 1,5 m Abstand verwendet werden� 2.4.2 Zwischenboden S 3004 Beim Einbau einer gelochten Schublade über der Hei-... -
Page 8: Einbaukasten Einbauen
Bei geringer Einbautiefe kann bei der Heizung S 5004 das Abgasrohr auch seitlich durchgeführt werden (Abb� 8-3) bzw� (Abb� 8-7)� Wird ein Truma Gebläse montiert, den runden Duch- bruch (Abb� 8-2) entfernen und das Gebläse entspre- chend der jeweils beiliegenden Einbauanweisung am Einbaukasten vormontieren�... - Page 9 Truma S 3004 / S 5004 Einbau VORSICHT 2.6.4 Gebläse* anbauen Schnittgefahr Siehe Einbauanleitung für Gebläse� Mögliche Verletzungsgefahr durch scharfe Kan- Nachfolgend wird der Einbau von einem Gebläse be- ten am Einbaukasten� schrieben� Wird bei der S 5004 ein Einbaukasten mit Schutzhandschuhe tragen�...
- Page 10 Einbau Truma S 3004 / S 5004 2.6.7 Internes Bedienteil für Gebläse* einbauen S 5004: Träger am Einbaurahmen mit 4 Schrauben 3,5 x 16 mm befestigen (Abb� 18)� Das Bedienteilkabel (Abb� 15-2) für das Gebläse durch die Aussparung (Abb� 15-1) im Träger schie- ben und in die dafür vorgesehene Kabelführung klemmen�...
-
Page 11: Heizung Innenteil Einbauen
Truma S 3004 / S 5004 Einbau Heizung Innenteil einbauen 2.7.3 Druckstange einbauen Druckstange von unten durch die Öffnung 2.7.1 Themostatfühler umbauen (Abb� 23-4) des Trägers stecken� Dieser Arbeitsschritt ist nur für den Linkseinbau Druckstange von oben in das Zündsicherungsventil notwendig�... -
Page 12: 2�10 Abgasführung Einbauen
Bei der Montage Schutzhandschuhe tragen� Bei doppelschaligen Dächern den Zwischenraum mit geeignetem, hitzebeständigem Material (Abb� 25-1) Die Heizungen sind nur mit diesen Truma Originalteilen ausfüttern� Dadurch wird das Dach so versteift, dass geprüft und zugelassen� es beim Anziehen der Verschraubung nicht verformt... - Page 13 Truma S 3004 / S 5004 Einbau 2.10.2 Abgasrohr an die Heizung anschließen Dichtplatte (Abb� 29-1) festhalten und dabei die Schraube (Abb� 29-2) fest anziehen� Kamin Vorbereiten: Rohr (Abb� 30-1) über Abgasrohr (Abb� 30-2) schieben� Dabei muss das Rohr vom Kamin Den festen Sitz des Abgasrohrs durch leichtes Zei- bis zur Rückwand des Einbaukastens reichen�...
-
Page 14: 2�13 Bedienelemente / Verkleidung
2.13.2 Beleuchtung* anstecken beiten die Heizung wieder ausgebaut werden kann� Nachfolgende Beschreibung gilt wenn Verkleidungen S 3004 CI und S 5004 CI (mit beleuchtetem Gasbedien- Vor dem Anschluss an die Heizung sicherstellen, dass teil und vormontierter Sensorelektronik) Verwendung die Gasleitungen frei von Schmutz, Spänen und Ähnli- finden oder ein Beleuchtungsset nachgerüstet wird�... - Page 15 Truma S 3004 / S 5004 Einbau Truma-Logo in die entsprechende Sichtfenster-Aus- sparung der Verkleidung (bei Rechtseinbau – links, bei Linkseinbau – rechts) einclipsen� Abb� 33 Die Beleuchtung wird über das Gebläse TEB-3 mit Spannung versorgt� Wird das Gerät S 3004 / S 5004 Abb�...
-
Page 16: Abschließende Arbeiten
Einbau Truma S 3004 / S 5004 2.14 Abschließende Arbeiten 2.14.1 Typenschild Das Jahr der ersten Inbetriebnahme auf dem Typen- schild ankreuzen� Das Typenschild befindet sich auf dem Sockel� 2020 2021 2022 Abb� 36 2.14.2 Aufkleber Dem Gerät liegen Aufkleber mit Warnhinweisen oder mit ergänzenden Informationen bei�... -
Page 17: About These Instructions
1�7 Safety instructions for experts ���������������������� 18 • Installation �������������������������������������������������� 19 Validity 2�1 Special information for installation ���������������� 19 These instructions apply to the Truma S 3004 and 2�2 Electrical connection ������������������������������������� 20 S 5004� 2�3 Warm air distribution ������������������������������������ 21 2�4 Warm air distribution example ����������������������... -
Page 18: Warnings
About these instructions Truma S 3004 / S 5004 This also applies to operation using remote control- Symbol Meaning lers, such as preset times or timer functions in control (Fig� 3-1) See figure 3 - number 1 panels, remote controls, apps on mobile devices or the Diagnose Tool�... -
Page 19: Installation
National regulations and rules must be followed� Safety devices may be attached to appliances� If a safety shut-off device (e�g� Truma MonoControl / Risk of injury if the safety device is missing or faulty� DuoControl CS) is not installed, the gas cylinder must... -
Page 20: Electrical Connection
2.2.1 12 V connection To prevent unburned gas from building up, the floor If a Truma TEB-3 fan or lighting for the control panels base in the lower base plate (Fig� 1-2) must have a ven- is installed, a 12 V mains supply is required (alternating tilation opening of at least 2 cm²... -
Page 21: Warm Air Distribution
Truma TEB-3 or TN-3 fan� The S 5004 heater can be fitted with two fans. A special installation box is available for this. -
Page 22: Making A Cut-Out In The Floor
The figures show the Pretension the frame halves (Fig� 7-1) by bending template for the S 3004 by way of example� Use the open the legs so that the frame sits properly in the corresponding template for installing the S 5004�... -
Page 23: Installing The Installation Box
(Fig� 8-3) or (Fig� 8-7) if the instal- lation depth is low� If a Truma fan is being installed, remove the circular breakthrough (Fig� 8-2) and pre-assemble the fan on the installation box in accordance with the supplied installa- tion instructions�... - Page 24 Installation Truma S 3004 / S 5004 CAUTION 2.6.4 Installing the fan* Danger of cut injuries See the installation instructions for fans� Possible risk of cut injuries from sharp edges on The installation of a fan is described below� If an instal- the installation box�...
- Page 25 Truma S 3004 / S 5004 Installation 2.6.7 Installing an internal fan control panel* S 5004: Secure the support to the mounting frame with 4 screws (3�5 x 16 mm) (Fig� 18)� Push the control panel cable (Fig� 15-2) for the fan through the recess (Fig� 15-1) in the support and clip it into the designated cable guide�...
-
Page 26: Installing The Heater Interior Part
Installation Truma S 3004 / S 5004 Installing the heater interior part 2.7.3 Installing the control rod Insert the control rod from below through the sup- 2.7.1 Repositioning the thermostat sensor port opening (Fig� 23-4)� This work step is only necessary for left-hand Press the control rod from above into the safety pilot installation�... -
Page 27: 2�10 Installing The Exhaust Gas System
Inform the vehicle manufacturer of the location of ly or if parts other than original Truma parts are any wiring or roof struts� used for the exhaust gas system�... - Page 28 Installation Truma S 3004 / S 5004 2.10.2 Connecting the exhaust duct to the heater Hook the sealing plate on the lugs of the exhaust duct connection on both sides and rotate to the stop Prepare the cowl: Slide the duct (Fig� 30-1) over the position�...
-
Page 29: 2�13 Control Panels / Cover
2.13.2 Connecting the lighting* Before connecting to the heater, please ensure that the The description below applies when S 3004 CI and gas lines are free of dirt, shavings and the like� S 5004 CI covers (with illuminated gas control panel... -
Page 30: Finishing Work
Installation Truma S 3004 / S 5004 Clip the Truma logo into the relevant mica window recess of the cover (left for right-hand installation and right for left-hand installation)� Fig� 33 The lighting is supplied with power via the TEB-3 fan�... - Page 31 Truma S 3004 / S 5004 Installation WARNING Risk of burns Possible injury / material damage if the heater is operated without a cover� Risk of burn injury from hot surfaces at the heat exchanger� Operate the heater only with the cover fitted�...
-
Page 32: À Propos De Ce Mode D'emploi
Informations concernant la sécurité pour le • personnel qualifié ������������������������������������������ 33 Validité Montage ������������������������������������������������������ 34 Ce mode d’emploi est valable pour les produits Truma 2�1 Consignes particulières pour le montage ����� 34 S 3004 et S 5004� 2�2 Connexion électrique ������������������������������������ 36 Groupe cible 2�3... -
Page 33: Avertissements
Truma� Après le montage, retirer toutes les substances Veuillez lire et observer les informations suivantes inflammables (p� ex� papier, carton, polystyrène, co- pour vous protéger et protéger votre environnement�... -
Page 34: Montage
Montage Truma S 3004 / S 5004 Prendre les mesures nécessaires pour assurer la sé- Après l’installation, veiller à ce que tous les disposi- curité du travail et porter un équipement de protec- tifs de sécurité (caches, informations concernant la tion individuelle�... - Page 35 Les droits à garantie des vices cachés ou rédhibitoires, S 5004� à garantie ainsi qu’à demande de réparation du préju- dice vis-à-vis de Truma sont exclus dans les cas décrits sous le point « Exclusion de la garantie » du mode d’emploi�...
-
Page 36: Connexion Électrique
Fig� 2 Connexion électrique 2.2.1 Branchement 12 V Le montage d’un ventilateur Truma TEB-3 ou d’un éclai- rage pour les pièces de commande exige une alimen- tation en tension de 12 V (ondulation de tension alter- native < à 1,2 Vcc)� Raccorder le chauffage au réseau électrique de bord protégé... -
Page 37: Réaliser La Découpe De Plancher
Orienter précisément les flèches la- poser un écarteur (par exemple une isolation) afin d’évi- térales vers le bord avant de la découpe� ter le contact� Le clip de tuyau SC de Truma peut être utilisé à partir de 1,5 m de distance� 2.4.2 Double-plancher... -
Page 38: Monter La Niche
S 5004, de placer le tuyau d’évacuation latéralement (Fig� 8-3) ou (Fig� 8-7)� En cas de montage d’un ventilateur Truma, enlever le passage rond (Fig� 8-2) et prémonter le ventilateur sur la niche conformément aux instructions de montage jointes�... - Page 39 S 3004 (Fig� 11-1)� Montage à gauche = (Fig� 11-2) Montage à droite = (Fig� 11-3)� S 3004 : soulever le passage correspondant à l’aide d’un tournevis pour le retirer� Avec un matériau approprié, obturer impérativement les points de perçage enfoncés par inadvertance et...
- Page 40 2.6.9 Fixer le support sur le cadre de montage échéant, presser légèrement les attaches en tôle sur le centrage (Fig� 20-3) vers le bas pour les plaquer S 3004 : fixer le support sur le cadre de la niche à complètement� l’aide de 3 vis de 3,5 x 16 mm (Fig� 17)�...
-
Page 41: Monter La Partie Intérieure Du Chauffage
Truma S 3004 / S 5004 Montage Monter la partie intérieure du 2.7.3 Placer la barre de compression chauffage Enfoncer la barre de compression depuis le bas par l’ouverture (Fig� 23-4) du support� 2.7.1 Transformer la sonde thermostatique Pousser la barre de compression depuis le haut dans Cette étape de travail est nécessaire uniquement en... -
Page 42: Monter La Cheminée De Toit
Au besoin, demander au fabricant du véhicule où que les pièces Truma d’origine pour le guidage passent les conduites et solives� de gaz brûlés�... - Page 43 Truma S 3004 / S 5004 Montage 2.10.2 Raccordement du tuyau d’évacuation au Faire glisser la bague préformée jusqu’à la tubulure chauffage d’évacuation ou le collecteur de gaz brûlés et l’insé- rer dans la rainure� Préparer la cheminée� Pousser le tuyau (Fig� 30-1) dans le tuyau d’évacuation (Fig�...
-
Page 44: Monter L'allumeur Automatique
Montage Truma S 3004 / S 5004 2.11 Monter l’allumeur automatique 2.13 Éléments de commande / façade La position de la douille (Fig� 32-4) pour la poignée de Raccorder l’allumeur automatique� Pour ce faire, réglage (Fig� 32-3) dépend du montage du chauffage (à... -
Page 45: Travaux Finaux
Truma S 3004 / S 5004 Montage Clipser le logo Truma dans l’évidement de la fa- çade correspondant au voyant (à gauche lors d’un montage à droite et à droite lors d’un montage à gauche)� Fig� 33 L’alimentation en tension de l’éclairage est assurée par le ventilateur TEB-3�... - Page 46 Montage Truma S 3004 / S 5004 2.14.4 Vérification du fonctionnement Insérer la pile dans l’allumeur automatique (voir le mode d’emploi)� Mettre la façade en place (voir le mode d’emploi)� AVERTISSEMENT Risque de brûlure Risque de dommages corporels / matériels en cas de fonctionnement du chauffage sans fa- çade�...
-
Page 47: Note Riguardo Alle Presenti Istruzioni
Con personale qualificato s’in- tendono persone che, sulla base della formazione pro- fessionale, delle conoscenze e delle esperienze acquisite con i prodotti Truma e le norme pertinenti, so- no in grado di eseguire correttamente i lavori necessari e di individuare possibili pericoli�... -
Page 48: Avvertenze
Note riguardo alle presenti istruzioni Truma S 3004 / S 5004 danni o anermeticità sul tubo del combustibile, non uti- Simbolo Significato lizzare l’apparecchio prima di aver eliminato il danno� Simbolo indicante un passaggio opera- All’apertura dei tubi del gas o del gasolio potrebbero tivo: Qui è... -
Page 49: Installazione
Prima di eseguire lavori su installazioni o componen- Utilizzare solo componenti originali, pezzi di ricambio e ti elettriche togliere l’alimentazione elettrica, ad es� parti a usura della Truma Gerätetechnik GmbH & Co KG� tramite fusibili o interruttori di sicurezza per correnti Installazione di guasto nella distribuzione principale del veicolo�... - Page 50 Installazione Truma S 3004 / S 5004 Durante la marcia, il conducente non deve venire a Per evitare l’accumulo di gas incombusto, la base nella contatto con il riscaldamento dal proprio posto di guida� piastra inferiore (Figura 1-2) deve essere provvista di Non installare il riscaldamento subito dietro il sedile del uno sfiato di almeno 2 cm²...
-
Page 51: Collegamento Elettrico
(ad es� stu- o di utilizzo di parti non originali Truma per la fa, tubo dell’aria calda)� distribuzione dell’aria calda�... -
Page 52: Praticare Il Foro Nel Pavimento
Installazione Truma S 3004 / S 5004 Rispettare la profondità minima l₁ e l’altezza minima l₂ (Figura 4)� 45° S 3004 S 5004 l₁ 280 mm 380 mm l₂ 480 mm 505 mm Figura 6 S 3004 S 5004 Verificare che in corrispondenza del foro previsto,... -
Page 53: Montare La Nicchia Di Montaggio
Montaggio a sinistra = (Figura 11-2) Montaggio a destra = (Figura 11-3)� S 3004: Far leva con un cacciavite per aprire il foro che si vuole utilizzare� Se si dovesse aprire per errore un foro senza utiliz- zarlo, è... - Page 54 2.6.9 Fissaggio del supporto nel telaio di 2.6.5 Montaggio dell’unità di comando esterna* montaggio del ventilatore S 3004: Fissare il supporto al telaio di montaggio Montare l’unità di comando esterna come indicato con 3 viti 3,5 x 16 mm (Figura 17)� nelle istruzioni per l’uso del ventilatore�...
-
Page 55: Installazione Della Parte Interna Della Stufa
Indossare guanti di protezione� Estrarre con cautela la lamiera di protezione (Figura 21-1) con sensore termico sfilando i morsetti S 3004: Posizionare obliquamente dall’alto la ma- di fissaggio (Figura 21-4) dai perni (Figura 21-5)� scherina (Figura 19-1) sui 2 ausili di centraggio Portare la lamiera di protezione, il sensore termico e (Figura 19-3) presenti sul supporto (Figura 19-2)�... -
Page 56: Smontaggio Dell'accenditore Automatico
Installazione Truma S 3004 / S 5004 Montaggio del camino a tetto Per il montaggio del camino è necessario praticare un foro in un punto adatto del tetto� Assicurarsi che in cor- rispondenza del foro non passino cavi elettrici (ad es�... -
Page 57: 2�10 Montaggio Dello Scarico Fumi
Truma S 3004 / S 5004 Installazione 2.10 Montaggio dello scarico fumi 2.10.2 Collegamento del tubo di scarico fumi al riscaldamento ATTENZIONE Preparazione del camino: Far scorrere il tubo Pericolo di incendio/Pericolo di soffocamento (Figura 30-1) sopra il tubo (Figura 30-2)� Il tubo deve... -
Page 58: Montaggio Dell'accenditore Automatico
Installazione Truma S 3004 / S 5004 2.11 Montaggio dell’accenditore Far scorrere l’anello di tenuta verso il bocchetto- ne di scarico/collettore di scarico e spingerlo nella automatico scanalatura� Collegare l’accenditore automatico� Infilare i con- Far scorrere l’anello di spinta e la piastra di tenuta nettori (Figura 31-3) e (Figura 31-4) nelle rispettive verso l’anello di tenuta�... -
Page 59: 2�13 Elementi Di Comando / Pannello
2.13.2 Collegamento dell’illuminazione* La seguente descrizione vale se sono impiegati i pan- nelli S 3004 CI ed S 5004 CI (con elemento di comando del gas illuminato ed elettronica premontata del senso- re) o se viene montato a posteriori un kit illuminazione�... -
Page 60: Lavori Conclusivi
Installazione Truma S 3004 / S 5004 2.14.4 Prova di funzionamento Agganciare il logo Truma nella cavità della finestra del pannello (a sinistra con montaggio destro, a de- Inserire la batteria nell’accenditore automatico (ve- stra con montaggio sinistro)� dere Istruzioni per l'uso)�... - Page 63 Instrukcję obsługi i instrukcję montażu w Państwa wersji językowej można otrzymać w firmie Truma lub serwisie firmy Truma znajdującym się w Państwa kraju. Navodila za uporabo in vgradnjo v vašem jeziku lahko naročite pri proizvajalcu Truma oz. v servisni službi podjetja Truma v vaši državi.
- Page 64 In order to avoid delays, please have the unit model and serial number ready (see type plate). Veuillez vous adresser au centre de SAV Truma ou à un de nos partenaires de SAV agréés en cas de dysfonctionnements (voir www.truma.com). Pour un traitement rapide de votre demande, veuillez tenir prêts le type d’appareil et le...
Need help?
Do you have a question about the S 3004 and is the answer not in the manual?
Questions and answers