
Related Manuals for I-View ANYCAM DM-2MIPA 04 Series


Summary of Contents for I-View ANYCAM DM-2MIPA 04 Series
- Page 1 5/3/2-mega Pixels Network camera 2/4/5-MEGA IVA Network camera DM-2mipA/4mipA 04 Series Instruction menu Version: V4.0 Doc. No.: 108120801...
- Page 2 Safety information This symbol indicates that dangerous voltage consisting a risk of electric shock is present within this unit. Megapixels This exclamation point symbol is intended to alert the user to the presence of important operating and maintenance (servicing) instructions in the literature accompanying the appliance.
- Page 3 fire or electric shock. 8. If this product fails to operate normally, contact the nearest service center and never disassemble or modify this product in any way. (I-View is not liable for problems caused by unauthorized modifications or attempted repair.) 9.
- Page 4 IMPORTANT SAFETY INSTRUCTIONS Read these instructions. Keep these instructions. Heed all warnings. Follow all instructions. Do not use this apparatus near water. Clean only with dry cloth. Do not block any ventilation openings. Install in accordance with the manufacturer’s instructions.
- Page 5 SAFETY INFORMATION FCC STATEMENT This device complies with part 15 of the FCC Rules. Operation is subject to the following conditions: 1. This device may not cause harmful interference, and 2. This device must accept any interference received including interference that may cause undesired operation.
- Page 6 If technical problems arise with the use of our products in which you and your vendor cannot resolve, please try the following: If you have an Internet connection, visit the I-View website http://www.i-view.com.tw (Taiwan) for any software or product updates, or email to support@i-view.com.tw (Taiwan) or Tel: 886-3-510-3001 Fax: 886-3-510-3002 (Taiwan).
-
Page 7: Table Of Contents
Table of Contents Chapter 1. Introduction ---------------------------------------------------------------------------------------- 8 1-1. Highlights of your new Network IP Camera ------------------------------------------------ 8 1-2. Product Specification --------------------------------------------------------------------------- 9 1-3. Packaging Contents --------------------------------------------------------------------------- 18 1-4. Product Dimension ---------------------------------------------------------------------------- 18 1-5. Product Parts Description -------------------------------------------------------------------- 19 Chapter 2. Camera Installation------------------------------------------------------------------------------ 21 2-1. -
Page 8: Chapter 1. Introduction
Chapter 1. Introduction 1-1. Highlights of your new Network IP Camera Congratulates on purchasing this IVA (Intelligent Video Analytic) Mega pixels network IP Dome Camera! This IP Camera provides 2/4/5-Mega pixels high-resolution video quality, with its advanced megapixel lens; you can view images in more detail than conventional CCTV cameras. Other highlights of this network IP Camera include: ... -
Page 9: Product Specification
1-2. Product Specification DM-2MIPA04 Series System Platform: High performance SoC CPU; Linux Embedded O.S. Image Device 1/2.8" 2 M pixels (1920x 1080 pixels) SONY progressive CMOS sensor. . Video Setting Compression: Video: 16KM ~ 32M bits/sec (CBR/VBR/LBR configurable) H.265MP/H.264 HP/MP/BP, M-JPEG; Audio: G.711μ-low/a-low Codec (64K sample rate) Resolution: Main Streaming: 1920×1080, 1280x1024, 1280x960, 1280×720, D1, VGA, 640*360, 352 x 288. - Page 10 Front size: position & Color adjustable by user. Configure Import/Export parameters, Restore, Default setup Audio Setting G.711μ-Low audio encoding and decoding; 2-way audio; External Microphone input; Speaker output. 2Vp-p audio input and audio output with 600Ω impedance. IVA Functions (Optional) Object Counting, Unattended /Missing Object, Loitering, Tripwire Detection.
- Page 11 IR Cut: Built on removable IR-cut filter for day & night function. IR Illuminators: 4 pieces VCSELIR LED Illuminators, up to 50 meters IR Cut: Built on removable IR-cut filter for day & night function. Storage Micro SD slot for SD/SDHC card storage; Support Prerecording and Post recording; Network failed start recording on SD card, SD card failed indicator.
- Page 12 DM-4MIPA04 Series System Platform: High performance SoC CPU; Linux Embedded O.S. Image Device 1/2.8" 4MP pixels SONY (2572 X 1520 pixels) progressive CMOS sensor. . Video Setting Compression: Video: 16K ~ 8M bits/sec (CBR/VBR configurable) H.265MP/H.264 HP/MP/BP, M-JPEG; Audio: G.711μ-low/ Codec (8K sample rate) Resolution: Main Streaming: 2572x1520, 2560x1440, 2048x1520, 1920×1080, 1280x960, 1280×720, D1, VGA, 640*360, 352 x 288.
- Page 13 G.711μ-Low audio encoding and decoding; 2-way audio; External Microphone input; Speaker output. 2Vp-p audio input and audio output with 600Ω impedance. IVA Functions (Optional) Object Counting, Unattended /Missing Object, Loitering, Tripwire Detection. Smart Motion detection, Color Cast, Lose Focus, Image Expose, Image Dark, Video Loss, Video Occlusion, Network Failed, IP address Conflict, Illegal Access, Object Detection.
- Page 14 Storage Micro SD slot for SD/SDHC card storage; Support Prerecording and Post recording; Network failed start recording on SD card, SD card failed indicator. Backup/Restore to device configuration file to FTP/SMTP server. Management Time management: Manual Time Setting; Time Server, NTP support DST offset and Real Time Clock..
- Page 15 DM-5MIPA04 Series System Platform: High performance SoC CPU; Linux Embedded O.S. Image Device 1/2.8" 5MP pixels SONY (2572 X 1520 pixels) progressive CMOS sensor. . Video Setting Compression: Video: 16K ~ 8M bits/sec (CBR/VBR configurable) H.265MP/H.264 HP/MP/BP, M-JPEG; Audio: G.711μ-low/ Codec (8K sample rate) Resolution: Main Streaming: 2592x1944, 2560x1440, 1920x1080 Sub streaming: D1, 720x576, 640x480, 352x288 Frame Rate: 5MP: 20 fps, the reset resolution is 25fps @ H.265/H.264/M-JPEG Mode;...
- Page 16 2-way audio; External Microphone input; Speaker output. 2Vp-p audio input and audio output with 600Ω impedance. IVA Functions (Optional) Object Counting, Unattended /Missing Object, Loitering, Tripwire Detection. Smart Motion detection, Color Cast, Lose Focus, Image Expose, Image Dark, Video Loss, Video Occlusion , Network Failed, IP address Conflict, Illegal Access, Object Detection.
- Page 17 failed start recording on SD card, SD card failed indicator. Backup/Restore to device configuration file to FTP/SMTP server. Management Time management: Manual Time Setting; Time Server, NTP support DST offset and Real Time Clock.. Event management: Events triggered by IVA or sensor trigger with configured schedule. Event notification: Event notification via Pop up video, move PTZ camera preset, send email and trigger alarm output.
-
Page 18: Packaging Contents
1-3. Packaging Contents Please check the contents of your new Network IP Camera when you unpack the package. If any item is missing, please contact your dealer of purchase for help. The package includes the following items: Network IP Camera x 1ea ... -
Page 19: Product Parts Description
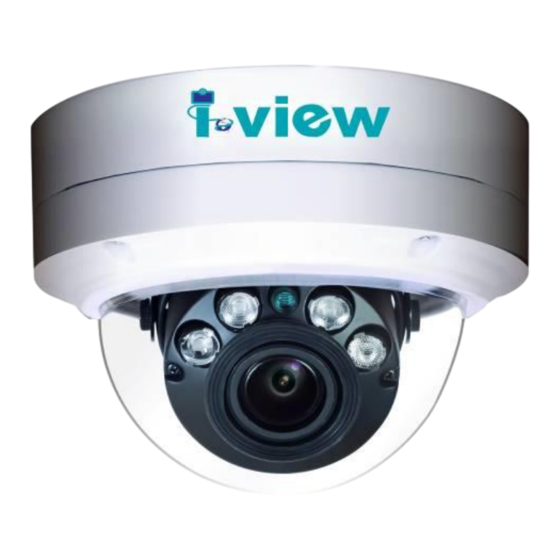
1-5. Product Parts Description A: RJ45 LAN port A:Video ou IR LED IR Sensor Lens A+: Alarm out A-: Alarm out A1: Alarm in + C: Alarm in - Micro SD card slot A/B: Audio in/out AG: Audio ground Reset Button V+: DC12V(+) V -: DC12V(+) - Page 20 Alarm I/O & Audio in/out port Power block Fix hole Rubber Seal plug on the hole for Power & I/O & Audio in/out Cables Lens Rubber Seal plug on the hole for RJ45 Ethernet Cables Cabling Cutout & RJ45 Socket fixed bracket Cover Zoom screw...
-
Page 21: Chapter 2. Camera Installation
Chapter 2. Camera Installation 2-1. Ceiling Mount installation Preparation – Remove the dome cover 1. Use the supplied security torx key to loosen (not remove) the three cover screws. 2. Loosen the three screws (marked with the triangle icon) on the dome base. - Page 22 Fix the camera on the Ceiling & Wall 1) Paste the Mount hole sticker on the position that you want to install. 2) According to your needs, create 6mm (0.2”) holes at the T1/T2template positions. Then insert the screw anchors into the holes. If you want to feed wiring from the hole on the top of the back case, create a circular opening (bottom conduit hole) in the mounting surface.
-
Page 24: Chapter 3. Running Ip Camera By Witness Pro Nvr Software
Chapter 3. Running IP Camera by Witness Pro NVR software. 3-1. Network Deployment General Connection (without PoE) 1. Connect RJ45 Ethernet cable to a switch. Use a Category 5 Cross Cable when your network camera is directly connected to PC. 2. -
Page 25: Install Witness Pro Nvr Software
IP camera which allow you run 32/64 channels IP cameras on a PC. Please follow the steps below to complete the installation of Witness Pro NVR software. While into Windows, and insert the I-View DVR software CD into a CD/DVD drive. Select the NVR64 or NVR32 software Fig. - Page 26 Step 5. Click the “Browse” button to install into a different directory, otherwise click on the “Next” button to install the software into the proposed director. Fig. 1-3-1.5 Installation Directory Step 6. Select “No, I will restart my computer later” and press on the “Finish”...
-
Page 27: Setting Ip Camera For Witness Pro Nvr Software
Fig B Search IP camera: Click this icon will auto search IP cameras of I-View brand. You can refer to the Fig A diagram. Move the Mouse and click to the IP camera which you want to selected and... - Page 28 There is no conflict between the define IP address and the other device of the same LAN. b. The Username/Password of all IP cameras are the same. This function for I-View’s IP camera only. Change IP: Click “Change IP” icon to setup the DHCP or Static IP address for individual IP cameras.
- Page 29 2. Setup the parameters of Individual IP camera Fig D This section will allow you setup the parameters for individual IP camera for I-View’s and the other brand. Disable channel: This will disable the selected channel when enable this function.
- Page 30 The Fig D diagram please refers to “1. Setup the parameters of All IP cameras (For I-View’s IP camera only)” Section Advance setup: Click this icon will enable the detail parameters setting of IP camera. You need to load the Active X if this NVR is activated this process at first time.
- Page 31 Reboot: Click this icon will reboot the IP camera. Setup: Click this icon for detail setting of IP camera (refer to I-View’s IP camera; maybe there are some difference setting diagram when used difference models); you may not need to I.E. Browser for the detail IP camera setting.
- Page 32 :Click this icon to save the video clips from SD card to HDD of your PC. c. Search: Click this icon and the search time period from SD card. The video clips information will list on the table list. You can playback the video clips of SD card without download them.
-
Page 33: Chapter 4. Accessing Ie, Chrome, Safari And Firefox Browser
Chapter 4. Accessing IE, Chrome, Safari and Firefox Browser You can use your new Network IP Camera by its web user interface via IE, Chrome, Safari and Firefox. You must know the IP address of IP Camera before you can connect to it. The IP Camera will use DHCP server on your local network to obtain an IP address automatically by default. -
Page 34: Install Plug-In On Ie, Chrome, Safari And Firefox Browser
If you have several network connections, please disable connections that are not connected to IP camera, otherwise the IP Search Tool.exe program may fail to search IP camera. 4-1. Install Plug-in on IE, Chrome, Safari and Firefox Browser | You can connect to the IP camera by Internet Explorer or other web browsers for remote viewing by entering IP address in address bar. -
Page 35: Using Rtsp Players
For security reason, it will pop up change password message when you log in and pass the checking. Click " Ok" to set up a new password for next time login, press " Cancel" icon to ignore this message. 4-2. Using RTSP Players To view the video streaming media using RTSP players, you can use one of the following players that support RTSP streaming such as Quick Time Player, Real Player, VLC media player... -
Page 36: The Function Description Of Live Window
4-3. The Function Description of Live Window After Plug-in is installed, you should be able to see the live video from IP camera as below. 3 4 5 10 11 Zoom In(Out): Press and drag the left button from top left (bottom right) to bottom right (top left) to zoom in (out), for the motorized Lens. - Page 37 Control Panel function description For Motorized Lens model only. Press “+” for Zoom in, Focus near and enlarge IRIS. Press “-” for Zoom out, Focus far and smaller IRIS. Press “+” to increase the valueof “Brightness /Contract “. Press “-” to decrease the valueof “Brightness /Contract “ Click become to default setting.
- Page 38 Event Type: The icon will be flash when event is triggered. Click this icon will show the event table diagram as below. Show Smart Detection Rule: Check it the setting status of Smart detection will display on the screen. Show Smart Detection Result: Check it the event result of Smart detection will pop up on the screen. : The icon on the top, the function description as below: The icon will change to red color when motion detection is triggered.
-
Page 39: The Function Description Of Setup Window
4-4. The Function Description of Setup Window Click “ Setup “ icon to start setup the parameters of IP camera. You can configure basic IP camera settings like data transfer protocol and data storage folder…etc. Device Information: Information: Click this button to check the current Mac number, Firmware version, model, and also allow you entry the camera name on the “Device name:”... - Page 40 PTZ Setting: Click this button to setup the PTZ setting parameters. Time Setting: Click this button to setup the time clock, NTP and DST time zone. Time setting: Click the Device time section to adjust the Date/Time, then click the “Timing” to finish the time clock adjustment.
- Page 41 Check “ Enable DST” icon and then select the DST period and DST bias time. Save: Check “ Save “ icon to set up the setting parameters. Audio Settings: Click this button to setup the Time stamp and Text OSD position. ...
- Page 42 Display Settings: Click this button to setup the Time stamp and Text OSD position. Name: Check “ Show” icon and entry the device name or location to show the text on the screen. Main/Sub/Third Stream OSD: Choose the size of name front which want to show on the main /Sub/Third stream.
- Page 43 Video Parameters: Click this button to setup Resolution, Frame rate, Bit rate…ect. Day & Night Mode: Mode: There are Auto/External trigger/Color/B &W modes. Auto mode: Switch color and B&W video that detects by the image sensor. External Trigger: Switch color and B&W video that detects by the IR sensor. Color: Select this model the video always keep on the color video.
- Page 44 WDR: There are Off/ Low/ Mid/ High modes selectable. The default setting is off. 3DNR: There are Low/ Mid/ Mid High/High modes selectable. The default setting is Low. Sharpness: Setup the sharpness of video color, the high value will get more sharpness color. ...
- Page 45 Off: Select the Off mode; the IR LED will be turned off. Save : Click the Save icon to setup the parameters. ROI Setting : ROI (Region of Interest) encoding is used to enhance the quality of images which are specified in advance.
- Page 46 1. Check ”Enable” and select the value of sensitivity. The high value will get more sensitivity. 2. Setup the date from drop of week section (Default whole week), and select the time period. You can select multi period per day. Repeat the above process to setup another date. 3.
- Page 47 for each camera. Click “Clear” bottom to clear the current detective areas. 4. Specify the notify method (Such as Trigger alarm output, move PTZ camera position, notify via email) when an event occur. 5. Click Save icon to store the setting. ...
- Page 48 Target Count: Click this button to setup Target count function. Enable: Enable or disable the target counting function. Arming Schedule: Arm schedule of enable Target count. Check/Uncheck from Monday to Sunday, each date can has its own trigger period. ...
- Page 49 Interval: Set the counting time interval, when it is more than the time interval, the flow counter will reset and enter into next counting period automatically. The maximum is 3600 seconds; 0= Ignore. Threshold: Set the upper limit value for target counting, the alarm will be triggered automatically when the value is more than the setting.
- Page 50 Object Left/Lost: Click this button to setup object left and object lost detection function. Enable: Enable or disable the object left and object lost detection function. Arming Schedule: Arm schedule of enable object left and object lost detection. Check/Uncheck from Monday to Sunday, each date can has its own trigger period.
- Page 51 automatically when the value is more than the setting. Email: Check “Email” and once the event triggers that it will send Email to setting email address. Alarm Output: Check “Alarm output” and once the event triggers, the camera will linkage to alarm output.
- Page 52 Clear: Click Clear to delete all detection regions Detection Area: To add new Detection Area (Max. 4 regions) and each line can setup individual corresponding parameters. Detection Type: There are “Target Entry”, “Target Lave”, “ Target Enter/Leave” and “Target Loiter” modes, and choose one for the detection type.
- Page 53 Audio Exception: Click this button to setup Audio exception detection. Enable: Enable or disable the function of audio exception detection. Audio Exception: There are 4 audio exception detection- Baby cry, Gunshots, Screaming and Explosions on these section. Each audio has 4 levels (Off/Low/Mid/High). The system will be triggered when detect these 4 kinds audio.
- Page 54 Line Crossing: Click this button to setup triple wire detection function. Enable: Enable or disable the line cross detection function. Arming Schedule: Arm schedule of enable area detection. Check/Uncheck from Monday to Sunday, each date can has its own trigger period. ...
- Page 55 Alarm Output: Check “Alarm output” and once the event triggers, the camera will linkage to alarm output. PTZ: Check “PTZ” and once the event triggers, the camera will linkage PTZ camera to move the assign Preset point. Preset: Setup the Preset point for the PTZ camera move to when the event is triggered. ...
- Page 56 ration is smaller than the setting value, the system will ignore the target which motion trigger. 5. Specify the notify method (Such as Trigger alarm output, move PTZ camera position, notify via email) when an event occur. 6. Click Save to change the setting. ...
- Page 57 PTZ: Check “PTZ” and once the event triggers, the camera will linkage PTZ camera to move the assign Preset point. Preset: Setup the Preset point for the PTZ camera move to when the event is triggered. Save: Click “Save” icon to store the setting. ...
- Page 58 7. Check “ FullJPEG “ icon will snapshot the best quality. 8. Face Quality Threshold: Setup the value threshold of face detection, less the setting value will ignore the image. 9. Capture Quality: Setup the value threshold of snapshot image quality, less the setting value will get poor image quality, but file size will be less.
- Page 59 2. Enter the Static IP, Subnet mask, Default router, and Primary DNS provided by your ISP Subnet mask: This is used to determine if the destination is in the same subnet The default value is “255.255.255.0”. 3. Configure the NIC settings, including the IPv4 (IPv6) Address, IPv4(IPv6) Subnet Mask and IPv4(IPv6) Default Gateway.
- Page 60 real-time stream, it needs to verify the user name and password. RTMP Port: Use domain name to access and login device need mapping RTMP, The default port is1935. Video Plan: Click this button to setup the recording schedule for the deference event. ...
- Page 61 Management Platform: Click this button to setup Server program. This function for the System Integrator only. AntsWebServer: Enable this program for the Internet Browser viewing. Fseye: Enable this program for the App of Mobile phone or Pad remote access. ...
- Page 62 the stream at the same time by requesting a copy from the multicast group address Therefore, enabling multicast can effectively save Internet bandwidth. The ports can be changed to values between 1025 and 65535. The multicast RTP port must be an even number and the multicast RTCP port number is the multicast RTP port number plus one, and thus is always odd.
- Page 63 4. Entry the standby domain which you had been applied. 5. Click “Save” icon to complete the parameters settings. 6. You can enable/disable the DDNS from the” Status” section. UPnP Settings: Click this button to setup UPuP function.. 1. Click “ Add “ icon to setp UPnP function. . 2.
- Page 64 Enable UPnP port forwarding: To access the Network Camera from the Internet, select this option to allow the Network Camera to open ports on the router automatically so that video streams can be sent out from a LAN. To utilize of this feature, make sure that your router supports UPnP and it is activate.
- Page 65 FTP Settings: Click this button to setup the FTP server which you want to save the video clips, Email and snapshot file. Alarm Input: Click this button to setup the alarm input parameters.
- Page 66 Enable: Check “ Handle” icon to enable the alarm input function. Alarm input: This IP camera support 2 alarm input ports. Select the alarm input port. Alarm in name: You can define the alarm input name or location. ...
- Page 67 Exception Settings: Click this button to setup the alarm output trigger of exception event. Exception Type: There are Network Discounted/ IP Address Conflict/ Illegal Access/ HDD Full/HDD (SD) Error, there are 5 exception types. Alarm Output: Entry the value alarm output trigger period. The alarm output will keep on sending the signal of each trigger.
- Page 68 System Update: Click this button to update the newest Firmware. You can visit www.i-view.com.tw to find put the newest Firmware when needed. File: Click “ Browse” icon to select the new Firmware file. Please save the Firmware at the C:\ or E:\ path directory to avoid the update failed.
- Page 69 Restore: Click this button to restore the parameters setting. . Export Config: Export and store the existing configuration. Import Config: Restore the configuration to the IP camera. Restore: Restore the parameters as default setting, choose the difference items to back to default. ...
- Page 70 Developer: This section for the software developer or system integrator use only. The detail information please contact to i-View Communication Inc. Support@i-view.com.tw...
-
Page 71: The Function Description Of File Window
4-5. The Function Description of File Window Click “ File “ Section to playback the video clips or snapshot file of IP camera from the SD card or HDD of PC. The File Management interface as shown in the follow figure. Entry the specify period and then click “... -
Page 72: The Function Description Of Log Window
Playback function description Play: Click button to playback the video clip. Stop: Click button to stop the playback the video clip. Decrease speed – Decrease the speed of playback. Increase speed – Increase the speed of playback. Copy video clip – Copy current video clip to a specified location for archiving or distribution. Snapshot –... -
Page 73: Chapter 5. Troubleshooting
Chapter 5. Troubleshooting Before you send this IP Camera back to your dealer when you found this IP Camera is not working properly, please checks the table as below to save your time. Problem description Possible solution(s) Can’t connect to IP Camera ...
Need help?
Do you have a question about the ANYCAM DM-2MIPA 04 Series and is the answer not in the manual?
Questions and answers