Sign In
Upload
Download
Table of Contents
Contents
Add to my manuals
Delete from my manuals
Share
URL of this page:
HTML Link:
Bookmark this page
Add
Manual will be automatically added to "My Manuals"
Print this page
×
Bookmark added
×
Added to my manuals
Manuals
Brands
New Holland Manuals
Farm Equipment
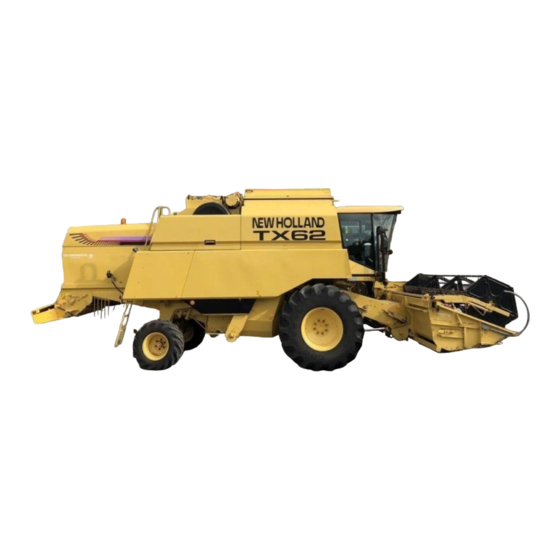
TX62
Operator's manual
New Holland TX62 Operator's Manual
Hide thumbs
Also See for TX62
:
Assembly instruction manual
(10 pages)
1
2
3
4
5
6
7
8
9
10
11
12
13
14
15
16
17
18
19
20
21
22
23
24
25
26
27
28
29
30
31
32
33
34
35
36
37
38
39
40
41
42
43
44
45
46
47
48
49
50
51
52
53
54
55
56
57
58
59
60
61
62
63
64
65
66
67
68
69
70
71
72
73
74
75
76
77
78
79
80
81
82
83
84
85
86
87
88
89
90
91
92
93
94
95
96
97
98
99
100
101
102
103
104
105
106
107
108
109
110
111
112
113
114
115
116
117
118
119
120
121
122
123
124
125
126
127
128
129
130
131
132
133
134
135
136
137
138
139
140
141
142
143
144
145
146
147
148
149
150
151
152
153
154
155
156
157
158
159
160
161
162
163
164
165
166
167
168
169
170
171
172
173
174
175
176
177
178
179
180
181
182
183
184
185
186
187
188
189
190
191
192
193
194
195
196
197
198
199
200
201
202
203
204
205
206
207
208
209
210
211
212
213
214
215
216
217
218
219
220
221
222
223
224
225
226
227
228
229
230
231
232
233
234
235
236
237
238
239
240
241
242
243
244
245
246
247
248
249
250
251
252
253
254
255
256
257
258
259
260
261
262
263
264
265
266
267
268
269
270
271
272
273
274
275
276
277
278
279
280
281
282
283
284
285
286
287
288
289
290
291
292
293
294
295
296
297
298
299
300
301
302
303
304
305
306
307
308
309
310
311
312
313
314
315
316
317
318
319
320
321
322
323
324
325
326
327
328
329
330
331
332
333
334
335
336
337
338
339
340
341
342
343
344
345
346
347
348
349
350
351
352
353
354
355
356
357
358
359
360
361
362
363
364
365
366
367
368
369
370
371
372
373
374
375
376
Table Of Contents
377
page
of
377
Go
/
377
Contents
Table of Contents
Troubleshooting
Bookmarks
Table of Contents
Table of Contents
Section 1 - Introduction
To the Purchaser
Product Identification
Header Information
Important Ecological Considerations
Safety Information
Battery Warning
Safety Decals
Protective Devices
Header Standard Safety Latch
Straw Elevator Additional Support
Safety Guard for Straw Elevator
Signal Plates
Straw Chopper Spreader Chute
Fire Extinguisher
Driving Downhill
Intended Use
Access Protection to Engine Compartment
Airborne Noise Emission
Electromagnetic Compatibility (EMC)
Safety Requirements for Fluid Power Systems and Components - Hydraulics
Vibration Level Information
Legal Obligations
Section 2 - Operation
Machine Function
Feeding
Threshing
Separation
Cleaning
Storage
Controls and Instruments
Emergency Exit
Steeing Column and Control Pedals
Arm Rest Module
Instrument Panel
Operating Lights Tumbler Switch Summary
Speed Control Module and Header Lateral Float Indicator
Console Module
Cab Roof Instruments
Operator Seat and Surroundings
Air-Suspended Seat
Fuses and Relays
Access to Machine Components
Access to Operator’s Platform
Before Driving the Combine
Starting the Engine
Stopping the Engine
Driving the Combine
Emergency and Parking Brake
Gearshifting System
Self-Diagnostics
Message/Error Report
Header Attachment
Detaching the Header from the Combine
Towing the Combine
Wheels and Tyres
Tyre Pressure
Grease Fittings and Lubrication Intervals
Section 3 - Lubrication
Oil Level
Oil Change
Gearbox Capacity
Oil Specification
Fuel Sulphur Content
Recommended Oil and Filter Change Intervals
Engine Sump and Filter Capacity
Chains
Threaded Rods
Pivot Points
Brake Fluid Level
Brake Fluid Change
Oil Reservoir
Oil and Oil Filter Change
Oil Capacity
Tracks Lubrication
Lubricant Specification
Lubrication Schedule
Before Starting Operation
Section 4 - Field Operation
General Information
Header Height Controls
Operation Modes
Transport Operation
Compensation Operation
Stubble Height Operation
Autofloat Operation
Flex Header Operation
Header Height Control Calibrations
Calibration of the Ground Level
Calibration of the Maximum Cylinder Pressure
Calibration of the Ground Level through Autofloat Sensors
Autodiagnostics
Error Reports
Header and Straw Elevator Reversing System
Header And/Or Straw Elevator Blockage - Manual Clearing
Reel to Ground Speed Synchronization
Straw Elevator Adjustment
Straw Elevator Bottom Plate
Straw Elevator Intermediate Plate Extension
Straw Elevator Removal
Stone Trap
Grain Pan Access
Antidust Plate
Drum and Concave
Fundamentals of Adjustment
Drum Speed
Drum Blockage
Concave Clearing
Changing the Concave Clearance Mechanically
Drum Speed Reducer
De-Awning Plates
Beater
Drum and Concave Type Use
Adjustable Stripper Plates
Toothed Beater Bars
Multi-Thresh System
Rotary Separator
Straw Flow Beater
Straw Retarding Curtain
Cleaning Shoe
Sieves
Sieve Removal
Types of Sieves Available
Hillside Dividers
Cleaning Fan
Returns System
Grain Tank
Grain Sample Access
Grain Tank Window
Grain Tank Unloading Auger
Grain Tank Cover
Grain Tank Level Sensor
Unloading Tube
Audible Alarm
Shearbolt on the Unloading System
Infoview Monitor
Automatic Engine Shut-Off
Panel Overview
Combine Operation Modes
RPM Mode
Error Reporting System
Calibration Mode
Engine Load Bargraph A/B
Returns Capacity Bargraph
Threshing Drum Speed
Ground, Cleaning Fan or Engine Speed
Concave Clearance
Area Counter Mode
Threshing Drum Hours
Area Count
Bottom Text Line
Memory Mode
Average Area Capacity (Ha/Hour)
Distance
Memorizing Area Counter Results
Memory Screen Bottom Line
Selecting Memory Values
Clearing Memories
Service Mode
Service Intervals
Error Summary
Error Table
Calibration
Access to the Calibration Mode
Select the Correct Language
Chopper: Yes/No
Lat. Float: Yes/No
Cal Lat Float: no
Cal Lat Float: Yes - Set
Right Return: Yes
Units: Metric/Imperial
Maximum Engine RPM XXXX
Cal Engine RPM: no
Be Sure Engine Speed Is Maximum and Press Enter
Display Concave: Yes
Cal Concave
Concave Open and Push Enter
Concave Closed and Push Enter
Automatic Comp: Yes
Cal. Header Speed: no
Header Speed Up: 200
Header Speed Down: 200
Header Speed Fast Down: 200
Cal/Set Complete
Reel Speed Synchro Gain: 95%
Header Width: XXX CM
Calibrate Height: no
Set Maximum Stubble
Set Ground Level
Flex Header Installed: no
Flex Header Sens: X.XXX
Correction Neutral: X.XX
Header Rams
Speed Factor
Is Standard Stubble Height Control Calibrated?: no
Calibrate First the Normal Hader Height Control Cal/Set Complete
Threshing on and Set Max Stubble Height and Push Enter
Threshing on and Set Min Stubble
Execute US Calibration and Enter When Done
Seat Header Height Drive Back Point
Ground Speed Const: XXXX
Return Cap Constant: 200
Calibrate Return: no
Calibrate Return: Yes/Set Threshing On/Set Engine Speed Max
Date and Time
Calibration Schedule
Speed Control Module
Differential Lock
Straw Chopper
Straw Chopper Operation
Access to the Straw Chopper Rotor
Chopper Knives
Counter Knives
Chopping Quality
Chopping Maize
Straw Chopper Clutch
Chaff Spreader
Disengaging and Removing the Spreader
Air Conditioning
Combine Performance Checks
Kill-Stall
Performance Indicators
Grain Tank Sample
Grain Pan/Upper Sieve Distribution
Returns Sample
Grain Loss Measuring Kit
Losses
How to Obtain an Idea on Loss Level
Summary of Machine Settings for Different Crops
Drive Belts and Chains
Section 5 - Adjustments and Maintenance
Header Drive Belt
Straw Elevator and Header Engaging Belt
Unloading System Engaging Belt
Main Engaging Belt
Cleaning Shoe Drive Belt
Eccentric Shaft Drive
Roto-Thresher and Returns Cross
Regurns Auger Drive Chain
Main Drive Belt
Straw Chopper Front Drive Belt
Straw Chopper Rear Drive Belt
Chaff Spreader Drive Belt
Chaff Spreader Discs Drive Belt
Drive Belts and Chains Diagram
Unloading System Drive Chain
Drum Vari-Drive Belt
Checking Variator Adjustment
Beater Drive Belt
Grain Storage Belt
Grain Elevator Drive Chain
Rotary Separator Drive Belt
Cleaning Fan Vari-Drive Belt
Straw Walker Intermediate Shaft Drive Belt
Straw Walker Drive Belt
Cooling System Intermediate Shaft
Cooling Fan Drive Belt
Rotary Dust Screen Drive Belt
Hydraulic Pump Drive Belt
Alternator and Air Conditioner Compressor Drive Belt
Alternator Drive Belt
Air Conditioning Compressor Drive Belt
Returns Auger Drive Chain
Straw Flow Beater Drive Belt
Straw Elevator
Slip Clutch
Threshers Maintenance
Front Face Adjustment
Roto-Threshers
Grain Elevator Maintenance
Concave Adjustment
Chain Tension
Brakes Maintenance and Adjustment
Parking Brake Adjustment
Foot Brakes
Steering Axle
Fixed Steering Axle
Steering Wheel Stops
Steering Ball Joints
Adjustable Steering Axle
Heavy-Duty Adjustable Steering Axle
Rear-Wheel Position
Assembly Position of Steering Arm Assembly
Minimum Track Width Position
Rear-Wheel Driven Steering Axle
Engine Maintenance
Fuel System
Filling the Fuel Tank
Fuel Tank Capacity
Fuel Prefilter/ Water Separator
Fuel Filters
Bleeding the Fuel System
Cooling System Maintenance
Fuel Injection Pump and Injectors
Coolant Level
Coolant Change
Coolant System Capacity
Coolant Specification
Crankcase Breathing System
Advertisement
Quick Links
Download this manual
OPERATOR'S MANUAL
TX62
TX63
TX64 Plus
TX65 Plus
TX66
TX67
TX68
TX68 Plus
Print No. 604.63.021.00
3rd edition
English 09/98
Table of
Contents
Previous
Page
Next
Page
1
2
3
4
5
Advertisement
Table of Contents
Need help?
Do you have a question about the TX62 and is the answer not in the manual?
Ask a question
Questions and answers
Related Manuals for New Holland TX62
Spreader New Holland TX Series Assembly Instruction Manual
Chaffspreader (10 pages)
Farm Equipment New Holland TX63 Operator's Manual
(377 pages)
Farm Equipment New Holland TX64 Plus Operator's Manual
(377 pages)
Farm Equipment New Holland TX65 Plus Operator's Manual
(377 pages)
Farm Equipment New Holland TX67 Operator's Manual
(377 pages)
Farm Equipment New Holland TX68 Plus Operator's Manual
(377 pages)
Farm Equipment New Holland AutoCommand T7.175 Operator's Manual
(15 pages)
Farm Equipment New Holland T7.175 Tier 4B Operator's Manual
(16 pages)
Farm Equipment New Holland T8010 Operator's Manual
(15 pages)
Farm Equipment New Holland TT45A Repair Manual
(10 pages)
Farm Equipment New Holland TL70 Repair Manual
(20 pages)
Farm Equipment New Holland TC5040 Operator's Manual
(358 pages)
Farm Equipment New Holland TC5050 Operator's Manual
(358 pages)
Farm Equipment New Holland TC48DA Repair Manual
(21 pages)
Farm Equipment New Holland T7 AutoCommand Quick Instruction Manual
(16 pages)
Farm Equipment New Holland TC5.80 Service Manual
Combine (61 pages)
This manual is also suitable for:
Tx63
Tx64 plus
Tx65 plus
Tx66
Tx67
Tx68
...
Show all
Tx68 plus
Table of Contents
Save PDF
Print
Rename the bookmark
Delete bookmark?
Delete from my manuals?
Login
Sign In
OR
Sign in with Facebook
Sign in with Google
Upload manual
Upload from disk
Upload from URL


Need help?
Do you have a question about the TX62 and is the answer not in the manual?
Questions and answers