Table of Contents
Advertisement
Quick Links
Directed Digital System
VW02
Firmware Specific Guide
This product is intended for installation by a professional
installer only! Attempts to install this product by a person
other than a trained professional may result in severe
damage to a vehicle's electrical system and components.
© 2016 Directed, Vista, CA
Directed Digital System 2016-11
Advertisement
Table of Contents

Related Manuals for Directed VW02


Summary of Contents for Directed VW02
- Page 1 This product is intended for installation by a professional installer only! Attempts to install this product by a person other than a trained professional may result in severe damage to a vehicle’s electrical system and components. © 2016 Directed, Vista, CA Directed Digital System 2016-11...
-
Page 2: Table Of Contents
Contents Warning! Safety first ........................3 Introduction ............................ 4 Vehicle application guide ......................4 Wiring connections ......................... 5 Main power harness (H1), 12-pin thick gauge connector ............... 5 Auxiliary output harness (H2), 16-pin black connector ..............5 Analog harness (H3), 18-pin white connector ................6 MC501 harness (H4), 8 thick-gauge wires (optional) .............. -
Page 3: Warning! Safety First
This testing should be performed by an authorized Directed dealer in accordance with the Safety Check outlined in this product installation guide. If the vehicle starts in gear, cease remote start operation immediately and consult with the user to fix the problem immediately. -
Page 4: Introduction
Introduction The VW02 firmware for Directed Digital Systems is a complete solution for remote start, security (if applicable) and convenience needs compatible with specific Audi and Volkswagen vehicles. Warning! This module can only be programmed via the web tool, which can be found on www.directechs.com or using the Directechs Mobile application for smartphones. -
Page 5: Wiring Connections
If these outputs are not used by the firmware, they can be configured by the installer when the module is flashed. Note that they are low current and a relay may be necessary. Directed Digital System VW02 © 2016 Directed. All rights reserved. -
Page 6: Analog Harness (H3), 18-Pin White Connector
These connections are only required if the corresponding statuses are not supported by the firmware. See "Vehicle application guide" on page 4 for a list of compatible features. Directed Digital System VW02 © 2016 Directed. All rights reserved. -
Page 7: Immobilizer Interface
Make sure the key will fit, otherwise it is recommended to use a different method. Note: OEM immobilizer receiver is located on the underside of the steering column, where the ignition switch would normally be. Directed Digital System VW02 © 2016 Directed. All rights reserved. -
Page 8: Method 3: Key Wrap For Regular Key
- Make connections to the OEM Immobilizer receiver as shown above. - Test and secure mounted loops before reassembling the vehicle. * When possible use valet key for key wrap, if blade key is used, battery must be removed. Directed Digital System VW02 © 2016 Directed. All rights reserved. -
Page 9: Method 5: Key Wrap For Push-To-Start (Pts)
- Make 4-6 loops and place them around the front of the plastic body of the vehicle’s coded key as shown above. - Make connections to the OEM Immobilizer Receiver as shown above. - Test and secure mounted loops before reassembling the vehicle. Directed Digital System VW02 © 2016 Directed. All rights reserved. -
Page 10: Method 7: Key Wrap For Key Port (Types 5 And 6 Only)
- Make 4-6 loops and place them in between trunk and unlock button of the plastic body of the vehicle's coded key as shown above. - Test and secure mounted loops before reassembling the vehicle. Directed Digital System VW02 © 2016 Directed. All rights reserved. -
Page 11: Installation
Siren The installation of an aftermarket hood pin is only required on vehicles that are not equipped with a factory hood pin. The siren is only compatible with Directed Digital Hybrid Systems. For Key Wrap instructions refer to pages 7-10. -
Page 12: Type 2 - Push-To-Start
Siren The installation of an aftermarket hood pin is only required on vehicles that are not equipped with a factory hood pin. The siren is only compatible with Directed Digital Hybrid Systems. For Key Wrap instructions refer to pages 7-10. -
Page 13: Type 3 - Regular Key
Siren The installation of an aftermarket hood pin is only required on vehicles that are not equipped with a factory hood pin. The siren is only compatible with Directed Digital Hybrid Systems. For Key Wrap instructions refer to pages 7-10. -
Page 14: Type 4 - Regular Key
Siren The installation of an aftermarket hood pin is only required on vehicles that are not equipped with a factory hood pin. The siren is only compatible with Directed Digital Hybrid Systems.. For Key Wrap instructions refer to pages 7-10. -
Page 15: Alternate Clutch Connection For Audi R8 (Type 4)
2x 1Amp Diodes (-) Clutch Output: Dk. Blue: 7 (-) Clutch: (-) Clutch: Green/Gray, Gray/Blue, pin 41 pin 39 Engine Control Module (ECM) located at the front right of the engine compartment Directed Digital System VW02 © 2016 Directed. All rights reserved. -
Page 16: Type 5 - Key Port
(+) 12V The installation of an aftermarket hood pin is only required on vehicles that are not equipped with a factory hood pin. The siren is only compatible with Directed Digital Hybrid Systems.. For Key Wrap instruction refer to pages 7-10. -
Page 17: Type 6- Key Port
Clutch Pedal Switch The installation of an aftermarket hood pin is only required on vehicles that are not equipped with a factory hood pin. The siren is only compatible with Directed Digital Hybrid Systems.. For Key Wrap instructions refer to pages 7-10. -
Page 18: Type 7 - Regular Key
Siren The installation of an aftermarket hood pin is only required on vehicles that are not equipped with a factory hood pin. The siren is only compatible with Directed Digital Hybrid Systems.. For Key Wrap instructions refer to pages 7-10. -
Page 19: Type 8- Push-To-Start
Siren The installation of an aftermarket hood pin is only required on vehicles that are not equipped with a factory hood pin. The siren is only compatible with Directed Digital Hybrid Systems.. For Key Wrap instructions refer to pages 7-10. -
Page 20: Type 9 - Regular Key
The installation of an aftermarket hood pin is only required on vehicles that are not equipped with a factory hood pin. The siren is only compatible with Directed Digital Hybrid Systems. For Key Wrap instructions refer to pages 7-10. -
Page 21: Type 10- Push-To-Start
Siren The installation of an aftermarket hood pin is only required on vehicles that are not equipped with a factory hood pin. The siren is only compatible with Directed Digital Hybrid System. For Key Wrap instructions refer to pages 7-10. -
Page 22: Type 11 - Regular Key
Siren The installation of an aftermarket hood pin is only required on vehicles that are not equipped with a factory hood pin. The siren is only compatible with Directed Digital Hybrid Systems.. For Key Wrap instructions refer to pages 7-10. -
Page 23: Vehicle Wiring Reference Charts
2009 VESCM, Black, (G Plug) pin 11 2010-14 Black/Violet 2010-15 Black/White Installation type 11 Starter Vehicle Years Steering Column - pin 6 Audi 2015-16 Red/Black Volkswagen 2010-14 Red/Black or Red/Brown Directed Digital System VW02 © 2016 Directed. All rights reserved. -
Page 24: Connecting The Module
Manual or automatic transmission selection The yellow loop on the Directed Digital System controls which transmission type the unit is configured for. The state of the loop (uncut or cut) when the main module is powered up will determine which type is selected. -
Page 25: Optional Sensors
Please follow the instructions included with the kit for appropriate installation and programming information. When flashing the Directed Digital System, make sure to pick the remote you will be using. This way the main module will have the necessary firmware to interact with the remote and Control Center (antenna) combination. -
Page 26: Module Programming
Connect all but the white 12-pin harness Connect all the harnesses to the Directed Digital System, EXCEPT the white12-pin main power harness. Must be connected LAST Connect the white12-pin main power harness, and wait until the LED turns &... - Page 27 Connect all but the white 12-pin harness Connect all the harnesses to the Directed Digital System, EXCEPT the white12-pin main power harness. Must be connected LAST Connect the white12-pin main power harness, and wait until the LED turns &...
-
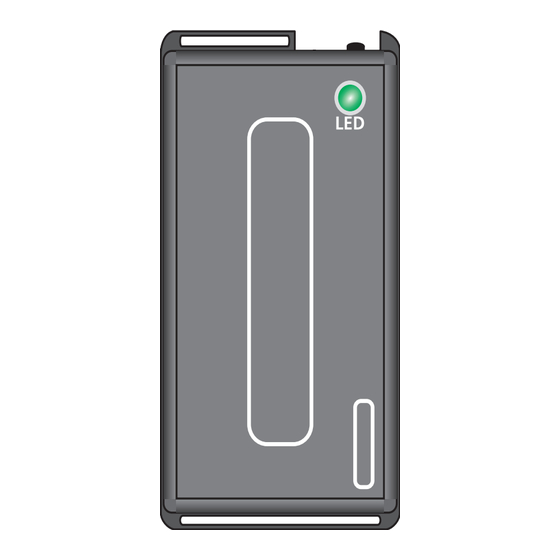
Page 28: Led Diagnostics And Troubleshooting
Used to ensure the module has received the remote GWR (Status) Commands can come from RF, D2D or start message and has enabled the remote start command received. W2W. runtime. Flashes green Directed Digital System VW02 © 2016 Directed. All rights reserved. -
Page 29: Module Reset
After 3 seconds the LED turns ON solid orange. Keep holding the & & programming button until the LED flashes red, then orange slowly. Solid Hold Flashes Release the programming button. The LED turns ON solid red. & Solid Release Directed Digital System VW02 © 2016 Directed. All rights reserved. -
Page 30: Learning The Tach (Not Needed With Virtual Tach)
Important! After successfully learning Virtual Tach, a small minority of vehicle starters may over crank or under crank during remote start. Use the VirtualTach Fine tune feature in the configuration wizard to adjust the starter output time in 50mS increments to compensate for such an occurrence. Directed Digital System VW02 © 2016 Directed. All rights reserved. -
Page 31: Limited Lifetime Consumer Warranty
Directed dealer; the unit will be professionally reinstalled in the vehicle in which it was originally installed by an authorized Directed dealer; and the unit is returned to Directed, shipping prepaid with a legible copy of the bill of sale or other dated proof of purchase bearing the following information: consumer’s name, telephone number and address;... -
Page 32: Quick Reference Guide - Viper, Clifford, Python, Avital & Automate (Regular Key)
Press the Lock button on the transmitter.* The vehicle engine will shut OFF after locking Press Lock on the system. either remote* * Your key may differ from the model shown in the illustrations. Directed Digital System VW02 © 2016 Directed. All rights reserved. - Page 33 Pit stop mode SmartStart compatible This system is compatible with Directed SmartStart 3.0. For a complete list of Stop the vehicle in a safe parking spot and put the supported features, please visit www.mysmartstart.com. gear in Park (P). On manual transmission vehicle,...
- Page 34 Notes Directed Digital System VW02 © 2016 Directed. All rights reserved.
-
Page 35: Quick Reference Guide - Autostart (Regular Key)
Press Lock to shut vehicle Off or Trunk (aftermarket remote doors and enter idle mode. only) to enter idle mode * Your key may differ from the model shown in the illustrations. Directed Digital System VW02 © 2016 Directed. All rights reserved. - Page 36 Idle mode (automatic transmission only) SmartStart compatible This system is compatible with Directed SmartStart 3.0. For a complete list of Stop the vehicle in a safe parking spot and put the gear in supported features, please visit www.mysmartstart.com. gear in Park (P).
- Page 37 Notes Directed Digital System VW02 © 2016 Directed. All rights reserved.
-
Page 38: Quick Reference Guide - Viper, Clifford, Python, Avital & Automate (Smart Key)
Press the Lock button on the transmitter.* The vehicle engine will shut Off after locking Press Lock on either remote* the system. * Your key may differ from the model shown in the illustrations. Directed Digital System VW02 © 2016 Directed. All rights reserved. - Page 39 Pit stop mode SmartStart compatible This system is compatible with Directed SmartStart 3.0. For a complete list of Stop the vehicle in a safe parking spot and put the supported features, please visit www.mysmartstart.com. gear in Park (P). On manual transmission vehicle,...
- Page 40 Notes Directed Digital System VW02 © 2016 Directed. All rights reserved.
-
Page 41: Quick Reference Guide - Autostart (Smart Key)
Press Lock to shut vehicle Off or Trunk (aftermarket remote doors and enter idle mode. only) to enter idle mode * Your key may differ from the model shown in the illustrations. Directed Digital System VW02 © 2016 Directed. All rights reserved. - Page 42 Idle mode (automatic transmission only) SmartStart compatible This system is compatible with Directed SmartStart 3.0. For a complete list of Stop the vehicle in a safe parking spot and put the gear in supported features, please visit www.mysmartstart.com. gear in Park (P).
- Page 43 Notes Directed Digital System VW02 © 2016 Directed. All rights reserved.
Need help?
Do you have a question about the VW02 and is the answer not in the manual?
Questions and answers