Hanseatic HBCO7010PA1 User Manual
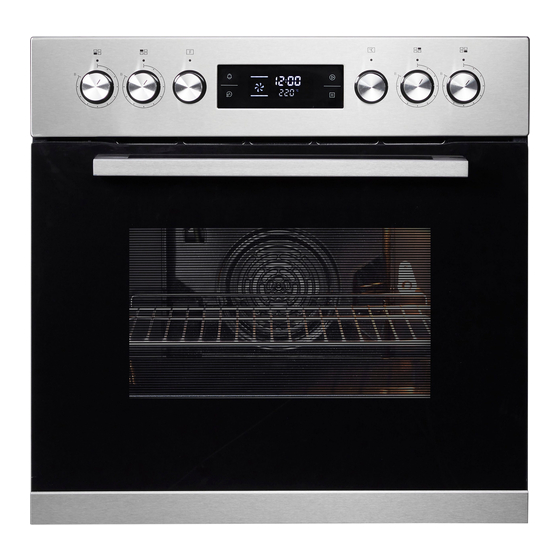
Built-in oven with glass ceramic hob and timer
Hide thumbs
Also See for HBCO7010PA1:
- User manual (92 pages) ,
- User manual (96 pages) ,
- User manual (98 pages)
Table of Contents
Advertisement
Available languages
Available languages
Quick Links
Advertisement
Chapters
Table of Contents

Related Manuals for Hanseatic HBCO7010PA1


Summary of Contents for Hanseatic HBCO7010PA1
- Page 1 HBCO7010PA1 + HC46066CB Gebrauchsanleitung Einbau-Herdset mit Glaskeramik- Anleitung/Version: 199319_DE_20211018 Bestell-Nr.: 20502062 Kochfeld und Zeitschaltuhr Nachdruck, auch aus zugs wei- se, nicht ge stat tet!
-
Page 2: Table Of Contents
Seite DE-2 Inhaltsverzeichnis Inhaltsverzeichnis Der Backofen ....DE-21 Bevor Sie das Gerät benut- Voraussetzungen ....DE-21 zen, le sen Sie bit te zu erst Vorbereitung . -
Page 3: Begriffs- Und Symbolerklärung
Seite DE-3 Begriffs- und Symbolerklärung Netzanschluss – Hinweise für den Entsorgung und Abfallvermeidung . . DE-43 Installateur ..... DE-38 Unser Beitrag zum Schutz der Anschlussbedingungen . -
Page 4: Sicherheit
Seite DE-4 Sicherheit Sicherheit Bestimmungsgemäßer Sicherheitshinweise Gebrauch In diesem Kapitel finden Sie allgemeine Si- cherheitshinweise, die Sie zu Ihrem eigenen Das Herdset ist zum Kochen, Braten, Ba- Schutz und zum Schutz Dritter stets beachten cken, Grillen und Warmhalten von Speisen müssen. - Page 5 Seite DE-5 Sicherheit Risiken für bestimmte Risiken im Umgang mit Personengruppen elektrischen Haushaltsgeräten VORSICHT WARNUNG Gefahren für Kinder und Personen mit Stromschlaggefahr! verringerten physischen, sensorischen Das Berühren spannungsführender Tei- oder mentalen Fähigkeiten (beispiels- le kann zu schweren Verletzungen oder weise teilweise Behinderte, ältere Perso- zum Tod führen.
- Page 6 Seite DE-6 Sicherheit ■ Nie mals versuchen, das de fek te oder ge fahr brin gen! Das gilt auch für das Tren nen vom Stromnetz und den Aus- ver meint lich defekte Gerät selbst zu bau des Altgeräts. re pa rie ren. Sie kön nen sich und spä- ■...
- Page 7 Seite DE-7 Sicherheit Risiken im Umgang mit dem Gerät Verbrennungsgefahr! Während des Gebrauchs wird das Gerät WARNUNG heiß. Die Kochzonen/-fl ächen heizen sich im Be trieb stark auf und sind auch Gesundheitsgefahr! nach dem Ausschalten noch heiß; dies Acrylamid steht im Verdacht, krebser- wird durch die Restwärmeanzeige sig- zeugend zu sein.
- Page 8 Seite DE-8 Sicherheit ■ Keine heißen Töpfe oder Pfannen auf ■ Gegenstände aus Metall, wie z. B. dem Sensorfeld abstellen. Die darun- Messer, Gabeln, Löffel und Deckel, ter befi ndliche Elektronik kann sonst sollten nicht auf der Kochebene ab- beschädigt werden. gelegt werden, da sie heiß...
- Page 9 Seite DE-9 Sicherheit Risiken im Umgang mit Die Kochzonen vollständig abkühlen ■ Glaskeramik-Kochfeldern lassen, bevor Sie mit der Reinigung beginnen. WARNUNG Ausnahme: Zucker- oder stärkehal- tige Verunreinigungen, Kunststoff Stromschlaggefahr! oder Alu-Folie sofort mit einem schar- Berühren spannungsführender fen, handelsüblichen Schaber von der Teile kann zu schweren Verletzungen noch heißen Glaskeramik entfernen.
- Page 10 Seite DE-10 Sicherheit oder Kochmulden abdeckungen kann Schweres Geschirr nicht über das ■ zu Unfällen führen. Kochfeld schieben, die Glaskeramik Das Kochfeld nach dem Kochen im- kann zerkratzen. Auch wenn kleine ■ mer vollständig ausschalten! Ge gen stän de punktförmig auf das Koch feld treffen, kann die Glaske- Verletzungsgefahr! ramik beschädigt werden.
- Page 11 Seite DE-11 Sicherheit ■ Backofen-Beleuchtung: Bei der pyrolytischen Selbstreinigung – Vor dem Auswechseln der Lampe wird die Antihaftbeschichtung von Ble- chen und Formen zerstört, und es kön- sicherstellen, dass das Gerät aus- nen giftige Gase entstehen. geschaltet ist, um einen möglichen ■...
- Page 12 Seite DE-12 Sicherheit ■ Temperaturempfi ndliche, brennbare ■ Die Türdichtungen sind empfi ndlich oder feuergefährliche Gegenstände gegen Öl und Fett – das Gummi wird nicht im Backofen aufbewahren! Bei dadurch porös und spröde. ■ Türdichtungen nicht abnehmen. unbeabsichtigtem Einschalten kön- ■...
- Page 13 Seite DE-13 Sicherheit Risiken bei Backofenbetrieb mit ■ Den Backofen nicht am Türgriff an- Zeitschaltuhr heben! Dieser ist nicht dafür gedacht, das hohe Gewicht des Geräts zu tra- VORSICHT gen. Brandgefahr! Beschädigungsgefahr! ■ Vor dem Start des Zeitschaltuhrbe- Während der Pyrolyse dürfen nur py- triebs alle Haushaltsangehörigen in- rolysefeste Gegenstände im Garraum formieren, damit nie mand etwas in...
-
Page 14: Bedienelemente Und Geräteteile
Seite DE-14 Bedienelemente und Geräteteile Bedienelemente und Geräteteile Bedienblende (9) (10) (11) (12) (13) (14) Temperaturregler Kochzone hinten links (10) Temperaturregler Kochzone vorne links (11) Kontroll-Leuchte für die linken (21) (18) (15) Kochzonen (12) Kontroll-Leuchte für die rechten Kochzonen (13) Temperaturregler Kochzone vorne rechts (14) -
Page 15: Das Kochfeld Nutzen
Seite DE-15 Das Kochfeld nutzen Das Kochfeld nutzen Voraussetzungen VORSICHT – Sie haben das Kapitel „Sicherheit“ am An- Verletzungsgefahr! fang dieser Anleitung gelesen. Metallische Gegenstände wie Messer, – Das Gerät ist angeschlossen, wie im Kapi- Gabeln, Löffel und Deckel können heiß tel „Einbau des Kochfelds“... -
Page 16: Versenkbare Schalter
Seite DE-16 Das Kochfeld nutzen Nicht verwenden sollten Sie: – eingedrückte oder ausgebeulte Töpfe. – Töpfe mit rauem Boden. – Töpfe mit gewölbtem Boden. – beschichtetes Kochgeschirr, das innen zer- kratzt ist. Versenkbare Schalter Verwenden Sie am besten Elektrogeschirr Zum Schutz vor heißen Dämpfen während –... -
Page 17: Kochzonen Und Regler
Seite DE-17 Das Kochfeld nutzen Kochzonen und Regler Zweikreis- und Bräterzone bedienen (9) (10) (13) (14) HINWEIS Beschädigungsgefahr! Die Regler (10) und (14) zum Einschal- ten nur im Uhrzeigersinn, zum Ausschal- (22) (24) ten gegen den Uhrzeigersinn drehen. Nie mit Gewalt über das Doppelzo- nen-Symbol hinwegdrehen. -
Page 18: Die Kontrollleuchten
Seite DE-18 Das Kochfeld nutzen Die Kontrollleuchten heizen ca. 50 °C erreicht hat. Nach dem Ausschalten leuchtet sie weiter, solange die Kochzone noch heiß ist. So werden Sie vor (11) (12) möglichen Verbrennungen gewarnt und Sie wissen, dass Sie noch Restwärme nutzen können. - Page 19 Seite DE-19 Das Kochfeld nutzen – Lassen Sie beim Kochen möglichst immer den Deckel auf dem Topf. Flüssigkeiten werden mit Deckel schneller zum Kochen gebracht als ohne. – Verwenden Sie nur hoch- und neuwertige Töpfe und Pfannen. Sie liegen plan auf dem Kochfeld auf und haben dadurch eine bes- sere Energieleitfähigkeit als Kochgeschirr mit verzogenem oder verbeultem Boden...
-
Page 20: Kochfeld Reinigen
Seite DE-20 Kochfeld reinigen Kochfeld reinigen Feste, eingebrannte VORSICHT! Verschmutzungen Verbrennungsgefahr! Unsachgemäße Reinigung kann zu Ver- brennungen führen. ■ Die Kochzonen vor dem Reinigen voll- ständig abkühlen lassen. Ausnahme: Sie wollen zucker- oder stärkehaltige Speisereste, Kunststoffe oder Alufoli- en entfernen (siehe weiter unten). •... -
Page 21: Der Backofen
Seite DE-21 Der Backofen Der Backofen Voraussetzungen Richtiger Umgang mit dem Ofen – Sie haben das Kapitel „Sicherheit“ am An- fang dieser Anleitung gelesen. – Das Gerät ist angeschlossen, wie im Kapi- VORSICHT! tel „Einbau des Kochfelds“ ab Seite DE-35 Brandgefahr! beschrieben. -
Page 22: Gitterrost, Backblech Und Fettpfanne
Seite DE-22 Der Backofen Gitterrost, Backblech und Backblechträger mit Fettpfanne Teleskopschienen (29) (28) An den Seitenwänden des Garraums befinden sich die Backblechträger (29) mit den auszieh- baren Teleskopschienen (28). Damit lassen sich die Backbleche bequemer herausziehen, z. B. um einen Braten zu begießen. Sie können die Backblechträger mitsamt der Teleskopschienen abnehmen, wenn Sie –... -
Page 23: Wählen
Seite DE-23 Der Backofen Funktionen / Beheizungsarten wählen Standard- Symbol Bedeutung Einstellung Garraum-Beleuchtung: Nur der Garraum ist beleuchtet. Heizung – und Gebläse bleiben ausgeschaltet. Auftauen: Hier wird der Garraum lediglich von unbeheizter Luft – durchströmt. Unterhitze: Die Hitze wird nur unten erzeugt. Das Gebläse ist ausgeschaltet. -
Page 24: Signaltöne
Seite DE-24 Der Backofen Signaltöne (21) (18) (16) (20) (16) 88:88 3. Gardauer ändern: Drehen Sie den Regler (21), bis das Display (18) die gewünschte (21) (19) (17) (15) Gardauer anzeigt ( 0: 0 1 9: 0 0 4. Um die angezeigte Gardauer zu bestäti- Wenn Sie einen der Regler (15) bzw. -
Page 25: Besonderheiten Bei Der Funk Tion „Garraumbeleuch Tung
Seite DE-25 Der Backofen ■ Das Gefriergut frühzeitig aus dem Besonderheiten bei der Funk- Gefrierfach nehmen und abgedeckt tion „Garraumbeleuch tung“ im Kühlschrank auftauen lassen. Die Im Gegensatz zu den meisten anderen Pro- Auf tau fl üs sig keit muss dabei abfl ie- grammen können Sie hier keine Gardauer ßen können, da sich sonst schädliche oder Gartemperatur einstellen. -
Page 26: Besonderheiten Beim Ansetzen Von Hefeteig
Seite DE-26 Der Backofen Besonderheiten beim Kindersicherung Ansetzen von Hefeteig Ihr Backofen ist mit einer Kindersicherung ausgestattet, die vor unbefugtem oder verse- HINWEIS hentlichem Ein-/Ausschalten oder dem Verän- dern der Einstellungen schützt. Aufgestaute Hitze kann die Emaille des Back ofens beschädigen. ■... -
Page 27: Backofen Reinigen
Seite DE-27 Backofen reinigen Backofen reinigen Gehäuseoberflächen reinigen VORSICHT! – Reinigen Sie die Oberflächen nach dem Verbrennungsgefahr! Abkühlen gründ lich mit warmem Spülwas- ■ Den Backofen vollständig abkühlen ser oder All zweck rei ni ger. lassen, bevor Sie ihn reinigen. –... -
Page 28: Pyrolytische Selbstreinigung
Seite DE-28 Backofen reinigen Pyrolytische Selbstreinigung Während der pyrolytischen Selbstreini- gung ist die Backofentür verriegelt. Die Verriegelung löst sich erst wieder von VORSICHT selbst, wenn das Geräteinnere ausrei- Verbrennungsgefahr! chend gekühlt ist. Während der pyrolytischen Selbstreini- ■ Niemals versuchen, die Backofentür gung wird das Gerät auch außen sehr während des Pyrolysevorgangs oder heiß. -
Page 29: Backblechträger Und Teleskopschienen Reinigen
Seite DE-29 Backofen reinigen Pyrolyse unterbrechen/vorzeitig 3. Entfernen Sie grobe Verschmutzungen aus dem Garraum. beenden 4. Schließen Sie die Garraumtür. Wie Sie den vorgehen müssen, hängt davon Anderenfalls wird der Vorgang nicht starten ab, wie stark der Garraum bereits aufgeheizt und das Display anzeigen. - Page 30 Seite DE-30 Backofen reinigen Um die Backofentür und alle Bereiche des Garraums bequem reinigen zu können, ist die Back ofentür aushängbar. Back ofentür aushängen 1. Öffnen Sie die Back ofentür ganz. 2. Ziehen Sie den Backblechträger unten ca. 45° von der Wand ab, so dass sie ihn entnehmen können.
-
Page 31: Leuchtmittel Der Backofen- Beleuchtung Auswechseln
Seite DE-31 Backofen reinigen Back ofentür einhängen Als Backofenbeleuchtung benötigen Sie ein 1. Halten Sie die Back ofentür mit bei den hitzefestes Back ofen-Leuchtmitttel vom Typ Händen in Schräg la ge. 220–240 V~, 25 W, G9, T 300 °C. 2. Haken Sie die Scharniere in die Öffnun- 1. -
Page 32: Die Zeitschaltuhr
Seite DE-32 Die Zeitschaltuhr Die Zeitschaltuhr Uhrzeit einstellen Startzeit einstellen Bei Erstinbetriebnahme oder nach Stromaus- Wenn der Garvorgang nicht sofort, sondern fall leuchtet im Display . Die Uhrzeit muss zu einer bestimmten Uhrzeit beginnen soll, 0: 0 0 eingestellt werden. können Sie eine Startzeit einstellen, Ausnah- men: Funktionen Voraussetzung: Die Uhrzeit ist eingestellt. -
Page 33: Countdown-Timer/Kurzzeitwecker
Seite DE-33 Die Zeitschaltuhr Countdown-Timer/ Kurzzeitwecker Ihr Backofen kann Sie daran erinnern, den Garvorgang zu starten, oder Ihnen mitteilen, wenn Ihre Eier fertig gekocht sind. Hierzu geben Sie einen Zeitraum von 0: 0 1 9: 5 9 Stunden ein. Nach Ablauf des Zeitraums hö- ren Sie 10 Signaltöne. -
Page 34: Lieferung
Seite DE-34 Lieferung Lieferung Lieferumfang (1) 1× Glaskeramik-Kochfeld (2) 1× Backofen (3) 1× Gitterrost (4) 1× Backblech (5) 1× Fettpfanne (6) 4× Klammer zur Befestigung des Glaskeramik-Kochfelds an einer Arbeitsplatte (7) 4× Schraube zur Klammerbefestigung (8) 2× Schraube zur Backofenbefestigung 1×... -
Page 35: Einbau Des Kochfelds
Seite DE-35 Einbau des Kochfelds Einbau des Kochfelds Transportieren putz do se sein oder außer halb des Ein bau- rau mes lie gen. HINWEIS • Kochfeld und Backofen werden durch den fest verbauten Kabelstrang verbunden; Beschädigungsgefahr! sie müssen deshalb direkt überein an der ■... - Page 36 Seite DE-36 Lieferung Kochfeld vorbereiten und 1. Sägen Sie mit einer Stichsäge den Aus- schnitt für das Kochfeld mit folgenden Ma- einsetzen ßen in die Arbeitsplatte. HINWEIS 560 bis 564 Bruchgefahr! ■ Kochfeld nicht auf den Glas ke ra- mik-Rand auf set zen! 1.
- Page 37 Seite DE-37 Lieferung Dicke Arbeitsplatte 4. Schrauben Sie die 4 Klammern je nach Dicke der Arbeitsplatte von unten in das Kochfeld. So verhindern Sie ein Verrut- schen des Kochfelds.
-
Page 38: Netzanschluss - Hinweise Für Den Installateur
Seite DE-38 Netzanschluss – Hinweise für den Installateur Netzanschluss – Hinweise für den Installateur Netzleitung anschließen WARNUNG Die Klemmleiste und die Anschlusspläne be- Stromschlag- / Brandgefahr! finden sich hinten auf der Oberseite. Unsachgemäßer elektrischer Anschluss 1. Schalten Sie vor dem Zugang zu den An- kann zu elektrischem Schlag und/oder schlussklemmen alle Versorgungsstrom- kreise aus und sichern Sie diese gegen... -
Page 39: Einbau Des Backofens
Seite DE-39 Einbau des Backofens Einbau des Backofens Beachten Sie in jedem Fall die folgenden Bedingungen: ➍ – Bauen Sie den Backofen nicht direkt neben einem Kühl- oder Gefrierschrank ein . Durch die Wärme abgabe steigt dessen En er gie- ver brauch unnötig. -
Page 40: Vor Dem Ersten Gebrauch
Seite DE-40 Einbau des Backofens Vor dem ersten Gebrauch 1. Heben Sie den Backofen an den seitlichen Tragemulden an und schieben Sie ihn 1. Entfernen Sie alle Transportsicherungen so weit in den Einbauschrank, dass die (Pappstreifen etc.) und alle Klebestreifen Anschlüsse und die Erdungsschraube für aus dem Backofen. -
Page 41: Fehlersuchtabelle
Seite DE-41 Fehlersuchtabelle Fehlersuchtabelle Bei allen elektrischen Geräten können Störungen auf tre ten. Da bei muss es sich nicht um ei nen Defekt am Gerät handeln. Prüfen Sie des halb bitte an hand der Ta bel le, ob Sie die Störung be sei- ti gen können. -
Page 42: Service
Durch Nichtbeachtung dieser Anleitung ver ur sach te Schäden können leider nicht anerkannt werden. Damit wir Ihnen schnell helfen können, nennen Sie uns bitte: Gerätebezeichnung Bestellnummer hanseatic Einbau-Herdset mit Glaskeramik-Kochfeld und Zeitschaltuhr 20502062 HBCO7010PA1 + HC46066CB Beratung, Bestellung und Reparaturen und Ersatzteile Reklamation Durch die Reparatur defekter Geräte können... -
Page 43: Entsorgung Und Abfallvermeidung
Seite DE-43 Entsorgung und Abfallvermeidung Entsorgung und Abfallvermeidung Unser Beitrag zum Schutz der Elektro-Altgeräte Ozonschicht umweltgerecht entsorgen Elektrogeräte enthalten Schadstoffe Unsere Verpackungen wer den aus und wertvolle Ressourcen. um welt freund li chen, wie der ver wert- ba ren Materialien hergestellt: Jeder Verbraucher ist deshalb ge- –... -
Page 44: Tabelle Prüfgerichte
Seite DE-44 Tabelle Prüfgerichte Tabelle Prüfgerichte Diese Gerichte wurden gemäß den Normen DIN 44547 und EN 60350 zubereitet. Anzahl Einschub - Temperatur Gardauer Speise Beheizungsart Bleche höhe in °C in Min. Ober-/Unterhitze 180–200 10–20 Spritzgebäck Umluft mit 170–180 10–20 Ober- und Unterhitze Ober- /Unterhitze 170–180 25–35... -
Page 45: Produktdatenblatt Gemäß Vo (Eu) Nr. 65/2014
Seite DE-45 Produktdatenblatt gemäß VO (EU) Nr. 65/2014 Produktdatenblatt gemäß VO (EU) Nr. 65/2014 Warenzeichen HANSEATIC Modellkennung HBCO7010PA1+HC46066CB Energieeffizienzindex 77,4 Energieeffizienzklasse auf einer Skala A+++ (höchste Effizienz) bis D (geringste Effizienz) Energieverbrauch konventionellen Modus 0,87 kWh/Zyklus Energieverbrauch Umluft-Modus 0,65 kWh/Zyklus Anzahl der Garräume... -
Page 46: Produktinformation Gemäß Vo (Eu) Nr. 66/2014
Seite DE-46 Produktinformation gemäß VO (EU) Nr. 66/2014 Produktinformation gemäß VO (EU) Nr. 66/2014 Modellkennung HBCO7010PA1+HC46066CB Art des Backofens einbaufähig Masse des Gerätes 40,2 kg Anzahl der Garräume Wärmequelle elektrisch Volumen 70 l Energieverbrauch im konventionellen Modus 0,87 kWh/Zyklus Energieverbrauch im Umluftmodus... - Page 47 Seite DE-47 Produktinformation gemäß VO (EU) Nr. 66/2014 Modellkennung HBCO7010PA1+HC46066CB Art der Kochmulde elektrische Kochmulde Anzahl der Kochzonen Heiztechnik Strahlungskochzonen Maße Kochzone vorne links Ø 14,0 / 22,5 cm Kochzone hinten links Ø 16,0 cm Kochzone hinten rechts L 26,5 cm, W 16,0 cm Kochzone vorne rechts Ø...
-
Page 48: Technische Daten
Technische Daten Technische Daten Bestellnummer 20502062 Gerätebezeichnung Einbau-Herdset mit Glaskeramik-Kochfeld Modell HBCO7010PA1+HC46066CB Bemessungsspannung 220 - 240 V ~ / 380- 415 V 3N ~ Frequenz 50 Hz / 60 Hz Bemessungsaufnahme Backofen 3200 W Gerätemaße Backofen (H x B x T) 595 mm x 595 mm x 575 mm Nischenmaße Backofen (H x B x T) - Page 49 HBCO7010PA1 + HC46066CB User manual Built-in oven with glass ceramic hob Manual/version: 199319_EN_20211018 Article no.: 20502062 and timer Reproduction, even of excerpts, is not permitted!
- Page 50 Page EN-2 Table of contents Table of contents The oven ..... . EN-20 Please read through the safety Requirements ....EN-20 instructions and user manual Preparation .
-
Page 51: Explanation Of Terms And Symbols
Page EN-3 Explanation of terms and symbols Connection to the power supply – Disposal and waste prevention ..EN-42 notes for the installer ... . . EN-37 Our contribution to the protection Connection conditions . -
Page 52: Safety
Page EN-4 Safety Safety Intended use Risks to children The oven is designed for cooking, frying, bak- WARNING ing, grilling and keeping food warm. Risk of suffocation! The oven should not be used to defrost raw ■ Do not allow children to play with the meat, poultry or fish. - Page 53 Page EN-5 Safety ■ Do not allow children to play with the tailed information about this can be appliance or have access to the appli- found on the nameplate. ■ Connection to the mains supply may ance if they are unsupervised. ■...
- Page 54 Page EN-6 Safety ■ Mains cord/mains plug: ■ Do not use a steam cleaner to clean – Lay the mains cord so that it does the device. Steam could get through not pose a tripping hazard. cracks into live electrical components –...
- Page 55 Page EN-7 Safety ■ Children less than 8 years of age shall CAUTION be kept away unless continuously su- Fire hazard! pervised. During use the appliance becomes hot. ■ Metallic objects such as knives, forks, The cooking zones/areas get very hot spoons and lids should not be placed during operation.
- Page 56 Page EN-8 Safety Risks when handling the glass ■ Do not place hot pots or pans on the ceramic hob sensor fi eld. Otherwise the electronics underneath may be damaged. WARNING ■ Do not push heavy pans across the Risk of electric shock! hob;...
- Page 57 Page EN-9 Safety ■ Allow the cooking zones to cool com- Risk of injury! pletely before cleaning. This hob has sharp edges. Improper Exception: Remove sugary or star- handling can result in cut injuries. ■ Wear protective gloves when unpa- chy contaminants, plastic or alumi- nium foil from the hot glass ceramic cking and installing the hob.
- Page 58 Page EN-10 Safety Risks associated with using ovens Risk of burns! During use the appliance becomes hot. CAUTION Particular care should be taken to avoid touching heating elements inside the Health hazard! oven. Improper use of this appliance can lead ■...
- Page 59 Page EN-11 Safety Fire hazard! Loose food residue, grease and meat ■ Only ever operate the oven with the juices can ignite during the pyrolytic oven door closed. self-cleaning process. ■ Do not cover cakes or roasts being ■ Remove large bits of food or other cooked in the oven with baking contaminants from the cooking parchment.
- Page 60 Page EN-12 Safety the cooking compartment, the oven During the pyrolytic self-cleaning pro- temperature must not exceed 50°C. cess, the interior of the appliance beco- Be careful when handling cookware mes very hot. ■ Following the pyrolytic self-cleaning – the enamel can be easily scratched. ■...
-
Page 61: Operational Controls And Appliance Parts
Page EN-13 Operational controls and appliance parts Operational controls and appliance parts Control panel (9) (10) (11) (12) (13) (14) Temperature controller for back left cooking zone (10) Temperature controller for front left cooking zone (11) Indicator light for left cooking zones (21) (18) (15) -
Page 62: Using The Hob
Page EN-14 Using the hob Using the hob Requirements CAUTION – You have read the chapter “Safety” at the Risk of injury! beginning of this manual. Metallic objects such as knives, forks, – The appliance is connected, as described in spoons and lids can get hot chapter “Installing the hob”... -
Page 63: The Right Cookware
Page EN-15 Using the hob The right cookware Energy and time-saving pressure – cookers are also well-suited. The relative- NOTICE ly high purchase costs are quickly saved again. Risk of damage! – Steel pots and pans as well as coated and Glass is a poor heat conductor. -
Page 64: Cooking Zones And Dials
Page EN-16 Using the hob Cooking zones and dials Operating the double circle and casserole zone (9) (10) (13) (14) NOTICE Risk of damage! Turn the dials (10) and (14) only clock- wise to switch the cooking zones on and (22) (24) anticlockwise to switch them off. -
Page 65: The Indicator Lights
Page EN-17 Using the hob The indicator lights switched off, the indicator continues to be lit for as long as the cooking zone is hot. It warns you of any possible burning and lets you know (11) (12) that you can still use residual heat to cook. Tips for saving energy and for cooking When at least one cooking zone is turned on,... - Page 66 Page EN-18 Using the hob – Only ever use high-quality, new saucepans and pans. They lie flat on the hob and there- fore conduct energy more easily than cook- ware with a warped or dented base (please note in the chapter “The right cookware”). –...
-
Page 67: Cleaning The Hob
Page EN-19 Cleaning the hob Cleaning the hob Hard, baked-on dirt CAUTION! Risk of burns! Improper handling may lead to burns. ■ Allow the cooking zones to cool com- pletely before cleaning. Exception: Immediately remove sugar or starchy food particles, synthetic materials, or aluminium foil (for further informati- on see below). -
Page 68: The Oven
Page EN-20 The oven The oven Requirements Proper handling of the oven – You have read the chapter “Safety” at the CAUTION! beginning of this manual. – The appliance is connected, as described in Fire hazard! chapter “Installing the hob” from page EN-34. ■... -
Page 69: Oven Rack, Baking Tray And Dripping Pan
Page EN-21 The oven Oven rack, baking tray and You can remove the baking tray guides to- gether with the telescopic oven rails if you dripping pan – need more space in the oven, e.g. when preparing yeast dough, – want to clean the side walls. For instructions, see “Cleaning the cooking compartment”... -
Page 70: Selecting Functions/Heating Modes
Page EN-22 The oven Selecting functions/heating modes Symbol Meaning Default setting Cooking compartment light: Only the cooking compartment is lit. – Heating and fans remain switched off. Defrosting: This merely circulates unheated air within the – cooking compartment. Bottom heat: Heat is only generated below. The fan is switched 60 °C off. -
Page 71: Starting The Cooking Process
Page EN-23 The oven Starting the cooking process (18) (16) (15) The following description applies to all func- tions/heating modes except for 88:88 See below. (21) (18) (16) 5. Adjusting the temperature: Turn the con- troller (15) until the display (18) shows the 88:88 desired temperature. -
Page 72: Special Features Of The "Cooking Compartment Lighting" Function
Page EN-24 The oven Special features of the (21) (18) (16) “cooking compartment lighting” function 88:88 Unlike most other programmes, you cannot set a cooking time or temperature here. 1. Selecting a function: Turn the dial (21) until (21) (18) (16) the display (18) shows the symbol. -
Page 73: Special Preparation Information For Yeast Dough
Page EN-25 The oven Special preparation Child lock information for yeast dough Your oven is equipped with a child lock which protects against the oven being used without NOTICE permission or unintentionally switched on or off or the settings being changed. Pent-up heat can damage the oven’s enamel. -
Page 74: Cleaning The Oven
Page EN-26 Cleaning the oven Cleaning the oven Cleaning the cooking CAUTION! compartment Risk of burns! ■ Allow the oven to cool completely be- – Only switch on the cooking compartment light for cleaning. fore cleaning. – Clean the cooking compartment and bak- ■... -
Page 75: Pyrolytic Self-Cleaning
Page EN-27 Cleaning the oven Pyrolytic self-cleaning The oven door locks during the pyrolytic self-cleaning process. The locking me- chanism will release automatically CAUTION once the interior of the appliance is suf- Risk of burns! fi ciently cooled off. During the pyrolytic self-cleaning pro- ■... -
Page 76: Cleaning Baking Tray Guides And Telescopic Oven Rails
Page EN-28 Cleaning the oven Interrupting/terminating pyrolysis 3. Remove large bits of food or other con- taminants from the cooking compartment. How you interrupt or terminate pyrolysis all 4. Close the cooking chamber door. depends on how much the cooking compart- Otherwise, the process will not start and ment has heated up. - Page 77 Page EN-29 Cleaning the oven You can unhinge the oven door in order to be able to clean the oven door and all areas of the cooking compartment. Removing the oven door from its hinges 1. Open the oven door completely. 2.
-
Page 78: Replacing Oven Lightbulbs
Page EN-30 Cleaning the oven Putting the oven door back on its hinges For the oven lighting, you need a heat-resist- ant oven bulb: type 220–240 V~, 25 W, G9, 1. Hold the oven door at an angle using both T300°C. -
Page 79: The Timer
Page EN-31 The timer The timer Setting the time Setting the start time When starting up the appliance for the first If you don’t want the cooking process to be time or after a power failure, the display will started immediately, but at a certain time, you show . -
Page 80: Countdown Timer
Page EN-32 The timer Countdown timer Your oven can remind you to start cooking, or tell you when your eggs are cooked. To do this, enter a period of hours. After 0: 0 1 9: 5 9 the time has elapsed, you will hear 10 signal tones. -
Page 81: Delivery
Page EN-33 Delivery Delivery Package contents (1) 1× Glass ceramic hob (2) 1× Oven (3) 1× Oven rack (4) 1× Baking tray (5) 1× Dripping pan (6) 4× Bracket for attaching the glass ceramic hob to a worktop (7) 4× Screw for attaching bracket (8) 2×... -
Page 82: Installing The Hob
Page EN-34 Installing the hob Installing the hob Transport • The hob and oven are connected by the permanently installed wiring harness; they NOTICE must therefore be installed in direct align- ment to each other. Risk of damage! ■ If a trolley is used to move the oven, the appliance must be lifted as shown Required materials on the packaging. - Page 83 Page EN-35 Installing the hob Preparing and inserting the hob 1. Use a jigsaw to cut a hole in the worktop for the hob. It must have the following di- mensions. NOTICE Risk of breakage! 560 to 564 ■ Do not place the hob on the glass ceramic edge! 1.
- Page 84 Page EN-36 Installing the hob Thick worktop 4. Depending on the worktop’s thickness, attach the 4 brackets by screwing them to the hob from below. This will prevent the hob from moving.
-
Page 85: Connection To The Power Supply - Notes For The Installer
Page EN-37 Connection to the power supply – notes for the installer Connection to the power supply – notes for the installer Connecting to the mains WARNING The terminal block and connection diagrams Electric shock / fi re hazard! can be found on the rear side of the oven. Improperly installed electrical connec- 1. -
Page 86: Installing The Oven
Page EN-38 Installing the oven Installing the oven The following conditions must be observed: – Do not install the oven directly next to a re- ➍ frigerator or freezer. This will increase its energy consumption unnecessarily due to heat emission. –... -
Page 87: Before First Use
Page EN-39 Installing the oven Before first use back into the built-in cabinet so that the connections and earthing screw for the 1. Remove all transport safety devices (card- hob can still be easily reached. board strips, etc.) and all adhesive strips from the oven. -
Page 88: Troubleshooting Table
Page EN-40 Troubleshooting table Troubleshooting table Malfunctions can occur in all electrical appliances. This does not necessarily mean there is a defect in the appliance. For this reason, please check the tables to see if you can correct the malfunction. WARNING Risk of electric shock in case of improper repair! Never try to repair a defective or suspected defective appliance yourself. -
Page 89: Service
Damage resulting from non-compliance with this manual unfortunately cannot be recognised. In order for us to help you quickly, please tell us: Name of appliance Order number hanseatic built-in oven with glass ceramic hob and timer 20502062 HBCO7010PA1 + HC46066CB Advice, order and complaint Repairs and spare parts Please contact your mail order company’s... -
Page 90: Disposal And Waste Prevention
Page EN-42 Disposal and waste prevention Disposal and waste prevention Our contribution to the Disposing of old electrical protection of the ozone layer devices in an environmentally- friendly manner Our packaging is made of environ- mentally friendly, recyclable materi- Electrical appliances contain harm- als: ful substances as well as valuable –... -
Page 91: Test Report" Table
Page EN-43 “Test report” table “Test report” table These dishes were prepared in accordance with DIN 44547 and EN 60350 standards. Cooking Number Rack Temperature Dish Heating method time in of trays height in °C min. Top/bottom heat 180-200 10-20 Shortbread biscuits Convection with top and 170-180... -
Page 92: Product Fiche Concerning Regulation (Eu) No 65/2014
Product fiche concerning Regulation (EU) No 65/2014 Product fiche concerning Regulation (EU) No 65/2014 Trade mark HANSEATIC Model identifier HBCO7010PA1+HC46066CB Energy efficiency index 77,4 energy efficiency class class on a scale from A+++ (most efficient) to D (least efficient) Energy consumption in conventional mode... -
Page 93: Product Information Concerning Regulation (Eu) No. 66/2014
Page EN-45 Product information concerning Regulation (EU) No. 66/2014 Product information concerning Regulation (EU) No. 66/2014 Model identification HBCO7010PA1+HC46066CB Type of oven built-in Mass of the appliance 40,2 kg Number of cavities Heat source electricity Volume 70 l Energy consumption in conventional mode... - Page 94 Page EN-46 Product information concerning Regulation (EU) No. 66/2014 Model identification HBCO7010PA1+HC46066CB Type of hob electric hob Number of cooking zones Heating technology Radiant cooking zones Dimension Cooking zone front left Ø 14,0 / 22,5 cm Cooking zone back left Ø...
-
Page 95: Technical Specifications
Technical specifications Item number 20502062 Name of appliance Built in oven with glass ceramic hob Modell HBCO7010PA1+HC46066CB Rated voltage 220 - 240 V ~ / 380- 415 V 3N ~ Frequency 50 Hz / 60 Hz Rated power input oven... - Page 96 Page EN-48 Technical specifications...
Need help?
Do you have a question about the HBCO7010PA1 and is the answer not in the manual?
Questions and answers