Table of Contents
Advertisement
Available languages
Available languages
Quick Links
Advertisement
Table of Contents

Related Manuals for Nikon ECLIPSE Si


Summary of Contents for Nikon ECLIPSE Si
- Page 1 M795E 20.11.NC.1 Upright Microscope Instructions...
- Page 2 Thank you for purchasing a Nikon product. This instruction manual is intended for users of the Nikon Upright Microscope ECLIPSE Si RS. No part of this manual may be reproduced or transmitted in any form without prior written permission from Nikon.
-
Page 3: Table Of Contents
Contents Contents Safety Precautions ........................... 3 Meaning of Symbols Used on the Product ..................3 WARNING and CAUTION Symbols ....................3 WARNING ..........................4 CAUTION ..........................6 Sicherheitsvorkehrungen .......................... 7 Consignes de sécurité ..........................12 Precauciones de seguridad ........................17 Precauzioni per la sicurezza ........................ - Page 4 Contents 3.10 Tips for Each Microscopy Method ....................92 3.10.1 Tips for Phase Contrast Microscopy ................92 3.10.2 Tips for Simple Polarizing Microscopy ................93 3.10.3 Tips for Diascopic Fluorescence Microscopy ..............94 3.10.4 Tips for Dark-field Microscopy ..................95 3.11 Combinations of Optical Parts ......................
-
Page 5: Safety Precautions
Safety Precautions Safety Precautions Although this product is designed and manufactured to be completely safe during use, incorrect usage or failure to follow the safety instructions provided may cause personal injury or property damage. To ensure correct usage, read this manual carefully before using the product. Do not discard this manual and keep it handy for easy reference. -
Page 6: Warning
Disassembling this product may result in electric shock or malfunction. Malfunctions and damage due to disassembly will not be warranted. Do not disassemble any part unless instructed to do so in this manual. If you experience problems with the product, contact your nearest Nikon representative. Read the instructions thoroughly. - Page 7 Safety Precautions WARNING ! Photobiological safety This product is designed and manufactured in accordance with the safety standard IEC 62471 “Photobiological safety of lamps and lamp systems.” Illumination near the stage and light from the binocular part of the eyepiece tube or the teaching head, and light from the camera port of the trinocular eyepiece tube are classified into the following risk group.
-
Page 8: Caution
AC adapter. Then, wipe off the liquid with a dry cloth. Ingress of foreign matter may also result in malfunction. If liquids or foreign matter gets in the product, cease use of the product, and contact your nearest Nikon representative. Moving the product •... -
Page 9: Sicherheitsvorkehrungen
Sicherheitsvorkehrungen Sicherheitsvorkehrungen Obwohl dieses Gerät auf einen sicheren Gebrauch ausgelegt ist, kann eine falsche Verwendung oder Nichtbeachtung der Sicherheitshinweise zu Verletzungen oder Sachschäden führen. Lesen Sie vor Gebrauch des Geräts dieses Handbuch aufmerksam durch, um einen korrekten Gebrauch zu gewährleisten. Entsorgen Sie dieses Handbuch nicht. - Page 10 Fehlfunktionen und Schäden durch Zerlegung sind nicht von der Garantie abgedeckt. Bauen Sie keine Teile auseinander, außer Sie werden in diesem Handbuch dazu aufgefordert. Wenden Sie sich bei Problemen mit dem Gerät an einen Nikon-Vertreter in Ihrer Nähe. Lesen Sie sich die Anweisungen gründlich durch.
- Page 11 Sicherheitsvorkehrungen WARNUNG ! Hinweise zur Bedienung der Schieber an der Kondensoreinheit Ein Schieberegler für die Mikroskopie hat zwei festgelegte Positionen. Er ist an der Kondensoreinheit angebracht und dient zum Umschalten der Beobachtungsmethoden oder Vergrößerungen durch Veränderung der eingestellten Position. Das helle Licht kann das Okularrohr erreichen, wenn Sie mittels des Schiebereglers die eingestellte Position ändern.
- Page 12 Sicherheitsvorkehrungen WARNUNG ! Blicken Sie nicht in den Beleuchtungsbereich. Das folgende Warnetikett, auf dem vor dem höchsten Risiko (Risikogruppe 3) für die photobiologische Sicherheit gewarnt wird, ist an der Griffseite des Objekttisches angebracht, um den Benutzer an die folgenden Vorsichtsmaßnahmen zu erinnern. (Die Positionen dieses Etiketts finden Sie in der Abbildung unter „Chapter 1 Nomenclature of Each Part“.) WARNUNG (Risikogruppe 3) Infrarotstrahlung und möglicherweise gefährliches Licht werden vom Kameraanschluss...
- Page 13 Das Eindringen von Fremdstoffen kann ebenfalls zu Fehlfunktionen führen. Falls Flüssigkeiten oder Fremdstoffe in das Gerät gelangen, stellen Sie den Gebrauch des Geräts ein und wenden Sie sich an Ihren Nikon-Ansprechpartner. Bewegen des Geräts • Das Mikroskop verfügt über Haltegriffe.
-
Page 14: Consignes De Sécurité
Consignes de sécurité Consignes de sécurité Ce produit a été conçu et fabriqué de façon à ne présenter aucun risque de sécurité lié à son utilisation. Cependant, une utilisation incorrecte ou le non-respect des consignes de sécurité fournies peut entraîner des blessures ou des dommages matériels. - Page 15 Manipulation de solvants inflammables Les solvants inflammables suivants sont utilisés avec le produit : • Huile d'immersion (huile d'immersion Nikon pour les objectifs à immersion d'huile) • Alcool absolu (alcool éthylique ou alcool méthylique pour le nettoyage des pièces optiques) •...
- Page 16 Consignes de sécurité AVERTISSEMENT ! Notes sur le fonctionnement des curseurs de la partie condenseur Un curseur pour microscope a deux positions définies. Il est fixé à la partie condenseur et utilisé pour changer les méthodes d'observation ou les grossissements en changeant la position définie. La lumière vive peut atteindre le tube d'oculaire lorsque vous déplacez le curseur pour modifier la position définie.
- Page 17 Consignes de sécurité AVERTISSEMENT ! Ne regardez dans la section d'éclairage. L'étiquette d'avertissement suivante indiquant le risque le plus élevé (groupe de risque 3) pour la sécurité photobiologique est apposée sur le côté poignée de la platine afin de rappeler à l'utilisateur les précautions suivantes.
- Page 18 La pénétration de corps étrangers peut également entraîner un dysfonctionnement. Si des liquides ou des corps étrangers pénètrent dans le produit, cessez d'utiliser le produit et contactez votre représentant Nikon le plus proche. Déplacement du produit • Le microscope est doté de poignées de transport.
-
Page 19: Precauciones De Seguridad
Precauciones de seguridad Precauciones de seguridad Aunque el proceso de diseño y fabricación de este producto garantiza su uso seguro, si lo utiliza de forma incorrecta o no sigue las instrucciones de seguridad indicadas se pueden producir lesiones personales o daños materiales. - Page 20 Las averías y los daños ocasionados debidos al desmontaje del producto no están cubiertos por la garantía. No desmonte ninguna pieza a menos que se indique en este manual. Si tiene problemas con el producto, póngase en contacto con el representante de Nikon más cercano.
- Page 21 Precauciones de seguridad ADVERTENCIA ! Notas sobre el uso de portaobjetos en el condensador Un portaobjetos tiene dos posiciones fijas. Se coloca en el condensador y se utiliza para modificar el método de observación o el porcentaje de aumento al cambiar la posición. La luz brillante puede llegar al tubo ocular al mover el portaobjetos cuando se cambia de posición.
- Page 22 Precauciones de seguridad ADVERTENCIA ! No mire directamente a la fuente de iluminación. La siguiente etiqueta de advertencia que indica el nivel de riesgo más elevado (grupo de riesgo 3) de seguridad fotobiológica está colocada en el lado del asa de la platina para recordar al usuario las siguientes precauciones.
- Page 23 CA. A continuación, retire el líquido con un paño seco. La entrada de cuerpos extraños también puede provocar averías. Si entran líquidos o cuerpos extraños en el producto, deje de usarlo y póngase en contacto con su representante de Nikon más cercano. Transporte del producto •...
-
Page 24: Precauzioni Per La Sicurezza
Precauzioni per la sicurezza Precauzioni per la sicurezza Sebbene questo prodotto sia stato progettato e realizzato per garantire la massima sicurezza durante l'uso, l'utilizzo non corretto o il mancato rispetto delle istruzioni di sicurezza possono causare lesioni personali o danni alla proprietà. Per garantire un utilizzo corretto, leggere attentamente il presente manuale prima di utilizzare il prodotto. - Page 25 Trattamento dei solventi infiammabili I seguenti solventi infiammabili sono utilizzati con il prodotto: • Olio per immersione (olio per immersione Nikon) • Alcool puro (etilico o metilico per la pulizia dei componenti ottici) • Benzina (per rimuovere l'olio per immersione) •...
- Page 26 Precauzioni per la sicurezza AVVERTENZA ! Note sull'azionamento dei cursori sulla parte del condensatore Un cursore per microscopia ha due posizioni impostate. È fissato alla parte del condensatore e utilizzato per commutare i metodi di osservazione o gli ingrandimenti modificando la posizione impostata.
- Page 27 Precauzioni per la sicurezza AVVERTENZA ! Non rivolgere lo sguardo verso l'illuminazione. La seguente etichetta di avvertenza che indica il rischio più elevato (Gruppo di rischio 3) per la sicurezza fotobiologica è apposta sul lato manico del piano per ricordare all'utente le seguenti precauzioni.
- Page 28 CA, quindi rimuovere il liquido con un panno asciutto. Anche l'ingresso di corpi estranei può determinare malfunzionamenti. Se liquidi o corpi estranei entrano nel prodotto, interromperne l'uso e contattare il rappresentante Nikon di zona. Trasporto del prodotto •...
-
Page 29: Veiligheidsvoorschriften
Veiligheidsvoorschriften Veiligheidsvoorschriften Dit product is ontworpen voor veilig gebruik. Onjuist gebruik of het niet opvolgen van de veiligheidsvoorschriften kan leiden tot persoonlijk letsel of schade aan uw eigendom. Lees deze handleiding zorgvuldig voordat u het product in gebruik neemt voor een veilig gebruik. Bewaar deze handleiding voor een snelle raadpleging. - Page 30 Storingen en schade als gevolg van het demonteren van het product vallen niet onder de garantie. Demonteer geen onderdelen van dit product tenzij de instructies dit duidelijk aangeven. Wanneer u problemen ondervindt met het product, neemt u contact op met de Nikon-vertegenwoordiger bij u in de buurt.
- Page 31 Veiligheidsvoorschriften WAARSCHUWING ! Opmerkingen over de bediening van de schuifregelaars op het condensorgedeelte Een schuifregelaar voor microscopie heeft twee ingestelde posities. De regelaar is bevestigd aan het condensorgedeelte en wordt gebruikt voor het wisselen van de observatiemethoden of vergrotingen door de ingestelde positie te wijzigen. Het heldere licht kan het oculair bereiken wanneer u de schuifregelaar beweegt om de ingestelde positie te wijzigen.
- Page 32 Veiligheidsvoorschriften WAARSCHUWING ! Kijk niet in de belichtingssectie. Het volgende waarschuwingsplaatje dat het hoogste risico (risicogroep 3) voor de fotobiologische veiligheid aangeeft, is aangebracht aan de handgreepzijde van de objecttafel om de gebruiker te herinneren aan de volgende voorzorgsmaatregelen. (Zie de afbeelding in "Chapter 1 Nomenclature of Each Part"...
- Page 33 Vreemde objecten in het product kunnen leiden tot storingen. Wanneer vloeistof of een vreemd object in het product terechtkomt, moet u het gebruik direct staken en contact opnemen met een Nikon-vertegenwoordiger bij u in de buurt. Het product verplaatsen • De microscoop heeft handgrepen om het product te verplaatsen.
-
Page 34: Sikkerhedsforanstaltninger
Sikkerhedsforanstaltninger Sikkerhedsforanstaltninger Selvom dette produkt er designet og fremstillet til at være helt sikkert under brug, kan forkert brug eller manglende overholdelse af de medfølgende sikkerhedsanvisninger forårsage personskade eller tingsskade. Læs denne vejledning omhyggeligt, før du bruger produktet, for at sikre korrekt brug. Denne vejledning må ikke kasseres, og den skal opbevares, så... - Page 35 Håndtering af brændbare opløsningsmidler Følgende brændbare opløsningsmidler anvendes sammen med produktet: • Immersionsolie (Nikon-immersionsolie til objektiver, der skal nedsænkes i olie) • Ren alkohol (ætylalkohol eller metylalkohol til rengøring af optiske dele) • Petroleumsbenzin (til aftørring af immersionsolien) •...
- Page 36 Sikkerhedsforanstaltninger ADVARSEL ! Bemærkninger om betjening af skyderne på kondensatordelen En skyder til mikroskopi har to indstillede positioner. Den er fastgjort til kondensatordelen og bruges til at skifte observationsmetoder eller forstørrelser ved at ændre den indstillede position. Det klare lys kan nå...
- Page 37 Sikkerhedsforanstaltninger ADVARSEL ! Se ikke ind i belysningsprofilen. Følgende advarselsmærkat, der angiver den største risiko (risikogruppe 3) for fotobiologisk sikkerhed, er påsat på håndtagets side af krydsbordet for at minde brugeren om følgende forholdsregler. (For placeringen af denne mærkat, se figuren i "Chapter 1 Nomenclature of Each Part.") ADVARSEL (risikogruppe 3) Der udsendes IR og muligvis farligt lys fra kameraporten, når det trinokulære okularrør...
- Page 38 Tør derefter væsken af med en tør klud. Indtrængen af fremmedlegemer kan også medføre fejlfunktion. Hvis der kommer væske eller fremmedlegemer ind i produktet, skal du ophøre med at bruge produktet og kontakte den nærmeste Nikon-repræsentant. Flytning af produktet • Mikroskopet har holdeanordninger og håndtag.
-
Page 39: Precauções De Segurança
Precauções de segurança Precauções de segurança Apesar de este produto ser concebido e fabricado para ser totalmente seguro durante a utilização, a utilização incorreta ou o incumprimento das instruções de segurança fornecidas pode causar ferimentos pessoais ou danos materiais. Para garantir uma utilização correta, leia este manual cuidadosamente antes de utilizar o produto. - Page 40 Manuseamento de solventes inflamáveis Os seguintes solventes inflamáveis são utilizados com o produto: • Óleo de imersão (óleo de imersão Nikon para objetivas de imersão em óleo) • Álcool absoluto (álcool etílico ou álcool metílico para a limpeza de peças óticas) •...
- Page 41 Precauções de segurança AVISO ! Notas sobre o funcionamento dos manípulos no condensador Um manípulo para microscopia tem duas posições definidas. Está fixo ao condensador e é utilizado para alterar os métodos de observação ou as ampliações através da modificação da posição definida.
- Page 42 Precauções de segurança AVISO ! Não olhe para a secção de iluminação. A seguinte etiqueta de aviso, que indica o risco mais elevado (Grupo de risco 3) para a segurança fotobiológica, está afixada no lado de manuseamento da platina para lembrar o utilizador das seguintes precauções.
- Page 43 CA. Em seguida, limpe o líquido com um pano seco. A entrada de materiais estranhos também pode resultar em avarias. Se entrarem líquidos ou materiais estranhos no produto, deixe de utilizar o produto e contacte o representante da Nikon mais próximo. Mover o produto •...
-
Page 44: Turvatoimet
Turvatoimet Turvatoimet Vaikka tämä tuote on suunniteltu ja valmistettu täysin käyttöturvalliseksi, sen virheellinen käyttö tai turvallisuusohjeiden laiminlyönti voi johtaa henkilövahinkoihin tai aineellisiin vahinkoihin. Oikeanlaisen käytön varmistamiseksi tämä opas on luettava huolellisesti ennen tuotteen käyttöä. Opas on myös säilytettävä ja pidettävä helposti saatavilla. Tuotteessa olevien symbolien selitykset Tuotteeseen merkityt symbolit osoittavat, että... - Page 45 • Jos vaihtovirtasovitin peitetään tai sen päälle asetetaan esineitä, lämmön haihtuminen voi estyä ja aiheuttaa sovittimen epätavallisen kuumenemisen. Syttyvien liuottimien käsittely Tuotteen yhteydessä käytetään seuraavia syttyviä liuottimia: • immersioöljy (Nikon-immersioöljy öljyimmersio-objektiiveja varten) • absoluuttinen alkoholi (etanoli tai metanoli optisten osien puhdistamista varten) • petrolibensiini (immersioöljyn pois pyyhkimistä varten) • lääkealkoholi (mikroskoopin desinfiointia varten).
- Page 46 Turvatoimet VAKAVA ! VAROITUS Fotobiologinen turvallisuus Tämän tuotteen suunnittelussa ja valmistuksessa on noudatettu turvallisuusstandardia IEC 62471 Lamppujen ja lamppujärjestelmien fotobiologinen turvallisuus. Näytepöydän lähivalaistus ja okulaariputken binokulaariosasta tai opetuskannasta tuleva valo ja trinokulaariputken kameraportista tuleva valo on luokiteltu seuraavassa esitettyyn riskiryhmään. Seuraava etäisyys (vaaraetäisyys) näytepöydästä...
- Page 47 Turvatoimet VAROITUS ! Mikroskoopin kokoaminen • Kun kokoat mikroskooppia, vaihtovirtasovitin ei saa olla liitettynä siihen. • Varo sormien ja käsien joutumista puristuksiin osien väliin. Suojele tuote kastumiselta ja vierasesineiden sisäänpääsyltä. Tuote on suojeltava kastumiselta. Kastuminen voi aiheuttaa toimintahäiriön, ylikuumenemisen tai sähköiskun.
-
Page 48: Προφυλάξεις Ασφαλείας
Προφυλάξεις ασφαλείας Προφυλάξεις ασφαλείας Παρόλο που αυτό το προϊόν έχει σχεδιαστεί και κατασκευαστεί για να σας παρέχει απόλυτη ασφάλεια κατά τη χρήση, τυχόν λανθασμένη χρήση ή αμέλεια των οδηγιών ενδέχεται να προκαλέσουν προσωπικό τραυματισμό ή ζημία. Για να εξασφαλιστεί η σωστή χρήση, διαβάστε προσεκτικά αυτό το εγχειρίδιο οδηγιών πριν από τη χρήση... - Page 49 Χειρισμός εύφλεκτων διαλυτών Οι ακόλουθοι εύφλεκτοι διαλύτες χρησιμοποιούνται με το προϊόν: • Έλαιο εμβάπτισης (έλαιο εμβάπτισης Nikon για αντικειμενικούς φακούς ελαίου εμβάπτισης) • Απόλυτο οινόπνευμα (αιθυλική αλκοόλη ή μεθανόλη για τον καθαρισμό οπτικών τμημάτων) • Βενζίνη πετρελαίου (για σκούπισμα του ελαίου εμβάπτισης) •...
- Page 50 Προφυλάξεις ασφαλείας ΠΡΟΕΙΔΟΠΟΙΗΣΗ ! Σημειώσεις για τον χειρισμό των αντικειμενοφόρων πλακών στο τμήμα του συμπυκνωτή Μια αντικειμενοφόρος πλάκα για τη μικροσκοπική εξέταση έχει δύο καθορισμένες θέσεις. Στερεώνεται στο τμήμα του συμπυκνωτή και χρησιμοποιείται για την εναλλαγή των μεθόδων παρατήρησης ή των μεγεθύνσεων...
- Page 51 Προφυλάξεις ασφαλείας ΠΡΟΕΙΔΟΠΟΙΗΣΗ ! Μην κοιτάζετε απευθείας στο τμήμα φωτισμού. Η ακόλουθη ετικέτα προειδοποίησης που υποδεικνύει τον υψηλότερο κίνδυνο (Ομάδα κινδύνου 3) στη φωτοβιολογική ασφάλεια είναι κολλημένη στην πλευρά λαβής της πλάκας, για να υπενθυμίζει στον χρήστη τις ακόλουθες προφυλάξεις. (Για τις τοποθεσίες αυτής της ετικέτας, ανατρέξτε στο σχήμα στο...
- Page 52 Η εισχώρηση ξένων σωμάτων στο προϊόν ενδέχεται επίσης να οδηγήσει σε δυσλειτουργία. Εάν υγρά ή ξένα σώματα εισέλθουν στο προϊόν, διακόψτε τη χρήση του προϊόντος και επικοινωνήστε με τον πλησιέστερο αντιπρόσωπο της Nikon. Μετακίνηση του προϊόντος • Το μικροσκόπιο διαθέτει χειρολαβές και λαβές...
-
Page 53: Notes On Handling The Product
In particular, the precision of objectives may be lost by even weak physical shocks. Electromagnetic environment Before using this product, Nikon recommends evaluating the electromagnetic environment of the installation site. Do not use this product close to strong electromagnetic radiation sources (example: unshielded intentional RF sources.) They may interfere with the proper operation of this product. - Page 54 Notes on Handling the Product Fastening plate The microscope is held tightly by the red fastening plate during shipment. Be sure to remove the plate before use. The microscope cannot be used without removing the fastening plate. For details, see “Chapter 4 Assembly.” Fastening plate (red)
- Page 55 Notes on Handling the Product This page is intentionally blank.
-
Page 56: Chapter 1 Nomenclature Of Each Part
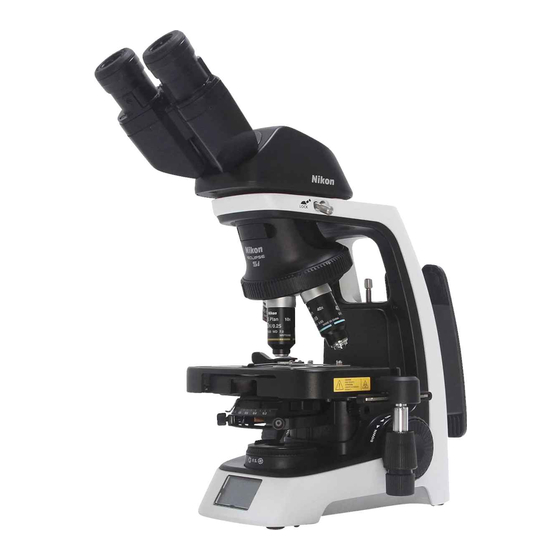
Chapter 1 Nomenclature of Each Part Chapter 1 Nomenclature of Each Part Nomenclature of Each Part This chapter describes the names of parts and the functions of controls of the microscope system. Nomenclature of Each Part Eyepieces Binocular eyepiece tube (A trinocular eyepiece tube is available for photomicrography and TV observation.) AC adapter... - Page 57 Chapter 1 Nomenclature of Each Part Functions of Controls (1) Diopter correction ring (9) Coarse focus knob torque adjustment ring (10) Coarse focus knob (11) Fine focus knob (5) Stage vertical movement stopper Focus knob (left) (10) Coarse focus knob (2) Nosepiece (5 holes) (11) Fine focus knob (3) Specimen holder...
-
Page 58: Chapter 2 Microscopy Techniques
Chapter 2 Microscopy Techniques Chapter 2 Microscopy Techniques Microscopy Techniques This chapter explains the procedures for the five types of microscopy techniques supported by this microscope. (1) Bright-field microscopy (See 2.1.) (2) Phase contrast microscopy (See 2.2.) (3) Simple polarizing microscopy (See 2.3.) (4) Diascopic fluorescence microscopy (See 2.4.) (5) Dark-field microscopy (See 2.5.) Turning on and off the power to the microscope... -
Page 59: Bright-Field Microscopy
Chapter 2 Microscopy Techniques Bright-field Microscopy Bright-field microscopy is the most basic observation method using diascopic illumination. For details on the configuration and the assembly of the microscope for bright-field microscopy, see “4.2.1 Basic Configuration (For Bright-field Microscopy).” Face the eyepiece tube Install the microscope. - Page 60 Chapter 2 Microscopy Techniques Bring the 10x objective into the optical path. Rotate the revolving nosepiece to swing the 10x objective into the optical path. Turning the nosepiece The objective will click into place when rotated into position. Set the magnification of the objective to 10x. Specimen (Up to two Knob Place the specimen on the stage, and bring the...
- Page 61 Chapter 2 Microscopy Techniques Adjust the interpupillary distance. Adjust the distance between the eyepieces so that the right and left fields of view are merged into one when looking through the eyepieces. Eye level When the binocular part is turned upward, the eye level is raised, and when it is turned downward, the The eye level is The eye level is...
- Page 62 Chapter 2 Microscopy Techniques Adjust the diopter. (1) Swing the 40x objective in the optical path and rotate the focus knobs to focus on the specimen. (2) Change the objective to the 10x (or 4x) objective and focus on the specimen by rotating the diopter ring without using the focus knob.
- Page 63 Chapter 2 Microscopy Techniques Change the objective to the objective of the magnification used for observation. Rotate the revolving nosepiece to bring the objective of the desired magnification into the optical path. Do not directly switch from the 4x objective to the 60x or 100x objective.
- Page 64 Chapter 2 Microscopy Techniques Perform focusing and centering of the condenser. (1) Turn the field diaphragm dial to narrow down the field diaphragm until the field diaphragm image can be seen in the field of view. Narrow down the field (2) Turn the condenser vertical movement knob to diaphragm until the focus on the field diaphragm image.
- Page 65 Chapter 2 Microscopy Techniques Fix the eyepiece tube backward. Store the microscope. After observation, turn the eyepiece tube backward and fix it. Loosen the fixing screw for the eyepiece tube a couple of turns, and then turn the eyepiece tube. Fixing screw Store the AC adapter in the storage part on the rear for the...
-
Page 66: Phase Contrast Microscopy
Chapter 2 Microscopy Techniques Phase Contrast Microscopy Phase contrast microscopy is a method of using diascopic illumination to observe unstained, colorless and transparent specimens such as live cells. Phase contrast microscopy uses the interference between direct light and light diffracted while passing through a colorless and transparent specimen to visualize light phase shifts as brightness variations. - Page 67 Chapter 2 Microscopy Techniques Bring the phase contrast objective into the optical path. Turn the nosepiece to bring the phase contrast objective (Ph objective) of the desired magnification into the optical path. The phase contrast ring inside the objective is brought into the optical path.
- Page 68 Chapter 2 Microscopy Techniques Eyepiece of the Overwrap the annular diaphragm image with the Flange centering telescope annular image of the phase plate using the centering telescope. (1) Remove one eyepiece, attach the centering telescope, and focus on the annular diaphragm image.
- Page 69 Chapter 2 Microscopy Techniques Observe the specimen using the phase contrast microscopy method. Turn the stage and focus knobs to observe the specimen. To observe the specimen with a different magnification, repeat steps 3 to 7. Switch to bright-field microscopy. (1) Remove the phase contrast slider to remove the annular diaphragm from the optical path.
-
Page 70: Simple Polarizing Microscopy
Chapter 2 Microscopy Techniques Simple Polarizing Microscopy Simple polarizing microscopy is an observation method for measuring polarization, refraction, and other states of the specimen by bringing the analyzer and polarizer into the microscope's optical path to limit the light's vibration direction. For details on the configuration and the assembly of the microscope for simple polarizing microscopy, see “4.2.3 Configuration for Simple Polarizing Microscopy.”... - Page 71 Chapter 2 Microscopy Techniques Bring the analyzer and the polarizer into the optical path. (1) Turn off diascopic illumination. Press the illumination on/off button to turn off diascopic illumination. (2) Attach the simple polarization analyzer. Remove the eyepiece tube, attach the simple polarization analyzer to the dovetail for the eyepiece Analyzer tube mount, and re-attach the eyepiece tube at its...
- Page 72 Chapter 2 Microscopy Techniques Bring an objective into the optical path. Rotate the revolving nosepiece to bring the objective of the desired magnification into the optical path. Do not directly switch from the 4x objective to the 100x objective. Be sure to focus on the specimen with the 10x objective before using the objective of a higher magnification.
- Page 73 Chapter 2 Microscopy Techniques Switch to bright-field microscopy. (1) Turn off diascopic illumination. Press the illumination on/off button to turn off diascopic illumination. (2) Remove the simple polarization analyzer. Remove the eyepiece tube, remove the simple polarization analyzer from the dovetail for the eyepiece tube mount, and re-attach the eyepiece tube at its original position.
-
Page 74: Diascopic Fluorescence Microscopy
The brightness of fluorescent light excited during diascopic fluorescence microscopy might be reduced, for example due to the expression efficiency of the sample GFP. Nikon recommends darkening the room because images are not clearly visible if the ambient light is too bright. - Page 75 Chapter 2 Microscopy Techniques Bring the diascopic fluorescence objective into the optical path. Turn the nosepiece to bring the objective into the optical path. When light intensity management is on When the light intensity management function is turned on (LIM), bringing the objective into the optical path loads the memorized brightness.
- Page 76 Chapter 2 Microscopy Techniques Bring the excitation filter and barrier filter into the optical path, and adjust the illumination to set the microscope to diascopic fluorescence microscopy. BA filter slider (1) From the right side, push the EX filter slider inserted in the slot on the side of the condenser.
- Page 77 Chapter 2 Microscopy Techniques Switch to bright-field microscopy. (1) Darken diascopic illumination, and then turn off diascopic illumination. Turn the brightness control knob to darken diascopic illumination. Then, press the illumination on/off button to turn off diascopic illumination. (2) Pull the BA filter slider up to the click position. The barrier filter is removed from the optical path.
-
Page 78: Dark-Field Microscopy
Chapter 2 Microscopy Techniques Dark-field Microscopy Dark-field microscopy is a method of using oblique illumination to observe unstained specimens. A bright observation target can be visualized on a dark background in high contrast. In dark-field microscopy, the annular diaphragm narrows the illumination to an annular shape, and light passes through the edge of the condenser lens to obliquely illuminate the specimen. - Page 79 Chapter 2 Microscopy Techniques At the fully open Fully open the filed diaphragm and the aperture position diaphragm. (1) Turn the field diaphragm dial clockwise until it reaches the limit. (2) Set the aperture diaphragm lever of the condenser at the fully open position (leftmost). Condenser position Turn it clockwise until it reaches...
- Page 80 Chapter 2 Microscopy Techniques Switch to bright-field microscopy. (1) Darken diascopic illumination, and then turn off diascopic illumination. Turn the brightness control knob to darken diascopic illumination. Then, press the illumination on/off button to turn off diascopic illumination. (2) Insert the dark-field slider from the left side up to the click position, and bring the empty position into the optical path.
-
Page 81: Chapter 3 Detailed Explanation
Chapter 3 Detailed Explanation Chapter 3 Detailed Explanation Detailed Explanation Turning the Power On and Off 3.1.1 Turn On/Off the Power to the Microscope Powering on the microscope Connect the AC adapter to turn on this microscope. Connect the DC plug of the AC adapter to the DC IN connector on the rear of the product. -
Page 82: Operating Diascopic Illumination
Chapter 3 Detailed Explanation Operating Diascopic Illumination This microscope contains a diascopic illumination device using an LED light source. 3.2.1 Turning Diascopic Illumination On and Off and Adjusting the Brightness Turning diascopic illumination on and off To turn diascopic illumination on or off, use the illumination on/off button on the left side of the microscope. -
Page 83: Operating The Stage Specimen Holder
Chapter 3 Detailed Explanation Operating the Stage Specimen Holder 3.3.1 Placing a Specimen Using the Specimen Holder Specimens are placed using the specimen holder installed Specimen (Up to two Knob glass slides can be on the stage. placed.) (1) Use the knob of the claw on the specimen holder to open the claw. -
Page 84: Operating The Nosepiece And Objectives
Chapter 3 Detailed Explanation Operating the Nosepiece and Objectives 3.4.1 Switching Objectives To switch objectives to use for observation, manually turn the turret ring of the nosepiece right or left until it reaches the click position. Objectives are usually set in such an order that the objective magnification increases as the nosepiece is turned clockwise (as viewed from the top of the nosepiece). -
Page 85: Performing Water-Immersion Microscopy
• Avoid contact of immersion oil with eyes or skin. In the event of contact with eyes or skin, take one of the following measures although Nikon immersion oil does not contain any toxic ingredients. Contact with skin: Rinse your skin thoroughly with soap and water. -
Page 86: Focusing Operations
Chapter 3 Detailed Explanation Focusing Operations 3.5.1 Focusing on a Specimen This procedure is to operate the fine and coarse focus knobs to raise and lower the stage so that the specimen to be observed can be seen most clearly. The UP and DOWN indications on the sides of the microscope base indicate the direction in which the stage moves by rotation of the focus knobs. -
Page 87: Torque Adjustment Of The Coarse Focus Knob
Chapter 3 Detailed Explanation Using the objective of a higher magnification for observation First, use the 10x objective to focus on the specimen, and then change it to the desired objective and rotate the fine focus knob to precisely focus on the specimen. When operating the focus knob while using the objective of a higher magnification, care must be taken to prevent the slide glass from... -
Page 88: Replacing A Specimen Using The Stage Vertical Movement Stopper
Chapter 3 Detailed Explanation 3.5.3 Replacing a Specimen Using the Stage Vertical Movement Stopper When focusing on the specimen with 40x or higher magnification objective, you will find the specimen is brought very near to the objective (*1). Turn the stopper until it stops (in the At this time, special care must be taken to avoid damaging HIGH direction) -
Page 89: Operating The Binoculars
Chapter 3 Detailed Explanation Operating the Binoculars 3.6.1 Adjustment of Diopter This procedure is to adjust the diopter ring on the eyepieces according to the difference between your right and left eyesight. Effect of diopter correction This adjustment enables the user to take full advantage of objective performance, and reduce loss of focus when switching magnifications. -
Page 90: Adjusting Interpupillary Distance
Chapter 3 Detailed Explanation 3.6.2 Adjusting Interpupillary Distance “Adjusting interpupillary distance” means to adjust the distance between the eyepieces to match the distance between the observer's eyes. Performing this adjustment makes it easier to observe specimens with both eyes. Selecting an eye point The binoculars of this microscope can be turned both upward and downward. -
Page 91: Operating The Condenser
Chapter 3 Detailed Explanation Operating the Condenser 3.7.1 Focusing the Condenser Adjust the vertical position of the condenser so that the field diaphragm image is clearly visible in the field of view. Caution: Do not raise the condenser too much. If you raise the condenser too much, the condenser lens might hit the specimen's glass slide, causing damage to the condenser lens or the glass slide. -
Page 92: Adjustment Of Aperture Diaphragm
Chapter 3 Detailed Explanation Adjustment of Aperture Diaphragm The size of the condenser aperture diaphragm must be adjusted according to the NA value of the objective in the optical path. The condenser is labeled with an adjustment position mark for the aperture diaphragm, which serves as a guideline for the adjustment position. -
Page 93: Adjustment Of Field Diaphragm
Chapter 3 Detailed Explanation Adjustment of field diaphragm “Adjusting the field diaphragm” means narrowing the illumination to limit the field of observation of the specimen. To resize the field diaphragm, turn the field diaphragm dial. Usually, observation is performed with the field diaphragm narrowed until it roughly circumscribes the edge of the field of view. -
Page 94: Tips For Each Microscopy Method
Chapter 3 Detailed Explanation 3.10 Tips for Each Microscopy Method 3.10.1 Tips for Phase Contrast Microscopy Phase contrast microscopy is suited for observing colorless and transparent specimens, unstained or lightly stained specimens, specimens that have lost their color, and ultra-thin sections for electron microscopes. Shaded or strongly stained specimens are not suited to phase contrast microscopy. -
Page 95: 3.10.2 Tips For Simple Polarizing Microscopy
Chapter 3 Detailed Explanation Notes on limits on objectives When a phase contrast slider's bright-field position is used, the following limits apply depending on the objective: • For objectives of NA 0.75 or higher, part of the field of view is lost (vignetting occurs). •... -
Page 96: 3.10.3 Tips For Diascopic Fluorescence Microscopy
Chapter 3 Detailed Explanation 3.10.3 Tips for Diascopic Fluorescence Microscopy Diascopic fluorescence microscopy is a microscopy method for using diascopic illumination to examine specimens stained with fluorescent dye or fluorescent protein. You can observe excited fluorescence as an image by directing diascopic illumination of a particular wavelength at objects stained with special fluorescent dye. -
Page 97: 3.10.4 Tips For Dark-Field Microscopy
Chapter 3 Detailed Explanation 3.10.4 Tips for Dark-field Microscopy Notes on limits on objectives Objectives that can be used for dark-field microscopy are limited to the following: • For dark-field microscopy: NA 0.65 or lower • For observation using a bright-field position: NA 1.25 or lower Note on the bright-field position of the dark-field slider Objectives that can be used in the bright-field position of the dark-field slider have different conditions than for regular bright-field microscopy. -
Page 98: Combinations Of Optical Parts
Chapter 3 Detailed Explanation 3.11 Combinations of Optical Parts Compatibility between objectives and microscopy methods Compatibility between optical parts and microscopy methods Objective Magnification Bright-field Phase Simple Diascopic Dark-field Contrast Polarizing Fluorescence E Plan 4x E Plan 10x E Plan 40x E Plan 60x E Plan 100x Oil 100x... -
Page 99: Microscope Terminology
: Refractive index (according to the medium between the specimen and objective) If the medium is air: 1 If the medium is immersion oil (Nikon Immersion Oil): 1.518 ω : Resolving power of the eye (assumed to be 5' = 0.0014) : Total magnification N.A. -
Page 100: Chapter 4 Assembly
Y-THSP Y-THSP Support for Ø45 mm filter Side by Side ECLIPSE Si RS Main Body E2-F-BF Blue Light Cut Filter When mounting eyepiece tubes on the teaching unit for face to face, be sure that the weight of L is equal to or heavier than M . -
Page 101: Assembly
Chapter 4 Assembly Assembly This chapter explains the microscope assembly procedure for each microscopy method. Before assembling or connecting devices, thoroughly read the “Safety Precautions” and “Notes on Handling the Product” at the beginning of this manual, and be sure to follow all the instructions written therein. Tools Required for Assembly: Hexagonal wrench (the distance between opposite sides is 3 mm) (one hexagonal wrench is provided with the microscope) 4.2.1... - Page 102 Chapter 4 Assembly Installing the eyepiece tube Insert the eyepiece tube into the circular dovetail mount while tilting it so that the eyepiece tube fits into it properly. Securely tighten the fixing screw for the eyepiece tube while supporting the eyepiece tube by hand. Fit the stopper screw for the eyepiece tube, and tighten the screw by using the supplied hexagonal wrench.
- Page 103 (the distance between opposite sides is 2.5 mm) to loosen the fixing screws. Contact your nearest Installation of the eyepieces Nikon representative if you have any questions. Installing the objective Screw an objective into the revolving nosepiece. Screw the objective firmly to the end.
- Page 104 Chapter 4 Assembly Connecting the AC adapter and power cord Plug the power connector of the specified power cord into the AC adapter’s inlet for equipment. Inlet for equipment For details on the specified power cord, see Chapter 7, Power connector “Specifications.”...
-
Page 105: Configuration For Phase Contrast Microscopy
Chapter 4 Assembly 4.2.2 Configuration for Phase Contrast Microscopy When performing phase contrast microscopy, assemble the microscope in the basic configuration for bright-field microscopy, and then attach the following optical parts to the microscope: (1) Phase contrast sliders There are two kinds of phase contrast sliders: Slider for 10x-40x and slider for 100x). Objectives that can be used are limited to the following: Supported objectives for phase contrast sliders Objective... -
Page 106: Configuration For Simple Polarizing Microscopy
Chapter 4 Assembly 4.2.3 Configuration for Simple Polarizing Microscopy When performing simple polarizing microscopy, assemble the microscope in the basic configuration for bright-field microscopy, and then attach the following optical parts to the microscope: (1) Simple polarization polarizer Attach the simple polarization polarizer over the field lens. Adjust the polarization state by turning the polarizer. -
Page 107: Configuration For Diascopic Fluorescence Microscopy
Chapter 4 Assembly 4.2.4 Configuration for Diascopic Fluorescence Microscopy When performing diascopic fluorescence microscopy, assemble the microscope in the basic configuration for bright-field microscopy, and then attach the following optical parts to the microscope. (1) E2-F-FL Dia-FL Set GFP-B The E2-F-FL Dia-FL Set GFP-B is composed of the following two parts: •... - Page 108 Chapter 4 Assembly Attaching the EX Filter Slider Attach the EX filter slider (excitation filter) to the microscope. The EX filter is inserted into the slot on the side of the condenser. Set the aperture diaphragm lever of the condenser to the NA 1.25 side.
- Page 109 Chapter 4 Assembly Attaching the Shielding Plate Attach the shielding plate to the arm end. Fixing screw Turn the eyepiece tube 90°, and fix it as shown in the figure. (See (2) Changing the direction of the eyepiece tube, removing and attaching the eyepiece tube in “4.2.1 Basic Configuration (for Bright-field Microscopy.”) Attach the shielding plate to the arm end as shown in the figure, and tighten two fixing screws using a...
-
Page 110: Configuration For Dark-Field Microscopy
Chapter 4 Assembly 4.2.5 Configuration for Dark-Field Microscopy When performing dark-field microscopy, assemble the microscope in the basic configuration for bright-field microscopy, and then attach the following optical parts to the microscope: (1) Slider for dark-field microscopy (2) Objective for dark-field microscopy Objectives that can be used for dark-field microscopy are limited to the following: ... -
Page 111: Setting Up The Microscope
Chapter 4 Assembly Setting Up the Microscope When you have finished attaching the optical parts to the microscope, you must register information about the objectives mounted on the microscope. (1) Turn off the microscope. Disconnect the AC adapter and turn off the microscope. - Page 112 Chapter 4 Assembly (4) Set how long ECO mode waits to enter sleep mode. Move the cursor () to “ECO TIME” and press the illumination on/off button. The cursor moves to the displayed time period (“[15]min”). Specify how long to wait (in minutes) until Setting time before going to sleep mode entering sleep mode, and press the illumination on/off button (setting range: 1 to...
-
Page 113: Chapter 5 Troubleshooting
If you detect problems that are not listed below or the problem still persists after measures are taken, unplug the power cord of the device and contact your nearest Nikon representative. Problems With the Microscope Image 5.1.1... -
Page 114: Problems In Phase Contrast Microscopy
Chapter 5 Troubleshooting Image not bright enough Problems Check Items Reference Adjust the brightness by rotating the brightness control Setting of the brightness control knob 3.2.1 knob. Aperture diaphragm is closed too far. Open properly. Field diaphragm is closed too far. Open properly. -
Page 115: Problems In Simple Polarizing Microscopy
Chapter 5 Troubleshooting Weak contrast in phase contrast image Problems Check Items Reference The Ph annular diaphragm of the phase contrast slider Bring a Ph annular diaphragm that has the same code and the Ph code of the objective are incompatible. as the objective's Ph code into the optical path. -
Page 116: Problems In Dark-Field Microscopy
Check Items Reference The objective or cover glass is dirty. Clean the lens. 3.3.1 Use a low-fluorescence oil (Nikon immersion oil) The immersion oil is emitting fluorescence. 3.4.2 specified by Nikon. The slide glass is emitting fluorescence. Use a non-fluorescent glass slide. -
Page 117: Problems In Operation
Chapter 5 Troubleshooting Problems in Operation Image cannot be focused with high magnification objectives. Problems Check Items Reference Slide is upside down. Turn over the slide so that the cove glass faces up. 3.3.1 Coverglass is too thick. Use a coverglass of the specified thickness (0.17 mm). ―... -
Page 118: Electrical
Chapter 5 Troubleshooting Electrical Illumination does not turn on when the illumination on/off button is turned on. Problems Check Items Reference The AC adapter is not connected to the microscope Insert the DC plug of the AC adapter into the DC input ... -
Page 119: Chapter 6 Care And Maintenance
We especially recommend that the objectives and eyepieces be kept in a container (such as a desiccator) with desiccant in it. Periodical Inspections (Charged) • To maintain the performance of the microscope, periodical inspections and maintenance are recommended. • For details, contact your nearest Nikon representative. -
Page 120: Chapter 7 Specifications
Chapter 7 Specifications Chapter 7 Specifications Specifications Microscopy (Principles) Use objectives and eyepieces of the microscope to magnify minute cells and tissue optically, and manipulate levers and knobs of the microscope unit to adjust the focus or move the observation point. Then observe or take photographs of the sample fixed on the slide. -
Page 121: Performance Properties
Chapter 7 Specifications Performance Properties Model Name ECLIPSE Si RS Main Body Optical System CFI60 (Infinity-corrected CF optical system) Field Number: It depends on the combination. When using Si eyepiece tubes and other optional products supporting a field number of 20:... -
Page 122: Physical Properties
Chapter 7 Specifications Physical Properties Model Name ECLIPSE Si RS Main Body External dimensions and Main body (only): mass (reference) External dimensions: 236 (W) x 284 (H) x 280 (D) mm Mass (reference): Approximately 5.3 kg Set containing binocular eyepiece tube: External dimensions: 236 (W) x 401.5 (H) x 280 (D) mm (excluding protrusion) -
Page 123: Power Cord
Chapter 7 Specifications Power Cord When used in Japan: PSE approved detachable power cord set 3 conductor grounding Type VCTF 3x0.75mm , 3m long maximum, rated at 125 VAC minimum) When used in a 100-120 V UL listed detachable power cord set region, outside Japan: 3 conductor grounding Type SVT, NO.18 AWG, 3m long maximum, rated at 125 VAC minimum) -
Page 124: External Dimensions (Unit: Mm)
Chapter 7 Specifications External dimensions (unit: mm) Binocular eyepiece tube set Trinocular eyepiece tube set...
Need help?
Do you have a question about the ECLIPSE Si and is the answer not in the manual?
Questions and answers