Table of Contents
Advertisement
Quick Links
Advertisement
Table of Contents
Troubleshooting

Related Manuals for Abbott PLEX-ID SP


Summary of Contents for Abbott PLEX-ID SP
- Page 1 PLEX-ID SP User Manual Rev. 1.0...
- Page 3 PLEX-ID SP User Manual Rev. 1.0, Cat. no. N09455...
- Page 4 The PLEX-ID SP Instrument software programs and documentation are protected by copyright. All rights reserved. Printed for Abbott Molecular in Finland by Thermo Fisher Scientific. No part of this media may be reproduced, stored, retrieved, or transmitted in any form or by any means without the prior written permission of Abbott Molecular.
- Page 5 This Warranty does not cover defects or malfunctions which: (1) are not reported to Abbott during the Warranty Period and within one week of occurrence; (2) result from chemical decomposition or corrosion; (3) are caused primarily by failure to comply with any requirements or instruction contained in the applicable Abbott User Manual;...
-
Page 7: Intended Users
This user manual is designed to give you the information to: user manual Review safety precautions ● Install the PLEX-ID SP ● Use the PLEX-ID SP in routine jobs – the processing step ● Perform basic cleaning and maintenance procedures ● Troubleshoot the instrument performance ●... -
Page 8: Safety Symbols And Markings
Union’s Waste Electrical & Electronic Equipment (WEEE) Directive 2002/96/EC. ▲ A black label with the following text (Figure 2–4): WARNING: DISCONNECT SUPPLY BEFORE SERVICING AVERTISSEMENT: COUPER L'ALIMENTATION AVANT L'ENTRETIEN ET LE DEPANNAGE 6 PLEX-ID SP User Manual 10/2009 N09455 Abbott Laboratories... -
Page 9: Warning And Other Markings Used In The Documentation
Caution Risk of damage to the instrument, other equipment or loss of performance or function in a specific application. ▲ Note Marks a hint, important information that is useful in the optimum operation of the system, or an item of interest. ▲ Abbott Laboratories PLEX-ID SP User Manual 10/2009 N09455... -
Page 10: Instrument Safety And Guidelines For Use
The device shall be operated only with software specifically ● designed for the device. Never open any other covers of the PLEX-ID SP than the see- ● through lid or the sliding door (Figure 2–3) while the instrument is plugged into a power source. -
Page 11: Table Of Contents
How to use this user manual ............. 5 Safety symbols and markings............. 6 Safety symbols and markings used on the PLEX-ID SP....6 Warning and other markings used in the documentation ....7 Instrument safety and guidelines for use..........8 Chapter 1 Introduction to the PLEX-ID SP .............. - Page 12 Contents Do’s and Don’ts of the PLEX-ID SP..........39 Chapter 4 Routine Operation ..................39 Do ....................39 Don’t ................... 39 Switching on ................... 39 Control panel.................. 40 Keyboard..................40 Keys ..................40 Display..................41 Navigating ................... 42 Using internal software..............44 Factory protocols................
- Page 13 Troubleshooting Guide ................77 Error messages and warnings ............77 Troubleshooting guide ..............78 Service request protocol..............79 Chapter 9 Ordering Information................... 81 PLEX-ID SP ................... 81 List of accessories and consumables ..........81 Abbott Laboratories PLEX-ID SP User Manual 10/2009 N09455...
- Page 14 Figure 1–1. PLEX-ID SP magnetic particle processor ........15 Figure 2–2. PLEX-ID SP front view without see-through lid......17 Figure 2–3. PLEX-ID SP front view with see-through lid and plates.....17 Figure 2–4. PLEX-ID SP back view ..............18 Figure 2–5. PLEX-ID SP side view..............18 Figure 2–6.
- Page 15 Figure 4–46. Two different heating blocks available ........59 Figure 5–47. Unfastening the two finger screws.......... 62 Figure 5–48. Removing the turntable............62 Figure 5–49. Black spill shield exposed for cleaning........63 Abbott Laboratories PLEX-ID SP User Manual 10/2009 N09455...
- Page 16 Table 6–6. General specifications ..............69 Table 6–7. Performance specifications............69 Table 8–8. Error messages reported..............77 Table 8–9. Actions taken against error messages and warnings....78 Table 9–10. Codes for products ..............81 Table 9–11. Codes for accessories and consumables........81 PLEX-ID SP User Manual 10/2009 N09455 Abbott Laboratories...
-
Page 17: Introduction To The Plex-Id Sp
The patented technology of the PLEX-ID SP system is based on the use of magnetic rods covered with a disposable, specially designed tip comb and plates. The instrument functions without any dispensing or aspiration parts or devices. -
Page 18: Advantages Of Using Plex-Id Sp
Introduction to the PLEX-ID SP Advantages of using PLEX-ID SP Advantages of The PLEX-ID SP magnetic particle processor has several operational advantages: using PLEX-ID SP Enables automation of complicated manual steps ● Enables simultaneous processing and purification ● Binding and elution are enhanced due to the heating option ●... -
Page 19: Chapter 2 Functional Description
Chapter 2 Functional Description Instrument This section shows the front, back and side views of the PLEX-ID SP instrument. layout Front view The front views of the PLEX-ID SP instrument are shown in Figure 2–2 and Figure 2–3. Interchangeable head... -
Page 20: Back / Side View
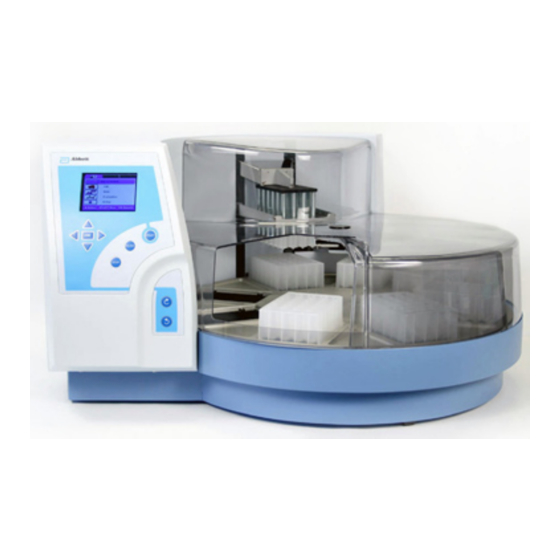
Figure 2–4. PLEX-ID SP back view Figure 2–5. PLEX-ID SP side view PLEX-ID SP The PLEX-ID SP (Figure 2–6) has room for eight plates. The tip combs are compatible with the plates. During the individual steps, the magnetic plates are kept stationary, and the only moving assembly is the particle processing head with tip comb and magnetic rods. -
Page 21: Principle Of Magnetic Particle Processing
Magnetic particles are transferred with the aid of magnetic rods covered with a disposable, specially designed plastic tip comb. Figure 2–6. PLEX-ID SP magnetic particle processor Principle of magnetic particle processing Figure 2–7. Inverse magnetic particle processing... -
Page 22: Working With A Magnetic Rod
The volume of the first plate can be larger than the volume of the next plate, and this is used for concentration purposes (see Figure 2–8 during the magnetic below). particle processing PLEX-ID SP User Manual 10/2009 N09455 Abbott Laboratories... -
Page 23: Figure 2-8. A Concentration Step During Magnetic Particle Processing
Functional Description Working with a magnetic rod Figure 2–8. A concentration step during magnetic particle processing Abbott Laboratories PLEX-ID SP User Manual 10/2009 N09455... - Page 24 Functional Description Working with a magnetic rod PLEX-ID SP User Manual 10/2009 N09455 Abbott Laboratories...
-
Page 25: Chapter 3 Installation
▲ Warning The PLEX-ID SP weighs approximately 28 kg [62 lbs.] without the transport package and should be lifted with care. It is recommended that two persons lift the instrument together, taking the proper precautions to avoid injury. -
Page 26: Checking Delivery
If any parts are damaged, contact your local Abbott Molecular representative. Requirements When you set up your PLEX-ID SP, avoid sites of operation with excess dust, vibrations, strong magnetic fields, direct sunlight or UV light, draft, excessive moisture or large temperature fluctuations. -
Page 27: Precautions And Limitations
Never spill fluids in or on the equipment. ● Caution The PLEX-ID SP should not be kept in close proximity to magnetic tapes, computer discs or other magnetic storage systems, such as credit cards, as these can be damaged by the strong magnetic field of the magnet heads. -
Page 28: Figure 3-9. Plex-Id Sp Transport Locks Fitted
Heating block transport lock Figure 3–9. PLEX-ID SP transport locks fitted 1. To remove the transport lock of the tip comb holder, take firmly hold of the lock and press tightly on both sides of the lock according to Figure 3–10 so that the lock ends are released. Keep hold of the tip comb holder and lock simultaneously, and start gradually lifting the holder. -
Page 29: Figure 3-11. Tip Comb Holder Transport Lock Removed
Figure 3–13. Removing the transport lock of the heating block (B) 5. Then fasten the screw clockwise to its storage site on the heating block base. The two screws on the heating block base guide the heating block into the correct position. Abbott Laboratories PLEX-ID SP User Manual 10/2009 N09455... -
Page 30: How To Ensure Startup
. The heating block will thus rise. Insert the heating block by first START setting it and then pressing it hard into place (Figure 3–15 and Figure 3–16). The heating block will snap at both ends if you have done it correctly. PLEX-ID SP User Manual 10/2009 N09455 Abbott Laboratories... -
Page 31: Figure 3-15. Inserting The Heating Block
Installation Installation setups Figure 3–15. Inserting the heating block Figure 3–16. Pressing the heating block into place Abbott Laboratories PLEX-ID SP User Manual 10/2009 N09455... -
Page 32: Shield Plate
You can add a heating step of ambient temperature +5°C to +115°C to a protocol. The heating block is preheatable but no cooling can be carried out. All PLEX-ID SP plates can be heated. There are two different kinds of interchangeable heating blocks available, for 24 Deep Well plates and 96 Deep Well plates (Table 3–1). -
Page 33: Figure 3-17. Shield Plate Prior To Fitting
Figure 3–18. Inserting the shield plate 4. When fastening the two plate retaining screws (Figure 3–19), be careful not to drop them inside the instrument. Figure 3–20 shows the shield plate installed. Abbott Laboratories PLEX-ID SP User Manual 10/2009 N09455... -
Page 34: Interchangeable Magnet Heads
It is very important to keep the magnet heads away from each other and other magnets at all times. Clashing of the magnets together may cause serious damage to the magnets. ▲ PLEX-ID SP User Manual 10/2009 N09455 Abbott Laboratories... -
Page 35: Figure 3-21. The Magnet Heads In Their Storage Boxes
(Figure 3–21). Figure 3–21. The magnet heads in their storage boxes Caution The PLEX-ID SP should not be kept in close proximity to magnetic tapes, computer discs or other magnetic storage systems, such as credit cards, as these can be damaged by the strong magnetic field of the magnet heads. -
Page 36: Figure 3-22. Inserting The Magnet Head
Installation Installation setups Figure 3–22. Inserting the magnet head PLEX-ID SP User Manual 10/2009 N09455 Abbott Laboratories... -
Page 37: See-Through Lid
Run the check protocol (Check_96dw_tip or Check_24dw_tip) under the Maintenance menu according to the magnet head and plastics you are using. If the check is all right, proceed with your own runs. Abbott Laboratories PLEX-ID SP User Manual 10/2009 N09455... -
Page 38: How To Pack The Instrument For Transportation
Figure 3–25. Refitting the transport lock of the heating block (A) 5. The transport lock of the heating block is refitted according to Figure 3–26. Screw the transport lock screw clockwise (Figure 3–26). Figure 3–29 shows both the transport locks refitted. PLEX-ID SP User Manual 10/2009 N09455 Abbott Laboratories... -
Page 39: How To Refit The Transport Lock Of The Tip Comb Holder
2. Press the tip comb holder transport lock ends together with both hands and insert all the way down to lock position (Figure 3–28). Note that the turntable can move slightly although the transport lock is fitted. Abbott Laboratories PLEX-ID SP User Manual 10/2009 N09455... -
Page 40: Figure 3-28. Fitting The Transport Lock Of The Tip Comb Holder (B)
Figure 3–28. Fitting the transport lock of the tip comb holder (B) Figure 3–29. Both transport locks refitted Figure 3–29 shows both the transport lock of the heating block and the tip comb holder refitted. PLEX-ID SP User Manual 10/2009 N09455 Abbott Laboratories... -
Page 41: Do's And Don'ts Of The Plex-Id Sp
If needed, use suitable protection covering. Switching on Before you switch on the PLEX-ID SP, ensure that the voltage on the type label at the bottom left of the back/side panel (Figure 2–4) corresponds to the local voltage. -
Page 42: Control Panel
Routine Operation Control panel Control panel This section describes the PLEX-ID SP control panel and internal software. Keyboard The keyboard is shown in Figure 4–30. START, PAUSE and Arrow keys and OK button STOP function buttons TURNTABLE ROTATING CLOCKWISE and... -
Page 43: Display
Main view row Icon Info text bar Figure 4–31. Main view on the display of the PLEX-ID SP There are three menus in the PLEX-ID SP user interface: Factory protocols, User protocols and Maintenance. In routine use you mainly navigate in the Factory/User protocols menu. In advanced level options there is one extra menu, Maintenance. -
Page 44: Navigating
Routine Operation Control panel Navigating This section visualizes navigation in the PLEX-ID SP user interface. The main view changes according to the selections you make either with the Up or Down arrow keys or the button. The available buttons and their function are shown on the info text bar. -
Page 45: Table 4-3. Icons In The Main View
Default “Selecting the protocol” on page 44 Evaluation Other “Device information” on page 47 “Computer interface” on page 47 “Language” on page 48 “Buzzer” on page 49 “Maintenance protocol” on page 50 Abbott Laboratories PLEX-ID SP User Manual 10/2009 N09455... -
Page 46: Using Internal Software
Routine Operation Using internal software Using internal This section describes procedures related to the PLEX-ID SP internal software. software Factory This section describes the factory protocols. They are found in the Factory protocols menu. Factory protocols are protocols which are protocols preloaded into the instrument internal memory in the factory. -
Page 47: Setting The Default Protocol
If you do not, the last used protocol will be shown. protocol To set the default protocol, go to the protocol list Last used/Default protocol row. Last used Default Press to start setting your default protocol. Press to select your default protocol. Abbott Laboratories PLEX-ID SP User Manual 10/2009 N09455... - Page 48 Routine Operation Factory protocols Use the Up and Down arrow keys to select the protocol. Press to set the default protocol. Press to go back. STOP PLEX-ID SP User Manual 10/2009 N09455 Abbott Laboratories...
-
Page 49: Instrument Options
There are two types of computer interfaces available: RS-232 and USB. The instrument will automatically connect to the interface that is first used after the power is switched on. Go to the Maintenance menu. Select the Computer interface row. Abbott Laboratories PLEX-ID SP User Manual 10/2009 N09455... -
Page 50: Language
Use the Up and Down arrow keys to select the computer interface in use. Not active will reset the computer interfaces. Press Language You can set the language of the internal software. Go to the Maintenance menu. Select the Language selection row. PLEX-ID SP User Manual 10/2009 N09455 Abbott Laboratories... -
Page 51: Buzzer
You can choose whether or not the instrument produces a sound for different functions. Note that all functions make a certain sound. Go to the Maintenance menu. Select the Buzzer on/off row. Press Abbott Laboratories PLEX-ID SP User Manual 10/2009 N09455... -
Page 52: Maintenance Protocol
Press Maintenance protocol You can set which protocol is automatically selected as the maintenance protocol when the PLEX-ID SP is powered on. Go to the Maintenance menu. Select the Maintenance protocol row. Press . All available maintenance protocols will be displayed. -
Page 53: How To Handle Tip Combs
2. Unpack the package by separating the two tip combs (Figure 4–33) and placing one of the tip combs onto the 96 Deep Well plate (= tip-plate) (Figure 4–36 and Figure 4–37). Abbott Laboratories PLEX-ID SP User Manual 10/2009 N09455... -
Page 54: Figure 4-33. Separating The Two Tip Combs
To handle 24 deep well tip combs correctly, follow these steps: 1. Unpack the consumable kit and remove a 24 Deep Well Tip Comb package (Figure 4–35). PLEX-ID SP User Manual 10/2009 N09455 Abbott Laboratories... -
Page 55: How To Start
Only one tip comb is placed onto a plate (= tip-plate) per run (Figure 4–37). Confirm the plate loading by pressing START Abbott Laboratories PLEX-ID SP User Manual 10/2009 N09455... -
Page 56: Figure 4-36. Combining The Tip Comb And Plate (A)
When the instrument is in its basic position, plate station 1 is under the magnet head. After the protocol has been run, note that the turntable may stop in a different position than the basic position. PLEX-ID SP User Manual 10/2009 N09455 Abbott Laboratories... -
Page 57: Figure 4-38. Loading The Tip-Plate
Routine Operation How to start A1 corner Figure 4–38. Loading the tip-plate Tip-plate Figure 4–39. Loading the plates Abbott Laboratories PLEX-ID SP User Manual 10/2009 N09455... -
Page 58: Figure 4-40. Plates Loaded
Tip comb in the tip comb holder Figure 4–41. Tip comb in the tip comb holder 5. When the turntable moves, the shield plate moves over the plate underneath (Figure 4–42) forming a protective cover. PLEX-ID SP User Manual 10/2009 N09455 Abbott Laboratories... -
Page 59: Figure 4-42. Shield Plate In Function
For startup, refer to “Switching on” on page 39. Figure 4–43. Plates The PLEX-ID SP is compatible with 24 Deep Well plates and 96 Deep Well plates (Figure 4–43 and Table 4–4). Specially designed magnetic rods (magnet heads) and tip combs that protect the magnets during the process are available for different plate types and applications. -
Page 60: Changing The Heating Block
The heating block will snap at both ends if you have done it correctly. Press the button when START the task has been completed. Figure 4–44. Inserting the heating block PLEX-ID SP User Manual 10/2009 N09455 Abbott Laboratories... -
Page 61: Figure 4-45. Pressing The Heating Block Into Place
Heating block for the 24 Deep Well – plate Heating block for the 96 Well plate – Warning The heating block surface can be hot, whereby there can be risk of burns. ▲ Abbott Laboratories PLEX-ID SP User Manual 10/2009 N09455... -
Page 62: Shutdown
Shutdown Shutdown To shut down the PLEX-ID SP, follow the steps below: 1. Switch OFF the PLEX-ID SP by pressing the power switch (Figure 2–4) at the bottom left of the back/side panel of the instrument into the OFF position. -
Page 63: Chapter 5 Maintenance
Although the PLEX-ID SP is constructed from high-quality materials, you must immediately wipe away spilt saline solutions, solvents, acids or alkaline solutions from outer surfaces to prevent damage. -
Page 64: Figure 5-47. Unfastening The Two Finger Screws
Unscrew the two finger screws (Figure 5–47). Note that the screws still remain attached to the turntable when the screws are unfastened. Alignment stud Figure 5–47. Unfastening the two finger screws Lift the turntable off (Figure 5–48). Figure 5–48. Removing the turntable PLEX-ID SP User Manual 10/2009 N09455 Abbott Laboratories... -
Page 65: How To Clean The Magnetic Rods
(SDS), soap solution or alcohol. magnetic rods Caution The PLEX-ID SP should not be kept in close proximity to magnetic tapes, computer discs or other magnetic storage systems, such as credit cards, as these can be damaged by the strong magnetic field of the magnet heads. -
Page 66: How To Clean The Shield Plate
▲ 1. Prepare the decontaminant: 200 ml 4% glutaraldehyde solution (or another agent recommended by your safety officer). PLEX-ID SP User Manual 10/2009 N09455 Abbott Laboratories... -
Page 67: Packing For Service
Inform about the use of hazardous materials. ● Decontaminate the instrument beforehand. ● Install the transport locks. ● Place the magnet head into its transportation box. ● Pack the instrument according to the enclosed packing ● instructions. Abbott Laboratories PLEX-ID SP User Manual 10/2009 N09455... -
Page 68: Service Contracts
Contact the Abbott Molecular technical service department for more details. Disposal of the If the PLEX-ID SP has to be disposed of, follow the guidelines below. instrument Warning Decontaminate the instrument before disposal. Refer to “Decontamination procedure” on page 64 about decontamination. - Page 69 - Do not treat electrical and electronic equipment as unsorted municipal waste. ▲ Regarding the original packaging and packing materials, use the recycling operators known to you. For more information, contact your local Abbott Molecular representative. Abbott Laboratories PLEX-ID SP User Manual 10/2009 N09455...
- Page 70 Maintenance Disposal of the instrument PLEX-ID SP User Manual 10/2009 N09455 Abbott Laboratories...
-
Page 71: Chapter 6 Technical Specifications
Performance specifications Processing volume 24: 200 µl – 5 mL 96: 20 – 1000 µl Capacity 96 samples/run Collection efficiency of > 95%, 96 Well plate, neutral wash buffer containing detergent, Continued Abbott Laboratories PLEX-ID SP User Manual 10/2009 N09455... -
Page 72: Safety Specifications
START PAUSE STOP TURNTABLE ROTATING CLOCKWISE / four arrow keys / LCD TURNTABLE ROTATING COUNTERCLOCKWISE Safety This section describes the safety specifications for the PLEX-ID SP instrument. specifications In conformity PLEX-ID SP bears the following markings: with the Type 711 100 –... - Page 73 2) The pollution degree describes the amount of conductive pollution present in the operating environment. Pollution degree 2 assumes that normally only nonconductive pollution, such as dust, occurs with the exception of occasional conductivity caused by condensation. ▲ Abbott Laboratories PLEX-ID SP User Manual 10/2009 N09455...
- Page 74 Technical Specifications In conformity with the requirements PLEX-ID SP User Manual 10/2009 N09455 Abbott Laboratories...
-
Page 75: Frequently Asked Questions
Q2: What plates can be used with the PLEX-ID SP? A2: The PLEX-ID SP is compatible with two different plate types: 24 Deep Well plates and 96 Deep Well plates. Each plate type has an optimized magnet head and tips. - Page 76 Adding low amounts of detergent will improve the collection of magnetic particles as well. Quickly centrifuge the plate to sediment the particles to the bottom of the plate. PLEX-ID SP User Manual 10/2009 N09455 Abbott Laboratories...
- Page 77 A13: The transport locks are only necessary when relocating the instrument. Q14: What should you do if the tip loading does not succeed? A14: Try first to manually stretch the tips both lengthwise and width wise to level the tip comb. Abbott Laboratories PLEX-ID SP User Manual 10/2009 N09455...
- Page 78 Frequently Asked Questions Q&As PLEX-ID SP User Manual 10/2009 N09455 Abbott Laboratories...
-
Page 79: Chapter 8 Troubleshooting Guide
However, this error may show up in the error log. The requested movement is not Cannot perform the requested movement. For example, the head and Continued Abbott Laboratories PLEX-ID SP User Manual 10/2009 N09455... -
Page 80: Troubleshooting Guide
Timer already expired. This warning is reported if a wait for a timer (WAI) command is executed and the timer has already expired. Troubleshooting A troubleshooting guide for the PLEX-ID SP instrument is presented in Table 8–9. guide Table 8–9. Actions taken against error messages and warnings... -
Page 81: Service Request Protocol
Description Timer expired Contact authorized technical service. Service request If the PLEX-ID SP requires service, contact your local Abbott Molecular representative. Do not under any circumstances send the protocol instrument for service without prior contact. It is imperative to indicate the fault and nature of the required service. - Page 82 Troubleshooting Guide Service request protocol PLEX-ID SP User Manual 10/2009 N09455 Abbott Laboratories...
-
Page 83: Chapter 9 Ordering Information
Chapter 9 Ordering Information Contact your local Abbott Molecular representative for ordering and service information. Ordering information codes are presented in Table 9–10 and Table 9–11. PLEX-ID SP Table 9–10. Codes for products Code Instrument / System 03N31-080 PLEX-ID SP List of Table 9–11. - Page 84 Ordering Information List of accessories and consumables PLEX-ID SP User Manual 10/2009 N09455 Abbott Laboratories...
- Page 85 A disposable tip comb always has to be placed onto the microplate prior to processing. There are two different kinds of disposable tip combs available: • for 24 Deep Well plates Abbott Laboratories PLEX-ID SP User Manual 10/2009 N09455...
- Page 86 Glossary: 84 PLEX-ID SP User Manual 10/2009 N09455 Abbott Laboratories...
- Page 87 58 incubation, 20 clean, 24, 61, 63, 65 installation, 5, 23, 24, 25, 28, 30, 65, 71 magnetic rods, 63 installing the PLEX-ID SP, 23, 25, 71 shield plate, 64 instrument layout, 17 turntable, 61 instrument options, 47...
- Page 88 8, 17, 19, 28, 35, 39, 53, 57, 65 warranty, 23, 39 service, 39, 60, 64, 65, 66, 78, 79, 81 working with a magnetic rod, 20 contracts, 66 86 PLEX-ID SP User Manual 10/2009 N09455 Abbott Laboratories...
- Page 89 Notes Abbott Laboratories PLEX-ID SP User Manual 10/2009 N09455 87...
- Page 90 Notes 88 PLEX-ID SP User Manual 10/2009 N09455 Abbott Laboratories...
- Page 91 Notes Abbott Laboratories PLEX-ID SP User Manual 10/2009 N09455 89...
- Page 93 Abbott Molecular Inc. 1300 E Touhy Ave., Des Plaines, IL 60018 www.abbottmolecular.com N09455...
Need help?
Do you have a question about the PLEX-ID SP and is the answer not in the manual?
Questions and answers