Table of Contents
Advertisement
Quick Links
Advertisement
Table of Contents

Related Manuals for gefran ADL300 EPC v2

Summary of Contents for gefran ADL300 EPC v2
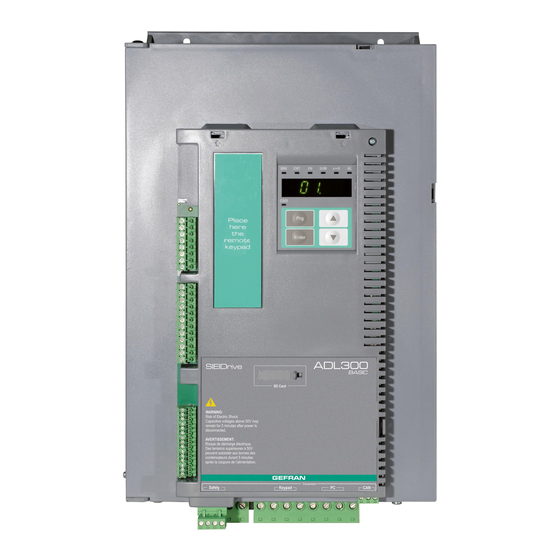
- Page 1 Application: Elevator Position Control ADL300 EPC v2 English User Guide...
- Page 2 The data can only be used for the product description and they can not be understood as legally stated properties. Thank you for choosing this Gefran product. We will be glad to receive any possible information which could help us improving this manual.
-
Page 3: Table Of Contents
TABLE OF CONTENTS INTRODUCTION ............................... 5 INSTALL THE APPLICATION ....................... 6 General Information ..........................6 Requirements ............................6 Preliminary operations ........................6 APPLICATION OVERVIEW ........................8 CONFIGURATION OF THE INTERNAL POSITIONING DEVICE (EPC) ..........9 Layout of cams ............................ 9 Description of Functions (EPC) ...................... - Page 4 Introduction ............................53 Fixed allocated inputs ........................53 Reallocatable inputs .......................... 53 Input commands ..........................54 Example of Control Word Composition ..................... 55 Outputs .............................. 56 Status Word Composition ......................... 57 REMOTE CONTROL OR VIA I/O ......................58 Introduction ............................58 Example of Control via Digital I/Os ....................
-
Page 5: Introduction
INTRODUCTION This document provides all the information necessary for the design, wiring and configuration of a system based on the EPC (Elevator Position Control) application in the lift industry using a product from the SIEIDrive ADL300 series. It describes the sequences and functions of EPC (Elevator Position Control). The version 2 introduce the enhancement to manage installations up to 32 floors doubling the previous version where the max number of floors was 16. -
Page 6: Install The Application
(Releases 1.x do not support the EPC application). To install the application you must have a PC, version 1.6.5 or higher of the Gefran GF_eXpress software with Catalog, the RS-485 serial interface cable (cod 8S864C). The application set-up file... - Page 7 At this stage the application is ready to be used. • Parameters are available in menu 5 “LIFT”. ____________________ _ Page 7 of 64 ADL300-EPCv2- User Guide...
-
Page 8: Application Overview
APPLICATION OVERVIEW This section contains a general description of the EPC (Elevator Positioning Control) application. The EPC (Elevator Positioning Control) function is a separate application for independent management of direct arrival at the floor with internal position regulator and saving of floor distances (system autotuning). There are two possible configurations for this application: Digital I/O control: in the installations where the number of available I/Os is sufficient, the control can be done via I/Os. -
Page 9: Configuration Of The Internal Positioning Device (Epc)
CONFIGURATION OF THE INTERNAL POSITIONING DEVICE (EPC) 3.1 Layout of cams The floor management cams must be arranged as illustrated in the figure: Maximum lift travel limit. UpperLimit There must only be one landingZone cam inside this area. Maximum landing zone SlowUpperLimit Deceleration zone SlowLowerLimit... - Page 10 Types of cams Three types of cams are used in the system: Deceleration cams • There are two deceleration cams: Deceleration lower limit (SlowLowerLimit) read by the InputSlowLowerLimit input; • • Deceleration upper limit (SlowUpperLimit) read by the InputSlowUpperLimit input. •...
- Page 11 Layout of floor counter cams The cams must be arranged as follows with respect to the lift floor: Sensor B Sensor A Cam A Landing Zone Line of the floor Positive direction Cam B Length of cam A and of cam B. d1 = d2 Distance between the lower edge of cam A and the line of the floor.
- Page 12 The figure below shows a possible alternative cam and sensor layout. This second method is functionally identical to that illustrated on the previous page but simpler to install and service. For further details please see appendix B. Sensor A Sensor B Landing Zone Line of the floor...
- Page 13 Use of cams to count floors The floor counter cams are arranged so as to simulate a hypothetical incremental encoder "spread" over the lift shaft. In this hypothetical simulation the cams correspond to the notches on the disk and the two sensors, on the lift car, represent the photocells.
-
Page 14: Description Of Functions (Epc)
3.2 Description of Functions (EPC) The internal positioning device (EPC) offers standard functions, positioning mode functions and special functions. 3.2.1 Standard functions: Some of the functions are already available in the standard version of the drive (EFC application). These mainly include: Signals and sequences for brake and door contactor commands Pre-torque function Ramping down of current at the end of the sequence... -
Page 15: Target Floor Call" Mode
3.2.8 “Target floor call” mode In this mode the PLC sends the command of the floor to be reached directly via digital inputs or CANopen control word (floorSel =..4) and a pulse signal of recognition (floor call). Thus the application already has a target destination before sending a start command. A request to change destination may be received during travel, with the application giving a negative response: “Passed Braking Point"... -
Page 16: Lift Control Commands
3.3 LIFT CONTROL COMMANDS The following commands are available: Jog Forward (JogFwd) • Jog Reverse (JogRev) • Zero cycle (Cycle0) • • Self study (SelfStudy) Floor call (FloorCall) • • Forward (Forward) Reverse (Reverse) • Stop (Stop) • • Maintenance (Maintenance) Realignment (Relevelling) -
Page 17: Zero Cycle Command
3.3.4 Zero cycle command The zero cycle command is used to initialise the lift encoder counter and the floor counter. When the initialisation procedure is complete, if the floor levels are operational, it executes a floor 0 positioning operation. The zero cycle is a sequence used to: Initialise the motor incremental encoder. -
Page 18: Selfstudy Command
3.3.4.1 Minimum lift travel limit The minimum lift travel limit is equal to the minimum limit of the zero cam. The lift must normally never exceed this limit, although there are some exceptions when special maintenance operations are required. Due to these exceptions the control system does not perform any checks or take any action if this limit is exceeded. -
Page 19: Floorcall Command
3.3.6 FloorCall command This command is used to request positioning of the lift car at a specific floor. This command has the following operating mode: 1. On the rising edge of the FloorCall command a request is sent to position the lift car at the requested floor. -
Page 20: Forward Command
If on the rising edge of the reverse command the stop command is TRUE the lift moves to the next floor. This command can ONLY be executed if the Self Study sequence has been successfully completed, and the SelfStudyOk parameter is set to TRUE. 3.3.8 Forward command The forward command has four operating modes:... -
Page 21: Battery Run Mode Function
3.3.10 Battery Run Mode function The battery run mode function is used to manage lift movements with the emergency power supply (power failure) 3.3.11 Battery SEL function The battery sel function is used to disable alarms (undervoltage and phase loss). Only the jog and battery run commands are enabled. -
Page 22: Commissioning Via Keypad
COMMISSIONING VIA KEYPAD 4.1 ASYNCHRONOUS MOTOR START-UP WIZARD From ADL300 quick start guide page 48/80 for asynchronous motor and page 55/80 for brushless motor The STARTUP WIZARD is a guided procedure used for quick start-up of the drive that helps to set the main parameters. - Page 23 Step 8 Setting application parameters: for asynchronous and synchronous motors PAR: 11040 Travel Unit Sel Value: PAR: 11024 Speed fwd / rev 0.000 m/s Def: 0.0000 PAR: 11026 Speed zero Cycle 0.000 m/s Def: 0.0000 PAR: 11028 Speed jog 0.000 m/s Def: 0.0000 PAR: 11030...
- Page 24 PAR: 11032 Speed Battery Mode 0.000 m/s Def: 0.0000 PAR: 11034 Multispeed 6 0.000 m/s Def: 0.0000 PAR: 11036 Multispeed 7 0.000 m/s Def: 0.0000 PAR: 11000 Acc ini Jerk 0.500 m/s3 Def: 0.500 PAR: 11004 Acceleration 0.600 m/s2 Def: 0.600 PAR: 11012 Acc end Jerk 1.400 m/s3...
- Page 25 PAR: 11016 Deceleration 0.600 m/s2 Def: 0.600 PAR: 11018 Dec end Jerk 0.500 m/s3 Def: 0.500 ____________________ _ Page 25 of 64 ADL300-EPCv2- User Guide...
-
Page 26: Description Of Parameters
DESCRIPTION OF PARAMETERS This manual only includes the parameters concerning the application (menu 5). For all other parameters reference should be made to the "Description of functions and list of parameters" manual. 5 – LIFT The LIFT menu displays the parameters concerning the LIFT function in the configuration with internal positioning device (EPC). - Page 27 Menu Description Type FB BIT 5.1.1 11006 Car Max Speed FLOAT 16/32BIT 10.0 Lift car speed at base frequency. This represents the system speed. It is also used to calculate the mechanical constant. Menu Description Type FB BIT 5.1.2 11042 Gearbox Ratio FLOAT 16/32BIT 45.0...
- Page 28 Menu Description Type FB BIT 5.1.13 12050 Inertia Calculated Kgm2 FLOAT The system inertia with half load relayed to the motor is displayed. This value can be entered in the Inertia parameter in the SPEED REG GAINS menu. 05.02 – SPEED Menu Description Type...
- Page 29 1 fwd/rev speed 2 Zero cycle speed 3 Jog speed 4 Self study speed 5 Battery mode speed 6 Multispeed 6 7 Multispeed 7 8 Null Menu Description Type FB BIT 5.2.10 11040 Travel Unit Sel INT16 Selection of the unit of measure for the speed references. 0 Hz (motor speed) 1 m/s (speed of the lift car and depends on the mechanical constant) 2 Rpm (speed of the motor shaft)
- Page 30 Menu Description Type FB BIT 5.3.4 11014 Dec ini jerk m/s3 FLOAT 1.400 0.001 Setting of the jerk value for the initial part of deceleration. Menu Description Type FB BIT 5.3.5 11016 Deceleration m/s2 FLOAT 0.600 0.001 Maximum deceleration value setting. Menu Description Type...
- Page 31 Enable MR0 acc end jerk MR0 dec ini jerk MR0 deceleration MR0 acceleration MR0 dec end jerk MR0 acc ini jerk Speed thr Speed ref Spd 0 ref delay Brake open delay Cont open delay Magn. current Brake close dly Cont close delay RUN cont mon / UP cont mon /...
- Page 32 When set to 0 the contactor sequences can be enabled without sending the Enable command (Enable is only needed for motor operation). The enable signal can be sent by an auxiliary contact of the output contactors. If set to 1 the contactor sequences can only be enabled if the enable command is active. Menu Description Type...
- Page 33 Menu Description Type FB BIT 5.4.10 12024 Actual Multispeed Sel ENUM The currently selected speed is displayed. 0 Multispeed 0 1 fwd/rev speed 2 Zero cycle speed 3 Jog speed 4 Self study speed 5 Battery mode speed 6 Multispeed 6 7 Multispeed 7 8 Null Menu...
- Page 34 Self study Self study command Dig input 5X Jog Fwd Jog forward command Dig input 7X Jog Rev Jog reverse command Dig input 8X Realignment Realignment command Dig input 9X Forward Forward command Null Reverse Reverse command Null Stop Stop command Null Maintenance Maintenance command...
- Page 35 37 Lift decom2 B0 38 Lift decom2 B1 39 Lift decom2 B2 40 Lift decom2 B3 41 Lift decom2 B4 42 Lift decom2 B5 43 Lift decom2 B6 44 Lift decom2 B7 45 Lift decom2 B8 46 Lift decom2 B9 47 Lift decom2 B10 48 Lift decom2 B11 49 Lift decom2 B12...
- Page 36 Menu Description Type FB BIT 5.5.11 11418 Stop cmd sel ENUM 6000 Setting of the source for the Stop command: “COMMAND SOURCE LIST” see PAR 11400. Menu Description Type FB BIT 5.5.12 11422 Maintenance cmd sel ENUM 6000 Setting of the source for the Maintenance command: “COMMAND SOURCE LIST”...
- Page 37 05.06 – INPUTS The input signals of the EPC lift application can be connected to a signal via a switch that can be used to select from among a series of options listed in the selection list. The selection list can be used to select from among the following options for each single input: Null or One Digital Inputs of the I/O expansion card Some internal signals (e.g.
- Page 38 12262 B6 Lift decomp 12264 B7 Lift decomp 12266 B8 Lift decomp 12268 B9 Lift decomp 12270 B10 Lift decomp 12272 B11 Lift decomp 12274 B12 Lift decomp 12276 B13 Lift decomp 12278 B14 Lift decomp 12280 B15 Lift decomp 1110 Digit input E 1210 Digit input 1X 1212 Digit input 2X...
- Page 39 21 Lift decom1 B1 22 Lift decom1 B2 23 Lift decom1 B3 24 Lift decom1 B4 25 Lift decom1 B5 26 Lift decom1 B6 27 Lift decom1 B7 28 Lift decom1 B8 29 Lift decom1 B9 30 Lift decom1 B10 31 Lift decom1 B11 32 Lift decom1 B12 33 Lift decom1 B13...
- Page 40 Menu Description Type FB BIT 5.6.11 11512 Contactor Fbk sel ENUM Setting of the source for the counter feedback input: “EPC INPUT LIST” see PAR 11500. Menu Description Type FB BIT 5.6.12 11514 Brake Fbk sel ENUM Setting of the source for the brake feedback input: “EPC INPUT LIST”...
- Page 41 Menu Description Type FB BIT 5.6.20 12210 Control Word 2 Mon UINT32 The status of the inputs is displayed as a hexadecimal value, see the description of "Lift control word2" for the meaning of each bit Menu Description Type FB BIT 5.6.21 12216 Command lnput mon1 UINT32...
- Page 42 05.07 – LIFT OUTPUTS Lift control output signals are connected directly to the PAD parameters. See table in chapter 6.6 Outputs. The set of lift output signals is comprised in two LiftStatusWords, see chapter 6.7. Menu Description Type FB BIT 5.7.1 11450 Sel Status Word1...
- Page 43 05.09 – LIFT ALARMS The MdPlc application for ADL300 manages and generates the following alarms: Alarm Type of EPC alarm Description Plc1 fault Contactor feedback Contactor feedback signal error Plc2 fault Brake feedback Brake feedback signal error Plc3 fault Door feedback Door feedback signal error Plc4 fault Data Base Alarm...
- Page 44 4 Fast Stop 5 Lift Stop Menu Description Type FB BIT 5.9.3 11562 Lim Activity INT16 Setting of the behaviour of the drive if the "Limit" alarm is present. This alarm indicates that the rephaser limits have been exceeded (upper/lower limit). 0 Ignore 1 Warning 2 Disable...
- Page 45 If set to 0 the brake feedback alarm is signalled immediately. If set to 1 the possible brake feedback alarm is signalled at the end of the travel: this allows the lift car to reach the floor in case of a faulty brake status signal. Menu Description Type...
- Page 46 Menu Description Type FB BIT 5.9.11 12190 On Speed Limit On Rephaser alarm status. 05.10 – FLOOR COMMANDS Menu Description Type FB BIT 5.10.1 11088 IP Signal Time INT16 4000 A digital signal is sent to the Output 3708 (see menu 5.7 INPUT/OUTPUT Outputs Table) in case of Synchronous motors, and to the bit 11 Lift Status Word in case of asynchronous motors, when the elevator go through each floor.
- Page 47 Menu Description Type FB BIT 5.11.1 12146 EPC Status INT16 The EPC status is displayed. The following values are possible: ready jog forward jog Reverse Zero Cycle 1 of 2 Zero Cycle 2 of 2 SelfStudy 1 of 2 SelfStudy 2 of 2 Floor Call floor call reverse...
- Page 48 05.12 – FLOOR ARRAY The Self Study command is used to detect the position of the cams that indicate the position of the floors in the lift shaft. These positions are detected automatically by performing a series of movements. The following positions are stored for each floor: A Low, B Low, A High, B High.
- Page 49 Menu Descrizione Tipo FB BIT 11074 Floor Upper Limit FLOAT 0.0000 5.12.4 11076 Floor Lower Limit FLOAT 0.0000 5.12.5 By these two parameters, for each floor (selected by parameter 11066,) is possible to set the position respectively of the upper edge (A High) of Cam A and lower edge (B Low) of Cam B (see picture at page 47).
- Page 50 Menu Description Type FB BIT 11166 Pre-torque Enable 5.14.1 Enabling of the pre-torque function 0 Off 1 On Menu Description Type FB BIT 11168 Pre-torque Source INT16 11170 5.14.2 Selection of the origin (source) of the signal to be used for the pre-torque function. 11170 Init pretorque 1600 AnalogInp1...
- Page 51 entered. Ideally the reference should be set so that the minimum value corresponds to the empty lift car and the maximum value corresponds to the lift car at full load. Menu Description Type FB BIT 5.14.8 12034 Pre-torque Input perc INT32 The reference value sampled at start-up is displayed.
- Page 52 Awaiting entry into cam A entered cam A 05.17 – LIFT SERVICE This menu is RESERVED TO GEFRAN SERVICE ONLY. Users are required to avoid any modification. ____________________ _ Page 52 of 64 ADL300-EPCv2- User Guide...
-
Page 53: Configuration Of Input/Output Commands
CONFIGURATION OF INPUT/OUTPUT COMMANDS 6.1 Introduction This section describes the management of signals, input commands (control words) and output commands (status words). These signals can be used to manage the application with a lift control system using a limited number of I/Os and the processing channels of a fieldbus such as CANopen. 6.2 Fixed allocated inputs The Enable input and inputs for reading the sensors of the floor counter cams A and B are allocated to fixed positions and cannot be reallocated:... -
Page 54: Input Commands
6.4 Input commands The input commands described in the table below can be allocated at will and individually using a selector in the 5.5 LIFT COMMANDS menu. The selection list can be used to select from among the following options for each single command: Null or One Digital Inputs of the I/O expansion card Some internal signals (e.g. -
Page 55: Example Of Control Word Composition
6.5 Example of Control Word Composition A signal can generally be connected to a normal or expanded digital input, some internal signals and a bit of the Lift Decomp word bit. With the EPC application, two Decomp word bits are used: Control word 1 is the input of decomp lift word bit 1 •... -
Page 56: Outputs
CONTROL WORD2 (SelLiftWdecInp1): Description Remarks Enable Enable command Floor Call Floor call command Cycle 0 Zero cycle command Self study Self study command Jog Fwd Jog forward command Jog Rev Jog reverse command Realignment Realignment command Forward Forward command Reverse Reverse command Stop Stop command... -
Page 57: Status Word Composition
The set of lift output signals is comprised in two LiftStatusWords. A selector enables the two status words to be connected to Pad 11 or 12 or to fieldbus S ->M1 or S -> M2. 6.7 Status Word Composition The set of lift output signals has been composed in two LiftStatusWords, connected respectively to Pad 11 and Pad 12. -
Page 58: Remote Control Or Via I/O
REMOTE CONTROL OR VIA I/O 7.1 Introduction This section describes how to configure the digital inputs and outputs of the ADL300 drive with EPC application. It includes an example of I/O connection and another of how to send command signals via fieldbus. -
Page 59: Connection Of Card Exp-D16R4-Adl
Battery Mode Battery Mode command Dig input 3X Battery Run Battery Run command Dig input 3X Floor 0 Floor 0 command Dig input 10X Floor 1 Floor 1 command Dig input 11X Floor 2 Floor 2 command Dig input 12X Floor 3 Floor 3 command Null... -
Page 60: Connection Of Card Exp-Sesc-Ir1F2-Adl
7.2.3 Connection of card EXP–SESC-IR1F2-ADL Connection in case of a digital encoder, normally used in synchronous mode. The inputs connected to cam A and B must be allocated to fixed positions! ____________________ _ Page 60 of 64 ADL300-EPCv2- User Guide... -
Page 61: Example Of Remote Control Via Canopen
7.3 Example of remote control via CANopen 7.3.1 Connection of card EXP–D8R4-ADL: This example refers to a configuration using four digital inputs. EXP-IO-D8R4-ADL 50 51 52 53 54 55 56 57 10 11 12 ____________________ _ Page 61 of 64 ADL300-EPCv2- User Guide... -
Page 62: Appendix
APPENDIX 8.1 Appendix A: floor cam Introduction Method for obtaining a "spread encoder" using two sensors and a cam. Sensors 125mm 250mm Position 1 100 mm 225 mm 300 mm 550 mm ____________________ _ Page 62 of 64 ADL300-EPCv2- User Guide... - Page 63 Position 2 0 mm 125 mm 175 mm 300 mm 550 mm Position 3 0 mm 125 mm 175 mm 300 mm 425 mm 550 mm Position 4 0 mm 125 mm 175 mm 300 mm 425 mm 550 mm ____________________ _ Page 63 of 64 ADL300-EPCv2- User Guide...
- Page 64 Position 5 0 mm 125 mm 175 mm 300 mm 425 mm 550 mm Position 6 0 mm 125 mm 175 mm 300 mm 425 mm 550 mm ____________________ _ Page 64 of 64 ADL300-EPCv2- User Guide...
Need help?
Do you have a question about the ADL300 EPC v2 and is the answer not in the manual?
Questions and answers