
Subscribe to Our Youtube Channel
Related Manuals for ProSoft Technology inRAx MVI56E-MNETC


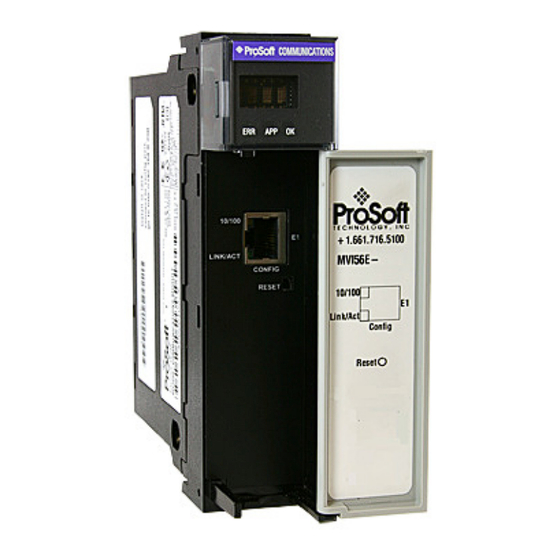
Summary of Contents for ProSoft Technology inRAx MVI56E-MNETC
- Page 1 MVI56E-MNETC ControlLogix Platform Modbus TCP/IP Multi Client Enhanced Communication Module April 18, 2011 SETUP GUIDE...
-
Page 2: Your Feedback Please
ProSoft Technology Product Documentation In an effort to conserve paper, ProSoft Technology no longer includes printed manuals with our product shipments. User Manuals, Datasheets, Sample Ladder Files, and Configuration Files are provided on the enclosed CD-ROM, and are available at no charge from our web site: www.prosoft-technology.com... -
Page 3: Important Safety Information
Important Safety Information North America Warnings Warning - Explosion Hazard - Substitution of components may impair suitability for Class I, Division 2. Warning - Explosion Hazard - When in hazardous locations, turn off power before replacing or rewiring modules. Warning - Explosion Hazard - Do not disconnect equipment unless power has been switched off or the area is known to be nonhazardous. -
Page 4: Battery Life Advisory
Markings Agency Applicable Standards RoHS IEC61010 EMC-EN61326-1:2006 EN61000-6-4:2007 CSA CB Safety CA/10533/CSA IEC 61010-1 Ed. 2 CB 243333-2056722 (2090408) cULus GOST-R EN61010 ATEX EN60079-0 EN60079-15 243333 E183151 ME06 <cULus> E183151 Class I Division 2 Groups A, B, C, and D Temp Code T5 0°... -
Page 5: Table Of Contents
Important Safety Information ....................... 3 Battery Life Advisory ........................... 4 Scope What's New? ......................8 Learning Objectives ....................9 ProSoft Technology Documentation ............... 10 Prerequisites ......................11 Before You Begin System Requirements ..................... 14 Required Items ......................15 Sample Files ......................16 The Sample Application About the MODBUS TCP/IP Protocol .............. - Page 6 How do I monitor MVI56E-MNETC operation? ............65 5.1.12 Are there any other ways to monitor module diagnostics besides being connected to the module’s network (subnet)? ....................65 Glossary of Terms Index Page 6 of 72 ProSoft Technology, Inc. April 18, 2011...
-
Page 7: Scope
In This Chapter What's New? ................... 8 Learning Objectives ................. 9 ProSoft Technology Documentation ............10 Prerequisites ..................11 This document acts as a tutorial, providing step-by-step instructions on how to read and write bi-directional data from one network device to another network device using the MVI56E-MNETC. -
Page 8: What's New
Ethernet settings, allowing quick and easy replacement. LED Scrolling Diagnostic Display: 4-character, alphanumeric display, providing standard English messages for status and alarm data, and for processor and network communication status. Page 8 of 72 ProSoft Technology, Inc. April 18, 2011... -
Page 9: Learning Objectives
Install the MVI56E-MNETC configuration software Install the MVI56E-MNETC module Import the Add-On Instruction to the processor (page 34) Configure the Modbus TCP/IP Client (page 40) Verify the MVI56E-MNETC module communication status (page 55) ProSoft Technology, Inc. Page 9 of 72 April 18, 2011... -
Page 10: Prosoft Technology Documentation
Telephone Support: Please call ProSoft Technology Technical Support at: (Country Code 1+) 661-716-5100. Support is available 24 hours a day, 7 days a week. ProSoft Technology telephone support is free and unlimited. Page 10 of 72 ProSoft Technology, Inc. -
Page 11: Prerequisites
IP address and subnet mask Hardware installation and wiring: install the module and safely connect Modbus TCP/IP Client and ControlLogix devices to a power source and to the MVI56E-MNETC module’s Ethernet port ProSoft Technology, Inc. Page 11 of 72 April 18, 2011... - Page 12 Scope MVI56E-MNETC ♦ ControlLogix Platform Setup Guide Modbus TCP/IP Multi Client Enhanced Communication Module Page 12 of 72 ProSoft Technology, Inc. April 18, 2011...
-
Page 13: Before You Begin
Before You Begin Modbus TCP/IP Multi Client Enhanced Communication Module Setup Guide Before You Begin In This Chapter System Requirements ................14 Required Items ..................15 Sample Files ..................16 ProSoft Technology, Inc. Page 13 of 72 April 18, 2011... -
Page 14: System Requirements
1024 × 768 recommended) CD-ROM drive Note: The Hardware and Operating System requirements in this list are the minimum recommended to install and run software provided by ProSoft Technology ® . Other third party applications may have different minimum requirements. Refer to the documentation for any third party applications for system requirements. -
Page 15: Required Items
Quantum power supply 140XBP01000 Quantum rack 140NOE77111 NOE Card Ethernet cable Ethernet cable to connect MVI56E-MNETC module to Ethernet network for Modbus TCP/IP communication and diagnostics (supplied with the module) ProSoft Technology, Inc. Page 15 of 72 April 18, 2011... -
Page 16: Sample Files
Sample rung import file containing Add-On Instruction Copy the file from the ProSoft Solutions CD-ROM, or download them from www.prosoft-technology.com. Save it to a convenient location in your PC, such as Desktop or My Documents. Page 16 of 72 ProSoft Technology, Inc. April 18, 2011... -
Page 17: The Sample Application
Modbus TCP/IP Multi Client Enhanced Communication Module Setup Guide The Sample Application In This Chapter About the MODBUS TCP/IP Protocol ............ 18 General Overview .................. 19 Architecture ................... 20 Memory Map ..................21 ProSoft Technology, Inc. Page 17 of 72 April 18, 2011... -
Page 18: About The Modbus Tcp/Ip Protocol
MODBUS TCP/IP network and the Rockwell Automation backplane. The module uses an internal database to pass data and commands between the processor and the Client and server devices on the MODBUS TCP/IP network. Page 18 of 72 ProSoft Technology, Inc. April 18, 2011... -
Page 19: General Overview
Configure the Modbus TCP/IP Client Write Command (page 41, page 42) Transfer the configuration to the module (page 47) Set up the NOE Modbus TCP/IP Server (page 53) Verify Communication (page 55) ProSoft Technology, Inc. Page 19 of 72 April 18, 2011... -
Page 20: Architecture
An Ethernet cable connecting the MVI56E-MNETC Modbus TCP/IP Client to the Modbus TCP/IP Server. The following illustration shows the sample application. Note: The illustration does not show the required Ethernet connection for processor programming. Page 20 of 72 ProSoft Technology, Inc. April 18, 2011... -
Page 21: Memory Map
The following table describes the memory map for data transfer between the MVI56E-MNETC module and the Quantum processor. Function MVI56E-MNETC Database Quantum Memory Start Word Count Start Address (Client) Address (Server) Read 1000 400801 Write 400401 ProSoft Technology, Inc. Page 21 of 72 April 18, 2011... - Page 22 The Sample Application MVI56E-MNETC ♦ ControlLogix Platform Setup Guide Modbus TCP/IP Multi Client Enhanced Communication Module Page 22 of 72 ProSoft Technology, Inc. April 18, 2011...
-
Page 23: Procedures
Downloading the Project to the Module ..........47 Configuring the NOE Ethernet adapter for Modbus TCP/IP (Server) ..53 Connecting the MVI56E-MNETC Module to the Modbus TCP/IP Server54 Verifying Communication............... 55 ProSoft Technology, Inc. Page 23 of 72 April 18, 2011... -
Page 24: Setting Jumpers
Note: If you are installing the module in a remote rack, you may prefer to leave the Setup pins jumpered. That way, you can update the module’s firmware without requiring physical access to the module. Page 24 of 72 ProSoft Technology, Inc. April 18, 2011... -
Page 25: Installing The Module In The Rack
Verify that power is removed or the area is non-hazardous before proceeding. Repeated electrical arcing causes excessive wear to contacts on both the module and its mating connector. Worn contacts may create electrical resistance that can affect module operation. ProSoft Technology, Inc. Page 25 of 72 April 18, 2011... - Page 26 (backplane) of the ControlLogix rack. Turn power ON. Note: If you insert the module improperly, the system may stop working or may behave unpredictably. Page 26 of 72 ProSoft Technology, Inc. April 18, 2011...
-
Page 27: Creating A New Rslogix 5000 Project
N Select your ControlLogix controller model. Select R EVISION Enter a name for your controller, such as My_Controller. Select your ControlLogix chassis type. Select S 0 for the controller. ProSoft Technology, Inc. Page 27 of 72 April 18, 2011... -
Page 28: Creating The Module
Configuration Size Important: You must select the Comm Format as D - INT in the dialog box, otherwise the module will not communicate over the backplane of the ControlLogix rack. Page 28 of 72 ProSoft Technology, Inc. April 18, 2011... - Page 29 Values between 1 and 10 milliseconds should work with most applications. Save the module. Click OK to close the dialog box. Notice that the module now appears in the Controller Organization window. ProSoft Technology, Inc. Page 29 of 72 April 18, 2011...
-
Page 30: Importing The Add-On Instruction
ROGRAM OUTINE Select an empty rung in the new routine, and then click the right mouse button to open a shortcut menu. On the shortcut menu, choose I MPORT Page 30 of 72 ProSoft Technology, Inc. April 18, 2011... - Page 31 If your module is located in Slot 1 of the local rack, this step is not required. ProSoft Technology, Inc. Page 31 of 72 April 18, 2011...
- Page 32 The procedure has also imported new user-defined data types, data objects and the Add-On Instruction for your project. Save the application and then download the sample ladder logic to the processor. Page 32 of 72 ProSoft Technology, Inc. April 18, 2011...
-
Page 33: Connecting Your Pc To The Controllogix Processor
Connect the right-angle connector end of the cable to your controller at the communications port. Connect the straight connector end of the cable to the serial port on your computer. ProSoft Technology, Inc. Page 33 of 72 April 18, 2011... -
Page 34: Downloading The Sample Program To The Processor
PROGRAM mode to RUN mode. Note: If you receive an error message during these steps, refer to your RSLogix documentation to interpret and correct the error. Page 34 of 72 ProSoft Technology, Inc. April 18, 2011... -
Page 35: Using Prosoft Configuration Builder Software
ONFIGURATION UILDER action starts the installation wizard for ProSoft Configuration Builder. Click N on each page of the installation wizard. Click F on the last INISH page of the wizard. ProSoft Technology, Inc. Page 35 of 72 April 18, 2011... -
Page 36: Setting Up The Project
Your first task is to add the MVI56E-MNETC module to the project. Use the mouse to select D in the tree view, and then click the EFAULT ODULE right mouse button to open a shortcut menu. Page 36 of 72 ProSoft Technology, Inc. April 18, 2011... - Page 37 In the Product Line Filter area of the dialog box, select MVI56E. In the Select Module Type dropdown list, select MVI56E-MNETC, and then click OK to save your settings and return to the ProSoft Configuration Builder window. ProSoft Technology, Inc. Page 37 of 72 April 18, 2011...
-
Page 38: Uploading The Sample Configuration From The Module
In ProSoft Configuration Builder, select the MVI56E-MNETC module, and then click the right mouse button to open a shortcut menu. On the shortcut menu, choose U PLOAD FROM EVICE TO This action opens the Upload Files dialog box. Page 38 of 72 ProSoft Technology, Inc. April 18, 2011... - Page 39 OK button. ProSoft Configuration Builder now contains the sample configuration for your MVI56E-MNETC module. In the following steps, you will configure the Read and Write commands. ProSoft Technology, Inc. Page 39 of 72 April 18, 2011...
-
Page 40: Enabling The Mnet Client 0 Commands
Client. If a bit for a specific command is set to zero (0) in the WriteCmdBits[x] controller tag, the command will not be executed, regardless of its enabled or disabled state in the configuration. Page 40 of 72 ProSoft Technology, Inc. April 18, 2011... - Page 41 The DevAddress parameter is 0-based so 800 = 400801, 801 = 400802, and so on. The Enable code must be set to 1 to enable the command (0 = disable) The destination Slave node address must be set as 1 (Node parameter) ProSoft Technology, Inc. Page 41 of 72 April 18, 2011...
- Page 42 0-based so 400 = 400401, 401 = 400402, and so on. DDRESS The E code must be set to 1 to enable the command (0 = disable). NABLE The destination Slave node address must be set as 1 (Node parameter) Page 42 of 72 ProSoft Technology, Inc. April 18, 2011...
-
Page 43: Connecting Your Pc To The Module
3 switch between the computer and the module OR reconfigure the router/ layer 3 switch to allow routing of the UDP broadcast messages. In the tree view in ProSoft Configuration Builder, select the MVI56E-MNETC module. ProSoft Technology, Inc. Page 43 of 72 April 18, 2011... - Page 44 Modbus TCP/IP Multi Client Enhanced Communication Module Click the right mouse button to open a shortcut menu. On the shortcut menu, choose D IAGNOSTICS In the Diagnostics window, click the S button. ONNECTION Page 44 of 72 ProSoft Technology, Inc. April 18, 2011...
- Page 45 Important: The temporary IP address is only valid until the next time the module is initialized. For information on how to set the module’s permanent IP address, see the user manual's Ethernet Configuration section. ProSoft Technology, Inc. Page 45 of 72 April 18, 2011...
- Page 46 ONNECTION current settings. If the Test Connection is successful, click C . The Diagnostics menu ONNECT will display in the Diagnostics window. Page 46 of 72 ProSoft Technology, Inc. April 18, 2011...
-
Page 47: Downloading The Project To The Module
Click T to verify that the IP address allows access to the ONNECTION module. If the connection succeeds, click D to transfer the Ethernet OWNLOAD configuration to the module. ProSoft Technology, Inc. Page 47 of 72 April 18, 2011... - Page 48 Select the module, and then click the right mouse button to open a shortcut menu. On the shortcut menu, choose S PCB. ELECT FOR Close ProSoft Discovery Service. Click D to transfer the configuration to the module. OWNLOAD Page 48 of 72 ProSoft Technology, Inc. April 18, 2011...
-
Page 49: Using Cipconnect To Connect To The Module
(the last ENBT/CNBx and chassis in the path). To use CIPconnect, follow these steps. In the Select Connection Type dropdown list, choose 1756-ENBT. The default path appears in the text box, as shown in the following illustration. ProSoft Technology, Inc. Page 49 of 72 April 18, 2011... - Page 50 The connection between the source and destination modules is performed through the backplane. Destination Module Slot Number The slot number where the destination MVI56E module is located. Page 50 of 72 ProSoft Technology, Inc. April 18, 2011...
-
Page 51: Using Rswho To Connect To The Module
In the tree view in ProSoft Configuration Builder, right-click the MVI56E- MNETC module. From the shortcut menu, choose D OWNLOAD FROM EVICE In the Download dialog box, choose 1756 ENBT from the Select Connection Type dropdown box. ProSoft Technology, Inc. Page 51 of 72 April 18, 2011... - Page 52 The MVI56E-MNETC module will automatically be identified on the network. Select the module, and then click OK. In the Download dialog box, click D OWNLOAD Page 52 of 72 ProSoft Technology, Inc. April 18, 2011...
-
Page 53: Configuring The Noe Ethernet Adapter For Modbus Tcp/Ip (Server)
MNET Client 0 Commands in ProSoft Configuration Builder. The following illustration shows the E / I/O S dialog box with the THERNET CANNER NOE card configured as a Modbus TCP/IP Server in Concept version 2.6. ProSoft Technology, Inc. Page 53 of 72 April 18, 2011... -
Page 54: Connecting The Mvi56E-Mnetc Module To The Modbus Tcp/Ip Server
Ethernet hub or switch, to the Ethernet port on an NOE card in the same rack with the Quantum processor. The following illustration shows the Ethernet connection between the MVI56E- MNETC module and the Quantum processor. Page 54 of 72 ProSoft Technology, Inc. April 18, 2011... -
Page 55: Verifying Communication
View the Module Status in the RSLogix 5000 Controller Tags View the LED Status Indicators 4.11.1 Viewing Exchanged Data The following illustration describes the source and destination for the data exchanged by the two Modbus TCP/IP Client Commands. ProSoft Technology, Inc. Page 55 of 72 April 18, 2011... - Page 56 Concept. In Concept, navigate to the R to monitor the EFERENCE DITOR processor memory addresses from 400401 through 400410. The data should match the data you sent from RSLogix 5000. Page 56 of 72 ProSoft Technology, Inc. April 18, 2011...
- Page 57 Concept. Tip: Repeat these tests, using different values each time, to verify that the same data appears in the proper place in each processor. ProSoft Technology, Inc. Page 57 of 72 April 18, 2011...
-
Page 58: Checking Module Status Through Controllogix Controller Tags
The following controller tags should increment periodically, indicating that the Modbus TCP/IP Client is continuously sending commands and receiving responses: MNETC.STATUS.C [0].C LIENT TATUS MNETC.STATUS.C [0].C LIENT TATUS MNETC.STATUS.C [0].R LIENT TATUS EQUESTS MNETC.STATUS.C [0].R LIENT TATUS ESPONSES Page 58 of 72 ProSoft Technology, Inc. April 18, 2011... -
Page 59: Led Status Indicators
"Processor faulted or is in program mode". <IP Address> Module IP address <C0> OK: Port is communicating without error Communication Errors: port is having communication errors. Refer to PCB diagnostics for further information about the error. ProSoft Technology, Inc. Page 59 of 72 April 18, 2011... - Page 60 24 hours. If ERR LED still does not go off, contact ProSoft Technology, as the battery is not a user-serviceable item. Page 60 of 72 ProSoft Technology, Inc. April 18, 2011...
-
Page 61: Building On Success
For technical support and warranty information for your MVI56E-MNETC module, refer to Support, Service, and Warranty in the MVI56E-MNETC User Manual. For more information on ProSoft Technology products and services, please visit www.prosoft-technology.com. ProSoft Technology, Inc. Page 61 of 72... -
Page 62: Frequently Asked Questions
-enabled: Allows end-users to use PCB from remote locations to local and remote chassis installed MVI56E module(s) through a 1756- ENxT. Multi hop (Ethernet and ControlNet™) connections are supported. RSLinx OEM is not required. Page 62 of 72 ProSoft Technology, Inc. April 18, 2011... -
Page 63: What Is The Difference Between The Mvi56E-Mnet(R) And The Mvi56E-Mnetc(R)
The Ethernet port (E1) is the application port as well as the configuration port and allows a remote PC to upload and download configuration files and monitor the module operation through ProSoft Configuration Builder (PCB). ProSoft Technology, Inc. Page 63 of 72 April 18, 2011... -
Page 64: How Do I Change The Module's Ip Address
For RSLogix™ 5000 version 16 applications (or later), the included Add-On Instruction encapsulates the entire ladder logic into one single instruction. For RSLogix 5000 version 15 and older, sample ladder logic is available from ® the ProSoft Technology website at www.prosoft-technology.com. Page 64 of 72 ProSoft Technology, Inc. -
Page 65: How Do I Monitor Mvi56E-Mnetc Operation
ControlLogix backplane to other 1756-ENxT or 1756-CNBx modules, for up to five more route links, to reach an MVI56E module in a chassis connected on EtherNet/IP or ControlNet™ process networks. ProSoft Technology, Inc. Page 65 of 72 April 18, 2011... - Page 66 Building on Success MVI56E-MNETC ♦ ControlLogix Platform Setup Guide Modbus TCP/IP Multi Client Enhanced Communication Module Page 66 of 72 ProSoft Technology, Inc. April 18, 2011...
-
Page 67: Glossary Of Terms
Telephones are an example of a full-duplex communication system. Both parties on a telephone conversation can talk and listen at the same time. If both talk at the same time, their two signals are not corrupted. ProSoft Technology, Inc. Page 67 of 72 April 18, 2011... - Page 68 A series of stations or nodes connected by some type of communication medium. A network may consist of a single link or multiple links. Node An address or software location on the network. Page 68 of 72 ProSoft Technology, Inc. April 18, 2011...
- Page 69 Class B network (with a subnet mask of 255.255.0.0), the first two numbers (150.215) represent the Class B network address, and the second two numbers (017.009) identify a particular host on this network. ProSoft Technology, Inc. Page 69 of 72 April 18, 2011...
- Page 70 Glossary of Terms MVI56E-MNETC ♦ ControlLogix Platform Setup Guide Modbus TCP/IP Multi Client Enhanced Communication Module Page 70 of 72 ProSoft Technology, Inc. April 18, 2011...
- Page 71 Procedures • 23 logic? • 64 ProSoft Technology Documentation • 10 Downloading the Project to the Module • 19, 47 ProSoft Technology® Product Documentation • 2 Downloading the Sample Program to the Processor • Protocol • 69 9, 19, 34 Required Items •...
-
Page 72: Prosoft Technology, Inc
What is the purpose of the MVI56E-MNETC Ethernet (E1) Port? • 63 What is the purpose of the Optional MVI56E-MNETC Add-On Instruction? • 64 What's New? • 8 Your Feedback Please • 2 Page 72 of 72 ProSoft Technology, Inc. April 18, 2011...
Need help?
Do you have a question about the inRAx MVI56E-MNETC and is the answer not in the manual?
Questions and answers