Table of Contents
Advertisement
Installation Instructions
CHS/CHTS
Ceiling Hinge & Swivel / Ceiling Hinge & Swivel with Telescope
Models-CHS&CHST3,4&5
Design Highlights
-Near Silent Motor System
-Bi-Directional Swivel Unit
-Modular Format Ensures Simple Installation
-Range Of Standard Sizes
-Sized To Suit Options Available
email info@futureautomation.co.uk tel: +44 (0) 1438 833577 fax: +44 (0) 1438 833565
Thank you for choosing
futureautomation
ISSUE 002
Advertisement
Table of Contents

Related Manuals for Future Automation CHS Series


Summary of Contents for Future Automation CHS Series
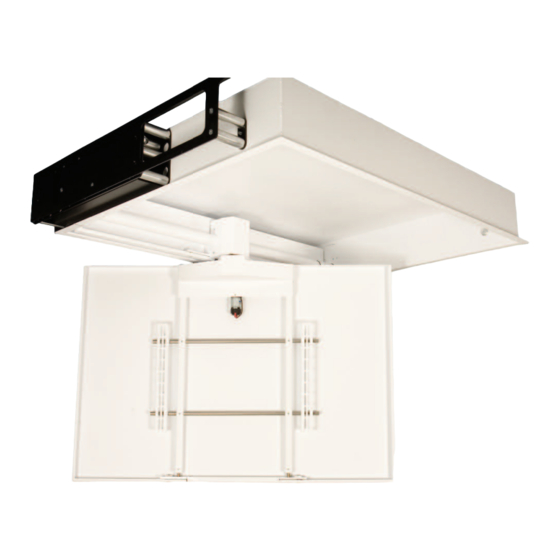
- Page 1 Installation Instructions CHS/CHTS Ceiling Hinge & Swivel / Ceiling Hinge & Swivel with Telescope Models-CHS&CHST3,4&5 Design Highlights -Near Silent Motor System -Bi-Directional Swivel Unit -Modular Format Ensures Simple Installation -Range Of Standard Sizes -Sized To Suit Options Available Thank you for choosing futureautomation email info@futureautomation.co.uk tel: +44 (0) 1438 833577 fax: +44 (0) 1438 833565 ISSUE 002...
-
Page 2: Safety Information
Exceeding the weight capacity can result in serious personal injury or damage to equipment. Future Sound & Vision trading as Future Automation intend to make this and all documentation as accurate as possible. However, Future Automation makes no claim that the information contained herein covers all details, conditions or variations, nor does it provide for every possible contingency in connection with the installation or use of this product. -
Page 3: Table Of Contents
CHS - Ceiling Hinge & Swivel Contents Page Introduction Safety Information Contents Contents Tool Indicator Icons Installation Parts List Package Contents Stage 1 Before You Start Control Box Setup Installation Option 1 Stage 2 Installation Option 2 Deciding Which Way To Fix The Mechanism Stage 3 Mechanism Installation Stage 4... -
Page 4: Contents
CHS - Ceiling Hinge & Swivel Tool Indicator Icons 1. - Drill 3. - Allen Keys 5. - Screwdrivers 7. - Pencil 2. - Tape measure 4. - Spirit Level 6. - Spanners 8. - Saw Page 3 of 18 // email info@futureautomation.co.uk tel: +44 (0) 1438 833577 fax: +44 (0) 1438 833565... -
Page 5: Package Contents
CHS - Ceiling Hinge & Swivel Package Contents Nuts & Bolts Multipack: 1 - Mechanism Various Fixing’s 1.1 - Box 1.2 - Top Trim 1.3 - Left Trim 1.4 - Right Trim 1.5 - Main Tray 1.6 - Cross Bars 1.7 - Screen Uprights 1.8 - Pivot Tube 1.9 - Mount Plates... -
Page 6: Before You Start
CHS - Ceiling Hinge & Swivel Before you start, check the following: -The product is in good condition -No damage to any parts -Wiring is all secure -The unit is in the closed position -Test the mechanism by running it up and down, best done with it upside down on the floor -See page 13-16 for controls. -
Page 7: Installation Option
CHS - Ceiling Hinge & Swivel NOTE: Generic images for all CH installations, may differ from Decide which way to fix the mechanism actual model. Mechanism installation Option 1 One option is to hang the mechanism from 4 bolts fixed to the top of the mount plates. -
Page 8: Stage
CHS - Ceiling Hinge & Swivel Option 2 Fix the mount plates in the positions shown. 27mm behind the back of the opening. 22mm above the bottom of the finished ceiling level. Viewing Side View on right beam Section CC - 1:8 27mm View on left beam Section BB - 1:8... -
Page 9: Securing The Mechanism
CHS - Ceiling Hinge & Swivel Securing the mechanism Option 2 Then lift the mechanism into place and slide apart to lock in place. Gearbox 4 no. M8 bolts need loosening so that the mechanism can telescope in and fit into the recess. Then telescope out and tighten the bolts to secure Fix the mechanism in place with 6 bolts that held it to the mount... -
Page 10: Running Screen Cables
CHS - Ceiling Hinge & Swivel Running screen cables The mechanism has cable management through the pivot tube. Screen cables can be run in at one end of the pivot tube and exit through a slot in its middle to go straight to the back of the screen being mounted The control box needs to be stored in an easily accessible location CHS Mechanism... -
Page 11: Fixing The Box (Not Needed For Option 1)
CHS - Ceiling Hinge & Swivel NOTE: Fixing the box (Not needed for option 1) Generic images for all CH installations, may differ from Set the screen frame at about 20 degrees from the actual model. up position. The box can then be lifted into place. 20 Approx Slide box up over screen mount and hook into place... -
Page 12: Fixing The Screen
CHS - Ceiling Hinge & Swivel Fixing the screen Slide the box to the left, hard against the gearbox. In order to mount the screen, Make sure mechanism is in the OUT position then remove the slotted hook-on uprights and bolt them both to the back of the screen. Make sure at this point the back tray is attached at the top of the swivel unit. -
Page 13: Adjustments & Trim Panels
CHS - Ceiling Hinge & Swivel Adjustments and trim panels Fix the top trim in position before fixing the left & right trim panels to the mechanism. Take the mechanism up with the controller. Be very careful when it shuts for the first time. Cover the STOP button just incase the cover panel doesn’t line up. -
Page 14: Electrical Connections In The Control Box
CHS - Ceiling Hinge & Swivel Connections & Control Box Connect the control box to the DC power supply and the power supply to the mains IEC Power lead 110V - 240V AC Connect infrared sensor here Page 13 of 18 // email info@futureautomation.co.uk tel: +44 (0) 1438 833577 fax: +44 (0) 1438 833565... -
Page 15: Contact Closure
CHS - Ceiling Hinge & Swivel Contact Closure - Use an RJ45 connector in the CCI socket on the control box to operate via contact closure WIRE / CABLE CONTACT CLOSURE DESCRIPTION ACTION 568A 568B LED INDICATOR 12V SUPPLY 12V SUPPLY - CURRENT LIMITED PIN 2 NOT USED GROUND GROUND... -
Page 16: Rs232
CHS - Ceiling Hinge & Swivel RS232 - Use an RJ25 connector in the socket marked RS232 on the control box to operate using RS232 Details RJ25 9 PIN D Baud rate: 9600 PIN 1: RX PIN 2: TX Stop bit: Parity: None PIN 6: TX... -
Page 17: Remote Control
CHS - Ceiling Hinge & Swivel Replacing batteries Future Automation IR Remote Controller needs x2 AAA batteries which are provided within the packaging Operation Buttons - Swivel Mechanism In - Takes the screen into Stop - Will stop the the closed/in position... -
Page 18: Trouble Shooting
CHS - Ceiling Hinge & Swivel Trouble Shooting For information on our products please refer to our web site - www.futureautomation.co.uk or for questions on installations and our product range please phone us on - +44(0) 1438 833577 and ask for our technical support department Page 17 of 18 // email info@futureautomation.co.uk tel: +44 (0) 1438 833577 fax: +44 (0) 1438 833565... - Page 19 CHS - Ceiling Hinge & Swivel Notes... Page 18 of 18 // email info@futureautomation.co.uk tel: +44 (0) 1438 833577 fax: +44 (0) 1438 833565...
- Page 20 Future Automation Unit 2 Kimpton Enterprise Park Claggy Road Kimpton Hertfordshire SG4 8HP United Kingdom Tel: +44 (0) 1438 833 577 Fax: +44 (0) 1438 833 565 Email: info@futureautomation.co.uk www.futureautomation.co.uk...
Need help?
Do you have a question about the CHS Series and is the answer not in the manual?
Questions and answers