
Subscribe to Our Youtube Channel
Related Manuals for Future Automation HQA2


Summary of Contents for Future Automation HQA2
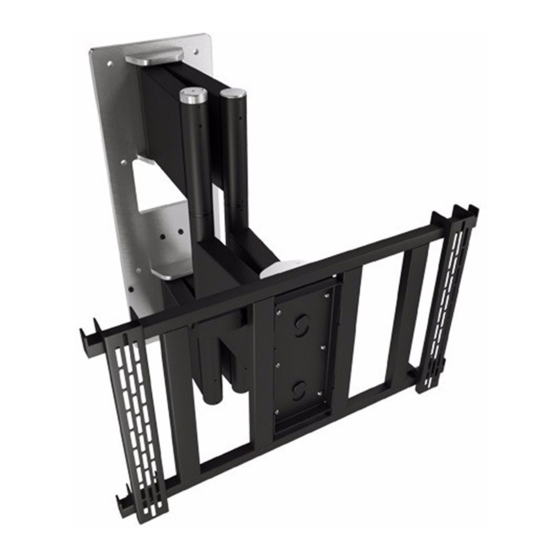
- Page 1 HQA2 Two Way Articulated TV Wall Mount 80"-110" Installation Instructions Issue 001...
-
Page 2: Safety Disclaimer
Clean only with a dry cloth and always unplug any electrical items being used in conjunction with this product before cleaning. Future Sound & Vision trading as Future Automation intend to make this and all documentation as accurate as possible. However, Future Automation makes no claim that the information contained herein covers all details, conditions or variations, nor does it provide for every possible contingency in connection with the installation or use of this product. -
Page 3: Table Of Contents
Testing The Mechanism Screen Mounting Manual Rotation Adjustment 12-13 Marine Lock Mechanism Control General Control Infrared (IR) Contact Closure RS232 Product Warranty Contact Information Page 3 of 20 // Installation Instructions - HQA2 Two Way Articulated TV Wall Mount 80"-110"... -
Page 4: Package Contents
- Mains Power Lead - Infrared Control Lead - CAT5 Lead with RJ45 Connector - Screen Fixings Pack (Multi-pack of Bolts, Washer and Spacers) 1.6* Page 4 of 20 // Installation Instructions - HQA2 Two Way Articulated TV Wall Mount 80"-110"... -
Page 5: Installation Instructions
VESA mounting holes. NOTE: If the display is not VESA compatible a custom adapter will need to be added at this stage. Display Uprights Page 5 of 20 // Installation Instructions - HQA2 Two Way Articulated TV Wall Mount 80"-110"... -
Page 6: Wall Mounting
It is the installers responsibility to obtain the appropriate fixings when attaching to the wall and to make sure the mechanism is secure and safe. Page 6 of 20 // Installation Instructions - HQA2 Two Way Articulated TV Wall Mount 80"-110"... -
Page 7: Recess Mounting
HQA - Heavy Quad Arm Technical Sheet • In order to mount the HQA2 in a recess, a minimum of 10mm perimeter gap from the screen is required, also ensure adequate ventilation for tight recesses. Recess Mounting In order to mount the HQA in a recess, a minimum of 10mm perimeter gap from the screen is required, also ensure adequate RECESS DEPTH = SCREEN DEPTH + 200 [7.9]... -
Page 8: Removing Cover Panels
• Repeat for other cover panels required for cable installation and store safely. Page 8 of 20 // Installation Instructions - HQA2 Two Way Articulated TV Wall Mount 80"-110"... -
Page 9: Cable Management
• Feed the screen, speaker and signal cables though the unit following as per the image above. Page 9 of 20 // Installation Instructions - HQA2 Two Way Articulated TV Wall Mount 80"-110"... -
Page 10: Testing The Mechanism
Ensure all cables are securely fastened and there is enough slack to allow for full head rotation. • Once checks have been completed replace cover panels. Page 10 of 20 // Installation Instructions - HQA2 Two Way Articulated TV Wall Mount 80"-110"... -
Page 11: Screen Mounting
• You can fine tune the level of the display by rotating the bolt on top of the Uprights. Page 11 of 20 // Installation Instructions - HQA2 Two Way Articulated TV Wall Mount 80"-110"... -
Page 12: Manual Rotation Adjustment
To manually adjust the parallel head position remove the top head inner plate as shown below. • Loosen the 4 rotational locking bolts circled in the detail view. Top Head Inner Plate 4x Rotational Locking Bolts Page 12 of 20 // Installation Instructions - HQA2 Two Way Articulated TV Wall Mount 80"-110"... - Page 13 Manually rotate the head into the desired parallel position then lock back in place by tighten the rotational locking bolts back up. • Finally replace the head inner plate back onto of the head. Page 13 of 20 // Installation Instructions - HQA2 Two Way Articulated TV Wall Mount 80"-110"...
-
Page 14: Marine Lock
Installation Instructions Marine Catch The HQA2 can be ordered with an optional marine lock to securely lock the mechanism in the IN position. Marine Lock Latch Bracket Marine Lock mechanism rotates to secure the main assembly. • Suitable for indoor marine installations. -
Page 15: Mechanism Control
The standard Future Automation Infrared (IR) remote control required x2 AAA batteries to operate. These are provided with the mechanism in the Accessories Pack. These batteries can be replaced as the per the image below. Page 15 of 20 // Installation Instructions - HQA2 Two Way Articulated TV Wall Mount 80"-110"... -
Page 16: Infrared (Ir)
Only buttons indicated above are functional with the product. Any other button press will STOP the mechanism. Page 16 of 20 // Installation Instructions - HQA2 Page 16 of 20 // Installation Instructions - HQA2 Two Way Articulated TV Wall Mount 80"-110"... -
Page 17: Contact Closure
Contact Closure LED Layout LED 1 LED 2 LED 3 LED 4 LED 5 (NOT USED) Contact Closure Input Port Contact Closure Input Table Page 17 of 20 // Installation Instructions - HQA2 Two Way Articulated TV Wall Mount 80"-110"... -
Page 18: Rs232
Device OUT to memory position C fa_stop Carriage Return (Enter / ASCII 13) Device STOP (At any position) fa_home Carriage Return (Enter / ASCII 13) Device OUT swivel parallel Page 18 of 20 // Installation Instructions - HQA2 Two Way Articulated TV Wall Mount 80"-110"... -
Page 19: Product Warranty
• Compensation for loss of use of the product, and consequential loss of any kind. Any part of your system that needs to be replaced during a warranty repair becomes the property of Future Automation. Customer Support - Contact Details... -
Page 20: Contact Information
Mon - Fri 8:00 to 17:30 GMT Mon - Fri 7:00 to 17:00 EST Saturday & Sunday - Closed Saturday & Sunday - Closed Page 20 of 20 // Installation Instructions - HQA2 Two Way Articulated TV Wall Mount 80"-110"...
Need help?
Do you have a question about the HQA2 and is the answer not in the manual?
Questions and answers