Table of Contents
Advertisement
Advertisement
Table of Contents

Subscribe to Our Youtube Channel
Related Manuals for Teledyne BOA Spot ID Series


Summary of Contents for Teledyne BOA Spot ID Series
- Page 1 BOA Spot ID Quick Start Guide BOA Spot ID Quick Start Version 1.2; 2017-11-20...
- Page 2 All copyrights in this manual, and the hardware and software described in it, are the exclusive property of Teledyne DALSA Incorporated and its licensors. Claim of copyright does not imply waiver of Teledyne DALSA Incorporated or its licensors other rights in the work. See the following Notice of Proprietary Rights.
- Page 3 Certifications Declaration of Conformity Manufacturer Teledyne DALSA Industrial Products Incorporated 700 Technology Park Drive Billerica MA 01867 We declare that this product has been tested to comply with the EC Directive for a class A digital device in accordance with EN55022/CISPR22.
- Page 4 If you need to return the BOA Spot Vision Sensor, you must contact the Teledyne DALSA representative who sold you the product. Do not return your product to Teledyne DALSA without prior authorization.
-
Page 5: Table Of Contents
Table Of Contents Introduction Product Overview ……………………......Code Reading Considerations ……………………......Code Variability ……………………......Inspection Capabilities ……………………......Components ……………………......Lens, Cover & Light Options ……………………......FOV and Reading Distances ……………………......Installation Connections & Pin-outs ……………………......Cable Configurations ……………………......Mounting Options ……………………...... -
Page 6: Introduction
Introduction BOA Spot ID Overview BOA Spot is a fully integrated vision sensor that has been designed for industrial ID (Barcode, 2D Matrix and Text) applications. Packaged complete with application software, BOA Spot ID offers a robust, easy-to-deploy fixed code reader and inspection tool for the factory floor. -
Page 7: Code Reading Considerations
Code Reading Considerations BOA Spot ID offers fast decoding of 1D and 2D codes printed or directly marked on a variety of surfaces, including paper, plastic and metal. The decoder is robust and able to read poorly printed, worn or environmentally degraded codes in any orientation. Guidelines for reliable code reading are as follows: 1D Codes •... -
Page 8: Code Variability
Compensating for Code Variability The variability between surface type and printing method can result in significant changes in code appearance from part to part. The IDS and IDE models includes image filters and control parameters to enhance readability for poor print quality or direct part marking (DPM). -
Page 9: Inspection Capabilities
BOA Spot ID Inspection Capabilities The following table shows the tools available in the IDS & IDE models. Detailed information about each of the tools is available in the on-line help. Tool Icon Model Description Use to decode: Code 11, 32, 39, 93, 128, Barcode IDS &... -
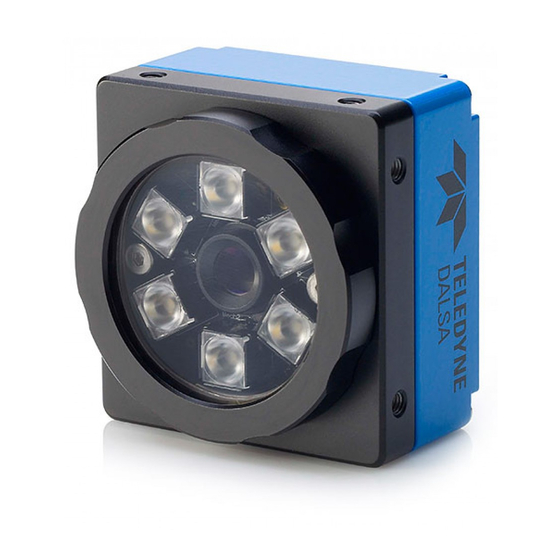
Page 10: Components
BOA Spot Vision Sensors are shipped with the components listed below. Take a few moments to verify that everything has arrived in good condition. If your product has been visibly damaged during shipment or is missing parts, please contact your Teledyne DALSA representative immediately. -
Page 11: Lens, Cover & Light Options
Lens, Cover, and Light Options M12 Lens The BOA Spot Vision Sensor can be ordered with an M12 lens in several focal lengths (6, 8, 12, 16 mm). The M12 option comes with a special IP67 cover, that allows you to change focus without removing the cover. -
Page 12: Fov And Reading Distances
Field Of View (FOV) and reading Distances 6 mm Lens The following table shows the field of view (FOV) widths of the 6 mm lens focused to 205 mm at various working distances for the M640 & M1280 model sensors. Distance in mm Approx FOV (mm) 2D min cell (mil) - Page 13 Field Of View (FOV) and reading Distances 8 mm Lens The following table shows the field of view (FOV) widths of the 8 mm lens focused to 415 mm at various working distances for the M640 & M1280 model sensors. Distance in mm Approx FOV (mm) 2D min cell (mil)
- Page 14 Field Of View (FOV) and reading Distances 12 mm Lens The following table shows the field of view (FOV) widths of the 12 mm lens focused to 410 mm at various working distances for the M640 & M1280 model sensors. Distance in mm Approx FOV (mm) 2D min cell (mil)
- Page 15 Field Of View (FOV) and reading Distances 16 mm Lens The following table shows the field of view (FOV) widths of the 16 mm lens focused to 550 mm at various working distances for the M640 & M1280 model sensors. Distance in mm Approx FOV (mm) 2D min cell (mil)
- Page 16 2. Additional manuals and documentation are included on the CD that ships with the product. 3. Factory support is available by email at: support.ipd@teledyne.com. 4. Call, fax or email your local representative who sold you the product. BOA Spot ID Quick Start...
-
Page 17: Installation
Installation Connecting the BOA Spot Vision Sensor This section details how to connect the BOA Spot Vision Sensor with its associated components and factory environment. Camera Connectors and Indicators I/O PWR 12 Pin LAN 8 Pin Designator Definitions 10/100 BaseT Ethernet connection. Provides the primary interface for configuring the sensor, developing the application and monitoring results. - Page 18 Cable Pinouts The BOA Spot Vision Sensor is compatible with M12 factory cables as show below: LAN Connector Pinout NOTE: the BOA Spot LAN Name RJ45 connector is different than PWR * specified in the ProfiNet interconnection technology guide. GND * TDX- RDX+ TDX+...
-
Page 19: Cable Configurations
Cable Configurations The BOA Spot Vision Sensor offers flexible cabling to suit a number of application configurations: 1. For typical applications, both the Ethernet and I/O-PWR cables are connected to provide flexibility between the sensor and the control environment. In this configuration, power is usually supplied by the I/O-PWR cable. - Page 20 Ethernet and I/O Setup 1. Connect the M12-8 male end of the Ethernet cordset (A-BVS-E8S-X) to the M12-8 female connector labeled “LAN” on the sensor. 2. Connect the RJ45 end of the Ethernet cordset to the RJ45 on the client PC, PLC or factory LAN (PC is only required for setup) 3.
- Page 21 Ethernet Only Setup 1. Connect the M12-8 male end of the Ethernet cordset (A-BVS-E8S-X) to the M12-8 female connector labeled “LAN” on the sensor. 2. Connect the RJ45 end of the Ethernet cordset to the RJ45 connector labeled “CAM LAN” on the Panel Link breakout module (A-BVS-PL-100) 3.
-
Page 22: Mounting Options
Mounting Options The BOA Spot Vision Sensor provides M4 holes on the sides of the sensor for convenient mounting as shown in the following illustrations. Surface Mount We recommend using more than two screws in high vibration environments Thru Fit Mount BOA Spot ID Quick Start Version 1.2;... -
Page 23: Dimensional Drawings
BOA Spot Mechanical Dimensions Top View Side Side View View Note: All dimensions in mm Bottom View Back View C Mount Lens Cover BOA Spot ID Quick Start Version 1.2; 2017-11-20... - Page 24 Panel Link Mechanical Dimensions PL-101 Top View PL-101 Side View Note: All dimensions in mm PL-100 Top View PL-100 Side View BOA Spot ID Quick Start Version 1.2; 2017-11-20...
-
Page 25: Specifications
Product Specifications General Specifications This following table lists the specifications of the BOA Spot Vision Sensor: Specification Definition Memory Storage 256MB Storage; 256MB Program 1/3” CMOS; 3.75 μm pixel size, Global Shutter Image Sensor Resolution 640x480 and 1280x960 Type Monochrome Progressive Scan Exposure 22 us to 1000 ms Acquisition... -
Page 26: Input Specifications
Input Specifications The BOA Spot Vision Sensor provides three (3) dedicated opto-isolated, polarity independent inputs. One of the inputs provides the acquisition Trigger function, while the other two are general purpose. Specification Definition Voltage 11-30 V 0-3 V (12 V nominal threshold) Current 8.0 mA typical (24 V applied) Protection... - Page 27 Job Switching Using Inputs BOA Spot can store up to 32 Solutions (job files) that can be loaded on demand via a hardware switch. The switch uses the general purpose GPI1 & GPI2 inputs. A PLC, or other hardware controlling device, sets a HIGH signal on the “job change” line (GPI1) and sends a series of pulses on the “job select”...
-
Page 28: Output Specifications
Output Specifications The BOA Spot Vision Sensor provides three (3) dedicated opto-isolated, solid state relay outputs. One may be used as “strobe” pulse output for an external light source. Or all three can be used as general purpose outputs. Specification Definition Voltage (Vin) Load... - Page 29 Output Considerations A hardware output is a signal with a fixed programmed pulse duration and fixed programmed offset relative to the incoming Trigger signal. Set one output to PASS and another to FAIL. If processing is not complete when the output decision is scheduled, a FAIL output will result.
-
Page 30: Pl-101 Specifications
PL-101 Specifications The PL-101 module offers additional isolation for the BOA Spot sensor and simplifies wiring at the control panel. The PL-101 is connected to the sensor through a single M12 cable. When using the PL-101, Power input PWR must be 24 Volts. The I/O and RS-232 connections of BOA Spot are available through the PL-101. -
Page 31: Pl-101 Wiring Diagrams
PL-101 Wiring Diagrams Current Sinking Outputs (NPN) Current Sourcing Outputs (PNP) Out0/Strb Out0/Strb Out1 Out1 Out2 Out2 OCMN OCMN ─ ─ Molex connector terminals Current Sinking Inputs (PNP) Current Sourcing Inputs (NPN) In0/Trig In0/Trig ICMN ICMN ─ ─ BOA Spot ID Quick Start Version 1.2;... -
Page 32: Serial Port Connection
Serial Port Connection The RS-232 serial port is exposed through the I/O connector and available on the PL- 101 module. By default, the serial port settings are set as follows: Port definition Setting Baud Rate 115200 Data Bits Parity None Stop Bits Flow Control None... -
Page 33: Software Setup
Software Setup & Access How to Access BOA Spot The BOA Spot Vision Sensor is supplied with the vision software embedded. The application runs directly on the device and does not require a PC connection at runtime. However, a PC client is required to access, setup and store a solution (job file) on the device. -
Page 34: Configure Client Pc
Configure the Client PC for BOA Spot Access BOA Spot is compatible with computers running Windows 7, 8.1 and 10. PC Security settings and the Network Interface should be configured for the BOA Spot. You must have Administrator Privileges to perform the steps below. Note: The paths to some tools depend on the Windows configuration and appearance settings. - Page 35 1. Open the Control Panel. Click on “System & Security”. Click on “Change User Account Control”. 2. Pull the slider all the way to the bottom and then click “OK”. C: Windows Firewall BOA Spot communicates with the PC through the Network connection. Windows Firewall will block this communication.
- Page 36 D: Internet Explorer BOA Spot is compatible with Internet Explorer versions 6 through 11. BOA Spot is not compatible with Microsoft Edge. 1. Open Internet Explorer. Click on “Tools” and select “Menu bar”. 2. Pull down the Tools menu, and select “Internet Options”. 3.
- Page 37 11. In the popup menu, scroll down to find “ActiveX controls and plug-ins”. 12. Change the “Download unsigned ActiveX controls” to “Prompt”. 13. Disable “Automatic prompt for ActiveX”. 14. Enable “Run ActiveX controls and plug-ins” 15. Click “OK” to close the Security Settings. 16.
-
Page 38: Configure Boa Spot
Configure the BOA Spot Address Take note of the following before attempting to access the application: 1. BOA Spot sensors are preconfigured with a default static IP address of 192.168.0.100 and device name “boaspot”. Note: Do not set the PC to this address; it will flag an error when the BOA Spot is booted. -
Page 39: Idiscover Utility
If the PC has not previously been used to interface a BOA Spot sensor, you must first install the BOA Spot Emulator software. Once installed, the program can be invoked from the iDiscover shortcut (“Start>Programs>Teledyne DALSA>iNspect Express Emulator for BOASpot>Discover BOASpot Cameras”). -
Page 40: Boa Spot Web Server
The BOA Spot Web Server The BOA Spot web server is a portal through which the BOA Spot Vision Sensor can be set up and configured for an application. The web server is accessed from a PC (client) using Microsoft Internet Explorer version 6 through 11, as follows: 1. -
Page 41: Firmware Upgrading
To do this, click on the “Upgrade Device” hotlink to launch the upgrade control. To upgrade, simply browse to the location of the upgrade binary file (obtain from your Teledyne DALSA representative) on the connected PC and click the upgrade button. -
Page 42: Application Settings
Web Server Application Settings Some hardware changeable parameters of BOA Spot sensors are available on the “Application Setup” page of the web server. To access, click the “Home” link and then click the “Application Setup” link on the far right to access the following: •... -
Page 43: Application Interface
BOA Spot Application Interface The application interface has three panels. The left panel is for Instruction and Setup. The large right panel is for displaying the Image and drawing tools. The bottom right panel is for Configuration and displaying Status. The top right panel is the Navigation bar. -
Page 44: Getting Started
Getting Started The following steps show how to setup a basic Solution on BOA Spot. More detailed information is available by clicking the help button in the Navigation bar. 1. Click on “Select Solution” in the Navigation bar. 2. Click on the “Start New Solution” button in the Configuration panel. 3. - Page 45 4. Click on “Tool Setup” in the Navigation bar. 5. Click on the green “Take a Picture” button to snap an image. If using triggered acquire, click the button to the right (will show as green) 6. Click on the tool you want to use in the “Select Tools” panel. * IDS model tools shown Draw the Region Of Interest (ROI) on the image in which the tool will inspect.
- Page 46 7. Optionally: Click on “Setup Communications” in the Navigation bar. This panel is where you would setup connections to outside devices (i.e. PLCs or storage devices) for control/status communication and/or an FTP connection for storing images. Select connection method Set up connection method Add connection method Delete connection method Set up image logging via FTP...
- Page 47 Image Logging Two methods of image logging are supported. If a client PC is connected at runtime, images can be logged directly to the PC drive. If no client is connected at runtime, Image logging can be setup to a networked device using the FTP protocol. Note: Image logging affects performance and is not recommended for time critical applications.
- Page 48 Setting up Outputs The BOA Spot application provides two options for controlling the outputs. These are selected in “Setup Connections” in the “Configuration” panel as shown below. Click on the GUI table cells to set the Driver, polarity and associated pulse parameters.
- Page 49 Soft Pulse Setting: Selecting this setting will automatically define scripts based on the pulse settings defined in the GUI. This offers a convenient alternative to learning the script tool if you only need to generate a pulse output. Pulse Setting: This mode offers a deterministic output with an offset and duration synchronized to the incoming trigger.
- Page 50 9. Click on “Run Solution” in the Navigation bar. Here you can test the solution to see if it meets the inspection objective. 10. Click on “Save Solution” in the Navigation bar. When you are satisfied with the solution, you can save it on the BOA Spot vision sensor using this panel.
-
Page 51: Complementary Programs
BOA Spot application for users who do not wish to use the standard web browser interface. After the installation is complete, the following related shortcuts will be available from the windows start menu: Start>All Programs>Teledyne DALSA>iNspect Express Emulator for BOASpot> Launch Emulator Config Open online Help... - Page 52 This utility provides a quick and easy way to setup the emulator. It is launched from the windows start menu: Start>All Programs>Teledyne DALSA>iNspect Express Emulator for BOA Spot>BOASpot Emulator Config Select the BOA Spot model, and location of the stored images, then click “Launch Emulator”.
-
Page 53: Common Startup Issues
Troubleshooting Common Problems Problems Changing the Address Problem: BOA Spot disappears in iDiscover after clicking “Apply”. Does not reappear. Reason: BOA Spot must be rebooted for the new address to take effect. Solution: Close iDiscover. Cycle power to the BOA Spot. Wait for the boot to complete (about 20-30 seconds). - Page 54 Problem: When I click the “iNspect” link, an error message says ActiveX cannot be installed or security settings are preventing ActiveX installation. Reason 1: Internet Explorer Security settings, or Windows Firewall. Solution 1: Refer to instructions on pages 34-37 on configuring the PC for BOA Spot. Disable the firewall.
- Page 55 Problem: I cannot reconnect to the BOA Spot. I keep getting a message to run iAssistant and clean the system. But running iAssistant and cleaning is not fixing this problem. Reason: Either the BOA Spot or the PC may be “stuck” with a running process that does not quit when is should.
Need help?
Do you have a question about the BOA Spot ID Series and is the answer not in the manual?
Questions and answers