Keysight Technologies FieldFox N9913A Service Manual
Handheld analyzers
Hide thumbs
Also See for FieldFox N9913A:
- Configuration manual (21 pages) ,
- Security features and volatility documentation (24 pages) ,
- User manual (756 pages)
Table of Contents
Advertisement
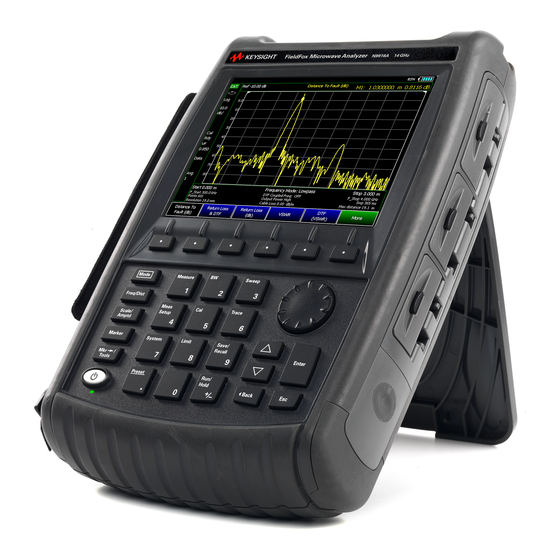
Keysight FieldFox Handheld Analyzers
This manual provides documentation for the following models:
N9913A, N9914A, N9915A, N9916A, N9917A, N9918A
N9925A, N9926A, N9927A, N9928A
N9935A, N9936A, N9937A, N9938A
N9950A, N9951A, N9952A
N9960A, N9961A, N9962A
Notice: This document contains references to Agilent.
Please note that Agilent's Test and Measurement
business has become Keysight Technologies. For
more information, go to www.keysight.com.
Service Guide
Advertisement
Table of Contents
Troubleshooting

Related Manuals for Keysight Technologies FieldFox N9913A


Summary of Contents for Keysight Technologies FieldFox N9913A
- Page 1 N9925A, N9926A, N9927A, N9928A N9935A, N9936A, N9937A, N9938A N9950A, N9951A, N9952A N9960A, N9961A, N9962A Notice: This document contains references to Agilent. Please note that Agilent’s Test and Measurement business has become Keysight Technologies. For more information, go to www.keysight.com. Service Guide...
- Page 2 COVERING THE MATERIAL IN THIS DOCUMENT THAT CONFLICT WITH government requirements THESE TERMS, THE WARRANTY beyond those set forth in the © Keysight Technologies, Inc. TERMS IN THE SEPARATE EULA shall apply, except to the 2013-2018 AGREEMENT WILL CONTROL. extent that those terms, rights, or...
- Page 3 Where to Find the Latest Information Documentation is updated periodically. For the latest information about these products, including instrument software upgrades, application information, and product information, browse to one of the following URLs, according to the name of your product: http://www.keysight.com/find/Fieldfox To receive the latest updates by email, subscribe to Keysight Email Updates at the following URL: http://www.keysight.com/find/MyKeysight...
-
Page 5: Table Of Contents
Contents Table of Contents 1. Safety and Regulatory Information Information in This Chapter ........... . 9 Safety Symbols . - Page 6 Contents Performance Tests (Keysight N7841A Software Package) ......36 Performance Verification Tests ..........37 Adjustments (Keysight N7841A Software Package) .
- Page 7 Contents Voltages and Power Supplies ..........73 Power Control and Management .
- Page 8 Contents Removing and Replacing the Main Battery ........109 Removing and Replacing the Case Group Parts.
-
Page 9: Safety And Regulatory Information
Keysight FieldFox Handheld Analyzers N991xA, N992xA, N993xA, N995xA, N996xA Service Guide Safety and Regulatory Information Information in This Chapter This chapter provides safety information that will help protect you and your network analyzer. It also contains information that is required by various government regulatory agencies. -
Page 10: Safety Symbols
Safety and Regulatory Information Safety Symbols Safety Symbols The following safety symbols are used throughout this manual. Familiarize yourself with each of the symbols and its meaning before operating this instrument. Caution denotes a hazard. It calls attention to a procedure that, if not correctly performed or adhered to, could result in damage to or destruction of the instrument. -
Page 11: Before Applying Power
Safety and Regulatory Information General Safety Considerations Before Applying Power If this product is not used as specified, the protection provided by the equipment could be impaired. This product must be used in a normal condition (in which all means for protection are intact) only. -
Page 12: Electrostatic Discharge Protection
Safety and Regulatory Information Electrostatic Discharge Protection Electrostatic Discharge Protection Protection against electrostatic discharge (ESD) is essential while removing assemblies from or connecting cables to the network analyzer. Static electricity can build up on your body and can easily damage sensitive internal circuit elements when discharged. - Page 13 Safety and Regulatory Information Electrostatic Discharge Protection Figure 1-1 ESD Protection Setup Keysight FieldFox Handheld Analyzers Service Guide...
-
Page 14: Regulatory Information
Safety and Regulatory Information Regulatory Information Regulatory Information This section contains information that is required by various government regulatory agencies. Instrument Markings The instruction documentation symbol. The product is marked with this symbol when it is necessary for the user to refer to the instructions in the documentation. The CE mark is a registered trademark of the European Community. -
Page 15: Battery Disposal
If the either the primary power battery, or the RTC (real time clock) battery (on the A3 front panel interface board) needs to be disposed of, dispose of it in accordance with your country’s requirements. If required, you may return the battery to Keysight Technologies for disposal. Refer to “Contacting Keysight” on page 28 for assistance. - Page 16 Safety and Regulatory Information Regulatory Information Keysight FieldFox Handheld Analyzers Service Guide...
-
Page 17: General Product Information
Keysight FieldFox Handheld Analyzers N991xA, N992xA, N993xA, N995xA, N996xA Service Guide General Product Information Information in This Chapter Section Title Summary of Content Start Page Documentation Map A list of the documentation available for the FieldFox. page 18 Maintenance Cleaning instructions for the external surfaces of your page 19 analyzer. -
Page 18: Documentation Map
General Product Information Documentation Map Documentation Map This Service Guide is available only on the Web via an Internet connection. It contains information for testing, adjusting, troubleshooting, and repairing your FieldFox analyzer. The User’s Guide, included with the product, helps you to quickly familiarize yourself with the analyzer. -
Page 19: Maintenance
General Product Information Maintenance Maintenance To prevent electrical shock, disconnect the FieldFox from the mains source before cleaning. Use a dry cloth or one slightly dampened with water to clean the external case parts. Do not attempt to clean internally. Physical Maintenance Clean the FieldFox case using a dry or slightly damp cloth only. -
Page 20: Fieldfox Options
General Product Information FieldFox Options FieldFox Options Below is a list of options that effect hardware for the FieldFox at the time of initial product release. Additional options will be added as product features are enhanced. Go to http://www.keysight.com/find/Fieldfox for information on currently available upgrade options. - Page 21 General Product Information FieldFox Options Table 2-1 Options Option Description Cable and Antenna Analyzer Base Base GPS Receiver Vector Voltmeter DC Bias Variable-Voltage Source Built-In Power Meter Channel Scanner Reflection Measurements Base Base (Return Loss, VSWR, Scalar Measurement) Pulse Measurements AM/FM Metrics Keysight FieldFox Handheld Analyzers Service Guide...
-
Page 22: Option Descriptions
General Product Information FieldFox Options Option Descriptions Option 010, Vector Network Analyzer Time Domain With Option 010 or time domain, FieldFox computes the inverse Fourier transform of the frequency-domain data to display reflection or transmission coefficients versus time. Time domain gating can be used to remove unwanted responses such as connector mismatch or cable discontinuities, and the results can be displayed in either time or frequency domain. - Page 23 General Product Information FieldFox Options Option 209, Extended Range Transmission Analysis (ERTA) ERTA can be used to measure the scalar transmission gain or loss of an RF system. It is useful when measuring long lossy cables where the two ends cannot easily be brought together, such as those bolted in on ships or aircrafts.
- Page 24 General Product Information FieldFox Options Option 212, 1-Port Mixed-Mode S-Parameters Option 212 enables mixed-mode S-parameter reflection measurements in FieldFox's network analyzer mode. Mixed-mode S-parameters are also knows as balanced measurements. Measurements: — Scc11: common mode reflection — Sdd11: differential mode reflection —...
- Page 25 General Product Information FieldFox Options Option 236, Interface Analyzer and Spectrogram Option 236 provides quick and accurate identification of interfering signals using the spectrogram or waterfall display. Record and playback allows signal capture and offline processing. Option 233 is prerequisite. Option 238, Spectrum Analyzer Time Gating —...
- Page 26 General Product Information FieldFox Options Option 312, Channel Scanner Option 312 provides the functionality to measure and display channel power vs frequency for up to 20 channels simultaneously. Option 320, Reflection Measurements (Return Loss, VSWR, and Scalar Measurement) Measurement of VSWR and return loss can be made on active and passive devices, cables, connectors and antennas.
-
Page 27: Keysight Support, Services, And Assistance
The analyzer’s standard warranty is a one-year return to Keysight Technologies service warranty. There are other repair and calibration options available from Keysight Technologies. Contact Keysight for additional information on available service agreements for this product. Refer to “Contacting Keysight” on page... -
Page 28: Contacting Keysight
Keysight for repair. If you wish to send your network analyzer to Keysight Technologies for service or repair: — Include a complete description of the service requested or of the failure and a description of any failed test and any error message. -
Page 29: Tests And Adjustments
Keysight FieldFox Handheld Analyzers N991xA, N992xA, N993xA, N995xA, N996xA Service Guide Tests and Adjustments Information in This Chapter This chapter contains procedures to help you check, verify, and adjust your FieldFox analyzer. — The checks verify the operation of the assemblies in your analyzer. —... -
Page 30: Before You Begin
Refer to the calibration kit documentation for detailed connector care information. For course numbers about additional connector care instruction, contact Keysight Technologies. Refer to “Contacting Keysight” on page Keysight FieldFox Handheld Analyzers Service Guide... - Page 31 Tests and Adjustments Before You Begin Table 3-1 Connector Care Quick Reference Guide Handling and Storage — Keep connectors clean Do Not — Touch mating-plane surfaces — Extend sleeve or connector nut — Set connectors contact-end down — Use plastic end-caps during storage —...
-
Page 32: Service Test Equipment
Tests and Adjustments Service Test Equipment Service Test Equipment The test equipment required for the TME based N7841A test and adjustment software is listed in the N7841A help file. The following additional test equipment is recommended when servicing the FieldFox analyzer: —... -
Page 33: Before Returning An Instrument To A Customer
Tests and Adjustments Before Returning an Instrument to a Customer Before Returning an Instrument to a Customer When finished servicing an FieldFox analyzer, perform the following before returning the unit to the customer: — Set the Display Colors to Indoor and the display Brightness to 80% via System (7) >... -
Page 34: Operational Check
Tests and Adjustments Operational Check Operational Check This operational check exercises only very basic measurement functionality. Required Equipment A short compatible with the port connector type on the FieldFox. A load compatible with the port connector type on the FieldFox. (Both are typically available in a compatible cal kit.) Procedure 1. - Page 35 Tests and Adjustments Operational Check 5. Press Mode. If SA is available then continue below, otherwise the operational check is complete. — For this step Port 2 should be unconnected or connected to a short or load. — Press SA. —...
-
Page 36: Performance Tests (Keysight N7841A Software Package)
Tests and Adjustments Performance Tests (Keysight N7841A Software Package) Performance Tests (Keysight N7841A Software Package) The performance tests section of the Keysight N7841A software package verifies the electrical performance of your FieldFox analyzer. The software automatically configures your analyzer to execute the performance tests. The N7841A software package is not included with the analyzer;... -
Page 37: Performance Verification Tests
Tests and Adjustments Performance Tests (Keysight N7841A Software Package) Performance Verification Tests — Error Terms Test — Note that the associated adjustment should be performed every 12 months. “Adjustments (Keysight N7841A Software Package)” on page — Frequency Accuracy Test —... -
Page 38: Adjustments (Keysight N7841A Software Package)
Tests and Adjustments Adjustments (Keysight N7841A Software Package) Adjustments (Keysight N7841A Software Package) The adjustments section of the Keysight N7841A software package may be used to fine-tune your analyzer. The N7841A software package is not included with the analyzer; it must be ordered separately. -
Page 39: Troubleshooting
Keysight FieldFox Handheld Analyzers N991xA, N992xA, N993xA, N995xA, N996xA Service Guide Troubleshooting Information in This Chapter The information in this chapter helps you: — Identify the portion of the analyzer at fault. — Locate the specific troubleshooting procedure to identify the assembly or peripheral at fault. -
Page 40: Protect Against Electrostatic Discharge (Esd)
Troubleshooting Protect Against Electrostatic Discharge (ESD) Protect Against Electrostatic Discharge (ESD) This is important. If not properly protected against, electrostatic discharge can seriously damage your analyzer, resulting in costly repair. To reduce the chance of electrostatic discharge, follow all of the recommendations outlined in “Electrostatic Discharge Protection”... -
Page 41: Fieldfox High-Temperature Protection
Troubleshooting FieldFox High-Temperature Protection FieldFox High-Temperature Protection The following features prevent degradation or damage in the event of high internal temperatures in the FieldFox. Do NOT store the FieldFox in the softcase while powered ON or in Standby mode. How to monitor the internal FieldFox temperature: —... -
Page 42: Getting Started With Troubleshooting
Check the Basics A problem can often be solved by repeating the procedure you were following when the problem occurred. Before calling Keysight Technologies or returning the instrument for service, please perform the following checks: 1. Does the analyzer have power available? It is recommended that the battery is installed and the AC power adapter is also connected. -
Page 43: Troubleshooting Organization
Troubleshooting Getting Started with Troubleshooting Troubleshooting Organization Follow the flowgraph in Figure 4-1 to help direct you to the correct section for troubleshooting the analyzer. Figure 4-1 Troubleshooting Organization Flowchart Go to “Power Up Troubleshooting” on page Go to “Power Up Troubleshooting” on page Go to “Measurement Group... -
Page 44: Power Up Troubleshooting
Troubleshooting Power Up Troubleshooting Power Up Troubleshooting If the display is operational but the unit does not boot up successfully: — Make sure there is sufficient power for the unit to operate. — Try re-installing firmware using the firmware upgrade process described in Chapter —... -
Page 45: Front Panel Group Troubleshooting
Troubleshooting Front Panel Group Troubleshooting Front Panel Group Troubleshooting Checking Display Brightness and Sound If the display is dark (no backlight) — Press System, 7 — Select Preferences — Select Preferences — Use the arrow keys to select Brightness, press Ed it, then use the arrow keys to change the display brightness. -
Page 46: Usb And Sd Card Slot Ports
Troubleshooting Front Panel Group Troubleshooting USB and SD Card Slot Ports To verify proper operation of any rear USB ports or SD Card port: — Connect a known good USB flash memory or SD memory card. — Wait 15 seconds for the analyzer to verify the device connection, and then check the operation of the USB flash memory or SD memory card by performing the recall function Save/Recall. -
Page 47: Measurement Group Troubleshooting
Troubleshooting Measurement Group Troubleshooting Measurement Group Troubleshooting — Make sure the unit is warmed up for at least 30 minutes. — Make sure the correct cal kit definition is being used; erase user data to force use of factory cal kit definitions (see Chapter 8 for information on the “Erase User Data... - Page 48 Troubleshooting Measurement Group Troubleshooting Figure 4-2 Typical Four Channel Display — If all traces are present and are similar to the traces in Figure 4-2, then there are no major problems with the analyzer's VNA measurement system. There may, however, be a minor failure in the analyzer. —...
-
Page 49: Problems In Sa Mode
Troubleshooting Measurement Group Troubleshooting Problems in SA Mode The instruments unique signal analyzer blocks that are located on the A4, RF Board can be verified using a signal source and a functioning spectrum analyzer capable of measuring a 33.75 MHz signal. Verifying the 33.75 MHz I.F. - Page 50 Troubleshooting Measurement Group Troubleshooting Inject that 1 GHz CW signal into the Port 2 SA RF Input connector on the instrument as illustrated in Figure 4-4 From an instrument preset, tune the instrument to 1 GHz, 0 Span. Verify that the input attenuator (Atten) is set to 10 dB.
- Page 51 Troubleshooting Measurement Group Troubleshooting Since the input attenuator is set to 10 dB, there should be 6 dB of conversion loss from the RF input connector to the I.F. Out connector. The 1 GHz test signal was set to 0 dBm. The input attenuator on the analyzer was set to 10 dB. If the A4 R.F.
- Page 52 Troubleshooting Measurement Group Troubleshooting Keysight FieldFox Handheld Analyzers Service Guide...
-
Page 53: Theory Of Operation
Keysight FieldFox Handheld Analyzers N991xA, N992xA, N993xA, N995xA, N996xA Service Guide Theory of Operation Information in This Chapter This chapter provides a general description of the operating theory of the FieldFox analyzer. — Theory of operation is explained to the assembly level only. —... -
Page 54: Analyzer System Operation
Theory of Operation Analyzer System Operation Analyzer System Operation The FieldFox analyzer is capable of both network analyzer (NA) and spectrum analyzer (SA) functions. — Full two port NA functions are supported by the hardware. Model and option combinations determine available functionality. —... - Page 55 Theory of Operation Analyzer System Operation Figure 5-1 Overall Block Diagram Keysight FieldFox Handheld Analyzers Service Guide...
-
Page 56: Front Panel Group
Theory of Operation Front Panel Group Front Panel Group The front panel group consists of the following assemblies: — A3 Front Panel Interface Board — A2 LCD Assembly Refer to Figure 5-1 for a simplified overall block diagram which includes the front panel group. -
Page 57: A2 Lcd Assembly
Theory of Operation Front Panel Group There is an input inrush current control circuit on the Ext DC input that limits inrush current to 4 amps. Variable Voltage Source This circuitry provides a constant voltage intended to bias circuits under test. The user interface for controlling this function may be accessed via System >... -
Page 58: Measurement Group
Theory of Operation Measurement Group Measurement Group The measurement group produces a stable output signal by phase locking a synthesized voltage-controlled oscillator (VCO). The measurement group consists of the: — A4 RF Board — A5 System Board — A6 SOM Board —... - Page 59 Theory of Operation Measurement Group Figure 5-2 Simplified RF Block Diagram - N991xA, N992xA, N993xA Keysight FieldFox Handheld Analyzers Service Guide...
- Page 60 Theory of Operation Measurement Group Figure 5-3 Simplified RF Block Diagram - N995xA, N996xA Keysight FieldFox Handheld Analyzers Service Guide...
- Page 61 Theory of Operation Measurement Group NA RF Section An LO synthesizer produces a single LO signal from the 90 MHz time base located on the A5 System board. The LO output is delivered to the NA mixers of both ports. The LO frequency is always above the measured frequency. The IF is 390 kHz.
- Page 62 Theory of Operation Measurement Group Table 5-1 Frequency Bands - NA RF Section N991xA, N992xA, N993xA Band Instrument Start Stop 15000.000 20000.000 20000.000 26500.000 Table 5-2 Frequency Bands - NA RF Section N995xA, N996xA Band Instrument Start Stop 0.010 2.034 2.035 2.425...
- Page 63 Theory of Operation Measurement Group The RF Out attenuator between the source and the reflectometer has three settings: nominal values of 0 dB, 35 dB or user input value. The setting is determined by the High, Low or Manual power setting on the user interface. And beginning from firmware A.06.18, the default output power level is -15 dBm.
- Page 64 Theory of Operation Measurement Group SA RF Section An external RF input signal can be analyzed when connected to the Port 2 SA RF Input connector. Before the input signal is mixed, the signal will go through the input attenuator and optional internal preamplifier. The input attenuator default setting from the factory is 10 dB.
- Page 65 Theory of Operation Measurement Group Table 5-4 Frequency Bands - SA RF Section N995xA, N996xA Band Instrument Start Stop 0.030 15.000 15.000 500.000 500.000 1366.250 1366.250 2600.000 2600.000 3900.000 3900.000 7500.000 7500.000 9500.000 9500.000 12300.000 12300.000 15700.000 15700.000 16300.000 16300.000 19500.000 19500.000 23000.000...
-
Page 66: A5 System Board
Theory of Operation Measurement Group Power Management Circuitry The circuitry on the A4 RF board has five special sections that may be powered down for the purpose of power management. These sections may be selectively powered down (via “load switching”) when not required for the current operating mode of the analyzer. - Page 67 Theory of Operation Measurement Group Figure 5-4 Simplified System Board Block Diagram Keysight FieldFox Handheld Analyzers Service Guide...
- Page 68 Theory of Operation Measurement Group System Monitor (SM) Microcontroller This is the heart of the analyzer. It is active whenever there is DC power available. The microcontroller has ultra-low power dissipation. It is sometimes referred to as the “MSP 430”. The following is a list of some of the functions performed by the SM.
- Page 69 Theory of Operation Measurement Group Time Base The Time Base is an internal TCXO that produces 90 MHz signals for use throughout the analyzer. A 10 MHz signal at the Ref In/Trig input may be used to provide an external time base.
-
Page 70: A6 Som Board
Theory of Operation Measurement Group A6 SOM Board The A6 SOM (System on Module) board plugs directly into the A5 System board as a daughter board and contains: — the CPU — Flash ROM: 64 MB (N991xA, N992xA, N993xA) 128 MB (N995xA, N996xA) —... -
Page 71: A7 Real Time Clock Board
Theory of Operation Measurement Group A7 Real Time Clock Board The battery for the RTC (real time clock) on the A7 RTC is connected to the A6 SOM board via the A5 System board. The battery powers the RTC when the FieldFox is powered off. -
Page 72: Grounding And Power
Theory of Operation Grounding and Power Grounding and Power Grounding Each printed circuit board has a single ground plane. The ground planes on the A4 RF board and A5 System board are connected via the common shields at multiple points. The ground plane on the A3 Front Panel Interface board is connected to the ground plane on the A5 System board. -
Page 73: Voltages And Power Supplies
Theory of Operation Grounding and Power Voltages and Power Supplies The following power supplies exist within the analyzer: — Digital 5 volts Generated from Unreg DC on the A3 Front Panel Interface board, controlled by the System Monitor on the A5 System board, and used on the A3, A4, and A5 boards. -
Page 74: Power Control And Management
Theory of Operation Grounding and Power Power Control and Management Power States The On/Off Button is used to switch between On, Off, and Standby power states: Only the System Monitor and battery control circuits are powered up (if power is available from the battery or external power). If the battery is charging, the LED below the On/Off Button slowly flashes orange with increasing intensity, otherwise this LED is off. - Page 75 Theory of Operation Grounding and Power — Source—switched off during SA mode, switched off between sweeps during CAT or NA modes. — LO—switched off when data is not being taken by receivers. — SA—switched off when in one port CAT or NA modes, on all the time in two port mode.
-
Page 76: Battery Related Information
Theory of Operation Grounding and Power Battery Related Information Battery Description and Operation The main battery is an SBS (Smart Battery System) compliant pack of lithium ion cells. Refer to “Battery Disposal” on page 15 for important information about replacing and disposing of this battery. The nominal voltage of the battery is 10.8 volts and normally varies from 9 to 12 volts. - Page 77 Theory of Operation Grounding and Power Battery Charging Management The battery pack determines when the battery needs charging and requests a charge over the Smart Batt Bus. The Battery Charger and Manager circuit on the A5 System board responds by charging the battery if there is sufficient voltage on the Ext DC line.
-
Page 78: Operation In Modes
Theory of Operation Operation in Modes Operation in Modes The FieldFox User’s Guide describes the various modes of operation and describes the user interface for each mode. The following information describes how the hardware is used in the various modes to make measurements. - Page 79 Theory of Operation Operation in Modes Modes CAT/TDR Power Meter Power Meter (USB Sensor) (Buil t In) NA Settings Calibration Power Level Output Power Port Extensions Transform Meas Setup Settings High Low Man Standard Standard Standard Standard Standard Option 010 CAT or ...
-
Page 80: Cat, Na, And Vvm Modes
Theory of Operation Operation in Modes Modes CAT/TDR Power Meter Power Meter (USB Sensor) (Buil t In) ERTA Source Source Source Mode Normalize Source Power Source CW Enable (CW) (OFF ON) Freq OFF ON Option 209 Option 209 Option 209 Option 209... -
Page 81: Power Meter Mode
Theory of Operation Operation in Modes The RF In Atten can be set from 0 through 30 dB in 5 dB steps. The Attenuator Slope Adjustment determines the correction factors for each step in each frequency band. The RF In Atten can be controlled manually or automatically. When in auto mode, the Reference Level setting determines the attenuator setting. -
Page 82: Temperature Related Information
Theory of Operation Temperature Related Information Temperature Related Information Five temperature sensors are in the analyzer: two on the A4 RF board, two on the A5 System board, and one in the battery pack. — RF1—on the A4 RF board —... -
Page 83: User Calibration In Cat, Na, And Vvm Modes
Theory of Operation User Calibration in CAT, NA, and VVM Modes User Calibration in CAT, NA, and VVM Modes There are three types of calibrations for the CAT, NA and VVM modes: CalReady, QuickCal and Mechanical Cal. See the FieldFox Analyzer User's Guide (Part Number N9927-90001) "Calibration for CAT, NA and VVM Modes"... -
Page 84: Quickcal - N991Xa, N992Xa, N993Xa Only
Theory of Operation User Calibration in CAT, NA, and VVM Modes QuickCal - N991xA, N992xA, N993xA only The QuickCal function mathematically “extends” the preset calibration to the end of a cable or adapter. It is a firmware only function; it does not involve analyzer hardware. -
Page 85: Firmware Related Information
Theory of Operation Firmware Related Information Firmware Related Information General Description The analyzer is based on the Windows CE operating system. This is a closed system; no direct user access to the desktop of general operating system functions is provided. The file system for Windows CE is maintained in flash memory on the A6 SOM board. -
Page 86: Error Log
Theory of Operation Firmware Related Information The System Information screen indicates the time and date of the most recent erase. Chapter 8 for instructions on executing the Erase User data utility. Error Log Chapter 8 for instructions on viewing the error log. The error log is cleared each time the analyzer is powered off. -
Page 87: Lan Interface
Theory of Operation LAN Interface LAN Interface See the “System Configuration” section of the FieldFox Analyzer User’s Guide (Part Number N9927-90001) for details on reviewing and configuring LAN settings. The LAN interface supports Auto MDIX. When a LAN cable is connected to the FieldFox, if the other end of the cable supports Auto MDIX, there is no need for a cross-over cable. - Page 88 Theory of Operation LAN Interface Keysight FieldFox Handheld Analyzers Service Guide...
-
Page 89: Replaceable Parts
Keysight FieldFox Handheld Analyzers N991xA, N992xA, N993xA, N995xA, N996xA Service Guide Replaceable Parts Information in This Chapter This chapter: — identifies the replaceable parts for the FieldFox analyzer. — includes several tables and illustrations to assist you in identifying the correct part for your analyzer. -
Page 90: Ordering Information
To order a part listed in the replaceable parts lists: — include the part number — indicate the quantity required — Contact Keysight Technologies for instructions on where to send the order. Refer to “Contacting Keysight” on page To order a part that is not listed in the replaceable parts lists: —... -
Page 91: Assembly Replacement Procedure
Replaceable Parts Assembly Replacement Procedure Assembly Replacement Procedure The following steps describe how to replace an assembly in the analyzer. Step 1. Identify the faulty group. Begin with Chapter 4, “Troubleshooting.” Follow up with the appropriate troubleshooting chapter that identifies the faulty assembly. -
Page 92: Replaceable Parts Listings
Replaceable Parts Replaceable Parts Listings Replaceable Parts Listings Entire Analyzer Figure 6-1 Entire Analyzer , Exploded View Descriptions and part numbers for the assemblies and parts in each group shown in the above illustration can be found at the following locations: —... -
Page 93: Front Panel Group
Replaceable Parts Replaceable Parts Listings Front Panel Group Refer to Figure 6-2 for part locations. Reference Part Number Description Designator Replacement Assemblies A3 Front Panel Board N9927-60110 Front Panel Board Assembly—Includes: Assembly A3 front panel interface board Separately Replaceable Individual Parts and Assemblies N9912-40001 Keypad assembly N9927-60118... - Page 94 Replaceable Parts Replaceable Parts Listings Figure 6-2 Front Panel Group, Exploded View Keysight FieldFox Handheld Analyzers Service Guide...
-
Page 95: Measurement Group
Replaceable Parts Replaceable Parts Listings Measurement Group “Repair Each time the FieldFox case is opened for any reason, you must order a and Re-assembly Kit” “Miscellaneous Parts” on page 103 . See Refer to Figure 6-3 for part locations. Reference Part Number Description Designator... - Page 96 Replaceable Parts Replaceable Parts Listings Reference Part Number Description Designator RF N9927-60115 N991xA RF Top Panel Assembly—Includes: Top Panel N992xA Connector cover (tethered cap), for Type-N connector, qty 2 (1) Connector cover, for SMA connector (W3 & W4), 1401-0245, Assembly N993xA qty 2...
- Page 97 Replaceable Parts Replaceable Parts Listings Reference Part Number Description Designator N9927-60123 Type-N Adapter assembly (N991xA, N992xA, N993xA only) N9927-60122 3.5 mm Adapter assembly (N9938A only) 2.4mm Test Port Connector Assembly (N995xA, N996xA only) N9950-60140 0515-0372 Screw, machine w/crest cup washer, pan head, Torx T10, (10) M3.0 x 0.5, 8 mm...
- Page 98 Replaceable Parts Replaceable Parts Listings Figure 6-3 Measurement Group, Exploded View - N991xA, N992xA, N993xA Keysight FieldFox Handheld Analyzers Service Guide...
- Page 99 Replaceable Parts Replaceable Parts Listings Figure 6-4 Measurement Group, Exploded View - N995xA, N996xA Keysight FieldFox Handheld Analyzers Service Guide...
-
Page 100: Case Group
Replaceable Parts Replaceable Parts Listings Case Group Refer to Figure 6-5 for part locations. Reference Part Number Description Designator Replacement Assemblies N9927-60116 Front Enclosure Assembly—Includes: Front case, W1312-40049, with A1 keypad installed (2) LCD lens filter (3) Keypad overlay, N9912-80005 (4) N9927-60119 Left Side I/O Panel Assembly—Includes:... - Page 101 Replaceable Parts Replaceable Parts Listings Reference Part Number Description Designator Separately Replaceable Individual Parts and Assemblies Combination Nameplate Set N9927-80021 Nameplate, N9913A, 4 GHz N9927-80022 Nameplate, N9914A, 6.5 GHz N9927-80013 Nameplate, N9915A, 9 GHz N9927-80014 Nameplate, N9916A, 14 GHz N9927-80015 Nameplate, N9917A, 18 GHz...
- Page 102 Replaceable Parts Replaceable Parts Listings Figure 6-5 Case Group, Exploded View Keysight FieldFox Handheld Analyzers Service Guide...
-
Page 103: Miscellaneous Parts
Replaceable Parts Replaceable Parts Listings Miscellaneous Parts Description Model or Part Number Repair and Re-assembly Kit IMPORTANT This kit is required each time the FieldFox case is opened for any reason. The kit includes the following items, some or all of which are necessary to re-assemble the internal assemblies and the case, depending upon the depth of the repair. - Page 104 Replaceable Parts Replaceable Parts Listings Description Model or Part Number T-8 TORX driver; set to 6 in-lb T-10 TORX driver; set to 9 in-lb 5/16 inch, open-end torque wrench; set to 10 in-lb 7/16 inch, hex nut wrench or “nut driver”; set to 9 in-lb 9/16 inch, open-end torque wrench;...
-
Page 105: Repair And Replacement Procedures
N991xA, N992xA, N993xA, N995xA, N996xA Service Guide Repair and Replacement Procedures Information in This Chapter This chapter contains procedures for removing and replacing the major assemblies of your Keysight Technologies FieldFox analyzer. Section Title Summary of Content Start Page Personal Safety Warnings Warnings and cautions pertaining to personal safety. -
Page 106: Personal Safety Warnings
Repair and Replacement Procedures Personal Safety Warnings Personal Safety Warnings These servicing instructions are for use by qualified personnel only. To avoid electrical shock, do not perform any servicing unless you are qualified to do so. Danger of explosion if battery is incorrectly replaced. Replace only with the same or equivalent type recommended. -
Page 107: Assembly Replacement Sequence
Repair and Replacement Procedures Assembly Replacement Sequence Assembly Replacement Sequence The following steps show the sequence that you should follow to replace an assembly in the FieldFox analyzer. Step 1. Identify the faulty group. Begin with Chapter 4, “Troubleshooting.” Step 2. Order a replacement assembly. Refer to Chapter 6, “Replaceable Parts.”... -
Page 108: Removal And Replacement Procedures
Repair and Replacement Procedures Removal and Replacement Procedures Removal and Replacement Procedures Table 7-1 List of Procedures Reference Assembly Description Location Designator or Name Main battery Primary power battery page 109 Case parts All enclosure case parts page 111 Keypad page 124 RPG (part of front panel group) page 130... -
Page 109: Removing And Replacing The Main Battery
Repair and Replacement Procedures Removing and Replacing the Main Battery Removing and Replacing the Main Battery Tools Required None Refer to “Battery Disposal” on page 15 for important instructions on IMPORTANT disposing of the old battery. Replacing the Main Battery 1. - Page 110 Repair and Replacement Procedures Removing and Replacing the Main Battery Figure 7-1 Replacing the Main Battery Keysight FieldFox Handheld Analyzers Service Guide...
-
Page 111: Removing And Replacing The Case Group Parts
Repair and Replacement Procedures Removing and Replacing the Case Group Parts Removing and Replacing the Case Group Parts Tools Required — T-8 TORX driver (set to 6 in-lb) — T-10 TORX driver (set to 9 in-lb) — Isopropyl alcohol (Use only in a well ventilated area.) —... - Page 112 Repair and Replacement Procedures Removing and Replacing the Case Group Parts Replacing the Kickstand, Hinge Cover, and Hinge 1. Refer to Figure 7-2. Remove, and discard, the four screws (1) from the kickstand hinge cover. New screws are provided in the Repair and Re-assembly Kit.
- Page 113 Repair and Replacement Procedures Removing and Replacing the Case Group Parts 2. To replace the entire kickstand assembly: a. Lift the kickstand assembly off of the rear case and discard it. b. Place the new kickstand assembly on the rear case. c.
- Page 114 Repair and Replacement Procedures Removing and Replacing the Case Group Parts 4. To replace the hinge: a. Refer to Figure 7-3. Lift the kickstand assembly off of the rear case. b. Remove and discard the four hinge attachment screws (2). c.
- Page 115 Repair and Replacement Procedures Removing and Replacing the Case Group Parts Separating the Front and Rear Cases 1. Remove the battery. Refer to “Removing and Replacing the Main Battery” on page 109. 2. For N995xA and N996xA models only. Refer to Figure 7-4.
- Page 116 Repair and Replacement Procedures Removing and Replacing the Case Group Parts Figure 7-5 Separating the Front and Rear Cases (1) Figure 7-6 Separating the Front and Rear Cases (N995xA, N996xA) Keysight FieldFox Handheld Analyzers Service Guide...
- Page 117 Repair and Replacement Procedures Removing and Replacing the Case Group Parts 5. Separate the cases and position the rear case to one side, as shown in Figure 7-7, to allow access to the speaker side panel and strap handle. 6. Remove the strap handle from the two dowel pins. 7.
- Page 118 Repair and Replacement Procedures Removing and Replacing the Case Group Parts 8. Position the cases side-by-side as shown in Figure 7-8. 9. Unplug the battery cable, W15, from the A5 System board at the location indicated. 10.The front and rear cases are now completely separated. Figure 7-8 Separating the Front and Rear Cases (3) Keysight FieldFox Handheld Analyzers Service Guide...
- Page 119 Repair and Replacement Procedures Removing and Replacing the Case Group Parts Replacing the Battery Cable 1. Separate the front and rear cases. See “Separating the Front and Rear Cases” on page 115. 2. Refer to Figure 7-9. Note the orientation of the cable for installation of the new cable, then, using a small flat-blade screwdriver to move the cable connector, release the retention clips on the cable connector and remove the cable from the rear case.
- Page 120 Repair and Replacement Procedures Removing and Replacing the Case Group Parts Replacing the Strap Handle 1. Separate the front and rear cases to the positions shown in Figure 7-7. See Separating the Front and Rear Cases. 2. Note the orientation of the strap handle, then lift it off of the dowel pins at each end.
- Page 121 Repair and Replacement Procedures Removing and Replacing the Case Group Parts Figure 7-10 Removing All Measurement Group Assemblies as One Unit 3. Remove the measurement group assemblies (RF top panel assembly, A4 RF board, A5 System board, and A6 SOM board) as one unit with the I/O panel attached, but do not disconnect cable W11 from between the A2 LCD and the A5 System board.
- Page 122 Repair and Replacement Procedures Removing and Replacing the Case Group Parts 4. Refer to Figure 7-11. Remove the two screws (5) that secure the I/O side panel to the A5 System board and remove the I/O side panel. Figure 7-11 Replacing the I/O Side Panel Keysight FieldFox Handheld Analyzers Service Guide...
- Page 123 Repair and Replacement Procedures Removing and Replacing the Case Group Parts 5. Refer to Figure 7-12. Remove the three doors from the old I/O side panel: a. Open each door to its stopping point, then GENTLY force it beyond its stopping point to separate it from the panel. 6.
- Page 124 Repair and Replacement Procedures Removing and Replacing the Case Group Parts 9. Reinstall the measurement group assemblies (RF top panel assembly, A4 RF board, A5 System board, and A6 SOM board) as one unit with the new I/O panel attached. 10.Reinstall the rear case onto the front case.
- Page 125 Repair and Replacement Procedures Removing and Replacing the Case Group Parts 4. Carefully remove the serial number label from the inside bottom of the old front case and apply the label to the new front case. 5. Refer to Figure 7-13.
- Page 126 Repair and Replacement Procedures Removing and Replacing the Case Group Parts Combining the Front and Rear Cases 1. Install a new gasket on the speaker side panel being careful not to stretch it or to damage it in any way. Also, make sure there is no slack in the gasket.
- Page 127 Repair and Replacement Procedures Removing and Replacing the Case Group Parts 5. Refer to Figure 7-15. Position the rear case on top of the front case and to one side as shown. 6. Place the speaker side panel in the groove in the front case being careful not to damage the gasket.
- Page 128 Repair and Replacement Procedures Removing and Replacing the Case Group Parts 8. Position the rear case directly over, and aligned with, the front case and the side panels as shown. 9. Make sure the battery cable is tucked in between the measurement group assemblies and the speaker side panel and that it is not in the path of the screw hole indicated.
- Page 129 Repair and Replacement Procedures Removing and Replacing the Case Group Parts Figure 7-17 Combining the Front and Rear Cases (N995xA, N996xA) 13.For N995xA and N996xA models only. Refer to Figure 7-4. Place the nut rings onto the RF connectors. Using a 1.5 mm Allen torque screwdriver, tighten the 3 Allen screws on each nut ring.
-
Page 130: Removing And Replacing The Front Panel Group Assemblies
Repair and Replacement Procedures Removing and Replacing the Front Panel Group Assemblies Removing and Replacing the Front Panel Group Assemblies Tools Required — T-8 TORX driver (set to 6 in-lb) — T-10 TORX driver (set to 9 in-lb) — 7/16-inch hex nut wrench or “nut driver” (set to 9 in-lb) —... - Page 131 Repair and Replacement Procedures Removing and Replacing the Front Panel Group Assemblies d. To install a new RPG, reverse the above steps. A new cable, nut, and washer are included with the new RPG. When reinstalling the RPG cable, W12, bend the cable toward the right side on top of the display to front panel interface board cable.
- Page 132 Repair and Replacement Procedures Removing and Replacing the Front Panel Group Assemblies Replacing the A2 LCD, the LCD Shield, and LCD Cables 1. Perform the steps under “Pre-replacement Procedure” on page 130. 2. Refer to Figure 7-19. To replace the LCD shield: a.
- Page 133 Repair and Replacement Procedures Removing and Replacing the Front Panel Group Assemblies Figure 7-19 Replacing the A2 LCD, the LCD Shield, and LCD Cables Keysight FieldFox Handheld Analyzers Service Guide...
- Page 134 Repair and Replacement Procedures Removing and Replacing the Front Panel Group Assemblies Replacing the A3 Front Panel Interface Board (FPIB) The A3 front panel interface board contains a Lithium-ion battery. Refer to IMPORTANT “Battery Disposal” on page 15 for important instructions on disposing of this printed circuit board with the battery attached.
- Page 135 Repair and Replacement Procedures Removing and Replacing the Front Panel Group Assemblies Figure 7-20 Replacing the A3 Front Panel Interface Board Keysight FieldFox Handheld Analyzers Service Guide...
-
Page 136: Removing And Replacing The Measurement Group Assemblies
Repair and Replacement Procedures Removing and Replacing the Measurement Group Assemblies Removing and Replacing the Measurement Group Assemblies Tools Required — T-8 TORX driver (set to 6 in-lb) — T-10 TORX driver (set to 9 in-lb) — Small flat blade screwdriver —... - Page 137 Repair and Replacement Procedures Removing and Replacing the Measurement Group Assemblies Figure 7-21 Removing All Measurement Group Assemblies as One Unit Keysight FieldFox Handheld Analyzers Service Guide...
- Page 138 Repair and Replacement Procedures Removing and Replacing the Measurement Group Assemblies Removing and replacing the RF Top Panel Assembly 1. Separate the front and rear cases. Refer to “Separating the Front and Rear Cases” on page 115. 2. Remove all measurement group assemblies as one unit. Refer to “Removing All Measurement Group Assemblies as One Unit”...
- Page 139 Repair and Replacement Procedures Removing and Replacing the Measurement Group Assemblies Figure 7-22 Replacing the RF Top Panel Assembly (N991xA, N992xA, N993xA) Figure 7-23 Replacing the RF Top Panel Assembly (N995xA, N996xA) Keysight FieldFox Handheld Analyzers Service Guide...
- Page 140 Repair and Replacement Procedures Removing and Replacing the Measurement Group Assemblies Replacing the Type-N RF Connectors and RF Cables (N991xA, N992xA, N993xA) 1. Separate the front and rear cases. See “Separating the Front and Rear Cases” on page 115. 2.
- Page 141 Repair and Replacement Procedures Removing and Replacing the Measurement Group Assemblies Figure 7-24 Replacing the Type-N RF Connectors and RF Cables (N991xA, N992xA, N993xA) Keysight FieldFox Handheld Analyzers Service Guide...
- Page 142 Repair and Replacement Procedures Removing and Replacing the Measurement Group Assemblies Replacing the 2.4mm Test Port Connector (N995xA, N996xA) 1. Separate the front and rear cases. See “Separating the Front and Rear Cases” on page 115. 2. Remove all measurement group assemblies as one unit. Refer to “Removing All Measurement Group Assemblies as One Unit”...
- Page 143 Repair and Replacement Procedures Removing and Replacing the Measurement Group Assemblies Figure 7-25 Replacing the 2.4mm Test Port Connectors (N995xA, N996xA) Keysight FieldFox Handheld Analyzers Service Guide...
- Page 144 Repair and Replacement Procedures Removing and Replacing the Measurement Group Assemblies Replacing the Real Time Clock (RTC) Battery Located on the A5 System Board Shield The RTC battery is a Lithium-ion battery and must be disposed of properly. IMPORTANT Refer to “Battery Disposal”...
- Page 145 Repair and Replacement Procedures Removing and Replacing the Measurement Group Assemblies Replacing the A6 SOM Board 1. Separate the front and rear cases. Refer to “Separating the Front and Rear Cases” on page 115. 2. Remove all measurement group assemblies as one unit. Refer to “Removing All Measurement Group Assemblies as One Unit”...
- Page 146 Repair and Replacement Procedures Removing and Replacing the Measurement Group Assemblies Figure 7-27 Remove System Board Shield Keysight FieldFox Handheld Analyzers Service Guide...
- Page 147 Repair and Replacement Procedures Removing and Replacing the Measurement Group Assemblies Figure 7-28 Replacing the A6 SOM Board Keysight FieldFox Handheld Analyzers Service Guide...
- Page 148 Repair and Replacement Procedures Removing and Replacing the Measurement Group Assemblies Replacing the A5 System Board 1. Separate the front and rear cases. See “Separating the Front and Rear Cases” on page 115. 2. Remove all measurement group assemblies as one unit. Refer to “Removing All Measurement Group Assemblies as One Unit”...
- Page 149 Repair and Replacement Procedures Removing and Replacing the Measurement Group Assemblies 15.Remove the System board to FPIB cable (W14) from the old A5 System board and install it on the new board. 16.For N995xA and N996xA models, replace the top panel assembly. Refer to “Removing and replacing the RF Top Panel Assembly”...
- Page 150 Repair and Replacement Procedures Removing and Replacing the Measurement Group Assemblies Figure 7-29 Replacing the A5 System Board Keysight FieldFox Handheld Analyzers Service Guide...
- Page 151 Repair and Replacement Procedures Removing and Replacing the Measurement Group Assemblies Figure 7-30 Connecting the System Board and the RF Board Keysight FieldFox Handheld Analyzers Service Guide...
- Page 152 Repair and Replacement Procedures Removing and Replacing the Measurement Group Assemblies Figure 7-31 System Shield Torque Pattern Keysight FieldFox Handheld Analyzers Service Guide...
- Page 153 Repair and Replacement Procedures Removing and Replacing the Measurement Group Assemblies Replacing the RF Assembly Including the A4 RF Board (N991xA, N992xA, N993xA) 1. Separate the front and rear cases. Refer to “Separating the Front and Rear Cases” on page 115.
- Page 154 Repair and Replacement Procedures Removing and Replacing the Measurement Group Assemblies Figure 7-32 Replacing the A4 RF Board - N991xA, N992xA, N993xA Keysight FieldFox Handheld Analyzers Service Guide...
- Page 155 Repair and Replacement Procedures Removing and Replacing the Measurement Group Assemblies Figure 7-33 RF Board Separation - N991xA, N992xA, N993xA Keysight FieldFox Handheld Analyzers Service Guide...
- Page 156 Repair and Replacement Procedures Removing and Replacing the Measurement Group Assemblies Figure 7-34 RF Shield Torque Pattern - N991xA, N992xA, N993xA Keysight FieldFox Handheld Analyzers Service Guide...
- Page 157 Repair and Replacement Procedures Removing and Replacing the Measurement Group Assemblies Replacing the RF Assembly Including the A4 RF Board (N995xA, N996xA) Do NOT loosen the 2.4 mm connectors that interface the RF assembly to the airline/test ports. Doing so will invalidate the RF assembly calibration. 1.
- Page 158 Repair and Replacement Procedures Removing and Replacing the Measurement Group Assemblies Figure 7-35 System Board and Shield Removal - N995xA, N996xA Keysight FieldFox Handheld Analyzers Service Guide...
- Page 159 Repair and Replacement Procedures Removing and Replacing the Measurement Group Assemblies Figure 7-36 RF Assembly Separation from System Board and Shield - N995xA, N996xA Keysight FieldFox Handheld Analyzers Service Guide...
- Page 160 Repair and Replacement Procedures Removing and Replacing the Measurement Group Assemblies Figure 7-37 Connecting the System Board and the RF Board Keysight FieldFox Handheld Analyzers Service Guide...
- Page 161 Repair and Replacement Procedures Removing and Replacing the Measurement Group Assemblies Figure 7-38 System Shield Torque Pattern - N995xA, N996xA Keysight FieldFox Handheld Analyzers Service Guide...
- Page 162 Repair and Replacement Procedures Removing and Replacing the Measurement Group Assemblies Reinstalling All Measurement Group Assemblies as One Unit 1. Reinstall the I/O side panel, if needed. Refer to “Replacing the I/O Side Panel, Doors, and Gasket” on page 120. 2.
- Page 163 Repair and Replacement Procedures Removing and Replacing the Measurement Group Assemblies Figure 7-39 Replacing All Measurement Group Assemblies as One Unit Keysight FieldFox Handheld Analyzers Service Guide...
-
Page 164: Final Assembly Procedure
Repair and Replacement Procedures Final Assembly Procedure Final Assembly Procedure 1. If the RF Top Panel was removed, reinstall it. Refer to “Removing and replacing the RF Top Panel Assembly” on page 138 2. Reinstall the measurement group assemblies into the front case. Refer to “Reinstalling All Measurement Group Assemblies as One Unit”... -
Page 165: Post-Repair Procedures
Repair and Replacement Procedures Post-Repair Procedures Post-Repair Procedures After the replacement of an assembly, you must perform the service procedures in the order listed in Table 7-2. Procedures referenced in this table are located in Chapter 3, “Tests and Adjustments,” unless specified otherwise. -
Page 166: Manual Checks And Procedures
Repair and Replacement Procedures Post-Repair Procedures Manual Checks and Procedures Manual Check of Keyboard Check that each key works properly. Check that the keyboard backlight LEDs come on when a key is pressed. Manual Check of LCD Press Service (7) > Display, then use Display Colors and Brightness keys to exercise the display. -
Page 167: Processor Upgrade Procedures
Repair and Replacement Procedures Processor Upgrade Procedures Processor Upgrade Procedures N9910HU-100/200/300/400 Processor Upgrade Procedure 1. Separate the front and rear cases. See “Separating the Front and Rear Cases” on page 115. 2. Remove all measurement group assemblies as one unit. Refer to “Removing All Measurement Group Assemblies as One Unit”... - Page 168 Repair and Replacement Procedures Processor Upgrade Procedures 14.Place the RTC board onto the System board shield and secure with the two screws. Torque to 9 in-lbs. 15.Remove the System board to FPIB cable (W14) from the old A5 System board and install it on the new board. 16.Reinstall the I/O side panel.
-
Page 169: General Purpose Maintenance And Service Procedures
Keysight FieldFox Handheld Analyzers N991xA, N992xA, N993xA, N995xA, N996xA Service Guide General Purpose Maintenance and Service Procedures Information in This Chapter Section Title Summary of Content Start Page Service Related User Operations How to: page 170 — view options currently installed on your analyzer —... -
Page 170: Service Related User Operations
General Purpose Maintenance and Service Procedures Service Related User Operations Service Related User Operations To View Currently Installed Options — Press System(7). — Press System Configuration. — Press Options. — Press Show Options. A list of the currently installed options is displayed. To View the Current Firmware Revision, Etc. -
Page 171: To View Temperature Readings
General Purpose Maintenance and Service Procedures Service Related User Operations To View Temperature Readings — Press System(7). — Press Service Diagnostics. — Press Internal Temperatures. See the “Temperature Related Information” section of Chapter 5 for details. Erase User Data Utility —... -
Page 172: Options
General Purpose Maintenance and Service Procedures Options Options Installed options determine the functionality of the analyzer. There is a license associated with each option. To View Currently Installed Options — Press System(7). — Press System Configuration. — Press Options. — Press Show Options. A list of the currently installed options is displayed. - Page 173 General Purpose Maintenance and Service Procedures Options Additional Information About Options For information on acquiring additional options, go to www.keysight.com/find/fieldfoxsupport. There is an installation note associated with each option upgrade that provides detailed instructions. Some combinations of options are not valid; see the web information for details. Keysight FieldFox Handheld Analyzers Service Guide...
-
Page 174: Firmware Upgrades
General Purpose Maintenance and Service Procedures Firmware Upgrades Firmware Upgrades To Check the Current Firmware Revision — Press System(7). — Press Service Diagnostics. — Press System Information. The current firmware version is indicated on the “Firmware Release” line. For information on upgrading FieldFox firmware, go to www.keysight.com/find/fieldfoxsupport. - Page 175 Index operation principles of temperature connectors A1 keypad battery cable care of illustrated removal and contacting Keysight part number replacement CPU board removal and battery disposal operation replacement battery, main removal and A2 LCD removal and replacement illustrated replacement CSA mark operation battery, RTC part number...
- Page 176 Index front panel group illustrated battery charging operation manual check management troubleshooting operation CAT and NA modes front panel group assemblies parts list CPU board removal and removal and front panel group replacement replacement front panel interface front panel interface board LCD shield board illustrated...
- Page 177 Index illustrated cautions about battery maintenance cleaning the display miscellaneous part list of procedures contacting Keysight numbers sequence erase user data utility ordering information warnings about options replaceable case group procedures performance procedure caution about tests, N7841A CPU board post-repair procedures post-repair front panel group power...
- Page 178 Index service, part numbers troubleshooting front panel group measurement group power up where to begin upgrades firmware user accessible files user data erase utility view current firmware revision currently installed options temperature readings the error log warm up analyzer warning warranty standard three-year return to...
- Page 179 This information is subject to change without notice. © Keysight Technologies 2013-2018 Edition 4 August 2018 *N9927-90003* N9927-90003 www.keysight.com...
Need help?
Do you have a question about the FieldFox N9913A and is the answer not in the manual?
Questions and answers