Omnia .9 Installation & User Manual
Hide thumbs
Also See for OMNIA.9:
- Installation and operation manual (127 pages) ,
- Quick start installation manual (13 pages)

Related Manuals for Omnia OMNIA.9


Summary of Contents for Omnia OMNIA.9
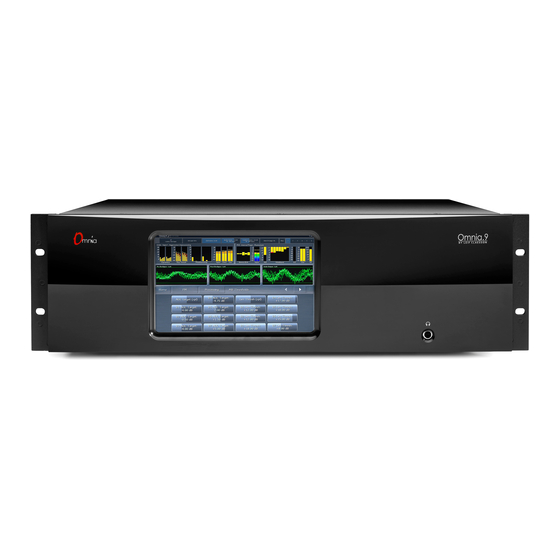
- Page 1 OMNIA.9 All you can imagine. And more. Installation & User’s Guide Version 3.18.99 (MKII) Revised May, 2018 1490-00082-007 --- USER MANUAL: OMNIA-9...
-
Page 2: User Warnings And Cautions
User Warnings and Cautions The installation and service instructions in this manual are for use by qualified personnel only. To avoid electric shock, do not perform any servicing other than that contained in the operating instructions unless you are qualified to do so. Refer all servicing to qualified personnel This instrument has an autoranging line voltage input. -
Page 3: Trademarks, Patents, And Licenses
Updates Telos Omnia.9 features and operations are determined largely by software. The Telos Alliance strives to provide the most stable and feature-rich software available. We encourage you to check for software updates from time to time by visiting our website or by contacting us directly. -
Page 4: We Support You
We support you… By Phone/Fax You may reach our Telos Support Team in emergencies by calling +1 216-622-0247. For billing questions or other non-emergency technical questions, call +1 216-241-7225 between 9:00 AM to 5:00 PM USA Eastern Time, Monday through Friday. By Email. -
Page 5: Table Of Contents
OMNIA.9 MANUAL | Table of Contents User Warnings and Cautions Trademarks, Patents, and Licenses We support you… Warranty A Letter from Frank Foti The Story Continues How it all came to be Processing for FM, AM, HD, Studio, and Streaming Audio... - Page 6 Home Screen & User Interface At the Top of Every Screen Understanding the User Interface and Display Navigation Modes Tree Navigation Mode Tabbed Navigation Mode The Three Basic Control Types Reading the Processing Meters The Home Menu Inputs 1/2/3 Source Audio Menu Source Audio Menu Auto Balance Menu Internal Playback Menu...
- Page 7 OMNIA.9 MANUAL | vii Load Preset Menu Save Preset Menu Preset Protection Menu FM Menu Basic Mode Input Conditioning Menu Enhance Menu Gain Riding Menu Multiband Menu Final Menu Bypass HD Crossfeed FM Menu Intermediate Mode Phase Processing Menu Downward Expanders Menu...
- Page 8 viii | Clipper HD Crossfeed FM Menu Expert Mode Phase Processing Downward Expanders Menu Exp Levels Expander Speed Input AGC Menu Sidechain PEQ Wideband AGC 1 Menu Sidechain PEQ Solar Plexus Parametric Equalizer Stereo Enhancer Multiband Setup Multiband AGC MB AGC Main MB AGC Levels MB AGC Speed Ratio Override...
- Page 9 FM Menu RDS RDS Main Menu ’ Using Omnia 9 s Built-In RDS Encoder Using External RDS Encoders Using an RDS Encoder After Omnia 9 UECP menu Flags Menu Station ID Menu Program Type Menu Alternative Frequencies Menus Field installing RDS...
- Page 10 FM Menu MPX Inputs MPX Input 1 and MPX Input 2 Menus Pre-emph Input Menu Display Settings Menu FM Menu Meter Options Meter Options Menu Loudness Matched A/B Menu Loudness Graph Menu Test Options Menu Display Settings Menu Studio Processing Menu Processing Menu HD Processing Menu Processing Menu...
- Page 11 OMNIA.9 MANUAL | AM Night Menu AM Phase Menu TX Out Menu Insert Menu AM Processing Presets Monitor Output Menu Patch Points Menu FM Processing Patch Points AM Patch Points Studio Processing Patch Points HD-1, HD-2, and HD-3 Patch Points...
- Page 12 | µMPX (Omnia microMPX) AM Options Menu File Recorder Menu Time/Date Menu Time Zone Menu NTP Menu Set Clock Manually Menu Scheduling Menu Info Menu Event Menus (A-B, C-D, E-F, etc ) GPIO Menu GPI Enable GPI Function A-D / E-H Livewire GPI Banks 1-4 GPO Function A-B / and Livewire GPO 1 –...
- Page 13 OMNIA.9 MANUAL | xiii Factory Presets FM Presets 1981A/O92 – by Jesse Graffam Barbeque Sound – by Rob Morsink Big Bottom– by Leif Claesson Big Iron – by Jesse Graffam Celeste – by LeeXS Classical/Jazz – by Leif Claesson Echoes - by Jim Kuzman Empire State of Processing –...
- Page 14 NfRemote Client Software Downloading, Installing, and Configuring the Client Software Some Important Ethernet/Wi-Fi Network Considerations Understanding the NfRemote Connection Window Initiating an Outbound Connection from Omnia 9 Client-Only Controls Client Audio Output Menu Client Microphone Input Menu Client File Recorder...
- Page 15 OMNIA.9 MANUAL | xv Input Section MPX Input MPX Output MPX Patch Point Pre-emphasis Patch Point Undo Input AGC/WB AGC1 WB AGC2 / AGC3 Post-Multiband WB AGC2 / AGC3 Bass Wideband WB AGC2 / AGC3 Bass Only Multiband Processing Speaker Controller...
- Page 16 AoIP, so that all types of broadcasters can excel in this ever-evolving digital world. Omnia Audio not only lets you stand out on the dial with your unique signature sound via legendary audio processors, audio codecs, and microphone processing, it lets you give your listeners a better streaming experi- ence across devices with innovative stream encoding / processing software and hardware.
- Page 17 BLANK PAGE...
-
Page 18: The Story Continues
There are no hidden or “back door” controls in Omnia.9. We’ve given you full access to all of its controls so as not to limit your ability to create exactly the sound you want on the air – and as you will soon discover – there is no shortage of controls. -
Page 19: Omnia 9 Mkii Defined
The Omnia.9 Toolbox Omnia.9 is unique in that it provides you with some built-in tools that we believe are essential to have when setting up your processing. In the past, tuning a processor was done purely by ear in most cases. And while processing is certainly a subjective process –... -
Page 20: That's A Lot Of Power
And the latest software adds even more sophisticated tools for you. If you were already an Omnia.9 user, MKII will be familiar, but even more powerful. For all of its capabilities, the Omnia.9 is not difficult to set up and use. We’ve given... -
Page 21: Quick Start Guide
Quick Start We know that you’re probably in a hurry to get your new Omnia.9 installed and on the air. If you have technical expertise and previous knowledge of audio processor fundamentals, this Quick-Start Setup Guide will get you up and running as quickly as possible. -
Page 22: Nfremote Software
2018, your system may need an MKII upgrade. Contact Telos Technical support or your dealer for details.) NfRemote Software NfRemote is a Windows-based client app that allows you to remotely connect to any Omnia.9 on your network. By default, you should use the port marked “WAN” for NfRemote access. -
Page 23: Physical Installation And Initial Configuration
Main and AES Reference Inputs in the Main Digital I/O section of the rear panel, Aux Digital Input in the Aux Digital I/O section, and Livewire+ AES67 inputs / Outputs over IP. (AoIP is standard on new Omnia 9’s as of April, 2018. -
Page 24: Output Configuration
“MPX Only”. In order to add the output choices needed for FM L/R audio, choose either “L/R Only” if you are you do not intend to use Omnia.9’s built-in stereo generator at all or “MPX + L/R” if you plan to use the built-in stereo generator for your main output, but need an additional pre-emphasized L/R output to feed a secondary chain. -
Page 25: Input Level Adjustment
Input meters in the Processing display window so that average levels keep the meters in the green. If the meters flash red, the input is being overdriven and levels to the Omnia.9 must be reduced. If necessary, it is also possible to invert the polarity of either or both channels with the Invert control. -
Page 26: Troubleshooting Faq
Navigate to Home>System>System Config>HTTP Access and add the IP address/addresses of computers that need to access Omnia.9’s HTTP server on Port 7380. Begin adding your IP addresses to the whitelist in the “IP 2” box, as “IP 1” is for use by the front panel touchscreen. - Page 27 For those who want to hear a processed headphone mix, a dedicated low-latency Studio processing core is provided for talent monitoring. This can be used if Omnia.9 is located at the studio, or if a suitable low-delay return path is available from the transmitter site.
-
Page 28: Obtaining Service
After hours support is available 24/7 by telephone by calling +1.216.622.0247 or by sending an e-mail to “support@ TelosAlliance.com” If you are outside the United States and need support in a language other than English, please contact the Omnia dealer you purchased your unit from. -
Page 29: General Processing Advice
Another suggestion for getting to know your way around Omnia.9 is to find a factory preset that you like and then go exploring in the various menus to see how that sound was achieved. For example, let’s say you find a preset with a smooth, open sound which matches your general processing goal. -
Page 30: Making And Saving Changes
CHAPTER 3 | Making and Saving Changes Human nature is fickle; the human ear adapts and tires quickly; and Omnia.9 is powerful! With those things in mind, here are some recommended “Do’s” and “Don’ts” when making and saving changes to presets: DO resist the temptation to constantly fiddle with every control right after you put Omnia.9 on the air. -
Page 31: Home Screen & User Interface
CPU Load, Speaker Volume, and Headphone Volume Additionally, when using the NfRemote there are choices for Client Volume, and Client CPU Usage. A location name of the particular Omnia.9 can be user-customized (path: Home/System/ System Configuration/SNMP). If you wanted, each drop-down menu could have the same identical choice, a bit of a waste of resources, but if it makes you happy…... - Page 32 This is a typical screen you will see upon opening NfRemote, and then clicking the Home button. This is your starting point. The Omnia.9 powers up in the “default” tree starting mode. The meters will be showing whatever their settings were before the previous shutdown.
-
Page 33: Understanding The User Interface And Display
The third tier is made up of Omnia.9’s controls. Some pages have subpages, which form a fourth tier. (Example: System - I/O Options - FM Options has sub pages such as Main, MPX and Insert. -
Page 34: Tree Navigation Mode
The bottom portion of the screen shows the buttons or controls for the current tier. ♦ In between these two areas is a navigation bar that shows you exactly where you “are” within Omnia.9, along with ♦ navigation arrow buttons that let you go forward or backward to most places you have visited in the fourth tier. -
Page 35: Tabbed Navigation Mode
HOME SCREEN & USER INTERFACE CHAPTER 4 | Tabbed Navigation Mode Clicking on the Menu button and selecting “Tabbed Mode” allows more direct control by displaying more information at once. In this mode: The navigation bar and arrows are eliminated. ♦... -
Page 36: The Three Basic Control Types
HOME SCREEN & USER INTERFACE CHAPTER 4 | The Three Basic Control Types There are three basic types of controls in Omnia.9: On/Off buttons - These controls toggle on and off, thereby enabling or disabling the associated function. ♦ Drop-down menus provide a drop-down list of options. Scrolling over each option highlights it, while a tap or left-click ♦... -
Page 37: Reading The Processing Meters
CHAPTER 5 | Reading the Processing Meters The Processing Meters Display provides a tremendous amount of information about what’s going on inside each of Omnia.9’s processing cores, but in a very efficient and easy-to-read manner. A: Input Level, B: Auto Balance, C: Stereo Enhance Narrowing, D: Stereo Enhance Widening, E: Wideband AGC 1, F: Multiband... - Page 38 READING THE PROCESSING METERS CHAPTER 5 | The Multiband meter window shows the levels and action of the AGC, Compressors, limiter, and noise reduction ♦ sections for each band (ranging from 2 to 7 depending upon the preset employed). As is the case with the AGC metering section, the scale will change based upon the settings of various multiband controls.
-
Page 39: The Home Menu
The Home Menu Omnia.9’s Home Menu is the highest level menu available in the user interface. From here, you can configure and route Input source audio, access the Undo menus and controls, access the controls of the various processing cores, configure the Monitor Outputs, and access system settings. -
Page 40: Inputs 1/2/3 Source Audio Menu
INPUTS 1/2/3 SOURCE AUDIO MENU CHAPTER 7 | Inputs 1/2/3 Source Audio Menu Input 1 feeds the FM, HD-1 and Streaming 1 path. On units so equipped (with proper licensing), Input 2 feeds the HD-2/ Streaming 2 path while Input 3 feeds the HD-3/Streaming 3 path. The menus and controls are identical for each. Source Audio Menu The Source Audio Menu provides access to the Auto Balance and Internal Playback sub-menus. -
Page 41: Auto Balance Menu
The Channel Loss Timeout option automatically fades to mono if one input channel is missing. The length of time ♦ Omnia.9 waits before fading to mono can be set to 3, 10, 30, or 60 seconds. 10 seconds is the default. This feature can be disabled altogether by selecting “Off”. -
Page 42: Internal Playback Menu
Or, provided Omnia.9 is located at the transmitter site, it can also play out music if you need to work on the STL. -
Page 43: Inputs 1/2/3 Undo Menu
This means NO leveler, neither wideband nor multiband. If the possibility of clipping the STL at the studio is a concern, simply turn down the input level to the STL and use Omnia.9’s Input Gain control to compensate. Omnia.9 will also happily boost low input levels automatically. - Page 44 INPUTS 1/2/3 SOURCE AUDIO MENU CHAPTER 8 | The second stage of Undo is a multi-band expander that is designed to restore dynamic range to audio that has been excessively compressed. Each of the five bands of the expander has a corresponding psychoacoustic dynamics detector and a peak detector that examine the peak levels of the incoming audio, and based upon that information plus the settings of the various controls, tells the expander how much dynamic range to restore to the audio.
-
Page 45: Undo Menu
A word of caution about Undo! In keeping with the “spirit” of Omnia.9, we have not blocked access to any of its controls, including those found in the Undo section. And while we would be the last ones to discourage you from making the most of everything Omnia.9 has to offer, we feel that outside of adjusting the level of de-clipping, most users will get the most out of... -
Page 46: Undo Main Menu
INPUTS 1/2/3 SOURCE AUDIO MENU CHAPTER 8 | Undo Main Menu The Undo Main menu contains the controls to enable and disable Undo. When selected, the Bypass control turns off both the de-clipper and the expander portions of Undo. The Enable De-clipper and Enable Expanders buttons turn the de-clipper and expander portions of Undo on and off independently, respectively. -
Page 47: De-Clipper Menu
The most effective way to monitor exactly what the de-clipper is doing is to view the pre-de-clipper and post-de-clipper waveforms side-by-side using Omnia.9’s built-in oscilloscopes. Details of how to configure the display windows and set up the oscilloscopes are provided in the Display Settings section of the manual. -
Page 48: Dynamics Detector To Ratio Menu
INPUTS 1/2/3 SOURCE AUDIO MENU CHAPTER 8 | The degree to which each dynamics detector band influences and controls each expander band is determined by a 5 x 5 slider matrix. Each column represents a dynamics detector band, while each row represents an expander band. The default (and recommended) settings are set up so that each expander band controlled almost entirely by its corresponding dynamics detector band, but with some control provided by surrounding dynamics detector bands. -
Page 49: Peak Detector Menu
INPUTS 1/2/3 SOURCE AUDIO MENU CHAPTER 8 | The detected amount of dynamics in each band is indicated by the Dynamics meters. Taller bars indicate more inherent dynamics in the music, while shorter bars indicate less dynamics and are generally the inverse of the Expansion Ratio meters. The result of settings in the Dynamics Detector to Ratio menu can be observed on the Expansion Ratio meters in the Undo Meter Window. -
Page 50: Expander Levels Menu
INPUTS 1/2/3 SOURCE AUDIO MENU CHAPTER 8 | The effect of the Peak Detector settings is represented by the peak “blips” at the top of the dark orange peak level bars within the Expander Threshold meters in the Undo Meter window. Average levels are indicated by the bright orange bars. A: Peak Blips and Peak Level Meters, B: Expansion Thresholds Expander Levels Menu The Expander Levels menu gives you access to the Relative Threshold, Band<Wideband Distance Limit, and Maximum Gain... -
Page 51: Expander Rates Menu
Signal patch point is very helpful for adjusting attack and release speeds as they show the gain that will be applied to the audio in each band. A detailed explanation of how to monitor various patch points within Omnia.9 is provided in the Display Settings menu of this manual. -
Page 52: Expander Ratios Menu
INPUTS 1/2/3 SOURCE AUDIO MENU CHAPTER 8 | Expander Ratios Menu Each Undo expander band can operate in a range of ratios between 1:1 and 4:1. The Minimum Ratio and Maximum Ratio determine the absolute minimum and maximum ratios, respectively, for each band. A: Multiband Expander Meters, B: Speed Governor Meters... - Page 53 INPUTS 1/2/3 SOURCE AUDIO MENU CHAPTER 8 | There are three additional meters in the Undo metering window for audio levels at the input to Undo, after the de-clipper but before the multiband expanders, and at the output of Undo following the de-clipper and expanders. In each case, the bright orange bar indicates average levels, the darker orange bars indicate peak levels, and the floating orange blips serve as peak hold indicators.
-
Page 54: Fm Menu Processing For Fm
Fair warning: There is no shortage of controls in Omnia.9! It was deliberately designed to provide a very comprehensive set of tools and give you complete freedom to create exactly the sound you want and feel is best suited to your station in your market. -
Page 55: Fm Processing Menu
FM MENU PROCESSING FOR FM CHAPTER 9 | FM Processing Menu The FM Processing menu (Expert mode controls shown here) provides access to all sections of the main FM processing core. From this menu, you can load and save presets, enable and configure Preset Protection, and adjust phase-related processing such as the Phase Scrambler, Phase Rotator, and Bass-EFX circuit. -
Page 56: Adjustment Levels
FM MENU PROCESSING FOR FM CHAPTER 9 | Adjustment Levels The choice of the “Adjustment Level” will determine how much finesse is made available to the operator. There are the “Basic”, “Intermediate”, and “Expert” levels of control. Shown here are the “Basic” screens and “Expert” screens. You may wish to do your initial setup using the basic controls to “get you in the ball park”. -
Page 57: Load Preset Menu
FM MENU PROCESSING FOR FM CHAPTER 9 | Load Preset Menu The Load Preset menu is shared among the “Adjustment Levels” within the “About Preset” tab. This allows you to view the preset currently on the air, toggle back and forth between the current and backup presets, load a new preset, compare the settings of two presets, and delete user presets. -
Page 58: Save Preset Menu
Save to PC. This will save a copy of the preset to your PC. This is highly recommended in order to have a backup of your ♦ work “just in case”. It is also convenient for sharing presets between Omnia.9’s. That said, we strongly recommend that after you have made some adjustments and are ready to save those changes to a Custom Preset you give it a unique name instead of saving directly over your current version. -
Page 59: Preset Protection Menu
The Preset Protection Menu is also common to all processing types. It allows you to password protect a preset so that it cannot be modified or copied for use in another Omnia.9. In addition, the settings for this preset will be hidden from view as long as the preset is locked. -
Page 60: Fm Menu Basic Mode
FM MENU BASIC MODE CHAPTER 10 | FM Menu Basic Mode Basic mode is ideal for anyone who does not care to dig deeply into the hundreds of controls exposed in the Expert mode, but it is also useful even for processing experts who just want the convenience of quickly tweaking a preset without having to manually make multiple adjustments. -
Page 61: Enhance Menu
FM MENU BASIC MODE CHAPTER 10 | Omnia.9 features downward expanders in its multiband AGC stage to help control noise in the content itself (for ♦ example, tape hiss present on an old recording) or environmental noise (such as HVAC noise in the studio). The maximum amount of downward expansion is determined by the Noise Reduction Amount control. -
Page 62: Gain Riding Menu
This necessitates some sort of make-up gain control later in the audio chain. The AGC’s in Omnia.9 operate both above AND below threshold (as you can see by observing the scale on the Input AGC meter) thereby controlling the dynamics over a much wider range without the need for makeup gain. -
Page 63: Multiband Menu
The controls of the Multiband menu work in a similar fashion to their counterparts in the Gain Riding menu but (as the sharper students in the class may have already surmised) work on Omnia.9’s multiband AGC section. The Multiband AGC Range control sets the total amount of available multiband gain. Setting this control too high ♦... -
Page 64: Final Menu
– only more distortion. We strongly recommend using Omnia.9’s oscilloscope as well as your ears to monitor the MPX Output signal while adjusting the final clip drive. This control ranges from -6.0 to +6.0 in one-quarter dB increments, which should give you the (correct) impression that small... -
Page 65: Bypass
FM MENU BASIC MODE CHAPTER 10 | Bypass The bypass processing control is mostly self explanatory. It bypasses the entire main processing section, but it does NOT bypass either Undo, the final clipper or the stereo generator. Peak control is absolute even with bypass enabled. You can adjust the bypass gain to compensate for the differences in levels between processed and unprocessed audio. -
Page 66: Hd Crossfeed
HD Crossfeed The HD-Crossfeed menu provides you access to drive and filter controls relating to the shared processing paths in Omnia.9. Crossfeed architecture allows FM and HD or AM and HD paths to share a common processing path, up to the point where those paths must diverge. -
Page 67: Fm Menu Intermediate Mode
FM MENU INTERMEDIATE MODE CHAPTER 11 | FM Menu Intermediate Mode Switching to Intermediate mode makes a significantly larger number of controls available and is much more akin to Expert mode than Basic. For instance, the three simple controls for multiband adjustments in Basic mode are replaced by entire menus that allow complete control over parameters like attack rate, release rate, targets, and thresholds for each band of the multiband AGC’s and multiband limiters. -
Page 68: Phase Processing Menu
FM MENU INTERMEDIATE MODE CHAPTER 11 | Phase Processing Menu The Phase Processing menu contains the controls for enabling the phase scrambler, enabling and adjusting the phase rotator, and enabling and adjusting the Bass-EFX feature. The Phase Scrambler button enables or disables the phase scrambler. Certain sharp sounds with high harmonic content ♦... -
Page 69: Downward Expanders Menu
FM MENU INTERMEDIATE MODE CHAPTER 11 | Downward Expanders Menu The Downward Expanders menu allows you to control the maximum noise reduction (downward expansion) for all bands in the Downward Expanders section as well as the threshold, attack and release speeds for each individual band. The total number of bands available in the Downward Expanders section is determined by the number of bands of processing used in the Current Preset. -
Page 70: Input Agc Menu
Automatic Gain Control. The Input AGC is the first gain control stage in Omnia.9 following Undo, and is designed to be used as a slower-acting leveler ahead of the Wideband AGC1 (if active) and multiband sections that follow it. -
Page 71: Wideband Agc 1 Menu
The Maximum Gain, Ratio, Attack rate Release rate, Target, Gate Threshold, and Freeze Threshold controls work in the ♦ same manner as their counterparts in the other sections of the Omnia.9. However, the Maximum Gain control in the Wideband AGC1 section has a range of 24db. -
Page 72: Solar Plexus
FM MENU INTERMEDIATE MODE CHAPTER 11 | Solar Plexus The Solar Plexus control switch activates a sub-harmonic bass enhancement effect. Unlike other attempts at this that use simple frequency dividers that provide phony sounding “one note” bass, the sub-harmonic enhancement here is locked to the original bass musically, in both frequency and level. -
Page 73: Stereo Enhancer
The parametric equalizer in Omnia.9 is a very versatile and powerful tool for creating your on-air sound. A visual representation of the effects of the PEQ using the built-in real time analyzer can be seen in the RTA portion of the Display Settings section of this manual. -
Page 74: Multiband Setup
It is worth mentioning again here the importance of a concept unique to Omnia.9. Most (if not all) other processors “top out at 0” – that is, they constantly operate in a state of gain reduction, and once the audio falls below threshold, they can no longer increase it any further. -
Page 75: Multiband Agc
FM MENU INTERMEDIATE MODE CHAPTER 11 | Multiband AGC There are 3 sections to the Multiband AGC control page: Main, Level and Speed. The buttons on the left of the screen allow you to navigate between pages. MB AGC Main The Maximum Gain control works in conjunction with the Ratio control to determine how much gain is available below ♦... -
Page 76: Mb Agc Levels
FM MENU INTERMEDIATE MODE CHAPTER 11 | MB AGC Levels The AGC Target controls set the target gain reduction / output level of the MB AGC bands individually or overall with the “coupled” control. A lower setting results in more gain reduction thus a corresponding lower output level while higher settings provide less gain reduction and a higher output level. -
Page 77: Mb Agc Speed
The Attack speed and Release speed controls work in the same manner as their counterparts in the other sections of the ♦ Omnia.9. However, the behavior of the multiband AGC compressors is also program-dependent. The Attack (coupled) control allows you to adjust the attack speed of all of the bands simultaneously by an equal ♦... -
Page 78: Multiband Compression
FM MENU INTERMEDIATE MODE CHAPTER 11 | Multiband Compression There are 2 sections to the Multiband Compression control page: Main and Speed. The buttons on the left of the screen allow you to navigate between pages. MBC Main The Multiband Compressors switch enables or disables the multiband compression section. When disabled all of the ♦... -
Page 79: Mbc Speed
FM MENU INTERMEDIATE MODE CHAPTER 11 | MBC Speed These controls allow you to adjust the attack and release times of the multiband compressor bands, either individually or for all bands simultaneously using the “coupled” controls. MB Thresholds The Multiband Thresholds menu allows you to set the target for each of the Multiband AGC bands, target for the compression for each of the Multiband AGC bands, as well as the threshold for each band of the Multiband Limiters. -
Page 80: Dry Voice Detection
Omnia.9 overcomes this situation by automatically detecting (in the Auto Detect mode) when the input audio is dry voice and using a separate set of multiband targets, attack rates, and release rates. This allows the dynamics section to do more of the “heavy lifting”... -
Page 81: Wideband Agc 2
CHAPTER 11 | Wideband AGC 2 The Omnia.9’s Wideband AGC2 control allows you to insert one additional AGC processing stage into the chain as outlined in detail below. The Wideband AGC2 menu provides access to the Sidechain Delay, Maximum Gain, Maximum Gain Reduction, Ratio, Attack, Release, Progressive Release, Target, Gate Threshold, and Freeze Threshold. -
Page 82: Band Mix
FM MENU INTERMEDIATE MODE CHAPTER 11 | Wideband AGC 3 The Wideband AGC3 menu operates in the same manner as Wideband AGC2, with all of the same controls, but with one difference: It cannot be used as a wideband compressor before the multiband section, only after. It can, however, be used in the Bass Only or Bass Wideband mode just like Wideband AGC2. -
Page 83: Power Limiter
– only more distortion. We strongly recommend using Omnia.9’s oscilloscope as well as your ears to monitor the MPX Output signal while adjusting the final clip drive. This control ranges from -6.0 to +6.0 in one-quarter dB increments, which should give you the (correct) impression that small... -
Page 84: Hd Crossfeed
HD Crossfeed The HD-Crossfeed menu provides you access to drive and filter controls relating to the shared processing paths in Omnia.9. Crossfeed architecture allows FM and HD or AM and HD paths to share a common processing path, up to the point where those paths must diverge. -
Page 85: Fm Menu Expert Mode
Omnia factory preset authors. While there are some very powerful controls available in this mode, our experience with Omnia.9 over the past several years is that they are best left alone unless you are intimately familiar with the intricacies of these processes and have a very specific need to make changes to these settings. -
Page 86: Downward Expanders Menu
FM MENU EXPERT MODE CHAPTER 12 | Downward Expanders Menu The information for the Downward Expanders is repeated here from the Intermediate level, however, the Expert Level also allows an operator to adjust Attack and Release times. The Downward Expanders menu allows you to control the maximum gain reduction (downward expansion) for all bands in the Downward Expanders section as well as the threshold, attack and release speeds for each individual band. -
Page 87: Expander Speed
The Input AGC Menu is used to set the ratio, maximum gain, attack rate, release rate, target, gate threshold, freeze threshold, and sidechain equalizer controls. The Input AGC is the first gain control stage in Omnia.9 following Undo, and is designed to be used as a slower-acting leveler ahead of the Wideband AGC1 and multiband compressor sections that follow it. - Page 88 Higher settings result in faster attack speeds and allow less unprocessed audio to enter subsequent sections. Because all of Omnia.9’s processing stages are to some extent program-dependent, putting actual measures of time on these controls would be pointless, and so the numbers on the various Attack and Release controls throughout are simply relative numbers.
-
Page 89: Sidechain Peq
Each band can be boosted or cut by 12dB in one-quarter dB increments for a total range of 24db per band. Note: You can see a visual representation of the sidechain EQ curve in a display window using Omnia.9’s built-in RTA by navigating to FM> Processing> Display Settings and choosing the Sidechain> AGC Sidechain option. -
Page 90: Wideband Agc 1 Menu
The Maximum Gain, Ratio, Attack rate Release rate, Target, Gate Threshold, and Freeze Threshold controls work in the ♦ same manner as their counterparts in the other sections of the Omnia.9. However, the Maximum Gain control in the Wideband AGC1 section has a range of 24dB. -
Page 91: Sidechain Peq
FM MENU EXPERT MODE CHAPTER 12 | Sidechain PEQ The 3-band Sidechain Equalizer can be used to make the Wideband AGC1 more or less sensitive to the frequencies ♦ determined by the Frequency, Width, and Gain controls, which function exactly like their counterparts in the Input AGC section above. -
Page 92: Parametric Equalizer
The parametric equalizer in Omnia.9 is a very versatile and powerful tool for creating your on-air sound. A visual representation of the effects of the PEQ using the built-in real time analyzer can be seen in the RTA portion of the Display Settings section of this manual. -
Page 93: Stereo Enhancer
Stereo Enhancer Omnia.9 offers a unique multi-band Stereo Enhancer, whose total number of bands is determined by the number of bands of processing used in the Current Preset. Regardless, it never works on bass, which is why Band 1 is never represented and Band 2 may be grayed out. -
Page 94: Multiband Setup
It is worth mentioning again here the importance of a concept unique to Omnia.9. Most (if not all) other processors “top out at 0” – that is, they constantly operate in a state of gain reduction, and once the audio falls below threshold, they can no longer increase it any further. -
Page 95: Multiband Agc
FM MENU EXPERT MODE CHAPTER 12 | Multiband AGC MB AGC Main The Maximum Gain control works in conjunction with the Ratio control to determine how much gain is available below ♦ threshold. If the Input AGC Ratio is set at Infinity:1 and the Input AGC Maximum Gain is set to 36dB, the Input AGC has 36dB of range below threshold. -
Page 96: Mb Agc Levels
FM MENU EXPERT MODE CHAPTER 12 | MB AGC Levels The AGC Target controls set the target gain reduction / output level of the MB AGC bands individually or overall with the ♦ “coupled” control. A lower setting results in more gain reduction thus a corresponding lower output level while higher settings provide less gain reduction and a higher output level. -
Page 97: Mb Agc Speed
The Attack speed and Release speed controls work in the same manner as their counterparts in the other sections of the ♦ Omnia.9. However, the behavior of the multiband AGC compressors is also program-dependent. The Attack (coupled) control allows you to adjust the attack speed of all of the bands simultaneously by an equal amount. -
Page 98: Ratio Override
FM MENU EXPERT MODE CHAPTER 12 | Ratio Override The Gain Reduction Ratio Override and Gain Reduction Ratio controls work together to let you set a different ratio for ♦ each band when audio in that band crosses above threshold – that is, when it is driven into gain reduction. The ratio for audio below threshold is always determined by the Ratio control for all bands. -
Page 99: Mbc Speed
The Attack speed and Release speed controls work in the same manner as their counterparts in the other sections of the ♦ Omnia.9. However, the behavior of the multiband AGC compressors is also program-dependent. The Attack (coupled) control allows you to adjust the attack speed of all of the bands simultaneously by an equal amount. -
Page 100: Mb Thresholds
FM MENU EXPERT MODE CHAPTER 12 | MB Thresholds The Multiband Thresholds menu allows you to set the target for each of the Multiband AGC bands, target for the compression for each of the Multiband AGC bands, as well as the threshold for each band of the Multiband Limiters. The total number of bands available in the Multiband Thresholds section is determined by the number of bands of processing used in the Current Preset. -
Page 101: Dry Voice Detection
Omnia.9 overcomes this situation by automatically detecting (in the Auto Detect mode) when the input audio is dry voice and using a separate set of multiband targets, attack rates, and release rates. This allows the dynamics section to do more of the “heavy lifting”... -
Page 102: Dry Voice Speed
FM MENU EXPERT MODE CHAPTER 12 | Dry Voice Speed The Attack, Release, Target, Limiter Threshold, Attack (Coupled), Release (Coupled), Speed (Coupled) and Target ♦ (Coupled) controls provide relative adjustments referenced to their counterparts in the Multiband section. The Peak Sense (Coupled) control simultaneously adjusts the attack and release rates but in opposition to one another. ♦... - Page 103 The Lim Target control sets the target output level of the Dry Voice AGC, again similar in operation to the other AGC sections of the Omnia.9. A lower setting results in a lower output level, while higher settings provide a higher output level.
-
Page 104: Wideband Agc 2
Wideband AGC 2 Main The Omnia.9’s Wideband AGC2 control allows you to insert one additional AGC processing stage into the chain as outlined in detail below. The Wideband AGC2 Main menu provides access to the Sidechain Delay, Maximum Gain, Maximum Gain Reduction, Ratio, Attack, Release, Progressive Release, Target, Gate Threshold and Freeze Threshold. -
Page 105: Sidechain Peq
FM MENU EXPERT MODE CHAPTER 12 | Sidechain PEQ A fully-adjustable, 3-band Sidechain Parametric Equalizer is available, which allows you to make it more or less sensitive to particular frequencies. When the controls are not set to cut or boost any frequency, the Input AGC reacts to the full audio spectrum. -
Page 106: Sidechain Peq
FM MENU EXPERT MODE CHAPTER 12 | Sidechain PEQ Similar to the Wideband AGC 1 and 2, another fully-adjustable, 3-band Sidechain Parametric Equalizer is available here, which allows you to make it more or less sensitive to particular frequencies. When the controls are not set to cut or boost any frequency, the Input AGC reacts to the full audio spectrum. -
Page 107: Power Limiter
– only more distortion. We strongly recommend using Omnia.9’s oscilloscope as well as your ears to monitor the MPX Output signal while adjusting the final clip drive. This control ranges from -6.0 to +6.0 in one-quarter dB increments, which should give you the (correct) impression that small... -
Page 108: Clipper Highs Menu
A setting of “0” will yield the cleanest highs but with less overall brightness. A setting of “100” will result in a uniformly bright sound but at the risk of more audible distortion, and sounds more like the original Omnia.9 clipper when pushed for loudness. -
Page 109: Clipper Lows Menu
The controls in the Bass Shape menu help set the “texture” of the bass. ♦ Unlike most bass clippers, the one in Omnia.9 can (but does not have to) create a square wave when processing strong ♦ low frequency content. Setting the “Bass Shape Strength” control at 0 will always prevent square waving the bass resulting in a very smooth low end texture, but one that does not offer the “slam”... -
Page 110: Dual Fm Configuration
CHAPTER 12 | Dual FM Configuration As if all of this capability was not impressive enough, with the optional “Dual FM” system configuration, the Omnia.9 can provide independent processing for two unique FM stations. When configured in this manner, the first FM processor (FM1) can provide processing for MPX (composite) only, L/R only, or MPX+L/R together. -
Page 111: Fm Menu Display Settings
Meters, Loudness Meters, Modulation Level (as bar graph meters), Modulation (as a numeric readout), Oscilloscope, RTA, and FFT Spectrum Analyzer. You can also turn off any or all of Omnia.9’s displays here – a handy feature for keeping your processing meters and settings from curious eyes! Since Omnia.9 can display such a wide variety of information about your station’s audio processing and signal, it allows you to... -
Page 112: Displays: This Is Where You Start
Or, you could devote an entire preset to the oscilloscope and monitor the program input, the output of Undo, the MPX before the clipper, and the MPX output to see what the various stages within Omnia.9 are doing to the audio signal. -
Page 113: Processing Meters Menu
CHAPTER 13 | Processing Meters Menu The Processing Meters menu allows you to display the levels and activity of Omnia.9’s various gain stages and processing sections. Here is an example of a typical processing meter indication: As pointed out in the previous section, you can see here that Display 1 is selected, so only one parameter is being displayed at this time as well. -
Page 114: Input Meters Menu
L/R Output and the output levels of external gear feeding Omnia.9’s MPX1 and MPX 2 inputs. The Modulation Meters menu displays the modulation levels of the MPX output of Omnia.9 as well as any processor or applicable tuner feeding the MPX1 or MPX2 inputs as a bar graph. -
Page 115: Oscilloscope Menu
The Oscilloscope menu allows you to monitor a very wide variety of input and output points from various stages of Omnia.9’s processing sections on the built-in oscilloscope. In the above example, the single Display 1 is selected, with the Instrumentation button engaged, as well as the Oscilloscope button. - Page 116 MPX signal with noise injection, and at the program passthrough point. The MPX Decoded patch points contain the decoded left or right channel of the MPX output of the Omnia.9 as well as ♦...
- Page 117 Below is a comparison of this signal to the L/R pre-emphasized output (the one you’d be using if you used an external stereo generator, whether fed with Analog or AES/EBU) so you can see just how much additional HF headroom Omnia.9’s own stereo...
-
Page 118: Rta Menu
FM MENU DISPLAY SETTINGS CHAPTER 13 | RTA Menu The Real-Time Analyzer menu allows you to monitor many of the same sources as those mentioned in the Oscilloscope menu section. The horizontal scale along the bottom of the RTA screen shows frequencies from 20 to 20,000Hz. The vertical scale along the left side shows the amplitude of the audio in decibels. -
Page 119: Fft Spectrum Analyzer Menu
FM MENU DISPLAY SETTINGS CHAPTER 13 | Below is an example of how to use the RTA menu: To see a visual representation of a parametric EQ (PEQ) setting: Display the MB DRC Solo menu and select PEQ Preview ♦ Set Resolution to 1/6 octave ♦... - Page 120 FM MENU DISPLAY SETTINGS CHAPTER 13 | The Decay Rate control adjusts how quickly the display will fall after a peak is displayed. Lower settings are the slowest, ♦ while the highest setting is instantaneous. The Peak Hold control enables or disables the ability to indicate and hold the highest peak achieved. Peak Hold is ♦...
- Page 121 FM MENU DISPLAY SETTINGS CHAPTER 13 | To display the RDS subcarrier frequency spectrum: Display the MPX Output ♦ Set the Resolution and Decay rate to any setting ♦ Set Peak Hold to “Off” ♦ Set X-Center to 57kHz ♦ Set X-Width 10kHz ♦...
- Page 122 FM MENU DISPLAY SETTINGS CHAPTER 13 | A phase flip (two peaks in the same direction) is a ONE. No phase change is a ZERO. The RDS bit-stream really is this simple, despite how complex it looks on the spectrum analyzer above.
-
Page 123: Fm Menu Itu-R Bs.412 Processing / Mpx Power Limiting
Speaking of bass, managing bass-heavy content presents a special challenge because of the amount of energy typically present in the lower frequencies. Most of Omnia.9’s “412” presets make use of the WB AGC2 or WB AGC3 compressors in “Bass Only”... - Page 124 FM MENU ITU-R BS.412 PROCESSING / MPX POWER LIMITING CHAPTER 14 | You will notice in the FM> Processing> Load Preset Menu that the preset list has been updated to include only those specifically designed for BS.412 use. There is also an additional Power Limit menu option. In addition, the Processing Meters display window now includes a meter for the Power Limiter and three meters showing output levels over 10 second, 30 second, and 60 second integration times.
-
Page 125: Mpx Power Graphs
In this example, you can see on the left side of the graph, the cold startup of the Omnia.9. In the middle of the graph is an example of varying depth of processing in the Power Limiter. -
Page 126: Fm Menu Rds
CHAPTER 15 | FM Menu RDS When installed in the unit, the RDS control section of Omnia.9 contains the Main RDS menu, fields for Program Service (PS) and Radio Text (RT) information, program identification fields, selectable dynamic Program Type (PTY), selectable flags, and a section for selecting alternative frequencies. -
Page 127: Using Omnia 9 ' S Built-In Rds Encoder
♦ When set to Off, RDS is turned off completely. If you want to insert RDS after the Omnia.9 in the chain, this is the mode to use. The External Input 1 and External Input 2 modes determine which of Omnia.9 MPX inputs are active for RDS input when using an external encoder. -
Page 128: Using External Rds Encoders
57 kHz signal internally. Thus, if you connect an RDS encoder to an Omnia.9 input, you no longer need to synchronize the encoder to anything; it’s okay if it’s free-running at 57 kHz. -
Page 129: Uecp Menu
As UECP can send commands via multicasting to multiple RDS encoders, each message contains addressing information. The Listen to specific address option instructns Omnia.9 to only listen for UECP commands targeted to the specified address. The options are Site/Encoder Address, DSN, PSN. -
Page 130: Flags Menu
Turning the Traffic flag on and off could be automated through a request to Omnia.9’s built-in http server. When enabled, the Music decoder information control identifies the station as one which broadcasts primarily music ♦... -
Page 131: Station Id Menu
However, it is possible to program the PS field in such a way that it can provide a bit more information. Here are some ways to creatively use the PS field: By splitting text with the “/” symbol, each text will alternate for 3 seconds. (WOMN-FM/88.5 FM/NOW WITH/OMNIA.9) or (WOMN-FM/TODAYS/HOTTEST/HITS) To change the amount of time the text is displayed, put the desired time in front of the text in seconds (1.5s:WOMN-... -
Page 132: Program Type Menu
FM MENU RDS CHAPTER 15 | Program Type Menu The Program Type Menu allows you to choose the RDS mode (USA or Europe), enable Dynamic Program Type, (PTY), and choose a PTY code. When enabled, Dynamic PTY indicates to listeners that the type of programming on your station may change periodically. This would be useful for a station that for example broadcasts music during the week, but airs sports programming on the weekends. -
Page 133: Field Installing Rds
FM MENU RDS CHAPTER 15 | Field installing RDS To upgrade a unit already operating in the field with RDS, you must purchase a key to enter into the unit. The key is then entered into the unit along the path: Home -System-System Configuration-Upgrades. -
Page 134: Fm Menu Mpx Inputs
RDS encoder as described in the previous section on RDS. If these MPX inputs are enabled (as described in the System Config Menu section of chapter 18 on the System Menu), they can also be used to put some of Omnia.9’s built-in tools to good use. -
Page 135: Mpx Input 1 And Mpx Input 2 Menus
If you have an exciter that you know to be perfectly accurate (such as a direct- digital-synthesis exciter) but a receiver that is not, you can use Omnia.9’s MPX test tone generator in conjunction with... -
Page 136: Pre-Emph Input Menu
The Pre-emphasis control should be set to match the amount of pre-emphasis the incoming signal has (or used to have if ♦ it was de-emphasized prior to being fed into Omnia.9). The Add Delay control allows you to delay the audio coming in from the pre-emphasis input to match that of the ♦... -
Page 137: Fm Menu Meter Options
FM MENU METER OPTIONS CHAPTER 17 | FM Menu Meter Options The Meter Options Menu contains sub-menus for Meter Options, Test Options, Loudness Matched A/B, and Display Settings. NfRemote also includes TCP Link Status which shows parameters related to the connection quality. -
Page 138: Meter Options Menu
This can be set differently from the MPX Power Limit control in the FM Processing section, and is available even when Omnia.9 is not operating in MPX Power Mode, to provide a power measurement reference. You can select as many or as few meter options as you need. -
Page 139: Loudness Matched A/B Menu
To make A/B comparisons easier, Omnia.9 can apply automatic leveling to several key input patch points and makes those available here in the Meter Options Menu (for display purposes) as well as in each of the Monitor Outputs menus. -
Page 140: Loudness Graph Menu
System > Time/Date menu. Choosing UTC shows readings relative to Coordinated Universal Time (no local time offset). When connected to Omnia.9 via NfRemote (and not working with the front panel touchscreen) there is an additional selection, Remote, which is similar to Absolute Time but references the clock of the PC running the NfRemote software. -
Page 141: Test Options Menu
♦ output connected to one of Omnia.9’s MPX Inputs. There is no such thing as perfect radio reception, and some noise will always be present, so this control helps “level the playing field” a bit. To use this feature, set up two FFT spectrum analyzer displays, one looking at MPX Output with Noise, and the other looking at the MPX Input. -
Page 142: Display Settings Menu
FM MENU METER OPTIONS CHAPTER 17 | Display Settings Menu The Display Settings menu is the same menu found in the Processing Menu of the Processing section. This is an example. -
Page 143: Studio Processing Menu
STUDIO PROCESSING MENU CHAPTER 18 | Studio Processing Menu The Studio Processing Core is a low-latency processing core mainly designed for talent monitoring. Its menu allows you to choose the input source, load and save presets, and make changes to the Parametric Equalizer, Downward Expanders, Input AGC, Wideband AGC1, Multiband Stereo Enhancer, Multiband AGC and Limiters, Wideband AGC2, and Band Mix sections. -
Page 144: Processing Menu
Processing Menu The vast majority of the menus and controls in Omnia.9’s Studio Processing core operate just as their counterparts in the FM Processing core do, and like the FM processing core, you should start with the About Preset tab, as this will make available the controls that determine how much finesse you will be able to access. -
Page 145: Hd Processing Menu
HD Processing Menu The HD-1, HD-2, and HD-3 menus of Omnia.9 provide access to all sections of the HD processing core(s), depending upon configuration. From this menu, you can choose the input source, load and save presets, and make changes to the Parametric Equalizer, Downward Expanders, Input AGC, Wideband AGC1, Multiband Stereo Enhancer, Multiband AGC and Limiters, Wideband AGC2, Band Mix, Bass Clipper, and Final Limiter sections. -
Page 146: Hd Processing Final
HD PROCESSING MENU CHAPTER 19 | HD Processing Final The HD Processing Final adjustments are similar to those found in the FM final adjustments, except that for FM, you ♦ have the final clipper, but for HD you have the final look-ahead limiter. The Treble adjustment allows you to roll off the higher audio frequencies to match those heard on FM, since, due to FM’s ♦... -
Page 147: Loudness Meters Menu
HD PROCESSING MENU CHAPTER 19 | Loudness Meters Menu The Loudness Meters Menu determines which meters are visible when the Loudness Meters are displayed. Choices include Program Input, Loudness Match, Program Output, and Test Input Test Input Menu The source audio for the Test Input is selected here along with adjustments for gain and delay time and an option for meter activity. -
Page 148: Loudness Matched A/B Menu
HD PROCESSING MENU CHAPTER 19 | Loudness Matched A/B Menu Loudness matching for HD works in the same manner as the corresponding section of the FM processing core previously described in detail though the Source and Match options are different. Source audio and Match audio can both come from either the Program Input to the HD core or from the Test Input as ♦... -
Page 149: Streaming Processing & Encoding Menu
The audio for Stream 1 is shared with the FM and HD-1 sections of Omnia.9, while Streams 2 and 3 are shared with their corresponding HD-2 and HD-3. -
Page 150: Processing Menu
This menu contains the controls necessary to set up and configure each of the enabled encoders and is where details of the servers can be entered. Depending on the configuration of your Omnia.9, you may see 8, 6 or 4 encoders from the Streams... -
Page 151: Overview / Metadata Menu
Because it’s accessible through the HTTP server, you can copy the URL in the Metadata page (and change the IP address from 127.0.0.1 to the actual LAN IP of the Omnia.9) and paste it into a web browser, to see what data format the unit is expecting –... -
Page 152: Encoder Menu
(set in Home > System >System Configuration > Processing Paths). 8 encoders will be available if light configurations, while an Omnia.9 classic Dual FM unit with be limited to 4 in the heaviest configurations. -
Page 153: Meter Options Menu
♦ Server is selected, the address will be the IP of the Omnia.9 on your network, with a port assigned by the Omnia 9. The Mount Point field (for Icecast 2 servers only) should contain the mount point on the server, in the following format: ♦... -
Page 154: Am Processing
AM PROCESSING CHAPTER 21 | AM Processing AM processing is a standard feature in all Omnia.9 configurations. FM-only units can now provide simultaneous processing for FM and AM using the same input audio source for both ♦ paths. Dual path units (9x2) will be able to process FM+FM, FM+AM, or FM/AM+FM using either the primary or secondary ♦... -
Page 155: Am Output Options
AM PROCESSING CHAPTER 21 | Once AM has been enabled and the configuration applied via the Apply Config button, an additional menu for AM processing will appear in the Home menu. All of the processing controls and settings found in other processing cores (FM, HD, Studio, Streaming) are present here and function in exactly the same way, including the need to set the Adjustment Level under the About Preset tab. -
Page 156: Am Main Menu
100% modulation for positive peaks, while negative peaks must be kept at or below 100% to prevent carrier loss. The L-R component of C-QUAM Stereo must be strictly limited to 100% at all times. Omnia.9 meets both requirements, as shown by the below screen shots of the built in oscilloscope showing the Mid and Side components separately. -
Page 157: Am Night Menu
AM PROCESSING CHAPTER 21 | Just as with the FM section of Omnia.9, there is a test generator in the AM section that provides various tones that are ♦ useful for system analysis and setup. Turning on any of the tones in the Test Generator dropdown menu will interrupt normal program audio. -
Page 158: Am Phase Menu
The Phase Menu contains the controls for the phase scrambler and phase rotator. These operate in the same manner as the corresponding controls in the FM section of Omnia.9, except here, they are enabled by default. Certain sounds with high harmonic content (such as trumpets and some synthesized sounds) are low in energy but ♦... -
Page 159: Insert Menu
♦ filter following the Omnia.9, for example a transformer which by definition cannot pass DC, one must apply the inverse what the high pass filter will do, meaning the lower the requency, the higher the level boost. This presents a challenge, as for an infinitely low frequency, we’d need an infinitely high output level. - Page 160 AM PROCESSING CHAPTER 21 | I/O Options – Source Adjustment – [Analog or other] Input Gain. If you need to, run a second copy of NfRemote connected to the same unit so that you can see the Insert page while adjusting the gains in other sections.
-
Page 161: Am Processing Presets
It also makes use of Wideband AGC 2 in Bass Only mode for enhanced low end. Fine Arts is similar to the Classical/Jazz preset found in Omnia.9’s FM, HD, Streaming, and Studio processing cores. As ♦... -
Page 162: Monitor Output Menu
Auxiliary Output. The menus and controls for each of these sections are identical. From this menu, you can choose which of Omnia.9’s processing cores you wish to monitor, and from within each core, which specific patch point you want to listen to. At the top level (and depending on configuration) you can monitor FM, AM, Studio, HD 1, 2, 3 and Streaming 1, 2 or 3 cores. -
Page 163: Patch Points Menu
Patch Points Menu The Patch Point menu lets you choose which of Omnia.9’s processing cores you wish to monitor in the Speaker, Headphone, and Aux outputs, and more specifically, which point within that core you want to hear. The patch point currently being monitored appears in the corresponding volume control at the top of the screen. -
Page 164: Am Patch Points
MONITOR OUTPUT MENU CHAPTER 22 | AM Patch Points You can feed each of the three Monitor Outputs audio from various points within the AM Processing core. The I/O menu lets you listen to Program Input, HD Output, AM Output or Test Input. ♦... -
Page 165: Hd-1, Hd-2, And Hd-3 Patch Points
MONITOR OUTPUT MENU CHAPTER 22 | HD-1, HD-2, and HD-3 Patch Points You can feed each of the three Monitor Outputs audio from various points within any of the HD processing cores. The I/O menu allows you to listen to either the Program Input, the Loudness Matched A/B patch point, the Digital ♦... -
Page 166: Streaming 1, Streaming 2, And Streaming 3 Patch Points
MONITOR OUTPUT MENU CHAPTER 22 | Streaming 1, Streaming 2, and Streaming 3 Patch Points You can feed each of the three Monitor Outputs audio from various points within each of the Streaming processing cores. The I/O menu allows you to listen to either the Program Input, the Loudness Matched A/B patch point, the Digital ♦... -
Page 167: Load Preset Menu
Load Preset Menu Because Omnia.9 provides all of the tools – minus a calibrated microphone – to perform speaker/room calibrations for each of the Monitor Outputs, it also provides a way for you to store those calibrated settings in the form of presets. -
Page 168: Save Preset Menu
MONITOR OUTPUT MENU CHAPTER 22 | Save Preset Menu The Save Preset menu allows you to edit the name of or save over an existing preset. You can rename your current preset, regardless of whether or not is has been modified, by selecting the Edit Preset Name ♦... -
Page 169: Over Menu
MONITOR OUTPUT MENU CHAPTER 22 | The Monitor Output sections each contain Protection Limiters, a useful feature when performing speaker calibrations, ♦ which are often performed at higher than normal volume levels and can involve radical amounts of parametric equalization in the pursuit of a flat frequency response. When the limiters are active, orange bars in the corresponding volume controls will appear indicating that the master gain should be reduced. -
Page 170: Delay Phase Menu
MONITOR OUTPUT MENU CHAPTER 22 | Delay Phase Menu The Volume and Master Gain controls are duplicates of those found in the Main menu, but are found here as well for ♦ convenience. The Delay All control allows you to delay the audio output of the Speaker and Headphone outputs. ♦... -
Page 171: Protection Limiting Menu
This is similar to the traditional “Loudness” adjustment found on many car audio systems as well as on some home systems and TV sets. It only affects the speaker outputs and does not affect the on-air audio of the Omnia 9. -
Page 172: Left Eq1, Left Eq2, Right Eq1, And Right Eq2 Menus
The Frequency, Width, and Gain sliders operate in the same manner as their counterparts in other sections of the ♦ Omnia.9 in which a parametric equalizer is offered. The Copy control places the settings from either the Left EQ 1 or Right EQ 1 section onto a “clipboard” so that they can ♦... -
Page 173: System Menu
System Menu The System Menu contains sub-menus that provide status information about the Omnia.9 itself, audio I/O, and remote connections. It is also where high level “global” settings such as the time and date, input, output, preset scheduling, and GPI configuration are set. - Page 174 The Network Information section provides information including the host name, IP address, and MAC addresses of the Omnia.9 system, and Livewire/ AoIP network adapters. It also indicates how many users are remotely connected, indicates TCP throttling, the remote port number (for NfRemote), and the security level of the current user.
- Page 175 SYSTEM MENU CHAPTER 23 | The Audio I/O Status section shows the current system sample rate as well as detailed information about audio input and output configurations. This information can help with system diagnostics and troubleshooting. The Monitor Out Status shows the speaker and the headphone output conditions (Mon Stat 1) and for Aux Output (Mon Stat 2).
-
Page 176: I/O Options Menu
I/O preset file. This makes it very easy to return to a known good configuration if you make a change to one of these settings and need a quick way to “get back home” or if you want to clone settings to transfer to another Omnia.9. -
Page 177: Input 1/2/3 Menus
♦ Digital, Aux Digital, AES Reference or Livewire inputs (if displayed: requires MKII platform) If you select a Secondary Source in the dropdown, the Omnia.9 will automatically use this alternate source if it has audio ♦ while the primary source is silence. -
Page 178: Livewire Inputs Menu
An example would be if a main and backup processor located at the main studio site were triggered into fail-over. Backup feeds could both be on their own Livewire or Livewire+/AES67 channels and seamlessly picked to feed the Omnia 9, via Input 1. If a secondary backup studio location, also with a main and backup processor existed –... - Page 179 Thus, any time we send or receive audio over Livewire, adaptive sample rate conversion is necessary. The conversion ratio is normally 1:1 but can vary a bit, and if the Omnia.9 is running at 44.1 kHz, the ratio will be 0.92:1 for inputs and 1.09:1 for outputs, since the network is always 48 kHz.
- Page 180 Resyncs indicates that the time code on the majority of the packets we received do not match our expectation, and that we had to resynchronize rather than try to adapt. If you see Lost packets alone, packets are getting lost between the Livewire audio source and the Omnia.9. This is usually can by faulty network cables or switches.
- Page 181 SYSTEM MENU CHAPTER 23 | This shows the same LW1 configuration but also shows the channel list. This shows the LW1 input channel list but with the search term “Program” applied. Note that the search is “live” and searches for the string you typed in all displayed columns. It will start to filter the list as you type. The Audition Switch is the on in the screen shot above, glowing RED.
-
Page 182: Livewire Outputs Menu
Studio 2. The channel numbers (or multicast addresses for AES67 streams) are shown, along with the assigned audio source inside the Omnia.9, as well as color coded status indication. This menu will only be visible for units that have had the MKII platform upgrade. - Page 183 CHAPTER 23 | This shows the settings for the clock source for the Omnia 9. In this case we are using Livewire clock (not PTP), it is SYNC’d (as shown in green) and the IP address of the source clock along with its priority are shown.
- Page 184 Studio output slot, described later. The Source selection lets you select which Omnia.9 audio source to assign to the LW output slot you are configuring. This list is identical to what you’d find when assigning a physical AES or Analog output, except it contains selections from both the aforementioned signal types, as we cannot know from this end whether you will be using an analog or digital node at the other end.
- Page 185 AES67 audio stream to receive in to your Omnia.9. The AES67 compliant unit generating that source stream will have a way to download an SDP file, which you can then upload to your Omnia.9, and it would describe that stream to the O9 in sufficient detail that it could receive the stream.
- Page 186 SYSTEM MENU CHAPTER 23 | An SDP file for an MPX stream may look like this: o=- 8 1 IN IP4 100.64.0.91 s=Omnia.9 @ O9-upper i=FM1 MPX c=IN IP4 239.200.35.141/127 t=0 0 a=type:multicast m=audio 5004 RTP/AVP 112 a=rtpmap:112 L16/192000/1 a=fmtp:112 fm_stereo_mpx; emphasis=75 a=ptime:3.750...
-
Page 187: Source Adjustment Menus
The Input Gain control allows you to adjust a variable gain stage after the clip detector and can be used to boost levels to ♦ meet Omnia.9’s reference input level as indicated by a green color on the input meters, with an adjustment range of 18dB. The Balance allows you to change the amount of left and right audio ♦... -
Page 188: Diversity Delay Menu
FM or AM analog signal in order to match the corresponding HD-1 audio is set with in this menu with the FM Diversity Delay slider. The available range will depend on the configuration of your Omnia.9 as well as the hardware version. Setting this control properly (and monitoring your FM, HD-1, AM, and Stream-1 signals regularly) will ensure as smooth a transition as possible between the analog and digital signals for listeners with HD receivers. -
Page 189: Main Outputs Menu
The corresponding Level sliders adjust the output levels. ♦ The AES FM Out 1 and Out 2 drop-down controls set the source audio for the Omnia Direct outputs and include L/R ♦ audio, MPX 1, MPX 2, or both MPX 1 and 2. -
Page 190: Fm Options Menu
With a Wi-Fi hotspot and a laptop or tablet running Omnia 9’s remote software, it is entirely possible to make these adjustments on the fly and in real time. - Page 191 If you are using a 32kHz STL, you will need to set the L/R Output Bandwidth to 15 or 15.5 to prevent over-modulation. If you are using your Omnia.9 to master music (some do – that psychoacoustic distortion masking clipper is the most effective weapon available in the loudness war), you’ll like the 20 kHz and above settings that are...
- Page 192 The Insert sub menu in the System > I/O Options > FM Options menu allows you to insert an external effect unit such as ♦ a ratings encoder into the Omnia.9 processing chain at the ideal place right before the final clipper. Please see the AM Processing section for a full description of this menu.
- Page 193 Omnia.9 provides extremely tight modulation control. Your modulation monitor’s meter should essentially stand still at +/- 75kHz. (The composite meter in Omnia.9 will stand still at 75kHz no matter what any external equipment is doing). If it does not, lack of DC coupling is a likely culprit. To test for this, follow these steps: Connect an Oscilloscope (making sure it is DC coupled, not AC coupled) to Omnia.9’s composite output.
-
Page 194: Μmpx (Omnia Micrompx)
IP connections as small as 320kbps. Omnia.9 is the first hardware processor to offer an encoder option for this revolutionary new codec. At the time of this writing, a µMPX decoder is available on our website as a software application, with Omnia hardware decoders coming soon. -
Page 195: File Recorder Menu
CHAPTER 23 | File Recorder Menu Omnia.9 features three built-in file recorders that allow you to capture audio from various points within the processing chain onto a USB flash drive or internal hard drive. Before you begin, select the “Name” input field and assign a name to your new file. Then choose which processing core (FM, HD-1, HD-2, HD-3, Stream 1, Stream 2, or Stream 3) you would like to record. -
Page 196: Time/Date Menu
CHAPTER 23 | If you are recording directly from the Omnia.9 unit or on a remote computer with a high speed connection to Omnia.9, the Source window will show “PCM,” indicating the recording will be uncompressed PCM source data. If you have a slower remote connection, the window will show “Vorbis”... -
Page 197: Time Zone Menu
NTP Menu The NTP menu contains the addresses for five Network Time Protocol servers. When enabled, NTP Synchronization will use one of these servers to keep the Omnia.9’s clock synchronized. Set Clock Manually Menu The Set Clock Manually menu contains the controls for manually setting the time and date. -
Page 198: Scheduling Menu
SYSTEM MENU CHAPTER 23 | Scheduling Menu The Scheduling menu allows you to program up to twenty-six (26) day- and time-driven events, including switching Undo Presets for each input, changing processing presets for the FM, Studio, and each HD and Streaming processing cores, and controlling the dry voice detector for each core. -
Page 199: Event Menus (A-B, C-D, E-F, Etc )
SYSTEM MENU CHAPTER 23 | Event Menus (A-B, C-D, E-F, etc.) Each Event Menu window simultaneously displays controls for two separate events. An event may be scheduled on one, several, or all days of the week by enabling the Day of Week control for a particular day(s). The time at which the event occurs is determined by the Time (hours and minutes) and Second (seconds) sliders. -
Page 200: Gpio Menu
SYSTEM MENU CHAPTER 23 | GPIO Menu The GPIO menu contains controls to enable or disable GPIO functionality. Go to Home > System > GPIO, and select GPI.. When the GPI is enabled, by selecting GPI A-D or E-H, you can click on the top item in the menu stack to Disable, Task, Undo Preset (per processing core), Processing Preset (per processing core) Dry Voice Detection (per processing core), AM Night Mode and just about anything else you’d like to control externally. -
Page 201: Gpi Function A-D / E-H
SYSTEM MENU CHAPTER 23 | Here is where you set GPI functions for main GPI or Livewire GPI. GPI Function A-D / E-H The Function control in each GPI channel - A through H - determines which available parameter is affected when the ♦... -
Page 202: Livewire Gpi Banks
Livewire GPI Banks 1-4 Four banks of 5 Livewire GPI’P are available in the Omnia.9 MKII platform, providing a total of 20 IP based closure inputs. Axia users will be well versed in using IP based contact closures which mimic those available on the units hardware GPIO pins. -
Page 203: Task Scripts
Task Scripts The new task scripting function allows you to assign just about any Omnia.9 function to GPIO Functions or for dayparting. This feature is not directly accessible from NfRemote or the front panel, access is through the HTTP server only. However, when you’ve created your task scripts, you will see them in the GPI and Scheduling sections in both NfRemote and on the front... - Page 204 SYSTEM MENU CHAPTER 23 | For example, navigate to Home / System / I/O Options / Input and right-click on Primary Source and select “Copy Path”: Go back to the web browser with the New Task page, and paste. You should get something like this: /sys/i-o/source1_input1=1 That’s actually all it takes to write a script to set the Primary Source parameter to what it currently is (Main Digital in this case).
-
Page 205: System Configuration Menu
SNMP. You can also check the software and GUI versions, save your custom configurations to a USB drive, update to the latest software versions, and, if you purchased an Omnia.9 without the additional HD and streaming capabilities, unlock additional HD, streaming cores and unlock other options via software key . -
Page 206: Sample Rate Menu
Sample Rate Menu The Sample Rate menu lets you choose the internal sample rate at which Omnia.9 will run, either 44.1kHz or 48kHz. The default rate is 44.1kHz. Be sure to select Apply Config to put the changes into effect, keeping in mind that doing so will cause an interruption to program audio as Omnia.9 restarts. -
Page 207: Password Menu
Power Menu The Power menu provides a means by which to restart or shut down your Omnia.9 and adjust the front panel display timeout. The Power displays differ between what you see on the physical unit, vs what you see via remote. This is the screen you see on the Omnia.9 front panel:... -
Page 208: Ip Configuration Menu
SYSTEM MENU CHAPTER 23 | Note: If you have one of the earliest units, (serial number 0025 and earlier), once the screen is asleep, it cannot be woken by touch, due to a hardware issue. In this case, you can wake the screen from NfRemote by pressing the Wake Display button in order to access the front panel. -
Page 209: Outbound Connection Menu
10435. You can also enter an IP address, wildcards or a full subnet mask in addition to the port number, which will instruct NfRemote which IP addresses to accept a connection from – useful if you have multiple Omnia.9’s on different public IP addresses connecting outbound to the same IP and port. - Page 210 This means bandwidth use over time will be negligible, but when you need to get back in, you will have to wait no more than four minutes, and once there’s been a successful connection, Omnia.9 will again...
-
Page 211: Http Access
IP with wildcards, or an IP with subnet mask. 192.168.5.7 Accept only IP 192.168.5.7 192.168.5.* Accept IPs 192.168.5.1 through 192.168.5.254 10.0.0.0/255.255.0.0 Accept IPs 10.0.0.1 through 10.0.255.254 If you attempt a connection from an IP not on the whitelist, Omnia.9 will respond as follows:... -
Page 212: Snmp Menu
The SNMP menu allows you to set the Simple Network Management Protocol parameters via NfRemote. It also lets you set the Location string of the Omnia.9 which will automatically be displayed in NfRemote and on the front panel. The SNMP menu provides the means to enter the information necessary to facilitate communication between Omnia.9 and your SNMP manager. -
Page 213: Software Update Menu
“3.xx.xx updater ready”. Click the Update Software to 3.xx.xx button to start the update process, which will take you of the air anywhere from a few seconds to a few minutes depending on the age of your current Omnia.9 software version. -
Page 214: Backup Menu
Should you wish to “clone” your Omnia.9 you can do so simply by uploading the file to the second unit instead of configuring each parameter individually, rather like the concept of creating an “image” in computer terms. This is also handy if you (or someone else) accidentally changes something and isn’t sure of the original settings, as uploading a known good configuration... -
Page 215: Upgrades Menu
SYSTEM MENU CHAPTER 23 | Generally speaking, if you are working with a single Omnia.9 and need to bring it back to a known good configuration, ¸ choose “Override.” If you are copying a custom configuration to another Omnia.9 and want to avoid potential IP conflicts (like duplicate IP addresses) or uploading an unknown password, choose “Retain”. -
Page 216: Getting The Sound You Want
Getting the Sound You Want Quality v. Loudness Omnia.9 is capable of providing sound quality superior to any other processor available today, and is equally capable of being louder than the competition, too. If loudness is your primary goal, you will find that you can match the level of your current processor while getting a much cleaner on-air sound. -
Page 217: Achieving A High Quality Sound
There are basically three ways to alter the spectral balance of your sound with Omnia.9, and each provides a different end result: The Parametric Equalizer, the Multiband AGC Targets, and the Band Mix control. Adjustments to each section can produce somewhat similar or very different outcomes depending upon a variety of factors. - Page 218 GETTING THE SOUND YOU WANT CHAPTER 24 | Finally, remember that EQ is a static process. That is, it increases or reduces gain to a particular part of the spectrum irrespective of program content. In other words, if you apply 8dB of bass boost it is applied to all incoming audio whether it is bass shy or bass heavy.
-
Page 219: Factory Presets
Factory Presets Omnia.9 contains a good assortment of factory presets created by a handful of folks who are deeply passionate about audio processing and have extensive experience with the product. “FM” presets lists are common to FM, HD, and Streaming processing paths since bandwidth structures are similar. -
Page 220: Fm Presets
ART VLA and the Dorrough DAP 310. It provides a warm, open, vocal sound and won’t attempt to aggressively re-equalize the original spectral balance of the source material. It makes use of Omnia.9’s multi-stage AGC sections prior to the multi-band compressors as well as the Gain Reduction Override feature in the multi-band section. -
Page 221: Echoes - By Jim Kuzman
A 7-band preset that unapologetically delivers an in-your-face rock sound, “Motor City” gets a little edgy in the mid-range but is never harsh. This preset makes use of Omnia.9’s Wideband AGC2 after the multi-band section, and while it uses a gentle... -
Page 222: New York - By Jesse Graffam
“Northridge FM” is a 7-band preset that makes use of the Wideband AGC2 compressor in “Bass Only” mode to deliver lots of bass punch. Loudness is built relying more upon the dynamics section of Omnia.9 rather than the final clipper, specifically through the use of the Wideband AGC1 compressor and the multiband limiters. -
Page 223: Plutonium Hd - By Leif Claesson
Rustonium – by Leif Claesson and Jesse Graffam A hybrid of two past presets – Jesse’s “Rusticity” and Leif’s “Plutonium” – “Rustonium” is Omnia.9’s default preset. The bass is always present but punchy, while the high end is bright and prominent but never shrill or edgy. The multi-band attack and release times are relatively slow, but this 7-band preset makes extensive use of Omnia.9’s progressive release control to allow... -
Page 224: Stacked Boxes Plus! - By Jim Kuzman
Trinity – by Leif Claesson Inspired by the sound of the classic Omnia.3 FM Turbo, this 3-band preset is dynamic and punchy with an open mid-range and a more classic “Omnia” sound. “Trinity” doesn’t use any parametric EQ or stereo enhancement, runs with a very light ratio in the multi-band section, and presents itself very transparently on the air, making it suitable for nearly any format. -
Page 225: Nfremote Client Software
Omnia.9 itself (including touchscreen support on PC’s providing that feature) to provide a familiar and feature-rich means of controlling your Omnia.9 remotely. If you can do it on the front panel, you can do it via remote - a feature you’ll appreciate if your Omnia.9 is located in a noisy rack room, at the transmitter site, or even thousands of miles away at a... -
Page 226: Some Important Ethernet/Wi-Fi Network Considerations
While the client software itself is not a terribly resource-intensive application, it does place some demands upon your local network. The client allows you to make “live” adjustments to the Omnia.9, observe its meters (as well as other displays such as the oscilloscope) in real time, and on networks with sufficient bandwidth play audio from the Omnia.9 to your remote... -
Page 227: Initiating An Outbound Connection From Omnia
Normally, an instance of NfRemote running on a remote computer initiates the connection to an Omnia.9 (“inbound” connection). However, there are some situations where it is more appropriate for Omnia.9 to initiate the connection to an instance of NfRemote on a remote computer (“outbound” connection). -
Page 228: Client-Only Controls
PC itself, or load a preset from the remote PC to your Omnia.9. This includes flash drives and external USB drives, which provides an excellent way to back up any custom... - Page 229 NFREMOTE CLIENT SOFTWARE CHAPTER 26 | Load From….brings up this typical file page from your computer: When using the Load Preset function, be aware that the preset will be loaded to the Current Preset position and will therefore immediately go on the air. Additionally, in order for the preset to appear in the list, you must save it using the Save Preset function.
-
Page 230: Client Audio Output Menu
Output (which requires at least 800kbps) or L/R Pre-emph Input/Output (which requires at least 400kbps). will be grayed out. You can still monitor the patch points under “MPX Decoded”, which do the decoding and de-emphasis in the Omnia.9 itself and transport flat audio, which require only 200kbps. - Page 231 NFREMOTE CLIENT SOFTWARE CHAPTER 26 | Enabling the SRC control lets the client software dynamically adjust the sample rate of the client playback. If you are ♦ experiencing interruptions or dropouts to the client audio stream, enabling SRC will result in a steadier connection, though at a slight cost to CPU usage.
- Page 232 A: Audio Buffer The TCP Link Status window provides information about the connection status between Omnia.9 and the remote PC, ♦ including Current Ping time in milliseconds, Link Bandwidth in KB/sec, the Audio Format of the stream, and Send and...
-
Page 233: Client Microphone Input Menu
Client File Recorder Just as it is possible to record audio from various patch points within the processing chain on the actual Omnia.9 itself, you can also record audio streamed to the client PC. The recorders in the client software work in exactly the same way. -
Page 234: Speaker Calibration
Some means by which to correct for speaker and/or room inaccuracies (such as a parametric equalizer). ♦ Omnia.9 provides three out of the four tools – the pink noise generator, the RTA, and the EQ. All you need to add is the calibrated mic. -
Page 235: Set Up Rta And Oscilloscope Display Windows
Feeding Pink Noise To the Speakers From the Home menu, select Client Audio, Client Microphone Input, then Input Device from the Home menu of the Omnia.9 client software on the remote PC. Your calibrated mic should be available in the device menu. You may need to refresh the list to make it visible. -
Page 236: Chasing Your Tail
We suggest that instead of making changes to the EQ sections, you use Omnia.9’s Loudness 1 and Loudness 2 menus to make subjective adjustments. These menus each give you three additional bands of fully parametric equalization. -
Page 237: Frequently Asked Questions
How do the physical rear panel inputs relate to the various processing cores? A fully-optioned Omnia.9 can take in three independent audio sources via its physical rear panel inputs. Each physical input is then assigned to an internal signal path within Omnia.9 in the System > I/O Options > Input 1/2/3 menus. - Page 238 The choice of which rear panel outputs to use will depend upon the configuration of your particular plant. In an all-digital plant where Omnia.9 is located at the studio and feeding AES audio to an STL with AES inputs, output audio should come from the AM, Main FM Out 1, Main FM Out 2, and Aux Out outputs.
- Page 239 If Omnia.9 is located at the transmitter, one of the two rear panel composite outputs can be used to feed the main FM audio directly to the exciter. This is also true if Omnia.9 is located at the studio feeding a composite STL. In these cases, adjustments to the output are made in the System >...
- Page 240 How do I set output levels? If you are using Omnia.9’s digital outputs, levels are set in in the System > I/O Options > Main Outputs menu. If you are using the composite outputs, levels are set in the System > I/O Options > FM Options menu. There are options to select Main, MPX, and Insert output levels.
- Page 241 Where is the diversity delay? Omnia.9 provides a “diversity delay” so that AM or FM audio can be delayed and time-aligned to corresponding HD-1 audio, ensuring listeners with HD radios will experience a smooth transition when their receivers switch back and forth between the analog and digital signals.
- Page 242 To set up an IP address, navigate to the System > System Configuration > IP Configuration menu from the front panel. Click on “Use DHCP” to enable Omnia.9 to receive an IP address from your DHCP server. If, after a period of 30-60 seconds, the internal loopback address is still displayed, Omnia.9 is not communicating with the DHCP servers and there are network issues outside...
- Page 243 The remote software client (NfRemote) is always available from within Omnia.9 itself and can be retrieved using the built-in HTTP server. Any time you update your Omnia.9 software it is a good idea to update your NfRemote software as well to ensure compatibility.
- Page 244 FREQUENTLY ASKED QUESTIONS CHAPTER 27 | Example:...
-
Page 245: Signal Path Diagrams
CHAPTER 28 | Signal Path Diagrams Many users of the Omnia.9 will be content with plugging it in, making the necessary I/O connections, picking a preset, then sitting back to enjoy the amazing aural delights and effortless dial dominance it provides. -
Page 246: Physical Inputs
SIGNAL PATH DIAGRAMS CHAPTER 28 | Physical Inputs Rear Panel Software I/O Board Main Dig Patch Point Main Digital Input Sample Rate Converter To Input (32 - 96 kHz) section AES Ref Patch AES Reference Point Input To Input (44.1 or 48 kHz) section Internal Reference... -
Page 247: Input / Output Overview
SIGNAL PATH DIAGRAMS CHAPTER 28 | Input / Output Overview Omnia.9 I/O Overview Output Omnia Input RDS/Pilot Stereo Generator, Direct Extractor, Psychoacoustic AES192 Internal RDS Composite Clipper Encoder Free-running (Integrator) 19 KHz Generator FM Proc Omnia Input Psychoacoustic L/R Direct... -
Page 248: Input Section
SIGNAL PATH DIAGRAMS CHAPTER 28 | Input Section Only one input section shown for simplicity. Main Digital Input Input Meter Control Signal Primary Source ITU BS.1770 Reference Overload Loudness Meter Input Detector Dual Input Silence Detector Auto Internal To Undo Input Aux Digital Gain... -
Page 249: Mpx Input
SIGNAL PATH DIAGRAMS CHAPTER 28 | MPX Input MPX Input Section Only one shown for simplicity MPX In Patch Point MPX Input Tilt Delay Gain Phase Matching DC Servo (From Physical Correction Parametric EQ Input Section) To MPX Out 1 Selector... -
Page 250: Mpx Output
RDS + Pilot Generator Omnia.9 will recover sync from external RDS signals automatically. It is not necessary to feed an external pilot. If your RDS encoder requires a 19 KHz input, you may use the MPX2 Output Mode: 19k Generator option. -
Page 251: Mpx Patch Point
SIGNAL PATH DIAGRAMS CHAPTER 28 | MPX Patch Point MPX Patch Point Used for both MPX Inputs and the MPX Output. FFT Spectrum and Oscilloscope can view any channel. RTA and Monitor Out can use only listenable channels. File Recorder records only source channels. Source Source Compensation... -
Page 252: Pre-Emphasis Patch Point
SIGNAL PATH DIAGRAMS CHAPTER 28 | Pre-emphasis Patch Point Pre- emph Patch Point Used by the L/R Clipper (If using an external stereo coder -- not recommended) Also used for the Pre- emph Test Input. FFT Spectrum and Oscilloscope can view any channel. RTA and Monitor Out can use only listenable channels. -
Page 253: Undo
SIGNAL PATH DIAGRAMS CHAPTER 28 | Undo Scale To B1 Exp Threshold Input Peak Peak Undo Distance "Relative Detector Detectors Actually 5 bands, only 2 bands are shown for simplicity. Limit Threshold" To B2 Exp Threshold Input Imagine if we showed all 5. Undo B1 Post B1 Pre... -
Page 254: Input Agc/Wb Agc1
SIGNAL PATH DIAGRAMS CHAPTER 28 | Input AGC/WB AGC1 Input AGC and Wideband AGC 1 Pink Noise Preview Input Generator Patch- 3-channel Point 3-band Parametric Equalizers Sidechain Audio "Input AGC" Patch- RMS -based Point Feed-Forward Preview Pink Noise Patch- Generator 3-channel Point 3-band... -
Page 255: Wb Agc2 / Agc3 Post-Multiband
SIGNAL PATH DIAGRAMS CHAPTER 28 | WB AGC2 / AGC3 Post-Multiband Wideband AGC 2/3, Post Multiband Mode ( Multiband is mixed down to two bands before this stage) 4-channel coupled wideband Band Band compressor with separate sidechain input High High Peak-based, Band Band... -
Page 256: Wb Agc2 / Agc3 Bass Wideband
SIGNAL PATH DIAGRAMS CHAPTER 28 | WB AGC2 / AGC3 Bass Wideband Wideband AGC 2/3, Bass- Wideband Mode (Shown with 5 bands. In 2 and 3-band mode, only Band 1 goes through the compressor.) 4-channel coupled Band 1 Band 1 wideband compressor with separate sidechain... -
Page 257: Wb Agc2 / Agc3 Bass Only
SIGNAL PATH DIAGRAMS CHAPTER 28 | WB AGC2 / AGC3 Bass Only Wideband AGC 2/3, Bass- Only Mode (Shown with 5 bands. In 2 and 3-band mode, only Band 1 goes through the compressor.) 4-channel coupled Band 1 Band 1 wideband compressor with separate sidechain... -
Page 258: Multiband Processing
SIGNAL PATH DIAGRAMS CHAPTER 28 | Multiband Processing Omnia.9 multiband processing. Double-lines signify multiple bands (2-7 bands). Crossovers with Parametric Equalizers Partial Mixer Discrete High and Input Low Outputs Multiband Downward Expanders Gain Phase Scrambler Wideband AGC 2 Adder (FM Only) -
Page 259: Speaker Controller
SIGNAL PATH DIAGRAMS CHAPTER 28 | Speaker Controller Speaker Controller Used for Monitor Outputs: Speaker, Headphone, Aux Also used for Client Audio Monitoring Solo Pink Noise Volume Master Gain High Pass Listenable Invert L/R Delay L/R Patch Switches Generator Control Low Pass L/R Level Point... -
Page 260: Specifications
SPECIFICATIONS CHAPTER 29 | Specifications Preliminary specifications at the time this manual was compiled are provided here: Frequency Response (FM) +/- 0.5dB 20Hz to 15kHz; 16.4kHz in extended mode. ♦ Signal-to-Noise Ratio Greater than -80dBu de-emphasized, 20Hz to 15kHz. ♦ System Distortion Less than 0.01% THD below pre-emphasis;... -
Page 261: Power Requirements
SPECIFICATIONS CHAPTER 29 | Distance from Earth to Moon 238,900 miles ♦ External Sync Range 44.1kHz or 48kHz. ♦ Inputs/Outputs Balanced, EMI-filtered, L/R analog input and output connectors. ♦ AES Reference Input, Main Digital Input, Aux Digital Input, Main FM Output 1, Main FM Output 2, and Aux Output on ♦... -
Page 262: Warranty
Telos Alliance Warranty Telos Alliance Limited Warranty Telos Alliance Radio Division has an industry-leading five-year warranty. As a company, we are commited to our products and the pursuit of providing better quality to our customers. Find the Warranty online at www.telosalliance.com/warranty. - Page 263 THIS PAGE INTENTIONALLY LEFT BLANK...
- Page 264 1241 Superior Ave. • Cleveland, Ohio, 44114, USA • +1.216.241.7225 • TelosAlliance.com © 2018 TLS Corp., All Rights Reserved. C18/2/15036 • P/N: 1490-00082-007 --- USER MANUAL: OMNIA-9...
Need help?
Do you have a question about the OMNIA.9 and is the answer not in the manual?
Questions and answers