Table of Contents
Advertisement
Quick Links
Advertisement
Chapters
Table of Contents

Related Manuals for Zetor FORTERRA HSX 100 2014


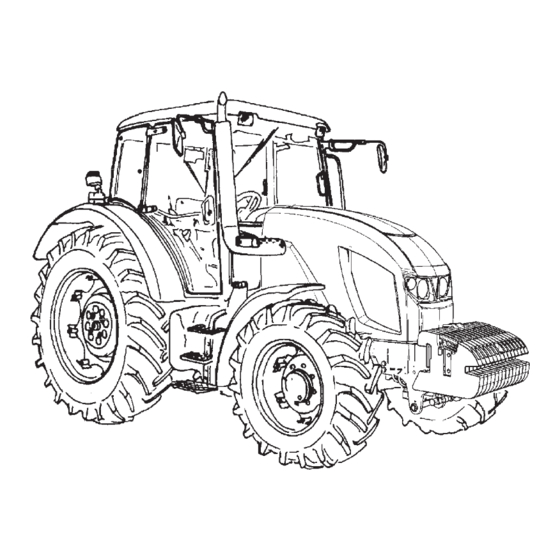
Summary of Contents for Zetor FORTERRA HSX 100 2014
- Page 2 ZETOR This Operator’s Manual for the Zetor Forterra HSX tractors, which we are presenting to you will help you to become familiar with the operation and maintenance of your new tractor. Although many of you have rich experience with the operation of other tractors, please, read the information contained in this Operator’s Manual very carefully.
- Page 3 The technical specifications and information about the design, equipment, material and appearance are valid at the time of print. The manufacturer reserves the right to implement changes. ...
-
Page 4: Table Of Contents
CONTENTS Page Location of serial numbers ..................7 Safety instructions for users ..................9 Preventive daily maintenance ................... 23 Acquaintance with the tractor ................... 29 Driving operation ....................... 61 Running in the tractor ....................95 Transportation ......................99 Drive of agricultural machines ................105 Hydraulic system .................... - Page 5 ZETOR FORTERRA TRACTORS HSX Engine power Type of (kW) the tractor 2000/25/EC Forterra HSX 100 Forterra HSX 110 Forterra HSX 120 Forterra HSX 130 Forterra HSX 140 F11N001 ...
-
Page 6: Location Of Serial Numbers
LOCATION OF SERIAL NUMBERS XH154... - Page 7 Tractor type Tractor serial number Engine serial number Zetor Forterra HSX 100 Zetor Forterra HSX 110 Zetor Forterra HSX 120 Zetor Forterra HSX 130 Zetor Forterra HSX 140 The “right”, “left”, “front” and “back” indications refer to the driving direction of the tractor.
-
Page 8: Safety Instructions For Users
SAFETY INSTRUCTIONS FOR USERS Please, pay increased attention to the parts of the Operator’s Manual that are marked with this symbol. This symbol accompanies all important warnings that concern operation safety. Observe these instructions and be extremely careful in these cases! Inform your colleagues and other users about these warnings. - Page 9 SAFETY INSTRUCTIONS FOR USERS PROPER CLOTHING 3. Do not wear loose clothing and free flying long hair. 4. During all work use suitable (prescribed) means of personal protection (working boots, gloves, goggles, etc.) STARTING THE ENGINE 5. Only start the engine from the driver’s seat with the clutch pedal fully depressed. Life hazard when starting by means of short-circuiting the starter terminals! 6.
- Page 10 18. When driving the tractor with agricultural machines attached to the front three-point hitch, reduce the driving speed to 20 km/h. 19. During aggregation of Zetor Forterra tractors with machines and implements with high tensile resistance when the engine speed drops and the engine tends to stall, the 1R, 2R reduced gears must not be used for the work with these machines (risk of shaft twist-off).
- Page 11 SAFETY INSTRUCTIONS FOR USERS LEAVING THE TRACTOR 29. Park the tractor only on an even land and where not possible, support with a shim assy. 30. Do not park the tractor with an attached implement in the lifted position. 31. Before leaving the tractor, do not forget to secure the tractor by manual brake. Engaging a gear does not secure the tractor against rozjetím (clutch is disengaged), remove the key from the switchbox and lock the cabin.
- Page 12 SAFETY INSTRUCTIONS FOR USERS HEALTH AND ENVIRONMENT PROTECTION 43. The tractors are not equipped with special filters of air aspirated to the cab. Therefore, they are not designed for work with aerosols and other harmful substances. 44. Coolant, brake liquid, kerosene, diesel fuel, mineral oil and other oil products that are used for the operation and maintenance of the tractor may cause various skin disorders in case of direct contact with your skin and can irritate mucous membranes, eyes, the digestive system and upper respiratory ways.
- Page 13 55. When handling the battery you must pay increased attention and avoid short-circuits. In tractors equipped with a battery disconnector switch the disconnector off when handling the battery. 56. Zetor Forterra HSX tractors must not be operated with a disconnected battery as this may lead to a serious failure of the tractor.
- Page 14 Transportation of personnel on front passenger’s seat is allowed only with road trans- portation. The cab of Zetor tractors in standard de- sign is not designed for work with aero- - Transportation of front passenger outside the seat designed for this pur- sols and other health hazardous sub- pose is forbidden.
- Page 15 SAFETY INSTRUCTIONS FOR USERS THE LEVEL OF EXTERNAL NOISE OF TRACTOR The exposition to the effects of high levels of noise for a longer period of time may lead to hearing disorders or deafness. Protect your hearing with protective means, e.g. headphones, ear plugs etc. Resulting levels of noise when measuring noise for hearing of a person near a tractor Based on European directive 2009/63/EC - Amendment VI TRACTORS FORTERRA HSX...
- Page 16 SAFETY INSTRUCTIONS FOR USERS THE LEVEL OF INTERNAL SOUND OF TRACTOR The exposition to the higher sound levels for longer periods of time may lead to hearing disorders or deafness. Protect your hearing with protective measures, e.g. headphones, ear plugs etc. Resulting levels of noise when measuring noise for hearing of driver Based on European directive 2009/76/EC - Amendment VI TRACTORS FORTERRA HSX...
- Page 17 SAFETY INSTRUCTIONS FOR USERS THE LEVEL OF VIBRATIONS ON DRIVER´S SEAT ZETOR tractors are classified in A category in classes I and II. “A” category includes all tractors with set level of vibrations owing to similar specifications of construction: Results of measurement on testing bench are listed in the following table pursuant to directive 78/764/EEC. The value a* is an adjusted value of effective acceleration balanced according to vibration movement.
- Page 18 Tractors ZETOR supplied already from production with front end loader are equipped with cab roof according to point 2. From safety reasons, series ZETOR tractors supplied without front end loader with standard roof pursuant to point 1 must not be equipped or used with front end loader.
- Page 19 - Do not ever adjust the front end loader by yourselves and do not use the adjusted front end loader without prior ZETOR´s ap- proval. The loader may become dangerous as a result of not observing these instructions. ZETOR TRACTORS shall not be held responsible in case of any damage or injury.
- Page 20 SAFETY INSTRUCTIONS FOR USERS - Use front end loader without additional weights on the tractor (danger of mutual contact). The load of front and rear drive axle must not exceed the maximum permitted load listed in the manual. The use of front end loader requires mounting of counter weight in the rear part of the tractor.
- Page 21 If Zetor tractor is utilized for forest work, a tractor operated within the European Union must be protected against these risks. It is necessary to observe applicable local valid regulations in countries which are not part of the European Union.
-
Page 22: Preventive Daily Maintenance
PREVENTIVE DAILY MAINTENANCE Perform this maintenance daily or after every 8 - 10 hours of operation at the latest. F11N004... - Page 23 PREVENTIVE DAILY MAINTENANCE F11N005 XF_02_193 F_02_3a1 FUEL SYSTEM LEAKS ENGINE OIL LEVEL COOLING SYSTEM Check fuel system leaks, After unscrewing and removing the oil Check the connections of the engine including the fuel tank. Repair any leaks dip-stick check the oil quantity in the cooling system for leaks and the coolant engine and then check the connection of...
- Page 24 PREVENTIVE DAILY MAINTENANCE FH12N017 FH12N064 LIQUID BRAKES TRAILER AIR BRAKES TRAILER HYDRAULIC BRAKES Check the liquid brakes for leaks as well Check the air system of the brakes for Check the hydraulic brakes of the trailer as the liquid control of the clutch and the leaks and the efficiency of the tractor for leaks.
- Page 25 PREVENTIVE DAILY MAINTENANCE D402 F_02_6a F_02_9 HYDROSTATIC STEERING AIR CLEANER CAB FILTRATION - Check the oil level in the hydrostatic If the air cleaner is heavily clogged with Check and if necessary clean the cab steering tank. dirt, this condition is indicated by a ventilation air filters installed in the front sensor that lights up an indicator on the...
- Page 26 PREVENTIVE DAILY MAINTENANCE F_02_100 F11N006 HITCHES AFTER WIRK WITH FRONT TYRES AND WHEELS IMPLEMENTS AND IN CASE OF Check the condition of the hitching and Check the air pressure in the front and COOLER CLOGGING attachment systems of the tractor and rear tyres.
- Page 27 PREVENTIVE DAILY MAINTENANCE FH12N014 SHORT FUNCTIONAL TEST After starting the engine check whether the hydrostatic steering failure, engine lubrication and charging indicators have gone off. Verify the function of the hydraulic steering circuits and check them for leaks.
-
Page 28: Acquaintance With The Tractor
ACQUAINTANCE WITH THE TRACTOR Page Safety cabin ......................31 Opening the door from the outside ................31 Opening the door from the inside ................31 Rear window ......................32 Side window ......................32 Windshield washer nozzle ..................33 ... - Page 29 ACQUAINTANCE WITH THE TRACTOR Display – setting language mutation ................. 49 Switches and levers ....................50 Lights switch ......................51 Front drive axle button ....................51 Switch of warning lights ..................... 51 Lights switch between the grill and the cabin ............52 Rear differential lock button ..................
-
Page 30: Safety Cabin
ACQUAINTANCE WITH THE TRACTOR F11N039 F_02_11 SAFETY CABIN OPENING THE DOOR FROM THE OPENING THE DOOR FROM THE OUTSIDE INSIDE Use the left side of the tractor for Door can be opened from the outside by 1. Lever for opening the door from the getting on and getting off the trac- pressing a button. -
Page 31: Rear Window
ACQUAINTANCE WITH THE TRACTOR REAR WINDOW SIDE WINDOW Is equipped with a handle and in an open Secured by plastic handle in half open position is locked by gas spruts. Rear position. window is heated. When driving on an uneven sur- face we recommend to secure the window in a closed position - danger of window cracking. -
Page 32: Windshield Washer Nozzle
ACQUAINTANCE WITH THE TRACTOR F_02_152a F_02_137 WINDSHIELD WASHER WINDSHIELD WASHER NOZZLE WINDSHIELD WASHER TANK ENGAGEMENT Nozzle is adjustable with a needle of a Windshield washer tank is placed on the maximum strength of max. of 0.8 mm. rear wall of the cabin from the outside Windshield washer is set in activity by side. -
Page 33: Passenger´s Seat
ACQUAINTANCE WITH THE TRACTOR FH12N020.tif PASSENGER´S SEAT Passenger´s seat is tiltable and placed on the left mudguard of the cabin. SEAT TILTING OUT Passenger´s seat to be tilted out in the direction of an arrow (1) upward. Locking of the seat is done automatically SEAT TILTING Lift the passenger´s seat in the direction of an arrow (2), pull the lever (3) to the direction of the driver´s seat, tilt the seat in the di- rection of an arrow (4). -
Page 34: Shelf And Toolbox
ACQUAINTANCE WITH THE TRACTOR FH12N025 F_02_12 SHELF AND TOOLBOX REAR VIEW MIRRORS Shelf is placed on the left side of driver´s seat. Before the drive or starting the work, ad- Toolbox is placed in the rear part of the cabin behind the driver´s seat. just rear view mirrors so that they enable to monitor the whole drive way or work- Another shelf is placed on the right mudguard. -
Page 35: Driver´s Seat
ACQUAINTANCE WITH THE TRACTOR FH12N026 DRIVER´S SEAT TILTING AND PROTRUSION OF STEERING WHEEL 1- The control of setting the seat suspension according to the driver´s weight (setting by rotation, in the direction according to pictogram on Tilting column of steering wheel enables variable the boot of the seat) setting of position of the steering wheel both in 2- Longitudinal setting of the seat lever... -
Page 36: Air Filter With Active Carbon
ACQUAINTANCE WITH THE TRACTOR F13BN015 *AIR FILTER WITH ACTIVE CARBON When spraying pesticides and using heating filters with active Active carbon filters are installed in the placed of standard dust filter and the re- carbon, the recirculation control placement is done in the same way as with standard filters. Filter must be inserted must be in the position of „air with the white side to the grid. -
Page 37: Heating Control Panel, Air-Condition
ACQUAINTANCE WITH THE TRACTOR F13BN009 F_02_16 F_02_17a HEATING CONTROL PANEL, AIR- SWITCH AIR-CONDITION (C) HEATING VALVE CONTROL (A) CONDITION a - heating valve closed Do engagement and disengagement of b - heating valve opened A - heating valve control air-condition system function by switch- B - ventilator control ing the switch with a symbol of snow... -
Page 38: Air Circulation In Cabin Control(D)
ACQUAINTANCE WITH THE TRACTOR F_02_17b F11009 F_02_18a AIR CIRCULATION IN CABIN PROPER FUNCTION OF THE HEATING FAST HEATING OF THE CABIN AREA CONTROL(D) AND AIR-CONDITION SYSTEM Proceed accordingly: 1 - Turn the heating valve control (A) to a - surrounding (outside) air is sucked in It is necessary to create surplus pressure the position on the right (fully opened through filters to cabin –... -
Page 39: Fast Cooling Of The Space Of The Cabin
ACQUAINTANCE WITH THE TRACTOR F_02_18 F_02_19 F_02_20 IMMEDIATELY AFTER COOLING THE FAST COOLING OF THE SPACE OF OPERATION OF HEATING OR AIR- THE CABIN CONDITION WITH TRACTOR´S WORK CABIN Proceed accordingly: With engaged inner recirculation of air is Immediately after cooling the cabin and 1 - Switch the heating valve control lever the inflow of fresh air closed and there is lowering the inner temperature on the... -
Page 40: Air-Condition And Heating Registers (A)
ACQUAINTANCE WITH THE TRACTOR F13BN010 F13BN011 AIR-CONDITION AND HEATING REGISTERS (A) FRONT WINDSHIELD (B) DEFROSTING Positionable heating and air-condition registers, front (A), rear (B). To ensure quick defrosting of the front windshield direct the central heating out- lets (1) under the angle of approx. 45° towards the windshield. -
Page 41: Sun Screen
ACQUAINTANCE WITH THE TRACTOR FH13N009 F13BN014 SUN SCREEN INTERNAL LIGHTING You can draw out the sun shield by pull- To be turned on and off by means of a ing the handle in the direction of the ar- button marked with the arrow. row. - Page 42 NOTES...
- Page 43 ACQUAINTANCE WITH THE TRACTOR FH12N010...
-
Page 44: Dashboard
ACQUAINTANCE WITH THE TRACTOR 21 - Gear box oil filling overheating con- DASHBOARD 8 - Lubricating (red). With engine running trol (red), for more see chapter “Driv- lights up with the oil pressure drop ing operation” under 120 to 60 kPa. If the engine is DESCRIPTION 22 - Gearbox switchboard delivery filter at standstill, it must be lit up... -
Page 45: Display Description
ACQUAINTANCE WITH THE TRACTOR FH13N001 FH12N036 DISPLAY DESCRIPTION CHANGE OF THE LOOK OF DISPLAY The following values are displayed on the display: The change of look of display from dis- play (1) to display (2) can be done by pressing a button (A). 1 - shifted gear of multiplier of torque, according to shifted gear L, M or H is displayed 2 - switching the switch of torque multiplier preselection 3 - switching the function of rear PTO shaft automatic disengagement... -
Page 46: Display - Change Of Display
ACQUAINTANCE WITH THE TRACTOR FH12N033 FH12N035 DISPLAY – CHANGE OF DISPLAY DISPLAY – RESETTING DATA By repeated pressing of button (A), you can click between individual displays of data Resetting data marked with an arrow can on display: be done on a display (4) and (5) 1 - Main field travel speed of tractor pole, secondary field of PTO shaft revolution, if it Select display (3) or (4) with a button (A) is on... -
Page 47: Display - Manual Brake
ACQUAINTANCE WITH THE TRACTOR FH12N039 FH12N041 DISPLAY – MANUAL BRAKE DISPLAY - ERROR MESSAGES If the tractor is not braked by a manual Serious faults in the system (1) brake, a warning is displayed on a dis- STOP sign, number of fault (1) is displayed on a display with serious faults. play (letter P in a circle) and at the same time a sound signal is heard. -
Page 48: Display - Service Menu
ACQUAINTANCE WITH THE TRACTOR FH12N063 FH12N067 DISPLAY – SERVICE MENU DISPLAY – SETTING LANGUAGE MUTATION Service menu serves for the mainte- nance of the tractor by an authorized Enter the service menu service and the setting of language for Select the item LANGUAGE by (B) and display of dashboard. -
Page 49: Switches And Levers
ACQUAINTANCE WITH THE TRACTOR SWITCHES AND LEVERS a - Lights switch (off, parking, head) b - Lower beam lights in the grill of the tractor and working lights in the cabin of the tractor switch c - Fog light switch (off - on). Fog light function is signalized by a lit symbol on the switch. -
Page 50: Lights Switch
ACQUAINTANCE WITH THE TRACTOR FH12N031 SWITCH OF WARNING LIGHTS LIGHTS SWITCH FRONT DRIVE AXLE BUTTON a - illumination off a - warning lights on Use the front drive axle with slip- b - side and end point lights on, illumi- b - warning lights off ping of the rear wheels to en- nation of licence label, illuminated... -
Page 51: Lights Switch Between The Grill And The Cabin
ACQUAINTANCE WITH THE TRACTOR FH12N032 D102 PRESELECTION OF TORQUE LIGHTS SWITCH BETWEEN THE REAR DIFFERENTIAL LOCK BUTTON GRILL AND THE CABIN MULTIPLIER SWITCH Engagement and disengagement of rear differential lock is done by pressing the a - roof lights on a - Preselection switch off button which returns to its original posi- b - roof lights off... -
Page 52: Direction Lights, Lower Beam Head Lights, Head Lights And Horn Switches
ACQUAINTANCE WITH THE TRACTOR X139 F13BN004 DIRECTION LIGHTS, LOWER BEAM SWITCH BOX HEAD LIGHTS, HEAD LIGHTS AND Switchbox is placed on the dashboard, see HORN SWITCHES arrow. a - Acoustic horn – press the switch in the direction of an axis b - Lower beam head lights c - Direction lights to the right d - Direction lights to the left... -
Page 53: Key In "0" Position
ACQUAINTANCE WITH THE TRACTOR KEY IN “II” POSITION KEY IN “0” POSITION KEY IN “I” POSITION The voltage of all key operated devices Voltage is connected to all devices with Starter and feeding of all devices is en- is disconnected. The key can be re- the exception of the starter. -
Page 54: Ignitor And Three-Pin Socket
ACQUAINTANCE WITH THE TRACTOR FH12N028 F13BN005 IGNITOR AND THREE-PIN SOCKET MANUAL THROTTLE Ignitor (1) and a three-pin socket (2) are A - maximum supply placed on the panel of right rear B - idle run mudguard. -
Page 55: Reversing Lever
ACQUAINTANCE WITH THE TRACTOR X212a FH12N037 FH12N038 REVERSING LEVER GEAR SHIFTING LEVER GEAR SHIFTING SCHEME - main gear shifting lever Reversing speeds can be shifted only by F – front driving; lever in the front means of reversing lever. The scheme is N - neutral placed on the head of gear shifting lever. -
Page 56: Pedals And Levers
ACQUAINTANCE WITH THE TRACTOR F13BN008 PEDALS AND LEVERS ROAD AND REDUCED SPEEDS SHIFTING LEVER 1 - travel clutch pedal 2 - foot brake pedals joint by a catch The lever is placed on the right side of 3 - throttle pedal driver´s seat. -
Page 57: Pto Revolutions Preselection Lever
ACQUAINTANCE WITH THE TRACTOR FH13N008 XF_02_213 HYDRAULIC CONTROL PANEL PTO REVOLUTIONS PRESELECTION MANUAL BRAKE LEVER AND LEVER COUPLING FOR SEMI-TRAILER It is placed in the area of right mudguard. CONTROL LEVER A detailed description of controls and func- The lever (1) is placed on the right side tion follows in chapters “Hydraulic equip- of driver’s seat. -
Page 58: Auxiliary Hydraulic Switchbox Control (External Hydraulic Circuit)
ACQUAINTANCE WITH THE TRACTOR FH12N040 FH13N011 FH12N022 BATTERY DISCONNECTOR AUXILIARY HYDRAULIC SWITCHBOX CONTROL PANEL ON THE RIGHT CONTROL (EXTERNAL HYDRAULIC COLUMN OF THE CABIN Disconnect the battery immediate- CIRCUIT) 1 - rear PTO shaft engagement ly by battery disconnector which is Is placed in the upper part of right mud- 2 - front PTO shaft engagement placed on the right side of the... -
Page 59: Fuel Tank
ACQUAINTANCE WITH THE TRACTOR F_02_22 AGGREGATION OPENING FUEL TANK FUEL TANK DRAIN PLUG A plastic tank of 240 litres volume is Plug for draining dirt and fuel off the fuel Aggregation opening serves for cabelling mounted as a standard for all types of tank is in its bottom. -
Page 60: Driving Operation
DRIVING OPERATION Page Before you start ......................63 If you do not succeed in starting the engine .............. 63 Non-permitted starting ....................63 Starting the engine of the tractor ................64 Ignition system disorders signalization ..............64 ... - Page 61 DRIVING OPERATION Serious failures of travel clutches and reversing levers system ..... 77 Less serious failures of travel clutches and reversing system ......77 Blocking the automatic dead start function ............. 77 Three-gear torque multiplier ................78 ...
-
Page 62: Before You Start
DRIVING OPERATION FH12N053 F11N012 F11N013 BEFORE YOU START IF YOU DO NOT SUCCEED IN NON-PERMITTED STARTING STARTING THE ENGINE Before you start the engine, make It is forbidden to start the tractor Return the key to "0" position. Wait 30 sure that: by short-circuiting the starter 1. -
Page 63: Starting The Engine Of The Tractor
DRIVING OPERATION FH12N051 FH112N052 F_02_176a 6. Turn the key to “I” position. A yellow STARTING THE ENGINE OF THE IGNITION SYSTEM DISORDERS control will light up on the dashboard TRACTOR SIGNALIZATION signalising the proper igniting function. Ignition system disorders are signalized As a standard, the tractors are equipped 7. -
Page 64: Coolant Heater
DRIVING OPERATION F11N016 COOLANT HEATER STARTING THE ENGINE WITH THE USE OF COOLANT HEATER Heating the coolant makes starting the engine easier with low temperatures. Inlet Coolant heater is mounted on the engine electric installation and its protection against dangerous touch must be done in ac- block. -
Page 65: Immediately After Start
DRIVING OPERATION FH11N092 FH11N091 IMMEDIATELY AFTER START ENGINE HEATING After start, set the revolutions for Do further heating of the engine during the drive. The heating of the engine by 800 - 1000 revolutions lengthy idle run or sharp increase in revolutions is harmful to the engine. nute, allow the engine to run for a If the temperature of coolant has not reached 45°C, do not exceed the engine time period of approximately 2... -
Page 66: Gear Shifting
DRIVING OPERATION FH12N037 X212a FH12N050 REVERSING LEVER POSITION GEAR SHIFTING REVERSING LEVER SIGNALIZATION The tractors are equipped with a five- The selection of the direction of travel gear synchronized gearbox, three-gear drive is done by reversing lever (forward, The individual positions of reversing lev- torque multiplier, reversing and two-gear backward). -
Page 67: Shifting Road And Reduced Speeds
DRIVING OPERATION FH12N057 FH12N069 DRIVER´S SEAT – SAFETY SWITCH SHIFTING ROAD AND REDUCED ROAD AND REDUCING SPEEDS SPEEDS LEVER POSITION SIGNALIZATION The driver´s seat is equipped with a safe- ty switch which signalizes the system of Road speeds The individual positions of road and re- driver abandoning the driver´s seat. -
Page 68: The Principles Of Appropriate Use Of Tractors
DRIVING OPERATION THE PRINCIPLES OF APPROPRIATE USE OF TRACTORS The listed principles for tractor´s operation serve for facilitating the operation and guarantee corresponding service life of travel clutch! THE DESCRIPTION OF THE SYSTEM OF TRAVEL CLUTCHES The tractor is equipped with two individual travel clutches, one for travelling forward and one for travelling backward. The selection of the driving direction and also the choice of a specific travel clutch is done by shifting the reversing lever under the steering wheel from neutral position to the position forward or backward. - Page 69 DRIVING OPERATION 2 - Clutch control button on the head of gear shifting lever This way of control has the function of automatic switch of travel clutch. When pressing the button of clutch control on the head of gear shifting lever there is release of travel clutch When releasing the red button of control clutch on the head of gear shifting lever, there is a switch of travel clutch.
-
Page 70: Interrupted Sound Signal
DRIVING OPERATION FH12N047 INTERRUPTED SOUND SIGNAL If the speed of tractor is control by partial depression of the clutch pedal with en- gine revolutions higher than 1 200 rpm, there is an interrupted sound signal and gearbox failure control is still lit. If this situation occurs, fully depress the clutch pedal immediately to stop or release the clutch pedal to the upper position and... -
Page 71: Dead Start Of The Tractor
DRIVING OPERATION DEAD START OF THE TRACTOR If at dead start, engine revolutions are higher than 1400 rpm L gear of multiplier is automatically shifted, not depending on the switch of multiplier pre-selection on dashboard being on or off. If the multiplier pre-selection switch on the dashboard is on at dead start, L gear of multiplier is shifted automatically independent on the number of engine revolutions at dead start (i.e. -
Page 72: Dead Start Of Tractor In Regular Operation - Clutch Pedal
DRIVING OPERATION DEAD START OF TRACTOR IN REGULAR OPERATION – CLUTCH PEDAL In regular operation use the clutch pedal only for stopping the tractor. For the need of delicate inching, e.g. when connecting the tools or when manipulating with tractor in crammed spaces, if even the reduced gears are not slow enough, use the clutch pedal only for short time. -
Page 73: Change The Direction Of Drive
DRIVING OPERATION CHANGE THE DIRECTION OF DRIVE CHANGE THE DIRECTION OF DRIVE BY MEANS OF REVERSING LEVER Change the direction of drive by means of reversing lever is done with travel speed lower than 10km/h. When you attempt to change the direction of drive in speed higher than 10 km/hour, acoustic signal starts (uninterrupted tone) and the tractor engages neutral. -
Page 74: Change The Direction Of Drive - Using The Clutch Pedal
DRIVING OPERATION CHANGE THE DIRECTION OF DRIVE - USING THE CLUTCH PEDAL Depress the clutch pedal and stop the tractor by foot brake. Shift the reversing lever to the requested direction of tractor drive Release the clutch pedal only to the point of travel engagement and with simultaneous increase of engine revolutions contin- ue in smooth release of the clutch pedal. -
Page 75: Signalization Of Travel Clutches And Gear Box System Failures
DRIVING OPERATION FH12N059 SIGNALIZATION OF TRAVEL CLUTCHES AND GEAR BOX SYSTEM FAILURES The failures in systems of travel clutches and gear box are signalized by red controls on the dashboard and a failure code on the display. 1 - Clogging of delivery filter of gear box switchboard control. It lights up with clogging of delivery filter of gear box switchboard. -
Page 76: Serious Failures Of Travel Clutches And Reversing Levers System
DRIVING OPERATION FH12N060 FH12N061 FH12N073 SERIOUS FAILURES OF TRAVEL LESS SERIOUS FAILURES OF BLOCKING THE AUTOMATIC DEAD CLUTCHES AND REVERSING TRAVEL CLUTCHES AND START FUNCTION LEVERS SYSTEM REVERSING SYSTEM With some failures of travel clutches sys- A failure of serious failure category is A failure of a category less serious is tem, the function of automatic dead start signalized by a red control gearbox fail-... -
Page 77: Three-Gear Torque Multiplier
DRIVING OPERATION FH12N058 FH12N047 FH12N054 THREE-GEAR TORQUE MULTIPLIER SIGNALIZATION OF MULTIPLIER INCREASING, DECREASING THE FUNCTION TRAVEL SPEED BY TWO GEARS Three-gear multiplier is a standard equipment of all types of tractors Individual engaged gears of multiplier are 2xH Increases the travel speed by two Shifting individual gears of three-gear signalized by a sign (1) in the left upper gears... -
Page 78: Multiplier Preselection Switch
DRIVING OPERATION FH12N090 FH12N068 MULTIPLIER PRESELECTION MULTIPLIER PRE-SELECTION SWITCH SIGNALIZATION a - Preselection switch off The switch of multiplier reselection b - Preselection switch on switch is signalized by a sign (1) on the display of dashboard. The position (b) preselection switch on is signalized by a lit symbol on a switch. -
Page 79: Automatic Multiplier Shifting
DRIVING OPERATION AUTOMATIC MULTIPLIER SHIFTING The system of automatic multiplier shifting is switched by multiplier pre-selection switch on the dashboard. If the multiplier pre- selection switch is on (control on the switch is lit), the gears of multiplier are shifted automatically depending on the engine revolu- tions according to preset values (engine revolutions). - Page 80 DRIVING OPERATION Example of use: We are driving with a tractor with multiplier pre-selection off with multiplier shifted to M gear, with engine revolutions of 1600 rpm we press L button on the gear shifting lever, by this we shift the torque multiplier to L gear, now we increase the engine revolutions to 1900 rpm and we press H button on the gear shifting lever, by this we shift the torque multiplier back to M gear.
- Page 81 DRIVING OPERATION Recommendation Before switching the switch of multiplier on the dashboard, do the manual shift of multiplier gear when using H and L buttons (once by H button and once by L button) on gear shifting lever with requested engine revolutions. The values (engine revolutions) will be saved and after subsequent engagement of the multiplier pre-selection switch on dashboard, the system of automatic mul- tiplier shifting will automatically shift multiplier gears according to these engine revolutions With multiplier pre-selection switch on, in case of release of travel clutch, for example with gear shifting, stopping and subsequent...
-
Page 82: Front Drive Axle Control
DRIVING OPERATION FH12N031 Front axle drive is engaged permanently FRONT DRIVE AXLE CONTROL AUTOMATIC DISCONNECTION OF by a long pressing of a button (app. 3s) Switching front drive axle on is done by FRONT DRIVE AXLE for the whole period of tractor drive pressing a button which returns to its When exceeding... -
Page 83: Drive With Front Drive Axle On
DRIVING OPERATION FH12N031 FH12N032 DRIVE WITH FRONT DRIVE AXLE ON REAR DIFFERENTIAL LOCK BUTTON Engagement of rear differential lock but- Use the front drive axle with slip- ton is done by pressing a button, which page of rear wheels to enhance returns to its original position after re- the draft of a tractor. -
Page 84: Diesel Particle Filter
DRIVING OPERATION FH12N056 FH12N074 DIESEL PARTICLE FILTER When operating tractors with en- gines equipped with diesel parti- The exhaust system of a tractor is equipped with a diesel particle filter which cle filter, avoid long-term opera- serves for cleaning exhaust fumes. Solid particles (carbon particles) are col- tion or low engine load. -
Page 85: Diesel Particle Filter - System Failures Signalization
DRIVING OPERATION FH12N075 DIESEL PARTICLE FILTER – SYSTEM FAILURES SIGNALIZATION DIESEL PARTICLE FILTER FAILURE CODES Failures in diesel particle system failure are signalized by a red control lighting up on the dashboard with engine running and subsequently by an acoustic Failure Operator´s activity signal. -
Page 86: Diesel Particle Filter Regeneration
DRIVING OPERATION FH12N076 Depending on the temperature of ex- DIESEL PARTICLE FILTER REGENERATION haust fumes and the degree of diesel During the operation of a tractor, diesel particle filter is clogged by solid parti- particle filter clogging, regeneration can cles originating in engine run when burning fuel. Clogged diesel particle filter take up to thirty minutes. -
Page 87: Manual Brake - Signalization
DRIVING OPERATION FH12N039 MANUAL BRAKE - SIGNALIZATION If the tractor is not braked by a manual brake, a warning is displayed on a dis- play (a letter P in a circle) and at the same time there is a sound signal. This situation occurs in two cases a - a tractor unbraked by a manual brake with engine running and a... -
Page 88: Driving Up The Slope
DRIVING OPERATION F11N020 F11N021 F106 DRIVING UP THE SLOPE DRIVING DOWN THE SLOPE FOOT BRAKES They are disc, wet, hydraulically con- Shift from higher to lower gear in Driving down the slope without trolled, double-pedalled with automatic time when driving up the slope engaged gear speed is forbidden. -
Page 89: Air Brakes Of Trailers And Articulated Trailers
DRIVING OPERATION F11N022 F11023 AIR BRAKES OF TRAILERS AND WARNING SIGNALIZATION OF AIR ARTICULATED TRAILERS PRESSURED DROP Air brakes of trailers (articulated trailers) Air pressure drop below 450 kPa is sig- control and control of tractor brakes is nalized by alit red control bulb placed on done so that braking effect of both vehi- a dashboard. -
Page 90: One-Hose And Two-Hose Brakes
DRIVING OPERATION FH12N089 FH12N087 FH12N088 ONE-HOSE AND TWO-HOSE BRAKES ONE-HOSE BRAKES TWO-HOSE BRAKES 1. clutch head of one-hose brakes Valve is marked with a black colour. The valve of the left head is labelled in 2. clutch heads of two-hose brakes yellow (braking branch), the valve of the When connecting the trailer (ar- right head is labelled in red (filling... -
Page 91: Hydraulic Brakes Of Trailers
DRIVING OPERATION FH12N86 HYDRAULIC BRAKES OF TRAILERS When braking with one brake pedal, hydraulic brakes of the trailer are not Connect hydraulic brakes of trailer or articulated trailer to the quick couplings marked by an arrow. active. CONNECTING AND DISCONNECTING Control of hydraulic brakes of trailers (articulated trailers) and control of tractor brakes QUICK COUPLINGS OF TRAILER is done so that the braking effect of both vehicles is synchronized. -
Page 92: Stopping The Tractor - Manual Brake
DRIVING OPERATION F11N026 FH13N010 FH12N077 LEAVING THE TRACTOR STOPPING THE TRACTOR – MANUAL STOPPING THE ENGINE BRAKE After the work of tractor when the engine Before leaving the tractor with a safety was fully loaded, it is necessary to se- cabin, do not forget to remove the key Stop the tractor slowly under standard cure its cooling. -
Page 93: Warning Signalization Of Hydrostatic Steering Failure
DRIVING OPERATION F_02_68 WARNING SIGNALIZATION OF HYDROSTATIC STEERING FAILURE Hydrostatic steering pump failure is with oil pressure drop under 120 kPa behind a pump signalized on a dashboard by an applicable symbol. Note: When starting the tractor or with low engine revolutions, the control may blink, if it switches off after starting or in- creasing the revolutions, it is not a fail- ure. -
Page 94: Running In The Tractor
RUNNING IN THE TRACTOR Page General principles for running in the new tractor in the course of the first 100 hours of operation ..................96 During the first 10 hours .................... 96 From 100 hours on ....................97 ... - Page 95 RUNNING IN THE TRACTOR F11N030 F11N031 GENERAL PRINCIPLES FOR RUNNING IN THE NEW TRACTOR IN THE DURING THE FIRST 10 HOURS COURSE OF THE FIRST 100 HOURS OF OPERATION - Run in the tractor in the transport regime. During the first 100 operation hours: - Tighten the fitting nuts of the front and - Load the engine normally rear wheels, including the bead / rim...
- Page 96 RUNNING IN THE TRACTOR E256 FROM 100 HOURS ON After running-in you can work with the tractor without any restrictions. Recommended 1400 - 2300 rpm operation speed Idle speed 800 ± 25 rpm Operation oil 0.2 - 0.5 MPa pressure Oil pressure at the min.
- Page 97 NOTES...
-
Page 98: Transportation
TRANSPORTATION Page CBM stage quick-adjusting hitch ................100 Height adjustment and disassembly of the CBM stage hitch ........100 Automatic mouth of the CBM stage hitch ..............100 Modular system of hitches for trailers and semi-trailers .......... 101 ... -
Page 99: Cbm Stage Quick-Adjusting Hitch
TRANSPORTATION D201 D202 E304 AUTOMATIC MOUTH OF THE CBM CBM STAGE QUICK-ADJUSTING HEIGHT ADJUSTMENT AND HITCH DISASSEMBLY OF THE CBM STAGE STAGE HITCH HITCH It is designed for attachment of double- When the lever (1) is moved in the direc- axle trailers or lighter single-axle semi- By moving the control lever in the arrow tion of the arrow (a), the pin (2) is retracted... -
Page 100: Modular System Of Hitches For Trailers And Semi-Trailers
TRANSPORTATION D204 D205 D206 MODULAR SYSTEM OF HITCHES FOR SWINGING DRAW-BAR CONSOLE SWINGING DRAW-BAR CONSOLE TRAILERS AND SEMI-TRAILERS MODULE WITH A FIXED PIN MODULE The swinging draw-bar console module Perform the assembly and disassembly Module types: Fig. (B) - Swinging draw-bar console is located in the stage hitch console. -
Page 101: Console With A Ø 80 Ball Module
TRANSPORTATION D207 D208 CONSOLE WITH A Ø 80 BALL HITCH FOR A SINGLE-AXLE CBM MODULE SEMI-TRAILER The hitch for a single-axle semi-trailer The console with a ø 80 ball is may be equipped with a hook (A) or with only used to connect semi-trailers a swinging draw-bar (B). -
Page 102: Maximum Permissible Vertical Static Load Of Hitches For Trailers And Semi-Trailers
TRANSPORTATION MAXIMUM PERMISSIBLE VERTICAL STATIC LOAD OF HITCHES FOR TRAILERS AND SEMI-TRAILERS Hitch Hitch type Permis- Hitch Hitch type Permis- Hitch Hitch type Permis- sible ver- pin Ø sible ver- pin Ø sible ver- pin Ø tical stat- tical stat- tical stat- ic load ic load... - Page 103 TRANSPORTATION MAXIMUM PERMISSIBLE VERTICAL STATIC LOAD OF HITCHES FOR TRAILERS AND SEMI-TRAILERS Hitch type Permissible Hitch pin Hitch type Permissible Hitch pin Hitch type Permissible Hitch pin vertical (ball) Ø vertical (ball) Ø vertical (ball) Ø static load static load static load Fixed pin 31 mm...
-
Page 104: Drive Of Agricultural Machines
DRIVE OF AGRICULTURAL MACHINERY Page Work with PTO shaft ....................106 Front and rear PTO shaft control ................107 Rear pto shaft revolutions preselection lever ............108 Standard and economical Independent revolutions of rear PTO shaft ....109 ... -
Page 105: Work With Pto Shaft
DRIVE OF AGRICULTURAL MACHINERY WORK WITH PTO SHAFT 1. When working with PTO shaft mind that all the covers are duly fixed. 2. After completing the work, always mount the cover of PTO shaft back. 3. Any repairs or cleaning of aggregated machines parts driven by PTO shaft to be done only with the engine at halt and PTO clutch disengaged 4. -
Page 106: Front And Rear Pto Shaft Control
DRIVE OF AGRICULTURAL MACHINERY FH13N012 FRONT AND REAR PTO SHAFT CONTROL Switches and controls of front and rear PTO shaft control are located on the right column of the cabin. 1. The control of the selection of rear PTO shaft revolutions (P.T.O.) 2. -
Page 107: Rear Pto Shaft Revolutions Preselection Lever
DRIVE OF AGRICULTURAL MACHINERY FH13N005 REAR PTO SHAFT REVOLUTIONS PRESELECTION LEVER The tractor may be equipped with one of two systems of rear PTO shaft revolutions preselection. The system used in the tractor is marked on the label placed by rear PTO shaft revolutions preselection lever. 1. -
Page 108: Standard And Economical Independent Revolutions Of Rear Pto Shaft
DRIVE OF AGRICULTURAL MACHINERY FH13N006 STANDARD AND ECONOMICAL INDEPENDENT REVOLUTIONS OF REAR PTO SHAFT The system used in the tractor is marked on the label placed by rear PTO shaft revolutions preselection lever. This system has only independent revolutions of rear PTO shaft. Standard PTO shaft revolutions engaged Neutral position (rear PTO shaft end-point can be spun freely) Economical revolutions of PTO shaft engaged... -
Page 109: Dependent And Independent Rear Pto Shaft Revolutions
DRIVE OF AGRICULTURAL MACHINERY FH13N007 DEPENDENT AND INDEPENDENT REAR PTO SHAFT REVOLUTIONS The system used in a tractor is marked on the label placed by the rear PTO shaft revolutions preselection lever. This system has only 540 or 1000 rear PTO shaft revolutions. PTO shaft dependent revolutions engaged Neutral position (rear PTO shaft end-point can be spun freely) Independent PTO shaft revolutions engaged... -
Page 110: Facilitating Connection Of Joint Shaft Of An Aggregated Machine To The Tractor
DRIVE OF AGRICULTURAL MACHINERY FH12N002 FACILITATING CONNECTION OF JOINT SHAFT OF AN AGGREGATED MACHINE TO THE TRACTOR For facilitating the connection of joint shaft of aggregated machine to a tractor a but- ton (1) placed on mudguards can be used. With the engine running and rear PTO shaft switch off, spinning of rear PTO shaft occurs after pressing the button (1). -
Page 111: Rate Preselection Switch Of Starting Rear Pto Shaft
DRIVE OF AGRICULTURAL MACHINERY FH13N013 RATE PRESELECTION SWITCH OF STARTING REAR PTO SHAFT Three-position switch (1) on the right column of the cabin enables a selection of three modes of starting the rear PTO shaft clutch. These modes differ by longer idle periods between engagement of switch of rear PTO shaft and the complete switch of the rear PTO clutch. -
Page 112: Selection Switch Of Rear Pto Clutch Revolutions (P.t.o.)
DRIVE OF AGRICULTURAL MACHINERY FH13N014 E357 SELECTION SWITCH OF REAR PTO CLUTCH REVOLUTIONS (P.T.O.) REPLACEABLE END POINTS OF REAR PTO SHAFT Shifting rear PTO shaft revolutions is done by a switch (1) placed on the right column The tractor is equipped with six or twen- of the cabin. -
Page 113: Rear Pto Switch
DRIVE OF AGRICULTURAL MACHINERY FH13N015 REAR PTO SWITCH Rear PTO shaft clutch is engaged by switch of rear PTO shaft. After engagement of the switch the shaft spins. The engagement of the rear PTO clutch is done by a switch (1) placed on the right column of the cabin. The switch is equipped with a mechanical lock (2) against unwanted switch. -
Page 114: Engaging Rear Pto Shaft - Independent Revolutions
DRIVE OF AGRICULTURAL MACHINERY F13BN018 FH13N016 FH12N008 ENGAGING REAR PTO SHAFT - INDEPENDENT REVOLUTIONS The number of PTO shaft revolutions is dependent on the number of engine revolutions With engine running: 1. Select applicable operation mode PTO shaft revolutions preselection lever. 2. -
Page 115: Engagement Of Rear Pto Shaft - Dependent Revolutions
DRIVE OF AGRICULTURAL MACHINERY F13BN018 FH13N016 ENGAGEMENT OF REAR PTO SHAFT – DEPENDENT REVOLUTIONS The number and the direction of the revolutions are dependent on the engaged gear and the position of reversing lever. The posi- tion of reduction lever does not have any influence on the number rear PTO shaft revolutions in dependent revolution mode. With engine running: 1. -
Page 116: Automatic Disengagement Of Pto Clutch
DRIVE OF AGRICULTURAL MACHINERY FH13N017 AUTOMATIC DISENGAGEMENT OF PTO CLUTCH The function of automatic disengagement of the PTO clutch means that with PTO shaft engaged after lifting the arms of rear three-point hitch, the rear PTO clutch is disengaged automatically and the shaft comes to a halt, after subsequent lowering or arms of three-point hitch, the rear PTO shaft is automatically engaged and the shaft spins provided that the direction of drive is engaged by reversing lever and the tractor has travelling speed of at least 0.3 km/h. -
Page 117: Setting Automatic Disengagement Of Pto Shaft Clutch - Display Description
DRIVE OF AGRICULTURAL MACHINERY FH12N080 SETTING AUTOMATIC DISENGAGEMENT OF PTO SHAFT CLUTCH - DISPLAY AUTOMATIC DISENGAGEMENT OF DESCRIPTION PTO SHAFT CLUTCH – RETURN TO BASIC SETTING Display the third display on dashboard by gradual depressing of (A) button. These values are displayed on the display: Basic values set by the manufacturer H-LIMIT –... -
Page 118: Setting Automatic Disengagement Of Pto Shaft Clutch
DRIVE OF AGRICULTURAL MACHINERY FH12N081 SETTING AUTOMATIC DISENGAGEMENT OF PTO SHAFT CLUTCH Setting automatic disengagement of PTO shaft clutch is done with standing tractor with started engine, with disengaged PTO shaft clutch switch and reversing lever under the steering wheel in neutral position. Display the third display on dashboard by gradual depression of (A) button. -
Page 119: Work With Automatic Disengagement Of Pto Shaft Clutch
DRIVE OF AGRICULTURAL MACHINERY WORK WITH AUTOMATIC DISENGAGEMENT OF PTO SHAFT CLUTCH Switch automatic disengagement of PTO shaft clutch by (A) switch with tractor at standstill with engine running. Switching automatic disengagement of PTO shaft clutch is signalized by (B) display on the display of the dashboard. After switching the function with a switch (A), the rear PTO shaft is at standstill;... -
Page 120: Front Pto Shaft
DRIVE OF AGRICULTURAL MACHINERY F_02_64 FH13N019 FH12N009 FRONT PTO SHAFT FRONT PTO SHAFT CONTROL Front PTO shaft is equipped with a solid Engagement and disengagement of front PTO shaft is done by a switch (1) placed on six or twenty-one splined end point and it the right column of the cabin. -
Page 121: Maximum Transferred Output
DRIVE OF AGRICULTURAL MACHINERY F_02_46 FH12N009 MAXIMUM TRANSFERRED OUTPUT DRIVE OF MACHINES WITH GREATER INERTIA MASSES PTO shaft Transferred out- (CRUSHERS, ROTARY HARROWS, REAPING MACHINES.) Front Cardan shaft for drive of these machines 1000 per minute 60 kW must be equipped with the so called free- Rear wheel clutch which ensures disconnection 1000 per minute full engine output... -
Page 122: Hydraulic System
HYDRAULIC SYSTEM Page Hydraulic system ..................... 124 Hydraulic pump ....................... 124 Location of control elements - EHR - B - Bosch electro-hydraulic system ....124 Outer hydraulic circuit ....................125 Connecting and disconnecting quick-couplers ............125 ... -
Page 123: Hydraulic System
HYDRAULIC SYSTEM F_02_112a F_02_113a F_02_53 HYDRAULIC SYSTEM HYDRAULIC PUMP LOCATION OF CONTROL ELEMENTS - EHR - B - BOSCH ELECTRO- The system consists of the inner and The hydraulic pump cannot be disen- HYDRAULIC SYSTEM outer circuit. gaged. When the engine is running, the The source of pressurized oil is a gear pump is in operation. -
Page 124: Outer Hydraulic Circuit
HYDRAULIC SYSTEM FH12N045 C411a FH12N046 OUTER HYDRAULIC CIRCUIT CONNECTING AND DISCONNECTING *QUICK-COUPLINGS WITH DRIP QUICK-COUPLERS COLLECTION The outer circuit supplies pressurized oil to hydraulic implements connected to the Optionally, a system of collection of re- When connecting and discon- outer outlets of the hydraulic system ter- sidual oil drips with a tank can be in- necting the quick-couplers pay minated with quick-couplers. -
Page 125: Hydraulic Distributor Of The Outer Hydraulic Circuit
HYDRAULIC SYSTEM FH12N048 HYDRAULIC DISTRIBUTOR OF THE OUTER HYDRAULIC CIRCUIT A three-section or two-section distributor with four-position sections may be installed in the tractor. The control levers of the sections are installed in the cab on the fender of the right rear wheel. The first (right) section of the distributor is equipped with lock- ing in pressure positions with hydraulic securing. -
Page 126: Description Of The Functions Of Individual Positions Of Control Levers Of The Hydraulic Distributor
HYDRAULIC SYSTEM FH12N049 DESCRIPTION OF THE FUNCTIONS OF INDIVIDUAL POSITIONS OF CONTROL LEVERS OF THE HYDRAULIC DISTRIBUTOR Lever position Function Pressurized oil flows to quick-couplers: “2“, "4", "6" Rear (upper) posi- Quick-couplers connected to the return line: “1“, “3“, “5“ tion Neutral Central position... -
Page 127: Rear Outlets Of The Outer Hydraulic Circuit
HYDRAULIC SYSTEM FH12N044 F168 REAR OUTLETS OF THE OUTER FRONT OUTLETS OF THE OUTER If the tractor is equipped with a HYDRAULIC CIRCUIT HYDRAULIC CIRCUIT three-point hitch, the (F)(3)(4)(N) lever is used for its control. Quick In the tractor version that is not equipped They are installed on a panel in the right couplers must not be connected at the with the front outlets or the front three-... -
Page 128: Connecting Machines And Implements To The Outer Hydraulic Circuit
HYDRAULIC SYSTEM CONNECTING MACHINES AND IMPLEMENTS TO THE OUTER HYDRAULIC CIRCUIT Connecting machines and implements consisting of more parts During work with agricultural machines that consist of more parts (combinators, skids, harrows) and that have side frames hat are hinged to the central frame and during transport are folded to the vertical position by separate hydraulic cylinders controlled by the outer hydraulic circuit of the tractor, the folding of the side frames must always be controlled by the upward (backward) movement of the auxiliary distributor lever. - Page 129 NOTES...
-
Page 130: Electro-Hydraulic System
ELECTRO-HYDRAULIC SYSTEM Page Control element functions..................132 Equipment “OFF” ....................132 Blocking cancellation....................133 Quick sinking......................134 Transport of implements..................134 Stop position ......................134 Vibration compensator (damper) ................135 Limitation of the upper position of the three-point hitch ........... 135 ... -
Page 131: Control Element Functions
ELECTRO-HYDRAULIC SYSTEM F_02_162 F_02_188 CONTROL ELEMENT FUNCTIONS EQUIPMENT “OFF” Lifting switch Electric installation deactivated with the a - Transport, lifting key of the switching box. The electronic b - STOP system is off, the lifting device is blocked. c - Regularity of lowering (working) d - Free position, fast sinking- automatic return of lever to (c) position by a spring Blocking (in transport position) Lowering speed... -
Page 132: Blocking Cancellation
ELECTRO-HYDRAULIC SYSTEM F_02_164 F_02_163 BLOCKING CANCELLATION The engine can only be started After the activation of the system EHR-B first for safety reasons When you switch on the electric installa- if the engine (1) is in position limits the lifting speed of the hy- tion with the key of the switching box (I), (b). -
Page 133: Quick Sinking
ELECTRO-HYDRAULIC SYSTEM F_02_165 F_02_166 F_02_167 QUICK SINKING TRANSPORT OF IMPLEMENTS STOP POSITION Lever (1) in position (d) - free position. Shift the lifting lever (1) to position "a" By moving the lever (1) to position (b) - You must hold the lever in this position; and block it with the moving latch (2). -
Page 134: Vibration Compensator (Damper)
ELECTRO-HYDRAULIC SYSTEM F_02_168 F_02_169 VIBRATION COMPENSATOR (DAMPER) LIMITATION OF THE UPPER POSITION OF THE THREE-POINT It is used during transport of a heavy implement attached to the rear three-point hitch. HITCH After activation of the vibration compensator (10) the arms of the rear three-point hitch sink by approx. -
Page 135: Lowering Speed
ELECTRO-HYDRAULIC SYSTEM F_02_170 F_02_171 LOWERING SPEED FREE POSITION The lowering speed of the three-point For permanent work with free hydraulic hitch is set with the control (3). system, e.g. during work with a plough with a support wheel the position of the Symbol of the maximum control (4) under the indication (A) and lowering speed... -
Page 136: Setting The Control Of Three-Point Hitch
ELECTRO-HYDRAULIC SYSTEM ahc_01 F_02_172a The activity of control (lifting and lower- SETTING THE CONTROL OF THREE- MANUAL SETTING OF CONTROL OF ing) can be monitored by means of indi- POINT HITCH THREE-POINT HITCH cation diodes (8) and (9). Na shift the Electrohydraulics enables two ways of Perform according to “Cancel blocking”... -
Page 137: Automatic Control Of Three-Point Hitch
ELECTRO-HYDRAULIC SYSTEM F_02_172a AUTOMATIC CONTROL OF THREE-POINT HITCH Do the step according to “Cancel blocking” part. Set the control (6) to HITCHTRONIC (AHC) position. By control (4), set the working depth of tools attached to rear three- point hitch. When the implement attached in the rear three-point hitch reaches the depth set by the control (4), control system measures the soil resistance and this value is used as default for further control. -
Page 138: Using The Rear Control
ELECTRO-HYDRAULIC SYSTEM F_02_98 FH12N001 F_02_65 EXTERNAL CONTROL BUTTONS OF THE ELECTRO-HYDRAULIC SYSTEM USING THE REAR CONTROL The rear control is used to connect and 1. Lifting disconnect implements. lifting 2. Lowering switching lever (1) on the EHR-B electro- The movement only lasts as long as the buttons are held. hydraulic control panel must be in posi- tion (b) or (c). -
Page 139: Indication Of Ehr-B Errors
ELECTRO-HYDRAULIC SYSTEM DESCRIPTION OF SIGNALS OF EHR-B ELECTRO-HYDRAULIC SYSTEM ERRORS Flashing combination of the diagnostic LED (7). Error category Error description F -02 -173 Error with internal safety shutdown of the INDICATION OF EHR-B ERRORS electro-hydraulic system - the electro- Serious error The electronic part of the electro- hydraulic system is out of operation - the... -
Page 140: Description Of Minor Errors Of The Ehr-B Electro-Hydraulic System
ELECTRO-HYDRAULIC SYSTEM F_02_174 DESCRIPTION OF MINOR ERRORS OF THE EHR-B ELECTRO-HYDRAULIC SYSTEM Flashing combination of the diagnostic LED (7). Error location Possible cause of the error Right dynamometric pin (A) Faulty dynamometric pin Left dynamometric pin (A) Faulty contact or interrupted conductor of the dynamometric Short-circuit of the dynamometric pin conductor Possible overloading of the dynamometric pin Lowering speed control (3) - Page 141 NOTES...
-
Page 142: Hitches
HITCHES Page Rear three-point hitch ....................144 Safety principles of working with the three-point hitch ..........144 Height adjustment of the lifting draw-bars ............... 145 Fixed and free position of the lower hydraulic draw-bars ........145 Limiting draw-bars .................... -
Page 143: Rear Three-Point Hitch
HITCHES REAR THREE-POINT HITCH It is intended for attaching carried or semi-carried agricultural machines and implements with hitching points of ISO category II. Category II. Hitch axis length 870 mm of openings of connect- 28 mm ing balls of the lower draw-bars according ... -
Page 144: Height Adjustment Of The Lifting Draw-Bars
HITCHES E453 E454 E455 HEIGHT ADJUSTMENT OF THE FIXED AND FREE POSITION OF THE LIMITING DRAW-BARS LIFTING DRAW-BARS LOWER HYDRAULIC DRAW-BARS The limiting draw-bars - stabilizers (1) Lifting draw-bar - see fig. (A): Fixed position of the lower hydraulic limit or completely prevent lateral swing- After disconnecting the upper end of the draw-bars (A): ing of the lower draw-bars. -
Page 145: Lower Draw-Bars With Extensible End Pieces
HITCHES E459 E460 LOWER DRAW-BARS WITH LOWER DRAW-BARS WITH CBM HOOKS EXTENSIBLE END PIECES The lower (3) and upper (4) draw-bars of the hitch are equipped with CBM hooks. The lower draw-bars of the hitch are First, suspension CBM balls (1) must be fitted to the implement and the limiting draw- equipped with semi-automatic extensible bars must be used to set the distance between the lower draw-bars of the hitch (3). -
Page 146: Securing The Lower Draw-Bars With Cbm Hooks
HITCHES X901 E456 SECURING THE LOWER DRAW-BARS UPPER DRAW-BAR WITH CBM HOOKS The upper draw-bar (1) has adjustable length. It is attached to the tractor to the For especially demanding working console openings. positions (aggregation with heavy machines on slopes or aggrega- When extending the upper draw- tion with machines overhanging to bar you must make sure that... -
Page 147: Front Three-Point Hitch
HITCHES E461 FH12N065 X463 FRONT THREE-POINT HITCH FRONT THREE-POINT HITCH ADJUSTING THE LOWERING RATE CONTROL OF THE FRONT THREE-POINT HITCH It is designed for attachment of frontally The hitch is equipped with two hydraulic Before the start of work with an imple- carried agricultural machines and imple- cylinders that are supplied with oil from ment attached to the front three-point... -
Page 148: Hydraulic Lock Of The Front Three-Point Hitch
HITCHES X464 E466 FH12N066 HYDRAULIC LOCK OF THE FRONT WORKING AND TRANSPORT DRIVING WITH AGRICULTURAL THREE-POINT HITCH POSITION OF THE FRONT MACHINES ATTACHED TO THE THREE-POINT HITCH FRONT THREE-POINT HITCH Hydraulic locking of the front three-point hitch is performed in any position of the Working position of the front The maximum permissible speed hydraulic cylinders with the ball valve in... - Page 149 NOTES...
-
Page 150: Wheel Track Change
WHEEL TRACK CHANGE Page Possible adjustable tracks of the front wheels of the front driving axle of the tractors . 152 Front wheels track of front drive axle in tractors equipped with non-removable discs.. 153 Toe-in of the wheels of the front driving axle ..............154 Adjustment of toe-in of the wheels of the front driving axle .......... -
Page 151: Possible Adjustable Tracks Of The Front Wheels Of The Front Driving Axle Of The Tractors
WHEEL TRACK CHANGE POSSIBLE ADJUSTABLE TRACKS OF THE FRONT WHEELS OF THE FRONT Note: Use of different tyre dimensions with individual tractor types - see chapter DRIVING AXLE OF THE TRACTORS Main technical parameters. Used tyres Tighten the front wheel nuts with the 12.4-24 13.6R24 12.4-28... -
Page 152: Front Wheels Track Of Front Drive Axle In Tractors Equipped With Non-Removable Discs
WHEEL TRACK CHANGE FRONT WHEELS TRACK OF FRONT DRIVE AXLE IN TRACTORS EQUIPPED WITH NON-REMOVABLE DISCS Used tyres 12,4-24 13,6R24 12,4-28 14,9-24 12,4R24 380/70R24 14,9R24 320/85R24 340/85R24 420/70R24 380/85R24 Front wheel tracks in mm 1840 1850 1850 1850... -
Page 153: Toe-In Of The Wheels Of The Front Driving Axle
WHEEL TRACK CHANGE TOE-IN OF THE WHEELS OF THE FRONT DRIVING AXLE Proper toe-in of the front wheels of tractors with the front driving axle is 0 to 2 mm and is measured on the front wheel hub flanges (if the front wheels are installed, you can measure toe-in on the wheel rims). -
Page 154: Adjustment Of Toe-In Of The Wheels Of The Front Driving Axle
WHEEL TRACK CHANGE F_02_160 ADJUSTMENT OF TOE-IN OF THE WHEELS OF THE FRONT DRIVING AXLE Set the wheels symmetrically with the longitudinal axis of the tractor. At the front on the horizontal plane of the wheel axes measure, in accordance with fig. -
Page 155: Front Drive Axle Fenders
WHEEL TRACK CHANGE E505 FRONT DRIVE AXLE FENDERS Front drive axle fenders can come in two designs A - Fenders with solid consoles where the axis of fenders turn corresponds with the axis of front wheel turn. Fenders are on adjustable holders that can be set according to required tracks and the type of tyres used on the side (by relocating screws (a) to different openings) and also in terms of height (by relocating screws (b) to different openings). -
Page 156: Setting The Wheel Lock With Front Drive Axle
WHEEL TRACK CHANGE F13BN0033 SETTING THE WHEEL LOCK WITH FRONT DRIVE AXLE Perform the setting of lock with every change of wheel track or tyre replacement with front drive axle. The locks with front drive axle must be set so that the distance between the front drive axle tires and the tractor with full wheel lock and full swing of axle around central pivot is at least 50 mm. -
Page 157: Rear Wheel Track Change
WHEEL TRACK CHANGE F_02_99 F218 REAR WHEEL TRACK CHANGE REAR WHEEL TRACK ADJUSTMENT Depending on the width of the rear Rear wheel tracks are adjustable with the step of 75 mm and the adjustment is performed tyres you can set the wheel tracks in by changing the position of the rim and disc with the rear part of the tractor lifted so that the following range: the wheels can rotate freely. -
Page 158: Ballast Weights
BALLAST WEIGHTS Page Rear wheel weights ....................160 Bottom weights ......................160 Front weights ......................161 Weight of the front three-point hitch............... 161 Valve for filling tyre tubes with liquid ................ 162 Procedure of filling the tyres with liquid ..............162 ... -
Page 159: Rear Wheel Weights
BALLAST WEIGHTS F222 F223 REAR WHEEL WEIGHTS BOTTOM WEIGHTS Mass of weights Combina- Mass of weights Combina- tion of (kg) tion of (kg) weights weights (pcs) (pcs) 2x34 2x25 + 4x30 2x25 + 6x30 They are installed in case the tractor is 2+10 2x25 + 10x30 not equipped with the front PTO into the... -
Page 160: Front Weights
BALLAST WEIGHTS F_02_26 E552a FRONT WEIGHTS WEIGHT OF THE FRONT THREE- Note: After the insertion of the pin the POINT HITCH front weights and the weight carrier can Front weights be used as the front hook for emergency Material Weight mass Combination Mass of weights... -
Page 161: Valve For Filling Tyre Tubes With Liquid
BALLAST WEIGHTS F_02_109 F226 VALVE FOR FILLING TYRE TUBES PROCEDURE OF FILLING THE TYRES WITH LIQUID WITH LIQUID Unload the tyre by lifting the tractor and turn it with the valve upwards (A). All the tubes of the rear wheels are Deflate the tyre and unscrew the valve insert. -
Page 162: Procedure Of Draining Liquid From The Tyres
BALLAST WEIGHTS F227 F11N033 PROCEDURE OF DRAINING LIQUID FROM THE TYRES WEDGING THE FRONT WHEELS 1. Unload the tyre by lifting the tractor and turn it with the valve upwards (A). Before lifting the rear wheels do 2. Deflate the tyre and unscrew the valve insert; turn the wheel with the valve down- not forget to secure the tractor wards. -
Page 163: Maximum Liquid Weight (Kg) By Tyre Dimensions
BALLAST WEIGHTS MAXIMUM LIQUID WEIGHT (KG) BY TYRE DIMENSIONS Dimen- Filling with Calcium chloride solution sions clean water (l), (kg) CaCl (kg) Water (l) Extra load- ing (kg) 16.9-34 16.9-38 18.4-34 18.4R-38 480/70R38 18.4-38 520/70R38 The table mentions values for temperatures down to - 30°C. -
Page 164: Antifreeze Solution For Tyre Filling
BALLAST WEIGHTS ANTIFREEZE SOLUTION FOR TYRE FILLING Water for solu- Calcium chloride Hydrated lime Solution density Freezing point Total volume Added weight tion preparation CaCl at 20°C approx. (kg) (kg) (kg) (C) 11.8 0.21 1.13 13.9 0.23 1.18 15.4 0.25 1.21 An antifreeze solution may only be used for filling tyres if you have purchases addi- tional tubes! Caution, the tractor is equipped with tubeless tyres by the manufactur-... - Page 165 NOTES...
-
Page 166: Electric Installation
ELECTRIC INSTALLATION Page Electric system ......................168 Basic service information ..................168 Accumulator battery ....................169 Accumulator battery maintenance ................170 Alternator ......................... 171 Alternator maintenance ................... 171 Fuse box ......................... 172 Placement of fuses in fuse box ................ -
Page 167: Electric System
ELECTRIC INSTALLATION E602 ELECTRIC SYSTEM BASIC SERVICE INFORMATION The battery must always be connected with the “minus” pole to the ground and with Nominal voltage 12 V the “plus” pole to the alternator. If the battery is connected the other way round, it will (minus (-) pole grounded) destroy the whole semiconductor equipment of the alternator. -
Page 168: Accumulator Battery
ELECTRIC INSTALLATION FH12N022 ACCUMULATOR BATTERY BATTERY DISCONNECTOR The accumulator battery is installed un- Battery disconnector is placed on the left der the cover on the left side of the trac- side of the tractor behind the stairs of the tor under the cab step. driver. -
Page 169: Accumulator Battery Maintenance
ELECTRIC INSTALLATION F298 ACCUMULATOR BATTERY MAINTENANCE Keep the accumulator battery clean and properly fixed to the vehicle. However, the fixing device must not deform the battery case. In the case of polypropylene batteries the electrolyte level must not be below the minimum mark indicated on the case. Only add distilled water to the battery! 1. -
Page 170: Alternator
ELECTRIC INSTALLATION FH12N023 F_02_207 ALTERNATOR ALTERNATOR MAINTENANCE Charging is monitored by the red indica- When washing and cleaning the tractor protect the alternator from penetra- tor on the combined dashboard instru- tion of water or diesel fuel! ment. During operation the alternator must not be disconnected from the battery! During repairs of the tractor by The alternator must never be put in operation without load, i.e. -
Page 171: Fuse Box
ELECTRIC INSTALLATION F13HBN027 FUSE BOX is accessible after removing the left cov- er of steering console. Fuses (1) are shear and when replacing them, it is necessary to keep prescribed values of the fuse. With repeated chop- ping, find the nearest garage. Ignition fuse (2) is strip of the size of 80 A. -
Page 172: Placement Of Fuses In Fuse Box
ELECTRIC INSTALLATION PLACEMENT OF FUSES IN FUSE BOX Positions of fuses in the fuse box Pos. Fuse Protected system size Warning lights chopper Brake lights horn, beacon Dashboard feeding, EHR control and engine ignition Lower beam headlights with a switch Left side lights, dashboard illumination, licence label illu- mination Right side lights, rear working light with a control... -
Page 173: Checking The Adjustment Of The Front Grill Headlights
ELECTRIC INSTALLATION F_02_145 F12N001 CHECKING THE ADJUSTMENT OF THE FRONT GRILL HEADLIGHTS ADJUSTING THE FRONT GRILL HEADLIGHTS During a check on a test wall the tractor must stand on a level surface and the tyres must be inflated to the prescribed pressure. The basic vertical setting is 3.5% at the The adjustment is performed simultane- shipping weight of the tractor. -
Page 174: Checking The Adjustment Of The Cab Roof Headlights
ELECTRIC INSTALLATION F11N034 CHECKING THE ADJUSTMENT OF THE CAB ROOF HEADLIGHTS In the vertical direction there must not be any point of illuminated area lying on the road surface plane to the left from the longitudinal vertical plane passing through the headlight centre further than 30 m from the front outline of the tractor. -
Page 175: List Of Lamps
ELECTRIC INSTALLATION H12N062 LIST OF LAMPS Note Bulb location Voltage Output Sockets Note Main headlamps H4 12 V 55/60 W P 43t Roof dimmed headlamps H7 12 V 55 W PX26d Front combined lamps Directional lights P21W 12 V 21 W BA 15s Side lights R5W 12 V... -
Page 176: Tractor Maintenance
TRACTOR MAINTENANCE Page Steps performed daily before the start of work ............178 Steps performed every 50 hours of work ..............178 Steps performed every 100 hours of work .............. 178 Steps performed every 500 hours of work .............. 179 ... -
Page 177: Steps Performed Daily Before The Start Of Work
TRACTOR MAINTENANCE STEPS PERFORMED DAILY BEFORE THE START OF WORK Before starting the engine After starting the engine Check the oil level in the engine Check the engine lubrication function (indicator) Check the level of cooling liquid and tightness of connections Check the charging function (indicator) of the cooling system Check the steering function (indicator) -
Page 178: Steps Performed Every 500 Hours Of Work
TRACTOR MAINTENANCE STEPS PERFORMED EVERY 500 HOURS OF WORK Diesel particle filter maintenance Check the tension of V-belts Check the whole hydrostatic steering system for play Check the front axle pin for play Check the play adjustment of the clutch and brake pedals Check the function of the parking and foot brake Check the function of the brakes for the trailer Check the tightness and function of the pressurized air system... -
Page 179: Filling And Filter Replacement
TRACTOR MAINTENANCE FILLING AND FILTER REPLACEMENT in a new tractor or tractor after a general overhaul subsequently after every hour counter reading …hours Replace engine oil Replace the engine oil cleaner element Replace the fuel cleaner element Replace the air cleaner element 1000 Replace the safety insert of the air cleaner 2000... -
Page 180: Used Operation Liquids And Filling - Quantities
TRACTOR MAINTENANCE USED OPERATION LIQUIDS AND FILLING - QUANTITIES Quantity in Designation litres Brake liquid Coolant 20,5 Engine oil Hydrostatic steering oil Oil of the front driving axle box Oil of the planetary reducers of the front driving axle 2x0,7 Gearbox and final drive housing oil Front PTO gearbox oil Fuel... - Page 181 TRACTOR MAINTENANCE SPECIFICATION OF OILS FOR ZETOR ENGINES EQUIPPED BY DIESEL PARTICLE FILTER Classification Viscosity class Performance class ACEA E9/E7 15W-40 API CJ-4/SM OILS FOR ZETOR ENGINES WHICH ARE EQUIPPED WITH DIESEL PARTICLE FILTER Oil marking Viscosity class Performance class...
- Page 182 TRACTOR MAINTENANCE OILS FOR ZETOR ENGINES WHICH ARE NOT EQUIPPED WITH DIESEL PARTICLE FILTER DPF Oil labeling Viscosity class Performance class Shell Rimula R3 X 15W-40 API CH-4 ARAL Mega Turboral 10W-40 API CH-4 MOL Dynamic Transit 15W-40 API CI-4...
-
Page 183: Front Pto Oil
TRACTOR MAINTENANCE FRONT PTO OIL Manufacturer Oil designation Manufacturer Oil designation Shell Donax TX Mobil Mobil ATF Autran DX III Texaco Texamatic 7045 Fluid 9 Valvoline ATF Dextron II-E Esso ATF E 25131 Beverol Dextron II-E Castrol Transmax S (Fina)matic HP Elfmatic G2 Syn Hygard JDMJ 20C Elfmatic G3... -
Page 184: Oil For The Front Driving Axle
TRACTOR MAINTENANCE OIL TO GEAR SYSTEMS OF TRACTORS Manufacturer Oil marking Viscosity class Performance class API Paramo Traktol STOU 10W - 30 GL-4 Aral Super Traktoral 10W - 30 GL-4 ÖMV Austrotrac 10W - 30 GL -4 Fuchs AGRIFARM STOU 10W-30 MC 10W - 30 GL-4 OIL FOR THE FRONT DRIVING AXLE... -
Page 185: Oil For The Hydrostatic Steering Of The Tractors
TRACTOR MAINTENANCE OIL FOR THE HYDROSTATIC STEERING OF THE TRACTORS Manufacturer Oil designation Classification Shell TELLUS DO 32 HLP DIN 51524 Aral Vitam DE 32 HLP DIN 51524 Fuchs RENOLIND10VG32 HLP DIN 51524-2 ÖMV Hyd HLP 32 HLP DIN 51524 PARAMO MOGUL H-LPD 32 HLP DIN 51524... -
Page 186: Hydraulic Brake Liquid For The Tractors
TRACTOR MAINTENANCE HYDRAULIC BRAKE LIQUID FOR THE TRACTORS Type Classification Shell Donax YB SAE J 1703, ISO 4925 Synthol 205 PND 31-656-80, ISO 4925, SAE - J 1703 Fuchs Stopred SAE - J 1703 Brake Fluid DOT 4 ISO 4925, SAE - J 1703 EVOX DOT 4+ ISO 4925/4 SAE - J 1704 CAUTION! - Page 187 TRACTOR MAINTENANCE FUEL FOR ZETOR ENGINES WHICH ARE NOT EQUIPPED WITH DIESEL PARTICLE FILTER Summer diesel for the period of April 1 to October 31. Winter diesel for the period of November 1 to March 31. Note: Similarly applicable types of fuel should be used abroad.
-
Page 188: Front Driven Axle
TRACTOR MAINTENANCE LUBRICATION PLAN OF THE TRACTOR FRONT DRIVEN AXLE Pos. Identification No. of lubrication points Turning radius pins Central pin... -
Page 189: Hitch For A Single-Axle Semi-Trailer
TRACTOR MAINTENANCE HITCH FOR A SINGLE-AXLE SEMI-TRAILER Pos. Identification No. of lubrication points Hook pin bearings 0 to 4 (by version) FRONT THREE-POINT HITCH Pos. Identification No. of lubrication points Pins of cylinders of the front three- point hitch... -
Page 190: Three-Point Hitch
TRACTOR MAINTENANCE THREE-POINT HITCH Pos. Identification No. of lubrication points Pins of auxiliary hydraulic cylinders Lifting draw-bars HITCH MOUTH FOR A TRAILER Pos. Identification No. of lubrication points Hitch mouth for a trailer... -
Page 191: General Overhaul Of The Tractors
TRACTOR MAINTENANCE GENERAL OVERHAUL OF THE TRACTORS A general overhaul of the tractor should be carried out if its further use is uneconomical, if most of its parts require a repair and its overall technical condition endangers traffic safety. If all the maintenance instructions specified in the technical documentation of the manufacturer are observed and if work is carried out in a moderate climate and plain terrain, the mean service life of the engine and transmission system is 8000 hours of work. -
Page 192: Maintenance Instructions
MAINTENANCE INSTRUCTIONS Page Opening the hood....................195 Checking the oil level in the engine ................. 196 Draining oil from the engine ..................196 Replacing the full-flow engine oil cleaner ..............196 Filling the engine with oil ..................197 Replacing the fuel filter element ................197 Bleeding the fuel system .................. - Page 193 MAINTENANCE INSTRUCTIONS Draining condensate from the air reservoir ............... 210 Checking the air systems for leaks ................. 211 Working pressure of air brakes ................211 Maintenance and treatment of tyres................ 212 Tyre inflation ......................212 Recommended inflation values of the front wheel tyres .......... 213 Recommended inflation values of the rear wheel tyres ...........
-
Page 194: Opening The Hood
MAINTENANCE INSTRUCTIONS OPENING THE HOOD Release the hood by pressing the button (1), grasp it in the places of arrows and lift it. Thanks to a gas brace the hood will open automatically after that. The hood is locked in this lifted position thanks to this gas-liquid brace. -
Page 195: Checking The Oil Level In The Engine
MAINTENANCE INSTRUCTIONS H193 H195 REPLACING THE FULL-FLOW CHECKING THE OIL LEVEL IN THE DRAINING OIL FROM THE ENGINE ENGINE ENGINE OIL CLEANER Drain oil by unscrewing the drain plug (3), best immediately after a drive or after Check the oil level daily before starting The cleaner is replaced at every engine heating the engine to the working tem- work with the tractor in the horizontal po-... -
Page 196: Filling The Engine With Oil
MAINTENANCE INSTRUCTIONS H196 F238 FILLING THE ENGINE WITH OIL REPLACING THE FUEL FILTER ELEMENT Pour the prescribed quantity of engine oil into the filling opening (2), start the en- Replace the filter element after releasing gine and let it run for 2 - 3 minutes at 750 the nut (1) and unscrewing the bowl (2). -
Page 197: Bleeding The Fuel System
MAINTENANCE INSTRUCTIONS F_02_93a E706 E707 1. Prime the fuel system with several strokes of the manual control of the priming BLEEDING THE FUEL SYSTEM pump (1). Before bleeding place a suitable 2. Release the screw (2) of the fitting of the fuel inlet to the filter and let the foam es- container under the engine to col- cape. -
Page 198: Dry Air Cleaner Maintenance Instructions
MAINTENANCE INSTRUCTIONS G712 G713 G714 REPLACING THE SAFETY ELEMENT DRY AIR CLEANER MAINTENANCE RECOVERY OF THE MAIN AIR INSTRUCTIONS CLEANER ELEMENT OF THE AIR CLEANER Remove the main element of the dry Remove the safety element of the dry Perform maintenance of the air cleaner in the following way: cleaner (2) by pulling... -
Page 199: Reassembly Of The Air Cleaner Elements
MAINTENANCE INSTRUCTIONS G715 REASSEMBLY OF THE AIR CLEANER HYDROSTATIC STEERING OIL TANK ELEMENTS The tank is accessible after opening the hood. It is found in the front part on the When reassembling the air cleaner ele- left side of the tractor. ments proceed in the reverse order. -
Page 200: Replacing The Filtration Element Of The Hydrostatic Steering
MAINTENANCE INSTRUCTIONS F_02_107 XF_02_141 F_02_114 5 - Unscrew the tank lid 8 - Disconnect both the hoses from the REPLACING THE FILTRATION 6 - Replace the filtration element working cylinder and together with ELEMENT OF THE HYDROSTATIC 7 - Install the new element the return hose insert their ends to a STEERING waste oil container. -
Page 201: Bleeding The Hydraulic Circuit Of The Hydrostatic Steering
MAINTENANCE INSTRUCTIONS F11N035 F11N036 10 - Secure the tractor against movement BLEEDING THE HYDRAULIC CIRCUIT During all the steps of bleeding of and lift the front axle. OF THE HYDROSTATIC STEERING the hydrostatic steering observe 11 - Place an oil collection container un- the oil level in the tank to avoid 1 - Start the engine and let it run at the der the working cylinder and by turn-... -
Page 202: Replacing The Hydrostatic Steering Hoses
MAINTENANCE INSTRUCTIONS F11N037 REPLACING THE HYDROSTATIC STEERING HOSES The hoses must be replaced after four years from the production date (the date is in- dicated on their surface) or after 3500 hours of work of the tractor or immediately af- ter discovering signs of their damage (hose sweating, local buckling, leaks of the working media around the end pieces and on the hose surface, abrasion of the hose surface to the metallic reinforcement, damage of the outer yarn braiding in the case... -
Page 203: Replacing Coolant
MAINTENANCE INSTRUCTIONS FH12N084 XF_02_199 Start the engine and allow it to run for REPLACING COOLANT Always use the prescribed cool- approximately 1 min. ant to fill the cooling system of Proceed in the following way: Fill the level of coolant in equalizing ves- the engine. -
Page 204: Checking The Oil In Gearbox
MAINTENANCE INSTRUCTIONS FH12N016 FH12N015 CHECKING THE OIL IN GEARBOX CHECK AND REPLACEMENT OF OIL IN GEAR BOX The height of oil in gear box set is checked by oil level indicator DRAINING AND CHECKING HOLES which is placed at the right rear part of the gearbox behind the 1. -
Page 205: After Draining Oil
MAINTENANCE INSTRUCTIONS FH12N078 F11N038 FH12N055 AFTER DRAINING OIL REPLACEMENT OF THE INSERTION PIECE REPLACEMENT OF TRANSMISSION OIL CLEANER THE OIL CLEANER WITH DELIVERY 1. Clean the magnet (it is part of the lid) ELEMENT WITH HYDRAULIC PUMP FILTER OF THE GEARBOX and the strainer element of the suction- ing filter (2) SUCTION FILTER... -
Page 206: Lubrication And Filling Points Of The Front Driving Axle
MAINTENANCE INSTRUCTIONS C730 C731 LUBRICATION AND FILLING POINTS FILLING, INSPECTION AND DRAIN OF THE FRONT DRIVING AXLE OPENING OF OIL OF THE FRONT WHEEL REDUCERS 1. Lubricating nipple of the kingpin 2. Sliding bearings (2 pieces) of the Oil is checked, filled and drained through front driving axle one opening after turning of the reducer 3. -
Page 207: Front Pto
MAINTENANCE INSTRUCTIONS F206 FH12N017 F13BN029 FRONT PTO BRAKE FLUID REPLACEMENT CARBON FILTER INSTALLATION INSTRUCTIONS The inspection and filling plug of oil (1) is The vessel is placed on the rights side situated on the front side of the front and is accessible after lifting the front 1. -
Page 208: Cleaning The Heating Filters
MAINTENANCE INSTRUCTIONS F13BN030 F13BN031 CLEANING THE HEATING FILTERS *AIR FILTER WITH ACTIVE CARBON Recover the filters positioned under the Filters with active carbon are installed instead of the standard dust filter and they are covering grills over the windshield out- replaced in the same way as the normal filters. -
Page 209: Air-Conditioning Maintenance
MAINTENANCE INSTRUCTIONS F_02_120 F267 F268 Be careful about the proper routing of DRAINING CONDENSATE FROM THE AIR-CONDITIONING MAINTENANCE hoses to the oil cooler. AIR RESERVOIR The most important element of Draining is performed by deflecting or maintenance of the air-conditioning When air-conditioning functions... -
Page 210: Checking The Air Systems For Leaks
MAINTENANCE INSTRUCTIONS H12N083 F_02_56 CHECKING THE AIR SYSTEMS FOR WORKING PRESSURE OF AIR LEAKS BRAKES Fill the air reservoir to the maximum In the single- and double-hose version the air pressure at the double-hose cou- pressure With the engine stopped the air pres- pling (2) (red cap) is 740 ±... -
Page 211: Maintenance And Treatment Of Tyres
MAINTENANCE INSTRUCTIONS F_02_122a MAINTENANCE AND TREATMENT OF TYRES Regularly check the outer surface of tyres and verify whether they are free of defects at the sides and over the bead and whether the reinforcement is not damaged. Do not use tyres that show a defect any longer. TYRE INFLATION The basic recommended inflation values are specified in the table. -
Page 212: Recommended Inflation Values Of The Front Wheel Tyres
MAINTENANCE INSTRUCTIONS RECOMMENDED INFLATION VALUES OF THE FRONT WHEEL TYRES The value of the permitted load-bearing capacity of the front axle must not exceed the sum of the load-bearing capacity values of both the tyres that are installed on the axle. The values of the permitted load-bearing capacity of the axles are specified in the “Main technical parameters”... -
Page 213: Recommended Inflation Values Of The Rear Wheel Tyres
MAINTENANCE INSTRUCTIONS RECOMMENDED INFLATION VALUES OF THE REAR WHEEL TYRES The value of the permitted load-bearing capacity of the rear axle must not exceed the sum of the load-bearing capacity values of both the tyres that are installed on the axle. The values of the permitted load-bearing capacity of the axles are specified in the “Main technical parameters”... - Page 214 MAINTENANCE INSTRUCTIONS During loading of the tractor the maximum values of the permitted load-bearing capacity of the axles mentioned in the “Technical parameters of the tractor” table must not be exceeded. Changes of the load-bearing capacity of the tyres from the basic values are specified in the tables below.
-
Page 215: Tyres For Driving Wheels
MAINTENANCE INSTRUCTIONS TYRES FOR DRIVING WHEELS TYRES FOR DRIVING WHEELS STORING THE TRACTOR Driving wheels - radial tyres If the tractor is to be put out of operation Driving wheels - diagonal tyres for a shorter period, inflate the tyres to Speed Load- Inflation... -
Page 216: Diesel Particle Filter Maintenance
MAINTENANCE INSTRUCTIONS FH12N056 DIESEL PARTICLE FILTER MAINTENANCE Leave the maintenance of diesel particle filter to an authorized service. - Page 217 NOTES...
-
Page 218: Adjustment
ADJUSTMENT Page Tensioning the V-belt ....................220 Tensioning the V-belt of the AC compressor ............220 Adjusting the play of the brake pedals ..............220 Bleeding the brake system of the tractor ..............220 Bleeding the rear brake system ................221 ... -
Page 219: Tensioning The V-Belt
ADJUSTMENT FH12N085 F_02_204 C756 TENSIONING THE V-BELT ADJUSTING THE PLAY OF THE BLEEDING THE BRAKE SYSTEM OF BRAKE PEDALS THE TRACTOR If the V-belt is properly tensioned - its de- flection must be 5.5 mm when one belt is The proper play between the piston rod Do the bleeding with the pedals discon- subject to the force of 25 N. -
Page 220: Bleeding The Rear Brake System
ADJUSTMENT FH12N018 FH12N019 BLEEDING THE REAR BRAKE SYSTEM During the bleeding observe the liquid level in the compensation tank to avoid Check the quantity of brake liquid in the compensation tank; fill up new liquid to the aspiration of air (A). maximum level. -
Page 221: Foot Brake Check
ADJUSTMENT F287 FOOT BRAKE CHECK With the foot brake pedals disconnected depress the pedal with the maximum force of approx 500 N. If the pedal can be depressed almost to the stop consist- ing in the boss on the bottom part of the console, the foot brake must be adjusted. -
Page 222: Foot Brake Adjustment
ADJUSTMENT FH12N070 F_2_132 FOOT BRAKE ADJUSTMENT PARKING BRAKE ADJUSTMENT Before the adjustment of the foot brake the parking brake lever The adjustment of the parking brake follows after the adjust- must be in the unbraked position and between the nut (1) and ment of the foot brake. -
Page 223: Adjustment Of The Lifting Draw-Bars Of The Hitch For A Single-Axle Semi-Trailer
ADJUSTMENT F_02_142 FH12N019 ADJUSTMENT OF THE LIFTING DRAW-BARS OF THE HITCH FOR A SINGLE- ADJUSTING THE BOWDEN CABLE AXLE SEMI-TRAILER It is performed if the carrier with the tow- Raise the hydraulic arms to the upper - transport position with the position control ing hook is in contact with the supporting hooks. - Page 224 ADJUSTMENT F_02_129 FH12N011 FH12N012 Press button (A) and button (B) simul- After another 2 sec, calibration is fin- CALIBRATION OF TRAVEL SPEED OF DIGITAL DASHBOARD taneously. Keep the buttons pressed ished automatically, dashboard is cali- down for 7 sec. There will be a sound brated and ready for operation Dashboard is calibrated after the assem- ...
- Page 225 NOTES...
-
Page 226: Main Technical Parameters
MAIN TECHNICAL PARAMETERS Page Main dimensions of the tractor (mm) ............... 228 Technical data of tractorS ..................229 Max. Permissible load of the carraro 20.19 front axle (kg) ........231 Max. permissible load of the rear axle (kg) .............. 231 ... -
Page 227: Main Dimensions Of The Tractor (Mm)
MAIN TECHNICAL PARAMETERS MAIN DIMENSIONS OF THE TRACTOR (MM) Tractor type FORTERRA HSX note Tyre dimen- Front 14,9R24 sions Rear 580/70R38 Outline length with hitches with the front three-point hitch lowered 5100 without ballast weights Outline length with hitches without the front three-point hitch 4520 without ballast weights... -
Page 228: Technical Data Of Tractors
MAIN TECHNICAL PARAMETERS TECHNICAL DATA OF TRACTORS FORTERRA FORTERRA FORTERRA FORTERRA FORTERRA Tractor type HSX 100 HSX 110 HSX 120 HSX 130 HSX 140 Engine type 1006 1306 1406 1506 1606 Engine kind diesel, four-stroke with direct fuel injection, turbocharged Engine design in-line, vertical, water cooled Number of cylinders... - Page 229 MAIN TECHNICAL PARAMETERS TECHNICAL DATA OF TRACTOR ENGINES FORTERRA FORTERRA FORTERRA FORTERRA FORTERRA Tractor type HSX 100 HSX 110 HSX 120 HSX 130 HSX 140 Engine type 1006 1306 1406 1506 1606 Minimum oil pressure at the engine speed of 750 rpm 0,08 and oil temperature of 80°C Max.
-
Page 230: Max. Permissible Load Of The Carraro 20.19 Front Axle (Kg)
MAIN TECHNICAL PARAMETERS MAX. PERMISSIBLE LOAD OF THE CARRARO 20.19 FRONT AXLE (KG) Wheel track (mm) Travelling speed km/h 1590 - 1655 1730 - 1740 1800-1880 1890 -1955 2030 - 2040 5600 5100 4400 4100 3800 4300 3900 3380 3150 2900 4300 3900... -
Page 231: Max. Permissible Weight Of The "Tractor + Machine" Set (Kg)
MAIN TECHNICAL PARAMETERS MAX. PERMISSIBLE WEIGHT OF THE “TRACTOR + MACHINE” SET (KG) Travelling speed Maximum weight of the set (km/h) 9000 8000 8000 8000 MANOEUVRABILITY CONDITION Travelling speed Weight of the front axle of the tractor out of the (km/h) total weight of the carrying set (%) min. -
Page 232: Load-Bearing Capacities Of The Front Tyres
MAIN TECHNICAL PARAMETERS LOAD-BEARING CAPACITIES OF THE FRONT TYRES Travelling speed 40 km.h 30 km.h 20 km.h 8 km.h Tyre load-bearing Tyre load-bearing Tyre load-bearing Tyre load-bearing Tyre dimen- capacity capacity capacity capacity sions (kg) (kg) (kg) (kg) Tyre Infla- Tyre Infla- Tyre... -
Page 233: Load-Bearing Capacities Of The Rear Tyres
MAIN TECHNICAL PARAMETERS LOAD-BEARING CAPACITIES OF THE REAR TYRES Travelling speed 40 km.h 30 km.h 20 km.h 8 km.h Tyre load-bearing Tyre load-bearing Tyre load-bearing Tyre load-bearing Tyre dimen- capacity (kg) capacity (kg) capacity (kg) capacity (kg) sions Tyre Infla- Tyre Infla- Tyre... -
Page 234: Change Of The Load Capacity Of The Rear Tyres (%)
MAIN TECHNICAL PARAMETERS CHANGE OF THE LOAD CAPACITY OF THE REAR TYRES (%) Travelling speed (km/h) diagonal radial + 40 + 50 + 20 + 23 - 20 PERMITTED COMBINATIONS OF WHEELS FOR TRACTORS Front wheels Rear wheels Tyre dimen- Equivalent Tyre dimensions Equivalent sions... -
Page 235: Power
MAIN TECHNICAL PARAMETERS POWER Tractor type FORTERRA FORTERRA FORTERRA FORTERRA FORTERRA HSX 100 HSX 110 HSX 120 HSX 130 HSX 140 Engine type Z 1006 Z 1306 Z 1406 Z 1506 Z 1606 PTO power (kW±2%) at the nominal engine speed and engaged 1000 rpm of the PTO Engine in the running-in stage (until 100 hours) 56,2... -
Page 236: Speed Of Tractor With Engine Revolutions Of 2 200 Rpm And Parameter Of Rear Wheels (Km/H)
MAIN TECHNICAL PARAMETERS SPEED OF TRACTOR WITH ENGINE REVOLUTIONS OF 2 200 RPM AND PARAMETER OF REAR WHEELS (KM/H) Front direction Rear direction Speed gear Multiplier gear 16.9 - 38 18.4 - 38 16.9 - 38 18.4 – 38 36.8 37.9 42.5 43.9... -
Page 237: Independent Rear Pto Shaft Revolutions
MAIN TECHNICAL PARAMETERS INDEPENDENT REAR PTO SHAFT REVOLUTIONS PTO speed / engine speed PTO speed / engine speed 540/1913 621/2200 540E 540/1595 745/2200 1000 1000/1950 1128/2200 1000E 1000/1626 1353/2200... -
Page 238: Dependent Rear Pto Shaft Revolutions 540/1000 With Nominal Engine Revolutions (2200 Rpm)
MAIN TECHNICAL PARAMETERS DEPENDENT REAR PTO SHAFT REVOLUTIONS 540/1000 WITH NOMINAL ENGINE REVOLUTIONS (2200 RPM) to the front to the rear gear multiplier degree 1000 1000 1 283 1 484 1 109 1 282 1 108 1 037 1 283 1 484 1 109 1 282... -
Page 239: Speed Of The Zuidberg Front Pto
MAIN TECHNICAL PARAMETERS SPEED OF THE ZUIDBERG FRONT PTO Turning direction PTO speed / engine speed PTO speed / engine speed right (a) 1000 / 1920 1146 / 2200 left (b) 1000 / 2000 1100 / 2200 - option... -
Page 240: Outer Outline And Track Turning Diameter - Fenders With Turnable Consoles
MAIN TECHNICAL PARAMETERS OUTER OUTLINE AND TRACK TURNING DIAMETER - FENDERS WITH TURNABLE CONSOLES 1810 mm 14,9 R24 480/65R24 front front Tyre Track width dimensions 1725 mm 18,4 R38 600/65R38 rear rear Without engagement of the front driving axle 9990 mm 10200 mm Track diameter 10980 mm... - Page 241 NOTES...
-
Page 242: Index
INDEX Auxiliary hydraulic switchbox control (external hydrau- lic circuit) Accumulator battery Accumulator battery maintenance Ballast weights Acquaintance with the tractor Basic service information Adjusting the Bowden cable Battery disconnector Adjusting the front grill headlights Before you start Adjusting the lowering rate of the front three-point hitch 148 Bleeding the brake system of the tractor Adjusting the play of the brake pedals Bleeding the fuel system... - Page 243 INDEX Dead start by means of automatic dead start function Driver´s seat - safety switch Dead start of the tractor Driving down the slope Dead start of tractor in regular operation - automatic Driving operation dead start function Driving up the slope Dead start of tractor in regular operation –...
- Page 244 INDEX Free position From 100 hours on Heating control panel, * air-condition Front and rear PTO shaft control Heating valve control (A) Front drive axle button Height adjustment and disassembly of the CBM stage Front drive axle control hitch Front driven axle Height adjustment of the lifting draw-bars Front outlets of the outer hydraulic circuit Hitch for a single-axle CBM semi-trailer...
- Page 245 INDEX Checking the oil level in the engine Location of serial numbers Lower draw-bars with CBM hooks Lower draw-bars with extensible end pieces If you do not succeed in starting the engine Lowering speed Ignition system disorders signalization Lubrication and filling points of the front driving axle Ignitor and three-pin socket Immediately after cooling the cabin Immediately after start...
- Page 246 INDEX Oil for the front driving axle Quick sinking Oil for the hydrostatic steering of the tractors Quick-couplings with drip collection One-hose and two-hose brakes One-hose brakes Rate preselection switch of starting rear PTO shaft Opening the door from the inside Rear differential lock button Opening the door from the outside Rear differential lock button...
- Page 247 INDEX Reversing lever position signalization Steps performed every 100 hours of work Road and reduced speeds shifting lever Steps performed every 50 hours of work Road and reducing speeds lever position signalization Steps performed every 500 hours of work Running in the tractor Stop position Stopping the engine Stopping the tractor –...
- Page 248 INDEX Tractor maintenance Transport of implements Transportation Two-hose brakes Tyre inflation Tyres for driving wheels Tyres for driving wheels Upper draw-bar Used operation liquids and filling - quantities Using the buttons Using the rear control Valve for filling tyre tubes with liquid Ventilator control (B) Vibration compensator (damper) Warning signalization of air pressured drop...
- Page 249 Operator's manual Forterra HSX 100 Forterra HSX 110 Forterra HSX 120 Forterra HSX 130 Forterra HSX 140 Edition: 4-100-2014 Publication No.: 222.212.734 Zetor Tractors s.r.o. Department of Technical Documentation Trnkova 111 632 00...
Need help?
Do you have a question about the FORTERRA HSX 100 2014 and is the answer not in the manual?
Questions and answers