
Related Manuals for Emerson Rosemount 2460


Summary of Contents for Emerson Rosemount 2460
- Page 1 Reference Manual 00809-0100-2460, Rev DB March 2017 ™ Rosemount 2460 System Hub for tank gauging systems...
-
Page 3: Spare Parts
Read this manual before working with the product. For personal and system safety, and for optimum product performance, make sure you thoroughly understand the contents before installing, using, or maintaining this product. ™ For equipment service or support needs, contact your local Emerson Automation Solutions/Rosemount Tank Gauging representative. Spare Parts Any substitution of non-recognized spare parts may jeopardize safety. - Page 4 Title Page Reference Manual 00809-0100-2460, Rev DB March 2017 Title Page...
-
Page 5: Table Of Contents
Reference Manual Contents 00809-0100-2460, Rev DB March 2017 Contents 1Section 1: Introduction 1.1 Safety messages..............1 1.2 Symbols . - Page 6 3.5.5 Cabling for the TRL2/RS485 bus ..........29 3.5.6 Connecting to the Rosemount 2460 System Hub ......30 3.5.7 Wiring .
- Page 7 6.17Firmware upgrade............. . . 126 6.17.1 Firmware upgrade of a single Rosemount 2460 System Hub ....126 6.17.2 Firmware upgrade of redundant system hubs.
- Page 8 Contents Reference Manual 00809-0100-2460, Rev DB March 2017 6.25Modem cards ..............139 6.25.1 RS232 and RS485 .
- Page 9 Reference Manual Contents 00809-0100-2460, Rev DB March 2017 BAppendix B: Product Certifications B.1 European Directive Information ........... 155 B.2 Ordinary location certification.
- Page 10 Contents Reference Manual 00809-0100-2460, Rev DB March 2017 GAppendix G: Fast Polling G.1 Configure fast polling with common threshold ........186 G.2 Configure fast polling with individual thresholds .
-
Page 11: Safety Messages
Reference Manual Introduction 00809-0100-2460, Rev DB March 2017 Section 1 Introduction Safety messages ..............page 1 Symbols . -
Page 12: Symbols
Reference Manual Introduction 00809-0100-2460, Rev DB March 2017 Symbols The CE marking symbolises the conformity of the product with the applicable European Community Directives. Protective Earth Ground Caution - see reference manual Introduction... -
Page 13: Section Overview
Section 4: Configuration describes how to configure the Rosemount 2460 System Hub by using the TankMaster WinSetup configuration program. This section includes how to setup a pair of redundant system hubs. -
Page 14: Technical Documentation
Rosemount 2230 Product Data Sheet (00813-0100-2230) Rosemount 5300 Product Data Sheet (00813-0100-4530) Rosemount 5400 Product Data Sheet (00813-0100-4026) Drawings Table 1-1. Installation drawings for the Rosemount 2460 System Hub Drawing Issue Title D7000001-927 Mechanical Installation Drawing Rosemount 2460 System Hub D7000001-928... -
Page 15: Service Support
Service support For service support contact the nearest Emerson Automation Solutions/Rosemount Tank Gauging represen- tative. Contact information can be found on the web site emerson.com/rosemount tank gauging. Product recycling/ disposal Recycling of equipment and packaging should be taken into consideration and disposed of in accordance with local and national legislation/regulations. - Page 16 Reference Manual Introduction 00809-0100-2460, Rev DB March 2017 Introduction...
-
Page 17: Introduction
Rosemount 2460 connected to a number of Rosemount 2410 Tank Hubs which collect measurement data and status information from the field devices. A Rosemount 2460 buffers measurement data and status information from one or more tanks, and sends the information to a TankMaster PC, or other host system, whenever the... -
Page 18: Communication
Figure 2-2. The Rosemount 2460 System Hub collects measurement data from field devices and transmits the data to a host system. It also handles communication from a host to the field devices. The Rosemount 2460 supports a number of communication interface standards. For host communication, the TRL2, RS485, and RS232 are supported. -
Page 19: Components
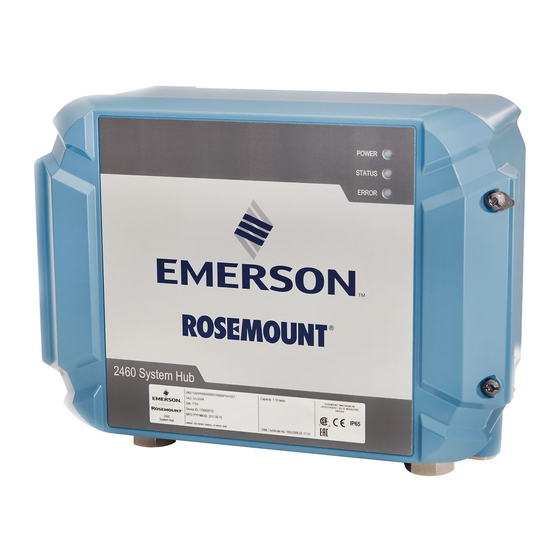
00809-0100-2460, Rev DB March 2017 Components This section shows the various parts of the Rosemount 2460 System Hub. Note The Rosemount 2460 System Hub is designed for use in non-hazardous areas. Figure 2-3. The Rosemount 2460 System Hub front and top view... - Page 20 Overview Reference Manual 00809-0100-2460, Rev DB March 2017 Figure 2-4. Cable entries A. Cable entry M25 B. Cable entries (6 x M20 x 1.5) C. Cable entry M25 (power) D. Membrane E. Cable entries (3 x M20 x 1.5) F. Cable entry for Ethernet connection ETH 1 G.
- Page 21 Reference Manual Overview 00809-0100-2460, Rev DB March 2017 Figure 2-5. Inside the Rosemount 2460 System Hub A. Communication boards B. Write protection switch C. Terminal board / ports (1 to 8) D. Ethernet ports E. USB port F. SD memory card reader G.
-
Page 22: Enclosure
The Rosemount 2460 System Hub is designed with a weather protected, wall-mounted box. Figure 2-6. Enclosure 2.3.2 Write protection switch The Rosemount 2460 System Hub is equipped with a write protection switch for preventing unauthorized changes of the 2460 configuration database. Figure 2-7. Write protection A. Write protection switch In addition to the switch, the 2460 supports software write protection as described in “Software write... -
Page 23: System Overview
Reference Manual Overview 00809-0100-2460, Rev DB March 2017 System overview The Rosemount Tank Gauging system is a state-of-the art inventory and custody transfer radar tank level gauging system. It is developed for a wide range of applications at refineries, tank farms and fuel depots, and fulfills the highest requirements on performance and safety. - Page 24 Radar Level Gauge Rosemount TankMaster PC Rosemount 2230 Display Rosemount 2410 Tank Hub Rosemount 3051S Pressure Transmitter Tankbus Rosemount 2460 System Hub Rosemount 5900S Radar Level Gauge Rosemount 2180 Field Bus Modem TRL2 Modbus Rosemount 644 Rosemount 2410 Tank Hub...
- Page 25 March 2017 Figure 2-9. Rosemount Tank Gauging system architecture for wireless systems NON-HAZARDOUS AREA HAZARDOUS AREA Rosemount 5900S Rosemount 2240S Radar Level Gauge Temperature Transmitter Emerson Wireless 775 THUM Adapter Rosemount TankMaster PC Rosemount 2230 Display Rosemount 2410 Tank Hub...
- Page 26 Overview Reference Manual 00809-0100-2460, Rev DB March 2017 Figure 2-10. Rosemount Tank Gauging system architecture in a Foundation fieldbus network Rosemount 5900S Rosemount 2240S NON-HAZARDOUS AREA HAZARDOUS AREA Radar Level Gauge Temperature Transmitter Rosemount 2230 Display Rosemount 3051S Pressure Transmitte FOUNDATION Fieldbus Rosemount 5900S Power Supply...
- Page 27 Hub to the system hub buffer memory. Whenever a request is received, the system hub can immediately send data from a group of tanks to a TankMaster PC, or a host. The Rosemount 2460 can be used to connect devices from other vendors as well, such as Honeywell® Enraf and Whessoe.
- Page 28 ™ inputs/outputs. By connecting an Emerson Wireless 775 THUM Adapter to the IS HART 4-20 mA output, the tank hub is capable of wireless communication with an Emerson Wireless Gateway in a ® WirelessHART network. Rosemount 5900S Radar Level Gauge The Rosemount 5900S Radar Level Gauge is an intelligent instrument for measuring the product level inside a tank.
- Page 29 An Emerson Wireless THUM Adapter allows wireless communication between a Rosemount 2410 Tank Hub and an Emerson Wireless Gateway. The gateway is the network manager that provides an interface between field devices and the TankMaster inventory software or host / DCS systems.
-
Page 30: Installation Procedure
“Installation considerations” on page If needed, install modem cards to support the desired communication protocols. “Exchanging a modem card” on page 102 Mount the Rosemount 2460 System Hub. “Mechanical installation” on page Wire the Rosemount 2460. “Electrical installation” on page Make sure covers and cable gland/ conduit connections are tight. -
Page 31: Section Overview
High voltage that may be present on leads could cause electrical shock: Avoid contact with leads and terminals. Make sure the main power to the Rosemount 2460 System Hub is off and the lines to any other external power source are disconnected or not powered while wiring the 2460. - Page 32 Reference Manual Installation 00809-0100-2460, Rev DB March 2017 Be careful when opening the lid in very low temperatures. High humidity and temperatures far below the freezing point may cause the gasket to get stuck to the lid. In that case you may use a heating fan to warm the housing in order to release the gasket.
-
Page 33: Installation Considerations
Installation considerations The Rosemount 2460 System Hub may be installed on various non-hazardous locations at the plant. In case the Rosemount 2460 System Hub is exposed to long periods of sunshine, a sunshade should be used to prevent the system hub from being heated to temperatures above the maximum operating temperature. -
Page 34: Installation Plan
Tank Databases of the Rosemount 2460 System Hub and Rosemount 2410 Tank Hub “Electrical installation” on page 28 for more information on cables and glands. -
Page 35: Mechanical Installation
27) is shipped with the 2460 which may be used for this purpose. 2. Drill four holes with appropriate size to fit screw diameter 6 mm. 3. Loosen the two screws (M6 x 2) on the Rosemount 2460 housing that keep the lid in closed position and open the lid. - Page 36 Installation 00809-0100-2460, Rev DB March 2017 4. Attach the Rosemount 2460 to the wall. There are four holes on the housing to be used for the screws. The required screw dimension is given by Figure 3-2 on page A. Holes (x4) for attaching the system hub to a wall B.
- Page 37 Reference Manual Installation 00809-0100-2460, Rev DB March 2017 A mounting template is shipped with the Rosemount 2460 which can be used to mark the position of the holes (see Figure 3-1). Figure 3-1. Mounting template with hole pattern for the Rosemount 2460 System Hub 292 mm Ø...
-
Page 38: Electrical Installation
3.5.1 Cable entries The Rosemount 2460 housing has nine M20 x 1.5 and two M25 x 1.5 entries. The connections must be made in accordance with local or plant electrical codes. Make sure that unused cable entries are properly sealed to prevent moisture or other contamination from entering the terminal board compartment of the electronics housing. -
Page 39: Cabling For The Trl2/Rs485 Bus
Installation 00809-0100-2460, Rev DB March 2017 3.5.5 Cabling for the TRL2/RS485 bus In a Rosemount Tank Gauging system a Rosemount 2460 System Hub communicates with a TankMaster ™ control room PC using the TRL2/RS485 Modbus protocol, see Section 2: Overview. -
Page 40: Connecting To The Rosemount 2460 System Hub
The TRL2 Bus requires a twisted and shielded pair cable with a cross-sectional area of 0.50 to 2.5 mm (AWG 20 to 14). A Rosemount 2180 Field Bus Modem (FBM) is used to connect the Rosemount 2460 to TankMaster or other host computer. - Page 41 March 2017 Communication ports for hosts and field devices The Rosemount 2460 System Hub has eight ports for communication interface boards. It is equipped with interface boards for field device communication and host communication. The specific configuration is specified in the ordering information. Communication boards can easily be exchanged if needed (see “Exchanging a modem card”...
-
Page 42: Wiring
Ensure that gasket and seats are in good condition prior to mounting the cover in order to maintain the specified level of ingress protection. The same requirements apply for cable inlets and outlets (or plugs). Cables must be properly attached to the cable glands. Figure 3-4. Rosemount 2460 front view Cover for communication board compartment... -
Page 43: Terminal Board And Ports
Reference Manual Installation 00809-0100-2460, Rev DB March 2017 3.5.8 Terminal board and ports Figure 3-5. Ports and terminals POWER WRITE PROT Port 1 Port 2 Port 3 Port 4 Port 5 Port 6 Port 7a Port ON/OFF SERVICE Port 7b Port 8b SD CARD Ground bar for... - Page 44 Ethernet communication bus. ETH1 is used for DCS/host communication via Modbus TCP. ETH 1 In case Modbus TCP is used and the Rosemount 2460 is connected to a Local Area Network (LAN), please make sure the connection is secure Standard Ethernet and no unauthorized personnel can grant access.
- Page 45 Reference Manual Installation 00809-0100-2460, Rev DB March 2017 Figure 3-6. Pin mapping for 4 pole and 5 pole connectors Port 1-6 Port 7-8 Standard Pins internally connected in parallel Pins internally connected in parallel For daisy chain Varec Mark/Space, L&J Tankway Table 3-7 Table 3-8 on page 36 for more information on bus connections for field and host ports.
- Page 46 Reference Manual Installation 00809-0100-2460, Rev DB March 2017 Table 3-7. Bus connections to Port 1 - 6 Standard Interface TRL2 (A and B polarity independent) RS485 (2-wire) Internally referenced to signal ground Enraf (A and B polarity independent) Whessoe 550/660 Do not use Do not use Digital Current Loop...
- Page 47 Installation 00809-0100-2460, Rev DB March 2017 ™ Ensure that you use cables suitable for the terminal blocks that are supplied by Emerson for the Rosemount 2460 System Hub. Table 3-9. Cables suitable for terminal blocks supplied by Emerson Conductor connection...
- Page 48 S/N: MFG (yymmdd): DEVICE ID: MAINS: 100-250VAC 50/60Hz, 24-48VDC 20W Cable entries with glands External Ground Table 3-10. Tightening torque for glands supplied by Emerson Tightening Torque (Nm) Thread Body Top Nut Table 3-11. Cable diameter for glands Cable Diameter (mm) Thread Cable Ø...
-
Page 49: Ground Lug
Reference Manual Installation 00809-0100-2460, Rev DB March 2017 3.5.9 Ground lug Figure 3-10. Ground lug dimensions A. Ground lug Cable lug thickness maximum 4 mm Cable lug height maximum 10 mm B. Cable size minimum 4 mm or AWG 11 C. -
Page 50: Power Supply Connection
Reference Manual 00809-0100-2460, Rev DB March 2017 3.5.10 Power supply connection The Rosemount 2460 System Hub supports the following power supply: 24 - 48 Vdc, 100 - 250 Vac 50/60 Hz. Note Connector is of type IEC C16. Note The Rosemount 2460 is polarity insensitive for DC voltage input. - Page 51 Reference Manual Installation 00809-0100-2460, Rev DB March 2017 Figure 3-12. Power connector supplied by Emerson Note Use connector type IEC C16 only. Table 3-12. Torque values for power connector assembly Item Max torque Terminals 0.8 Nm Cable clamp 1.2 Nm Cover 1.2 Nm...
-
Page 52: Wiring Diagram
31). In the standard configuration Port1 to Port 6 are connected to field devices and Port 7 and Port 8 are used for host communication. See also Table 3-6 on page Figure 3-13. Rosemount 2460 System Hub connected to field devices and TankMaster PC. Rosemount TankMaster PC Rosemount 2180... - Page 53 Reference Manual Installation 00809-0100-2460, Rev DB March 2017 Figure 3-14. Rosemount 2460 with gauges from other vendor. Rosemount TankMaster PC Rosemount 2180 Field Bus Modem Rosemount 2460 terminal board Gauges from other vendor Installation...
- Page 54 Installation Reference Manual 00809-0100-2460, Rev DB March 2017 Figure 3-15. Rosemount 2460 connected to host system via ETH 1 port and Modbus TCP. HOST SYSTEM MODBUS TCP Rosemount 2460 terminal board Installation...
- Page 55 Reference Manual Installation 00809-0100-2460, Rev DB March 2017 Wiring for redundant system hubs Figure 3-16. Example of wiring diagram with redundant Rosemount 2460 System Hubs Rosemount 2460 primary unit Rosemount 2460 backup unit A. Ethernet cable for redundancy connection B. TRL2 bus to host...
- Page 56 Installation Reference Manual 00809-0100-2460, Rev DB March 2017 Figure 3-17. Rosemount 2460 System Hub connected to Varec and L&J devices. Rosemount TankMaster PC Rosemount 2180 Field Bus Modem Rosemount 2460 terminal board Power 20-50 Vdc (Varec) 48-50 Vdc (L&J) Power 20-50 Vdc (Varec) 48-50 Vdc (L&J)
-
Page 57: Overview
Setting up a Rosemount 2460 System Hub ........ -
Page 58: Setting Up A Rosemount 2460 System Hub
“Exchanging a modem card” on page 102. 3. Make sure that the Rosemount 2460 is properly wired and up and running. Check that the Power LED is on and the Status LED indicates normal operation (see Table 5-3 on page 87). - Page 59 73 for more information. 8. In case the Rosemount 2460 communicates with a host system via the Ethernet 1 port and Modbus TCP protocol, open the Web based Graphical User Interface for configuration as described in Section 6: Service and Troubleshooting.
- Page 60 Configuration Reference Manual 00809-0100-2460, Rev DB March 2017 Figure 4-1. Rosemount Tank Gauging system architecture Host/DCS Rosemount TankMaster Modem Rosemount 2460 System Hub TRL2 RS232, RS485 Field Ports Host Ports Ethernet (ETH1) Modbus TCP Rosemount 2410 Tank Hub TRL2 Enraf BPM...
-
Page 61: Preconditions For Redundancy Setup
00809-0100-2460, Rev DB March 2017 4.3.3 Preconditions for redundancy setup The following conditions must be met to allow setting up two Rosemount 2460 System Hubs for redundancy operation: The same firmware version on both System Hubs Firmware version 1.C0 or higher ... - Page 62 Configuration Reference Manual 00809-0100-2460, Rev DB March 2017 Figure 4-2. Rosemount Tank Gauging system architecture with redundant system hubs Host System Modem Rosemount 2460 System Hub Rosemount 2460 System Hub Backup Primary Redundancy cable Field Ports Host Ports Host Ports...
-
Page 63: Installation Wizard
March 2017 4.3.4 Installation wizard This section describes how to install and configure a Rosemount 2460 System Hub by using the WinSetup installation wizard. Step 1. Select device type 1. In the WinSetup workspace, click the right mouse button on the Devices folder. - Page 64 Modbus address of the Rosemount 2460 System Hub” on page Note In case several Rosemount 2460 System Hubs are connected using the same default address (245), you will have to change the addresses of the system hubs before the Verify command can be used. See “How...
- Page 65 Reference Manual Configuration 00809-0100-2460, Rev DB March 2017 How to check Communication Channel and Port To check which channels are enabled: a. In the WinSetup workspace open the Protocols folder. Protocols folder Modbus Master protocol folder Modbus Master channel 1 b.
- Page 66 In the 2460 Communication window click the Change Address on Device button to open the Change Address window: b. Enter the Device ID and the new Modbus address. For the Rosemount 2460 System Hub it is recommended to use address 201 and up.
- Page 67 Normally there is no need to change any communication parameters. Standard configuration is automatically set for each modem type. a. Modem. The Rosemount 2460 supports a large number of modem types. Verify that correct modem is installed on each port to be used. See Appendix A: Specifications and Reference Data for details on available modems and protocols.
-
Page 68: Default Communication Parameters
Reference Manual Configuration 00809-0100-2460, Rev DB March 2017 Default communication parameters Table 4-1. Modbus communication parameters for Rosemount 2460 Host Ports Parameters Data bits per Interface Baud rate Stop bits Parity character TRL2 4800 None RS485 9600 None RS232 19200 None Table 4-2. - Page 69 For Host Ports the Min response time and Max response time define the time slot in which a response from the Rosemount 2460 will be sent to a host system. If needed, you may change these parameters to match the requirements for a particular host system.
- Page 70 March 2017 Step 4. Tank Database configuration The tank database of the Rosemount 2460 System Hub ensures that the system hub requests information from all the connected field devices. It is very important that the Tank Database of the Rosemount 2460 System Hub is properly configured to allow communication between the Rosemount...
- Page 71 3. Select the Field Port that the device is connected to. In the standard configuration there are six field bus ports available for the Rosemount 2460 System Hub. The TRL2 bus is the standard field bus interface for devices connected to a Rosemount 2460 System Hub. See “Connecting to the Rosemount 2460 System Hub”...
- Page 72 Level device address The Level Device Address field in the tank database of the Rosemount 2460 System Hub is used for level gauges such as the Rosemount 5900S. This address also needs to be stored in the tank database of the Rosemount 2410 Tank Hub.
- Page 73 Rosemount 2460 tank database for Whessoe devices L&J and Varec options are supported for Rosemount 2460 firmware version 1.E0 and higher Appendix H: L&J Device Configurationfor information on how to configure the Rosemount 2460 tank database for L&J devices...
- Page 74 Whessoe devices Vapor or Liquid pressure can be selected, not both. L&J and Varec options are supported for Rosemount 2460 firmware version 1.E0 and higher Appendix I: Varec® Device Configuration for information on how to configure the Rosemount 2460 tank database for Varec devices Appendix H: L&J Device Configuration...
- Page 75 Rosemount 2460 tank database for Whessoe devices L&J and Varec options are supported for Rosemount 2460 firmware version 1.E0 and higher Appendix I: Varec® Device Configuration for information on how to configure the Rosemount 2460 tank database for Varec devices Appendix H: L&J Device Configuration...
- Page 76 This step lets you setup a redundant pair of system hubs. For standalone system hubs, click Next to skip this step and proceed to next. See section “Redundancy configuration” on page 73 for instructions on how to configure redundant Rosemount 2460 System Hubs. Configuration...
- Page 77 Rosemount 2460 Redundant Rosemount 2460 4. Verify that the Rosemount 2460 System Hub appears in the TankMaster workspace window. Now the system hub will be able to communicate with the host system and collect data from the field devices. 5. Proceed with installation and configuration of Rosemount 2410 Tank Hubs and field devices.
-
Page 78: 2410 Tank Hub
Tank databases of the Rosemount 2460 System Hub and the Rosemount 2410 Tank Hub In a typical Rosemount Tank Gauging system, a Rosemount 2460 System Hub collects measurement data from a number of tanks via one or more Rosemount 2410 Tank Hubs. For proper communication with the control room PC and the Rosemount TankMaster operator’s interface, Modbus addresses need... - Page 79 Single tank with a single Rosemount 2410 Tank Hub In this example a Rosemount 2460 System Hub is connected to two tanks each of which has a separate Rosemount 2410 Tank Hub. Each tank has a Rosemount 5900S Radar Level Gauge Radar Level Gauge, a Rosemount 2240S Multi-Input Temperature Transmitter, and a Rosemount 2230 Graphical Field Display.
- Page 80 Reference Manual 00809-0100-2460, Rev DB March 2017 Figure 4-4. The Tank Database of the Rosemount 2460 System Hub must match the Tank Databases of connected Rosemount 2410 Tank Hubs Rosemount 2410 Tank Hub on tank TK-1 Rosemount 2460 System Hub...
- Page 81 Multiple tanks connected to a single Rosemount 2410 Tank Hub In this example a Rosemount 2460 System Hub is connected to a Rosemount 2410 Tank Hub that serves three tanks. The temperature device on tank 1 has the same Modbus address as the tank hub itself. The other temperature devices on tank 2 and 3 have separate Modbus addresses.
- Page 82 1, 2, and 3 in the Rosemount 2410 Tank Hub’s tank database. In the tank database of the Rosemount 2460 System Hub, you will have to configure 2410 Tank Position in order to be able to configure the correct Temperature Device Addresses for the three tanks.
-
Page 83: Redundancy Configuration
4.3.6 Redundancy configuration Setting up a redundant pair of Rosemount 2460 system hubs can be done by using TankMaster WinSetup or the Web Graphical Interface. This section describes the redundancy setup in the WinSetup configuration wizard for the Rosemount 2460 System Hub. See “Redundancy setup via Web GUI”... - Page 84 Configuration Reference Manual 00809-0100-2460, Rev DB March 2017 Once the synchronization process is successfully finished, the Redundancy window presents the current status and other information for the two system hubs. Table 4-8. Redundancy configuration Item Description Active/Passive mode can be changed manually. The Active device communicates with the host system and responds to requests for measurement Manual switch over button data, status information, and diagnostics.
-
Page 85: Configure Button
Reference Manual Configuration 00809-0100-2460, Rev DB March 2017 Configure button Click the Configure button to open the 2460 System Hub Redundancy Configuration window. This window lets you configure various options for fail-over and other redundancy related issues. You may also set separate Modbus addresses for the two system hubs. - Page 86 Reference Manual Configuration 00809-0100-2460, Rev DB March 2017 Passive device communication In case the Primary and Backup system hubs are connected to different ports on the host system, the same Modbus address can be used for communication with the two system hubs. Then there is no need to use individual Modbus addresses for the Primary and Backup devices.
-
Page 87: Redundancy Setup Via Web Gui
March 2017 4.3.7 Redundancy setup via Web GUI This section describes the redundancy setup for a Rosemount 2460 System Hub by using the Web interface. The setup includes two basic steps: Paring; two system hubs are setup as a redundant pair ... - Page 88 Reference Manual Configuration 00809-0100-2460, Rev DB March 2017 Redundancy configuration Once the synchronization is finished you may configure the system hubs for redundancy operation. 1. In the Web interface, select the Redundancy tab. 2. Expand the Configuration option. 3. Perform the desired configuration. Configuration...
- Page 89 Reference Manual Configuration 00809-0100-2460, Rev DB March 2017 Table 4-10. Redundancy configuration Item Description Active/Passive mode can be changed manually. The Active device communicates with the host system and responds to requests for Manual switch over measurement data, status information, and diagnostics. This option can be useful for testing that both system hubs function properly as Active and Passive.
- Page 90 Reference Manual Configuration 00809-0100-2460, Rev DB March 2017 Configuration...
-
Page 91: Overview
Reference Manual Operation 00809-0100-2460, Rev DB March 2017 Section 5 Operation Overview ............... . page 81 Safety messages . -
Page 92: Light Emitting Diodes
March 2017 Light emitting diodes There are three Light Emitting Diodes (LED) on the front of the Rosemount 2460 System Hub for status and error information. When the system hub is starting up, all LEDs, (Power, Status, and Error) are lit in order to verify that they work. -
Page 93: Start-Up Procedure
Start-up procedure When the Rosemount 2460 is starting up, the LEDs are lit up and turned off in a certain order to indicate proper operation. In case an error is detected during the start-up procedure the red LED remains turned Start-up: 1. -
Page 94: Runtime Operation
March 2017 5.3.2 Runtime operation After the start-up procedure is finished the Rosemount 2460 enters runtime mode. The red Error LED will be turned off. If an error occurs, the LED will start to blink as described in “Error LED” on page... -
Page 95: Error Led
Error LED When the Rosemount 2460 System Hub is starting up, all the LEDs are turned on. If no error is detected in the start-up procedure, the system hub enters runtime mode and the Error LED (Red) is turned off. - Page 96 Operation Reference Manual 00809-0100-2460, Rev DB March 2017 Example In case of a device error, the red LED will repeat a flash sequence that corresponds to the particular type of error that occurred. For example, in case of a RAM checksum error (code=4), the LED will show a sequence of 4 flashes followed by a 750 millisecond pause.
-
Page 97: Status Led
Status LED (Yellow) Table 5-3. LED sequence in runtime operation Status LED Description (Yellow) On=50 ms Full mode Off=9000 ms On=50 ms Off=200 ms Redundant system; passive On=50 ms (secondary) Rosemount 2460 Off=8700 ms On=1000 ms Reduced mode (warning) Off=500 ms Operation... - Page 98 Operation Reference Manual 00809-0100-2460, Rev DB March 2017 Example The yellow LED will repeat a flash sequence that corresponds to the particular type of status information to be displayed. For example, in Full mode the LED shows a sequence of 1 flash followed by a 9 seconds pause.
-
Page 99: Redundancy Operation
Redundancy operation To check redundancy status: 1. Open the Rosemount TankMaster WinSetup configuration program. 2. Right-click the system hub icon for the redundant Rosemount 2460. 3. Choose Properties. 4. Select the Redundancy tab. To check redundancy status using the Web interface: 1. -
Page 100: Redundancy State
You may check the current redundancy state by using the Rosemount TankMaster WinSetup program or by using the Web interface. Using TankMaster WinSetup 1. In the WinSetup workspace right click the Rosemount 2460 icon. 2. Choose the Properties option. Redundancy 3. - Page 101 Reference Manual Operation 00809-0100-2460, Rev DB March 2017 Using the web interface 1. Log in to the Web interface as described in “Using the web interface” on page 108. 2. Select the Redundancy tab. 3. Open the Status drop-down list to view the current status of the Primary and Backup devices. Operation...
-
Page 102: Errors And Warnings
5.4.2 Errors and warnings You may check the current status of the redundant Rosemount 2460 System Hubs by using the Properties option in TankMaster WinSetup. The Communication tab will show a warning in case of an error. Select the Redundancy tab for more information. - Page 103 Reference Manual Operation 00809-0100-2460, Rev DB March 2017 State messages for the Primary and Backup system hubs are listed in the following order: Redundancy error warnings Device error messages Primary/backup status Modem errors Device warnings What will trigger a redundancy warning? Typical failures that will trigger redundancy warning: network cable to backup device disconnected...
-
Page 104: Manual Switch Over
March 2017 5.4.3 Manual switch over The Rosemount 2460 System Hubs can be manually switched over from Active to Passive device. Using TankMaster WinSetup The Manual Switch Over button may be used to test that both the Primary and Backup Rosemount 2460 System Hubs function properly as Active or Passive device. - Page 105 Reference Manual Operation 00809-0100-2460, Rev DB March 2017 Manual switch over using the Web interface 1. Log in to the Web interface as described in “Using the web interface” on page 108. 2. Select the Redundancy tab. 3. Expand the Manual Switch Over option. 4.
-
Page 106: Rev Db March
Reference Manual Operation 00809-0100-2460, Rev DB March 2017 Operation... -
Page 107: Safety Messages
Reference Manual Service and Troubleshooting 00809-0100-2460, Rev DB March 2017 Section 6 Service and Troubleshooting Safety messages ..............page 97 Tools . - Page 108 Reference Manual Service and Troubleshooting 00809-0100-2460, Rev DB March 2017 Failure to follow safe installation and servicing guidelines could result in death or serious injury: Make sure only qualified personnel perform the installation. Use the equipment only as specified in this manual. Failure to do so may impair the protection provided by the equipment.
-
Page 109: Tools
Reference Manual Service and Troubleshooting 00809-0100-2460, Rev DB March 2017 Tools ™ The following standard tools are needed for service and maintenance of the Rosemount 2460: Screwdriver (Flat or Phillips) Wrench (Metric fixed or adjustable) Torx size 20 and 30 (for opening the lid and exchanging spare parts) ... - Page 110 Web Interface>Communication tab. Rosemount 2460 System • Check configuration of communication parameters for Configuration of Rosemount the Rosemount 2460 host ports. Connect a service PC 2460 System Hub to the Ethernet 3 port and open the Web Interface>Communication tab. •...
- Page 111 Symptom Possible cause Action • Check hardware write protection switch (see “Write protection” on page 134) The Rosemount 2460 is write Impossible to change protected • Check software write protection in TankMaster configuration (write to WinSetup Holding Registers) of the...
-
Page 112: Exchanging A Modem Card
00809-0100-2460, Rev DB March 2017 Exchanging a modem card The modem cards can be replaced during operation. The Rosemount 2460 System Hub supports plug-and-play and the proper protocol settings will automatically be used when the Rosemount 2460 detects a new modem card. - Page 113 Reference Manual Service and Troubleshooting 00809-0100-2460, Rev DB March 2017 Locking screw 7. Ensure that the ring on the Locking screw is folded down to ensure that the lid on the housing can be properly closed. Service and Troubleshooting...
-
Page 114: Exchanging The Terminal Board
00809-0100-2460, Rev DB March 2017 Exchanging the terminal board 1. Turn off power supply by disconnecting external switch. 2. Loosen the captive locking screws and open the lid on the Rosemount 2460 housing. WRITE PROT Port 1 Port 2 Port 3... - Page 115 L&J and Varec on Field Ports 1 to 6. It can be identified by its gray terminals unlike the orange terminals on the standard board. 8. Tighten the screws. 9. Replace the Terminal board cover and the cable connectors. 10.Close the lid on the Rosemount 2460 housing and tighten the two locking screws. Service and Troubleshooting...
-
Page 116: Replacing The Power Supply Unit
1. Turn off power supply by disconnecting external switch. 2. Remove the two screws and open the lid on the Rosemount 2460 housing. Note! The lid can be removed from the housing if the lock ring is removed. Be careful not to drop the lid on the floor. - Page 117 7. Remove the Power Supply Unit and replace it with a new one. 8. Tighten the screws, attach the Main Board connector, and plug in the power connection. 9. If removed, replace the lid on the Rosemount 2460 housing and ensure that the lid is secured with the ring.
-
Page 118: Using The Web Interface
“Terminal board and ports” on page 33. The Web Interface can be opened in any Web browser by navigating to IP-address 192.168.3.10. The Rosemount 2460 System Hub will act as a DHCP server and the connected PC will automatically receive a valid ip address. - Page 119 Once you are logged in, the web interface appears with a number of menus that represent various service functions. Figure 6-2. Web user interface for the Rosemount 2460 Table 6-2. Menus in the Rosemount 2460 Web user interface Menu Description...
-
Page 120: Ports Statistics
The Ports statistics option lets you view the current status of all field ports and host ports. Figure 6-3. Communication tab in the Rosemount 2460 web interface For each port this window shows what type of protocol that is used and the various communication addresses and parameters as well as Rx and Tx communication counters. -
Page 121: Logging
1. Install a USB stick or a SD card. See Figure 2-5 on page 11 for information on where to connect. 2. Open the Web interface for the Rosemount 2460 System Hub. See “Using the web interface” on page 108 for more information. - Page 122 Reference Manual Service and Troubleshooting 00809-0100-2460, Rev DB March 2017 7. Setup advanced filtering options for the ports to be logged. For each port you may choose: a. any device address or a specific address ® b. function code (Modbus), or TOR (Enraf GPU) c.
-
Page 123: To Stop Logging
Reference Manual Service and Troubleshooting 00809-0100-2460, Rev DB March 2017 6.9.1 To stop logging To stop communication logging: 1. Make sure that all ports are disabled, i.e. all check boxes are unchecked. Also make sure that Modbus TCP logging is set to None: 2. -
Page 124: Downloading Log Files To A Pc
3. Copy the log files from the “Comlogs” folder to the desired destination folder on the PC. Note Logging will be resumed when the USB stick/SD card is inserted into the Rosemount 2460 again. Note It is important that the USB stick/SD card is unmounted before removing it, otherwise log data may be lost. - Page 125 Reference Manual Service and Troubleshooting 00809-0100-2460, Rev DB March 2017 Downloading via the Web interface 1. Open the Web interface for the Rosemount 2460 System Hub. See “Using the web interface” on page 108. 2. Select the Communication>Logging menu option.
-
Page 126: Modbus Tcp Configuration
Time until TCP keep alive starts in case there is no active communication Idle time between the Rosemount 2460 and the host. TCP keep alive sends transmissions to verify that the idle connection is still active. Interval for TCP keep alive messages. -
Page 127: Modbus Tcp Statistics
Reference Manual Service and Troubleshooting 00809-0100-2460, Rev DB March 2017 6.11 Modbus TCP statistics The Modbus TCP statistics option lets you view the current status of communication counters and errors. Figure 6-5. Modbus TCP configuration Service and Troubleshooting... -
Page 128: Network
Service and Troubleshooting 00809-0100-2460, Rev DB March 2017 6.12 Network The Network tab lets you configure the Rosemount 2460 for communication on the Ethernet port 1 (Eth1). Table 6-4. Network configuration Menu Description Available mode options are DHCP (dynamic IP address), Static and Mode Disabled. -
Page 129: Recommendations For Modbus Tcp Ip Addressing
Reference Manual Service and Troubleshooting 00809-0100-2460, Rev DB March 2017 6.12.1 Recommendations for Modbus TCP IP addressing Network mode “Static” is the recommended selection for Eth1. There is neither a default IP address nor a default Netmask since they depend on the local network environment and the IP settings of the host PC. The recommendation is however to use IP addresses in the so-called private address range according to Table 6-5 below:... -
Page 130: Diagnostics
6.13 Diagnostics TankMaster WinSetup lets you view diagnostic registers for the Rosemount 2460 System Hub. The diagnostic registers are selected from available Input and Holding Registers to provide a quick overview of the current device status. For a more comprehensive troubleshooting you may use the View Input Registers function in WinSetup. -
Page 131: Restore To Factory Defaults
Note Restoring the Rosemount 2460 to factory default can not be reversed. It is recommended to save the configuration database (CDB) in case you would like to return to the current configuration (see “Configuration backup” on page 122). -
Page 132: Configuration Backup
2460 System Hub configuration can be stored on disk. This is useful for backup purposes and troubleshooting. To create a backup of the current configuration: 1. Open the Web interface for the Rosemount 2460 System Hub. See “Using the web interface” on page 108. -
Page 133: Configuration Backup Using Winsetup
2460 System Hub can be stored on disk by using the TanMaster WinSetup software. This is useful for backup purposes and troubleshooting. You can save a predefined set of Holding Registers to make a backup copy of the current Rosemount 2460 System Hub configuration. -
Page 134: Configuration Recovery
4. Click the Browse button and select a configuration database file. 5. Click the Upload button. Note CDB files from Rosemount 2460 System Hubs with firmware versions later than 1.A2 must not be uploaded to a Rosemount 2460 with firmware version 1.A2. Service and Troubleshooting... -
Page 135: Configuration Recovery Using Winsetup
To load a backup database do the following: 1. In the TankMaster WinSetup workspace select the Rosemount 2460 System Hub icon that represents the device for which you want to load a new database. -
Page 136: Firmware Upgrade
™ This section describes how to upgrade the Rosemount 2460 firmware. First section covers upgrade of a single standalone Rosemount 2460. The second section describes how to upgrade redundant system hubs. 6.17.1 Firmware upgrade of a single Rosemount 2460 System Hub To upgrade the Rosemount 2460 firmware: 1. -
Page 137: Firmware Upgrade Of Redundant System Hubs
Reference Manual Service and Troubleshooting 00809-0100-2460, Rev DB March 2017 6.17.2 Firmware upgrade of redundant system hubs Firmware upgrade of redundant system hubs requires a temporary change to standalone mode. 1. Disable the redundancy function. a. Use Web Graphical User Interface (GUI) to verify that the Primary device is active, if not do a manual switch over. -
Page 138: License Upgrade
132. Both system hubs need to be upgraded. 6.18.1 Upgrade procedure To upgrade the license of a Rosemount 2460: 1. Open the Web Graphical User Interface (GUI). See section “Using the web interface” on page 108) for more information on how to use the Web GUI. - Page 139 March 2017 Generated license info 7. Copy the generated license info. Paste it into an e-mail and send to Emerson Automation Solutions to order a new license. 8. Emerson Automation Solutions will reply with an e-mail including a new license key.
- Page 140 12.If the license key is properly verified, click the Apply new license button to download the new license key to the Rosemount 2460 System Hub. It is recommended that the system hub is restarted after the license key has been downloaded (the Rosemount 2460 will automatically restart the firmware in any case).
-
Page 141: Redundancy
Reference Manual Service and Troubleshooting 00809-0100-2460, Rev DB March 2017 6.19 Redundancy ™ The Redundancy tab lets you pair two Rosemount 2460 System Hubs. Once paired, the system hubs can be configured for redundancy operation. See “Redundancy setup via Web GUI” on page 77 for more information on how to setup redundant system hubs. -
Page 142: To Unpair Redundant System Hubs
Reference Manual Service and Troubleshooting 00809-0100-2460, Rev DB March 2017 6.19.2 To unpair redundant system hubs 1. Open the Web Graphical User Interface (GUI). See section “Using the web interface” on page 108) for more information on how to use the Web GUI. 2. -
Page 143: Fuses
™ Two T1.6A fuses are located on the Power Board inside the Rosemount 2460 housing. See Figure 6-6. Figure 6-6. Two T1.6A 250V fuses inside the Rosemount 2460 housing Power Board Fuses: 2x T 1.6A 250 V Service and Troubleshooting... -
Page 144: Write Protection
Hardware write protection switch To enable or disable the hardware write protection: 1. Remove the locking screws and open the lid on the Rosemount 2460 housing. 2. Locate the Write Protection switch. 3. Set the write protection switch to the desired position On or Off. -
Page 145: Software Write Protection
2. Select the Overview tab. 3. Enable or disable software write protection by choosing the desired option from the drop-down list. Note that in case the Rosemount 2460 is hardware write protected, the current SW write protection can not be changed. -
Page 146: Replacing The Backup Battery
Reference Manual Service and Troubleshooting 00809-0100-2460, Rev DB March 2017 6.22 Replacing the backup battery In case a battery warning appears, you will have to change the backup battery which is located on the Main Board. To change the battery you will have to remove the Terminal Board which is stacked on top of the Main Board. -
Page 147: Setting The Real-Time Clock
Reference Manual Service and Troubleshooting 00809-0100-2460, Rev DB March 2017 6.23 Setting the real-time clock To set the Real-Time Clock: 1. In the TankMaster WinSetup workspace click the right mouse button on the Rosemount 2410 Tank Hub Tank Hub icon. 2. -
Page 148: Maintenance
Use same system time ... lets you synchronize the Rosemount 2460 clock with the TankMaster PC. 5. Click OK to save the configuration and close the window. 6.24 Maintenance Use a soft cloth lightly dampened in water to clean the Rosemount 2460 housing. Do not use chemical solvents. Service and Troubleshooting... -
Page 149: Modem Cards
Reference Manual Service and Troubleshooting 00809-0100-2460, Rev DB March 2017 6.25 Modem cards 6.25.1 RS232 and RS485 The RS232/485 modem card (see Figure 6-7 on page 140) can be used for RS232 or RS485 communication. Four switches are available to configure the card as specified in Table 6-6. - Page 150 Service and Troubleshooting Reference Manual 00809-0100-2460, Rev DB March 2017 Figure 6-7. Modem card for RS232 and RS485 Service and Troubleshooting...
-
Page 151: Enraf
Reference Manual Service and Troubleshooting 00809-0100-2460, Rev DB March 2017 ® 6.25.2 Enraf The Enraf modem has a switch (S3) that allows you to set the Baud Rate to 1200, 2400, or 4800. The proper setting depends on what is supported by the connected field devices. 1200 is the standard setting. - Page 152 Figure 6-9. L&J modem card Table 6-10. Configuration switches Switch Description L&J Master/Slave operation. Table 6-11. Configuration of switch S1 for L&J modem Mode Master Slave Ensure that switch S1 is set in Master position for Rosemount 2460 field ports. Service and Troubleshooting...
-
Page 153: Varec
Reference Manual Service and Troubleshooting 00809-0100-2460, Rev DB March 2017 6.25.4 Varec Figure 6-10. Varec modem card Table 6-12. Configuration switches Switch Description S1:1 Varec baud rate selection externally (via local host) or internally (via DIP switch) S1:2 Varec baud rate selection 250/70 baud. Active only if S1:1 is OFF (INT). Table 6-13. - Page 154 Reference Manual Service and Troubleshooting 00809-0100-2460, Rev DB March 2017 Service and Troubleshooting...
-
Page 155: A.1 Communication/Configuration Specifications
(external power supply for powering the bus required) ® Varec RS485 In certain situations more than 10 devices may work. Contact Emerson Automation Solutions/Tank Gauging Service Department for advice. A.1.7 L&J emulation Support for data polling of L&J field devices (with Tankway protocol). -
Page 156: A.1.8 Varec Emulation
Specifications and Reference Data Reference Manual March 2017 00809-0100-2460, Rev DB A.1.8 Varec emulation Support for data polling of Varec field devices (with Mark/Space protocol). A.1.9 Rosemount 2160 emulation Host protocol, supporting Rosemount 2160 Field Communication Unit input register mapping. Enables replacement of Rosemount 2160 without need of host re-programming. - Page 157 Reference Manual Specifications and Reference Data March 2017 00809-0100-2460, Rev DB Figure A-1. Typical Configuration of a Rosemount 2460 System Hub TankMaster Host RS232 Modbus RTU/TCP Modem DCS/Host (TRL2, RS485, RS232) Rosemount 2460 RS232 TRL2, System Hub RS485 Rosemount 2410 Tank Hub...
-
Page 158: A.2 Electrical Specifications
Specifications and Reference Data Reference Manual March 2017 00809-0100-2460, Rev DB A.2 Electrical specifications A.4 Environmental specifications A.2.1 Power supply A.4.1 Temperature limits 24-48 VDC (-15%, +10%) Ambient temperature 100-250 VAC (-15%, +10%), 50/60 Hz (±2%) -40 to +70 °C (-40 to 158 °F) A.2.2 Power consumption Storage temperature Maximum 20 W... -
Page 159: A.6 Dimensional Drawings
Reference Manual Specifications and Reference Data March 2017 00809-0100-2460, Rev DB A.6 Dimensional drawings Figure A-3. Rosemount 2460 System Hub dimensions Dimensions are in millimeters (inches). (6.2) (10.4) (9.7) 2460- MADE IN GOTHENBURG SWEDEN TAG: S/N: MFG (yymmdd): DEVICE ID: MAINS: 100-250VAC 50/60Hz, 24-48VDC 20W 348 (13.7) - Page 160 Specifications and Reference Data Reference Manual March 2017 00809-0100-2460, Rev DB Figure A-4. Top view Dimensions are in mm (inch). 6.5 (0.3) x4 36 (1.4) 87 (3.4) 12.5 (4.9) x4 (18.3) 374 (14.7) 474 (18.7) with lid maximum open Specifications and Reference Data...
-
Page 161: A.7 Ordering Table
Specifications and Reference Data Reference Manual March 2017 00809-0100-2460, Rev DB A.7 Ordering table Table A-5. Rosemount 2460 System Hub ordering information Model Product Description 2460 System Hub (1) (2) Capacity 1-16 tanks 1-48 tanks 1-64 tanks Firmware Standard Redundancy/Remote access (Ethernet) - Page 162 Specifications and Reference Data Reference Manual March 2017 00809-0100-2460, Rev DB Table A-5. Rosemount 2460 System Hub ordering information Port 3, Field Communication (serial port) None TRL2 Modbus Enraf Bi-phase Mark Whessoe WM 550/660 (digital current loop) Whessoe WM 660 (RS485) (5)(6) L&J Tankway...
- Page 163 Specifications and Reference Data Reference Manual March 2017 00809-0100-2460, Rev DB Table A-5. Rosemount 2460 System Hub ordering information (5)(6) L&J Tankway, field communication (5)(6) Varec Mark/Space, field communication RS485 Modbus, field communication TRL2 Modbus, host communication RS485 Modbus, host communication...
- Page 164 Reference Manual March 2017 00809-0100-2460, Rev DB Table A-5. Rosemount 2460 System Hub ordering information Cable/Conduit Connections Metal cable glands (M20x1.5 and M25 x1.5). 9 plugs and 11 glands are included (2 pcs M25 and 7 pcs M20 plugs). NPT adapters (½ -14 NPT and ¾ -14 NPT). 9 plugs and 11 adapters are included (2 pcs M25 and 7 pcs M20 plugs).
-
Page 165: Bappendix B: Product Certifications
Rev 3.0 B.1 European Directive Information The most recent revision of the EU Declaration of Conformity can be found at Emerson.com/Rosemount. B.2 Ordinary location certification As standard, the transmitter has been examined and tested to determine that the design meets the basic electrical, mechanical,... - Page 166 Product Certifications Reference Manual March 2017 00809-0100-2460, Rev DB Product Certifications...
-
Page 167: Tank Database Configuration For Enraf Devices
This section describes how to configure the Tank Database of the Rosemount 2460 System Hub for supported Enraf devices. 1. In TankMaster WinSetup right-click the Rosemount 2460 System Hub that the device is connected to and choose Properties. 2. Select the Tank Database tab. - Page 168 Enraf device you should choose Enraf TOI B. 5. Select the Field Port that the device is connected to. Ensure that the port is equipped with an Enraf modem. In the standard configuration there are six field bus ports available for the Rosemount 2460 System Hub. See “Connecting to the Rosemount 2460 System Hub”...
- Page 169 ® Reference Manual Enraf Device Configuration March 2017 00809-0100-2460, Rev DB Table C-1. Summary of Tank Database entry fields Entry field Description Source Enraf (811, 813, 854, 873, 894, 970, 971) Field Port The field bus port that the selected device is connected to. Up to six field ports may be used.
-
Page 170: Advanced Enraf Configuration
® Enraf Device Configuration Reference Manual March 2017 00809-0100-2460, Rev DB Advanced Enraf configuration This section describes how to enable and configure Fast Polling for Enraf devices. Fast polling can be used to increase the sampling rate for tanks with level rates above a certain threshold value. A general threshold setting can be configured which applies for all servo tanks. -
Page 171: Dappendix D: Servo Commands
Reference Manual Servo Commands March 2017 00809-0100-2460, Rev DB Appendix D Servo Commands Sending a Servo Command ............page 161 Servo States . - Page 172 Servo Commands Reference Manual March 2017 00809-0100-2460, Rev DB 2. Click a servo command to be sent to the servo tank. The following commands are available: Command Description Holds the displacer in its current position. Freeze (Block) Raises the displacer to the top of the tank. Park (Lock/Stow) Unlocks the gauge after Freeze or Park, and the displacer moves Measure (Unlock/Unstow)
- Page 173 Servo Commands Reference Manual March 2017 00809-0100-2460, Rev DB When a servo command is sent, the Level /Displacer position field in the Servo Command window turns orange and the servo state is displayed to the left of the Level /Displacer position value as an abbreviation: Servo Command Abbreviation Freeze (Block)
- Page 174 Servo Commands Reference Manual March 2017 00809-0100-2460, Rev DB Tank Inventory When a Servo Command is executed the Level position field in all View Tank windows turns orange. All Inventory (volume) calculations are disabled as long as the servo command is active - only Level and Temperature values are displayed.
-
Page 175: Servo States
The Raise, Freeze and Lower servo states refer to the displacer movement. Table D-1. Servo command and servo state displayed by the 2460 Servo Command Displayed servo state in Windows Rosemount 2460 System Hub Freeze Down Park (Lock/Stow) Freeze (Block) -
Page 176: Type Of Request (Tor)
March 2017 00809-0100-2460, Rev DB Type of request (TOR) The Rosemount 2460 System Hub supports the following Type of Requests (TOR): Table D-2. TOR support by 2460 Enraf client server Description Data Request: Alarm Status, Level Status and Level Value... -
Page 177: Tank Database Configuration
This section describes how to configure the Tank Database of the Rosemount 2460 System Hub for supported Whessoe devices. 1. In TankMaster WinSetup right-click the Rosemount 2460 System Hub that the device is connected to and choose Properties. 2. Select the Tank Database tab. - Page 178 Control Loop modem. In the standard configuration there are six field bus ports available for the Rosemount 2460 System Hub. See “Connecting to the Rosemount 2460 System Hub” on page 30 more information. 6. Enter the address of the gauge into the Level Device Address field. Each field device has its own unique address in the range 00-99.
- Page 179 Whessoe Device Configuration Reference Manual March 2017 00809-0100-2460, Rev DB Table E-1. Summary of Tank Database entry fields Entry field Description Source Whessoe (WM550, WM660) Field Port The field bus port that the selected device is connected to. Up to six field ports may be used.
-
Page 180: Advanced Whessoe Configuration
E.2.2 Configure range values for Whessoe WM550 To configure range values for vapor and liquid pressure: 1. Open TankMaster WinSetup. Rosemount 2460 System Hub Properties 2. Click the right mouse button on the 2460 icon and choose Properties. Whessoe Device Configuration... - Page 181 The Advanced Whessoe 550 Configuration window lets you to set the Low Range and High Range values for Vapor and Product pressure. These values allow the Rosemount 2460 to perform scaling of collected pressure data to the correct values in bar.
-
Page 182: Configure Vapor Temperature For Whessoe Wm660
Whessoe Device Configuration Reference Manual March 2017 00809-0100-2460, Rev DB E.2.3 Configure Vapor Temperature for Whessoe WM660 1. Open TankMaster WinSetup. 2. In the WinSetup workspace, click the right mouse button on the 2460 icon and choose Properties. 3. Select the Tank Database tab. Whessoe WM660 device Advanced button 4. -
Page 183: Fappendix F: Modbus ® Standard Question
® Reference Manual Modbus Standard Question March 2017 00809-0100-2460, Rev DB ® Appendix F Modbus Standard Question Introduction ..............page 173 FC02 Status Register Area . -
Page 184: Fc02 Status Register Area
® Modbus Standard Question Reference Manual March 2017 00809-0100-2460, Rev DB FC02 Status Register Area Read status information for the parameter value in the FC04 area. Sensor data: a '0' means valid, a '1' means invalid. Alarm data: a '0' means normal, a '1' means alarm. F.2.1 Tank Register Area Table F-2. - Page 185 ® Reference Manual Modbus Standard Question March 2017 00809-0100-2460, Rev DB Register Register Name Number 1792-1855 User Defined 1 Value Status 1856-1919 User Defined 2 Value Status 1920-1983 User Defined 3 Value Status 1984-2047 User Defined 4 Value Status 2048-2111 User Defined 5 Value Status 2496-2559 Relay 1 Status...
-
Page 186: Fc03 Register Area
® Modbus Standard Question Reference Manual March 2017 00809-0100-2460, Rev DB FC03 Register Area Read Holding Register. F.3.1 System Register Area Table F-3. System Register Area Register Register Name Type Unit Description Number Unit Register Area Priority 5 question. Defines the unit for values in the FC04 area. -
Page 187: Fc04 Register Area
® Reference Manual Modbus Standard Question March 2017 00809-0100-2460, Rev DB FC04 Register Area Read Input Register. F.4.1 Tank Register Area Table F-4. Tank Register Area Register Register Name Type Unit Description Number Level Register Area Priority 1 question 0-127 Level FLOAT m, ft... - Page 188 ® Modbus Standard Question Reference Manual March 2017 00809-0100-2460, Rev DB Register Register Name Type Unit Description Number User Defined Register Area Priority 3 question 2560-2687 User Defined 1 Value FLOAT Unit is specified in Unit Register Area below, see register 9344-9663. Status is specified in Status Register Area, see register 4224-4351.
- Page 189 ® Reference Manual Modbus Standard Question March 2017 00809-0100-2460, Rev DB Register Register Name Type Unit Description Number 4096-4223 Pressure Status DWORD Bitfield Priority 2 question Bit 0: Simulated Vapor Pressure Bit 1: Manual Vapor Pressure Bit 2: Invalid Vapor Pressure Bit 3: CFail Vapor Pressure Bit 4: Reserved Bit 5: Reserved...
- Page 190 ® Modbus Standard Question Reference Manual March 2017 00809-0100-2460, Rev DB Register Register Name Type Unit Description Number 4224-4351 User Defined Value Status DWORD Bitfield Priority 3 question Bit 0: Simulated User Def 1 Bit 1: Manual User Def 1 Bit 2: Invalid User Def 1 Bit 3: CFail User Def 1 Bit 4: Backup User Def 1 used...
- Page 191 ® Reference Manual Modbus Standard Question March 2017 00809-0100-2460, Rev DB Register Register Name Type Unit Description Number 4864-4991 Relay Status DWORD Bitfield Priority 4 question Bit 0 - 9 (Relay1 - Relay10) (0 = Not energized, 1 = Energized) Bit 10 - 19 (Relay1 - Relay10) (0 = OK or Disabled, 1 = Error) Bit 20 - 29 (Relay1 - Relay10)
- Page 192 ® Modbus Standard Question Reference Manual March 2017 00809-0100-2460, Rev DB Register Register Name Type Unit Description Number Diagnostic Register Area 9984-10111 Diagnostic Level Device Status DWORD Bitfield Bit 7: Device Error Bit 11: Unknown Unit Bit 15: Invalid Level Bit16: Servo_CMD_bit0 Bit 17: Servo_CMD_bit1 Bit 18: Servo_CMD_bit2...
-
Page 193: System Register Area
® Reference Manual Modbus Standard Question March 2017 00809-0100-2460, Rev DB F.4.2 System Register Area Table F-5. System Register Area Register Register Name Type Unit Description Number 2460 Status Register Area Priority 5 question. Defines the unit for the values in the FC04 area. 24000 Device Status DWORD... - Page 194 ® Modbus Standard Question Reference Manual March 2017 00809-0100-2460, Rev DB ® Modbus Standard Question...
-
Page 195: Gappendix G: Fast Polling
Reference Manual Fast Polling March 2017 00809-0100-2460, Rev DB Appendix G Fast Polling Configure fast polling with common threshold ........page 186 Configure fast polling with individual thresholds . -
Page 196: Configure Fast Polling With Common Threshold
A general threshold setting can be configured which applies for all servo tanks. 1. Open TankMaster WinSetup. Rosemount 2460 Properties 2. In the WinSetup workspace, click the right mouse button on the Rosemount 2460 icon and choose Properties. Advanced Fast polling 3. - Page 197 Fast Polling Reference Manual March 2017 00809-0100-2460, Rev DB 4. Choose the Common Settings option. This option lets you apply the same level rate threshold for all servo tanks (“servo tank” means that Tank Type is set to one of the servo tank options available in the tank installation wizard).
-
Page 198: Configure Fast Polling With Individual Thresholds
It is possible to configure individual fast polling threshold values for different servo tanks. 1. Open TankMaster WinSetup. Rosemount 2460 Properties 2. Click the right mouse button on the Rosemount 2460 icon and choose Properties. Advanced Fast Polling 3. Select the Advanced tab and click the Fast Polling button. - Page 199 Fast Polling Reference Manual March 2017 00809-0100-2460, Rev DB 4. Choose the Individual Settings option. This option lets you apply individual level rate thresholds for each servo tank (“servo tank” means that one of the servo tank options is used as Tank Type in the tank installation wizard).
- Page 200 1. Open TankMaster WinSetup. Ensure that Individual Settings is enabled. See “Enable individual settings” on page 188. 2. In the WinSetup workspace, click the right mouse button on the Rosemount 2460 icon and choose Properties. 3. Select the Tank Database tab. Advanced button 4.
-
Page 201: Tank Database Configuration
This section describes how to configure the Tank Database of the Rosemount 2460 System Hub for supported L&J devices. 1. In TankMaster WinSetup right-click the Rosemount 2460 System Hub that the device is connected to and choose Properties. 2. Select the Tank Database tab. - Page 202 In the standard configuration there are six field bus ports available for the Rosemount 2460 System Hub. See “Connecting to the Rosemount 2460 System Hub” on page 30 more information. 6. Enter the address of the gauge into the Level Device Address field. Each field device has its own unique address in the range 0-127.
- Page 203 L&J Device Configuration Reference Manual March 2017 00809-0100-2460, Rev DB Table H-1. Summary of Tank Database entry fields Entry field Description Source L&J Tankway L&J MCG 1500XL L&J MCG 2000 Field Port The field bus port that the selected device is connected to. Up to six field ports may be used.
-
Page 204: Advanced L&J Configuration
H.2.2 Advanced L&J configuration 1. Open the TankMaster WinSetup program. 2. In the WinSetup workspace, click the right mouse button on the Rosemount 2460 icon and choose Properties. 3. Select the Tank Database tab. Advanced button L&J device... -
Page 205: Iappendix I: Varec ® Device Configuration
This section describes how to configure the Tank Database of the Rosemount 2460 System Hub for ® supported Varec devices. 1. In TankMaster WinSetup right-click the Rosemount 2460 System Hub that the device is connected to and choose Properties. 2. Select the Tank Database tab. Tank Database ®... - Page 206 In the standard configuration there are six field bus ports available for the Rosemount 2460 System Hub. See “Connecting to the Rosemount 2460 System Hub” on page 30 more information. 6. Enter the address of the gauge into the Level Device Address field. Each field device has its own unique address in the range 0-999.
- Page 207 Varec Mark/Space Level range Temperature global offset Measurement units Fast polling Varec option is supported for Rosemount 2460 firmware version 1.E0 and higher. “Advanced Varec configuration” on page 198 for more information. ® Varec Device Configuration...
-
Page 208: Advanced Varec Configuration
® Varec Device Configuration Reference Manual March 2017 00809-0100-2460, Rev DB Advanced Varec configuration This section describes advanced configuration options for supported Varec devices. I.2.1 Fast polling Appendix G: Fast Polling for information on how to setup fast polling. I.2.2 Advanced Varec configuration 1. - Page 209 ® Reference Manual Varec Device Configuration March 2017 00809-0100-2460, Rev DB 5. The Varec 1800/1900 Configuration window lets you configure level range for the selected tank. Choosing the most appropriate range will optimize level measurement resolution. You may also configure temperature offset, measurement units, as well as fast polling (see Appendix G: Fast Polling).
- Page 210 ® Varec Device Configuration Reference Manual March 2017 00809-0100-2460, Rev DB ® Varec Device Configuration...
- Page 211 Index Reference Manual March 2017 00809-0100-2460, Rev DB Index ......124 Numerics Configuration recovery .
- Page 212 Restore button Rosemount 2460 ........53 device type .
- Page 213 ....... . 60 Web Interface Rosemount 2460 ....... 63, 64, 146, 167 .
- Page 214 Index Reference Manual March 2017 00809-0100-2460, Rev DB Index...
- Page 216 Standard Terms and Conditions of Sale can be found on the Terms and Conditions of Sale page. The Emerson logo is a trademark and service mark of Emerson Electric Co. Middle East and Africa Regional Office Rosemount and Rosemount logotype are trademarks of Emerson. Emerson Automation Solutions All other marks are the property of their respective owners.
Need help?
Do you have a question about the Rosemount 2460 and is the answer not in the manual?
Questions and answers