Emerson Rosemount 2120 Reference Manual
Level switch
Hide thumbs
Also See for Rosemount 2120:
- Reference manual (72 pages) ,
- Quick start manual (40 pages) ,
- Manual supplement (16 pages)

Related Manuals for Emerson Rosemount 2120


Summary of Contents for Emerson Rosemount 2120
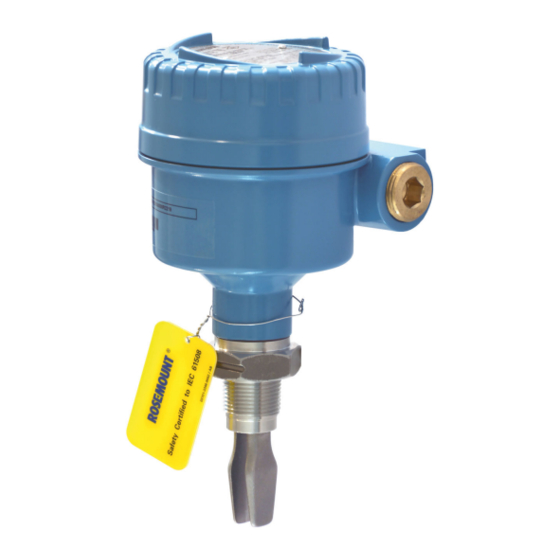
- Page 1 Reference Manual 00809-0100-4030, Rev GA March 2022 ™ Rosemount 2120 Level Switch Vibrating Fork...
- Page 2 • 1-800-654-7768 (24 hours a day — includes Canada) • Outside of these areas, contact your local Emerson representative. WARNING Failure to follow safe installation and servicing guidelines could result in death or serious injury. Ensure the level switch is installed by qualified personnel and in accordance with applicable code of practice.
- Page 3 Equipment ratings and certifications are no longer valid on any products that have been damaged or modified without the prior written permission of Emerson. Any continued use of product that has been damaged or modified without the written authorization is at the customer’s sole risk and expense.
-
Page 5: Table Of Contents
6.6 Spare parts..........................60 6.7 Replacement and calibration of cassettes.................. 61 6.8 Opening the lid (cover)......................63 6.9 Service support..........................63 Appendix A Specifications and reference data................65 A.1 General............................65 A.2 Physical specifications....................... 65 A.3 Performance specifications......................67 A.4 Electrical specifications......................67 Rosemount 2120 Level Switch... - Page 6 Contents Reference Manual March 2022 00809-0100-4030 A.5 Functional specifications......................68 A.6 Environmental specifications.....................68 A.7 Dimensional drawings....................... 71 Reference Manual...
-
Page 7: Chapter 1 Introduction
Introduction Using this manual The sections in this manual provide detailed information on installing, operating, and maintaining the Rosemount 2120 Level Switch - Vibrating Fork. The sections are organized as follows: Level switch overview provides a description of the level switch and its basic principles. - Page 8 Introduction Reference Manual March 2022 00809-0100-4030 Reference Manual...
-
Page 9: Level Switch Overview
Process characteristics Emerson's vibrating fork technology is virtually unaffected by turbulence, foam, solids content, coating products, and liquid properties. The natural frequency (1400 Hz) of the fork avoids interference from plant vibration that may cause false switching to a wet state. -
Page 10: Application Examples
Spillage caused by overfilling can be hazardous to people and the environment, resulting in lost product and potentially high clean-up costs. The Rosemount 2120 is an overfill prevention product from Emerson that can be used as one of multiple layers of protection. - Page 11 By selecting the option of direct load switching or relay electronics, the Rosemount 2120 is ideal for reliable pump control and can be used to protect against pumps running dry.
-
Page 12: Components Of The Level Switch
2.5.2 Fork design The “fast drip” design allows the liquid to be quickly drawn away from the fork tip, making the Rosemount 2120 quicker and more responsive in high density or viscous liquid applications. Reference Manual... - Page 13 Magnetic test point A magnetic test point is located on the side of the housing, allowing a functional test of the Rosemount 2120 and a system connected to it. Holding a magnet to the test point causes the output to change state.
- Page 14 Level switch overview Reference Manual March 2022 00809-0100-4030 Reference Manual...
-
Page 15: Chapter 3 Mechanical Installation
In explosion-proof/flameproof and non-incendive installations, do not remove the housing cover when power is applied to the level switch. The housing cover must be fully engaged to meet flameproof/explosion-proof requirements. Rosemount 2120 Level Switch... -
Page 16: Installation Considerations
Before installing the level switch, review the safety, environmental, application, and pre- installation sections. 3.2.1 Environmental considerations The Rosemount 2120 is weatherproof and protected against the ingress of dust, but must be protected from flooding. Avoid installing the level switch near heat sources. Reference Manual... - Page 17 Figure 3-1: Environmental Considerations 3.2.2 Application considerations The Rosemount 2120 is a wired point-level device for use on open or closed vessels (tanks) and in pipework containing liquid mediums. For most liquids, including coating, aerated liquids and slurries, the function is virtually unaffected by flow, turbulence, bubbles, foam, vibration, solid particles, build-up, or properties of the liquid medium.
- Page 18 Emerson. Foams In almost all cases, the Rosemount 2120 is insensitive to foams (i.e. does not see the foam). However in rare occasions, some very dense foams may be seen as liquid; known examples of this are found in ice-cream and orange juice manufacturing.
- Page 19 Figure 3-3: Switching Point in Inches (Millimeters) (2.5) (13) (13) Note When mounted vertically, a low density medium has a switching point closer to the process connection. A high density medium has a switching point closer to fork tip. Rosemount 2120 Level Switch...
- Page 20 Mechanical installation Reference Manual March 2022 00809-0100-4030 3.2.3 Pre-installation considerations Measurement accuracy is dependent upon the proper installation of the device. Keep in mind the need for easy access, personnel safety, practical field calibration, and a suitable environment for the device. Device identification To identify a version of the level switch, see the labels on the housing and on the electronics cassette inside the housing.
- Page 21 On metal housing versions, metal must contact metal to form a good seal. Always use Emerson's O-rings. Mounting orientation Mount the Rosemount 2120 at any angle that allows the level of the process medium to rise, fall, or flow through the fork gap. Related information...
- Page 22 Mechanical installation Reference Manual March 2022 00809-0100-4030 Insulation Figure 3-6: Insulation A. 3.9 in. (100 mm) clearance all around ® B. ROCKWOOL Pipe installation requirements • The inside pipe diameter (D) must be 1.4 in. (35 mm) or larger. • Ensure the fork tines intrude at least 0.9 in.
- Page 23 Extra consideration is needed if the plant vibration is close to the 1400 Hz operating frequency of the fork. Required supports for extended fork Supporting the extended fork avoids long fork length vibration. Figure 3-8: Vertical Installation (Standard) A. Maximum 3.28 ft. (1.0 m) B. 3.28 ft. (1.0 m) Rosemount 2120 Level Switch...
- Page 24 Mechanical installation Reference Manual March 2022 00809-0100-4030 Figure 3-9: Vertical Installation (Marine GL Approved) A. Maximum 1.3 ft. (0.4 m) B. 2.3 ft. (0.7 m) C. 0.65 ft. (0.2 m) Figure 3-10: Horizontal Installation (Standard) A. Maximum 3.28 ft. (1.0 m) B.
- Page 25 Reference Manual Mechanical installation 00809-0100-4030 March 2022 Figure 3-11: Horizontal Installation (Marine GL Approved) A. Maximum 1.3 ft. (0.4 m) B. 2.3 ft. (0.7 m) C. 0.65 ft. (0.2 m) Rosemount 2120 Level Switch...
-
Page 26: Installation Procedures
Mechanical installation Reference Manual March 2022 00809-0100-4030 Installation procedures 3.3.1 Process connection seals Figure 3-12: Process Connection Seals A. PTFE tape B. NPT or BSPT (R) thread C. Gasket D. BSPP (G) thread E. Tri Clamp F. The Tri Clamp seal is supplied in an accessory kit Reference Manual... - Page 27 The fork is correctly aligned by positioning the groove or notch as indicated (Figure 3-14). Figure 3-14: Correct Fork Alignment for Vessel (Tank) Installation A. Tri Clamp process connections have a circular notch B. Threaded process connections have a groove C. Flanged process connections have a circular notch Rosemount 2120 Level Switch...
- Page 28 Mechanical installation Reference Manual March 2022 00809-0100-4030 3.3.3 Mounting the threaded version Threaded vessel (tank) or pipework connection Procedure 1. Seal and protect the threads. Use anti-seize paste or PTFE tape according to site procedures. A gasket may be used as a sealant for BSPP (G) threaded connections. 2.
- Page 29 2. Tighten the bolts and nuts with sufficient torque for the flange and gasket. 3. Seal and protect the threads. Use anti-seize paste or PTFE tape according to site procedures. A gasket may be used as a sealant for BSPP (G) threaded connections. Rosemount 2120 Level Switch...
- Page 30 Mechanical installation Reference Manual March 2022 00809-0100-4030 4. Screw the level switch into the flange thread. Note Tighten using the hexagon nut only. A. Gasket for BSPP (G) threaded connection 3.3.4 Mounting the flanged version Procedure 1. Lower the level switch into the nozzle. A.
- Page 31 2. Tighten the bolts and nuts with sufficient torque for the flange and gasket. 3.3.5 Mounting the Tri Clamp version Procedure 1. Lower the level switch into the flange face. A. Seal (supplied with Tri Clamp) 2. Fit the Tri Clamp. Rosemount 2120 Level Switch...
- Page 32 Mechanical installation Reference Manual March 2022 00809-0100-4030 Reference Manual...
-
Page 33: Chapter 4 Electrical Installation
In explosion-proof/flameproof and non-incendive installations, do not remove the housing cover when power is applied to the level switch. The housing cover must be fully engaged to meet flameproof/explosion-proof requirements. Rosemount 2120 Level Switch... -
Page 34: Prepare The Electrical Connections
Electrical installation Reference Manual March 2022 00809-0100-4030 WARNING Electrical shock could cause death or serious injury. Avoid contact with the leads and terminals. High voltage that may be present on leads can cause electrical shock. Ensure the power to the level switch is off, and the lines to any other external power source are disconnected or not powered while wiring the level switch. - Page 35 Before use, check the cable glands and blanking plugs are suitably rated. • Isolate supply before connecting the switch or removing the electronics. • The Protective Earth (PE) terminal must be connected to an external earthing system. Note When replacing a cassette, it is important to re-calibrate. Rosemount 2120 Level Switch...
- Page 36 The Rosemount 2120 requires a minimum current to operate (I ), which continues to flow when the output is ‘off’. If selecting a relay to wire in series with the Rosemount 2120, ensure the drop-out voltage of the relay is greater than the voltage generated across the relay coil when I flows through it.
- Page 37 Mode: wet on, low level alarm < 4 mA < 4 mA 12 V 12 V DPST DPST DPST DPST LED on continuously LED flashes every second LED on continuously LED flashes every second = Load on = Load off Rosemount 2120 Level Switch...
- Page 38 Electrical installation Reference Manual March 2022 00809-0100-4030 PNP/PLC cassette Figure 4-2: PNP/PLC (3-wire) Cassette (Yellow Label) – Code G Wet On Mode O/P 0V F = Fuse 2A(T) Table 4-3: Electrical Parameters Parameter Value 20 - 60 Vdc < 4 mA + I <...
- Page 39 <100 μA <100 μA < 3 V < 3 V PNP dc < 3 V < 3 V <100 μA <100 μA LED on continuously LED flashes every second LED on continuously LED flashes every second Rosemount 2120 Level Switch...
- Page 40 Electrical installation Reference Manual March 2022 00809-0100-4030 Relay DPCO cassette (standard version) Figure 4-3: Relay DPCO Cassette, Standard Version (Green Label) – Code V Fuse 0.5 (T) DPST Note A DPST (Double Pole, Single Throw) on/off switch must be fitted for safe disconnection of the power supply.
- Page 41 NC C NO NC C NO NC C NO NC C NO NC C NO NC C NO NC C NO NC C NO LED on continuously LED flashes every second LED on continuously LED flashes every second Rosemount 2120 Level Switch...
- Page 42 A DPST (Double Pole, Single Throw) on/off switch must be fitted for safe disconnection of the power supply. Fit the DPST switch as near as possible to the Rosemount 2120. Keep the DPST switch free of obstructions. Label the DPST switch to indicate it is the supply disconnection device for the Rosemount 2120.
- Page 43 NC C NO NC C NO NC C NO NC C NO NC C NO NC C NO NC C NO NC C NO LED on continuously LED flashes every second LED on continuously LED flashes every second Rosemount 2120 Level Switch...
- Page 44 Figure 4-5: NAMUR Cassette (Light Blue Label) – Code K A. A certified intrinsically safe isolating amplifier to IEC 60947-5-6 Note • This cassette is suitable for Intrinsically Safe (IS) applications and requires a certified isolating barrier. See the Rosemount 2120 Product Certifications document for Intrinsically Safe approvals. •...
- Page 45 Mode: dry on, high level alarm Mode: wet on, low level alarm > 2.2 mA < 1.0 mA > 2.2 mA < 1.0 mA LED on continuously LED flashes every second LED on continuously LED flashes every second Rosemount 2120 Level Switch...
- Page 46 Figure 4-6: 8/16 mA Cassette (Dark Blue Label) – Code H A. A certified intrinsically safe isolating amplifier to IEC 60947-5-6 Note • This cassette is suitable for Intrinsically Safe (IS) applications and requires a certified isolating barrier. See the Rosemount 2120 Product Certifications document for Intrinsically Safe approvals. •...
- Page 47 Mode: dry on, high level alarm Mode: wet on, low level alarm > 15 mA < 8.5 mA > 15 mA < 8.5 mA LED on continuously LED flashes every second LED on continuously LED flashes every second Rosemount 2120 Level Switch...
-
Page 48: Connect Wiring And Power Up
Electrical installation Reference Manual March 2022 00809-0100-4030 4.2.6 Grounding Make sure grounding is done according to national and local electrical codes. Failure to do so may impair the protection provided by the equipment. Signal cable shield grounding Make sure the instrument cable shield is: •... - Page 49 Versions of the Rosemount 2120 with a glass-filled-nylon housing are not explosion-proof/flameproof. They do not have a cover-lock. 3. Remove the plastic plugs. Versions of the Rosemount 2120 with a glass-filled-nylon housing do not have plastic plugs fitted. 4. Pull cables through the cable gland/conduits.
- Page 50 Electrical installation Reference Manual March 2022 00809-0100-4030 5. Connect the cable wires (see Wiring diagrams for other cassettes). Metal housing: Glass-filled-nylon housing: 6. Ensure proper grounding. Reference Manual...
- Page 51 Reference Manual Electrical installation 00809-0100-4030 March 2022 7. Tighten the cable glands. Apply PTFE tape or other sealant to the threads. Metal housing: Glass-filled-nylon housing: Note Make sure to arrange the wiring with a drip loop. Rosemount 2120 Level Switch...
- Page 52 Electrical installation Reference Manual March 2022 00809-0100-4030 8. Plug and seal the unused conduit connection to avoid moisture and dust accumulation inside the housing. Apply PTFE tape or other sealant to the threads. Metal housing: Glass-filled-nylon housing: 9. Attach and tighten the cover. Make sure the cover is fully engaged.
-
Page 53: Chapter 5 Operation
Figure 5-2: Typical Settings for High Level Applications Dry On Wet On Seconds Delay A. Mode “Dry On” and 1 second time delay The "Wet On" mode is recommended for low level alarm installations (Figure 5-3). Rosemount 2120 Level Switch... -
Page 54: Led Indication Status
Operation Reference Manual March 2022 00809-0100-4030 Figure 5-3: Typical Settings for Low Level Applications Dry On Wet On Seconds Delay A. Mode “Wet On” and 1 second time delay 5.1.1 Set the mode switch and switching time delay Procedure 1. Select “Dry on” or “Wet on” mode. 2. -
Page 55: Service And Troubleshooting
In explosion-proof/flameproof and non-incendive installations, do not remove the housing cover when power is applied to the level switch. The housing cover must be fully engaged to meet flameproof/explosion-proof requirements. Rosemount 2120 Level Switch... -
Page 56: Magnetic Test Point
A magnetic test point is marked on the side of the housing to allow a functional test of the Rosemount 2120 in the overall system. By touching a magnet to the target, the output from the level switch will change state while the magnet is present. - Page 57 Figure 6-1: Magnetic Test Point (Glass-filled Nylon Housing) MAGNETIC MAGNETIC TEST TEST POINT POINT MAGNETIC TEST POINT A. Output off B. Output on Figure 6-2: Magnetic Test Point (Metal Housing) A. Output off B. Output on Rosemount 2120 Level Switch...
-
Page 58: Visual Inspection
Service and troubleshooting Reference Manual March 2022 00809-0100-4030 Visual inspection Visually examine the level switch and do not use if it is damaged. Check: • The housing cover, cable glands, and blanking plugs are fitted securely. • The LED flash rate is once every second or continually on. Figure 6-3: Visual Inspection Related information LED indication status... -
Page 59: Troubleshooting
Check the electrical installation for a load fault (current is too high or a short-circuit). Symptom or indication Visual inspection found fork damage. Recommended actions Contact Emerson to report the damage and discuss how to get a replacement. Symptom or indication Visual inspection found thick encrustation on the forks. Recommended actions Carefully clean the fork. -
Page 60: Spare Parts
Suppress the cause of the interference. Symptom or indication Cassette has been fitted from another level switch. Recommended actions Fit the factory supplied cassette and then calibrate. Spare parts See the Rosemount 2120 Product Data Sheet for the latest information about spare parts. Reference Manual... -
Page 61: Replacement And Calibration Of Cassettes
Procedure 1. Isolate and disconnect the power to the Rosemount 2120, and insulate the ends of the wires as a safety precaution. There may be more than one power source connected to a relay cassette. - Page 62 6. Set the mode switch to “Wet On” with a one second delay, ready for calibration (see Figure 6-6). Figure 6-6: Mode Switch Setting (Replacement Cassette) 7. Reconnect the power supplies to the Rosemount 2120. 6.7.2 Calibrate the replacement cassette Prerequisites Some of the calibration sequence steps are time-dependent and must be carried out within the noted times.
-
Page 63: Opening The Lid (Cover)
• No rain can enter into the housing. Service support To expedite the return process outside of the United States, contact the nearest Emerson representative. Within the United States, call the Emerson Instrument and Valve Response Center using the 1-800-654-RSMT (7768) toll-free number. This center, available 24 hours a day, will assist you with any needed information or materials. - Page 64 Service and troubleshooting Reference Manual March 2022 00809-0100-4030 Emerson Instrument and Valve Response Center representatives will explain the additional information and procedures necessary to return goods exposed to hazardous substances. Reference Manual...
-
Page 65: Appendix A Specifications And Reference Data
Emerson is not in a position to evaluate or guarantee the compatibility of the process fluid or other process parameters with the product, options, configuration or materials of construction selected. - Page 66 (51 mm) sizes, when ordered with Surface Finish option codes 3, 4, 7 and 8. Emerson certifies no process wetted components used in this product contain substances of animal origin. Materials used in the production or processing of wetted components for this product meet the requirements stated in EMA/410/01 Rev.
-
Page 67: Performance Specifications
Direct Load and PNP/PLC electronics Load-missing protection Direct Load and PNP/PLC electronics Surge protection (to IEC61326) All electronics A.4.2 Terminal connection (wire diameter) Minimum 26 AWG, maximum 14 AWG (0.13 to 2.5 mm ). Note national regulations. Rosemount 2120 Level Switch... - Page 68 Specifications and reference data Reference Manual March 2022 00809-0100-4030 A.4.3 Conduit plugs/cable glands Metal housing Conduit entries for explosion-proof areas are shipped with one Exd plug (loose in bag) and two dust caps fitted. Use suitably rated cable glands. Unused conduit entries must be sealed with a suitably rated blanking plug.
- Page 69 At 100 °F (38 °C), the pressure rating decreases with an increasing process temperature. At 122 °F (50 °C), the pressure rating decreases with an increasing process temperature. At 248 °F (120 °C), the rating decreases with an increasing process temperature. Rosemount 2120 Level Switch...
- Page 70 Specifications and reference data Reference Manual March 2022 00809-0100-4030 A.6.3 Maximum and minimum operating temperatures Figure A-2 for the maximum and minimum operating temperatures. The ambient temperature for a 8/16 mA cassette is limited to 158 °F (70 °C) in dust applications.
- Page 71 Specifications and reference data 00809-0100-4030 March 2022 Dimensional drawings Refer to the Type 1 Drawings on the Rosemount 2120 web page for dimensions of the 1- in. BSPP threaded versions. Figure A-3: ¾- and 1-in. Threaded Mounting (Standard Length) 3.5 (90) 4 (102) 4.7 (120)
- Page 72 Specifications and reference data Reference Manual March 2022 00809-0100-4030 Figure A-4: ¾- and 1-in. Threaded Mounting (Extended Length) 3.5 (90) 4 (102) 4.7 (120) (151) (171) (44) (44) A. Glass-filled nylon housing B. Aluminum/stainless steel housing C. Allow 1.2 (30) clearance to remove cover D.
- Page 73 E. Cable entry M20 x 1.5 or ¾-in. NPT F. 2.6 (65) A/F hexagon G. 2-in. thread H. 0.5 (13) switchpoint (when mounted vertically) I. 0.5 (13) switchpoint (when mounted horizontally) J. Customer specified fork length (see Table A-2) Dimensions are in inches (millimeters). Rosemount 2120 Level Switch...
- Page 74 Specifications and reference data Reference Manual March 2022 00809-0100-4030 Figure A-6: Tri Clamp Mounting (Standard Length, Surface Finish Codes 1 and 2) 4 (102) 4.7 (120) 3.5 (90) (132) (155) Ø0.9 (23) Ø0.9 (23) (64) (44) (64) (44) A. Glass-filled nylon housing (and not hygienically approved) B.
- Page 75 E. Cable entry M20 x 1.5 or ¾-in. NPT F. 1½-in. (38 mm) or 2-in (51 mm) Tri Clamp G. 0.5 (13) switchpoint (when mounted vertically) H. 0.5 (13) switchpoint (when mounted horizontally) Dimensions are in inches (millimeters). Rosemount 2120 Level Switch...
- Page 76 Specifications and reference data Reference Manual March 2022 00809-0100-4030 Figure A-8: Tri Clamp Mounting (Extended Length, Surface Finish Codes 1 and 2) 4 (102) 4.7 (120) 3.5 (90) (132) (162) Ø1.56 (39) Ø1.56 (39) Ø1.14 (29) Ø1.14 (29) (44) (44) A.
- Page 77 F. 1½-in. (38 mm) or 2-in. (51 mm) Tri Clamp G. 0.5 (13) switchpoint (when mounted vertically) H. 0.5 (13) switchpoint (when mounted horizontally) I. Customer specified fork length (see Table A-2) Dimensions are in inches (millimeters). Rosemount 2120 Level Switch...
- Page 78 Specifications and reference data Reference Manual March 2022 00809-0100-4030 Figure A-10: Flange Mounting (Standard Length) 3.5 (90) 4 (102) 4.7 (120) (121) (154) (102) (102) (44) (44) A. Glass-filled nylon housing B. Aluminum/stainless steel housing C. Allow 1.2 (30) clearance to remove cover D.
- Page 79 F. Ø0.9 (23) for up to 1 in. flange; Ø1.14 (29) for 1½ in. or larger flange; Ø1.18 (30) for 1½ in. or larger coated flange G. 0.5 (13) switchpoint (when mounted vertically) H. 0.5 (13) switchpoint (when mounted horizontally) I. Customer specified fork length (see Table A-2) Dimensions are in inches (millimeters). Rosemount 2120 Level Switch...
- Page 80 Specifications and reference data Reference Manual March 2022 00809-0100-4030 Figure A-12: Mobrey ‘A’ Flange 3.62 (92) 3.62 Ø2.68 (92) (Ø68) A. 4 off Ø0.55 (Ø14) holes equi-spaced on 3.62 (92) PCD Dimensions are in inches (millimeters). Figure A-13: Mobrey ‘G’ Flange Ø5.00 Ø2.68 (Ø127)
- Page 81 Reference Manual 00809-0100-4030 March 2022 Rosemount 2120 Level Switch...
- Page 82 2022 Emerson. All rights reserved. Emerson Terms and Conditions of Sale are available upon request. The Emerson logo is a trademark and service mark of Emerson Electric Co. Rosemount is a mark of one of the Emerson family of companies. All other marks are the property...
Need help?
Do you have a question about the Rosemount 2120 and is the answer not in the manual?
Questions and answers