Table of Contents
Advertisement
Place this chapter in the OVEN category section of the equipment manual.
903
OWNERS MANUAL
MODEL
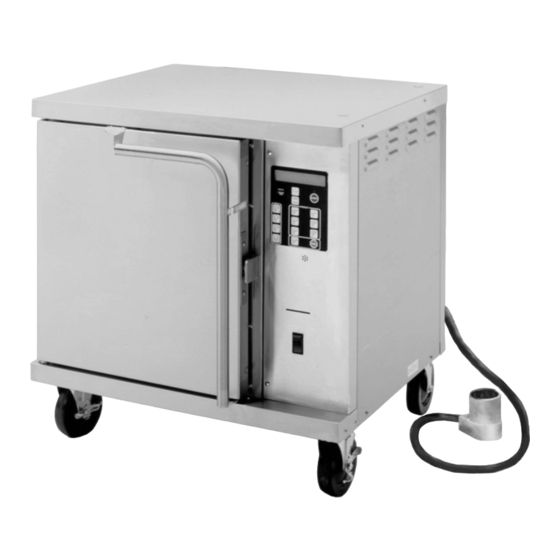
M4200
VENTED
CONVECTION
OVEN
Includes
OPERATING
INSTRUCTIONS
MAINTENANCE
INSTRUCTIONS
PARTS LIST
PROGRAMMING
INSTRUCTIONS
M4200 Convection Oven
IMPORTANT: DO NOT DISCARD THIS MANUAL
This manual is considered to be part of the appliance and is to be given to the OWNER or
MANAGER of the restaurant, or to the person responsible for TRAINING OPERATORS of
this appliance. Additional manuals are available from your WELLS DEALER.
THIS MANUAL MUST BE READ AND UNDERSTOOD BY ALL PERSONS USING OR
INSTALLING THIS APPLIANCE. Contact your WELLS DEALER if you have any
questions concerning installation, operation or maintenance of this equipment.
PRINTED IN UNITED STATES OF AMERICA
04
p/n 304618 Rev. B ECN-12746
M903
0914 cps
Advertisement
Table of Contents

Related Manuals for Wells M4200


Summary of Contents for Wells M4200
-
Page 1: Owners Manual
Additional manuals are available from your WELLS DEALER. THIS MANUAL MUST BE READ AND UNDERSTOOD BY ALL PERSONS USING OR INSTALLING THIS APPLIANCE. Contact your WELLS DEALER if you have any questions concerning installation, operation or maintenance of this equipment. - Page 2 INTRODUCTION Thank You for purchasing this Wells Manufacturing Co. appliance. IMPORTANT: Use only factory authorized service parts. Proper installation, professional operation and consistent For factory authorized service, maintenance of this appliance will ensure that it gives you the very or to order factory authorized best performance and a long, economical service life.
-
Page 3: Table Of Contents
TABLE OF CONTENTS AGENCY LISTING INFORMATION WARRANTY PRECAUTIONS & GENERAL INFORMATION GENERAL SPECIFICATIONS INSTALLATION FEATURES & OPERATING CONTROLS OVEN FEATURES SMART CONTROLLER OPERATION OPERATION QUICK-GLANCE OPERATING GUIDE DAILY SET-UP COOK CYCLE OPERATION PROGRAMMING IMPORTANT: Programming to be performed by Qualified Personnel ONLY! ENTER PROGRAMMING MODE CHANGE PROGRAMMED SETTINGS PROGRAMMING... -
Page 4: Warranty
Seller’s obligation under this warranty is limited to the one year from the date of original installation or 18 months repair of defects without charge by a Wells Mfg. Co. factory from the date of shipment from our factory, whichever... -
Page 5: Precautions & General Information
Call your Authorized Wells Service Agent for service. followed. Damage to the The technical content of this manual, including any wiring diagrams,... -
Page 6: Specifications
SPECIFICATIONS DIMENSIONS APPLIANCE OVEN CAVITY Wide 30-1/8” (765mm) 14-3/8” (365mm) Deep 25-1/4” (641mm) oven only 21” (533mm) 27-7/8” (682mm) incl. handle High 25-1/8” (638mm) oven only 20” (508mm) 34” (863mm) incl. prep-top\ and casters Door Swing 20" (508mm )radius ELECTRICAL 208 VAC 3ø... -
Page 7: Installation
INSTALLATION UNPACKING & INSPECTION NOTE: DO NOT discard the carton or other packing Carefully remove the appliance from the carton. Remove all materials until you have protective plastic film, packing materials and accessories from the inspected the appliance for Appliance before connecting electrical power or otherwise performing hidden damage and tested it any installation procedure. - Page 8 LEGS. With a spirit level, check that the appliance is level front-to-back and side-to-side. 5. OTHER OPTIONAL KITS a. Kit 21445 Prep Top allows the top of the M4200 to be used as an NSF 4-compliant work surface. b. Kit 21342 Oven Stacking Kit allows M4200 units to be stacked 2-high.
- Page 9 INSTALLATION (continued) DANGER: ELECTRICAL SHOCK HAZARD ELECTRICAL CONNECTIONS MUST BE MADE BY A LICENSED ELECTRICIAN Electrical shock will cause death or serious injury. Refer to the nameplate on the front of the appliance. CAUTION: • Verify the ELECTRICAL SERVICE POWER. Risk of •...
-
Page 10: Features & Operating Controls
FEATURES & OPERATING CONTROLS M4200 CONVECTION OVEN FEATURES... - Page 11 FEATURES & OPERATING CONTROLS (continued) ITEM DESCRIPTION FUNCTION A. OPTIONAL PREP TOP Allows top of oven to be used as a work surface B. OVEN TOP Covers and protects top insulation C. OVEN DOOR Covers and provides access to oven cavity D1.
-
Page 12: Smart Controller
FEATURES & OPERATING CONTROLS (continued) SMART CONTROLLER... - Page 13 FEATURES & OPERATING CONTROLS (continued) BUTTON DESCRIPTION / FUNCTION VIEW View current temperature & setpoint temperature by pressing and holding 3 seconds. TEMP When baking multiple products can view time remaining. In program mode arrow indicates cursor will move to the right when entering data. PROG Press and hold for 5 seconds to enter into program mode.
-
Page 14: Quick-Glance Operating Guide
QUICK-GLANCE OPERATING GUIDE WELLS CONVECTION OVEN OPERATING INSTRUCTIONS (SEE OPERATION SECTION OF OWNERS MANUAL FOR MORE INFORMATION) START-UP AND NORMAL OPERATION ACTION DISPLAY WILL READ 1. Verify the oven is plugged into proper outlet. 2. Turn power switch to “ON” position. -
Page 15: Daily Set-Up
Exposed surfaces can be hot 2. Place the ON/OFF switch in the ON position. A double "beep" will to the touch and may cause sound, display will read WELLS BLOOMFIELD for 3 seconds, burns. then display oven status: Oven door will be hot to the a. -
Page 16: Cook Cycle Operation
OPERATION (continued) COOK CYCLE OPERATION CAUTION: HOT SURFACE 1. Slide racks of product into oven as appropriate. Shelf positions required for quality baked products are: Exposed surfaces can be hot NO. OF PANS RACK POSITION to the touch and may cause OF PRODUCT UTILIZED burns. -
Page 17: Enter Programming Mode
PROGRAMMING INSTRUCTIONS IMPORTANT: This oven is pre-programmed from the factory and does not require programming adjustments under normal circumstances. Any programming changes must be performed by qualified persons only. ENTER PROGRAM MODE NOTE: Oven must be turned ON. No cooling timer or bake cycle can be active. Special Button Functions: Scroll through the options by pressing the PROG button: # 2 and #8 allows scrolling up or down;... - Page 18 PROGRAMMING INSTRUCTIONS (continued) IMPORTANT: This oven is pre-programmed from the factory and does not require programming adjustments under normal circumstances. Any programming changes must be performed by qualified persons only. CHANGE SETTINGS for name, cooking time, cooking temperature and cooling time NOTE: Cannot go into edit or view program mode when cooling timer s activated or when in a bake cycle.
- Page 19 PROGRAMMING INSTRUCTIONS (continued) IMPORTANT: This oven is pre-programmed from the factory and does not require programming adjustments under normal circumstances. Any programming changes must be performed by qualified persons only. ACTION DISPLAY WILL READ IMPORTANT: DO NOT CHANGE FACTOR VALUES OR TIME VALUES FOR EXISTING MENU ITMES Press PROG button.
-
Page 20: Enabling Scratch Biscuit Button (#6)
PROGRAMMING INSTRUCTIONS (continued) IMPORTANT: This oven is pre-programmed from the factory and does not require programming adjustments under normal circumstances. Any programming changes must be performed by qualified persons only. ENABLING SCRATCH BISCUIT BUTTON (#6) ACTION DISPLAY WILL READ 1. Enter programming mode, press and hold PROG button for 5 seconds CAL TEMP 2. -
Page 21: Instructions To Change Cookie Settings
INSTRUCTIONS FOR CHANGING COOKIE SETTINGS The Wells Convection Oven comes pre-programmed from the factory for cookies baked at 6:00 minutes at a temperature of 375 F. Following is the procedure to change the settings only in the event your location uses a different cookie or manufacturer. -
Page 22: Install Operating Systems Software
TESTING CARD 28 seconds is accepting information LOADING O/S 56 seconds LOADING DEFAULT MENU 1 second WELLS BLOOMFIELD 1 second Oven Will Start INCORRECT CARD (BEEP) Remove card 7. Audible alarm will sound and oven will start. Remove card from slot and return to protective packaging. -
Page 23: Transfer Menus From Card To Oven
PROGRAMMING INSTRUCTIONS (continued) IMPORTANT: Programming changes to be performed by qualified persons only. TRANSFER MENUS FROM MENU CARD TO CONTROLLER Loading new settings to Controller from Menu Card to Oven using Smart Card Reader NOTE: Oven must be in turned ON. No cooling timer or bake cycle can be active. ACTION DISPLAY WILL READ 1. -
Page 24: Default Settings
PROGRAMMING INSTRUCTIONS (continued) RECOMMENDED OVEN SETTINGS AS OF JAN. 1, 2004 IMPORTANT: Programming changes to be performed by qualified persons only. -
Page 25: Cleaning Instructions
CLEANING INSTRUCTIONS CAUTION: PREPARATION Allow oven to cool to 150ºF or less ELECTRIC SHOCK FREQUENCY Daily HAZARD TOOLS Disconnect appliance from Clean Towels electric power before cleaning. DAILY CLEANING 1. With power switch ON, open oven door. Press UTILITY key. CAUTION: Display will read FAST COOL MODE. - Page 26 CLEANING INSTRUCTIONS (continued) CAUTION: PREPARATION Allow oven to cool to 150ºF or less ELECTRIC SHOCK FREQUENCY Monthly HAZARD TOOLS Disconnect appliance from Fiber Brush, Plastic Scouring Pad, Plastic Scraper electric power Mild Detergent, McD Sanitizer, before cleaning. APC All Purpose Cleaner, Clean Towel CAUTION: MONTHLY CLEANING BURN HAZARD...
-
Page 27: Troubleshooting Suggestions
Fan motor is not working properly Contact Authorized Wells Displays <MTR ERROR> Service Agency for repairs NOTE: There are no user serviceable components in the appliance. In all cases of damage or component malfunction, contact your Authorized Wells Service Agency for repairs. -
Page 28: Preventative Maintenance
PREVENTATIVE MAINTENANCE TEMPERATURE CALIBRATION THE FOLLOWING PROCEDURE IS TO BE PERFORMED BY QUALIFIED PERSONNEL ONLY PRECAUTIONS: BURN HAZARD - Wear appropriate protective gloves FREQUENCY: Monthly TOOLS: Digital Thermometer with Oven Probe TEMPERATURE CALIBRATION 1. Verify power cord is plugged into appropriate supply. 2. -
Page 29: Hinge Adjustment
PREVENTATIVE MAINTENANCE (continued) CAUTION: HINGE ADJUSTMENT BURN HAZARD PRECAUTIONS: None Allow appliance to cool FREQUENCY: As Needed completely before adjusting. TOOLS: Phillips (+) Screwdriver 7/16" Nut Driver 7/8" and 1-1/8" Wrenches THE FOLLOWING PROCEDURE IS TO BE PERFORMED BY QUALIFIED PERSONNEL ONLY 1. -
Page 30: Exploded View And Parts List
EXPLODED VIEW and PARTS LIST... - Page 31 EXPLODED VIEW and PARTS LIST (continued) ITEM DESCRIPTION SVC P/N ASSY, CAVITY PANEL, CONTROL BRACKET, MOTOR MOUNT BRACKET, CAVITY SUPPORT GROMMET, 7/8" O.D. 51040 ASSY, BAFFLE SUPPORT MOUNT, TEMP SENSORS COVER, DOOR GASKET CLIP, RACK SUPPORT 63889 HANDLE ASSEMBLY LIGHT, SIGNAL “HEAT” 65145 BRACKET, HI-LIMIT THERMO ASSY, DOOR COMPLETE...
- Page 32 EXPLODED VIEW and PARTS LIST (continued) M4200-3SV...
- Page 33 GASKET, ELEMENT 63834 COVER, ELEMENT GASKET INNER 63836 COVER, ELEMENT GASKET OUTER 63837 TIME & TEMPERATURE CONTROLER 504616 SWITCH, ON/OFF 505295 WIRE SET (not shown) SLEEVING, FIBREGLASS (not shown) TIE, WIRE, STANDOFF (not shown) OP. MANUAL M4200 (not shown) Lit 304618...
-
Page 34: Wiring Diagram
WIRING DIAGRAM... -
Page 35: Parts & Service
OVEN RACK, REPLACEMENT (ea.) 21376 PREP TOP 21445 authorized replacement WALL SPACER KIT 21717 parts, contact your Wells LEG KIT, OVEN, S/S (set of 4) 22226 authorized service agency, VENTING KIT, SINGLE OVEN 505504 or call: Wells Manufacturing Co. - Page 36 PREPARED FOR PRINTED IN UNITED STATES OF AMERICA...
Need help?
Do you have a question about the M4200 and is the answer not in the manual?
Questions and answers