Table of Contents
Advertisement
Quick Links
Download this manual
See also:
User Manual
Advertisement
Table of Contents

Subscribe to Our Youtube Channel
Related Manuals for Planet mh-5000


Summary of Contents for Planet mh-5000
- Page 1 Multi-Homing Security Gateway MH-5000 User’s Manual...
-
Page 2: Customer Service
Information in this User’s Manual is subject to change without notice and does not represent a commitment on the part of PLANET. PLANET assumes no responsibility for any inaccuracies that may be contained in this User ’s Manual. PLANET makes no commitment to update or keep current the information in this User’s Manual, and reserves the right to make improvements to this User ’s Manual... - Page 3 Multi-Homing Security Gateway User’s Manual Revision User’s Manual for PLANET Multi-Homing Security Gateway Model: MH-5000 Rev: 1.0 (September, 2004) Part No. EM-MH5Kv1...
-
Page 4: Table Of Contents
Typical Example Topology ..................16 Changing the LAN1 IP Address ..................17 2.2.1 From LAN1 to configure MH-5000 LAN1 network settings............17 2.2.2 From CLI (command line interface) to configure MH-5000 LAN1 network settings .......18 2.2.3 The design principle ........................19 2.2.4 Web GUI design principle ......................19 2.2.5... - Page 5 Methods ........................38 Steps...........................39 5.3.1 Telnet ............................39 5.3.2 WWW............................39 5.3.3 SNMP............................39 5.3.4 ICMP ............................39 Chapter 6 NAT ......................40 Demands........................40 Objectives ........................41 Methods ........................41 Steps...........................42 6.4.1 Setup Many-to-one NAT rules.....................42 6.4.2 Setup Virtual Server for the FtpServer1..................46 NAT modes introduction....................50 6.5.1 Many-to-One type........................50 6.5.2 Many-to-Many type........................51 6.5.3...
- Page 6 9.2.7 IPSec Protocols ..........................67 Make VPN packets pass through MH-5000 ..............68 Chapter 10 Virtual Private Network – IPSec ............69 10.1 Demands........................69 10.2 Objectives ........................69 10.3 Methods ........................69 10.4 Steps...........................70 10.4.1 DES/MD5 IPSec tunnel: the IKE way ..................70 10.4.2 DES/MD5 IPSec tunnel: the Manual-Key way ................80 Chapter 11 Virtual Private Network –Dynamic IPSec..........88...
- Page 7 15.6 Steps for SMTP Relay....................116 Chapter 16 Content Filtering – FTP Filtering............117 16.1 Demands........................117 16.2 Objectives .........................117 16.3 Methods ........................117 16.4 Steps.........................118 Chapter 17 Intrusion Detection Systems.............121 17.1 Demands........................121 17.2 Objectives .........................121 17.3 Methods ........................121 17.4 Steps.........................122 Chapter 18 Bandwidth Management..............123 18.1 Demands........................123 18.2...
-
Page 8: Chapter 1 Quick Start
Steps for Backup / Restore Configurations ...............141 22.8 Steps for Reset password ..................142 Appendix A Command Line Interface (CLI) .............143 Enable the port of MH-5000 ..................143 CLI commands list (Normal Mode)................143 A.3 CLI commands list (Rescue Mode)..................145 Appendix B Troubleshooting................147 Appendix C System Log Syntax...............151... -
Page 9: Quick Start
1.2 Five steps to configure MH-5000 quickly Let’s look at the common network topology without MH-5000 applying like Figure 1-1. This is a topology which is almost used by all the small/medium business or SOHO use as their internet connectivity. Although that your topology is not necessarily the same diagram below, but it still can give you a guideline to configure MH-5000 quickly. - Page 10 Quick Start Here we would like to alter the original IP Sharer with the MH-5000 like Figure 1-2. If we hope to have MH-5000 to replace the IP Sharer, we just need to simply execute the following five steps as Figure 1-3 showed. By these steps, we hope to build an image to tell you how to let MH-5000 work basically.
-
Page 11: Wiring The Mh-5000
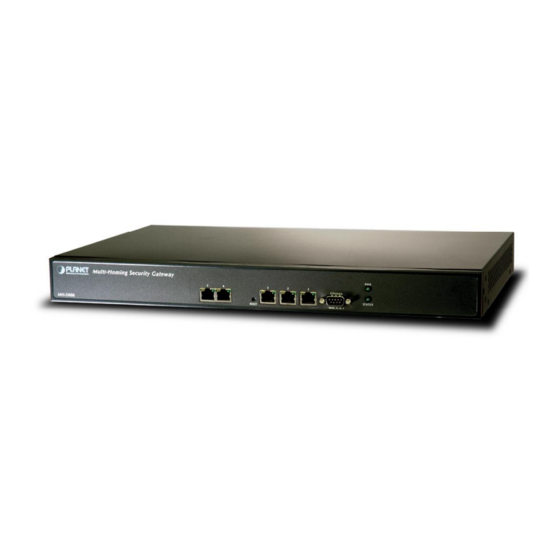
1.3 Wiring the MH-5000 First, connect the power cord to the socket at the back panel of the MH-5000 as in Figure 1-4 and then plug the other end of the power adapter to a wall outlet or power strip. The Power LED will turn ON to indicate proper operation. - Page 12 Chapter 1 MH-5000 User Manual Quick Start Figure 1-5 Front end of the MH-5000...
-
Page 13: Default Settings And Architecture Of Mh-5000
1.4 Default Settings and architecture of MH-5000 You should have an Internet account already set up and have been given most of the following information as Table 1-1. Fill out this table when you edit the web configuration of MH-5000. Items... -
Page 14: Using The Setup Wizard
A computer on your LAN1 must be assigned an IP address and Subnet Mask from the same range as the IP address and Subnet Mask assigned to the MH-5000, in order to be able to make an HTTPS connection using a web browser. The MH-5000 is assigned an IP address of 192.168.1.254 with a Subnet Mask of 255.255.255.0 by default. - Page 15 Chapter 1 MH-5000 User Manual Quick Start Step 1. Login Connect to https://192.168.1.254 Type “admin” in the account field, “admin” in the Password field and click Login. Step 2. Run Setup Wizard After login to https://192.168.1.254 Click the Run Setup Wizard.
- Page 16 DHCP client BASIC SETUP > Wizard > Next > DHCP If Get IP Automatically (DHCP) is selected, MH-5000 will request for IP address, netmask, and DNS servers from your ISP. You can use your preferred DNS by clicking the DNS IP Address and then completing the Primary DNS and Secondary DNS server IP addresses.
-
Page 17: Internet Connectivity
Finish to close the wizard. 1.6 Internet Connectivity After setting up MH-5000 with the wizard, MH-5000 can connect to the ISP. In this chapter, we introduce LAN1-to-WAN1 Connectivity to explain how the computers under LAN1 can access the Internet at WAN1 through MH-5000. -
Page 18: Lan1-To-Wan1 Connectivity
The LAN Settings page allows you to modify the IP address and Subnet Mask that will identify the MH-5000 on your LAN. This is the IP address you will enter in the URL field of your web browser to connect to the MH-5000. It is also the IP address that all of the computers and devices on your LAN will use as their Default Gateway. -
Page 19: Wan1-To-Dmz1 Connectivity
Step 5. Check NAT Rules ADVANCED SETTINGS > NAT > NAT Rules The MH-5000 has added the NAT rules as the right diagram. The rule Basic-LAN1 means that, when matching the condition (requests of LAN/DMZ-to-WAN direction with its source IP... - Page 20 ISP. Step 5. Check NAT Rules ADVANCED SETTINGS > NAT > NAT Rules The MH-5000 has added the NAT rules as the right diagram. The rule Basic-DMZ1 (number 1) means that, when matching the condition (requests of LAN/DMZ-to-WAN direction with its source IP falling in the range of 10.1.1.254 / 255.255.255.0), the request...
- Page 21 WAN side cannot connect to a private-IP (ex.10.1.1.5) through the internet. The data connections would fail. After enabling this feature, the MH-5000 will translate the private IP/port into an IP/port of its own. Thus the problem is gracefully solved. Another point is to be sure to check “Auto update to Firewall...
- Page 22 Firewall/NAT rules when you Apply this page”, it will automatically add one Firewall rule in the WAN1 to DMZ1 direction. This firewall rule will let the packets with dest. IP address/port be matched with virtual server rule in order to pass through MH-5000.
-
Page 23: Chapter 2 System Overview
MH-5000 Multi-Homing Security Gateways. The VPN tunnel secures communications between Organizations more safely. We will focus on how to build up the topology using the MH-5000 as the following Figure 2-1. In order to achieve this purpose, we need to know all the administration procedure. -
Page 24: Changing The Lan1 Ip Address
Management feature to manage your bandwidth. Chapter19 ~ Chapter21 System Maintenance In this part, we provide some useful skills to help you to justify MH-5000 more securely and steadily. 2.2 Changing the LAN1 IP Address The default settings of MH-5000 are listing in Table 1-1. However, the original LAN1 setting is 192.168.1.254/255.255.255.0 instead of 192.168.40.254/255.255.255.0 as in Figure 2-1. -
Page 25: From Cli (Command Line Interface) To Configure Mh-5000 Lan1 Network Settings
Warning: After you apply the changed settings, the network will be disconnected instantly since the network IP address you login is changed. 2.2.2 From CLI (command line interface) to configure MH-5000 LAN1 network settings Step 1. Use Console port to configure... -
Page 26: The Design Principle
2.2.4 Web GUI design principle Figure 2-2 You can select the functional area by the sequence in Web GUI If we want to configure MH-5000, we can follow the sequence as the Figure 2-2 illustrated. Step1. Select Main-function Step2. Select Sub-function Step3. - Page 27 Chapter 2 MH-5000 User Manual System Overview You may find many rules configuration in the MH-5000. They are distributed in the respective feature. These rules include NAT rule Virtual Server rule Firewall rule Policy route rule Bandwidth management rule The behavior of each rule is different, and so are their configuration parameters. But the designed principle of each rule is the same.
-
Page 28: Chapter 3 Basic Setup
1. Select the Fixed IP Address method in the MH-5000 Basic Setup/WAN settings/WAN1 IP, and then configure the related account and password in order to connet to the internet. 2. Configure the related network settings in the pages of the MH-5000 Basic Setup / DMZ settings / DMZ1 Status、 Basic Setup / LAN settings / LAN1 Status. - Page 29 Range / Format EXAMPLE Assignment Default WAN When Default WAN link is enabled, all the link packets sent out from MH-5000 will be via Enable/Disable Enabled (Gateway/DNS) this port. Get DNS Automatically à Get DNS related information from DHCP Server...
-
Page 30: Setup Dmz1, Lan1 Status
Chapter 3 MH-5000 User Manual Basic Setup User Name The user name of PPPoE account text string Password The password of PPPoE account text string G54688 Get DNS Automatically à Get DNS related information from PPPoE ISP Get DNS Get DNS... - Page 31 Chapter 3 MH-5000 User Manual Basic Setup Lease time(sec) Specify DHCP information lease time greater than 0 7200 None / RIPv1In / Determine to enable the dynamic routing protocol RIPv1In+out / Routing Protocol (RIP), to receive RIP message, to send out RIP...
-
Page 32: Setup Wan1 Ip Alias
Chapter 3 MH-5000 User Manual Basic Setup None / RIPv1In / Determine to enable the dynamic routing protocol RIPv1In+out / Routing Protocol None (RIP), to receive RIP message, to send out RIP RIPv2In / message if the message is received or not. - Page 33 Chapter 3 MH-5000 User Manual Basic Setup Step 2. Edit, Delete IP alias record BASIC SETUP > WAN Settings > IP Alias You can easily add, edit, or delete IP alias records by the Add, Edit, or Delete button. FIELD...
- Page 34 MH-5000 User Manual Step 3. See the IP alias setting in the BASIC SETUP > WAN Settings > WAN1 IP > Fixed IP Address “WAN1 IP” page After entering the IP alias address, it will show the result in the “WAN1 IP” page.
-
Page 35: Chapter 4 System Tools
1. Basic configurations for domain name, password, system time, timeout and services. 2. DDNS: Suppose the MH-5000’s WAN uses dynamic IP but needs a fixed host name. When the IP is changed, it is necessary to have the DNS record updated accordingly. To use this service, one has to register the account, password, and the wanted host name with the service provider. - Page 36 Figure 4-1 DDNS mechanism chart 3. DNS Proxy: After activating the DNS proxy mode, the client can set its DNS server to the MH-5000 (that is, send the DNS requests to the MH-5000). The MH-5000 will then make the enquiry to the DNS server and return the result to the client.
- Page 37 MH-5000 User Manual System Tools 4. DHCP Relay: Activate the DHCP relay mode of MH-5000 so that the MH-5000 will become the relay agent and relay the DHCP broadcast to the configured DHCP server. As the following Figure 4-3 described, WALL-1 redirects the DHCP request from the preconfigured port (LAN1) to the real DHCP server (10.1.1.4).
- Page 38 Figure 4-4 It is efficient to use SNMP Manager to monitor MH-5000 device 6. We can adjust the MH-5000 interface in the SYSTEM TOOLS > Admin Settings > Interface in according to our preference and requirement (3 WAN, 1 DMZ, 1 LAN). As the following Figure4-5 demonstrated, there are three ISP connected onto MH-5000.
-
Page 39: Steps
System Tools 4.4 Steps 4.4.1 General settings Step 1. General Setup SYSTEM TOOLS > Admin Settings > General Enter the Host Name as MH-5000, Domain Name as the domain name of your company Click Apply. FIELD DESCRIPTION EXAMPLE Host Name... - Page 40 You can also enter an IP address instead. Check the Continuously (every 3 min) update system clock and click Apply. The MH-5000 will immediately update the system time and will periodically update it. Check the Update system...
-
Page 41: Ddns Setting
We can configure the service name and numeric port number as the same group, so you can simply use the domain name for the configuration in the MH-5000. If you want to add/edit/delete the service record, just click the below button to add/edit/delete it. -
Page 42: Dns Proxy Setting
Enable DNS Proxy Enabled forwarding it to the assigned DNS server. When there is a response from assigned DNS server, then MH-5000 will forward it back to the host of the LAN/DMZ. Table 4-7 System Tools – DNS Proxy menu 4.4.4 DHCP Relay setting... -
Page 43: Snmp Control
System Tools FIELD DESCRIPTION EXAMPLE When the host of the LAN/DMZ in the MH-5000 internal network sends a DHCP request, MH-5000 will forward it automatically to the Enable DHCP Relay Enabled specified DHCP server (different subnet from the network segment of the DHCP client). -
Page 44: Change Mh-5000 Interface
Here we select 3 WAN (port1~3), 1 DMZ (port4), 1 LAN (port5). And then press apply button to reboot MH-5000. Note that the DMZ and LAN port IP addresses are going to be 10.1.1.254 and 192.168.1.254 after device finishes reboot. -
Page 45: Chapter 5 Remote Management
5.1 Demands Administrators may want to manage the MH-5000 remotely from any PC in LAN_1 with HTTP at port 8080, and from WAN_PC with TELNET. In addition, the MH-5000 may be more secure if monitored by a trusted host (PC1_1). What is more, the MH-5000 should not respond to ping to hide itself. -
Page 46: Steps
Check the LAN1 checkbox. In the Secure Client Address field. If you prefer indicated specified IP address. Just click the Selected, and enter the valid IP address for reading the SNMP MIBs at the MH-5000. Finally click the Apply button. 5.3.4 ICMP Step 1. Setup ICMP SYSTEM TOOLS >... -
Page 47: Chapter 6 Nat
Chapter 6 This chapter introduces NAT and explains how to implement it in MH-5000. To facilitate the explanation on how MH-5000 implements NAT and how to use it, we zoom in the left part of Figure 1-6 into Figure 6-1. -
Page 48: Objectives
1. Let PC1_1~PC1_5 connect to the Internet. 2. As the Figure 6-2 illustrated, the clients will connect to the MH-5000. Then MH-5000 will forward the packet to the real server. So FTPServer1 (10.1.1.5) will be accessed by other Internet users. -
Page 49: Steps
As the above Figure 6-3 illustrates, the server 10.1.1.5 provides FTP service. But it is located on the DMZ region behind MH-5000. And MH-5000 will act as a Virtual Server role which redirects the packets to the real server 10.1.1.5. And you can announce to the internet users that there exists a ftp server IP/port is 61.2.1.1/44444. - Page 50 Step 2. Check NAT Rules ADVANCED SETTINGS > NAT > NAT Rules As described in the above, the MH-5000 has set the rules for the LAN/DMZ zones. They all belong to the Many-to-One (M-1) type that will map many private addresses to the automatically chosen public IP address.
- Page 51 (an IP address with a netmask) to be translated, and enter the public IP address for being translated into. You can check the Auto choose IP from WAN ports. The MH-5000 will automatically determine which WAN IP is to be translated into. FIELD DESCRIPTION...
- Page 52 MH-5000 to translate the private IP addresses into the pool of public IP addresses. The MH-5000 will use the first public IP until MH-5000 uses up all source ports for the public IP. MH-5000 will then choose the second public...
-
Page 53: Setup Virtual Server For The Ftpserver1
IP assigned by the ISP. Step 5. Check NAT Rules ADVANCED SETTINGS > NAT > NAT Rules The MH-5000 has added the NAT rules automatically as right diagram described. The rule Basic-DMZ1 (number 1) means that, when matching... - Page 54 Customize the rule name as the ftpServer. For any packets with its destination IP equaling to the WAN1 IP (61.2.1.1) and destination port equaling to 44444, ask MH-5000 to translate the packet’s destination IP/port into 10.1.1.5/21. Check the Passive client? maximize compatibility of the FTP protocol.
- Page 55 Step 9. View the Result ADVANCED SETTINGS > NAT > Virtual Servers Now any request towards the MH-5000’s WAN1 IP (61.2.1.1) with port 44444 will be translated into a request towards 10.1.1.5 with port 21, and then be forwarded to the 10.1.1.5. The FTP server listening at port 21 in 10.1.1.5 will pick up...
- Page 56 “Auto update to Firewall/NAT rules when you Apply this page”, it will automatically add one Firewall rule in the WAN1 to DMZ1 direction. This firewall rule will let the packets with dest. IP address/port be matched with virtual server rule in order to pass through MH-5000.
-
Page 57: Nat Modes Introduction
As the above Figure 6-4 illustrated, NAT Many-to-One type means that many local PCs are translated into only one public IP address when the packets are forwarded out through the MH-5000. Take Connection1 for example. Its IP address and port are translated from 192.168.40.1:2933 to 61.2.1.1:2933. In the same way, when the packets of... -
Page 58: Many-To-Many Type
192.168.40.1:2933 to 61.2.1.1:2933. Until MH-5000 uses out of all source ports of the public (61.2.1.1), MH-5000 will then choose the second public IP (such as 61.2.1.2) from the address pool. For example, Connection2 are forwarded out, the source IP address will be translated into the second public IP address (61.2.1.2) from the public IP address pools. -
Page 59: Nat Modes & Types
As the above Figure 6-6 illustrated. NAT One to One type means that each local PC is translated into a unique public IP address when the packets are forwarded out through the MH-5000. Take Connection1 for example. Its IP address and port are translated from 192.168.40.1:2933 to 61.2.1.1:2933. -
Page 60: Chapter 7 Routing
This chapter introduces how to add static routing and policy routing entries To facilitate the explanation on how MH-5000 implements routing and how to use it. We zoom in the left part of Figure 2-1 into Figure 7-1 and increase some devices for description. -
Page 61: Objectives
Routing 7.2 Objectives 1. We need to let MH-5000 knows how to forward the packets which is the destination financial department (192.168.50.0/24). 2. The network administrator plans to solve the problem by subscribing the second link (ISP2). He hopes that all the packets from the General-Manager-Room (192.168.40.192/26) will pass through the ISP2 link instead of the... - Page 62 Chapter 7 MH-5000 User Manual Routing FIELD DESCRIPTION Range / Format EXAMPLE Determine this static routing entry record is multiple Type Net / Host hosts (Net) or a single host (Host)。 The destination IP address of this static routing entry...
-
Page 63: Add A Policy Routing Entry
Chapter 7 MH-5000 User Manual Routing 7.4.2 Add a policy routing entry Step 1. Setup the ISP2 link Basic Setup > WAN Settings > IP Alias We must add an IP alias record to the WAN1 port, because a new ISP link has been applied. See section 3.4.3 for the full procedures. - Page 64 Chapter 7 MH-5000 User Manual Routing FIELD DESCRIPTION Range / Format EXAMPLE Enabled / Activate this rule The policy routing rule is enabled or not. Enabled Disabled Status GenlManaRoo Rule name The policy routing rule name. text string Incoming LAN / DMZ...
- Page 65 MH-5000 User Manual Step 4. View the result Advanced Settings > Routing > Policy Route After filling data completely, view the policy routing entries which have been set. Step 5. View the routing table Device Status > System Status > Routing Table Finally click the “Routing Table”...
-
Page 66: Chapter 8 Firewall
1. Administrators detect that PC1_1 in LAN_1 is doing something that may hurt our company and should instantly block his traffic towards the Internet. 2. A DMZ server was attacked by SYN-Flooding attack and requires the MH-5000 to protect it. 8.2 Objectives 1. -
Page 67: Steps
Enable Firewall feature of MH-5000 Enabled Inspection Firewall Disabled Enable this feature will block the fragmented packets Block all fragment Enabled / by the firewall of MH-5000. Warning: Enable this Disabled packets Disabled feature will cause problem in some applications. BUTTON DESCRIPTION... - Page 68 Chapter 8 MH-5000 User Manual Firewall Step 3. Customize the rule ADVANCED SETTINGS > Firewall > Edit Rules > Insert Check the Activate this rule checkbox. Enter the rule name as PC1_1, and enter the IP address of PC1_1 (192.168.40.1 / 255.255.255.255). Select Block and Log to block and log the matched traffic.
- Page 69 Protocol/Service The record log is TCP, UDP or ICMP, and which service it will be. The firewall log direction is OUT or IN. The direction is based on the MH-5000. For Direction example, “OUT WAN1” means the packet is forwarded out through WAN1 to the internet.
-
Page 70: Setup Alert Detected Attack
When the rate of new connection One Minute High attempts rises above this number, the MH-5000 deletes half-open sessions as required to accommodate new connection attempts. This is the number of existing half-open sessions that causes the firewall to start deleting half-open sessions. - Page 71 Chapter 8 MH-5000 User Manual Firewall (min) Enter the length of Blocking Time in minutes. Table 8-4 Setup the Denial of Service Thresholds of attack alert...
-
Page 72: Chapter 9 Vpn Technical Introduction
Chapter 9 MH-5000 User Manual VPN Technical Introduction Chapter 9 VPN Technical Introduction This chapter introduces VPN related technology 9.1 VPN benefit If you choose to implement VPN technology in your enterprise, then it may bring the following benefits to your company. -
Page 73: Key Management
Chapter 9 MH-5000 User Manual VPN Technical Introduction 9.2.5 Key Management Key Management allows you to determine whether to use IKE (ISAKMP) or manual key configuration in order to setup a VPN. Ø IKE Phases There are two phases to every IKE (Internet Key Exchange) negotiation – phase 1 (Authentication) and phase 2 (Key Exchange). -
Page 74: Encapsulation
This may be unnecessary for data that does not require such security, so PFS is disabled (None) by default in the MH-5000. Disabling PFS means new authentication and encryption keys are derived from the same root secret (which may have security implications in the long run) but allows faster SA setup (by bypassing the Diffie-Hellman key exchange). -
Page 75: Make Vpn Packets Pass Through Mh-5000
Step 1. Enable IPSec ADVANCED SETTINGS > VPN Settings > Pass Through If we need to setup MH-5000 between the existed IPSec / PPTP / L2TP connections. We need to open up the Firewall blocking port of MH-5000 in advance. Here we provide a simple way. You can through enable the IPSec / PPTP / L2TP pass through checkbox on this page. -
Page 76: Chapter 10 Virtual Private Network - Ipsec
Chapter 10 MH-5000 User Manual Virtual Private Network – IPSec Chapter 10 Virtual Private Network – IPSec This chapter introduces IPSec VPN and explains how to implement it. As described in the Figure 2-1, we will extend to explain how to make a VPN link between LAN_1 and LAN_2 in this chapter. -
Page 77: Steps
ADVANCED SETTINGS > VPN Settings > IPSec Check the Enable IPSec checkbox and click Apply. FIELD DESCRIPTION EXAMPLE Enable IPSec Enable IPSec feature of MH-5000 Enabled BUTTON DESCRIPTION Apply Apply the settings which have been configured. Table 10-2 Enable the IPSec feature... - Page 78 Chapter 10 MH-5000 User Manual Virtual Private Network – IPSec Step 2. Add an IKE rule ADVANCED SETTINGS > VPN Settings > IPSec > IKE Click the IKE hyperlink and click Add to add a new IPSec VPN tunnel endpoint.
- Page 79 Chapter 10 MH-5000 User Manual Virtual Private Network – IPSec Step 3. Customize the rule ADVANCED SETTINGS > VPN Settings > IPSec > IKE > Add Check the Active checkbox. Enter a name for this rule like IKErule. Enter the Local IP Address (192.168.40.0/255.255.255.0) and the Remote IP...
- Page 80 Chapter 10 MH-5000 User Manual Virtual Private Network – IPSec Negotiation Choose Main or Aggressive mode, see Main / Action Main Mode Chapter 9 for details. Aggressive Encapsulation Choose Tunnel or Transport mode, see Tunnel / Tunnel Mode Chapter 9 for details.
- Page 81 Chapter 10 MH-5000 User Manual Virtual Private Network – IPSec Authenticate (MD5) / AH Algorithm Select Authentication Algorithm Disabled Authenticate (SHA1) The key which is pre-shared with remote Pre-Shared Key text string 1234567890 side. Table 10-4 Related field explanation of adding an IPSec policy rule Step 4.
- Page 82 Chapter 10 MH-5000 User Manual Virtual Private Network – IPSec Encrypt and Authenticate (DES, MD5) / Encrypt and Authenticate (DES, Encrypt and SHA1) / Encryption Choose a type of encryption and Authenticate Algorithm authentication algorithm combination. Encrypt and (DES、MD5) Authenticate (3DES,...
- Page 83 Chapter 10 MH-5000 User Manual Virtual Private Network – IPSec Set the IPSec SA lifetime. A value of 0 means 0 ~ 9999999999 SA Life Time IKE SA negotiation never times out. See 28800 sec sec/min/hour Chapter 9 for details.
- Page 84 Here we have a new rule before the default firewall rule. This rule will allow packets from 192.168.88.0 / 255.255.255.0 pass through MH-5000. And accomplish the VPN tunnel establishment. At WALL-2: Here we will install the IPSec properties of WALL-2. Note that the “Local Address” and “Remote address” field are opposite to the WALL-1, and so are “My IP Address”...
- Page 85 Chapter 10 MH-5000 User Manual Virtual Private Network – IPSec Step 2. Add an IKE rule ADVANCED SETTINGS > VPN Settings > IPSec > IKE Click the IKE hyperlink and click Add to add a new IPSec VPN tunnel endpoint.
- Page 86 Chapter 10 MH-5000 User Manual Virtual Private Network – IPSec Step 4. Remind to add a Firewall rule ADVANCED SETTINGS > VPN Settings > IPSec > IKE > Add After finishing IPSec rule settings, we need to add a firewall rule. Here system shows a window message to remind you of adding a firewall rule.
-
Page 87: Des/Md5 Ipsec Tunnel: The Manual-Key Way
192.168.40.0/24 to 192.168.88.0/24 will be allowed to pass through the MH-5000 and successfully access the 192.168.88.0/24 through the VPN tunnel. 10.4.2 DES/MD5 IPSec tunnel: the Manual-Key way In the previous section, we have introduced IKE method. Here we will introduce another method using Manual-Key way instead of IKE to install WALL-1. - Page 88 Chapter 10 MH-5000 User Manual Virtual Private Network – IPSec Step 3. Customize the rule ADVANCED SETTINGS > VPN Settings > IPSec > Manual Key > Add Same as those in IKE. But there is no pre-shared key in the manual-key mode. Enter the Key for encryption, such as 1122334455667788.
- Page 89 Interface IPSec tunnel with. Peer’s The IP address of remote site device, like IPv4 format 210.2.1.1 Address MH-5000 Multi-Homing Security Gateway. The Outgoing SPI (Security Parameter Index) hex(600 ~ 600000) / value. Outgoing SPI hex: 2222 dec(1500 ~ 6300000) The Incoming SPI (Security Parameter Index)
- Page 90 Chapter 10 MH-5000 User Manual Virtual Private Network – IPSec FIELD DESCRIPTION Range / Format EXAMPLE Utilize this field to select some packets which Transport Layer are specified protocol (ANY, TCP, UDP). If Condition ANY / TCP / UDP Protocol the packets are not the specified protocol will not be allowed to pass through IPSec tunnels.
- Page 91 Here we have a new rule before the default firewall rule. This rule will allow packets from 192.168.88.0 / 255.255.255.0 pass through MH-5000. And accomplish the VPN tunnel establishment. At WALL-2: Second, we will use the Manual-Key way to install the IPSec properties of WALL-1.
- Page 92 Chapter 10 MH-5000 User Manual Virtual Private Network – IPSec Step 2. Add a Manual Key rule ADVANCED SETTINGS > VPN Settings > IPSec > Manual Key Click the Manual Key hyperlink and click Add to add a new IPSec VPN tunnel endpoint.
- Page 93 Chapter 10 MH-5000 User Manual Virtual Private Network – IPSec Step 4. Remind to add a Firewall rule ADVANCED SETTINGS > VPN Settings > IPSec > Manual Key > Add After finishing IPSec rule settings, we need to add a firewall rule. Here system shows a window message to remind you of adding a firewall rule.
- Page 94 ADVANCED SETTINGS > Firewall > Edit Rules Now we have inserted a new rule before the default firewall rule. packets from 192.168.40.0/24 to 192.168.88.0/24 will be allowed to pass through the MH-5000 and successfully access the 192.168.88.0/24 through the VPN tunnel.
-
Page 95: Chapter 11 Virtual Private Network -Dynamic Ipsec
Chapter 11 MH-5000 User Manual Virtual Private Network –Dynamic IPSec Chapter 11 Virtual Private Network –Dynamic IPSec This chapter introduces Dynamic IPSec VPN and explains how to implement it. As described in the Figure 2-1, we will extend to explain how to make a dynamic VPN link between LAN_1 and LAN_2 in this chapter. -
Page 96: Steps
Chapter 11 MH-5000 User Manual Virtual Private Network –Dynamic IPSec 11.4 Steps In the following we will separately explain how to set up a secure DES/MD5 tunnel with the dynamic remote gateway IP address type. At WALL-1: At the first, we will install the IPSec properties of WALL-1. For the related explanation, please refer to Chapter 9 and Chapter 10. - Page 97 Chapter 11 MH-5000 User Manual Virtual Private Network –Dynamic IPSec Step 10. Customize the rule ADVANCED SETTINGS > VPN Settings > IPSec > IKE > Add Check the Active checkbox. Enter a name for this rule like IKErule. Enter the Local IP Address (192.168.40.0/255.255.255.0) and the Remote IP...
- Page 98 Chapter 11 MH-5000 User Manual Virtual Private Network –Dynamic IPSec Step 11. Detail settings of IPSec IKE ADVANCED SETTINGS > VPN Settings > IPSec > IKE > Add > Advanced In this page, we will set the detailed value of IKE parameter.
- Page 99 Here we have a new rule before the default firewall rule. This rule will allow packets from 192.168.88.0 / 255.255.255.0 pass through MH-5000. And accomplish the VPN tunnel establishment. At WALL-2: Here we will install the IPSec properties of WALL-2. Note that the “Local Address” and “Remote address” field are opposite to the WALL-1, and so are “My IP Address”...
- Page 100 Authenticate (DES, MD5). Enter the Pre-Shared 1234567890. Select User FQDN (mailbox) and enter planet.com.tw in My Identifier The opposite field. Click the Apply button to store the settings. side IP Address Note, in the Action region, you should choose either ESP Algorithm or AH Algorithm, or system will show error message.
- Page 101 ADVANCED SETTINGS > Firewall > Edit Rules Now we have inserted a new rule before the default firewall rule. packets from 192.168.40.0/24 to 192.168.88.0/24 will be allowed to pass through the MH-5000 and successfully access the 192.168.88.0/24 through the VPN tunnel.
-
Page 102: Chapter 12 Virtual Private Network - Pptp
Chapter 12 MH-5000 User Manual Virtual Private Network – PPTP Chapter 12 Virtual Private Network – PPTP This chapter introduces PPTP and explains how to implement it. 12.1 Demands 1. One employee in our company may sometimes want to connect back to our coporate network to work on something. -
Page 103: Methods
LAN1. 2. Setup the MH-5000 as the PPTP client. Let all the client PCs behind the MH-5000. They can connect to the network behind PPTP Server by passing through MH-5000. It sounds like no Internet exists but can connect with each other. -
Page 104: Setup Pptp Network Client
6. If the Public Network dialog box appears, choose the Don’t dial up initial connection and select Next. 7. In the VPN Server Selection dialog, enter the public IP or hostname of the MH-5000 to connect to and select Next. 8. Set Connection Availability to Only for myself and select Next. - Page 105 MH-5000 User Manual Virtual Private Network – PPTP FIELD DESCRIPTION EXAMPLE Enable PPTP Client Enable PPTP Client feature of MH-5000 Enabled Server IP The IP address of PPTP server. 61.2.1.1 Username The designed account which allows PPTP client to dial in.
-
Page 106: Chapter 13 Virtual Private Network - L2Tp
1. Setup the L2TP server at MH-5000 (LNS: L2TP Network Server). After dialing up to MH-5000, MH-5000 will assign a private IP which falls in the range of the settings in the L2TP server at MH-5000. Suppose the range is defined as 192.168.40.200 ~ 192.168.40.253, the remote host may get an IP of 192.168.40.200 and logically... -
Page 107: Steps
The IP address ending range which is allowed user to dial in LNS LAC End IP 211.54.63.5 server by using L2TP protocol. Username The account which allows L2TP client user to dial in MH-5000. L2tpUsers Password The password which allows L2TP client user to dial in MH-5000. Dif3wk... - Page 108 6. If the Public Network dialog box appears, choose the Don’t dial up initial connection and select Next. 7. In the VPN Server Selection dialog, enter the public IP or hostname of the MH-5000 to connect to and select Next. 8. Set Connection Availability to Only for myself and select Next.
- Page 109 Chapter 13 MH-5000 User Manual Virtual Private Network – L2TP Editing Windows Registry The default Windows 2000 L2TP traffic policy does not allow L2TP traffic without IPSec encryption. You can disable default behavior by editing the Windows 2000 Registry as described in the following steps. Please refer to the Microsoft documentation for editing the Windows Registry.
-
Page 110: Chapter 14 Content Filtering - Web Filters
Chapter 14 MH-5000 User Manual Content Filtering – Web Filters Chapter 14 Content Filtering – Web Filters This chapter introduces web content filters and explains how to implement it. 14.1 Demands Figure 14-1 Use web filter functionality to avoid users browsing the forbidden web site 1. -
Page 111: Objectives
Chapter 14 MH-5000 User Manual Content Filtering – Web Filters Figure 14-2 Use web filter functionality to avoid users view the forbidden web site 2. As the above Figure 14-2 illustrates, someone (PC1_1) is browsing forbidden web pages on office hours. The contents of the web pages may include stock markets, violence, or sex that will waste the bandwidth of the Internet access link while degrading the efficiency of normal working hours. -
Page 112: Steps
Check the Enable Web Filter checkbox and click the Apply right on the right side. FIELD DESCRIPTION EXAMPLE Enable Web Filter Enable Web Filter feature of MH-5000 Enabled BUTTON DESCRIPTION Apply Apply the settings which have been configured. Table 14-1 Enable Web Filter Step 2. - Page 113 Trusted Domains. However, if the web objects are set to be blocked by the MH-5000 in step 3, these allowed accesses will never be able to retrieve these objects. Check the “Don’t block …” to allow the objects for these trusted domains.
- Page 114 Enable Filter List Trusted Domains Enabled Customization pass through MH-5000. Contrarily, all the domains in the will be blocked by the MH-5000. Forbidden Domain Disable all web traffic Except the following specified domain range specified by the except for trusted trusted domain.
- Page 115 Step 6. Customize Categories ADVANCED SETTINGS > Content Filters > Web Filter > Categories With the built-in URL database, MH-5000 can block web sessions towards several pre-defined Categories of URLs. Check the items that you want to block or log. Simply click the Block all categories will apply all categories.
- Page 116 FIELD DESCRIPTION EXAMPLE Restricted Features Select the below items that will verified by Web Filter of MH-5000. ActiveX filter the web page that includes ActiveX Enabled Java filter the web page that includes Java applet...
-
Page 117: Setting Priorities
Chapter 14 MH-5000 User Manual Content Filtering – Web Filters Step 8. Setup contents keyword ADVANCED SETTINGS > Content Filters > Web Filter > Keyword blocking Check the Enable Keyword Blocking to block any Web pages that contain the entered keywords. - Page 118 Chapter 14 MH-5000 User Manual Content Filtering – Web Filters High Priority Low Priority Figure 14-3 web filter features priority (from High to Low) According to the priorities of web filter, we have the guiding principle to setup the web filter now. As we know, there are many choices according to your requirement in the web filter settings.
- Page 119 Chapter 14 MH-5000 User Manual Content Filtering – Web Filters If the web page contains the components included activex/java/javascript/cookie which indicated in “Web Filter > Web Filter > Features Web page Web”, or the keywords indicated in “Web Filter > Keyword”.
-
Page 120: Chapter 15 Content Filtering - Mail Filters
Chapter 15 MH-5000 User Manual Content Filtering – Mail Filters Chapter 15 Content Filtering – Mail Filters This chapter introduces SMTP proxies and explains how to implement it. 15.1 Demands 1. Sometimes there are malicious scripts like *.vbs that may be attached in the email. If the users accidentally open such files, their computers may be infectious with virus. -
Page 121: Steps For Anti-Virus
Chapter 15 MH-5000 User Manual Content Filtering – Mail Filters Figure 15-1 Use SMTP / POP3 filter functionality to avoid some sensitive e-mail directly opened 15.4 Steps for Anti-Virus Step 1 – Enable Anti-Virus ADVANCED SETTINGS > Content Filters > Mail Filters > Anti-Virus Click the Anti-Virus hyperlink. -
Page 122: Steps For Anti-Spam
Content Filtering – Mail Filters Step 3 – Block attached files When enabled SMTP/POP3/IMAP filter function, MH-5000 will do Anti-Virus with two steps. Step 1, add the extensions which you would like to block. (Max: 32 items) You can add/delete the items by... -
Page 123: Steps For Smtp Relay
Content Filtering – Mail Filters Step 3 – Add the black list When enabled SMTP/POP3/IMAP filter function, MH-5000 will do Anti-Spam with three steps. Step 1, add the emails which you would like to block. You can add/delete the block list by clicking Add/Delete button. -
Page 124: Chapter 16 Content Filtering - Ftp Filtering
Chapter 16 MH-5000 User Manual Content Filtering – FTP Filtering Chapter 16 Content Filtering – FTP Filtering This chapter introduces FTP proxies and explains how to implement it. 16.1 Demands 1. Some users in LAN1 use FTP to download big MP3 files and cause waste of bandwidth. -
Page 125: Steps
Click the Add button to add a new FTP filter. FIELD DESCRIPTION EXAMPLE Enable FTP Filter Enable FTP Filter feature of MH-5000 Enabled Table 16-1 FTP Filter FTP setting page Step 2. Add an FTP Filter ADVANCED SETTINGS > Content Filters > FTP Filter > FTP > Add Enter mp3 in the Name field and select Extension Name in the Blocked Type field. - Page 126 Chapter 16 MH-5000 User Manual Content Filtering – FTP Filtering Step 3. View the result ADVANCED SETTINGS > Content Filters > FTP Filter > FTP We can see the specified record in this page. Step 4. Add an Exempt Zone ADVANCED SETTINGS >...
- Page 127 Chapter 16 MH-5000 User Manual Content Filtering – FTP Filtering Step 5. Show the Exempt Zones ADVANCED SETTINGS > Content Filters > FTP Filter > FTP Exempt Zone Here we can discover that new added Exempt Zone record is appeared.
-
Page 128: Chapter 17 Intrusion Detection Systems
17.3 Methods 1. Specify where our Web server is located to let the IDS on the MH-5000 focus more on the attacks. 2. Setup logs to email to the specified email address when the log is full. You can also set daily/weekly emails to... -
Page 129: Steps
MH-5000 User Manual Chapter 17 Intrusion Detection Systems 17.4 Steps Step 1 – Enable IDS ADVANCED SETTINGS > IDS > IDS Status Check the Enable IDS checkbox, and then click the Apply button. Step 2 – Setup Logs DEVICE STATUS > Log Config > Mail Logs... -
Page 130: Chapter 18 Bandwidth Management
MH-5000 User Manual Chapter 18 Bandwidth Management Chapter 18 Bandwidth Management This chapter introduces bandwidth management and explains how to implement it. 18.1 Demands Figure 18-1 Use bandwidth management mechanism to shape the data flow on the downlink direction 1. As the above Figure 18-1 illustrated, we hope LAN_1 users can watch the Video Stream Server smoothly. -
Page 131: Objectives
MH-5000 User Manual Chapter 18 Bandwidth Management Figure 18-2 Use bandwidth management mechanism to shape the data flow on the uplink direction 2. As the above Figure 18-2 illustrated, LAN_1 PCs are using the E-Commerce service from the E-Commerce Server (140.113.79.3), causing the blocking of the VPN transfer from LAN_1 to LAN_2. So we want to make sure that the VPN tunnel links is reserved at least 600 kbps speed rate. -
Page 132: Methods
MH-5000 User Manual Chapter 18 Bandwidth Management The remaining bandwidths are named Other traffic. They are reserved for other ANY to LAN1 data transmission which don’t list in the above Figure 18-1 diagram. 2. Reserve at least 600kbps for the LAN_1 to LAN_2 transfer. The LAN_1 PCs can share about 20% (308kbps) for using E-Commerce Services. - Page 133 MH-5000 User Manual Chapter 18 Bandwidth Management FIELD DESCRIPTION Range/Format EXAMPLE Enable Bandwidth Enable Bandwidth Management feature of MH-5000 Enable/Disable Enabled Management BUTTON DESCRIPTION Reset Bandwidth Reset all the bandwidth management rules to default status. Management Apply Apply the settings which have been configured.
- Page 134 MH-5000 User Manual Chapter 18 Bandwidth Management Step 3. Add new classes ADVANCED SETTINGS > Bandwidth Mgt. > Edit Actions > Create Sub-class Create a sub-class named web-from-WAN from the default class. Enter 0.3% in the bandwidth field. Make sure that Borrow button is unchecked...
- Page 135 MH-5000 User Manual Chapter 18 Bandwidth Management Step 4. Partition into Classes ADVANCED SETTINGS > Bandwidth Mgt. > Edit Actions > Create Sub-Class Now there are three actions under the default action.
-
Page 136: Chapter 19 Load Balancer
The WAN load balancer module consists of outbound load balancing and inbound load balancing. Users may want to subscribe multiple WAN links and make their outbound traffic load-balanced among the WAN links. MH-5000 now supports outbound WAN load balancing. Inbound load balancing will be supported in a very near future. -
Page 137: Methods
MH-5000 User Manual Chapter 19 Load Balancer 19.3 Methods The outbound WAN load balancer module will intelligently decide whether the new connection will be directed to which WAN link. It has a built-in fuzzy intelligence that will measure the round-trip delay of the traffic and make the best route selection. -
Page 138: Chapter 20 System Status
Chapter 20 System Status 20.1 Demands Since we have finished the settings of MH-5000, we need to gather the device information quickly. Then we can have a overview of the system status. 20.2 Objectives We can know the current situation easily through an integrated interface. - Page 139 Click the Routing Table to see the routing table information of MH-5000. Step 6. Active Sessions DEVICE STATUS > System Status > Active Sessions Click the Active Sessions to see all the current sessions of MH-5000. The Active Sessions include all the outbound and inbound sessions.
- Page 140 MH-5000 User Manual Step 7. Top20 Sessions DEVICE STATUS > System Status > Top20 Sessions Click the Top20 Sessions to see the front-20 sessions of transmitted bytes amount. These front-20 sessions were sorted by the amount of transmitted bytes. Step 8.
-
Page 141: Chapter 21 Log System
1. Through tracking the system logs, you can distinguish which administrated action is valid or not. 2. Use the syslog server to receive mail, or edit the “Mail Logs” page of MH-5000. Make the log mailed out automatically every periodic time. -
Page 142: Syslog & Mail Log
Setup Syslog Server DEVICE STATUS > Log Config > Syslog Server Setup Syslog Server by checking the Enable Syslog Server. It will let MH-5000 send logs to the Syslog Server specified in the “Syslog Server IP Address” field. Notice: If the logs were sent out to the syslog server, they will still keep a copy in the MH-5000. - Page 143 MH-5000 User Manual Chapter 21 Log System When selecting Weekly in the “Log Schedule” field, we have to choose which day the mail logs will be sent out in the “Day for Day for Sending Logs Monday Sending Logs” field.
-
Page 144: Chapter 22 System Maintenance
CLI only because you can never enter the web GUI with the lost password. 3. Anthoer issue is that after setup the MH-5000 properly, we might want to keep the current configuration to avoid the unknown accident. Then we can recover the original state from the previous reserved configuration. -
Page 145: Steps For Firmware Upgrade From Web Gui
MH-5000‘s LAN1. Login to MH-5000’s console. Enter en to enter privileged mode. Configure the MH-5000> en LAN1 address so that the MH-5000 can connect to the TFTP server. The CLI command to MH-5000# ip ifconfig INTF3 192.168.40.254 255.255.255.0 configure LAN1 interface is ip ifconfig INTF3 192.168.40.254 255.255.255.0. -
Page 146: Steps For Database Update From Web Gui
MH-5000 User Manual Chapter 22 System Maintenance Upgrade firmware SYSTEM TOOLS > Firmware Upgrade > Firmware Upgrade In the System Tools / Firmware Upgrade page. Select the path of firmware through Browse button, check Preserve Saved Configurations to reserve original settings. Click the Upload button to upgrade firmware. -
Page 147: Steps For Factory Reset
Factory reset SYSTEM TOOLS > System Utilities > Factory Reset In the Web GUI mode. Follow the path of right side. We can make MH-5000 configuration restored to the factory defaults with simply clicking the Apply button. Warning: Be careful to use this function. It will make all your present configurations disappear. -
Page 148: Save The Current Configuration
Backup the current SYSTEM TOOLS > System Utilities > Save Configuration configuration After finishing the settings of MH-5000, be sure to Press the Save button in this page to keep the running configuration. 22.7 Steps for Backup / Restore Configurations Step 1. -
Page 149: Steps For Reset Password
MH-5000 User Manual Chapter 22 System Maintenance Step 2. Restore the previous saving SYSTEM TOOLS > System Utilities > Restore Configuration configuration In the page of System Tools / System Utilities / Restore Configuration, click the Browse button to select configuration file path first, and then click Upload button to restore configuration. -
Page 150: Appendix A Command Line Interface (Cli)
Command Line Interface (CLI) You can configure the MH-5000 through the web interface (http/https) for the most time. Besides you can use another method, console/ssh/telnet method to configure the MH-5000 in the emergency. This is known as the Command Line Interface (CLI). - Page 151 Show system and network status version (ver) sys version Show MH-5000 firmware version Table A-1 Non-privileged mode of normal mode Note: If you don’t know what parameter is followed by the commands, just type “?” following the command. Ex “ip ?”. It will show all the valid suffix parameters from “ip”.
-
Page 152: Cli Commands List (Rescue Mode)
If the original firmware was damaged by some accidents, you may need to recover it with the factory reset process in the rescue mode. Boot the MH-5000 and press <tab> or <space> during the 2-second countdown process. You may refer Section 22.5.3 for details. - Page 153 MH-5000 User Manual Appendix A Command Line Interface (CLI) Privileged mode Main Example Command description commands commands Show the help menu disable disable Turn off privileged mode command (dis) exit (ex) exit Exit command shell Configure IP related settings ip arp status Show the ip/MAC mapping table ip dns query www.yam.com.tw...
-
Page 154: Appendix B Troubleshooting
Please neglect the LED status, because it will confuse your judgment sometimes. I have already set the WAN1 ip address of MH-5000 the same subnet with my pc, but I can’t use https to login MH-5000 via WAN1 port from my pc all the time, why?... - Page 155 Make sure if you have already added a WAN to LAN policy in the Advanced Settings/Firewall to let the IPSec packets pass through the MH-5000. (The default value from WAN to LAN is block.) When you add a Firewall rule, the Source IP and Netmask are the IP address, PrefixLen/Subnet Mask in the pages of the Remote Address Type.
- Page 156 Why the Source-IP field of System Logs is blank? Ans: One reason is that you may enter Host Name and following by a space like “MH-5000 “. And enter the Domain Name string like “planet.com.tw” in the firmware version 1.391B. Then the System Name will present as “MH-5000.planet.com.tw”.
- Page 157 Almost all the cases will not cause firmware fail. The MH-5000 will automatically reboot and all configurations will still remain as before. But sometimes it will make firmware fail. If the firmware fails, MH-5000 will automatically enter rescue mode when it reboots. You may need to do the factory reset, and then restore your original configuration to MH-5000.
-
Page 158: Appendix C System Log Syntax
The first part is Component type, second part is Log ID, third part is log description and final part is Event ID. When you applied each setting in the MH-5000, you had been issued an Event. So the same Event ID may have many different Log IDs because you may change different settings in the same apply action. - Page 159 MH-5000 User Manual Appendix C System Log Syntax BANDWIDTH: [B01] WAN1 Disable bandwidth management with PPPoE connection. Web filter categories CONTENT: [C01] Web filter categories configuration update CONTENT configuration updated by admin (192.168.17.100:443). EID=6 Web filter added trusted CONTENT: [C02] Web filter add trusted host by admin host (192.168.17.100:443).
- Page 160 MH-5000 User Manual Appendix C System Log Syntax Disable web filter keyword CONTENT: [C21] Disable web filter keyword matching by matching admin (192.168.17.100:443). EID=24 Updated POP3 filter CONTENT: [C22] Updated POP3 filter exempt zone exempt zone configuration configuration by admin (192.168.17.100:443). EID=25...
- Page 161 MH-5000 User Manual Appendix C System Log Syntax Reload Firewall Rules FIREWALL: [F04] WAN1 Reload all NAT/Firewall rules for new WAN IP Logfile is Full LOG: [L01] logfile is full. Mail Log LOG: [L02] mail logfile to tom@hotmail.com. Remote Syslog Server...
- Page 162 (192.168.17.102:443). Set Host Name SYSTEM: [S10] HostName:MH-5000, set by admin (192.168.17.102:443). Set Domain Name SYSTEM: [S11] Domain Name: planet.com.tw, set by admin (192.168.17.102:443). Enable/Disable DDNS SYSTEM: [S12] Enable Dynamic DNS with hostname wall.adsldns.org on WAN1 by admin (192.168.17.102:443).
- Page 163 MH-5000 User Manual Appendix C System Log Syntax Interface PORTS Configuration (WAN/LAN/DMZ) Backup Configuration SYSTEM: [S18] Backup configuration file by admin (192.168.17.102:443). Restore Configuration SYSTEM: [S19] Restore configuration file by admin (192.168.17.102:443). Factory Reset SYSTEM: [S20] Factory Reset to default settings by admin (192.168.17.102:443)
- Page 164 MH-5000 User Manual Appendix C System Log Syntax Update WAN NAT settings SYSTEM: [S38] Update WAN NAT settings to FULL feature SYSTEM: [S38] Update WAN NAT settings to Basic Update WAN NAT settings operation Disable WAN NAT feature SYSTEM: [S38] Disable WAN NAT feature...
-
Page 165: Appendix D Glossary Of Terms
NAT (Network Address Translation) – By the network address translation skill, we can transfer the internal network private address of MH-5000 to the public address for the Internet usage. By this method, we can use a large amount of private addresses in the enterprise. - Page 166 MH-5000 User Manual Appendix D Glossary of Terms POP3 (Post Office Protocol 3) is the most recent version of a standard protocol for receiving e-mail. POP3 is a client/server protocol in which e-mail is received and held for you by your Internet server. Periodically, you (or your client e-mail receiver) check your mail-box on the server and download any mail.
-
Page 167: Appendix E Index
MH-5000 User Manual Appendix E Index Appendix E Index backup configuration............154 SMTP ................. 117, 118 Bandwidth Management .............131 syslog ................. 147, 148 bidirectional ..............51, 52, 58 tftp upgrade ................ 151 Content Filter ..............106 FTP Filter ................121 Mail Filter ................117 Web Filter ...............107 Virtual Server ............. -
Page 168: Appendix F Version Of Software And Firmware
MH-5000 User Manual Appendix F Version of Software and Firmware Appendix F Version of Software and Firmware MH-5000 Multi-Homing Security Gateway Version of Components: Firmware: v. 1.602...
Need help?
Do you have a question about the mh-5000 and is the answer not in the manual?
Questions and answers