Advertisement
Quick Links
Advertisement

Summary of Contents for Planet HAC-1000
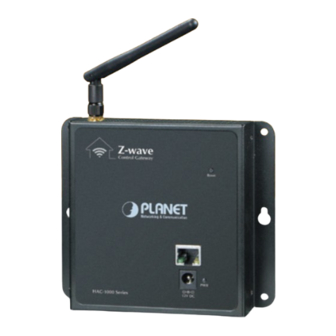
- Page 2 1. Verify the Contents Inside the Package Box The package should contain the following items plus HAC-1000. If any item is missing or damaged, please contact the seller immediately. Quick Installation Guide Wall-mounted & DIN-rail Kit Power Adapter Magnet Kit...
-
Page 3: Physical Specifications
2. Physical Specifications Dimensions (W x D x H) 148 x 25 x 134 mm Weight 441g (gross weight) 24.20 148.00 138.00 Z-wave Control Gateway Reset 134.00 118.00 6.00 HAC-1000 Series 12V DC Dimensions ( unit = mm ) - 2 -... - Page 4 System Color Function Lights to indicate that the Switch has Green power. RJ45 port Color Function Lights to indicate the port is successfully established. LNK/ Green Blinks to indicate that the switch is actively sending or receiving data over that port.
-
Page 5: Wall Mount Installation
Step 3: Screw the bolts into the conductor pipe. The HAC-1000 is between bolts and conductor pipe, as shown below. Z - w a v e C o n tr o l... -
Page 6: Magnet Installation
B. Magnet Installation To install the HAC-1000 on a magnetic surface, simply follow the following picture: Z - w a v e C o n tr o l G a te w a R e se t H A C -1 0... - Page 7 4. Cloud Home Registration by Internet-connected Smart Phone Step 1. Please refer to the following ways to download the Cloud Home App. A. Download Cloud Home App from App Store or Google Play Store by your iPhone or Android phone by searching “Cloud Home” as the key word.
- Page 8 Step 2. Make sure the HAC-1000 and Z-Wave device have been connected powered successfully. Door Lock Smart Power Sensor Wireless Router HAC-1000 ADSL Internet ADSL Web Browser ADSL Mobile App 3G Network ADSL 2/2+ ADSL 1000BASE-T UTP Z-wave - 7 -...
- Page 9 Step 3. Enter a mail and password, and press Register to register account. Interface Description Use your existing email account to get Account cloud server registered Password Your personal private password Enable it to automatically login each time Auto Login the app starts up Register For the first-time registration...
- Page 10 Step 4. Go to Setting Inclusion/Exclusion to include/exclude Z-Wave device. - 9 -...
- Page 11 Step 5. After pressing Inclusion Device, the “Add Device” message will be displayed. Step 6. Press the programming switch button on the Z-Wave device for connection at the same time. - 10 -...
- Page 12 The location of programming switch button depends on the type of Z-Wave device that you use. Please refer to the user manual of Note the Z-Wave device for details. Step 7. Go to Room to create rooms to distribute Z-Wave devices ...
- Page 13 Step 8. Go to Scene to create scene. - 12 -...
- Page 14 If you have any question about Z-Wave installation, please refer to Z-Wave device configuration in the user manual. Note HAC-1000 Default setting Default DHCP Client 192.168.0.253 – if DHCP Default IP Address Server does not exist in the...
-
Page 15: Customer Support
Thank you for purchasing PLANET products. You can browse our online FAQ resource and User’s Manual on PLANET Web site first to check if it could solve your issue. If you need more support information, please contact PLANET Home Automation support team.


Need help?
Do you have a question about the HAC-1000 and is the answer not in the manual?
Questions and answers