Daikin RY24PEV1K Service Manual
Duct type
Hide thumbs
Also See for RY24PEV1K:
- Operation and installation instructions manual (44 pages) ,
- Operating and installation instruction manual (45 pages)

Related Manuals for Daikin RY24PEV1K


Summary of Contents for Daikin RY24PEV1K
-
Page 1: Duct Type
SiK401004_A Duct type [Applied Models] Non-Inverter Pair : Cooling Only Non-Inverter Pair : Heat Pump... -
Page 2: Table Of Contents
SiK401004_A Non-Inverter Pair Duct Type INTRODUCTION ..................i Part 1 SPECIFICATIONS ............1 1. MODELS LIST ..................2 Outdoor Unit ..................... 2 Indoor Unit....................3 2. NOMENCLATURE..................4 3. FUNCTION ....................5 4. PRODUCT DATA ..................6 Product Data at Rated Condition.............. 6 Electrical Data .................. - Page 3 SiK401004_A Specification of Connection Pipe............79 4. ELECTRIC WIRING WORK ..............80 Wiring Principle ..................80 Electric Wiring Design ................84 Specification of Power Supply Wire and Air Switch ........ 86 Part 4 MAINTENANCE ..............87 1. REMOTE CONTROLLER DISPLAY MALFUNCTION AND CONTENTS .. 88 2.
-
Page 4: Introduction
SiK401004_A 1. INTRODUCTION Safety Cautions Be sure to read the following safety cautions before conducting repair work. Cautions and The caution items are classified into “ Warnings Warning” and “ Caution”. The “ Warning” items are especially important since they can lead to death or serious injury if they are not followed closely. -
Page 5: Cautions Regarding Products After Repair
SiK401004_A Caution Do not repair the electrical components with wet hands. Working on the equipment with wet hands can cause an electrical shock. Do not clean the air conditioner by splashing water. Washing the unit with water can cause an electrical shock. Be sure to provide the grounding when repairing the equipment in a humid or wet place, to avoid electrical shocks. - Page 6 SiK401004_A Be sure to install the product securely in the installation frame mounted on a For integral units window frame. only If the unit is not securely mounted, it can fall and cause injury. Be sure to use an exclusive power circuit for the equipment, and follow the technical standards related to the electrical equipment, the internal wiring regulations and the instruction manual for installation when conducting electrical work.
-
Page 7: Inspection After Repair
SiK401004_A 1.1.3 Inspection after Repair Warning Check to make sure that the power cable plug is not dirty or loose, then insert the plug into a power outlet all the way. If the plug has dust or loose connection, it can cause an electrical shock or fire. -
Page 8: Using Icons List
SiK401004_A 1.1.5 Using Icons List Icon Type of Description Information Note A “note” provides information that is not indispensable, but may nevertheless be valuable to the reader, such as tips and Note: tricks. Caution A “caution” is used when there is danger that the reader, through incorrect manipulation, may damage equipment, loose Caution data, get an unexpected result or has to restart (part of) a... -
Page 9: Specifications
SiK401004_A Part1 SPECIFICATIONS 1. MODELS LIST..................2 Outdoor Unit ..................... 2 Indoor Unit....................3 2. NOMENCLATURE..................4 3. FUNCTION ....................5 4. PRODUCT DATA ..................6 Product Data at Rated Condition.............. 6 Electrical Data ..................27 5. PIPING DIAGRAM.................. 28 SPECIFICATIONS... -
Page 10: Models List
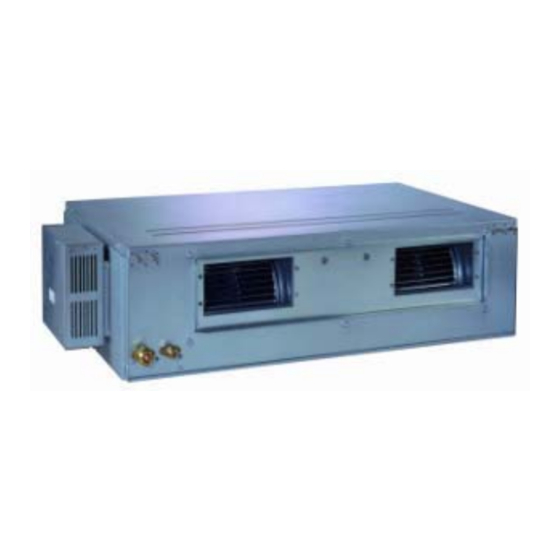
SiK401004_A 1. MODELS LIST 1.1 Outdoor Unit Model Refrigerant Power Supply Appearance RY24PEV1K 220-240V 1PH 50Hz R24PEV1K RY30PEV1K 220-240V 1PH 50Hz R30PEV1K RY36PEY1K 380-415V 3PH 50Hz R36PEY1K RY42PEY1K 380-415V 3PH 50Hz R42PEY1K RY48PEY1K 380-415V 3PH 50Hz R48PEY1K SPECIFICATIONS... -
Page 11: Indoor Unit
SiK401004_A 1.2 Indoor Unit Nominal Capacity Power Model Cooling/Heating Refrigerant Appearance Supply (Btu/h) FD(Y)M24PEV1K 23200/25500 Type FD(Y)M30PEV1K 26300/32100 220-240V FD(Y)M36PEV1K 33000/41000 1PH 50Hz FD(Y)M42PEV1K 38600/46100 FD(Y)M48PEV1K 44400/48200 Note:1Ton =12000Btu/h = 3.517kW Notes: The universal outdoor units means that the customer can choose any of three kind of indoor units to match the outdoor unit without any change with it. -
Page 12: Nomenclature
SiK401004_A 2. NOMENCLATURE SPECIFICATIONS... -
Page 13: Function
SiK401004_A 3. FUNCTION Function Description For the air conditioners with this memory function setting, the units may start automatically Memory function after power failure reset or the main power supply is turned on again (when the unit restarts , it will return to the same operation condition as that of the former operation status, and the mode and parameter are also kept the same.) Timing function it can make timing ON/ OFF separately, meanwhile, it can also make timing on circularly... -
Page 14: Product Data
SiK401004_A 4. PRODUCT DATA 4.1 Product Data at Rated Condition 4.1.1 Duct Type Outdoor R24PEV1K Model Indoor FDM24PEV1K Function ― COOLING Rated Voltage ― 220-240V 1Ph Rated Frequency ― 50Hz 6800 Total Capacity (Btu/h)/W 23200 Power Input 2500 Rated Current 11.9 Max Current 19.0... - Page 15 SiK401004_A Outdoor Unit R24PEV1K Compressor ManµFacturer/trademark ― Mitsubishi Compressor Model ― LHT42VBAC Compressor Type ― Rotary L.R.A. Compressor RLA 11.2 Compressor Power Input 2390 Overload Protector ― Auto Reset Thermal Overload Throttling Method ― Capillary Starting Method ― Start directly Working Temp Range °C Cooling: 18°C-52°C...
- Page 16 SiK401004_A Outdoor R30PEV1K Model Indoor FDM30PEV1K Function ― COOLING Rated Voltage ― 220-240V 1Ph Rated Frequency ― 50Hz 7700 Total Capacity (Btu/h)/W 26300 Power Input 2920 Rated Current 13.5 Max Current 21.0 Air Flow Volume (H/M/L)** 1500/1300/1100 (Btu/h)/W 9.01 Indoor Unit FDM30PEV1K Fan Motor Speed (H/M/L) r/min...
- Page 17 SiK401004_A Outdoor Unit R30PEV1K Compressor ManµFacturer/trademark ― Mitsubishi Compressor Model ― LHT53VBAC Compressor Type ― Rotary L.R.A. Compressor RLA 14.8 Compressor Power Input 3050 Overload Protector ― Auto Reset Thermal Overload Throttling Method ― Capillary Starting Method ― Start directly Working Temp Range °C Cooling: 18°C-52°C...
- Page 18 SiK401004_A Outdoor R36PEY1K Model Indoor FDM36PEV1K Function ― COOLING Rated Voltage ― 380-415V 3Ph Rated Frequency ― 50Hz 9700 Total Capacity (Btu/h)/W 33000 Power Input 3900 Rated Current Max Current 10.6 Air Flow Volume (H/M/L)** 2000/1900/1800 (Btu/h)/W 8.46 Indoor Unit FDM36PEV1K Fan Motor Speed (H/M/L) r/min...
- Page 19 SiK401004_A Outdoor Unit R36PEY1K Compressor ManµFacturer/trademark ― SANYO Compressor Model ― C-SBR145H38P Compressor Type ― SCROLL L.R.A. Compressor RLA Compressor Power Input 3650 Overload Protector ― Auto Reset Thermal Overload Throttling Method ― Capillary Starting Method ― Start directly Working Temp Range °C Cooling: 18°C-52°C Condenser...
- Page 20 SiK401004_A Outdoor R42PEY1K Model Indoor FDM42PEV1K Function ― COOLING Rated Voltage ― 380-415V 3Ph Rated Frequency ― 50Hz 11300 Total Capacity (Btu/h)/W 38600 Power Input 4600 Rated Current Max Current 13.0 Air Flow Volume (H/M/L)** 2000/1900/1800 (Btu/h)/W 8.39 Indoor Unit FDM42PEV1K Fan Motor Speed (H/M/L) r/min...
- Page 21 SiK401004_A Outdoor Unit R42PEY1K Compressor ManµFacturer/trademark ― SANYO Compressor Model ― C-SBX180H38P Compressor Type ― SCROLL L.R.A. Compressor RLA 8.06 Compressor Power Input 4300 Overload Protector ― Auto Reset Thermal Overload Throttling Method ― Capillary Starting Method ― Direct Working Temp Range °C Cooling: 18°C-52°C Condenser...
- Page 22 SiK401004_A Outdoor R48PEY1K Model Indoor FDM48PEV1K Function ― COOLING Rated Voltage ― 380-415V 3Ph Rated Frequency ― 50Hz 13000 Total Capacity (Btu/h)/W 44400 Power Input 5400 Rated Current 10.4 Max Current 14.5 Air Flow Volume (H/M/L)** 2300/2110/1850 EER/C.O.P (Btu/h)/W 8.22 Indoor Unit FDM48PEV1K Fan Motor Speed (H/M/L)
- Page 23 SiK401004_A Outdoor Unit R48PEY1K Compressor ManµFacturer/trademark ― SANYO Compressor Model ― C-SBX215H38P Compressor Type ― SCROLL L.R.A. Compressor RLA Compressor Power Input 5350 Overload Protector ― Auto Reset Thermal Overload Throttling Method ― Capillary Starting Method ― Direct Working Temp Range °C Cooling: 18°C-52°C Condenser...
- Page 24 SiK401004_A Outdoor RY24PEV1K Model Indoor FDYM24PEV1K Function ― COOLING HEATING Rated Voltage ― 220-240V 1Ph Rated Frequency ― 50Hz 6800 7500 Total Capacity (Btu/h)/W 23200 25500 Power Input 2500 2450 Rated Current 11.9 12.4 Max Current 18.3 15.8 Air Flow Volume (H/M/L)** 1600/1400/1200 EER/C.O.P...
- Page 25 SiK401004_A Outdoor Unit RY24PEV1K Compressor ManµFacturer/trademark ― Mitsubishi Compressor Model ― LHT42VBAC Compressor Type ― Rotary L.R.A. Compressor RLA 11.2 Compressor Power Input 2390 Overload Protector ― Auto Reset Thermal Overload Throttling Method ― Capillary Starting Method ― Start directly Working Temp Range °C...
- Page 26 SiK401004_A Outdoor RY30PEV1K Model Indoor FDYM30PEV1K Function ― COOLING HEATING Rated Voltage ― 220-240V 1Ph Rated Frequency ― 50Hz 7700 9400 Total Capacity (Btu/h)/W 26300 32100 Power Input 2950 3300 Rated Current 14.5 16.8 Max Current 21.0 19.0 Air Flow Volume (H/M/L)** 1500/1300/1100 EER/C.O.P (Btu/h)/W...
- Page 27 SiK401004_A Outdoor Unit RY30PEV1K Compressor ManµFacturer/trademark ― Mitsubishi Compressor Model ― LHT53VBAC Compressor Type ― Rotary L.R.A. Compressor RLA 14.8 Compressor Power Input 3050 Overload Protector ― Auto Reset Thermal Overload Throttling Method ― Capillary Starting Method ― Start directly Working Temp Range °C Cooling: 18°C-52°C...
- Page 28 SiK401004_A Outdoor RY36PEY1K Model Indoor FDYM36PEV1K Function ― COOLING HEATING Rated Voltage ― 380-415V 3Ph Rated Frequency ― 50Hz 9700 12000 Total Capacity (Btu/h)/W 33000 41000 Power Input 3900 3450 Rated Current Max Current 10.3 Air Flow Volume (H/M/L)** 2000/1900/1800 EER/C.O.P (Btu/h)/W 8.46...
- Page 29 SiK401004_A Outdoor Unit RY36PEY1K Compressor ManµFacturer/trademark ― SANYO Compressor Model ― C-SBR145H38P Compressor Type ― SCROLL L.R.A. Compressor RLA Compressor Power Input 3650 Overload Protector ― Auto Reset Thermal Overload Throttling Method ― Capillary Starting Method ― Start directly Working Temp Range °C Cooling: 18°C-52°C Heating: -7°C-24°C...
- Page 30 SiK401004_A Outdoor RY42PEY1K Model Indoor FDYM42PEV1K Function ― COOLING HEATING Rated Voltage ― 380-415V 3Ph Rated Frequency ― 50Hz 11300 13500 Total Capacity (Btu/h)/W 38600 46100 Power Input 4800 4150 Rated Current Max Current 12.5 Air Flow Volume (H/M/L)** 2000/1900/1800 EER/C.O.P (Btu/h)/W 8.04...
- Page 31 SiK401004_A Outdoor Unit RY42PEY1K Compressor ManµFacturer/trademark ― SANYO Compressor Model ― C-SBX180H38P Compressor Type ― SCROLL L.R.A. Compressor RLA 8.06 Compressor Power Input 4300 Overload Protector ― Auto Reset Thermal Overload Throttling Method ― Capillary Starting Method ― Direct Working Temp Range °C Cooling: 18°C-52°C Heating: -7°C-24°C...
- Page 32 SiK401004_A Outdoor RY48PEY1K Model Indoor FDYM48PEV1K Function ― COOLING HEATING Rated Voltage ― 380-415V 3Ph Rated Frequency ― 50Hz 13000 14100 Total Capacity (Btu/h)/W 44400 48200 Power Input 5500 4750 Rated Current 10.2 Max Current 18.6 12.6 Air Flow Volume (H/M/L)** 2300/2110/1850 EER/C.O.P (Btu/h)/W...
- Page 33 SiK401004_A Outdoor Unit RY48PEY1K Compressor ManµFacturer/trademark ― SANYO Compressor Model ― C-SBX215H38P Compressor Type ― SCROLL L.R.A. Compressor RLA Compressor Power Input 5350 Overload Protector ― Auto Reset Thermal Overload Throttling Method ― Capillary Starting Method ― Direct Working Temp Range °C Cooling: 18°C-52°C Heating: -7°C-24°C...
- Page 34 SiK401004_A Note: Nominal capacities are based on the follow conditions. Indoor Outdoor Cooling 27°C (80.6°F) DB: 35°C (95°F) WB: 19°C (66.2°F) WB: 24°C (75.2°F) Heating 20°C (68°F) DB: 7°C (44.6°F) WB: --°C (--°F) WB: 6°C (42.8°F) Piping Length The air volume is measured at the relevant standard external static pressure. ...
-
Page 35: Electrical Data
SiK401004_A 4.2 Electrical Data Compressor Fan Motor Max. Fuse Min. Supply Breaker Size Disconnect Size Power Condenser Qty. Blower (Indoor/Outdoor) (Indoor/Outdoor) Model Supply Fan Motors Motor V,Ph,Hz ― Each Each Amps Amps Each Each FD(Y)M24PEV1K R(Y)24PEV1K 11.2 0.61 1.35 6/25 2.5/14.6 220-240V 1PH 50Hz... -
Page 36: Piping Diagram
SiK401004_A 5. PIPING DIAGRAM SPECIFICATIONS... -
Page 37: Part 2 Function Control
SiK401004_A Part 2 FUNCTION CONTROL 1. OPERATION FLOWCHART ..............30 Cooling/Dry Operation................30 Heating Operation .................. 31 2. MAIN LOGIC ..................32 Cooling Mode ..................32 Dry Mode....................33 Heating Mode ..................34 Defrosting ....................35 Fan Mode ....................36 3. -
Page 38: Operation Flowchart
SiK401004_A 1. OPERATION FLOWCHART 1.1 Cooling/Dry Operation The operation flowchart for cooling/dry operation is as follows. Power Unit start and running at cool or dry mode Indoor fan run Satisfying open Satisfy compressor starting condition Comp. condition Comp. and outdoor fan run Temp of indoor ≤... -
Page 39: Heating Operation
SiK401004_A 1.2 Heating Operation The operation flowchart for heating operation is as follows. Power Unit start and running at heat mode Satisfying open Satisfy compressor comp. condition starting condition Comp. and outdoor fan run Avoid cool wind (only when comp. start) Temp of indoor ≥... -
Page 40: Main Logic
SiK401004_A 2. MAIN LOGIC 2.1 Cooling Mode Cooling mode operation is as follows. Manual OFF ≥T +1C: Cooling mode will be entered. In that case, the compressor and outdoor unit fan runs and indoor unit fan runs at setting speed. ≤T -1C: Cooling OFF status will be entered. -
Page 41: Dry Mode
SiK401004_A 2.2 Dry Mode Dry mode operation is as follows Dry Mode Manual OFF ≥T +2C: Cooling mode will be entered. In that case, the compressor and outdoor unit fan runs and indoor unit fan runs at low speed. ≤T -2C: Cooling OFF status will be entered. -
Page 42: Heating Mode
SiK401004_A 2.3 Heating Mode Heating mode operation is as follows. Manual (running at blowing surplus heat) (running when meeting condition) ≤T -1C: Heating mode will be entered. The compressor and outdoor unit fan will run and indoor unit fan will run at setting speed and the mode of cold-blast air prevention. ≥T +1C: The compressor and outdoor unit fan will stop but the 4-way valve will be still energized. -
Page 43: Defrosting
SiK401004_A 2.4 Defrosting Defrosting mode is as follows. Conditions of Defrosting ON: When accumulated heating time has reached 44min, the compressor has been running for continuous 4min and 50sec, and Tcon. ≤ -5C has been detected for continuous 1min, defrosting starts. If auxiliary heater is ON, it will be stopped firstly. -
Page 44: Fan Mode
SiK401004_A 2.5 Fan Mode Air supply mode Manual ON Manual OFF Compressor Outdoor unit H tap Running at setting speed Indoor unit 4-way valve Time The indoor unit fan will firstly run at high speed for 5 seconds and then run at setting speed. -
Page 45: Wired Remote Controller
SiK401004_A 3. WIRED REMOTE CONTROLLER 3.1 Displaying Part Fig.3.1.1 Outline of wired controller 3.1.1 LCD Display of Wired Controller Fig.3.1.2 LCD display FUNCTION CONTROL... -
Page 46: Instruction To Lcd Display
SiK401004_A 3.1.2 Instruction to LCD Display Description Instruction to Displaying Contents Swing * Swing function Air * Air exchange function Sleep Sleeping states Running mode Each kind of running mode of indoor unit (auto mode) Cooling Cooling mode Dry mode Fan mode Heating Heating mode... -
Page 47: Buttons
SiK401004_A 3.2 Buttons 3.2.1 Silk Screen of Buttons Fig.3.2.1 Silk screen of buttons 3.2.2 Instruction to Function of Buttons Description Function of Button (1) Function selection and canceling; Enter/Cancel (2) Press it for 5s to enter the outdoor ambient temperature display. ▲... - Page 48 SiK401004_A Setting Ambient 5 Function Temperature Under off-state of the unit, press Function and Timer buttons Sensor and three continuously for 5s into debugging menu. Press Mode button to adjust 7Timer Grades of Speed the setting items and ▲ or ▼ button to set the actual value. for Indoor Fan 5 Function Continuously press Function and ▼...
-
Page 49: Installation Of Wired Controller And Project Debugging
SiK401004_A 3.3 Installation of Wired Controller and Project Debugging 3.3.1 Installation of Wired Controller Fig.3.3.1: Sketch for Installation of Wired Controller Description Socket’s base box Soleplate of Screw M4X25 Front panel of Screw installed in the wall controller controller ST2.2X6.5 Fig.3.3.1: Sketch for Installation of Wired Controller. - Page 50 SiK401004_A 3.3.2 Project Debugging Enquiry of wired controller’s address: Press Function and Mode buttons at the same time for 5s under off-state of the unit, and then LCD displays wired controller’s address number. Setting of wired controller’s address: Press Function and Mode buttons at the same time for 5s.In this case, LCD displays address number.
-
Page 51: Instruction To Operation
SiK401004_A 3.4 Instruction to Operation 3.4.1 On/Off Press On/Off button to turn on the unit. Repress this button to turn off the unit. Note: The state shown in Fig.3.4.1 indicates off-state of the unit after energization. The state shown in Fig.3.4.2 indicates on-state of the unit after energization. Fig.3.4.1 Off-state of the unit Fig.3.4.2 On-state of the unit 3.4.2 Mode Setting... -
Page 52: Temperature Setting
SiK401004_A 3.4.3 Temperature Setting Press ▲ or ▼ button to increase or decrease of setting temperature under on-state of the unit. If press either of them continuously, temperature will be increased or decreased by 1°C every 0.5s. In Cooling, Dry, Fan and Heating mode, temperature setting range is 16°C~30°C. In Auto mode, the setting temperature is un-adjustable. -
Page 53: Swing Control Function
SiK401004_A 3.4.5 Swing Control Function * Under on-state of unit, press Function button till the unit enters swing control function and then press “Enter/Cancel“ button to turn on “swing” control function. During swing function, press Function button till the unit enters swing control function and then press Enter/Cancel button to cancel swing control function. - Page 54 SiK401004_A Hour, ON blinking. In this case, press ▲ or ▼ button to adjust timer on and then press Timer button to confirm. When LCD displays xx. Hour On Off, xx. Hour means time of timer off, but time of timer on won’t be displayed.
-
Page 55: Air Exchange Setting
SiK401004_A 3.4.7 Air Exchange Setting * Turn on air function: Under on-state of the unit, press Function button into this function setting (Air mark blinks). AIR 1 displayed at the ambient temperature-displayed location (888) is defaulted (the last type of AIR will be displayed after adjustment). -
Page 56: Sleep Setting
SiK401004_A 3.4.8 Sleep Setting Sleep on: Press Function button under on-state of the unit into sleep function and then press Enter/Cancel button to turn on sleeping function. Sleep off: During sleep on-state, press Function button into sleep function and then press Enter/Cancel button to turn off this function. -
Page 57: Turbo Function Setting
SiK401004_A 3.4.9 Turbo Function Setting Turbo function: The unit at high fun speed can realize quick cooling or heating so that room temperature can quickly approach setting temperature. In cooling or heating mode, press Function button till the unit enters turbo function and then press Enter/Cancel button to turn on turbo function. - Page 58 SiK401004_A temperature in heating mode. After that, press Enter/Cancel button to turn on energy saving function for heating. After energy saving function is turned on, press Function button into energy saving function and press Enter/Cancel button to cancel this function. The energy saving setting is shown in the fig.3.4.10.
- Page 59 SiK401004_A 3.4.11 E-heater setting * E-heater: In heating mode, E-heater is allowed to be turned on for improvement of efficiency. If heating mode is turned on by button operation, auxiliary electric heating function will be automatically turned on. Press Function button in heating mode into auxiliary electric heating function, E-HEATER blinking, and press Enter/Cancel button to turn on this function.
-
Page 60: Blow Function Setting
SiK401004_A 3.4.12 Blow Function Setting Blow function: After the unit is turned off, water in evaporator of indoor unit will be automatically evaporated to avoid mildew. In cooling and dry mode, press Function button till the unit enters blow function, BLOW blinking, and then press Enter/Cancel button to turn on this function. -
Page 61: Quiet Function Setting
SiK401004_A 3.4.13 Quiet Function Setting Quiet function consists of two kinds: quiet and auto quiet. Press Function button till the unit enters quiet function setting state, Quiet or Auto Quiet mark blinks. In this case, press ▲ or ▼ button to switch between Quiet and Auto Quiet and then press Enter/Cancel button to turn on this function. -
Page 62: Field Functions
SiK401004_A 3.4.14 Field Functions Under off-state of the unit, press Function and Timer buttons continuously for 5s into debugging menu. Press Mode button to adjust the setting items and ▲ or ▼ button to set the actual value. 3.4.14.1 Ambient Temperature Thermistor Setting In field setting mode, press Mode button to adjust the temperature displayed location displaying 00, and press ▲... - Page 63 SiK401004_A 3.4.15.3 Enquiry of Outdoor Ambient Temperature Under on or off-state of the unit, press Enter/Cancel button for 5s, outdoor ambient temperature will be displayed at temperature displaying location after a sound of click .Pressing any button, this enquiry state will quit. If there is not any operation for 20s, it will automatically quit.
-
Page 64: Error Display
SiK401004_A 3.5 Error Display If there is malfunction during running of the system, LCD will display error code at temperature–displayed location. Once there is more than one malfunction,, error codes will be displayed circularly. If there are multiple circuit systems, the system number of failed system will be displayed before the colon (not for single system). -
Page 65: Setting Of Indoor Room Sensor And Checking Of Outdoor Ambient Temperature
SiK401004_A 3.6 Setting of Indoor Room Sensor and Checking of Outdoor Ambient Temperature 3.6.1 Setting of Double Indoor Room Sensors This series of ducted air-conditioning unit has two indoor room sensors. One is located at the air intake of the indoor unit and the other one is located inside the wired controller. User can select one from the two indoor room sensors on the basis of the engineering requirement. - Page 66 SiK401004_A 3.6.3 Fresh Air Control * 11-levels control can be realized for the amount of fresh air taken in. The function not only facilitates the health of users, but also controls the electricity consumption loss due to take fresh air in. This kind of control can be carried out through the wired controller. The function can set at any time, goes into effect at any time, and features very simple operation.
- Page 67 SiK401004_A 3.6.4 Position and Method of Installing Wired Remote Controller One end of the control wire of the wired remote controller is connected to main board in the electric box of indoor unit, it should be tightened by wire clamp, the other end should be connected to the wired controller.
-
Page 68: Part 3 Installation
SiK401004_A Part 3 INSTALLATION 1. INDOOR UNIT INSTALLATION .............. 61 Installation of Duct Type ................. 61 2. OUTDOOR UNIT INSTALLATION ............69 Before Installation................... 69 Installation Site ..................69 Cautions for Installation................70 Dimension Data..................71 Installation Clearance Data ..............72 3. -
Page 69: Indoor Unit Installation
SiK401004_A 1. INDOOR UNIT INSTALLATION 1.1 Installation of Duct Type 1.1.1 Before Installation After receiving the unit, check if there is any damage during transportation. If there is damage on the surface or inside, inform the transportation company or equipment supplier in written form immediately. - Page 70 SiK401004_A 3) Insert a M10 expansion bolt into the hole. Drive a nail into the bolt. Refer to the profile dimensions drawing of the indoor unit for the distance between the holes. Refer to Figure 1 for the installation of the expansion bolt, as shown in Figure 1-1-1. Figure 1-1-1 Figure 1-1-2 Figure 1-1-3...
- Page 71 SiK401004_A 7) Horizontal Survey of the Indoor Unit After installation of the indoor unit is finished, horizontal survey of the complete unit must be executed to confirm the horizontal placement of the unit, which is shown as below: Level Instrument Air Intake Air Supply Condensate Drainpipe...
- Page 72 SiK401004_A Unit : mm Model FD(Y)M24PEV1K 1101 1159 1270 1002 FD(Y)M30PEV1K FD(Y)M36PEV1K 1011 1115 1226 FD(Y)M42PEV1K FD(Y)M48PEV1K Accessories Sheet Name Description Operation and Installation Instruction Heat Insulator of Gas Pipe Joint for gas joint of the indoor unit Heat Insulator of Liquid Pipe Joint for liquid joint of the indoor unit Heat Insulator of drain Pipe for wrapping condensate pipe and rubber plug...
-
Page 73: Installation Clearance Data
SiK401004_A 1.1.5 Installation Clearance Data Nut with spring pad Washer Indoor Unit Figure 1-1-8 1.1.6 Drain Piping Work 1) Installation of Drainage Pipeline A drainage outlet is located at both the left and right sides of the indoor unit. After selecting one drainage outlet, the other outlet shall be blocked by rubber plug. - Page 74 SiK401004_A 1) Testing of Drainage System After the electrical installation is completed, carry out the testing of the drainage system. During the test, check if the water correctly flows through the pipelines. Carefully observe the joints to ensure that there is no leakage. If the unit is to be installed in a new house, carry out testing before decorating the ceiling.
- Page 75 SiK401004_A 1) Installation of the Air Supply Duct Installation of Rectangular Air Duct as shown in Figure 1-1-11 Air Intake Air Intake Air Intake Figure 1-1-11 Name Name Hanger Air Inlet Air Intake Duct Main Air Supply Duct Canvas Air Duct Air Outlet Air Inlet ...
- Page 76 SiK401004_A 2) Installation of Round Air Outlet Take out both of the fixing bolts at left Unpack package and right sides, and then take out the parts from the unit one by one Round outlet Enclosure pipe parts Outlet pipe parts Packaging board (unnecessary when installing) Tighten the parts by bolts...
-
Page 77: Outdoor Unit Installation
SiK401004_A 2. OUTDOOR UNIT INSTALLATION 2.1 Before Installation After receiving the unit, check if there is any damage during transportation. If there is damage on the surface or inside, inform the transportation company or equipment supplier in written form immediately. ... -
Page 78: Cautions For Installation
SiK401004_A 2.3 Cautions for Installation The installation of the outdoor unit shall guarantee that the discharged air will return and enough service space shall be reserved around the unit. Installation site shall be well ventilated so that the unit can intake and discharge adequate air. -
Page 79: Dimension Data
SiK401004_A 2.4 Dimension Data Figure 2-4-1 Unit : mm Model RY24PEV1K 1018 RY30PEV1K R30PEV1K RY36PEY1K 1018 RY36PEY1K RY42PEY1K R42PEY1K 1107 1100 RY48PEY1K RY48PEY1K INSTALLATION... -
Page 80: Installation Clearance Data
SiK401004_A 2.5 Installation Clearance Data Figure 2-5-1 INSTALLATION... -
Page 81: Refrigeration Piping Work
SiK401004_A 3. REFRIGERATION PIPING WORK 3.1 Refrigeration Piping Work Procedures 1) Connecting Pipe Figure 3-1-1 INSTALLATION... - Page 82 SiK401004_A Match the flaring of copper pipe to the center of screwed connection, and then screw the flared nut up by hands. Screw flaring nut with torque wrench until the spanner sound, which is shown as figure 3-1-1. Figure 3-1-2 Form 3-1-1 the tightening torque needed for tightening nut Diameter of Pipe...
- Page 83 SiK401004_A Wrap connecting pipe and the joints that have not insulated with sponge and bind them up with plastic tape. 2) Vacuuming and leak test. Remove the bonnets of gas valve and liquid valve. Aim at the center of the pipe and screw the nut of connecting pipe tightly with hands ...
- Page 84 SiK401004_A Figure 3-1-5 Starting the vacuum pump them, when the low pressure gauge turns to 760mmHg, closing the low pressure handle and stopping vacuum pump. Keep for 15 minutes, ensuring the pressure of the low pressure gauge remains. Take out the valve cap of the gas valve together with the liquid valve. ...
- Page 85 SiK401004_A Figure 3-1-6 Figure 3-1-7 Use adhesive tape to bundle the connecting pipe and the cables together. To prevent condensate from overflowing out from the drainage pipe, separate the drainage pipe from the connecting pipe and the cables. Use thermal insulation tape to wrap the pipes from the bottom of the outdoor unit until the upper end of the pipe where the pipe enters the wall.
-
Page 86: Caution In Connecting Pipes
SiK401004_A 3.2 Caution in Connecting Pipes Layout of connecting pipeline shall comply with the following principles according to actual situation. The length of connecting pipe shall be short as much as possible and it is better to restrain the length within 5m. ... -
Page 87: Specification Of Connection Pipe
3.3 Specification of Connection Pipe External Diameter Maximum Length Maximum Difference Additional of Connection in Height between Charge Model Pipe Outdoor and Indoor Unit of Refrigerant Gas Pipe Liquid Pipe (g/m) RY24PEV1K R24PEV1K RY30PEV1K R30PEV1K RY36PEY1K R36PEY1K RY42PEY1K R42PEY1K RY48PEY1K R48PEY1K INSTALLATION... -
Page 88: Electric Wiring Work
SiK401004_A 4. ELECTRIC WIRING WORK 4.1 Wiring Principle 4.1.1 General Perform wiring of the power supply in conformance with the regulations of the local electric company. For the control wires connecting indoor units, and between indoor and outdoor units, use of double-core shield wires is recommended to prevent noise trouble. - Page 89 SiK401004_A 4.1.2 Connection between wire and terminal of patch board. 1) Caution Before installing the electrical equipment, please pay attention to the following matters which have been specially pointed out by our designers: Check to see if the power supply used conforms to the rated power supply specified on the nameplate.
- Page 90 SiK401004_A A Single wire B Multiple twisted wire Solderless Terminal Unit (mm) Insulation layer Warning: If the power supply flexible line or the signal line of the equipment is damaged, only use special flexible line to replace it. Before connecting lines, read the voltages of the relevant parts on the nameplate. Then carry out line connection according to the schematic diagram.
-
Page 91: Connection Of Wiring
SiK401004_A 4.1.4 Connection of Signal Line of Wired Controller Caution: Take great care when carrying out the following connections, so as to avoid malfunction of the air-conditioning unit because of electromagnetic interference. The signal line of the wire controller must be separated from the power line and the connecting line between the indoor unit and the outdoor unit. -
Page 92: Electric Wiring Design
SiK401004_A 4.2 Electric Wiring Design RY24PEV1K/R24PEV1K + FD(Y)M24PEV1K RY30PEV1K/R30PEV1K + FD(Y)M30PEV1K Power cord 3x4 mm (H07RN-F) Power cord 3x1.0 mm (H05VV-F) Communication cords 2×0.75mm (H05RN-F) INSTALLATION... - Page 93 SiK401004_A RY36PEY1K/R36PEY1K + FD(Y)M36PEV1K RY42PEY1K/R42PEY1K + FD(Y)M42PEV1K RY48PEY1K/R48PEY1K + FD(Y)M48PEV1K 3N ~ 50Hz Power cord 5x4mm (H07RN-F) Power cord 3x1.5 mm (H05VV-F) Communication cords 2×0.75mm (H05RN-F) INSTALLATION...
-
Page 94: Specification Of Power Supply Wire And Air Switch
Minimum Sectional Capacity of Minimum Sectional Power Supply Area of Power breaker Area of Earth Wire Model Supply Wire (V, Ph, Hz) RY24PEV1K 220-240, 1, 50 R24PEV1K RY30PEV1K 220-240, 1, 50 RY30PEV1K RY36PEY1K 380-415, 3, 50 R36PEY1K RY42PEY1K 380-415, 3, 50... -
Page 95: Part 4 Maintenance
SiK401004 Part 4 MAINTENANCE 1. REMOTE CONTROLLER DISPLAY MALFUNCTION AND CONTENTS .. 88 2. FLOW CHART OF TROUBLESHOOTING ..........91 WIRING DIADRAM................101 Wiring Diagram-Outdoor Units ............. 101 Wiring Diagram-Indoor units..............109 4. DISASSEMBLY AND ASSEMBLY PROCEDURE OF MAIN PARTS ..110 Outdoor Unit .................. -
Page 96: Remote Controller Display Malfunction And Contents
SiGR401004_A 1. Remote controller display malfunction and contents Malfunction Origin of Trouble Trouble Case Measure Code Signal Abnormality is detected when the contact of the high pressure switch opens for 3 sec. The Actuation of High High pressure system will be shut down. Only On/Off button is pressure switch switch acceptable. - Page 97 SiK401004_A Check the communication state between the indoor unit PCB and outdoor unit PCB by micro-computer. Abnormality is detected when the correct communication is not Malfunction of Communication conducted in 30se. When the malfunction of communications communication occurs, the system will be shut down the screen will display the malfunction code (E6).The reset for the communication failure is automatic reset.
- Page 98 SiK401004_A Malfunction outdoor ambient temperature thermistor is detected when a short circuit or an open circuit in the outdoor ambient temperature thermistor for more than 5 sec. The system will be shut down in cooling Malfunction of outdoor Outdoor ambient operation and dehumidifying operation.
-
Page 99: Flow Chart Of Troubleshooting
SiK401004_A 2. FLOW CHART OF TROUBLESHOOTING Service engineer shall collect the malfunction information as much as possible and research them thoroughly, list these electrical parts which may cause malfunction, service engineer shall be able to determine the specific reason and solve the faulted parts. ★... - Page 100 SiK401004_A Malfunction display: E1 Actuation of high pressure switch High pressure switch Check if the Check if pressure pressure is really high pressure with Replace the outdoor the measurement of a manometer switch is normal unit main board Replace pressure switch Check if Refer to Instruction...
- Page 101 SiK401004_A Malfunction display: E3 Actuation of low pressure switch Compressor low pressure switch Check if the pressure is really low pressure Refer to the high with the measurement of a pressure protection manometer Check if Charge refrigerant according to the amount specified refrigerant in the system is in the nameplate and calculated additional amount insufficient...
- Page 102 SiK401004_A Malfunction display: E4 Abnormal discharge temperature Abnormal discharge temperature Measure if Measure if Replace relevant compressor’s discharge temperature temperature sensor’s resistance discharge temperature has reached 130C value is correct sensor Replace the outdoor System pipeline leaks so unit main board complementation is needed.
- Page 103 SiK401004_A Malfunction display: E5 Compressor Overheat Abnormal overheat Check if Adjust compressor's compressor’s connection line is connection line properly connected Check if current Replace overheat protector value is higher than the protector’s setting If unit’s high pressure is normal Refer to “E1”...
- Page 104 SiK401004_A Malfunction display: E6 Communications Failure Malfunction of communication Check if Confirm the locations of indoor unit’s communication line is plug and socket properly connected Check if Replace the communication communication line is closed circuit line Check if the Confirm the locations of communication line between indoor and plug and socket...
- Page 105 SiK401004_A Malfunction display: E9 Malfunction of drain water level Malfunction of drain water level Check if the Replace the main board of Check if water overflow voltage of liquid level switch the indoor unit end is ok Check the liquid level switch Check if Check if the...
- Page 106 SiK401004_A Malfunction display: F0 Malfunction of Indoor Room Thermistor at Air Intake Malfunction of indoor room thermistor at air intake Check if the Check the direction of plug of the temperature sensor is correctly the plug and socket connected with socket on the mainboard Remove the Replace temperature...
- Page 107 SiK401004_A Malfunction display: F3 Malfunction of Outdoor Ambient Thermistor Malfunction of outdoor ambient thermistor Check if the plug of the temperature sensor is Check the direction of correctly connected with socket on the plug and socket the mainboard Remove the Replace temperature sensor to check if the resistance sensor...
- Page 108 SiK401004_A Malfunction display: F5 Malfunction of Indoor Room Thermistor at Wired Controller Malfunction of indoor room thermistor at wired controller Replace Wired Controller of the indoor unit MAINTENANCE...
-
Page 109: Wiring Diadram
SiK401004_A 3 WIRING DIADRAM 3.1 Wiring Diagram-Outdoor Units 3.1.1. RY24PEV1K MAINTENANCE... - Page 110 SiK401004_A 3.1.2. R24PEV1K: MAINTENANCE...
- Page 111 SiK401004_A 3.1.3. RY30PEV1K MAINTENANCE...
- Page 112 SiK401004_A 3.1.4. R30PEV1K MAINTENANCE...
- Page 113 SiK401004_A 3.1.5. RY36PEY1K MAINTENANCE...
- Page 114 SiK401004_A 3.1.6. R36PEY1K MAINTENANCE...
- Page 115 SiK401004_A 3.1.7. RY42PEY1K/RY48PEY1K MAINTENANCE...
- Page 116 SiK401004_A 3.1.8. R42PEY1K/ R48PEY1K MAINTENANCE...
-
Page 117: Wiring Diagram-Indoor Units
SiK401004_A 3.2 Wiring Diagram-Indoor units 3.2.1 Duct Type Model: FD(Y)M24PEV1K; FD(Y)M30PEV1K; FD(Y)M36PEV1K; FD(Y)M42PEV1K; FD(Y)M48PEV1K MAINTENANCE... -
Page 118: Disassembly And Assembly Procedure Of Main Parts
SiK401004_A 4. DISASSEMBLY AND ASSEMBLY PROCEDURE OF MAIN PARTS 4.1 Outdoor Unit R(Y)24PEV1K; R(Y)30PEV1K; R(Y)36PEV1K; R(Y)42PEV1K; R(Y)48TPEV1K Disassembly and Assembly of external casing Remark : Make sure that the power supply is cut off before disassemble of the external casing. Handling Instruction Step Illustration... - Page 119 SiK401004_A ●Put new right (back) panel into right position. ●Screw down the surrounding retaining screws with screwdriver. 6. Installation of new right (back) panel ●Put new panel (external casing) into right position on the unit; ●Screw down the surrounding retaining screws with screwdriver. ●Some models (R(Y)30PEV1K;...
- Page 120 SiK401004_A Disassembly and Assembly of Compressor Remark : Make sure there isn’t any refrigerant in pipe system and the power supply is cut off before removal of the compressor. Handling Instruction Step Illustration ●Unscrew the retaining screw of power cord with screwdriver. ●Unplug the power cord.
- Page 121 SiK401004_A Weld suction ●Heat the suction and discharge pipe and discharge with gas welding before removing pipe of compressor. compressor ●Provide nitrogen protection during gas welding and the nitrogen pressure 6. Connection of suction should be 0.05±0.01Mpa (relative and discharge pipe with pressure) pipeline system ●Please pay attention to heating in case...
- Page 122 SiK401004_A ●Remove the solenoid valve from 4-way valve. 2. Removal of solenoid valve ●Heat connection pipes for 4 pipes of 4-way valve with gas welding before removal of 4-way valve. ●Record the direciton of the 4-way valve and installation postition of each pipe before welding away 4-way valve.
- Page 123 SiK401004_A ●Pump vacuum and fill cooling medium if the system leak test passes. 7. Examination of System and cooling medium fillin Disassembly and Assembly of capillary Remark : Make sure that there isn’t any refrigerant in pipe system and the power supply is cut off before removal of the capillary Step Illustration...
- Page 124 SiK401004_A ●Position accurately new vapor liquid separator. ●Connect new vapor liquid separator with pipe line using gas welding ●screw down the retaining bolts on pothook. 3. Installation of new vapor liquid separator Disassembly and Assembly of Axial Flow Fan and motor Remark : Make sure that power supply of the unit is cut down before removal of axial flow fan and motor.
- Page 125 SiK401004_A ●Position reliably the new fan on the motor axis ●Hold the fans without movement. ●Screw down retaining screws for fan 5. Assembly of new with wrench. axial flow fan ●Re-assemble the outdoor parts of unit top cover, panel (external casing) and rear grill, etc.
- Page 126 SiK401004_A ●Disassemble retaining screws between electrical parts box and middle clapbord, motor support as well as right panel with screwdriver. 3. Disaasembly of sub-assy of electrical box. ●Hold and remove them upward to disconnect them with middle partition ●Remove sub-assy of electric box. 4.
-
Page 127: Indoor Unit
SiK401004_A 4.2 Indoor Unit 4.2.1 Duct Type FDM24PEV1K; FDM30PEV1K; FDM36PEV1KI; FDM42PEV1K; FDM48PEV1K; FDM60PEV1K Disassembly of filter screen for return air Remark: Make sure that the power supply is cut off before disassembling and protect all the parts during disassembly. Do not put filter screen near the high temperature heat source Step Illustration... - Page 128 SiK401004_A Disassembly of electrical box cover panel and electrical box Remark: Make sure that the power supply is cut off before disassembling and protect all the parts during disassembly, especially the electrical components. Do not dampen or hit them Step Illustration Handling Instruction ●Remove the screw...
- Page 129 SiK401004_A Disassembly of drainage pump Remark: Make sure that the power supply is cut off before disassembling and protect all the parts during disassembly. Step Illustration Handling Instruction ●Disassemble the screws on seal-plates of indoor panels and the pump drainage pipe. Remove the seal-plates.(As is shown in the illustration, the circle represents screws...
- Page 130 SiK401004_A Disassembly of water-containing plate Remark: Make sure that the power supply is cut off before disassembling and protect all the parts during disassembly. Step Illustration Handling Instruction ●Remove the fastening screws on the cover plate and remove the cover plate. (As is shown in the illustration, circle represents 6 screws under the cover plate...
- Page 131 SiK401004_A Disassembly of fan and motor Remark: Make sure that the power supply is cut off before disassembling and protect all the parts during disassembly. Step Illustration Handling Instruction ●Remove the fixing screws on the fan components. (As shown in the illustration, circle represents 6 screws.) 1.
- Page 132 SiK401004_A Disassembly of evaporator Remark: Make sure that the power supply is cut off and protect the copper tube and aluminum fin. If the time for disassembly shall be long, put the copper tube under pressurized condition. Step Illustration Handling Instruction ●Remove the screw connecting left and right side panels on the evaporator...
- Page 133 SiK401004_A Disassembly of external casing cabinet Remark: Make sure the power supply is cut off before disassembling and protect all the parts during disassembly. Step Illustration Handling Instruction ●Remove the screws between right and left panels and upper cover plates. Remove right and left panels.
- Page 134 Daikin Industries, Ltd.’s products are manufactured for export to numerous countries throughout the Warning world. Daikin Industries, Ltd. does not have control over which products are exported to and used in a particular country. Prior to purchase, please therefore confirm with your local authorised importer, distributor and/or retailer whether this product conforms to the applicable standards, and is suitable for use, in the region where the product will be used.
Need help?
Do you have a question about the RY24PEV1K and is the answer not in the manual?
Questions and answers