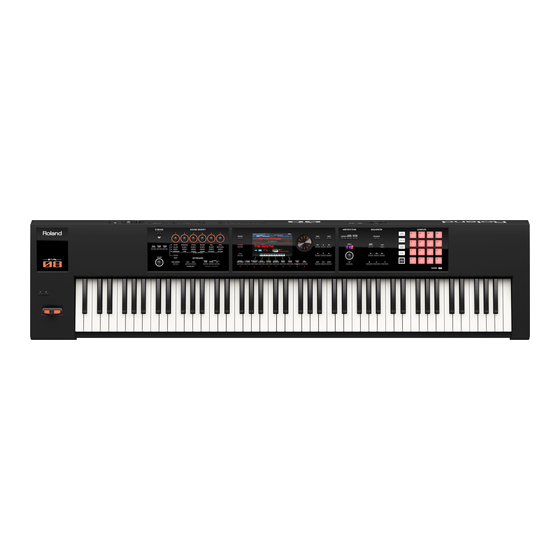
Roland FA-06 Quick Start Manual
Hide thumbs
Also See for FA-06:
- Parameter manual (120 pages) ,
- Service notes (67 pages) ,
- Quick start manual (32 pages)
Table of Contents
Advertisement
Quick Links
Introduction (A Message from the Developers) . . . . . . . . . . . . . . . . . . . . 2
Main Features . . . . . . . . . . . . . . . . . . . . . . . . . . . . . . . . . . . . . . . . . . . . . . . . . . . 3
Getting Ready . . . . . . . . . . . . . . . . . . . . . . . . . . . . . . . . . . . . . . . . . . . . . . . . . . . 4
Panel Descriptions . . . . . . . . . . . . . . . . . . . . . . . . . . . . . . . . . . . . . . . . . . . . . . 4
An Overview of This Unit . . . . . . . . . . . . . . . . . . . . . . . . . . . . . . . . . . . . . . . . 8
Turning the Power On/Off . . . . . . . . . . . . . . . . . . . . . . . . . . . . . . . . . . . . . . . 9
Playing the Demo Songs . . . . . . . . . . . . . . . . . . . . . . . . . . . . . . . . . . . . . . . . 9
Basic Operation . . . . . . . . . . . . . . . . . . . . . . . . . . . . . . . . . . . . . . . . . . . . . . . .10
Synthesizer (Performing) . . . . . . . . . . . . . . . . . . . . . . . . . . . . . . . . . . . . . . . .11
Selecting a Tone . . . . . . . . . . . . . . . . . . . . . . . . . . . . . . . . . . . . . . . . . . . . . . . .11
Performance Settings . . . . . . . . . . . . . . . . . . . . . . . . . . . . . . . . . . . . . . . . . .12
Using Performance Functions . . . . . . . . . . . . . . . . . . . . . . . . . . . . . . . . . . .13
Modifying the Sound in Real Time . . . . . . . . . . . . . . . . . . . . . . . . . . . . . .14
Registering/Recalling Favorite Sounds (Favorites) . . . . . . . . . . . . . . .16
Synthesizer (Editing) . . . . . . . . . . . . . . . . . . . . . . . . . . . . . . . . . . . . . . . . . . . .17
Editing a Studio Set . . . . . . . . . . . . . . . . . . . . . . . . . . . . . . . . . . . . . . . . . . . .17
Editing a Tone . . . . . . . . . . . . . . . . . . . . . . . . . . . . . . . . . . . . . . . . . . . . . . . . . .17
Editing the Effects . . . . . . . . . . . . . . . . . . . . . . . . . . . . . . . . . . . . . . . . . . . . . .18
Saving a Studio Set, Tone, or Song . . . . . . . . . . . . . . . . . . . . . . . . . . . . . .18
Printed Manual
• Quick Start (this document)
This explains basic operation.
• Using the Unit Safely (separate leaflet)
Read this first. It contains precautions that you must observe in
order to use the unit safely.
To obtain the PDF manual
1.
Enter the following URL in your computer.
http://roland.cm/om
2.
Choose "FA-06," "FA-07," or "FA-08" as the product
name.
Before using this unit, carefully read the sections entitled "USING THE UNIT SAFELY" and "IMPORTANT NOTES" (leaflet "USING THE UNIT SAFELY" and Quick
Start (p. 27)). These sections provide important information concerning the proper operation of the unit. Additionally, in order to feel assured that
you have gained a good grasp of every feature of your new unit, read Quick Start in its entirety. This Quick Start should be saved and kept on hand as a
convenient reference.
Copyright © 2017 ROLAND CORPORATION
Quick Start
Sampler (Recording) . . . . . . . . . . . . . . . . . . . . . . . . . . . . . . . . . . . . . . . . . . . .19
Playing Samples . . . . . . . . . . . . . . . . . . . . . . . . . . . . . . . . . . . . . . . . . . . . . . . .19
Sampling . . . . . . . . . . . . . . . . . . . . . . . . . . . . . . . . . . . . . . . . . . . . . . . . . . . . . .20
Sequencer (Creating Songs) . . . . . . . . . . . . . . . . . . . . . . . . . . . . . . . . . . . . .21
Selecting/Playing a Song . . . . . . . . . . . . . . . . . . . . . . . . . . . . . . . . . . . . . . .21
Recording a Performance (Realtime Recording) . . . . . . . . . . . . . . . . .22
DAW Control . . . . . . . . . . . . . . . . . . . . . . . . . . . . . . . . . . . . . . . . . . . . . . . . . . . .24
Loading a MIDI Track into a DAW Software . . . . . . . . . . . . . . . . . . . . . .24
Using This Unit as a DAW Controller . . . . . . . . . . . . . . . . . . . . . . . . . . . . .25
Settings . . . . . . . . . . . . . . . . . . . . . . . . . . . . . . . . . . . . . . . . . . . . . . . . . . . . . . . .26
Detailed Function Settings (Menu) . . . . . . . . . . . . . . . . . . . . . . . . . . . . . .26
Backing Up User Data (Backup/Restore) . . . . . . . . . . . . . . . . . . . . . . . . .26
Restoring the Factory Settings (Factory Reset) . . . . . . . . . . . . . . . . . . .26
USING THE UNIT SAFELY . . . . . . . . . . . . . . . . . . . . . . . . . . . . . . . . . . . . . . . . .27
IMPORTANT NOTES . . . . . . . . . . . . . . . . . . . . . . . . . . . . . . . . . . . . . . . . . . . . .27
PDF Manual
(download from the Web)
The PDF manual lets you quickly search for a term, and view a section of interest
simply by clicking a link.
• Reference Manual
This explains all functions of the unit.
• Parameter Guide
This explains parameters of the unit.
• Sound List
This lists the sounds that are built into the unit.
• Application Guide
This explains specific ways to play and use the unit.
• MIDI Implementation
This is detailed reference material regarding MIDI messages.
Advertisement
Table of Contents

Related Manuals for Roland FA-06


Summary of Contents for Roland FA-06
-
Page 1: Table Of Contents
This lists the sounds that are built into the unit. http://roland.cm/om • Application Guide This explains specific ways to play and use the unit. Choose “FA-06,” “FA-07,” or “FA-08” as the product • MIDI Implementation name. This is detailed reference material regarding MIDI messages. -
Page 2: Introduction (A Message From The Developers)
That’s the FA-06/07/08. In developing the FA-06/07/08, the first thing we wanted to do was to shorten the start-up time. Even if you turn on the power the moment you want to play, your musical ideas might disappear if it takes your instrument several minutes to get ready. If this has ever happened to you, you’ll appreciate the value of quick startup. -
Page 3: Main Features
Main Features The Sound Engine of the Flagship Model • A top-class sound engine is built in, providing the latest SuperNATURAL Acoustic, SuperNATURAL Synth, and PCM sounds, as well as support for expansion slots to accommodate Wave expansion sounds. • The SuperNATURAL synth tones are completely compatible with the INTEGRA-7. Tone import is also supported, and you can take advantage of an enormous sound library including sounds provided via the Axial sound library site. -
Page 4: Getting Ready
Getting Ready Panel Descriptions Top Panel Number Area Name Explanation Page By positioning your hand over the D-BEAM, you can apply various effects to the D-BEAM controller sound. Lets you play monophonic synthesizer sounds by moving your hand above the [SOLO SYNTH] button D-BEAM p. - Page 5 Number Area Name Explanation Page p. 22 [SEQUENCER] button Accesses the SEQUENCER screen. [SONG SELECT] button Selects a song. p. 21 p. 21 [LOOP] button Loops the song playback or overdubbing. Moves the song position to the beginning. If you press this button during playback, ] button the position returns to the beginning of the song and playback stops.
- Page 6 * Use a commercially available USB flash drive or a USB flash separately) or pedal switch (DP series; sold separately) (DP series; sold separately) and drive sold by Roland. However, we cannot guarantee that all use it as a hold pedal. here and use them to control various parameters or commercially available USB flash drives will work with this functions.
- Page 7 If you are unsure of the connection method, contact the nearest Roland Service Center, or an authorized Roland distributor, as listed on the “Information” page. GUITAR/MIC jack...
-
Page 8: An Overview Of This Unit
Getting Ready An Overview of This Unit Broadly speaking, this unit consists of three sections: synthesizer, sequencer, and sampler. Synthesizer Sequencer Sampler Synthesizer page 11 This unit provides 16 parts, allowing you to play multiple tones Studio set Normally you’ll simultaneously. -
Page 9: Turning The Power On/Off
Turning the Power On/Off Once everything is properly connected (p. 6), be sure to follow the procedure below to turn on their power. If you turn on equipment in the wrong order, you risk causing malfunction or equipment failure. Turning the Power On Concerning the Auto Off function * Before turning the unit on/off, always be sure to turn the The power to this unit will be turned off automatically... -
Page 10: Basic Operation
Getting Ready Basic Operation This section explains the basic button and dial operations you’ll use to operate this unit. Cursor Buttons Changing a Value One screen or window can contain multiple parameters (items To change the value that’s highlighted by the cursor, use the to set) or selections. -
Page 11: Synthesizer (Performing)
These are sounds that were called “rhythm sets” power or choose a different studio set, your tone selection on Roland synthesizers of the past, and have been disappears. If you want this unit to remember the tone you PCM drum kits tuned for this unit. -
Page 12: Performance Settings
Synthesizer (Performing) Performance Settings Raising/Lowering the Key Range in Semitones Raising/Lowering the Key Range in Octaves (Octave) (Transpose) Press the OCTAVE [DOWN] button or [UP] button. Hold down the [TRANSPOSE] button and press the MEMO [–] button or [+] button. •... -
Page 13: Using Performance Functions
Using Performance Functions Playing Arpeggios Playing Chords (Chord Memory) The arpeggiator is a function that automatically produces an Chord memory is a function that sounds a pre-registered arpeggio based on the keys that you press. chord form when you play a single note on the keyboard. Press the [ARPEGGIO] button to make it light. -
Page 14: Modifying The Sound In Real Time
Synthesizer (Performing) Modifying the Sound in Real Time Modifying the Sound by Moving Your Hand (D-BEAM Controller) Press a button to select the effect that the D-BEAM controller will have. Button Explanation [SOLO SYNTH] Play a monophonic synthesizer by moving your hand above the D-BEAM controller. [EXPRESSION] Use the D-BEAM controller to control volume. - Page 15 Using the SOUND MODIFY Knobs to Vary the Sound You can use the SOUND MODIFY knobs to control the sound in real time. You can control a total of 24 parameters, organized as four groups each containing six parameters. Group that is controlled (lit) Press the [SELECT] button to select the group of parameters that you want to control.
-
Page 16: Registering/Recalling Favorite Sounds (Favorites)
Synthesizer (Performing) Registering/Recalling Favorite Sounds (Favorites) Sounds (tones or studio sets) that you frequently use in live Bank 9 performance can be registered as “favorites” for instant recall. You can register ten sounds in each bank; ten such banks (0–9) can be created. -
Page 17: Synthesizer (Editing)
Synthesizer (Editing) Editing a Studio Set Here’s how to edit a studio set. Overall Settings for the Studio Set Editing the Part Settings Here’s how to make overall settings for the studio set. A studio set has 16 parts, and you can adjust settings such as volume (Level), equalizer (EQ), and key range (KBD) for each part. -
Page 18: Editing The Effects
Synthesizer (Editing) Editing the Effects Here’s how to edit the effects. Editing the effect parameters Hold down the [SHIFT] button and press the [3] (Effects Edit) button. The EFFECTS EDIT screen appears. Press a function button to enter the edit screen for each effect. -
Page 19: Sampler (Recording)
Sampler (Recording) Playing Samples This unit lets you play back samples that are assigned to pads [1]–[16]. Copying a sample Press a pad [1]–[16]. While a sample is playing, its Hold down the pad of the sample that you want to copy pad is blink. -
Page 20: Sampling
Sampler (Recording) Sampling This unit lets you sample the following sounds. Samples you’ve recorded can be played using the pads. • Keyboard performance • Input from the AUDIO INPUT jacks (audio device, microphone, guitar) Connect the device that you want to sample (audio Make sampling settings. -
Page 21: Sequencer (Creating Songs)
Sequencer (Creating Songs) Selecting/Playing a Song Here’s how to select and play a song. Press the [SONG SELECT] button. Loop-playing a Song You can make the song play repeatedly over the region you specify (loop playback). Hold down the [SHIFT] button and press the [LOOP] button. -
Page 22: Recording A Performance (Realtime Recording)
Sequencer (Creating Songs) Recording a Performance (Realtime Recording) Realtime recording is the method in which your keyboard performance and controller operations are recorded just as you perform them. Here we explain how to use realtime recording with two tracks. When you’ve finished recording, press the [ ] button. - Page 23 Sequencer (Creating Songs) Recording on track 2 Saving the Song Press the [SEQUENCER] button. The song you record is temporary. It will be lost when you turn off the power or select another song. If you want to keep the recorded song, save it to an SD card (p. 18).
-
Page 24: Daw Control
DAW Control Loading a MIDI Track into a DAW Software MIDI tracks that you created on this unit can be exported in WAV format and imported into your DAW software. Saving MIDI Tracks in WAV Format (Multi-track Loading WAV Files into DAW Software Export) Here’s how to load the exported WAV files into your DAW software. -
Page 25: Using This Unit As A Daw Controller
For details, refer to “DAW” in “Reference Manual” (PDF). Use this unit to control your DAW software. MEMO For details on downloading and installing the USB driver, refer Available controllers Explanation to the Roland website. Start playback. ] button http://www.roland.com/support/ Start recording on record-standby tracks. -
Page 26: Settings
Settings Detailed Function Settings (Menu) Press the [MENU] button. Menu Explanation The MENU screen appears. Tone Edit Edit a tone (p. 17). Effect Edit Edit the effects (p. 18). Use the cursor buttons to select a menu item, and press Part View View a list of part settings (p. -
Page 27: Using The Unit Safely
• The SD logo ( ) and SDHC logo ( ) are • Roland assumes no liability concerning the restoration of any trademarks of SD-3C, LLC. stored content that has been lost. • This product contains eParts integrated software platform of eSOL Co.,Ltd. - Page 28 *1 When using the KS-18Z, ensure that the height of the unit is one meter or lower. *2 Use a commercially available USB flash drive or a USB flash drive sold by Roland. However, we cannot guarantee that all commercially available USB flash drives will work with this unit.