Sign In
Upload
Manuals
Brands
TOYOTA Manuals
Automobile
LAND CRUISER
TOYOTA LAND CRUISER Manuals
Manuals and User Guides for TOYOTA LAND CRUISER. We have
5
TOYOTA LAND CRUISER manuals available for free PDF download: Owner's Manual, Service Manual Supplement, Repair Manual
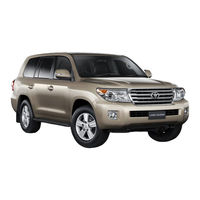
Toyota LAND CRUISER Owner's Manual (623 pages)
Station Wagon
Brand:
Toyota
| Category:
Automobile
| Size: 12.75 MB
Table of Contents
Table of Contents
2
Table of Contents
3
Exterior
9
Pictorial Index
9
Interior
12
Instrument Panel
16
Lift-Up Back Door Type
22
Luggage Compartment
22
Double Back Door Type
23
Accessories, Spare Parts and Modification of Your Toyota
25
For Your Information
25
Installation of a Mobile Two-Way Radio System
26
Vehicle Data Recordings
26
Event Data Recorder
27
Disclosure of the EDR Data
28
Scrapping of Your Toyota
28
Arrows Indicating Operations
30
Cautions & Notices
30
Symbols
30
Symbols Used in Illustrations
30
1 Before Driving
32
1-1. Key Information
33
Keys
33
Using the Mechanical Key
33
Key Number Plate
34
When Required to Leave the Vehicle’s Key with a Parking Attendant
34
When Riding in an Aircraft
34
Smart Entry & Start System
35
1-2. Opening, Closing and Locking the Doors
35
Back Door
36
Side Door Handle
36
Unlocking and Locking the Doors
36
Antenna Location and Effective Range
37
Conditions Affecting Operation
39
Operation Signals
39
Switching the Door Unlock Function
40
Battery-Saving Function
41
Electronic Key Battery Depletion
41
To Operate the System Properly
41
Note for the Entry Function
42
When the Vehicle Is Not Driven for Extended Periods
42
Alarms and Warning Indicators
43
Security Feature
43
Customization that Can be Configured at Toyota Dealer
46
If the Smart Entry & Start System Does Not Operate Properly
46
Vehicles with a Smart Entry & Start System
47
Vehicles Without a Smart Entry & Start System
47
Wireless Remote Control
47
Alarm
48
Door Lock Buzzer
48
Operating Conditions
48
Power Back Door Operation
48
If the Wireless Remote Control Does Not Operate Properly
49
Side Doors
51
Door Lock Switch
52
Inside Lock Button
52
Locking the Front Doors from the Outside Without a Key
53
Rear Door Child-Protector Lock
53
Using the Mechanical Key (Vehicles with a Smart Entry & Start System)
54
Back Door (Lift-Up Type)
55
Locking and Unlocking the Back Door
55
Opening the Back Door from Outside the Vehicle
55
Canceling the Power Back Door System
56
Opening the Back Door from Inside the Vehicle
56
Power Back Door Switch
56
Rear Step Bumper
57
When Closing the Back Door
57
The Power Back Door Can be Opened/Closed When
58
If the Back Door Opener Is Inoperative
59
Back Door Closer (Vehicles with Power Back Door)
60
Fall-Down Protection Function
60
Jam Protection Function (Vehicles with Power Back Door)
60
When Re-Connecting the Battery
60
Back Door (Double Type)
67
Back Door Child-Protector Lock
70
Manual Seat
73
Adjustable Components (Seats, Mirrors, Steering Wheel) Front Seats
73
Active Head Restraint
74
Power Seat
74
Rear Seats
76
Second Seat
76
Third Seat (with Center Seat)
76
Third Seat (Without Center Seat)
76
Before Tumbling the Second Seats
77
Tumbling the Second Seats and Third Seat Entry
77
Tumbling the Second Seats
78
If You Cannot Raise the Right Side Seatback
79
Before Folding up the Third Seats
80
Folding up the Third Seats
80
Driving Position Memory System
86
Entering a Position to Memory
86
Recalling the Memorized Position
87
Linking Driving Position Memory with Door Unlock Operation
88
Using the Wireless Remote Control
88
Canceling the Linked Door Unlock Operation
89
Using the Door Lock Switch
89
If the Battery Is Disconnected
90
Retained Accessory Power
90
To Cancel Seat Position Recall
90
Head Restraints
91
Adjusting the Height of the Head Restraints
92
Adjusting the Second Center Seat Head Restraint
92
Third Outboard Seats
92
Removing the Head Restraints
93
Installing the Head Restraints
94
When Not Using the Third Center Seat Head Restraint
94
Correct Use of the Seat Belts
95
Fastening and Releasing the Seat Belt
95
Seat Belts
95
Fastening and Releasing the Third Center Seat Belt
96
Releasing and Storing the Third Center Seat Belt
97
Adjusting the Height of the Belt
98
Seat Belt Pretensioners (Front and Second Outboard Seats)
98
Automatic Locking Retractor (ALR)
99
Emergency Locking Retractor (ELR)
99
Pre-Crash Seat Belts
99
Child Seat Belt Usage
100
Replacing the Belt after the Pretensioner Has Been Activated
100
Seat Belt Regulations
100
When the Third Center Seat Belt Cannot be Extended
100
Manual Tilt & Telescopic Steering Wheel (Type A)
105
Steering Wheel
105
To Change the Angle
105
To Change the Column Length
105
Manual Tilt & Telescopic Steering Wheel (Type B)
106
Auto Tilt Away
107
Power Tilt & Telescopic Steering Wheel
107
Automatic Adjustment of the Steering Position
108
Adjusting the Height of the Rear View Mirror
109
Anti-Glare Inside Rear View Mirror
109
Anti-Glare Function
110
Auto Anti-Glare Inside Rear View Mirror
110
Manual Anti-Glare Inside Rear View Mirror
110
To Prevent Sensor Error
111
Manually-Adjustable Type
112
Outside Rear View Mirrors
112
Power-Adjustable Type
112
Folding Back the Mirrors
113
Auto Anti-Glare Function
114
Linked Mirror Function When Reversing
114
Mirror Angle Can be Adjusted When (with Power-Adjustable Type Only)
114
When the Mirrors Are Fogged up
114
Power Windows
116
1-4. Opening and Closing the Windows and Moon Roof
116
Lock Switch
117
Door Lock Linked Window Operation
118
Jam Protection Function (Type a Driver’s Window Only and Type B)
118
Operating the Power Windows after Turning the Engine off
118
The Power Windows Can be Operated When
118
When the Power Window Does Not Close Normally
119
Moon Roof
121
Opening and Closing
121
Door Lock Linked Moon Roof Operation
122
Jam Protection Function
122
The Moon Roof Can be Operated When
122
To Reduce Moon Roof Wind Noise
122
If the Moon Roof Closes but then Re-Opens Slightly
123
If the Moon Roof Tilts down but then Tilts Back up
123
When the Moon Roof Does Not Close Normally
123
Moon Roof Open Reminder Function
124
Moon Roof Open Warning Buzzer (Vehicles with Optitron Type Meters)
124
Before Refueling the Vehicle
125
Opening the Fuel Tank Cap
125
Closing the Fuel Tank Cap
127
Fuel Types
127
Use of Ethanol Blended Gasoline in a Gasoline Engine
127
Engine Immobilizer System
130
1-6. Theft Deterrent System
130
Conditions that May Cause the System to Malfunction
131
System Maintenance
131
Setting the Alarm System
132
Triggering of the Alarm
132
Deactivating or Stopping the Alarm
133
Items to Check before Locking the Vehicle
133
Alarm-Operated Door Lock
135
Panic Mode
135
When the Battery Is Disconnected
135
Correct Driving Posture
136
1-7. Safety Information
136
SRS Airbags
138
Front Airbags
138
Side and Curtain Shield Airbags
139
Airbag System Components
140
If the SRS Airbags Deploy (Inflate)
141
SRS Airbag Deployment Conditions (SRS Front Airbags)
141
Types of Collisions that May Not Deploy the SRS Airbag (Front Airbags)
142
Types of Collisions that May Not Deploy the SRS Airbag
143
Deactivating the Curtain Shield Airbags in a Vehicle Rollover
151
This Switch Only Should be Used
152
Operating Conditions When the RSCA off Indicator Is on
152
Child Restraint Systems
153
Types of Child Restraints
153
Baby Seat (Infant Seat)
154
Child Seat (Convertible Seat)
154
Junior Seat (Booster Seat)
154
Child Restraint System Suitability for Various Seating Positions
155
When Installing the Child Restraint System on the Front Passenger Seat
159
Selecting an Appropriate Child Restraint System
159
Installing Child Restraints
162
ISOFIX Rigid Anchor
162
Child Restraint Anchor Fitting
162
Installing Child Restraints Using a Seat Belt
163
Removing a Child Restraint System Installed with a Seat Belt
168
Installation with ISOFIX Rigid Anchor
168
Using the Child Restraint Anchor Fitting
170
When Installing Child Restraint System in the Front Passenger’s Seat
171
2 When Driving
176
Driving Procedures Driving the Vehicle
177
Starting on a Steep Uphill
177
Breaking in Your New Toyota
178
Driving in the Rain
178
Drum-In-Disc Type Parking Brake System
178
Engine Speed While Driving
178
Idling Time before Engine Stop (Diesel Engine)
179
Operating Your Vehicle in a Foreign Country
179
Eco Driving Indicator
180
Engine (Ignition) Switch (Vehicles Without a Smart Entry & Start System)
190
Starting the Engine
190
Changing the Engine Switch Positions
191
If the Engine Does Not Start
192
Key Reminder Function
192
Turning the Key from “ACC” to “LOCK”
192
When the Steering Lock Cannot be Released
192
Engine (Ignition) Switch (Vehicles with a Smart Entry & Start System)
194
Changing “ENGINE START STOP” Switch Mode
195
Operation of the “ENGINE START STOP” Switch
196
When the “ENGINE START STOP” Switch Indicator Flashes in Amber
196
Auto Power off Function
197
Automatic Transmission
199
Shifting the Shift Lever
199
Shift Position Uses
200
Selecting a Driving Mode
201
Changing Shift Ranges in “S” Mode
202
Downshifting Restrictions Warning Buzzer (in the “S” Mode)
203
Shift Ranges and Their Functions
203
When Driving with the Cruise Control or Radar Cruise Control Activated
203
“S” Mode
203
Ai-Shift
204
Second Start Mode Automatic Deactivation
204
If the Indicators Flash Faster than Usual
205
Turn Signal Lever
205
Turn Signals Can be Operated When
205
Parking Brake
206
After Adjusting the Steering Wheel
207
Horn
207
Non-Optitron Type Meters
208
Optitron Type Meters
208
Instrument Cluster Gauges and Meters
208
Engine Coolant Temperature Gauge
209
Fuel Gauge
209
Speedometer
209
Tachometer
209
Switching the Display
210
Eco Driving Indicator Light Customization
211
Instrument Cluster Light Control (Optitron Type Meters)
212
The Brightness of the Instrument Cluster Lights
212
Indicators and Warning Lights
214
Center Panel (Vehicles with Navigation System)
215
Center Panel (Vehicles Without Navigation System)
215
Indicators
216
Warning Lights
218
Multi-Information Display
219
Trip Information
219
Average Fuel Consumption after Refueling
221
Average Fuel Consumption and Eco Driving Indicator Zone Display
221
Display Items
221
Switch the Display
221
Current Fuel Consumption
222
Driving Range
222
Average Vehicle Speed
223
Front Tire Angle
223
Turn-By-Turn Navigation (Vehicles with a Navigation System)
223
System Check Display
224
Turn-By-Turn Navigation (Vehicles with Navigation System)
224
When Disconnecting and Reconnecting Battery Terminals
224
Headlight Switch
225
2-3. Operating the Lights and Wipers
225
Turning on the High Beam Headlights
226
Automatic Light off System
227
Daytime Running Light System
227
Headlight Control Sensor
227
Automatic Headlight Leveling System
228
Fog Light Switch
229
Windshield Wipers and Washer
230
Without Intermittent Type
230
With Intermittent Type
231
Intermittent Wiper with Interval Adjuster
232
Rain-Sensing Windshield Wipers
234
Effects of Vehicle Speed on Wiper Operation
236
If no Windshield Washer Fluid Sprays
236
Rain Drop Sensor (Vehicles with Rain-Sensing Windshield Wipers)
236
The Windshield Wiper and Washer Can be Operated When
236
Rear Window Wiper and Washer
238
The Rear Window Wiper and Washer Can be Operated When
239
Headlight Cleaner Switch
240
The Headlight Cleaner Can be Operated When
240
Windshield Washer Linked Operation
240
Cruise Control
241
Setting the Vehicle Speed
241
2-4. Using Other Driving Systems
241
Adjusting the Set Speed
242
Canceling and Resuming the Constant Speed Control
242
Accelerating after Setting the Vehicle Speed
243
Automatic Cruise Control Cancelation
243
Cruise Control Can be Set When
243
Dynamic Radar Cruise Control
245
Changing the Vehicle-To-Vehicle Distance
248
Canceling and Resuming the Speed Control
249
Vehicle-To-Vehicle Distance Settings
249
Driving in Vehicle-To-Vehicle Distance Control Mode
250
Example of Constant Speed Cruising
250
Example of Deceleration Cruising
250
Approach Warning
251
Example of Acceleration
251
Example of Follow-Up Cruising
251
Warnings May Not Occur When
251
Selecting Conventional Constant Speed Control Mode
252
Automatic Cancelation of Vehicle-To-Vehicle Distance Control
253
Dynamic Radar Cruise Control Can be Set When
253
Automatic Cancelation of Constant Speed Control
254
Radar Sensor and Grille Cover
254
Warning Messages and Buzzers for Dynamic Radar Cruise Control
254
Sensor Types
259
Toyota Parking Assist-Sensor
259
Toyota Parking Assist-Sensor Switch
259
Touch Screen (Vehicles with a Navigation System)
260
Corner Sensors
261
Sensor Detection Display, Obstacle Distance
261
Rear Center Sensors
262
Buzzer Operation and Distance to an Obstacle
263
Detection Range of the Sensors
264
Alert Volume Setting
265
Setting up Toyota Parking Assist-Sensor
265
Alert Distance Setting
266
Display On/Off Setting
266
The Toyota Parking Assist-Sensor Can be Operated When
266
Toyota Parking Assist-Sensor Display
266
Sensor Detection Information
267
Center Differential Lock/Unlock Switch
270
Four-Wheel Drive Control Switch
270
Four-Wheel Drive System
270
Shifting between “H4” and “L4”
271
Shifting from “H4” to “L4”
271
Shifting from “L4” to “H4”
271
The Four-Wheel Drive Control Switch Can be Operated When
271
Advice for Driving on Slippery Roads
272
Locking/Unlocking the Center Differential
272
The Center Differential Lock Indicator Light
272
The Center Differential Lock/Unlock Switch Can be Operated When
272
Crawl Control (with Turn Assist Function)
275
Crawl Control Switch
275
Speed Modes
276
Turn Assist Function
276
Crawl Control
277
When the System Is Turned off
277
Automatic System Cancelation
278
Function Limitations
279
When the Crawl Control System Is Operated Continuously
279
Sounds and Vibrations Caused by the Crawl Control System
280
When There Is a Malfunction in the System
280
Multi-Terrain Select
281
Selectable Modes
282
Multi-Terrain Select Control Starting Conditions
283
Switching Modes
283
Statement on the Multi-Information Display
284
When It Is Difficult to Generate Traction
285
When the Brake System Operates Continuously
285
When the Vehicle Is Stuck
285
Multi-Terrain Monitor
287
Switching the Image
288
When the Shift Lever Is in “R”
288
Automatic Display Mode
289
Range Covered by each Camera
290
Display
291
Front Monitor
291
Side-Front Simultaneous Display Monitor
291
Wide View Front & Side Monitor Display
291
Rear Monitor (Toyota Parking Assist Monitor)
292
Side-Rear Simultaneous Display Monitor
292
Using the Monitor
293
Minimum Projected Turning Circle Display Mode
298
No Course Lines Mode
298
Projected Course Line Display Mode
298
Turning Course Line Display Mode
298
Switching Projected Course Line Display Mode
299
Using the Vehicle Width Line & Course Line
300
Vehicle Width Line
300
Minimum Projected Turning Circle & Projected Course Line
301
Automatic System Cancellation
302
Interruption Screens
302
The Multi-Terrain Monitor Can be Operated When
302
Displayed Area
303
Side Camera (Wide View Front & Side Monitor Display)
304
Side Camera (Side-Front Simultaneous Display Monitor)
305
Side Camera (Side-Rear Simultaneous Display Monitor)
306
Multi-Terrain Monitor Cameras
307
Display Settings
308
Flicker Effect
308
Smear Effect
308
If the Message “System Initializing.” Is Displayed
309
Active TRC (Traction Control)
312
Brake Assist
312
Driving Assist Systems
312
Multi Terrain ABS (Anti-Lock Brake System)
312
Trailer Sway Control
313
To Disable Active TRC And/Or VSC and Trailer Sway Control
314
Automatic Active TRC Reactivation
315
Automatic Reactivation of Active TRC, VSC and Trailer Sway Control
315
Turning off Active TRC, VSC and Trailer Sway Control
315
Automatic Active TRC, VSC and Trailer Sway Control Reactivation
316
Hill-Start Assist Control Is Operational When
316
If the Brake System Overheats
316
PCS (Pre-Crash Safety)
320
Pre-Crash Brake Assist
320
Pre-Crash Seat Belts (Front Seats Only)
320
Radar Sensor
320
Obstacles Not Detected
321
The Pre-Crash Safety System Is Operational When
321
Automatic Cancelation of the Pre-Crash Safety System
323
Off-Road Precautions
325
Off-Road Vehicle Feature
325
Advertisement
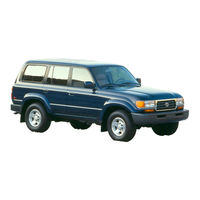
Toyota LAND CRUISER Service Manual Supplement (410 pages)
Brand:
Toyota
| Category:
Automobile
| Size: 73.11 MB
Table of Contents
Caution
2
Table of Contents
5
General Description
6
Troubleshooting
6
Preparation
6
Repair Procedures
6
How to Use this Manual
6
Specifications
7
How to Use this Manual in
7
Cautions, Notices, Hints
8
Si Unit
8
Engine Serial Number
9
Vehicle Identification Number
9
Identification Information
9
General Repair Instructions
10
Precaution
13
Before Beginning Test
14
FREE Position
15
LOCK Position
16
Braking Force Test
16
Speedometer Test or Other Tests
17
On —Vehicle Wheel Balancing
17
Precaution in
17
When Towing Full-Time 4Wd Vehicles
19
Vehicle Lift and Support Locations
20
Hardtop & Canvas Top
20
Station Wagon
22
Abbreviations Used in this Manual
23
How to Determine Bolt Strength
24
Standard Bolt Torque Specifications
24
Specified Torque for Standard Bolts
25
Clutch
26
Clutch Master Cylinder
27
Clutch Master Cylinder Removal
27
Components
27
Master Cylinder Disassembly
28
Master Cylinder Inspection
28
Connect Clutch Line Union
29
Install Master Cylinder
29
Install Reservoir Tank
29
Master Cylinder Installation
29
Manual Transmission
30
(Hardtop & Canvas Top) Description
31
Preparation
32
Transmission Removal and Installation
33
Remove Transfer Shift Lever
34
Transmission Removal
34
Remove Clutch Release Cylinder
35
Remove Front Exhaust Pipe
35
Remove Speedometer Cable
35
Remove Starter
35
Remove Crossmember
36
Remove Stabilizer Braket Set Bolts
36
Remove Transmission
36
Support Transmission
36
Remove Engine Rear Mounting
37
Remove Transfer from Transmission
37
Install Crossmember
38
Install Engine Rear Mounting
38
Install Transmission to Engine
38
Transmission Installation
38
Install Clutch Release Cylinder
39
Install Front Exhaust Pipe
39
Install Stabilizer Bracket Set Bolts
39
Install Starter
39
Install Speedometer Cable
40
Fill Transmission with Gear Oil
41
Install Transfer Shift Lever
41
Install Transmission Shift Lever
41
Tighten Fan Shroud
41
Output Shaft
42
In002
43
Inspect each Gear Oil Clearance
43
Inspect each Gear Thrust Clearance
43
Output Shaft Disassembly
43
Remove Ball Bearing and First Gear
43
Inspect Output Shaft
46
Output Shaft Assembly Inspection
46
Output Shaft Component Parts Inspection
46
INSPECT SYNCHRONIZER RING for 2Nd GEAR
47
Output Shaft Assembly
48
Inspect Fifth Gear Thrust Clearance
49
Install Snap Ring
49
Install Third Gear and Hub Sleeve No.2 Assembly
49
Inspect Third Gear Thrust Clearance
50
Install Second Gear and Hub Sleeve No.1 Assembly
50
Inspect Second Gear Thrust Clearance
51
Install Ball Bearing
51
Install First Gear
51
Service Data
53
Service Specifications
53
Torque Specifications
54
Description
55
Preparation
56
Sst (Special Service Tools)
56
Outputshaft
57
Service Specifications
69
Automatic Transmission
71
(Station Wagon) Description
72
Operation
74
Function of Components
75
Hydraulic Control System
78
Electronic Control System
79
Control of Lock-Up System
80
Control of Overdrive
80
Control of Shift Timing
80
Function of Tcm
80
A/T. Fluid Temperature Warning System
81
A/T. P. (Automatic Transmission Parking) INDICATOR
81
Equipment
82
Preparation
82
Troubleshooting
84
Check "O/D Off" Indicator Light
87
Diagnosis System
87
Read Diagnostic Code
88
Diagnostic Codes
89
Cancel out Diagnostic Code
90
Diagnostic Code 41
91
Diagnostic Code 42
91
Troubleshooting Flow-Chart
91
Diagnostic Code 61
92
Diagnostic Code 62
92
Diagnostic Code 63
92
No.2 Speed Sensor Circuitry
92
Diagnostic Code 64
93
Diagnostic Code 65
93
Diagnostic Code 86
93
Diagnostic Code 88
94
Engine Speed Sensor Circuitry
94
Check Fluid Condition
95
Check Fluid Level
95
Preliminary Check
95
Inspect Throttle Cable
96
Inspect Transmission Shift Lever Range
96
Inspect Idle Speed (N Range)
97
Inspect Neutral Start Swtich
97
Manual Shifting Test
98
Electronic Control Circuit
99
Electronic Control Components
101
Troubleshooting Flow - Chart
102
Trouble No.2 Shift Point too High or too Low
103
Trouble No.3 no Up-Shift to Overdrive (after Warm-Up)
104
Inspect Brake Signal
106
Inspect each Upshift Position
106
Inspect Throttle Position Sensor Signal
106
Terminal Voltage Inspection
106
Electronic Control Componenets
107
Inspect Voltage of Ect Ecu
107
Inspect Solenoid
109
Check Solenoid Seals
110
Check the Lock-Up Solenoid Valve
110
Inspect Throttle Position Sensor
110
Inspect Neutral Start Switch
111
Inspect No.2 Speed Sensor
111
Inspect O/D Switch
111
Inspect Pattern Select Switch
111
A/T Fluid Temperature Warning System Circuit
112
Inspect A/T Fluid Temperature Sensor
112
Inspect A/T Fluid Temperature Warning Light
112
Measure Stall Speed
113
Stall Test
113
Measure Time Lag
115
Time Lag Test
115
Hydraulic Test
117
Measure Line Pressure
117
Road Test
119
2 Range Test
120
L Range Test
121
R Range Test
121
Automatic Shift Schedule
123
Troubleshooting Matrix Chart
126
Drain Transmission Fluid
128
Remove Oil Pan and Gasket
128
Remove Oil Pan Protector
128
Valve Body Removal
128
Remove Oil Strainer
129
Remove Valve Body
129
Valve Body Installation
129
Install Drain Plug
131
Install Magnets in Pan
131
Install Oil Pan
131
Fill Transmission with Atf
132
Remove Frame Crossmember Set Bolts
133
Remove Throttle Cable
133
Remove Throttle Cable Clamp
133
Throttle Cable Removal
133
Connect Throttle Cable
134
If Throttle Cable Is New, Paint Mark on Inner Cable
134
Install Four Center Support Apply Gasket
134
Throttle Cable Installation
134
Assembly Removeal and Installation
136
Disconnect Throttle Cable
138
Assembly Removal and Installation
139
Disconnect Two Oil Cooler Tubes
141
Remove Engine under Cover
142
Remove Six Torque Converter Mounting Bolts
142
Remove Transmission Assembly
143
Torque Converter and Drive Plate Inspection
146
Torque Converter Cleaning
146
Remove Oil Filler Tube
151
Service Date
156
Service Specifications
156
Torque Specification
158
Transfer
159
(Hf2Av for Station Wagon with Abs) Description
160
Specifications
160
Precautions
161
Troubleshooting
161
Components
162
Remove Motor Actuator
163
Remove Output Gear
163
Remove Screw Plug, Spring and Ball
163
Transfer Disassembly
163
Remove Front Extension Housing
164
Remove Power Take-Off Case
164
Remove Transfer Indicator Switches
164
Remove Rear Extension Housing
165
Remove Retainer
165
Separate Shift Fork No.2 and Fork Shaft
165
Remove Case Cover
166
Separate Front Case and Rear Case
166
Component Parts
170
Disassembly of Input Shaft Assembly
170
Input Shaft Assembly
170
Assembly of Input Shaft Assembly
172
Install Front Ball Bearing
172
Install Input Gear
172
Install Rear Ball Bearing
173
Disassembly of Idler Gear Assembly
174
Idler Gear Assembly
174
Assembly of Idler Gear Assembly
175
Center Differential Assembly
177
Disassembly of Center Differential Assembly
177
Remove Front Drive Gear Piece
178
Remove Front Taper Roller Bearing
178
Disassembly of Front Extension Housing Assembly
186
Front Extension Housing Assembly
186
Remove Ball Bearing
187
Remove Dust Deflectors
187
Remove Front Output Shaft
187
Remove Oil Seal
187
Assembly of Front Extension Housing Assembly
188
Rear Extension Housing Assembly
190
Disassembly of Rear Extension Housing Assembly
191
Assembly of Rear Extension Housing Assembly
195
Check Side Clearance of Oil Pump
195
Check Tip Clearance of Driven Rotor
195
Install Dust Deflectors
196
Install Oil Seal
196
Install Rear Output Shaft
196
Install Center Differential Control Coupling Assembly
197
Install Oil Pump Plate Separator
197
Install Speedometer Drive Gear
197
Install Drive Rotor
198
Install Driven Rotor
198
Install Oil Pump Cover
198
Install Oil Receiver to Front Case
199
Install Two Bearing Races to Front Case
199
Transfer Assembly
199
Assemble Shift Fork No.1 and Fork Shaft
200
Install Input Shaft Assembly
200
Assemble Front Case and Rear Case
201
Install Oil Strainer to Rear Case
201
Install Case Cover
202
Install Rear Extension Housing
203
Install Retainer
203
Assemble Shift Fork No.2 and Fork Shaft
204
Install Front Extension Housing
204
Install Ball, Spring and Screw Plug
205
Install Power Take-Off Case
205
Install Transfer Indicator Switches
205
Install Motor Actuator
206
Install Output Gear
206
Inspect Shift Lever Position
207
Motor Shift Control System
207
System Inspection
207
Inspect Center Differential Lock Control Relay
208
Parts Inspection
208
Service Specifications
209
Propeller Shaft
211
Suspension and Axle
215
Assembly Removal and Installation
216
Front Differential
216
Primary Inspection
217
Wheel Alignment
217
Adjust Toe-In
218
Front Wheel Alignment
218
Inspect Caster
218
Inspect Toe-In
218
Inspect Wheel Angle
219
Assembly Removal and Installation
220
Front Differential
220
Service Specifications
221
Brake System
223
Preparation
224
Recommended Tools
224
Brake Pedal Check and Adjustment
226
Master Cylinder Removal
228
Remove Master Cylinder Boot
231
Remove Reservoir
231
Remove Reservoir Cap and Strainer
231
Install Two Pistons
232
Master Cylinder Assembly
232
Install No.2 Piston Stopper Bolt
233
Install Reservoir
233
Install Reservoir Cap
233
Connect Brake Lines
234
Load Sensing Proportioning and By-Pass Valve (Lsp & Bv)
235
Fluid Pressure Check and Adjustment
236
Set Rear Axle Load
236
Lsp & Bv Removal
237
Lsp & Bv Assembly Disassembly
238
Lsp & Bv Assembly
239
Lsp & Bv Inspection
239
Connect Shackle No.2 to Bracket
240
Install Lsp & Bv Assembly
240
Install Valve Bracket
240
Lsp & Bv Installation
240
Set Valve Body
241
Anti-Lock Brake System (Abs) Br-2O
242
System Parts Location
243
Wiring Diagram
244
Connectors
245
Diagnosis System Inspection
246
Clear Diagnostic Codes
249
Diagnostic Codes Clearing
249
"ABS" Warning Light Comes On.
250
Check that Warning Light Turns on
256
Inspect Battery Voltage
256
Speed Sensor and Deceleration Sensor Diagnosis System
256
Inspect Speed Sensor Signal Change
257
Diagnostic Code
259
Deceleration Sensor Operation Diagnosis System
260
Inspect Sensor Detection Point
260
Inspect Sensor Operation
261
Abs Actuator
262
Abs Actuator Removal and Installation
262
Main Points of Removal and Installation
263
Abs Actuator Inspection
264
Inspect Brake Actuator Operation
265
Inspect for Other Wheels
265
Connect Connectors
266
Push Sub Motor Switch
266
Control Relay
267
Control Relay Inspection
267
Front Speed Sensor
268
Front Speed Sensor Inspection
268
Front Speed Sensor and Sensor Rotor Serrations Inspection
269
Inspect Sensor Installation
269
Visually Inspect Sensor Rotor Serrations
269
Front Speed Sensor Installation
270
Front Speed Sensor Removal
270
Front Speed Sensor Air Gap Adjustment
271
Rear Speed Sensor
273
Rear Speed Sensor Inspection
273
Rear Speed Sensor and Sensor Rotor Serrations Inspection
274
Rear Speed Sensor Installation
275
Rear Speed Sensor Removal
275
Anti-Lock Brake System Circuit
277
Service Specifications
279
Body Electrical System
280
(Hardtop, Canvas Top & Station Wagon) Wiper and Washer System
281
Combination Meter Parts Location
282
Meter Circuit
283
Shift Position Indicator
286
Speed Sensor Inspection
289
Speedometer System
289
Fuel Gauge System
290
Fuel Receiver Gauge Inspection
290
Tachometer Inspection
290
Tachometer System
290
Fuel Level Warning System
291
Fuel Sender Gauge Inspection
291
Inspect Warning Light
291
Inspect Warning Switch
291
Water Temperature Gauge System
292
Water Temperature Receiver Gauge Inspection Operation
292
Inspect Voltmeter (On-Vehicle)
293
Voltmeter System
293
Oil Pressure Gauge System
294
Oil Pressure Receiver Gauge Inspection
294
Oil Pressure Sender Gauge Inspection
294
Brake Warning Light Inspection
295
Brake Warning System
295
Open Door Warning System
295
Parking Brake Switch Inspection
295
Door Courtesy Switch
296
Seat Belt Buckle Switch Inspection
296
Seat Belt Warning Inspection
296
Seat Belt Warning System
296
Engine Oil Level Warning System
298
Inspect Engine Oil Level Sensor
298
Meter Illumination Control System
298
Parts Location
300
Power Seat Control System
300
Power Seat Switch
302
Power Seat Switch Inspection
302
Circuit Breaker Operation
304
Front Vertical Motor Inspection
304
Power Seat Motor
304
Slide Motor Inspection
304
Rear Vertical Motor Inspection
305
Reclining Motor Inspection
305
Circuit Breaker Operation Driver' S Seat
306
Circuit Breaker Operation Passenger's Seat
306
Motor Operation Passenger' S Seat
306
Lumbar Support Motor Inspection Motor Operation
307
Cruise Control System
308
Connector Diagrams
309
Control Switch Operation
310
Main Switch Operation
310
Manual Cancel Operation
310
Speed Control Operation
310
System Description
310
Power Source Circuit
314
Cruise Control Indicator Circuit
315
Control Switch Circuit
316
Actuator Circuit
317
Speed Sensor Circuit
319
Stop Light Switch Circuit
320
Parking Brake Switch Circuit
322
ECT SOLENOID No.2 CIRCUIT (with A/T)
323
Neutral Start Switch Circuit
323
Idl Signal Circuit
324
Cruise Control ECU Circuit
325
Control Switch Inspection
326
Stop Light Switch Inspection
326
Cruise Control Actuator Inspection
327
Adjust Control Link Assembly
328
Control Link Assembly Adjustment
328
Extra (Sub) Tank System
329
Fuel Pump
332
Inspect Fuel Pump Operation
332
Inspect Sub Fuel Switch
332
Sub Fuel Switch
332
Fuel Level Switch
333
Fuel Sender Gauge
334
Fuel Solenoid Valve
334
Fuel Pump Control Ecu
335
Satellite Navigation System
338
Wiring Diagrams
339
Air Conditioning System
341
Electrical Wiring Diagram
342
Drive Belt
350
Inspect Drive Belt Tension
350
Refrigeration Lines
351
Compressor Removal
352
Magnet Clutch Disassembly
353
Cooling Unit Disassembly
354
Air Conditioner Amplifier
355
Inspect Amplifier Circuit
356
On-Vehicle Inspection
362
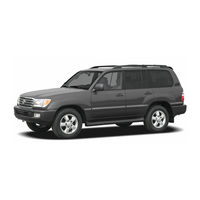
TOYOTA LAND CRUISER Owner's Manual (576 pages)
Brand:
TOYOTA
| Category:
Automobile
| Size: 7.61 MB
Table of Contents
Table of Contents
6
Instrument Panel Overview
2
Instrument Cluster Overview
5
Indicator Symbols on Instrument Panel
6
Table of Contents
9
Keys
10
Engine Immobilizer System
12
Side Doors
13
Power Windows
21
Power Quarter Windows
23
Back Door
24
Hood
26
Theft Deterrent System
27
Fuel Tank Cap
29
Electric Moon Roof
30
1 3 Section -
33
Front Seats
34
Seats
34
Armrest
37
Rear Seats
37
Head Restraints
46
Seat Heaters
47
Seat Belts
48
SRS Driver Airbag and Front Passenger Airbag
58
Child Restraint
76
1 4 Section -
97
Power Tilt and Telescopic Steering Wheel
98
Outside Rear View Mirrors
99
Anti- Glare Inside Rear View Mirror
100
Sun Visors
105
1 5 Section -
107
Headlight and Turn Signals
108
Emergency Flashers
110
Front Fog Lights
111
Instrument Panel Light Control
111
Interior Lights
112
Personal Lights
113
Ignition Switch Light
114
Windshield Wipers and Washer
114
Rear Window Defogger
115
Rear Window Wiper and Washer
115
Outside Rear View Mirror Heaters
116
1 6 Section -
117
Engine Coolant Temperature Gauge
118
Fuel Gauge
118
Engine Oil Pressure Gauge
119
Tachometer
120
Voltmeter
120
Odometer and Two Trip Meters
121
Service Reminder Indicators and Warning Buzzers
122
Brake System Warning Light
123
Driver's Seat Belt Reminder Light
125
Discharge Warning Light
125
Malfunction Indicator Lamp
126
Low Fuel Level Warning Light
126
SRS Warning Light
127
Open Door Warning Light
128
Unengaged "Park" Warning Light
128
Trip Information Display
129
1 7 Section -
133
Ignition Switch with Steering Lock
134
Automatic Transmission
135
Four-Wheel Drive System
139
Cruise Control
142
Parking Brake
142
Active Traction Control System
145
Vehicle Stability Control System
147
1 8 Section -
151
Reference
152
Using Your Audio System
152
Car Audio System Operating Hints
162
Rear Seat Audio System
166
Audio Remote Controls (Steering Switches)
167
1 9 Section -
169
Front Air Conditioning System: Controls
170
Air Flow Selector Settings
174
Operating Tips
175
Instrument Panel Vents
177
Rear Air Conditioning System: Controls
178
Air Flow Selector Settings
180
1 10 Section -
181
Clock
182
Outside Temperature Display
182
Rear View Monitor System
183
Cigarette Lighter and Ashtray
186
Power Outlets
186
Roll Sensing of Curtain Shield Airbags off Switch
187
Rear Console Box
188
Roll Sensing of Curtain Shield Airbags off Indicator Light
188
Garage Door Opener
189
Glove Box
189
Auxiliary Boxes
192
Cup Holders
193
Card Holder
195
Tie- down Hooks
195
Cargo Net Hooks
196
Roof Luggage Carrier
196
Floor Mat
198
Coat Hooks
199
2 Section
201
Off- Road Vehicle Precautionss
202
Break- in Period
203
Fuel
203
Fuel Pump Shut off System
205
Operation in Foreign Countries
205
Three- Way Catalytic Converter
206
Engine Exhaust Cautions
207
Facts about Engine Oil Consumption
208
Brake System
209
Iridium- Tipped Spark Plugs
209
Brake Pad Wear Limit Indicators
213
Rear Step Bumper
213
Buzzers" on
213
Limited- Slip Differential
214
Your Toyota's Identification
214
Suspension and Chassis
215
Theft Prevention Labels
215
Tire Information
216
Cargo and Luggage
224
Vehicle Load Limits
224
Types of Tires
227
3 Section
229
Before Starting the Enginee
230
How to Start the Engine
230
Tips for Driving in Various Conditions
231
Off- Road Driving Precautions
232
Winter Driving Tips
234
Dinghy Towing
235
Trailer Towing
235
How to Save Fuel and Make Your Vehicle Last Longer, too
243
4 Section
245
In Case of an Emergency
245
If Your Vehicle will Not Startt
246
If Your Engine Stalls While Driving
249
If You Cannot Increase the Engine Speed
250
If Your Vehicle Overheats
250
If You Have a Flat Tire
251
If Your Vehicle Becomes Stuck
262
If Your Vehicle Needs to be Towed
262
If You Cannot Shift Automatic Transmission Selector Lever
266
If You Lose Your Keys
266
Corrosion Prevention and Appearance Care
267
6 Section
275
Maintenance Requirementss
276
General Maintenance
277
Does Your Vehicle Need Repairing
279
Emissions Inspection and Maintenance (I/M) Programs
280
7 1 Section -
281
Engine Compartment Overview
282
Fuse Locations
283
Do- It- Yourself Service Precautions
284
Parts and Tools
285
Advertisement
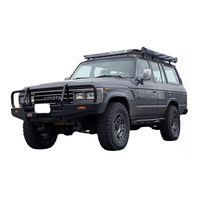
Toyota LAND CRUISER Owner's Manual (256 pages)
Brand:
Toyota
| Category:
Automobile
| Size: 6.9 MB
Table of Contents
Table of Contents
6
Important Information about this Manual
3
Driving Tips
5
Model Code
7
Operation of Instruments and Controls
8
Overview of Instruments and Controls
8
Instrument Panel Overview
9
1 2 Section −
14
Keys and Doors
14
Keys
15
Engine Immobilizer System
17
Side Doors
18
Power Windows
20
Door Vent Windows
24
Side Windows
24
Back Door
25
Rear Window
25
Hood
27
Fuel Tank Cap
29
1 3 Section −
32
Seats, Seat Belts, Steering Wheel and Mirrors
32
Front Seats
33
Seats
33
Adjusting Front Seats
35
Rear Seats
36
Folding Rear Seats
41
Head Restraints
41
Seat Belt Precautions
42
Seat Belts
42
SRS Driver Airbag and Front Passenger Airbag
48
Child Restraint
54
Child Restraint System
55
Tilt and Telescopic Steering Wheel
74
Anti−Glare Inside Rear View Mirror Anti Anti− − Glare Inside Rear View Mirror
75
Outside Rear View Mirrors
75
1 4 Section −
76
Lights and Wipers
76
Headlights and Turn Signals
77
Emergency Flashers
78
Front Fog Lights
79
Interior Light
79
Luggage Compartment Light
80
Windshield Wipers and Washer
80
Rear Window Wiper and Washer
81
Rear Window Defogger
82
1 5 Section −
84
Gauges, Meters and Service Reminder Indicators
84
Fuel Gauge
85
Sub Fuel Gauge
85
Engine Coolant Temperature Gauge
86
Oil Pressure Gauge
87
Tachometer
88
Voltmeter
88
Odometer, Two Trip Meters and Meter Light Control Display
88
Service Reminder Indicators and Warning Buzzers
90
1 6 Section −
96
Engine (Ignition) Switch, Transmission and Parking Brake
96
Engine (Ignition) Switch
97
Idle up Switch
97
Manual Transmission
98
Four−Wheel Drive System Wheel Drive System
99
Front and Rear Differential Lock System
100
Parking Brake
102
Audio System
104
Controls and Features
108
Air Conditioning System System
130
Air Conditioning Filter
137
1 9 Section −
140
Other Equipment
140
Clock
141
Cigarette Lighter and Ashtrays
143
Storage Precautions
143
Bottle Holders
144
Glove Box
144
Power Outlet Box
145
Tie−Down Hooks down Hooks
145
Floor Mat
146
Rear Console Box
146
Toyota LAND CRUISER Repair Manual (19 pages)
TOYOTA LAND CRUISER
Brand:
Toyota
| Category:
Automobile
| Size: 3.37 MB
Table of Contents
Manual Transmission
4
Automatic Transmission
4
Propeller Shaft
4
Brake System
4
Air Conditioning System
4
Table of Contents
5
How to Use this Manual
6
Identification Information
8
General Repair Instructions
8
Precautions for Vehicles Equipped with a Catalytic Converter
11
Precautions for Vehicles with an Audio System with Built-In Anti-Theft System
11
Precautions When Servicing Full-Time 4Wd Vehicles
12
Precautions When Towing Full-Time 4Wd Vehicles
17
Vehicle Lift and Support Locations
18
Abbreviations Used in this Manual
19
Advertisement
Related Products
Toyota LANDCRUISER 2019
Toyota LAND CRUISER 2010
TOYOTA LAND CRUISER - BROCHURE 2011
Toyota Land Cruiser 2000
Toyota Land Cruiser 1986
Toyota Land Cruiser 2005
Toyota Land Cruiser 1999
Toyota Land Cruiser 2004
Toyota Land Cruiser 2003
Toyota Land Cruiser Prado
TOYOTA Categories
Automobile
Automobile Accessories
Car Navigation system
Sewing Machine
Car Receiver
More TOYOTA Manuals
Login
Sign In
OR
Sign in with Facebook
Sign in with Google
Upload manual
Upload from disk
Upload from URL