Sign In
Upload
Manuals
Brands
NETGEAR Manuals
Switch
M4200 Series
NETGEAR M4200 Series Manuals
Manuals and User Guides for NETGEAR M4200 Series. We have
3
NETGEAR M4200 Series manuals available for free PDF download: Software Administration Manual, Hardware Installation Manual, Installation Manual
NETGEAR M4200 Series Software Administration Manual (688 pages)
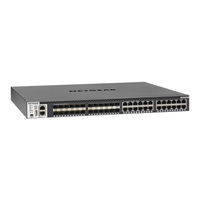
M4200 and M4300 Series ProSAFE Managed Switches
Brand:
NETGEAR
| Category:
Switch
| Size: 30.25 MB
Table of Contents
Table of Contents
3
Chapter 1 Documentation Resources
17
Chapter 2 Vlans
18
VLAN Concepts
19
Create Two Vlans
20
CLI: Create Two Vlans
20
Web Interface: Create Two Vlans
20
Assign Ports to VLAN 2
21
CLI: Assign Ports to VLAN 2
21
Web Interface: Assign Ports to VLAN 2
22
Create Three Vlans
23
CLI: Create Three Vlans
23
Web Interface: Create Three Vlans
23
Assign Ports to VLAN3
25
CLI: Assign Ports to VLAN 3
25
Web Interface: Assign Ports to VLAN 3
25
Assign VLAN 3 as the Default VLAN for Port 1/0/2
26
CLI: Assign VLAN 3 as the Default VLAN for Port 1/0/2
26
Web Interface: Assign VLAN 3 as the Default VLAN for Port 1/0/2
27
Create a MAC-Based VLAN
27
CLI: Create a MAC-Based VLAN
28
Web Interface: Assign a MAC-Based VLAN
29
Create a Protocol-Based VLAN
31
CLI: Create a Protocol-Based VLAN
31
Web Interface: Create a Protocol-Based VLAN
32
Virtual Vlans: Create an IP Subnet-Based VLAN
35
CLI: Create an IP Subnet-Based VLAN
36
Web Interface: Create an IP Subnet-Based VLAN
37
Voice Vlans
38
CLI: Configure Voice VLAN and Prioritize Voice Traffic
39
Web Interface: Configure Voice VLAN and Prioritize Voice Traffic
41
Configure GARP VLAN Registration Protocol
46
CLI: Enable GVRP
47
Web Interface: Configure GVRP on Switch a
49
Web Interface: Configure GVRP on Switch B
51
Private Vlans
52
Assign Private-VLAN Types (Primary, Isolated, Community)
54
CLI: Assign Private-VLAN Type (Primary, Isolated, Community)
54
Web Interface: Assign Private-VLAN Type (Primary, Isolated, Community)
54
Configure Private-VLAN Association
56
CLI: Configure Private-VLAN Association
56
Web Interface: Configure Private-VLAN Association
56
Configure Private-VLAN Port Mode (Promiscuous, Host)
57
CLI: Configure Private-VLAN Port Mode (Promiscuous, Host)
57
Web Interface: Configure Private-VLAN Port Mode
57
(Promiscuous, Host)
57
Configure Private-VLAN Host Ports
58
CLI: Configure Private-VLAN Host Ports
58
Web Interface: Assign Private-VLAN Port Host Ports
59
Map Private-VLAN Promiscuous Port
60
CLI: Map Private-VLAN Promiscuous Port
60
Web Interface: Map Private-VLAN Promiscuous Port
60
VLAN Access Ports and Trunk Ports
61
CLI: Configure a VLAN Trunk
62
Web Interface: Configure a VLAN Trunk
63
Chapter 3 Lags
67
Link Aggregation Concepts
68
Add Ports to Lags
69
CLI: Add Ports to the Lags
69
Web Interface: Add Ports to Lags
69
Chapter 4 Port Routing
71
Port Routing Concepts
72
Port Routing Configuration
72
Enable Routing for the Switch
73
CLI: Enable Routing for the Switch
73
Web Interface: Enable Routing for the Switch
74
Enable Routing for Ports on the Switch
74
CLI: Enable Routing for Ports on the Switch
75
Web Interface: Enable Routing for Ports on the Switch
75
Add a Default Route
77
CLI: Add a Default Route
77
Web Interface: Add a Default Route
78
Add a Static Route
78
CLI: Add a Static Route
79
Web Interface: Add a Static Route
79
Chapter 5 VLAN Routing
80
VLAN Routing Concepts
81
Create Two Vlans
81
CLI: Create Two Vlans
82
Web Interface: Create Two Vlans
83
Set up VLAN Routing for the Vlans and the Switch
86
CLI: Set up VLAN Routing for the Vlans and the Switch
86
Web Interface: Set up VLAN Routing for the Vlans and the Switch
87
Chapter 6 RIP
88
Routing Information Protocol Concepts
89
Enable Routing for the Switch
90
CLI: Enable Routing for the Switch
90
Web Interface: Enable Routing for the Switch
90
Enable Routing for Ports
91
CLI: Enable Routing and Assigning IP Addresses for Ports
91
1/0/2 and 1/0/3
91
Web Interface: Enable Routing for the Ports
91
Enable RIP on the Switch
93
CLI: Enable RIP on the Switch
93
Web Interface: Enable RIP on the Switch
93
Enable RIP for Ports 1/0/2 and 1/0/3
94
CLI: Enable RIP for Ports 1/0/2 and 1/0/3
94
Web Interface: Enable RIP for Ports 1/0/2 and 1/0/3
94
Configure VLAN Routing with RIP Support
95
CLI: Configure VLAN Routing with RIP Support
95
Enable Rip for the Switch
96
Web Interface: Configure VLAN Routing with RIP Support
97
Chapter 7 OSPF
100
Open Shortest Path First Concepts
101
Inter-Area Router
101
CLI: Configure an Inter-Area Router
102
Web Interface: Configure an Inter-Area Router
104
OSPF on a Border Router
108
CLI: Configure OSPF on a Border Router
108
Web Interface: Configure OSPF on a Border Router
109
Stub Areas
114
CLI: Configure Area 1 as a Stub Area on A1
114
Web Interface: Configure Area 1 as a Stub Area on A1
116
CLI: Configure Area 1 as a Stub Area on A2
120
Web Interface: Configure Area 1 as a Stub Area on A2
121
NSSA Areas
123
CLI: Configure Area 1 as an NSSA Area
123
Web Interface: Configure Area 1 as an NSSA Area on A1
125
CLI: Configure Area 1 as an NSSA Area on A2
128
Web Interface: Configure Area 1 as an NSSA Area on A2
130
VLAN Routing OSPF
134
CLI: Configure VLAN Routing OSPF
135
Web Interface: Configure VLAN Routing OSPF
137
Ospfv3
139
CLI: Configure Ospfv3
140
Web Interface: Configure Ospfv3
142
Chapter 8 PBR
145
Policy-Based Routing Concepts
146
Route-Map Statements
146
PBR Processing Logic
147
PBR Configurations
148
PBR Example
149
Chapter 9 ARP
152
Proxy ARP Concepts
153
Proxy ARP Examples
153
CLI: Show Ip Interface
153
CLI: Ip Proxy-Arp
153
Web Interface: Configure Proxy ARP on a Port
154
Chapter 10 VRRP
155
Virtual Router Redundancy Protocol Concepts
156
VRRP on a Master Router
157
CLI: Configure VRRP on a Master Router
157
Web Interface: Configure VRRP on a Master Router
158
VRRP on a Backup Router
159
CLI: Configure VRRP on a Backup Router
159
Web Interface: Configure VRRP on a Backup Router
160
Chapter 11 Acls
162
Access Control List Concepts
163
MAC Acls
163
IP Acls
164
ACL Configuration
164
Set up an IP ACL with Two Rules
164
CLI: Set up an IP ACL with Two Rules
165
Web Interface: Set up an IP ACL with Two Rules
166
One-Way Access Using a TCP Flag in an ACL
169
CLI: Configure One-Way Access Using a TCP Flag in an ACL
169
Web Interface: Configure One-Way Access Using a TCP
173
Flag in an ACL
173
Use Acls to Configure Isolated Vlans on a Layer 3 Switch
184
CLI: Configure One-Way Access Using a TCP Flag in ACL Commands
185
Web Interface: Configure One-Way Access Using a TCP
187
Flag in an ACL
187
Set up a MAC ACL with Two Rules
195
CLI: Set up a MAC ACL with Two Rules
195
Web Interface: Set up a MAC ACL with Two Rules
196
Configure ACL Mirroring
198
CLI: Configure ACL Mirroring
199
Web Interface: Configure ACL Mirroring
201
Configure ACL Redirection
204
CLI: Redirect a Traffic Stream
205
Web Interface: Redirect a Traffic Stream
206
Add ACL Remarks
209
Change the Sequence of an ACL Rule
210
Configure a Management ACL
212
Example 1: Permit any Host to Access the Switch through
213
Telnet or HTTP
213
Example 2: Permit a Specific Host to Access the Switch
213
Through SSH Only
213
Configure Ipv6 Acls
213
CLI: Configure an Ipv6 ACL
215
Web Interface: Configure an Ipv6 ACL
216
Chapter 12 Cos Queuing
222
Cos Queuing Concepts
223
Cos Queue Mapping
223
Trusted Ports
223
Untrusted Ports
224
Cos Queue Configuration
224
Show Classofservice Trust
225
CLI: Show Classofservice Trust
225
Web Interface: Show Classofservice Trust
225
Set Classofservice Trust Mode
225
CLI: Set Classofservice Trust Mode
225
Web Interface: Set Classofservice Trust Mode
226
Configure Cos-Queue Min-Bandwidth and Strict Priority Scheduler Mode
226
CLI: Configure Cos-Queue Min-Bandwidth and Strict Priority
226
Scheduler Mode
226
Web Interface: Configure Cos-Queue Min-Bandwidth and Strict Priority Scheduler Mode
226
Set Cos Trust Mode for an Interface
228
CLI: Set Cos Trust Mode for an Interface
228
Web Interface: Set Cos Trust Mode for an Interface
228
Configure Traffic Shaping
229
CLI: Configure Traffic-Shape
229
Web Interface: Configure Traffic Shaping
229
Chapter 13 Diffserv
230
Differentiated Services Concepts
231
Diffserv
232
CLI: Configure Diffserv
232
Web Interface: Configure Diffserv
235
Diffserv for Voip
248
CLI: Configure Diffserv for Voip
248
Web Interface: Diffserv for Voip
250
Auto Voip
255
Protocol-Based Auto Voip
255
OUI-Based Auto Voip
256
Example 1: Enable Protocol-Based Auto Voip
257
Example 2: Change the Queue of Protocol-Based Auto Voip
258
Example 3: Create an Auto Voip VLAN
259
Diffserv for Ipv6
260
CLI: Configure Diffserv for Ipv6
261
Web Interface: Configure Diffserv for Ipv6
262
Color Conform Policy
268
CLI: Configure a Color Conform Policy
269
Web Interface: Configure a Color Conform Policy
270
WRED Explicit Congestion Notification
275
Chapter 14 IGMP Snooping and Querier
278
Internet Group Management Protocol Concepts
279
IGMP Snooping
279
CLI: Enap Snooping
279
The Following Example Shows How to Enable Igble IGMMP Snooping
279
Web Interface: Enable IGMP Snooping
279
Show Igmpsnooping
280
CLI: Show Igmpsnooping
280
Web Interface: Show Igmpsnooping
280
Show Mac-Address-Table Igmpsnooping
281
CLI for Igmpv1 and Igmpv2: Show Mac-Address-Table Igmpsnooping
281
CLI for Igmpv3: Show Igmpsnooping Ssm Entries
281
Web Interface: Show Mac-Address-Table Igmpsnooping
282
External Multicast Router
282
CLI: Configure the Switch with an External Multicast Router
282
Web Interface: Configure the Switch with an External Multicast Router
282
Multicast Router Using VLAN
283
CLI: Configure the Switch with a Multicast Router Using VLAN
283
Web Interface: Configure the Switch with a Multicast Router
283
Using VLAN
283
IGMP Querier Concepts
284
Enable IGMP Querier
285
CLI: Enable IGMP Querier
285
Web Interface: Enable IGMP Querier
285
Show IGMP Querier Status
287
CLI: Show IGMP Querier Status
287
Web Interface: Show IGMP Querier Status
288
Chapter 15 MVR
289
Multicast VLAN Registration
290
Configure MVR in Compatible Mode
291
CLI: Configure MVR in Compatible Mode
292
Web Interface: Configure MVR in Compatible Mode
294
Configure MVR in Dynamic Mode
297
CLI: Configure MVR in Dynamic Mode
297
Web Interface: Configure MVR in Dynamic Mode
300
Chapter 16 Security Management
304
Port Security Concepts
305
Set the Dynamic and Static Limit on Port 1/0/1
306
CLI: Set the Dynamic and Static Limit on Port 1/0/1
306
Web Interface: Set the Dynamic and Static Limit on Port 1/0/1
306
Convert the Dynamic Address Learned from 1/0/1 to a Static Address
307
CLI: Convert the Dynamic Address Learned from 1/0/1 to the Static Address
307
Web Interface: Convert the Dynamic Address Learned from 1/0/1 to the Static Address
308
Create a Static Address
308
CLI: Create a Static Address
308
Web Interface: Create a Static Address
309
Protected Ports
309
CLI: Configure a Protected Port to Isolate Ports on the Switch
310
Web Interface: Configure a Protected Port to Isolate Ports
312
On the Switch
312
802.1X Port Security
315
CLI: Authenticating Dot1X Users by a RADIUS Server
316
Web Interface: Authenticating Dot1X Users by a RADIUS Server
317
Create a Guest VLAN
321
CLI: Create a Guest VLAN
322
Web Interface: Create a Guest VLAN
323
Assign Vlans Using RADIUS
326
CLI: Assign VLANS Using RADIUS
327
Web Interface: Assign VLANS Using RADIUS
329
Dynamic ARP Inspection
332
CLI: Configure Dynamic ARP Inspection
333
Web Interface: Configure Dynamic ARP Inspection
334
Static Mapping
337
CLI: Configure Static Mapping
337
Web Interface: Configure Static Mapping
338
DHCP Snooping
339
CLI: Configure DHCP Snooping
340
Web Interface: Configure DHCP Snooping
341
Find a Rogue DHCP Server
343
CLI: Find a Rogue DHCP Server
343
Web Interface: Find a Rogue DHCP Server
344
Enter Static Binding into the Binding Database
346
CLI: Enter Static Binding into the Binding Database
346
Web Interface: Enter Static Binding into the Binding Database
346
Maximum Rate of DHCP Messages
347
CLI: Configure the Maximum Rate of DHCP Messages
347
Web Interface: Configure the Maximum Rate of DHCP Messages
347
IP Source Guard
348
CLI: Configure Dynamic ARP Inspection
349
Web Interface: Configure Dynamic ARP Inspection
350
Command Authorization
353
CLI Example 1: Configure Command Authorization by a TACACS+ Server353
353
CLI Example 2: Configure Command Authorization by a RADIUS Server
356
Privileged Exec Command Mode Authorization
359
CLI Example 1: Configure EXEC Authorization by a TACACS+ Server
359
CLI Example 2: Configure EXEC Authorization by a RADIUS Server
362
Accounting
364
CLI: Configure Telnet Command Accounting by a TACACS+ Server
364
Configure Telnet EXEC Accounting by RADIUS Server
365
Use the Authentication Manager to Set up an Authentication Method List
366
Configure a Dot1X-MAB Authentication Method List with
367
Dot1X-MAB Priority
367
Configure a Dot1X-MAB Authentication Method List with
368
MAB-Dot1X Priority
368
Configure a Dot1X, MAB, and Captive Portal Authentication
368
Method List with Default Priority
368
RADIUS Change of Authorization
370
Ipv6 Stateless RA Guard
372
Chapter 17 MAB
374
Mac Authentication Bypass
374
MAC Authentication Bypass Concepts
375
Configure MAC Authentication Bypass on a Switch
377
Configure a Network Policy Server on a Microsoft Windows Server 2008 R2 or Later Server
381
Configure an Active Directory on a Microsoft Windows
389
Server 2008 R2 or Later Server
389
Reduce the MAB Authentication Time
390
CLI: Reduce the Authentication Time for MAB
391
Web Interface: Reduce the Authentication Time for MAB
391
Chapter 18 SNTP
393
Simple Network Time Protocol Concepts
393
Show SNTP (CLI Only)
393
Show Sntp
393
Show Sntp Client
393
Show Sntp Server
394
Configure SNTP
394
CLI: Configure SNTP
394
Web Interface: Configure SNTP
396
Set the Time Zone (CLI Only)
397
Set the Named SNTP Server
397
CLI: Set the Named SNTP Server
397
Web Interface: Set the Named SNTP Server
398
Chapter 19 Tools
401
Traceroute
401
CLI: Traceroute
401
Web Interface: Traceroute
402
Configuration Scripting
402
Script Command
403
Script List Command and Script Delete Command
403
Script Apply Running-Config.scr Command
404
Create a Configuration Script
404
Upload a Configuration Script
404
Pre-Login Banner
405
Create a Pre-Login Banner
405
Port Mirroring
406
CLI: Specify the Source (Mirrored) Ports and Destination (Probe)
406
Web Interface: Specify the Source (Mirrored) Ports and Destination (Probe)
407
Remote SPAN
407
CLI: Enable RSPAN on a Switch
408
Source Switch
409
Dual Image
410
CLI: Download a Backup Image and Make It Active
411
Web Interface: Download a Backup Image and Make It Active
412
Outbound Telnet
413
CLI: Show Network
414
CLI: Show Telnet
414
CLI: Transport Output Telnet
415
Web Interface: Configure Telnet
415
CLI: Configure the Session Limit and Session Time-Out
416
Web Interface: Configure the Session Time-Out
416
Error Disablement and Automatic Error Recovery
417
Loop Protection
419
Nondisruptive Configuration Management
420
Full Memory Dump
421
Chapter 20 Syslog
422
Syslog Concepts
423
Show Logging
423
CLI: Show Logging
423
Web Interface: Show Logging
424
Show Logging Buffered
426
CLI: Show Logging Buffered
426
Web Interface: Show Logging Buffered
427
Show Logging Traplogs
427
CLI: Show Logging Traplogs
427
Web Interface: Show Logging Trap Logs
428
Show Logging Hosts
428
CLI: Show Logging Hosts
428
Web Interface: Show Logging Hosts
429
Configure Logging for a Port
429
CLI: Configure Logging for the Port
429
Web Interface: Configure Logging for the Port
430
Email Alerting
431
CLI: Send Log Messages to Admin@Switch.com Using Account Aaaa@Netgear.com
432
Chapter 21 Switch Stacks
433
Switch Stack Management and Connectivity
434
Stack Master and Stack Members
434
Stack Master
435
Stack Members
436
Stack Member Numbers
436
Stack Member Priority Values
436
Install and Power-Up a Stack
436
Compatible Switch Models
436
Install a Switch Stack
437
Switch Firmware and Firmware Mismatch
438
Upgrade the Firmware
438
Migrate Configuration with a Firmware Upgrade
439
Web Interface: Copy Master Firmware to a Stack Member
439
Stack Switches Using a 10G Copper Port
440
CLI: Configure the 10G Copper Ports as Stack Ports
441
Web Interface: Configure the 10G Copper Ports as Stack Ports
443
Add, Remove, or Replace a Stack Member
444
Add Switches to an Operating Stack
444
Remove a Switch from a Stack
445
Replace a Stack Member
446
Switch Stack Configuration Files
447
Preconfigure a Switch
448
Renumber Stack Members
449
CLI: Renumber Stack Members
449
Web Interface: Renumber Stack Members
450
Move the Stack Master to a Different Unit
451
CLI: Move the Stack Master to a Different Unit
451
Web Interface: Move the Stack Master to a Different Unit
451
Chapter 22 SNMP
452
Add a New Community
453
CLI: Add a New Community
453
Web Interface: Add a New Community
453
Enable SNMP Trap
454
CLI: Enable SNMP Trap
454
Web Interface: Enable SNMP Trap
454
SNMP Version 3
455
CLI: Configure Snmpv3
455
Web Interface: Configure Snmpv3
456
Sflow
457
CLI: Configure Statistical Packet-Based Sampling of Packet
458
Flows with Sflow
458
Web Interface: Configure Statistical Packet-Based Sampling
459
With Sflow
459
Time-Based Sampling of Counters with Sflow
460
CLI: Configure Time-Based Sampling of Counters with Sflow
460
Web Interface: Configure Time-Based Sampling of Counters
461
With Sflow
461
Chapter 23 DNS
462
Domain Name System Concepts
463
Specify Two DNS Servers
463
CLI: Specify Two DNS Servers
463
Web Interface: Specify Two DNS Servers
463
Manually Add a Host Name and an IP Address
464
CLI: Manually Add a Host Name and an IP Address
464
Web Interface: Manually Add a Host Name and an IP Address
464
Chapter 24 DHCP Server
465
Dynamic Host Configuration Protocol Concepts
466
Configure a DHCP Server in Dynamic Mode
466
CLI: Configure a DHCP Server in Dynamic Mode
466
Web Interface: Configure a DHCP Server in Dynamic Mode
467
Configure a DHCP Server that Assigns a Fixed IP Address
469
CLI: Configure a DHCP Server that Assigns a Fixed IP Address
469
Web Interface: Configure a DHCP Server that Assigns a Fixed IP Address
470
Chapter 25 Dhcpv6 Server
472
Dynamic Host Configuration Protocol Version 6 Concepts
473
CLI: Configure Dhcpv6 Prefix Delegation
474
Web Interface: Configure Dhcpv6 Prefix Delegation
475
Configure a Stateless Dhcpv6 Server
479
CLI: Configure a Stateless Dhcpv6 Server
479
Web Interface: Configure a Stateless Dhcpv6 Server
480
Configure a Stateful Dhcpv6 Server
483
CLI: Configure a Stateful Dhcpv6 Server
483
Web Interface: Configure a Stateful Dhcpv6 Server
484
CLI: Set up a Configuration with a Dhcpv6 Server and Dhcpv6 Relay
488
Configure the Dhcpv6 Server
488
Configure the Dhcpv6 Relay
489
Chapter 26 Dvlans and Private Vlans
491
Double Vlans
492
CLI: Enable a Double VLAN
493
Web Interface: Enable a Double VLAN
493
Private VLAN Groups
496
CLI: Create a Private VLAN Group
497
Web Interface: Create a Private VLAN Group
498
Chapter 27 STP
502
Spanning Tree Protocol Concepts
503
Configure Classic STP (802.1D)
503
CLI: Configure Classic STP (802.1D)
503
Web Interface: Configure Classic STP (802.1D)
503
Configure Rapid STP (802.1W)
504
CLI: Configure Rapid STP (802.1W)
504
Web Interface: Configure Rapid STP (802.1W)
505
Configure Multiple STP (802.1S)
506
CLI: Configure Multiple STP (802.1S)
506
Web Interface: Configure Multiple STP (802.1S)
507
Configure PVSTP and PVRSTP
508
CLI: Configure PVSTP
510
Web Interface: Configure PVSTP
513
Chapter 28 Tunnels for Ipv6
517
Tunnel Concepts
518
Create a 6In4 Tunnel
518
CLI: Create a 6In4 Tunnel
519
Web Interface: Create a 6In4 Tunnel
520
Create a 6To4 Tunnel
524
CLI: Create a 6To4 Tunnel
525
Verify the Configuration
527
Web Interface: Create a 6To4 Tunnel
530
Chapter 29 Ipv6 Interface Configuration
543
Create an Ipv6 Routing Interface
544
CLI: Create an Ipv6 Routing Interface
544
Web Interface: Create an Ipv6 Routing Interface
545
Create an Ipv6 Routing VLAN
547
CLI: Create an Ipv6 Routing VLAN
547
Web Interface: Create an Ipv6 VLAN Routing Interface
549
Configure Dhcpv6 Mode on the Routing Interface
551
CLI: Configure Dhcpv6 Mode on Routing Interface
551
Web Interface: Configure Dhcpv6 Mode on Routing Interface
552
Protocol Independent Multicast
555
Chapter 30 PIM
556
Protocol Independent Multicast Concepts
556
Pim-DM
556
CLI: Configure PIM-DM
558
Web Interface: Configure PIM-DM
562
Pim-Sm
579
CLI: Configure PIM-SM
580
Web Interface: Configure PIM-SM
584
Chapter 31 DHCP L2 Relay and L3 Relay
604
DHCP L2 Relay
605
CLI: Enable DHCP L2 Relay
605
Web Interface: Enable DHCP L2 Relay
607
DHCP L3 Relay
609
Configure the DHCP L3 Server in a Windows Server Operating System
610
Configure a DHCP L3 Switch
618
Chapter 32 MLD
623
Multicast Listener Discovery Concepts
624
Configure MLD
624
CLI: Configure MLD
625
Web Interface: Configure MLD
627
MLD Snooping
636
CLI: Configure MLD Snooping
637
Web Interface: Configure MLD Snooping
638
Chapter 33 DVMRP
640
Distance Vector Multicast Routing Protocol Concepts
641
CLI: Configure DVMRP
642
Web Interface: Configure DVMRP
648
Chapter 34 Link Dependency
658
Link Dependency Concepts
659
CLI: Create a Link State Group
660
Web Interface: Create a Link State Group
660
Chapter 35 Captive Portals
663
Captive Portal Concepts
664
Captive Portal Configuration Concepts
665
Enable a Captive Portal
665
CLI: Enable a Captive Portal
665
Web Interface: Enable a Captive Portal
666
Client Access, Authentication, and Control
667
Block a Captive Portal Instance
667
CLI: Block a Captive Portal Instance
667
Web Interface: Block a Captive Portal Instance
668
Local Authorization, Create Users and Groups
668
CLI: Create Users and Groups
668
Web Interface: Create Users and Groups
669
Remote Authorization (RADIUS) User Configuration
670
CLI: Configure RADIUS as the Verification Mode
671
Web Interface: Configure RADIUS as the Verification Mode
672
SSL Certificates
672
Chapter 36 Iscsi
673
Iscsi Concepts
674
Enable Iscsi Awareness with VLAN Priority Tag
675
CLI: Enable Iscsi Awareness with VLAN Priority Tag
675
Web Interface: Enable Iscsi Awareness with VLAN Priority Tag
675
Enable Iscsi Awareness with DSCP
676
CLI: Enable Iscsi Awareness with DSCP
676
Web Interface: Enable Iscsi Awareness with DSCP
676
Set the Iscsi Target Port
677
CLI: Set Iscsi Target Port
677
Web Interface: Set Iscsi Target Port
677
Show Iscsi Sessions
678
CLI: Show Iscsi Sessions
678
Web Interface: Show Iscsi Sessions
679
Chapter 37 Override Factory Defaults
680
Override the Factory Default Configuration File
681
CLI: Install Another Factory Defaults Configuration File
681
CLI: Erase the Old Factory Default Configuration File
682
Chapter 38 NETGEAR SFP
683
Connect with NETGEAR SFP AGM731F
684
Index
685
Advertisement
NETGEAR M4200 Series Hardware Installation Manual (33 pages)
Managed Switch
Brand:
NETGEAR
| Category:
Switch
| Size: 1.62 MB
Table of Contents
Table of Contents
3
Chapter 1 Introduction
4
Hardware Overview
5
Hardware Features
5
Safety Instructions and Warnings
6
Chapter 2 Hardware Overview
9
Hardware Description
10
Front Panel
10
Back Panel and Bottom Panel
11
Leds
11
Switch Hardware Interfaces
13
RJ-45 Ports for 100M/1G/2.5/5GBASE-T Connectivity
13
10GBASE-X SFP+ Ports
14
USB Port
14
OOB 1G Ethernet Port
15
Mini USB Console Port
15
RJ-45 RS232 Console Port
15
Reset Button
15
Chapter 3 Installation
17
Step 1: Prepare the Site
18
Step 2: Protect against Electrostatic Discharge
19
Step 3: Unpack the Switch
20
Step 4: Install the Switch
21
Install the Switch on a Flat Surface
21
Attach the Switch to a Wall
21
Attach the Switch to a Rectangular Pole or Table Leg
22
Attach the Switch to a Round Pole or Table Leg
24
Install the Switch in a Rack
26
Step 5: Check the Installation
27
Optional Step 6: Install SFP Transceiver Modules
28
Step 7: Apply AC Power and Check the Leds
29
Optional Step 8: Connect a Console to the Switch
29
Appendix A Troubleshooting
31
Troubleshooting Chart
32
Additional Troubleshooting Suggestions
33
NETGEAR M4200 Series Installation Manual (2 pages)
Managed Switches
Brand:
NETGEAR
| Category:
Switch
| Size: 0.2 MB
Advertisement
Advertisement
Related Products
NETGEAR ProSAFE M4200-10MG-POE+
NETGEAR M4250 Series
NETGEAR M4250-10G2F-PoE+
NETGEAR M4250-10G2XF-PoE+
NETGEAR M4250-10G2XF-PoE++
NETGEAR M4250-12M2XF
NETGEAR M4250-16XF
NETGEAR M4250-26G4F-PoE+
NETGEAR M4250-26G4XF-PoE+
NETGEAR M4250-40G8F-PoE+
NETGEAR Categories
Wireless Router
Switch
Network Router
Adapter
Wireless Access Point
More NETGEAR Manuals
Login
Sign In
OR
Sign in with Facebook
Sign in with Google
Upload manual
Upload from disk
Upload from URL