Sign In
Upload
Manuals
Brands
Husky Manuals
Temperature Controller
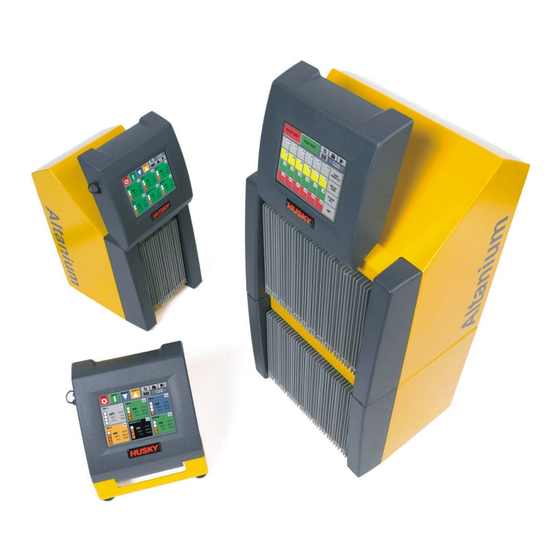
Altanium Neo2
Husky Altanium Neo2 Manuals
Manuals and User Guides for Husky Altanium Neo2. We have
1
Husky Altanium Neo2 manual available for free PDF download: User Manual
Husky Altanium Neo2 User Manual (120 pages)
Brand:
Husky
| Category:
Temperature Controller
| Size: 2 MB
Table of Contents
General Information
3
Husky Technical Support
3
Telephone Support Numbers
3
Husky Regional Service and Sales Offices
4
Table of Contents
5
Chapter 1 Introduction
11
General Safety
11
Safety Signs
12
Purpose of the Equipment
13
Restrictions of Use
13
General Safety
13
Input Wiring (Conventional)
15
Environmental Specification
15
Controller Lifting Instructions
15
Chapter 2 Hot Runner Temperature Control
19
Types of Temperature Control
19
Open Loop Control
19
Closed Loop Control
20
Temperature Measurement (Thermocouples)
20
Power Control Methods
20
Zero Cross Control
20
Phase Angle Control
20
Heating Elements
21
Thermocouple Types and Color Codes
22
Chapter 3 Connecting the System to the Mold
23
Prior to Start up
23
Verifying the Connection
23
Start up Procedure Checklist
24
Chapter 4 Neo2 Operator Interface
25
Overview
25
Operator Interface Modes
27
Changing Modes
27
USB Port
28
Printing Reports to File
29
Changing the Language Display
31
Supply Voltage Screen
31
Viewing the Supply Voltage
32
Chapter 5 Security
35
Entering a Password
36
Changing a Password
36
Setting Security Levels for Specific Functions
37
Security Item Descriptions
37
Chapter 6 Mold Setups
41
Loading a Mold Setup
42
Resetting a Mold Setup to the Default Settings
42
Copying a Mold Setup
42
Entering a Mold Name
43
Importing and Exporting Mold Setups
44
Importing a Mold Setup
44
Exporting a Mold Setup
45
Exporting All Mold Setups
45
Deleting a Mold Setup from a USB Disk
45
Chapter 7 Making Adjustments
47
Zone Data
47
Zone Status
48
Zone Information Fields
48
Changing the Zone Layout
50
Adjusting Basic Parameters
51
Changing a Setpoint
51
Turning a Zone on or off
52
Changing the Zone Regulation
53
Changing the Standby Setpoint
53
Changing the Boost Setpoint
54
Adjusting Advanced Parameters
54
Naming a Zone
54
Changing the Alarm Band
55
Changing the Abort Band
56
Zone Slave
56
Automatic Slave Function
56
Using the Automatic Slave Function
57
Manually Slaving One Zone to Another
57
Changing the Sensor Assignment
58
Changing the Priority Control Mode (PCM) Setting
58
The Optional Priority Control Mode (PCM) Digital Output
58
Changing the Automatic Manual Control (AMC) Setting
59
Changing the Power Limit Setting
59
Changing the Earth Leakage Setting
59
Changing the Power Output Control Method Setting
60
PID Control
60
Typical PID Values
60
Possible Causes of Oscillation
61
Changing PID Values
62
ACTIVE REASONING Technology - the Definition
62
Background
62
What It Does
62
Control Method
63
Changing the Control from PID to ART
63
When to Use the Manual ART Function
63
Running ART on a Zone
63
Chapter 8 Mold Diagnostics
65
Mold Test
65
Running a Mold Test
66
Setting the Delay Time
67
Test Results
67
Test Results Display
68
Saving Test Data for Future Reference
69
Automatic Thermocouple Rewiring
69
Viewing Amps, Volts, Watts and Ohms Data
69
Chapter 9 System Setup and Customization
71
System Setup
71
System Serial Number
71
Software Release Number
72
System KWH
72
Basic and Advanced Display Modes
72
Setting the Units (°F or °C)
72
Changing the Time and Date
72
Changing the Date and Time Format
73
Changing the Date
73
Changing the Time
73
Changing am and PM with a 12-Hour Clock
74
Adjusting the Screen Brightness
74
Advanced System Setup
75
Setting the Maximum Temperature Limit
76
Setting the Earth Leakage
76
Enabling or Disabling Auto Slave Function
77
Setting the Global Power Limit
77
Setting the Forced Bake out Time
77
Calibrating the Thermocouple Inputs
78
Automatically Loading the Last Mold Setup
78
Setting the Monitor Regulation
78
Access the Customize Screen
79
Customizing the Display
79
Displaying Zone Parameters
80
Enabling or Disabling the Mold Setups Screen
81
Enabling or Disabling the Security Screen
81
Assign to Basic
81
Assign to Advanced
82
Reset to Default Settings
82
Timers
82
Standby Timers
82
Setting the Manual Standby Timer
83
Setting the Remote Standby Timer
83
Setting the Delay Standby Timer
83
Standby Operation Description
84
Boost Timers
85
Setting the Manual Boost Timer
85
Setting the Remote Boost Timer
85
Changing the Standby Cycle
86
Setting the Delay Boost Timer
86
Boost Operation Description
86
Alarms and the Error Log
87
Viewing Alarms
87
Clearing and Resetting Alarm and Abort Errors
88
Viewing the Error Log
88
Printing the Error Log to File
89
Alarm and Abort Conditions
90
Alarm Conditions (Warning Errors)
90
Abort Conditions (Shut down Errors)
91
Chapter 10 Heating the Mold
93
Starting the Neo2 System
93
Earth Leakage / Wet Heater Bake out System
93
Soft Start Routine
94
Chapter 11 System Options
95
Altanium/Neo2 Optional Components
95
Integrated I/O
95
Integrated I/O Option (Inputs)
95
Integrated I/O Option (Outputs)
96
Input and Output Option Cable Pin-Out Description
97
Altanium I/O Box
97
Connecting the Altanium I/O Box to the Neo2 Display
98
I/O Box Options (Inputs)
98
I/O Box Options (Outputs)
99
Input/Output Option Connector Pin-Out Description
101
Configuring the Altanium Inputs and Outputs
102
Turning the Digital Input/Output on or off
102
Turning an Input/Output on or off
103
Configuring Input or Output Channels as Normally Open or Closed
103
Enabling the Mold Cooling Temperature Limit
104
SPI Communication Protocol
105
Viewing the SPI Communications Monitor
106
Chapter 12 User Service
107
Altanium/Neo2 Display
107
Servicing the Altanium System
108
Altanium Card Cage
108
Replacing an Intelligent Control Card (ICC2 or ICC3)
109
Replacing a Blown Fuse on an ICC2 or ICC3 (Intelligent Control Card)
110
Replacing a Blown Fuse on the Display and Internal Cooling Fan
111
Replacing a Neo2 Display
112
Calibrating the Thermocouple Inputs
112
Cleaning the System
113
Chapter 13 SPI Protocol Option
115
SPI Command Summary
115
Echo
115
Process Setpoint
116
Process Value
116
Alarm Active Status
116
Alarm 1 Setpoint
117
Alarm 2 Setpoint
117
Alarm 1 Reset
117
Controller Status
118
Manual Percent Output
119
Open/Closed Loop
119
Advertisement
Advertisement
Related Products
Husky Altanium Neo5
Husky Altanium Matrix2
Husky Altanium Delta3
Husky NANOOK
Husky N3R482478W5B
Husky N3R482478W5R
Husky N3R361872W4B
Husky Altanium Matrix5
Husky Altanium Delta5
Husky Altanium VGSC
Husky Categories
Tool Storage
Air Compressor
Indoor Furnishing
Automobile Accessories
Pressure Washer
More Husky Manuals
Login
Sign In
OR
Sign in with Facebook
Sign in with Google
Upload manual
Upload from disk
Upload from URL